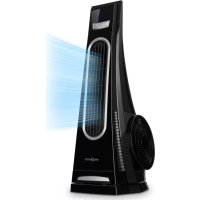
Freshboxx - Climate control OneConcept - Free user manual and instructions
Find the device manual for free Freshboxx OneConcept in PDF.
User questions about Freshboxx OneConcept
0 question about this device. Answer the ones you know or ask your own.
Ask a new question about this device
Download the instructions for your Climate control in PDF format for free! Find your manual Freshboxx - OneConcept and take your electronic device back in hand. On this page are published all the documents necessary for the use of your device. Freshboxx by OneConcept.
USER MANUAL Freshboxx OneConcept
text_image
QR code image containing encoded data, no visible human-readable textINHALT
text_image
SRING OFF HIGH MID LOW COOL NOT CAN THE ORDER WITHOUT WORK. WEED CONTINUING TO PARTSnatural_image
Symbol of a trash bin crossed with a diagonal line, no text or labels presentBerlin Brands Group UK Ltd
PO Box 1145
Oxford, OX1 9UW
United Kingdom
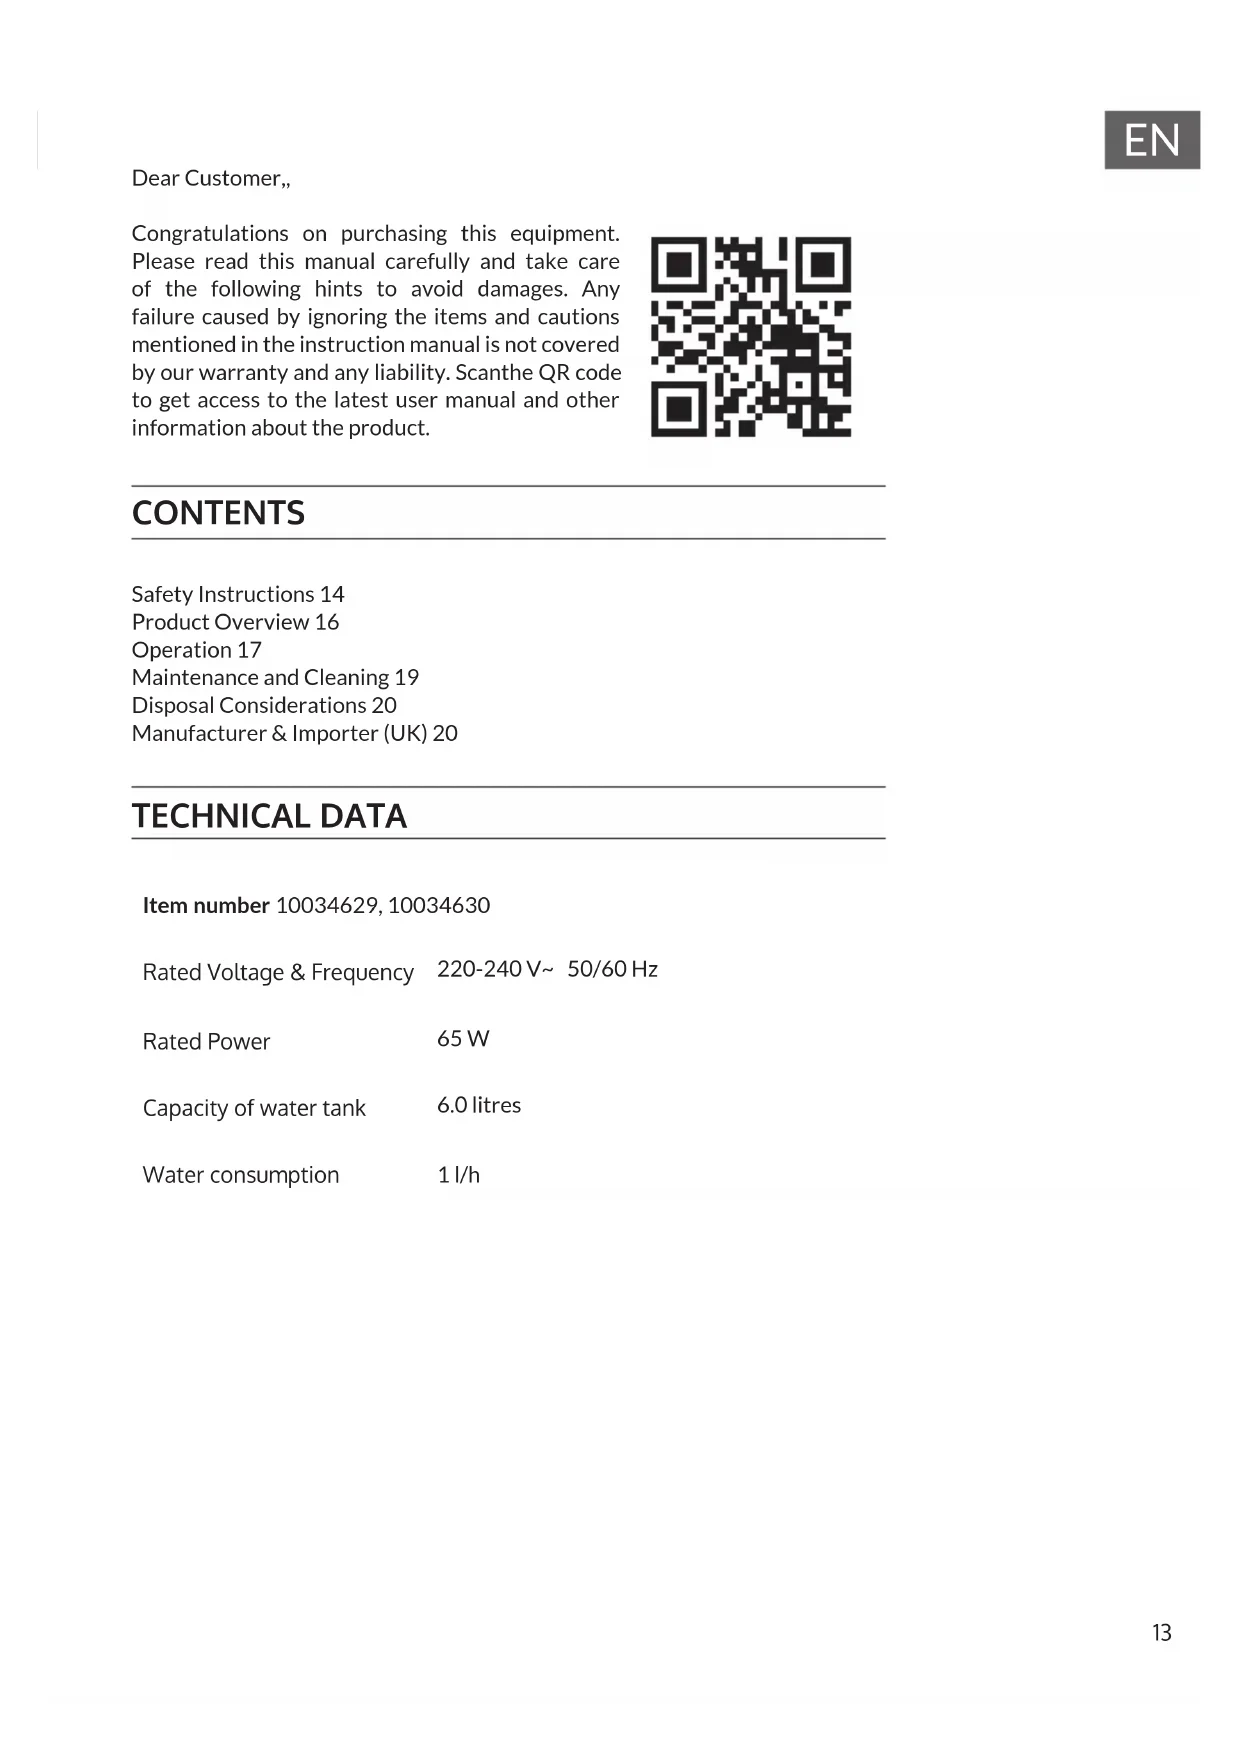
Congratulations on purchasing this equipment. Please read this manual carefully and take care of the following hints to avoid damages. Any failure caused by ignoring the items and cautions mentioned in the instruction manual is not covered by our warranty and any liability. Scanthe QR code to get access to the latest user manual and other information about the product.

text_image
QR code image containing encoded data, no visible human-readable textCONTENTS
Safety Instructions 14
Product Overview 16
Operation 17
Maintenance and Cleaning 19
Disposal Considerations 20
Manufacturer & Importer (UK) 20
TECHNICAL DATA
Item number 10034629, 10034630
Rated Voltage & Frequency 220-240 V\~ 50/60 Hz
Rated Power 65 W
Capacity of water tank 6.0 litres
Water consumption 1 l/h
SAFETY INSTRUCTIONS
- Connect to a main power supplier of 220-240V\~ 50-60 Hz only.
- Keep the appliance and cable away from sources of heat, sharp objects or anything that may cause damage.
- Do not place the cord under carpets. Do not cover the cord with small clothes, shirts or other similar elements. Place the cord away from traffic areas in order to avoid any risk of tripping over.
- Do not operate the appliance if the cable or plug damaged.
- If the supply cord is damaged, it must be replaced by the manufacturer, its service agent or similarly qualified persons in order to avoid a hazard.
- Indoor use only.
- Do not cover the machine during using.
• Always operate on a stable flat horizontal surface.
- Ensure the appliance is switched OFF before connecting to the mains power supply.
- Always ensure that hands are dry before operating or adjusting any switch on the product or touching the plug and mains supply connections.
- Do not leave this appliance unattended when it's in use. Turn off and disconnect the appliance when you leave the room for an extended period.
- Switch off the appliance and unplug from the mains socket when not in use, before filling, cleaning or other maintain.
- To disconnect the appliance, switch it "OFF", and then remove the plug from outlet. Do not pull the cord to disconnect the plug.
- This device may be only used by children 8 years old or older and persons with limited physical, sensory and mental capabilities and / or lack of experience and knowledge, provided that they have been instructed in use of the device by a responsible person who understands the associated risks.
- Cleaning and user maintenance shall not be made by children without supervision.
- Use the appliance only as described in this manual.
- Do not insert your fingers in the openings of the guard.
- Do not leave hair, tissue, tablecloths, clothes or curtains near all openings of the fan, they could be sucked into the fan and be taken within the internal moving parts that could cause injury or damage.
- Do not use the appliance in wet or damp locations such as bathrooms.
- Do not operate the appliance when it's not mounted on its wheels or if it's lying on the side.
- Make sure the cord is completely extended before use.
- Place the appliance on a flat horizontal surface. It must not be at an incline
during use.
- When in operation, evaporative coolers moisturize the ambient air. Over-humidification of residential rooms should be avoided. Recommendation: 40–50 % relative humidity. (Excessive humidity of the air can damage the home and cause health problems.)
- The appliance may only be set up on water- and moisture-proof flooring materials (spilling some drops of water is unavoidable when the content of the tank is changed).
- With each and every change of tank content, completely remove residual water from the equipment. To prevent nucleation, remove residual water from the equipment and water tank every time after three days of use.
PRODUCT OVERVIEW
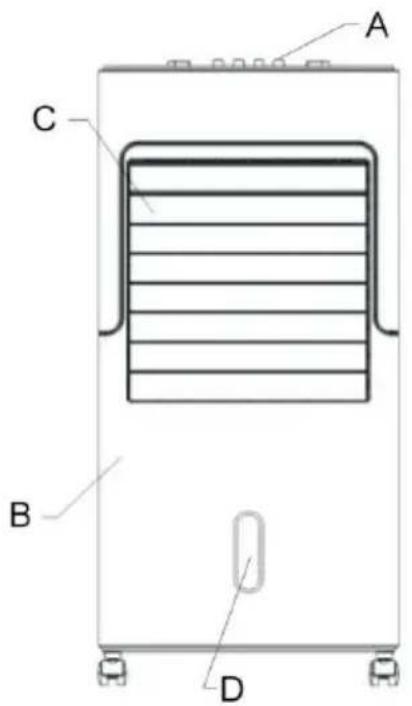
text_image
A C B D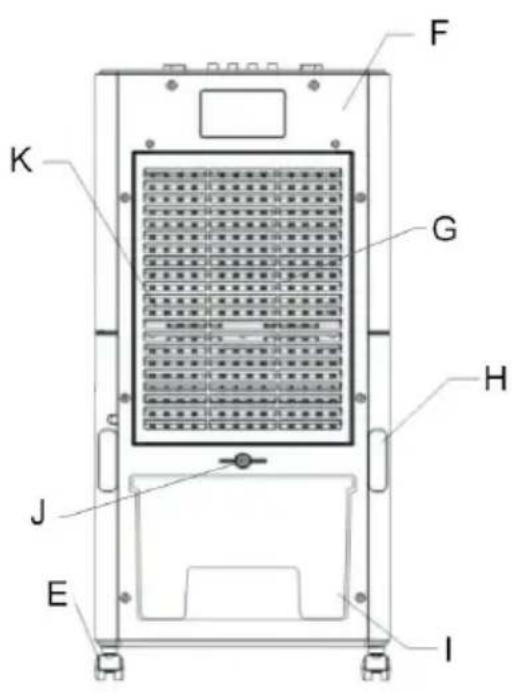
text_image
F K G H J E I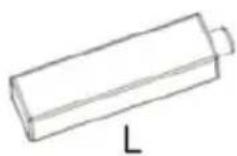
A Control panel
B B-Front board
C Louver frame
D Water indicate window
E Castor wheel
F Rear boardStaubfilter
G Dust-proof bracket
H Cord bobbin
I Water tank
J Small knob
K Filter
L Ice crystals box
OPERATION
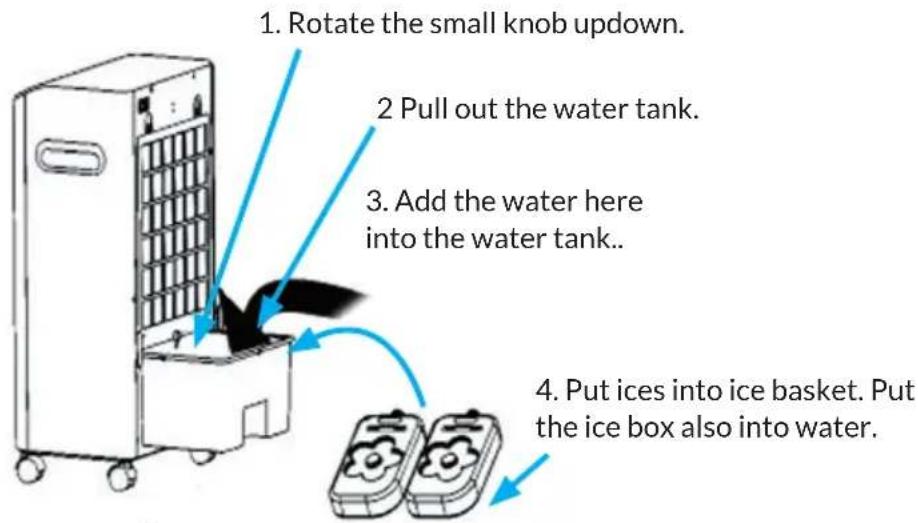
When using the appliance, make sure that it is on a flat and stable surface. Damage may occur if it is placed on an incline or decline. If you need cooler more, add ice block into upper water slot, see following image.
flowchart
graph TD
    A["1. Rotate the small knob updown."] --> B["2 Pull out the water tank."]
    B --> C["3. Add the water here into the water tank.."]
    C --> D["4. Put ices into ice basket. Put the ice box also into water."]
Note: the ice box should be far way from children to avoid eating.
- Insert the plug directly into a standard AC socket-outlet. Be sure plug fits tightly into outlet.
- "COOLING" button (Note: don't use this button without water, to avoid damage to parts.)
- The water pump starts operating. The draught becomes cooler and more humid. Make sure that the outlet valve of the water tank is firmly seated. Then add fresh water to the tank. Watch the water level indicator to overfill or underfill the tank. After filling the tank with water, press the COOL button. The unit will now blow cooler air. If you press the COOL button again, operation is stopped.
- If the air cooling is not sufficient for you, you can add another ice block to the water tank. To do this, remove the water tank lid. The maximum quantity of ice blocks must not be exceeded, otherwise the appliance will be damaged or an electric shock may occur.
- If you use a cool box instead of an ice block, place the cool box inside by opening the lid of the water tank.
- You can pull out the water tank completely, change the water or clean the water tank.
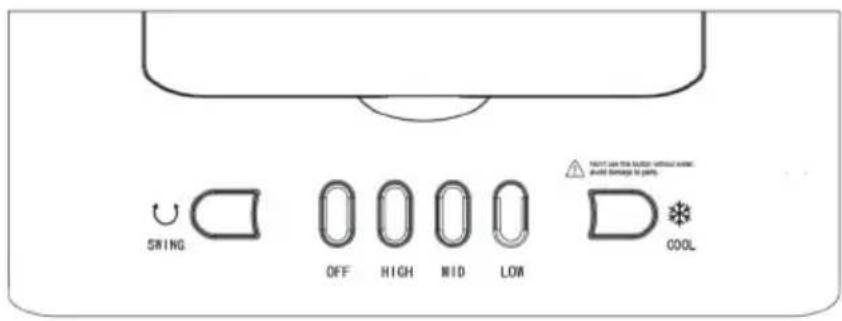
Buttons on the control panel
text_image
SWING OFF HIGH MID LOW COOL NOT CAN THE ROLLING WITHOUT AVE: would damage to parts| Button Function | |
| LOWPress | the button LOW to start the fan on low speed. |
| MIDMedium speed | |
| HIGHHigh speed. | |
| SWINGAutomatic horizontal swing. | |
| OFFSwitch | the unit off. |
To completely shut the unit off, turn all the controls to OFF, and remove plug from the socket-outlet.
MAINTENANCE AND CLEANING
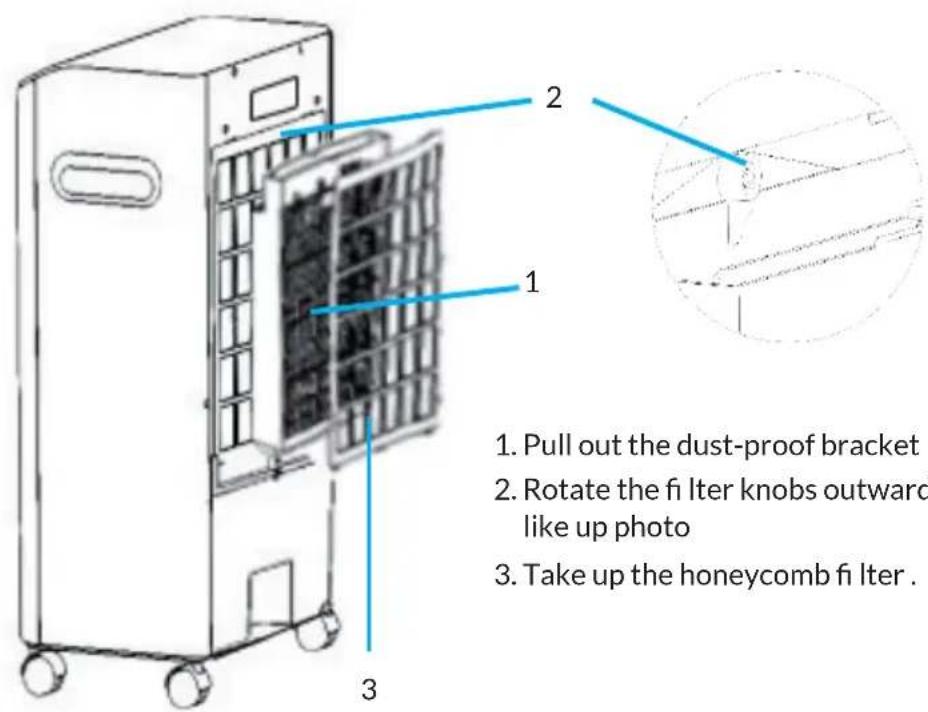
Changing the fi Iter
text_image
1. Pull out the dust-proof bracket 2. Rotate the fi lter knobs outward like up photo 3. Take up the honeycomb fi lter.Cleaning

WARNUNG
Danger of electric shock
Always remove the plug from the socket-outlet and allow the fan blower to stop acting before cleaning it.
Do not immerse the unit in water.
- Always remove the plug from the socket-outlet and allow the fan blower to stop acting before clean it.
- Clean the external surfaces of the unit with a soft damp (not dripping wet) cloth.
- Do not use any cleaning chemicals such as detergents and abrasives.
- Do not allow the interior (special for the PCB) to get wet as this could create a hazard.
- After extended periods of use, be sure to replace the water in the tank with fresh clean water at least weekly. Also remember to clean the fi Iter by unscrewing the fi Iter and removing the fi Iter cradle. It should be cleaned in a mild soapy solution and then left to dry before replacing the fi Iter.
- When the unit is not in use, make sure that it is unplugged from the wall socket, water is drained thoroughly and it is placed back into its original
box for storage until later use.
- In case of malfunction or doubt, do not try to repair the fan yourself, it may result in a fire hazard or electric shock.
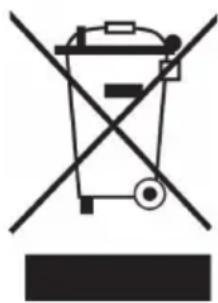
DISPOSAL CONSIDERATIONS
natural_image
Symbol of a trash bin crossed with a diagonal line, no text or numbers presentIf there is a legal regulation for the disposal of electrical and electronic devices in your country, this symbol on the product or on the packaging indicates that this product must not be disposed of with household waste. Instead, it must be taken to a collection point for the recycling of electrical and electronic equipment. By disposing of it in accordance with the rules, you are protecting the environment and the health of your fellow human beings from negative consequences. For information about the recycling and disposal of this product, please contact your local authority or your household waste disposal service.
MANUFACTURER & IMPORTER (UK)
Manufacturer:
Chal-Tec GmbH, Wallstrasse 16, 10179 Berlin, Germany.
Importer for Great Britain:
Berlin Brands Group UK Ltd
PO Box 1145
Oxford, OX1 9UW
United Kingdom
Chère cliente, cher client,
text_image
QR code image containing encoded data, no visible human-readable textSOMMAIRE
text_image
F G H J E I K
natural_image
Symbol of a trash bin crossed with a diagonal line, no text or numbers presentBerlin Brands Group UK Ltd
PO Box 1145
Oxford, OX1 9UW
United Kingdom
Estimado cliente:
text_image
QR code image containing encoded data, no visible human-readable textÍNDICE
text_image
SRING OFF HIGH MID LOW COOL NOT CAN BE ON YOUR WITHOUT WORK. WEED CONTINUING TO PARTSnatural_image
Symbol of a trash bin crossed with a diagonal line, representing no waste or discharge (no text or labels)Berlin Brands Group UK Ltd
PO Box 1145
Oxford, OX1 9UW
United Kingdom
Gentile Cliente,
text_image
QR code image containing encoded data, no visible human-readable textINDICE
text_image
F G H J E I K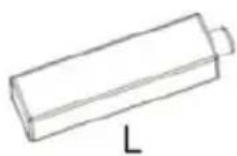
natural_image
Symbol of a trash bin crossed with a diagonal line, no text or numbers presentPRODUTTORE E IMPORTATORE (UK)
Produttore:
Chal-Tec GmbH, Wallstraße 16, 10179 Berlino, Germania.
Berlin Brands Group UK Ltd
PO Box 1145
Oxford, OX1 9UW
United Kingdom