Downwind Cruiser - Watersports board Capital Sports - Free user manual and instructions
Find the device manual for free Downwind Cruiser Capital Sports in PDF.

User questions about Downwind Cruiser Capital Sports
0 question about this device. Answer the ones you know or ask your own.
Ask a new question about this device
Download the instructions for your Watersports board in PDF format for free! Find your manual Downwind Cruiser - Capital Sports and take your electronic device back in hand. On this page are published all the documents necessary for the use of your device. Downwind Cruiser by Capital Sports.
USER MANUAL Downwind Cruiser Capital Sports
text_image
QR code image containing encoded data, no visible human-readable textINHALTSVERZEICHNIS
natural_image
Simple diagram of a mechanical component with curved arrows indicating rotation or cycle (no text or symbols)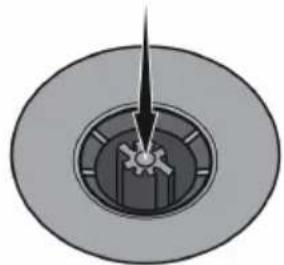
natural_image
Close-up of a mechanical dial with a needle inserted into the center (no text or symbols visible)text_image
Diagram illustrating a mechanical assembly process with numbered steps and component placementnatural_image
Black industrial water pump with handle and coiled base (no text or symbols visible)natural_image
Three views of a white ergonomic device: three elongated, flat, and folded (no text or symbols visible)Congratulations on purchasing this device. Please read the following instructions carefully and follow them to prevent possible damages. We assume no liability for damage caused by disregard of the instructions and improper use. Scan the QR code to get access to the latest user manual and more product information.

text_image
QR code image containing encoded data, no visible human-readable textCONTENT
Safety Instructions 14
Product Description 15
Use and Operation 15
Care and Cleaning 19
Leak Detection and Repairs 20
TECHNICAL DATA
| Item number 10034695 | 10034696 | 10034697 | 10034700 |
| 10034698 | 10034701 | ||
| 10034699 | |||
| Article name Maliko Runner Spreestar Downwind | Cruiser | ||
| Max. Recommended air pressure | 12-15 PSI(0,8 - 1 Bar) | 12-15 PSI(0,8 - 1 Bar) | 18-20 PSI(1,2 - 1,35 Bar) |
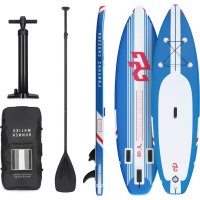
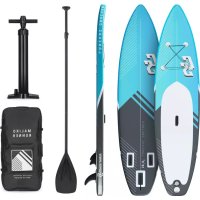
| Scope of delivery | Heavy duty backpack storage bagPump with gaugeRepair Kit3 Piece Paddle | ||
PRODUCTER
Chal-Tec GmbH, Wallstraße 16, 10179 Berlin, Germany.
SAFETY INSTRUCTIONS
Note: Paddle sports can be dangerous and physically demanding. Users of this product should understand that participating in stand up paddling can result in serious injury or death. Observe all applicable watercraft laws, and use common sense.
• Always paddle with others.
• Always wear a leash attaching you to the board.
- Wear a Coast Guard approved personal flotation device
• Always wear protective clothing.
• Always paddle in safe conditions.
- Be aware of changing weather conditions.
- Avoid paddling in off shore wind or windy conditions.
- Do not exceed your paddling ability; be aware of your limitations.
- Do not use alcohol or mind altering drugs prior to or while using this product.
- Do not use an air compressor. Damage to your board caused by over inflation from an air compressor is not covered by your warranty.
- Do not over-inflate the board. A max pressure of 20 - 25 PSI is adequate. The easiest gauge of a good working pressure is to have the chambers inflated to a firm pressure when you press on them.
- Do not pump to a high pressure and let the board sit out in the sun. If the board is going to be in a warm environment, slightly under-inflate the board and allow the heat from the sun to increase the internal pressure. When paddling, the colder temperature of the water may cause a slight loss in chamber pressure. It is a good idea to carry a pump with you so that you can add some air to the chambers if necessary.
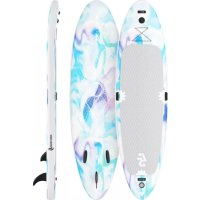
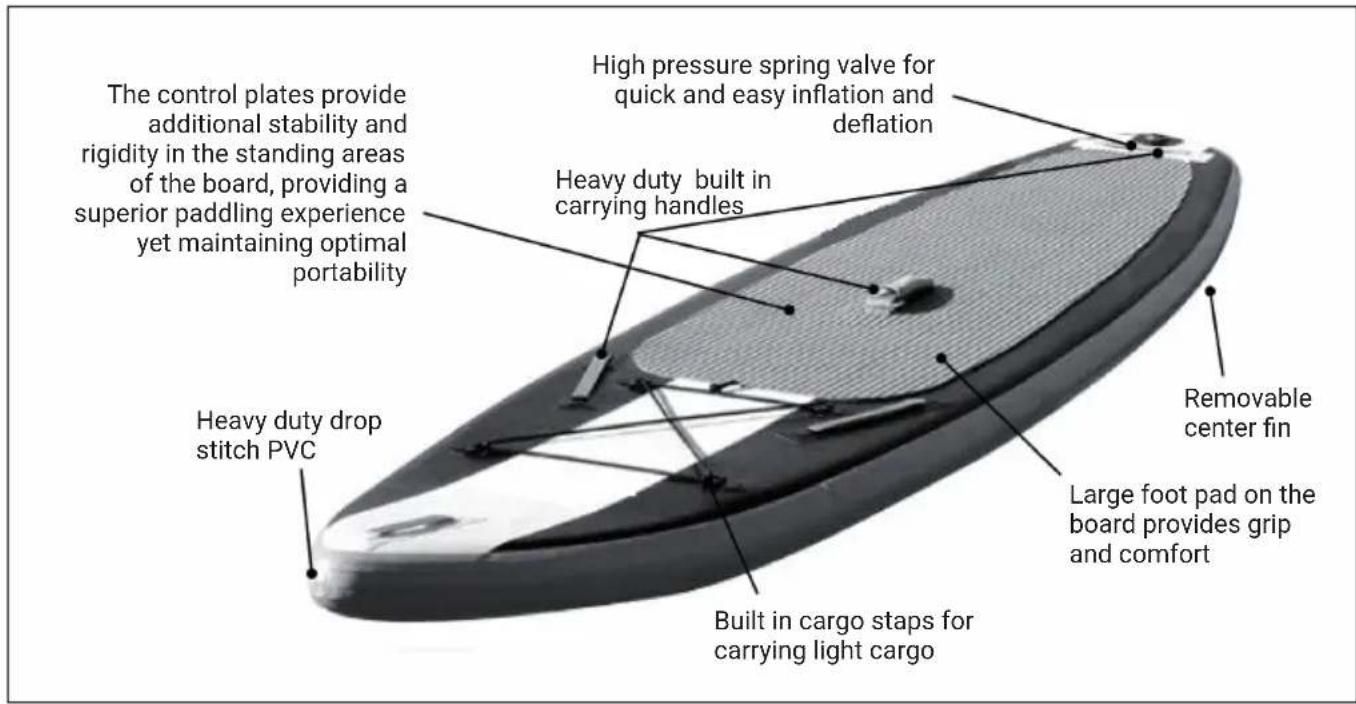
PRODUCT DESCRIPTION
text_image
The control plates provide additional stability and rigidity in the standing areas of the board, providing a superior paddling experience yet maintaining optimal portability Heavy duty drop stitch PVC High pressure spring valve for quick and easy inflation and deflation Heavy duty built in carrying handles Removable center fin Large foot pad on the board provides grip and comfort Built in cargo steps for carrying light cargoUSE AND OPERATION
Paddle Height and Paddle Position

text_image
30-45 cm Head HeightHow to Use
Assume a comfortable stance with your feet positioned roughly shoulder width apart Knees slightly bent in a relaxed upright stance, shoulders back, looking straight ahead.
Paddle Grip
Place your top hand on end of handle and your bottom hand approximately 24" down shaft of paddle. Paddle in a comfortable forward motion, with arms slightly bent.
Turn left and right
To turn left concentrate paddling on the right hand side of the board to turn right concentrate paddling on the left hand side of the board.
Inflating your Board
Follow the instructions below for valve operation and correct inflation and deflation procedures.
 | The board's inflation valve is located near the nose of the board.To close off the valve for inflation, make sure that the center valve pin is in the "up" position. If it isin the "down" position, press down on the valve pin and turn it counterclockwise until it pops up. |
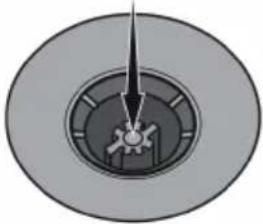 | To open the valve for deflation, press down on the valve pin and turn it clockwise so it locks down. Be careful of any sand or debris around the valve area when deflating as small particles could become airborne with the release of air pressure! |
natural_image
Simple diagram of a mechanical component with curved arrows indicating rotation or cycle (no text or symbols)
natural_image
Close-up of a mechanical dial with a needle inserted into the center (no text or symbols visible)Always lock the valve cover over the valve stem when in use. This will prevent accidental air release and entrance of any particles into the air chambers.
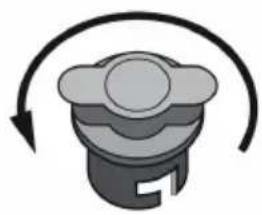
Important note on the valve
Sometimes air escapes from the board because the valve is not properly closed. For this there is a special tool to retighten the valve. Retighten the valve at least once a year:
1 First let the air out of the board.
2 Reach under the board with your right hand and hold the valve from below.
3 Take the key in your left hand, place it on the valve and tighten the valve clockwise.

text_image
Technical diagram illustrating a mechanical assembly process with numbered steps and component labelsBoard Inflation Steps
- Make sure that the valve is in the closed position (valve pin up)
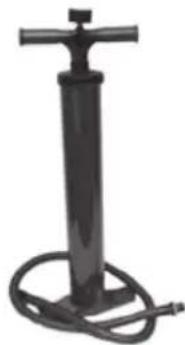
- Make sure the pump hose is connected to the "inflate" outlet
- Connect the pump nozzle into the valve receptacle.
- Start pumping air into the board by sliding the pump piston up and down.
natural_image
Black industrial water pump with handle and coiled base (no text or symbols visible)Note: If the pump piston starts to squeak, apply some spray silicone on the piston shaft.
Inflation Tips and Precautions
- The board can be inflated either with our hand pump or an electric pump. The electric pump can inflate the board to a moderate pressure and save a lot of time with about 90% of the required air volume. You will need to use your hand pump to inflate the chambers to the correct pressure.
- Do not use an air compressor. Damage to your board caused by over inflation from an air compressor is not covered by your warranty.
• After 2 or 3 days there may be a small decrease of pressure due to temperature change. If so, add a few pumps of air. - Before undertaking a long paddle, inflate the board for a full 24 hours to be sure the board is airtight. If you are seeing a consistent decrease in air pressure, follow the instructions for leak detection in the board repair section of this manual.
Note: Be careful not to fill the chamber of the paddle board with too high pressure.
Maximum recommended air pressure
| Item number 10034695 | 10034696 | 10034697 | 10034700 |
| 10034698 | 10034701 | ||
| 10034699 | |||
| Article name Maliko Runner Spreestar Downwind | Cruiser | ||
| Max. Recommended air pressure | 12-15 PSI(0,8 - 1 Bar) | 12-15 PSI(0,8 - 1 Bar) | 18-20 PSI(1,2 - 1,35 Bar) |
Board Deflation Steps
- Clear any water or debris out of the valve areas.
- Slowly press down on the valve stem to start letting air out of the board. There will be an initial burst of air, but that will slow down very quickly. Once the air flow has slowed down, press the valve stem all the way down and turn it clockwise to lock it into the "open" position.
Center Fin Installation
| 1 | 2 |
 | 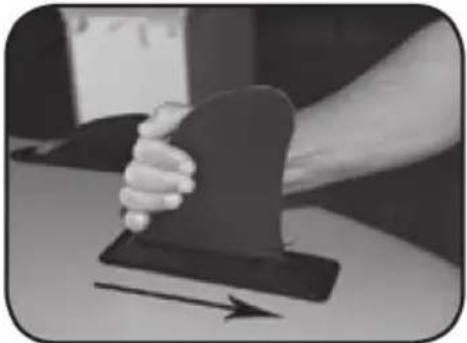 |
| Slide fin base into fin box. Slide fin all the way to back of the fin box. | |
| 3 | 4 |
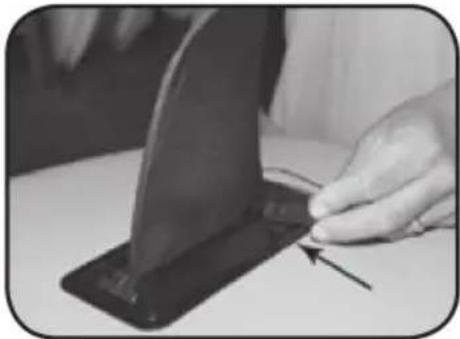 | 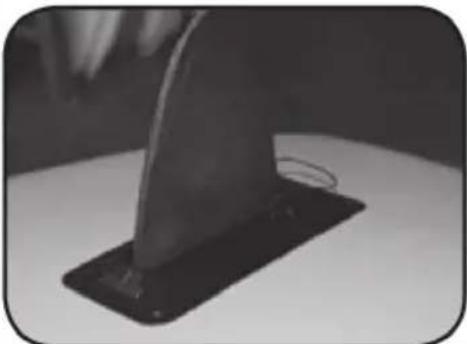 |
| Insert fin retention pin through slot. Correct fin installation. | |
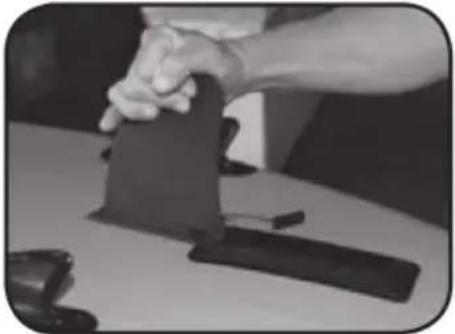
Board Folding Steps
- The board storage bag is designed to allow you to get your board into the bag as easily as possible with minimal folds.
- Follow the diagram below for the best folding procedures
- Make your folds so that the folding pattern will match the Deck Plate. Do not try and fold or bend deck plates. Always use the supplied side fin covers to prevent fin damage and bending.
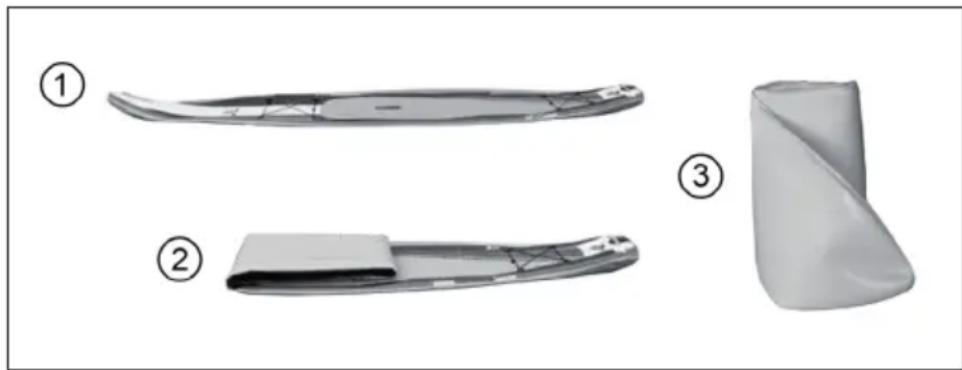
natural_image
Three views of a curved, segmented object: top view, front view, and side view (no text or symbols)CARE AND CLEANING
The PVC provides superior protection from ultraviolet light. However, to ensure extra years of flexibility and bright colors, avoid storing the board where it will be exposed to weather or in direct sunlight. Please review the following list for storage and board care tips.
- Before storing, hose off the board and let it dry completely to prevent mildew buildup.
- Do not use harsh chemicals for cleaning. Most dirt can be removed with a mild soap and fresh water.
- You may store the board inflated or deflated. If you deflate the board, we recommend that you store it in the protective bag that came with the board
- If storing the board outdoors, raise it up off the ground and cover it with a tarp to prevent exposure to the elements
• We do not recommend hanging the board. - Do not store in extreme conditions (i.e. above 150^ or below -10^ )
- Store in a clean, dry place.
LEAK DETECTION AND REPAIRS
About PVC
- Your new stand up paddleboard is made from a Durable PVC.
- If a tear or puncture does occur, PVC is Very easy to repair. Repairs are easily done with your Included patch kit.
- Read the following paragraphs for Leak detection and repair tips.
Air Leak Detection
- If you are losing air pressure, not caused by colder temperatures, check the board for leaks, starting with the valves.
- A leaking valve is rare, but if you do find a leak we can send you a replacement valve. To locate a leak, we recommend mixing soap and water in a spray bottle.
- Spray around the valve. If you see bubbles forming, check your valve seating and base and be sure the valve insert is screwed tight. If you continue to have problems it's probably time to order a new valve.
- Replacement of the whole valve can be done with a simple tool that
- comes with the replacement valve.
- If the board is losing air and all the valves are good, you probably have a small puncture. Small punctures can be repaired easily and permanently. Spray around the inside and outside of the board until air bubbles become visible and mark the position of the leak. If you do not find air bubbles, inflate the board to maximum air pressure and try to listen to find the leak. If you can narrow the area down, return with a spray bottle to identify the source of the leak.
- Punctures less than 1/8" in size can be repaired simply without a patch. Deflate your board, then clean and dry the area to be repaired. Apply a small drop of glue to cover the puncture, and let dry 12 hours.
Repairs
Your board comes with a repair kit as standard equipment.
1 Cut a patch out of the repair material and round off the corners. The patch should overlap the damaged area by 1.3 cm on each side.
2 Apply adhesive to the underside of the cut patch and around the area to be repaired. Too much glue will prevent proper repair.
3 Wait 2-4 minutes before gluing the patch to the damaged area.
4 Place a weight of approx. 1.3-2.3 kg on the spot so that pressure is permanently applied for approx. 12 hours.
5 After the patch has dried, re-apply adhesive around the corners to seal the patch completely. Allow to dry for another 4 hours.
Estimado cliente:
text_image
QR code image containing encoded data, no visible human-readable textÍNDICE DE CONTENIDOS
natural_image
Simple icon of a mechanical component with curved arrows indicating rotation or cycle (no text or symbols)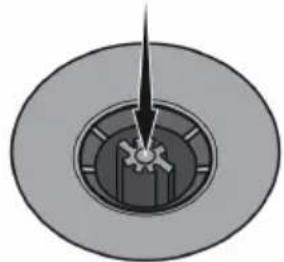
natural_image
Diagram of a mechanical component with a central shaft and circular base (no text or symbols)text_image
Diagram illustrating a mechanical assembly process with numbered steps and component placementInflado de la tabla
natural_image
Black industrial water pump with handle and coiled base (no text or symbols visible)natural_image
Three views of a white ergonomic device: three curved and one flat, with numbered annotations (1, 2, 3) indicating different components or features.LIMPIEZA Y CUIDADO
text_image
QR code image containing encoded data, no visible human-readable textSOMMAIRE
natural_image
Simple icon of a mechanical component with curved arrows indicating rotation or cycle (no text or symbols)