Solo Smart Lock D20 - Smart Home eufy - Free user manual and instructions
Find the device manual for free Solo Smart Lock D20 eufy in PDF.
| Product Type | Smart lock for front door |
| Brand | Eufy |
| Model | Solo Smart Lock D20 |
| Connectivity | Bluetooth 5.0, Wi-Fi 2.4 GHz |
| Compatibility | iOS 10.2 or later, Android 5.0 or later |
| Unlocking methods | Fingerprint, access code (4-8 digits), eufy Security app, mechanical key |
| User capacity | Up to 100 users (fingerprints and codes) |
| Security | ECC hardware encryption, AES128 software encryption, built-in security mode (5 failed attempts) |
| Power supply | 4 AA batteries (not included) |
| Mechanical lifespan | Approximately 250,000 lock/unlock cycles |
| Waterproof rating | IPX3 (outdoor installation) |
| Lock material | Zinc alloy |
| Operating temperature | -30 °C to 70 °C |
| Voice assistant | Google Assistant, Amazon Alexa |
| Main features | Auto-lock (timer up to 3 min), one-touch locking, code scrambling (up to 12 digits), activity log, OTA update |
| Installation | For door thickness 35 to 55 mm, door hole 25 mm, backset 54 mm or 38 mm |
| Maintenance | Clean with a soft, dry cloth, no chemicals |
| Box contents | Exterior assembly, interior assembly, deadbolt, strike plate, mounting plate, screws, batteries, mechanical keys, installation guide |
Frequently Asked Questions - Solo Smart Lock D20 eufy
User questions about Solo Smart Lock D20 eufy
0 question about this device. Answer the ones you know or ask your own.
Ask a new question about this device
Download the instructions for your Smart Home in PDF format for free! Find your manual Solo Smart Lock D20 - eufy and take your electronic device back in hand. On this page are published all the documents necessary for the use of your device. Solo Smart Lock D20 by eufy.
USER MANUAL Solo Smart Lock D20 eufy
Anker Innovations Limited. All rights reserved. eufy Security and eufy Security Logo are trademarks of Anker Innovations Limited, registered in the United States and other countries. All other trademarks are the property of their respective owners.
Model:T850I
51005002334 V02
USER MANUAL
Solo Smart Lock D20
English
Espanol
François
TABLE OF CONTENTS
| What's Included | 02 18 | Basic Operations |
| Product Overview | 03 19 | Specifications |
| Getting Started | 04 20 | Troubleshooting |
| Installing the Solo Smart Lock D20 | 07 21 | Important Safety Instructions |
| Setting up the Solo Smart Lock D20 | 14 21 | Notice |
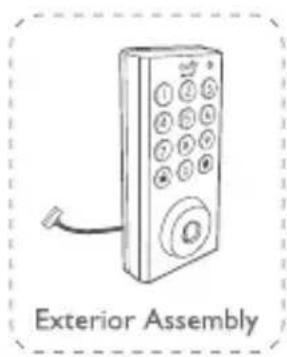
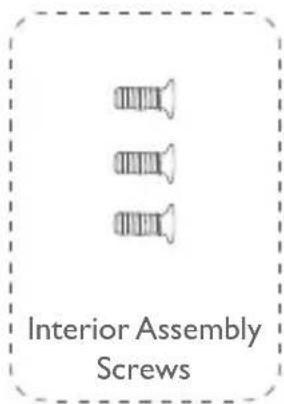
WHAT'S INCLUDED
For Solo Smart Lock D20 Installation

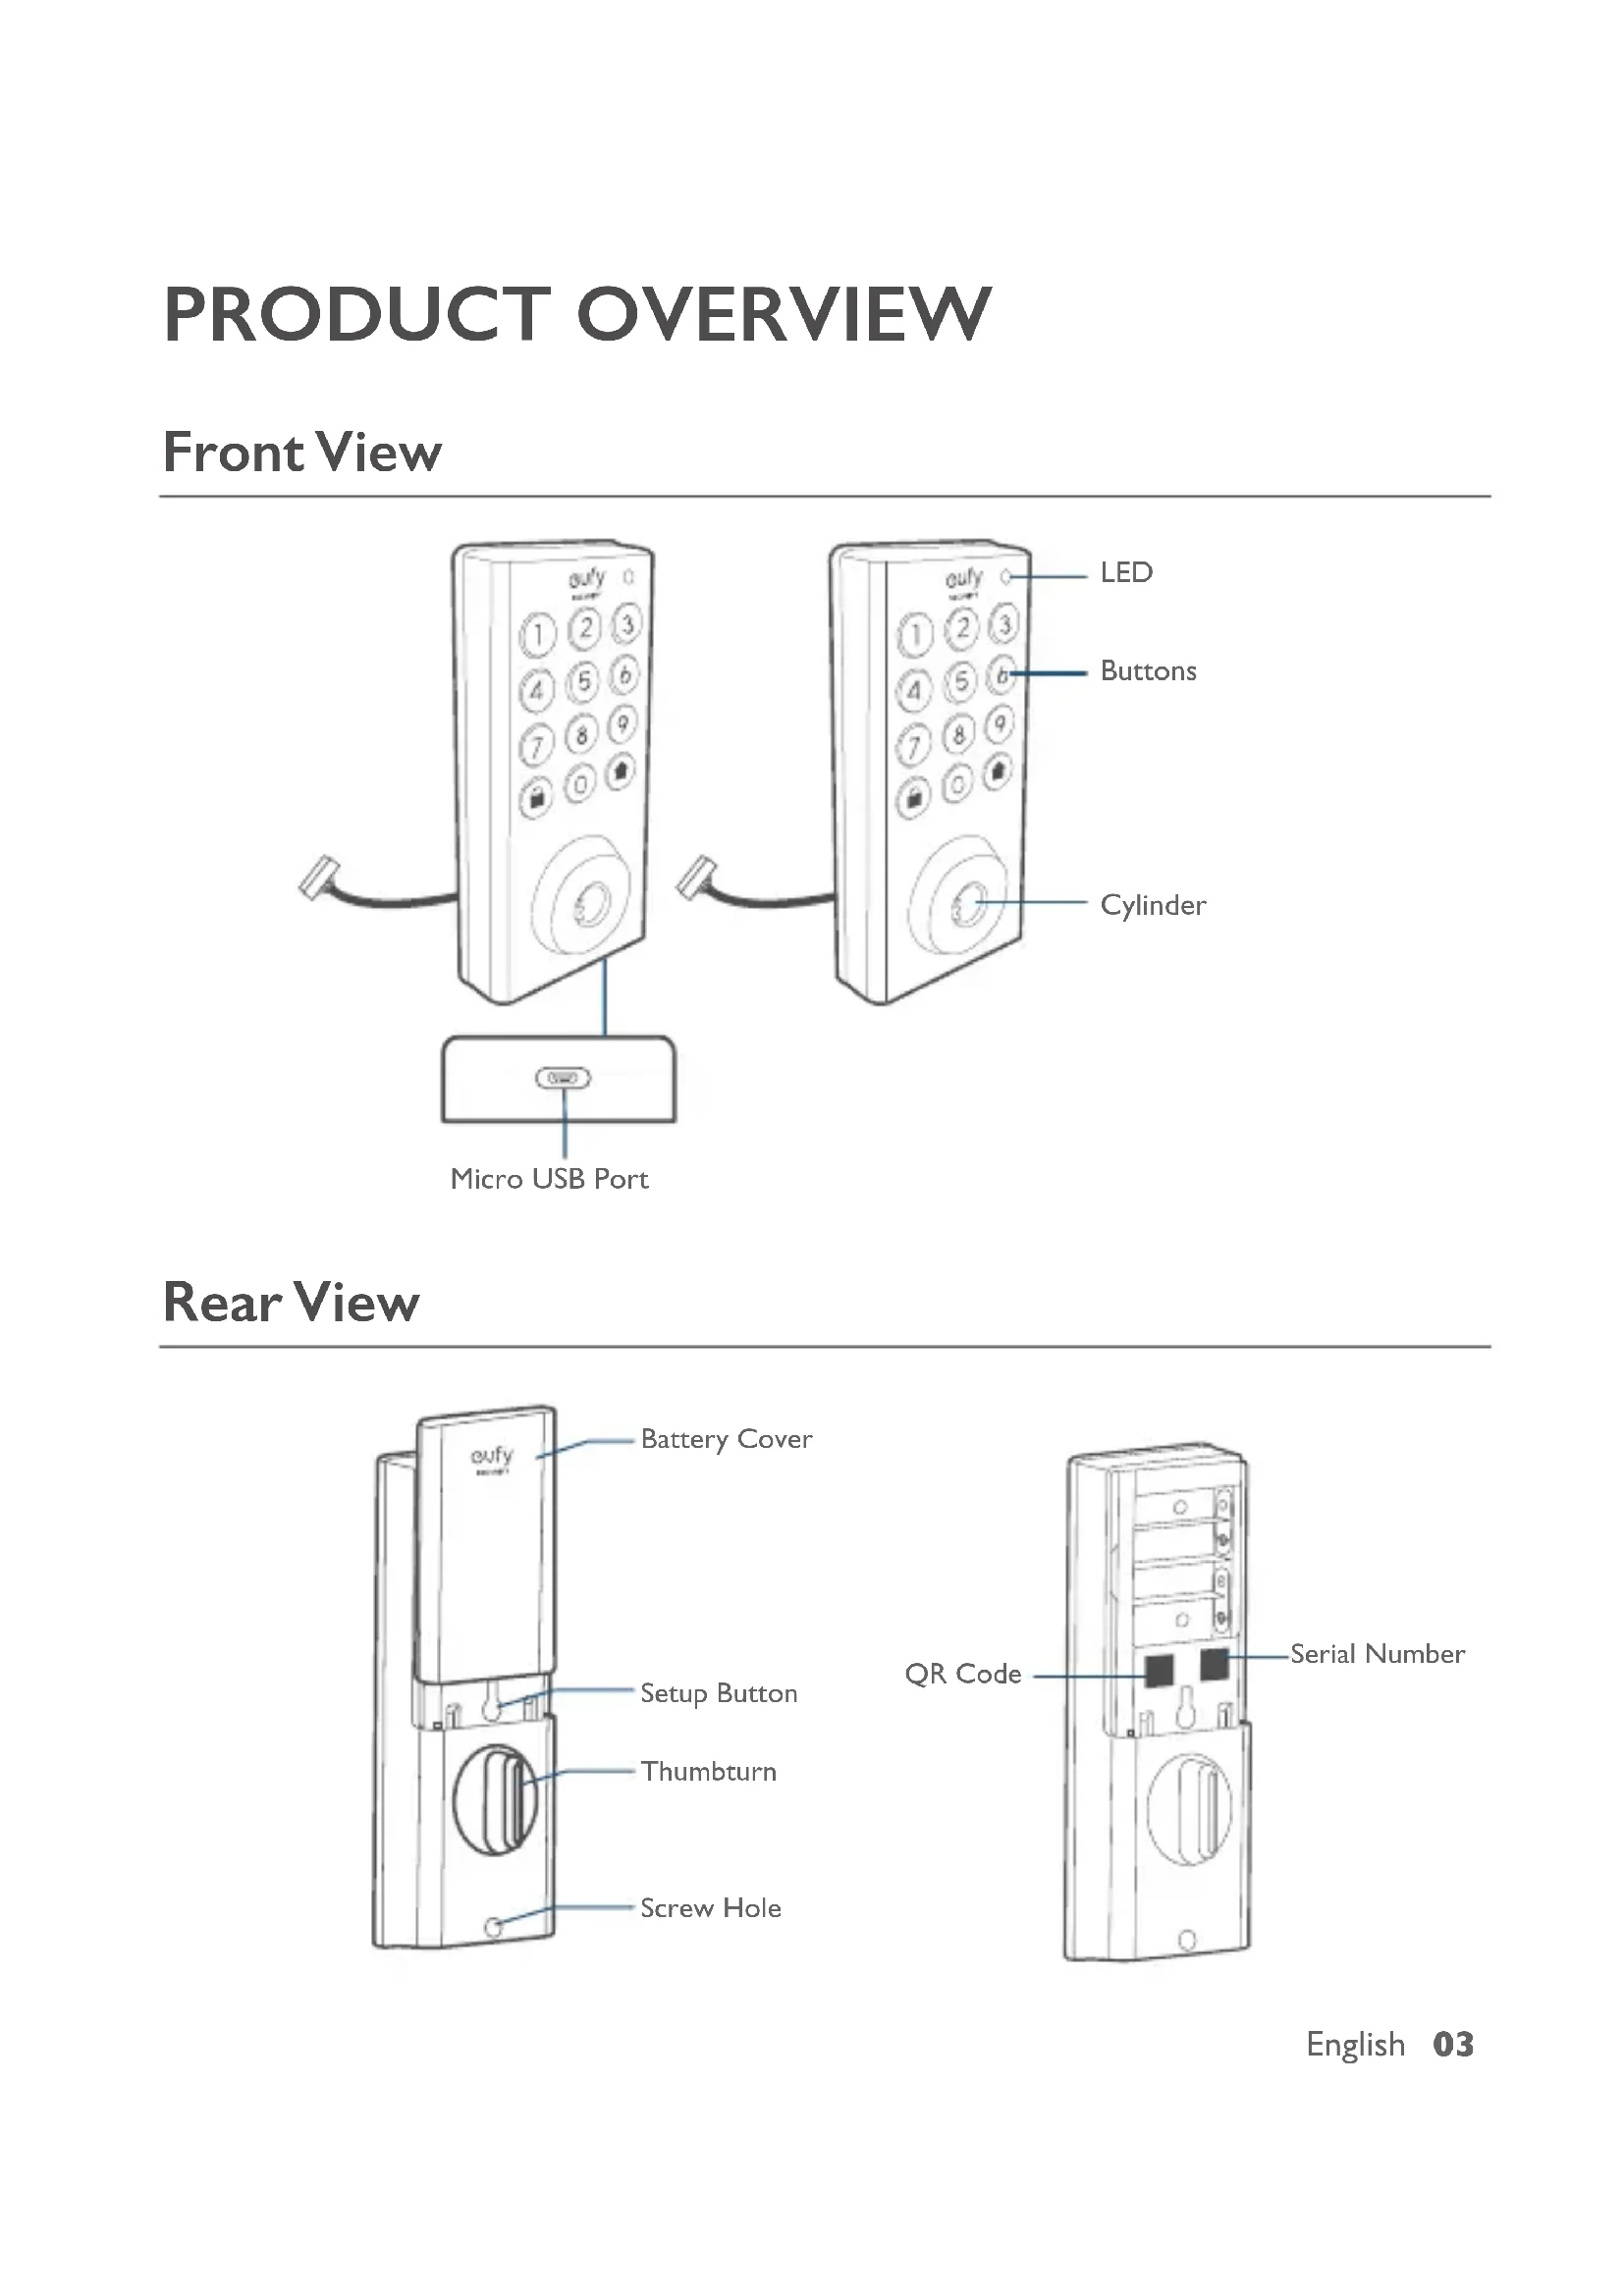
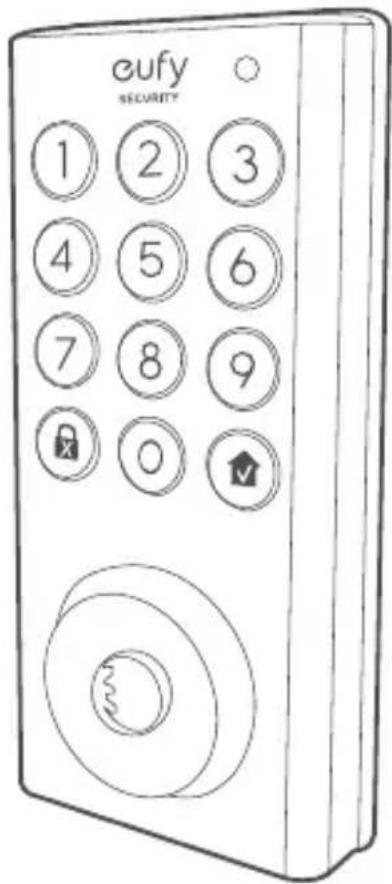
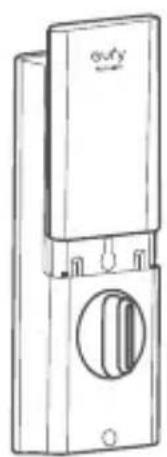
PRODUCT OVERVIEW
Front View
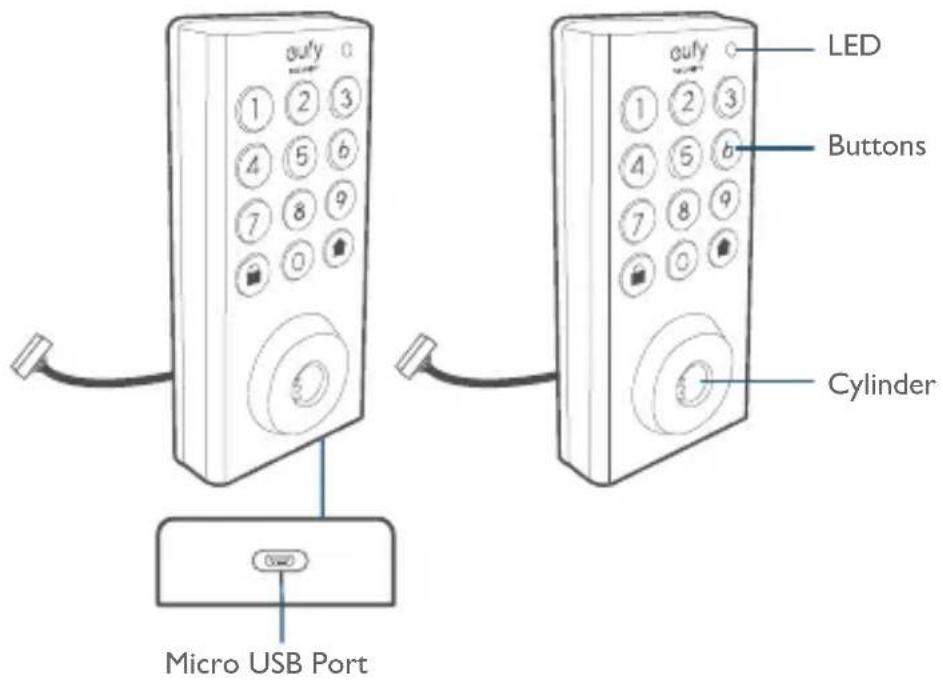
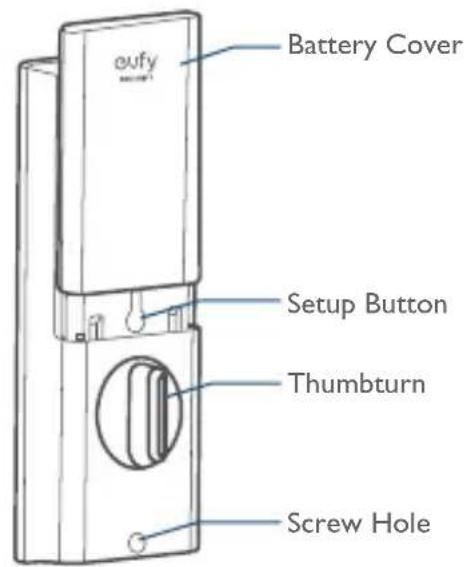
Rear View
GETTING STARTED
Download eufy Security App
Download the eufy Security app from the App Store (iOS devices running version 10.2 and later versions) or Google Play (Android devices running version 5.0 and later versions).


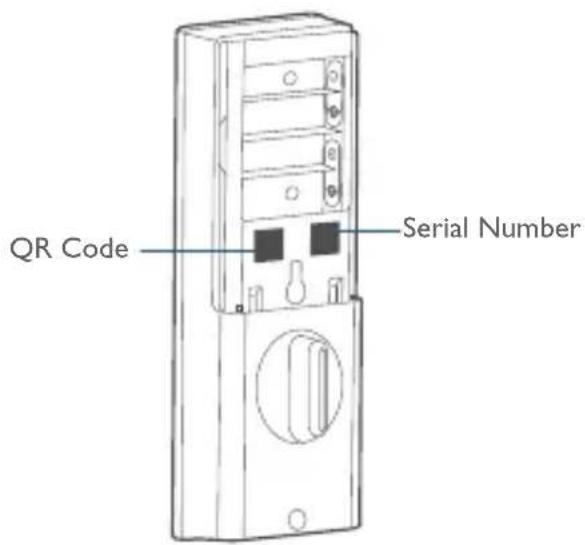
Sign up for a eufy Security account and add the Solo Smart Lock D20 to the device list. Remove the battery cover and scan the QR code on the back of the device to view the Solo Smart Lock D20 installation video.
Note: The Solo Smart Lock D20 is embedded with an encryption chip. Bluetooth data is all encrypted, so user information is secure and cannot be accessed by others.
Connect to the Network via Wi-Fi
Featuring a built-in Wi-Fi module, the Solo Smart Lock D20 can be connected to the network via your home router.
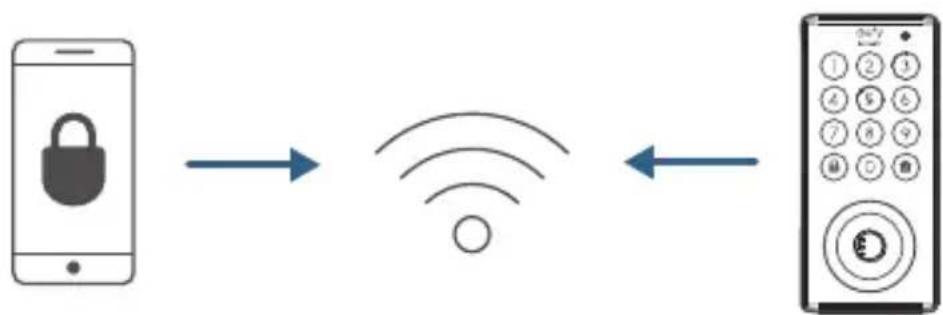
Follow the on-screen instructions in the WiFi Settings section on the eufy Security app to connect and pair your phone with Solo Smart Lock D20. Once successfully paired, you can operate the Solo Smart Lock D20 even when you're outside your home.
Note: Make sure you add Solo Smart Lock D20 to the device list on the eufy Security app before pairing it with your phone via Wi-Fi.
Works with the Google Assistant / Amazon Alexa
The Solo Smart Lock D20 can work with the Google Assistant / Amazon Alexa app. With Google Home or Amazon Alexa devices at home, you can lock the door using voice commands.


Note:
- Make sure you've downloaded the Google Assistant or Amazon Alexa app on your phone.
- Make sure your Google Home or Amazon Alexa devices are connected to the network.
Prepare Door for Installation
- Make sure that the following criteria are met so that the Solo Smart Lock D20 can be installed properly:
① Check the door status. Make sure the doorframe is aligned with the door.
② There are no obstructions stuck in the doorframe.
③ Leave enough space for the deadbolt to extend into the doorframe when the door is locked.
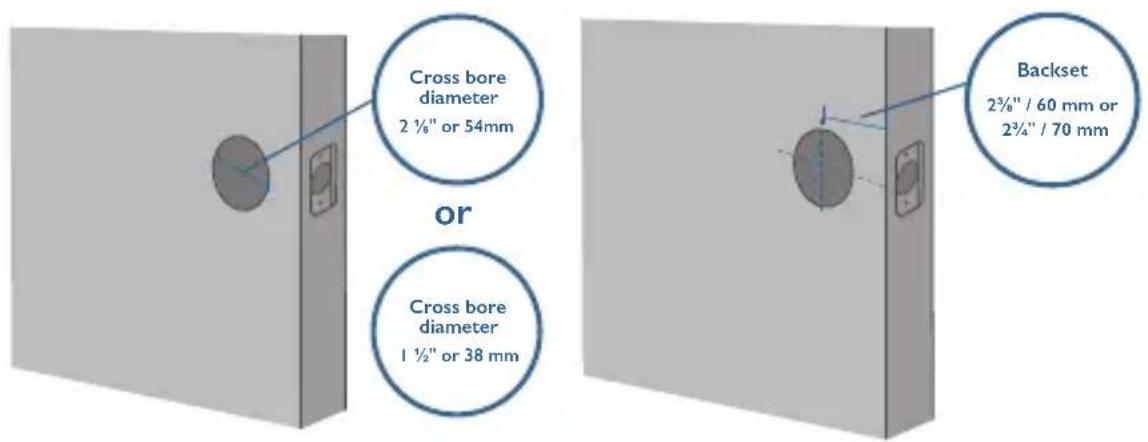
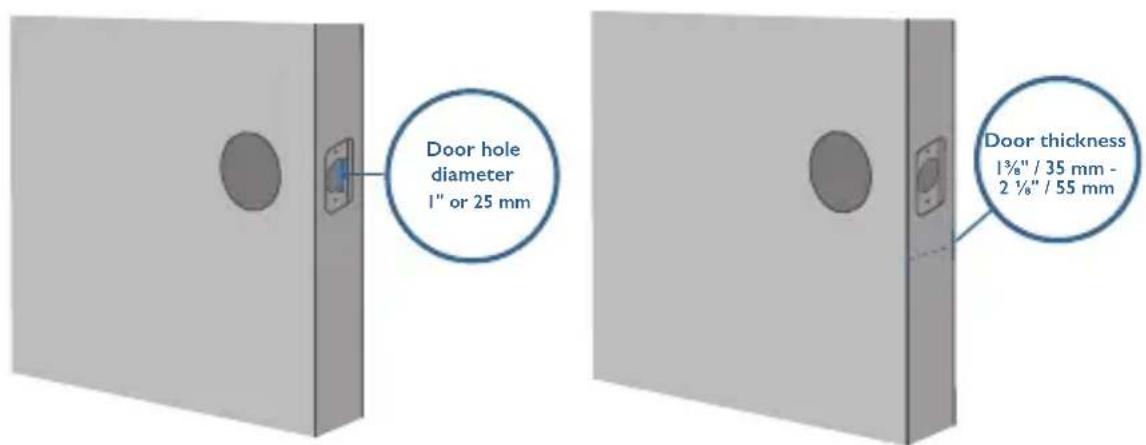
- Check your door / frame dimensions to make sure that they fit the following measurements:
The cross bore diameter (2 % 54 mm or 112 / 38 mm)
- Backset (2 " % 60 mm or 2¾" / 70 mm)
- Diameter of the door hole (l" / 25 mm)
- Door thickness (1 "35 mm - 2 "1/55 mm)
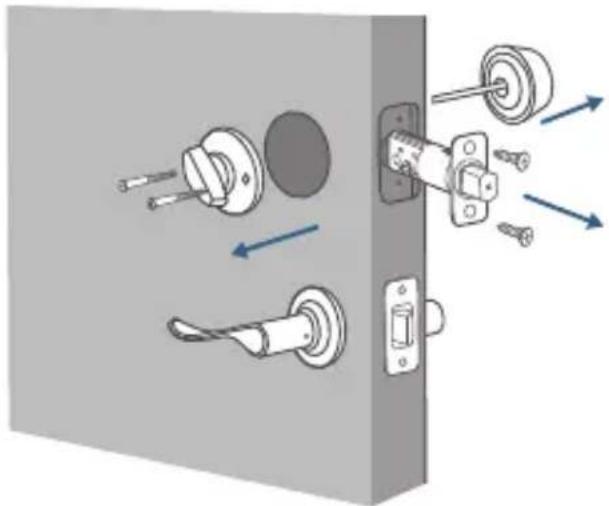
- If you have an existing lock, remove it, including the bolt.
INSTALLING THE SOLO SMART LOCK D20
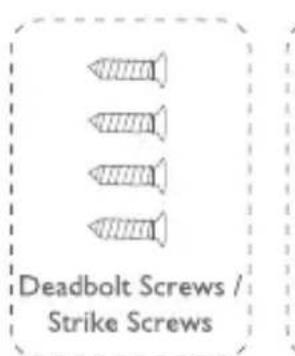
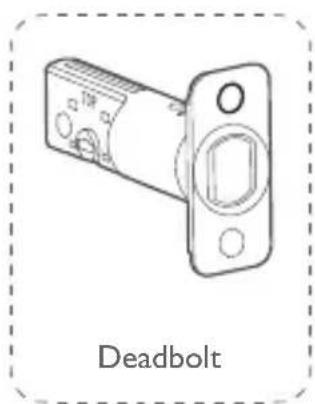
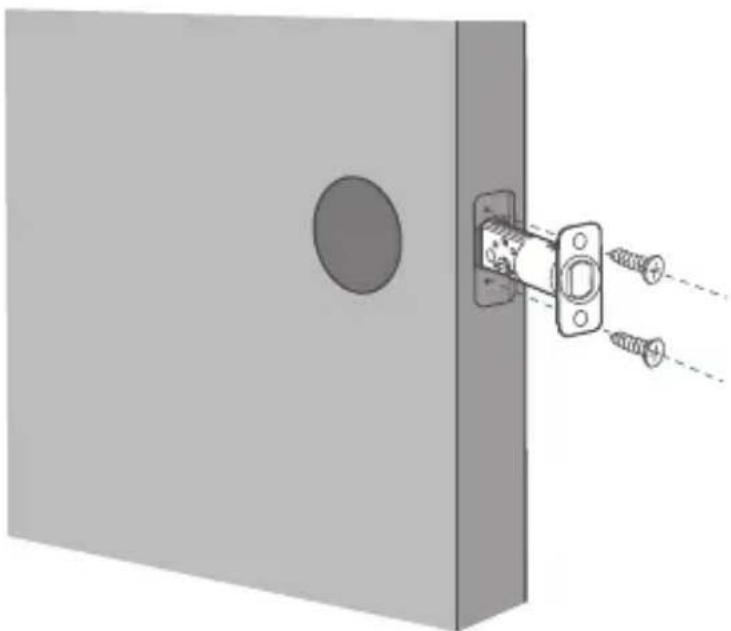
Step I: Install the Deadbolt
To install the deadbolt:
- Measure your door's backset dimension: whether it is 234'' / 70 mm or 238'' / 60 mm .
- If your door's backset dimension is 218'' / 60 mm , use the provided deadbolt to install. If your door's backset is 234'' / 70 mm , turn the faceplate 180^ and pull to extend simultaneously until the deadbolt locks in position as the illustration shows below.
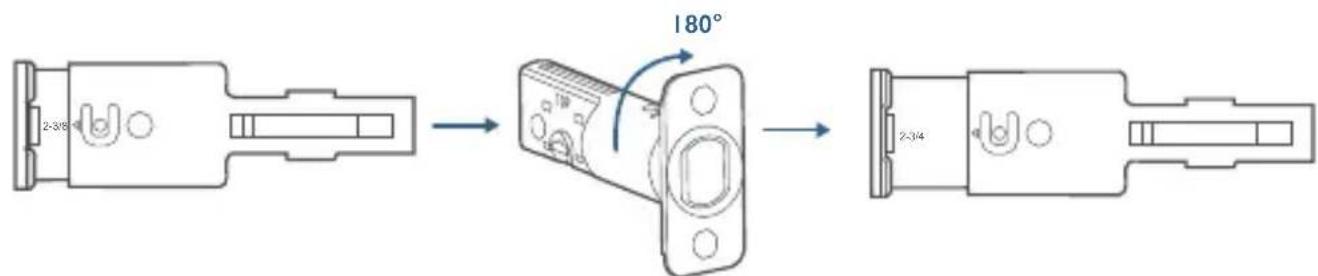
- Insert the deadbolt into the doorframe and make sure the word "TOP" faces up as indicated on the deadbolt.
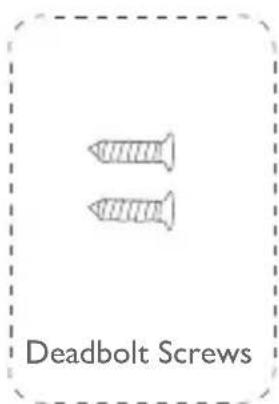
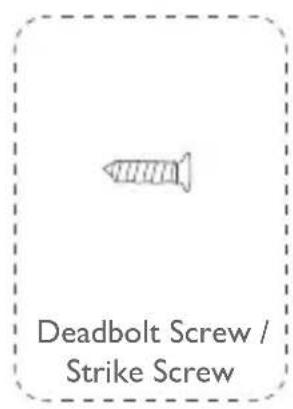
- Screw into the doorframe with a screwdriver (not provided).
What is required: Deadbolt, Deadbolt Screws, Screwdriver (not provided)
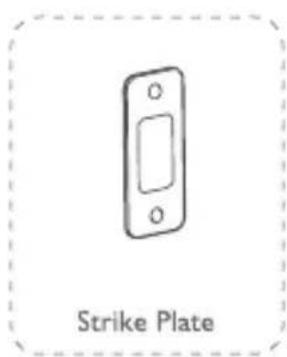
Step 2: Install the Strike Plate
If you have an existing strike plate installed, skip this step.
To install the strike plate:
I. Align the strike plate with the center hole of the deadbolt.
2. Secure the strike plate with strike screws. Make sure the plate is placed in the correct direction.
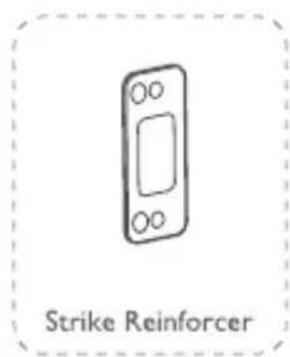
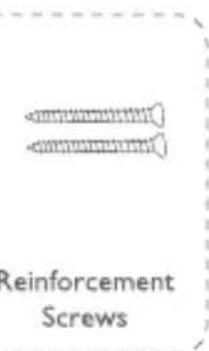
To enhance the security, you need to first install the strike reinforcer.
Attach the strike reinforcer on the doorframe and tighten the reinforcement screws with a screwdriver (not provided).
What is required: Strike Plate, Strike Screws, Strike Reinforcer (optional), Reinforcement Screws (optional), Screwdriver (not provided)


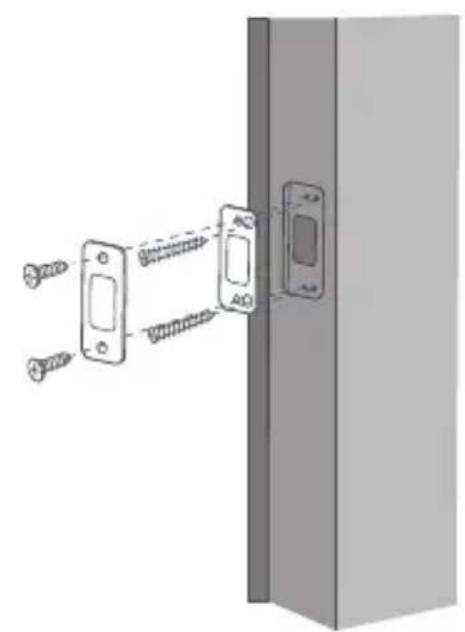
Note: This step is only necessary if you want to maintain BHMA Grade 2 security, or you can install strike plate directly.
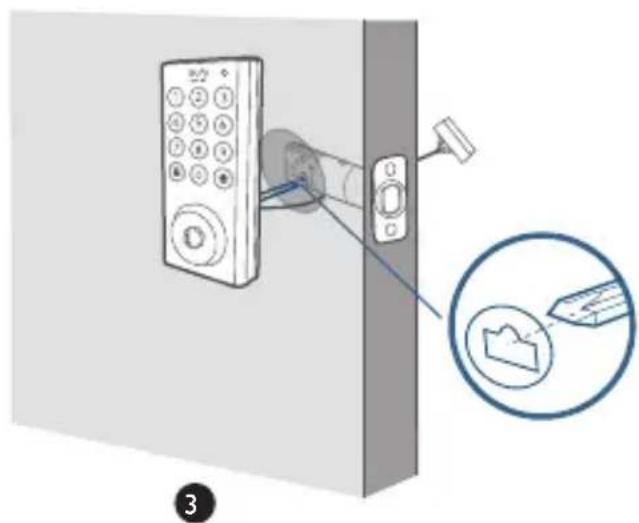
Step 3: Install the Exterior Assembly
To install the exterior assembly into the doorframe:
-
Measure your cross bore dimension and determine the installation steps accordingly.
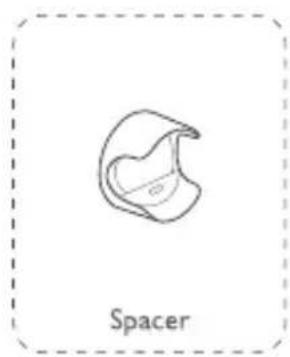
-
If the diameter of your cross bore is 2 18 / 54 ~mm , use the provided spacer to assist in installing the exterior assembly.
If you have a 112'' / 38 mm crossbore, remove the spacer.
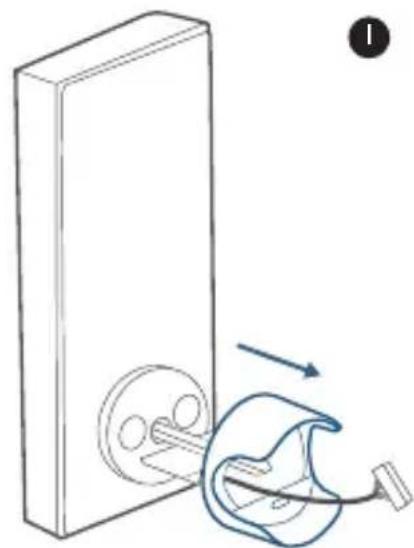
2 Route the cable connected on the exterior assembly under the deadbolt.
3. Align the tailpiece with the center hole of the deadbolt, and insert it into the center hole.
What is required: Exterior Assembly
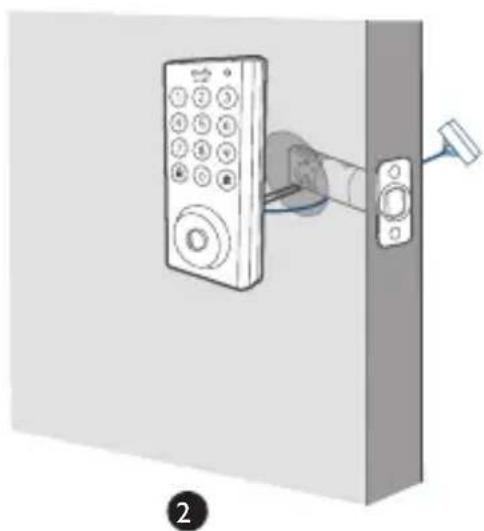
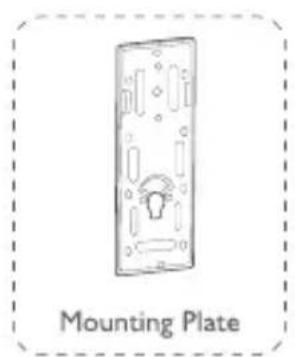
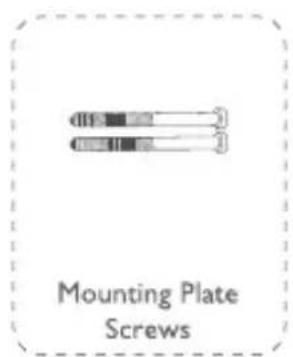
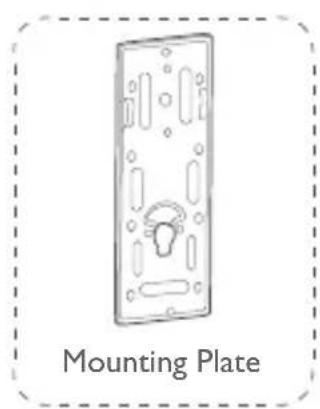
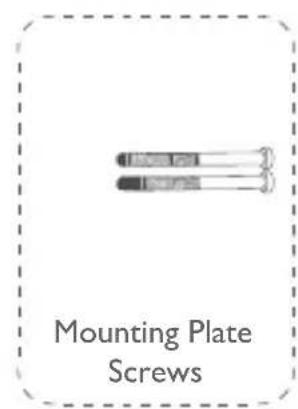
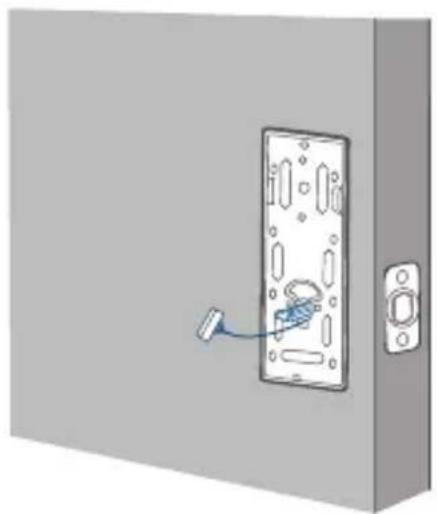
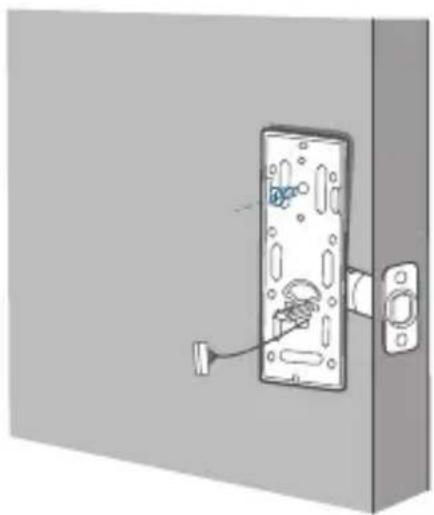
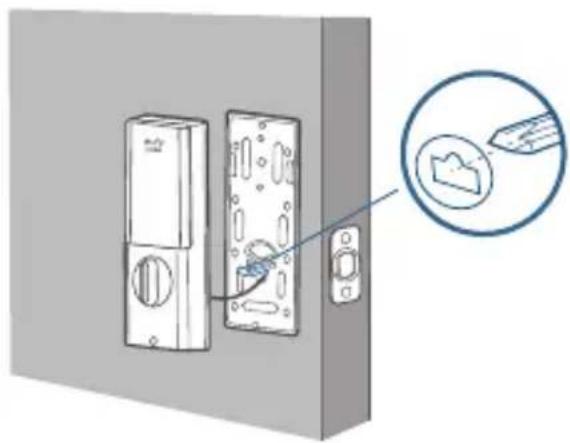
Step 4: Install the Mounting Plate
I. Route the cable through the mounting plate.
2 Fix the mounting plate onto the interior doorframe using the mounting plate screws. Make sure the screws go through the holes of the deadbolt and the mounting plate, and lock into place.
- Option A: If the mounting plate fits perfectly with the door, go to Step 5.
- Option B: If the mounting plate is not fastened tightly to the door, use an additional screw.
What is required: Mounting Plate, Mounting Plate Screws, Deadbolt Screw / Strike Screw, Screwdriver (not provided)
0

2
Option B
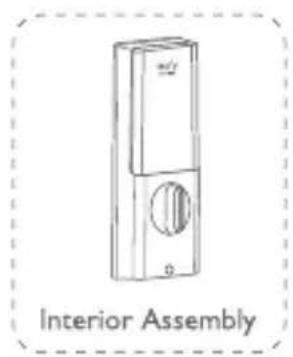
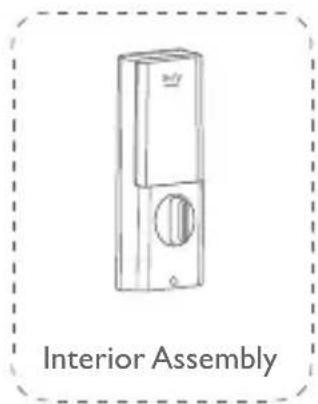
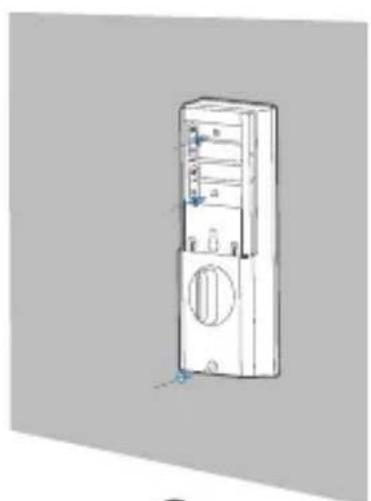
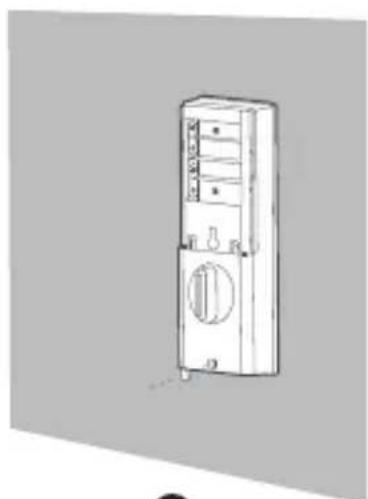
Step 5: Install the Interior Assembly
To install the Interior Assembly:
- Remove the battery cover.
2 Match the wire connector from the circuit board with the one from the interior assembly as illustrated. The wire connector can only be plugged into the socket in one way. Make sure you match the dot on the connector with the pin on the circuit board correctly. - Align the tailpiece with the key cylinder.
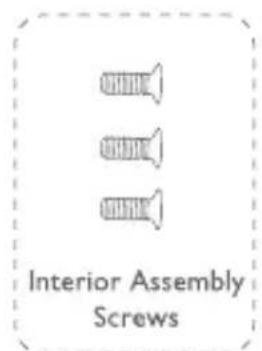
- Secure the provided screws into the interior assembly.
- Turn the thumbturn to check whether the deadbolt is retracted. If the deadbolt does not work smoothly, adjust the screws and install the mounting plate again.
- Use the plug to cover the screw hole at the bottom of the Solo Smart Lock D20.
What is required: Interior Assembly, Interior Assembly Screws, Screwdriver (not provided)

0

2
3
4

5
6
Note: Check carefully whether the wire is stuck or tangled. If the wire is stuck, re-install the Interior Assembly.
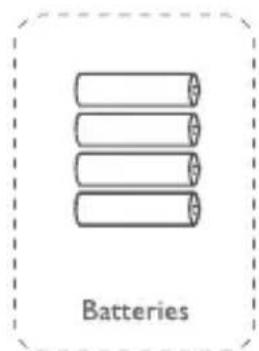
Step 6: Install Batteries
Insert four AA batteries into the battery compartment matching the polarity (+/-) indicated.
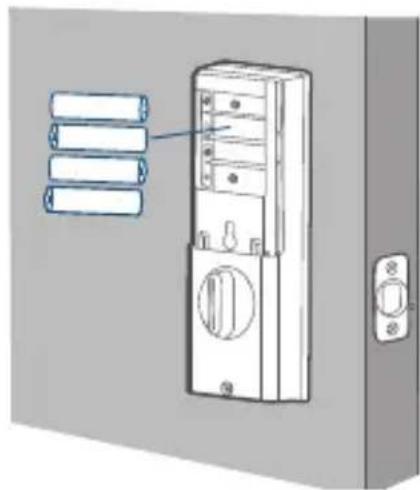
You are all set! Follow the in-app instructions to set up the Solo Smart Lock D20.
Note: Do not close the battery cover. This is to make sure you can scan the QR code in order to access information about Solo Smart Lock D20, as well as easily access the Setup button.
SETTING UP THE SOLO SMART LOCK D20
Pair Your Phone with Solo Smart Lock D20
Note: The lock will not lock automatically before the setup has completed. To avoid being locked outside, pair your phone with the Solo Smart Lock D20 and set an access code for unlocking the door.
To pair your phone with Solo Smart Lock D20:
14 English
I. Scan the QR code on the back of the Solo Smart Lock D20 to get Bluetooth information of the Solo Smart Lock D20. Follow the on-screen instructions to complete the setup.
-
Pair your phone with the Solo Smart Lock D20 via Bluetooth. Your phone will search for the Solo Smart Lock D20's Bluetooth and then connect.
-
Waiting to pair: The LED indicator flashes blue.
- Paired: the LED indicator turns steady blue for 5 seconds.
Note:
- The user that is paired is the only administrator and can authorize other users to use the lock.
- Press and hold the Setup button again the lock will return to default settings. All the settings will be erased and need to be reset. DO NOT press and hold the button if unnecessary.
Calibrate Solo Smart Lock D20
Once the Solo Smart Lock D20 is successfully paired with your phone, the eufy Security app will prompt you to calibrate the door lock.
To calibrate the Solo Smart Lock D20, follow the on-screen instructions to complete the process.
- Successfully calibrated: The button LED turns white for 2 seconds and then off. The voice prompt "calibration complete" can be heard.
- Fail to calibrate: The button and status LED turn solid red for 2 seconds and then off. The voice prompt "The deadbolt is stuck. Please return to the installation, and try again." can be heard.
Note: If the eufy Security app fails to calibrate the lock, check whether the door has been installed correctly and try again.
Set Access Code
After the lock is calibrated, the eufy Security app will prompt you to name your Solo Smart Lock D20 and set an access code. Follow the on-screen instructions to complete the process. The access code should be 4 to 8 characters.
Note: If you do not set the passcode and click “Return”, a message “initialization unsuccessful” will appear. Click the card to enter the Solo Smart Lock D20 page. The message “Continue or remove the device” will appear.
Set Scramble Passcode
A scramble passcode is a series of random numbers that you can input to prevent others from spying on your actual access code. It is ideal for those living in a condo with neighbors passing by all the time.
To set a scramble passcode, go to Settings on the eufy Security app. The scramble passcode should be no more than 12 digits in total.
Example
Access Code: 123456
Scramble Passcode Method:
1: 123456XXXXX
2:XXXX123456
3:XX123456XXX□□□□□
Other Settings
The Solo Smart Lock D20 supports many features that you can configure using the eufy Security app. The features are listed as follows:
- Add up to 100 users
- Set language: English
- Synchronize time for lock with the time on your phone
- Customize voice volume for the Solo Smart Lock D20
- Customize the time duration for automatic door-locking. You can set the countdown duration to be up to 3 minutes.
- Enable or disable sound effect
- Automatically record door opening and locking log
- Failsafe mode: After 5 consecutive failed attempts to input the access code, access code cannot be used.
- Check device information
OTA Update (Optional)
If your device requires an OTA update, the app will force you to update OTA. Follow the on-screen instructions to complete the process. If no OTA update is required, the app will automatically skip this process and enter "the setup complete" page.
Note:
- When the battery power level is lower than 25% , OTA update is not allowed.
- After OTA is successfully updated, wait for 1 minute and then reboot the Solo Smart Lock D20.
BASIC OPERATIONS
Unlock the Door
You can unlock the door using a valid access code, eufy Security app, or the provided key.
To unlock the door:
Option I: Use the access code
I. Press any key to wake up the keypad. The keypad will light on.
2. Enter your access code. If the access code is correct, press the button. The door will unlock. If the access code is wrong, press and enter a new code.
- Valid access code: The button turns solid white for 2 seconds.
- Access code error: The error button blinks red for 2 seconds. A beep will be heard.
If you fail to unlock the door for 5 consecutive times using the access code, you can also follow the in-app instructions or use the provided key to unlock the door.
Option 2: Use the eufy Security app
- Open the eufy Security app. The app will search for Solo Smart Lock D20 Bluetooth and connect.
- Follow the on-screen instructions on the eufy Security app to unlock the door.
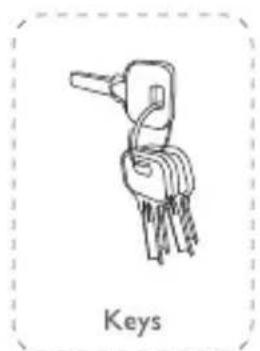
Option 3: Use the provided key
If you fail to unlock the door after 5 consecutive times using the access code, use the provided key to unlock the door.
Lock the Door
There are several options to lock the door.
Option 1: Use the access code
- Press any key wake up the keypad. The keypad will light on.
-
Enter your access code. If the access code is correct, press the button. The door will be locked. If the access code is wrong, press and enter a new code.
-
Valid access code: The button turns solid white for 2 seconds.
-
Access code error: The error button blinks red for 2 seconds. A beep will be heard.
Option 2: Use the eufy Security app
I. Open the eufy Security app. The app will search for Solo Smart Lock D20 Bluetooth and connect.
2. Follow the on-screen instructions on the eufy Security app to lock the door.
Option 3: Use automatic lock
I. On the eufy Security app, set the "Automatic lock" option to On, and set a countdown timer.
2. Once the door is unlocked, the Solo Smart Lock D20 starts the countdown, and automatically locks when the timer completes.
Option 4: One-touch lock
On the eufy Security app, the "one-touch lock" option is set to On by default. To use one-touch lock:
I. Set the "one-touch lock" option to On.
2 Press and hold the button to lock the door.
SPECIFICATIONS
Chipset: Realtek lower-power SOC BLE; BT 5.0;
Maximum access code: 100
Hardware encryption: ECC asymmetric encryption chip
Software encryption: AES 128
Waterproof: IPX3 (Exterior Assembly)
Numeric keypad:Keypad
Lock material: zinc alloy
Battery: 4 AA batteries
Times to unlock and lock: 250,000 times (mechanical)
TROUBLESHOOTING
I. How can I unlock the door if the Solo Smart Lock D20 doesn't work?
Use the provided key to unlock.
2 How can I unlock the door if the Solo Smart Lock D20's battery runs low?
① Insert a micro USB cable into the micro USB port and use a portable battery to power the Smart Lock.
② Use the access code to unlock.
- How to delete the registered access code?
Open your eufy Security app, and repeat steps mentioned in "Pair Your Phone with the Solo Smart Lock D20" to pair. Then you can delete the access code.
- The Solo Smart Lock D20 ringtone is too loud.
Open the eufy Security app and pair your phone with your Solo Smart Lock D20. You can set the ringtone volume on the eufy Security app.
-
Why the Solo Smart Lock D20's battery drains so quickly?
-
Make sure you use the standard battery.
- Check whether the Solo Smart Lock D20 is installed properly.
- Check whether the Solo Smart Lock D20 can be locked or unlocked smoothly using the thumbturn; If not, detach and install the Solo Smart Lock D20 again.
- Check whether water spills in the Interior Assembly. Exposure to water will drain the battery quickly.
- Contact Customer Service for technical support via eufy Security app or email.
For troubleshooting, check the installation video and instructions. Or you can contact Customer Service staff for technical support via via the eufy Security app or email.
IMPORTANT SAFETY INSTRUCTIONS
- DO NOT attempt to install or repair the product without authorization.
- Do not use excessive force or sharp objects to press lock buttons, as this can damage the product.
- Make sure the door is completely closed when going outside. The manufacturer does not assume responsibility for any harm caused by your improper closing of the door.
- Replace batteries when the low battery alarm is heard.
- Change your access code regularly to ensure security.
NOTICE
FCC Statement
This device complies with Part 15 of the FCC Rules. Operation is subject to the following two conditions: (1) this device may not cause harmful interference, and (2) this device must accept any interference received, including interference that may cause undesired operation.
Warning: Changes or modifications not expressly approved by the party responsible for compliance could void the user's authority to operate the equipment.
Note: This equipment has been tested and found to comply with the limits for a Class B digital device, pursuant to Part 15 of the FCC Rules. These limits are designed to provide reasonable protection against harmful interference in a residential installation.
This equipment generates uses and can radiate radio frequency energy and, if not installed and used in accordance with the instructions, may cause harmful interference to radio communications. However, there is no guarantee that interference will not occur in a particular installation. If this equipment does cause harmful interference to radio or television reception, which can be determined by turning the equipment off and on, the user is encouraged to try to correct the interference by one or more of the following measures: (1) Reorient or relocate the receiving antenna. (2) Increase the separation between the equipment and receiver. (3) Connect the equipment into an outlet on a circuit different from that to which the receiver is connected. (4) Consult the dealer or an experienced radio / TV technician for help.
FCC Radio Frequency Exposure Statement
The device has been evaluated to meet general RF exposure requirements. The device can be used in fixed / mobile exposure condition. The min separation distance is 5mm .
Notice: Shielded cables
All connections to other computing devices must be made using shielded cables to maintain compliance with FCC regulations.
The following importer is the responsible party.
Company Name: POWER MOBILE LIFE, LLC
Address: 400 I08th Ave NE Ste 400, Bellevue, WA 98004-5541
Telephone: 1-800-988-7973
IC Statement
This device complies with Industry Canada licence-exempt RSS standard(s). Operation is subject to the following two conditions:
(1) this device may not cause interference, and
(2) this device must accept any interference, including interference that may cause undesired operation of the device.
This Class B digital apparatus complies with Canadian ICES-003.
When using the product, maintain a distance of 20cm from the body to ensure compliance with RF exposure requirements.
This product complies with the radio interference requirements of the European Community.
Hereby, Anker Innovations Limited declares that this device is in compliance with the essential requirements and other relevant provisions of Directive 2014/53/EU. For the declaration of conformity, visit https://uk.eufylife.com/.
Do not use the Device in the environment at too high or too low temperature, never expose the Device under strong sunshine or too wet environment.
The suitable temperature for the product and accessories is -30^ - 70^ / -22^ - 158^ .
RF exposure information: The Maximum Permissible Exposure (MPE) level has been calculated based on a distance of d = 20 cm between the device and the human body. To maintain compliance with RF exposure requirement, use product that maintain a 20cm distance between the device and the human body.
CAUTION RISK OF EXPLOSION IF BATTERY IS REPLACED BY AN INCORRECT TYPE. DISPOSE OF USED BATTERIES ACCORDING TO THE INSTRUCTIONS
Bluetooth Operating Frequency Range: 2402~2480MHz;
Bluetooth Max Output Power: 8 dBm (EIRP)
WiFi Operating Frequency Range:2412~2472 MHz(2.4G); Wifi Max Output Power:19 dBm(ERIP);
The following importer is the responsible party (contact for EU matters only)
This product is designed and manufactured with high quality materials and components, which can be recycled and reused.
This symbol means the product must not be discarded as household waste, and should be delivered to an appropriate collection facility for recycling. Proper disposal and recycling helps protect natural resources, human health and the environment.
For more information on disposal and recycling of this product, contact your local municipality, disposal service, or the shop where you bought this product.

This product complies with the radio interference requirements of the United Kingdom
Declaration of Conformity
Hereby, Anker Innovations Limited declares that this product is in compliance with Radio Equipment Regulations 2017. The full text of the UK declaration of conformity is available at the following internet address: https://uk.eufylife.com.
Anker Technology (UK) Ltd I Suite B, Fairgate House, 205 Kings Road, Tyseley, Birmingham, B1 2AA, United Kingdom
TABLEDE CONTENIDOS
This product complies with the radio interference requirements of the European Community.
Solo Smart Lock D20: 36-Month Limited Warranty
Mechanical part: 36-Month Warranty
Electrical Part: 18-Month Warranty
+1 (800) 988 7973 Mon-Fri 9AM-5PM (PT)

+44 (0) 1604 936 200 Mon-Fri 6AM-11AM (GMT)
+49 (0) 69 9579 7960 Mon-Fri 6:00-11:00

Customer Support: support@eufylife.com
Anker Innovations Limited
Room 1318-19, Hollywood Plaza, 610 Nathan Road, Mongkok, Kowloon, Hong Kong

@EufyOfficial

@EufyOfficial

eufyofficial