
AXO940 - Vacuum Cleaner H.KOENIG - Free user manual and instructions
Find the device manual for free AXO940 H.KOENIG in PDF.
| Product type | Cyclone vacuum cleaner |
| Brand | H.Koenig |
| Model | AXO940 |
| Power supply | Mains (cord with pedal rewinder) |
| Power | Not specified |
| Reservoir capacity | Not specified |
| Filtration | Cyclone filter + washable filter |
| Cord length | Not specified |
| Accessories included | Extendable metal hose, brush, cyclone reservoir |
| Safety | Overheating protection device, automatic shut-off |
| Maintenance | Regular cleaning of the reservoir and filters |
| Weight | Not specified |
| Dimensions | Not specified |
| Noise level | Not specified |
| Brush type | Standard brush |
| Usage | Domestic |
| Warranty | 2 years |
| Wear parts | Filters (to be changed every 6-12 months) |
| Repairability | After-sales service, parts available on sav.hkoenig.com |
| Reservoir volume | Not specified |
| Power cord | Estimated length 5-6 meters (not specified) |
| Control | On/off pedal |
| Motor protection | Yes, thermal cutoff |
| Filter | Cyclone filter + washable filter |
| Color | Not specified |
Frequently Asked Questions - AXO940 H.KOENIG
User questions about AXO940 H.KOENIG
0 question about this device. Answer the ones you know or ask your own.
Ask a new question about this device
Download the instructions for your Vacuum Cleaner in PDF format for free! Find your manual AXO940 - H.KOENIG and take your electronic device back in hand. On this page are published all the documents necessary for the use of your device. AXO940 by H.KOENIG.
USER MANUAL AXO940 H.KOENIG
- Be sure to use the cleaner in compliance with the contents of this manual, and use the fittings designated by the manufacturer.
- Please do not leave the cleaner when it is powered on. Turn off the power switch and pull out the power plug when not using or before maintenance.
- Please do not pull or carry the cleaner by the power cord, or nip it when closing a door; keep the cord free from the press of the cleaner.
- Please do not let children take the cleaner as a toy, and close attention is necessary when the cleaner approaches children.
- Please do not use the cleaner when its power cord or plug is damaged. Send it to the appointed service center. Please do not unplug by pulling the cord or plug. To unplug, grasp the plug, not the cord.
- Never pull the power plug or use the cleaner with wet hands.
- When using the cleaner, pay attention to prevent any hair roll or other rubbish block up the air inlet (including the hose and the splice), otherwise motor failure and housing
distortion may be caused. If the matters absorbed in forms a blockage, stop the cleaner by pulling out the power plug immediately to clean the blockage.
- When using the cleaner, don't plug up the air outlet by towel or other matters, otherwise the efficiency of dust absorbance will be influenced, and the motor will be at high risk of being burnt out.
- Never use the cleaner at uneven floor or ground; and be very careful when cleaning stairs to prevent the cleaner from falling down.
- Never absorb live stumps with the cleaner, otherwise the motor may be damaged.
- The cleaner should be kept far away from heat sources (such as central heating, oven, etc) to avoid the distortion of plastic parts as well as the influence caused by such distortion.
- Before using the cleaner, please remove big and sharp matters on the floor to avoid damaging the plastic parts, filter gauzes and motor.
- Never absorb water or other liquid with this cleaner, otherwise, the motor will be damaged.
- This appliance may be used by persons with reduced physical, sensory or mental capabilities or lack of experience or knowledge, provided that they are
supervised or instructed in the safe use of the appliance and that they fully understand the potential hazards.
-
Your appliance has been designed for domestic use only. It is not intended for use in the following situations which are not covered by the warranty:
-
in staff kitchen areas in shops, offices and other professional environments,
- in farm hostels,
- by guests in hotels, motels and other residential environments,
-
in bed and breakfast type environments.
-
If the power cord is damaged, it must be replaced with an after-sales service to avoid any danger.
- Do not operate this appliance if it has a damaged cord or plug, if it is not working properly or if it has been damaged or dropped. If the supply cord is damaged, it must be replaced by the manufacturer or its service agent or a similarly qualified person in order to avoid a hazard.
- This appliance may be used by children of at least 8 years of age, as long as they are supervised and have been given instructions about using the appliance safely and are fully aware of the dangers involved.
- Cleaning and maintenance should not be carried
out by children unless they are at least 8 years of age and are supervised by an adult.
- Keep the appliance and its power cord out of reach of children under 8 years of age.
- When using electrical equipment, safety precautions must always be taken to prevent the risk of fire, electric shock and/or injury in the event of misuse.
- Make sure that the voltage rating on the typeplate corresponds to your main voltage of your installation. If this is not the case, contact the dealer and do not connect the unit
- Never leave the unit unattended while in operation.
- Make sure that the voltage rating on the typeplate corresponds to your main voltage of your installation. If this is not the case, contact the dealer and do not connect the unit.
- Please keep this document at hand and give it to the future owner in case of transfer of your device.
- The device must not be used if it has been dropped, it obvious signs of damage are visible or if it has leaks.
- The device is not intended to be operated by external timer means or a remote control system.
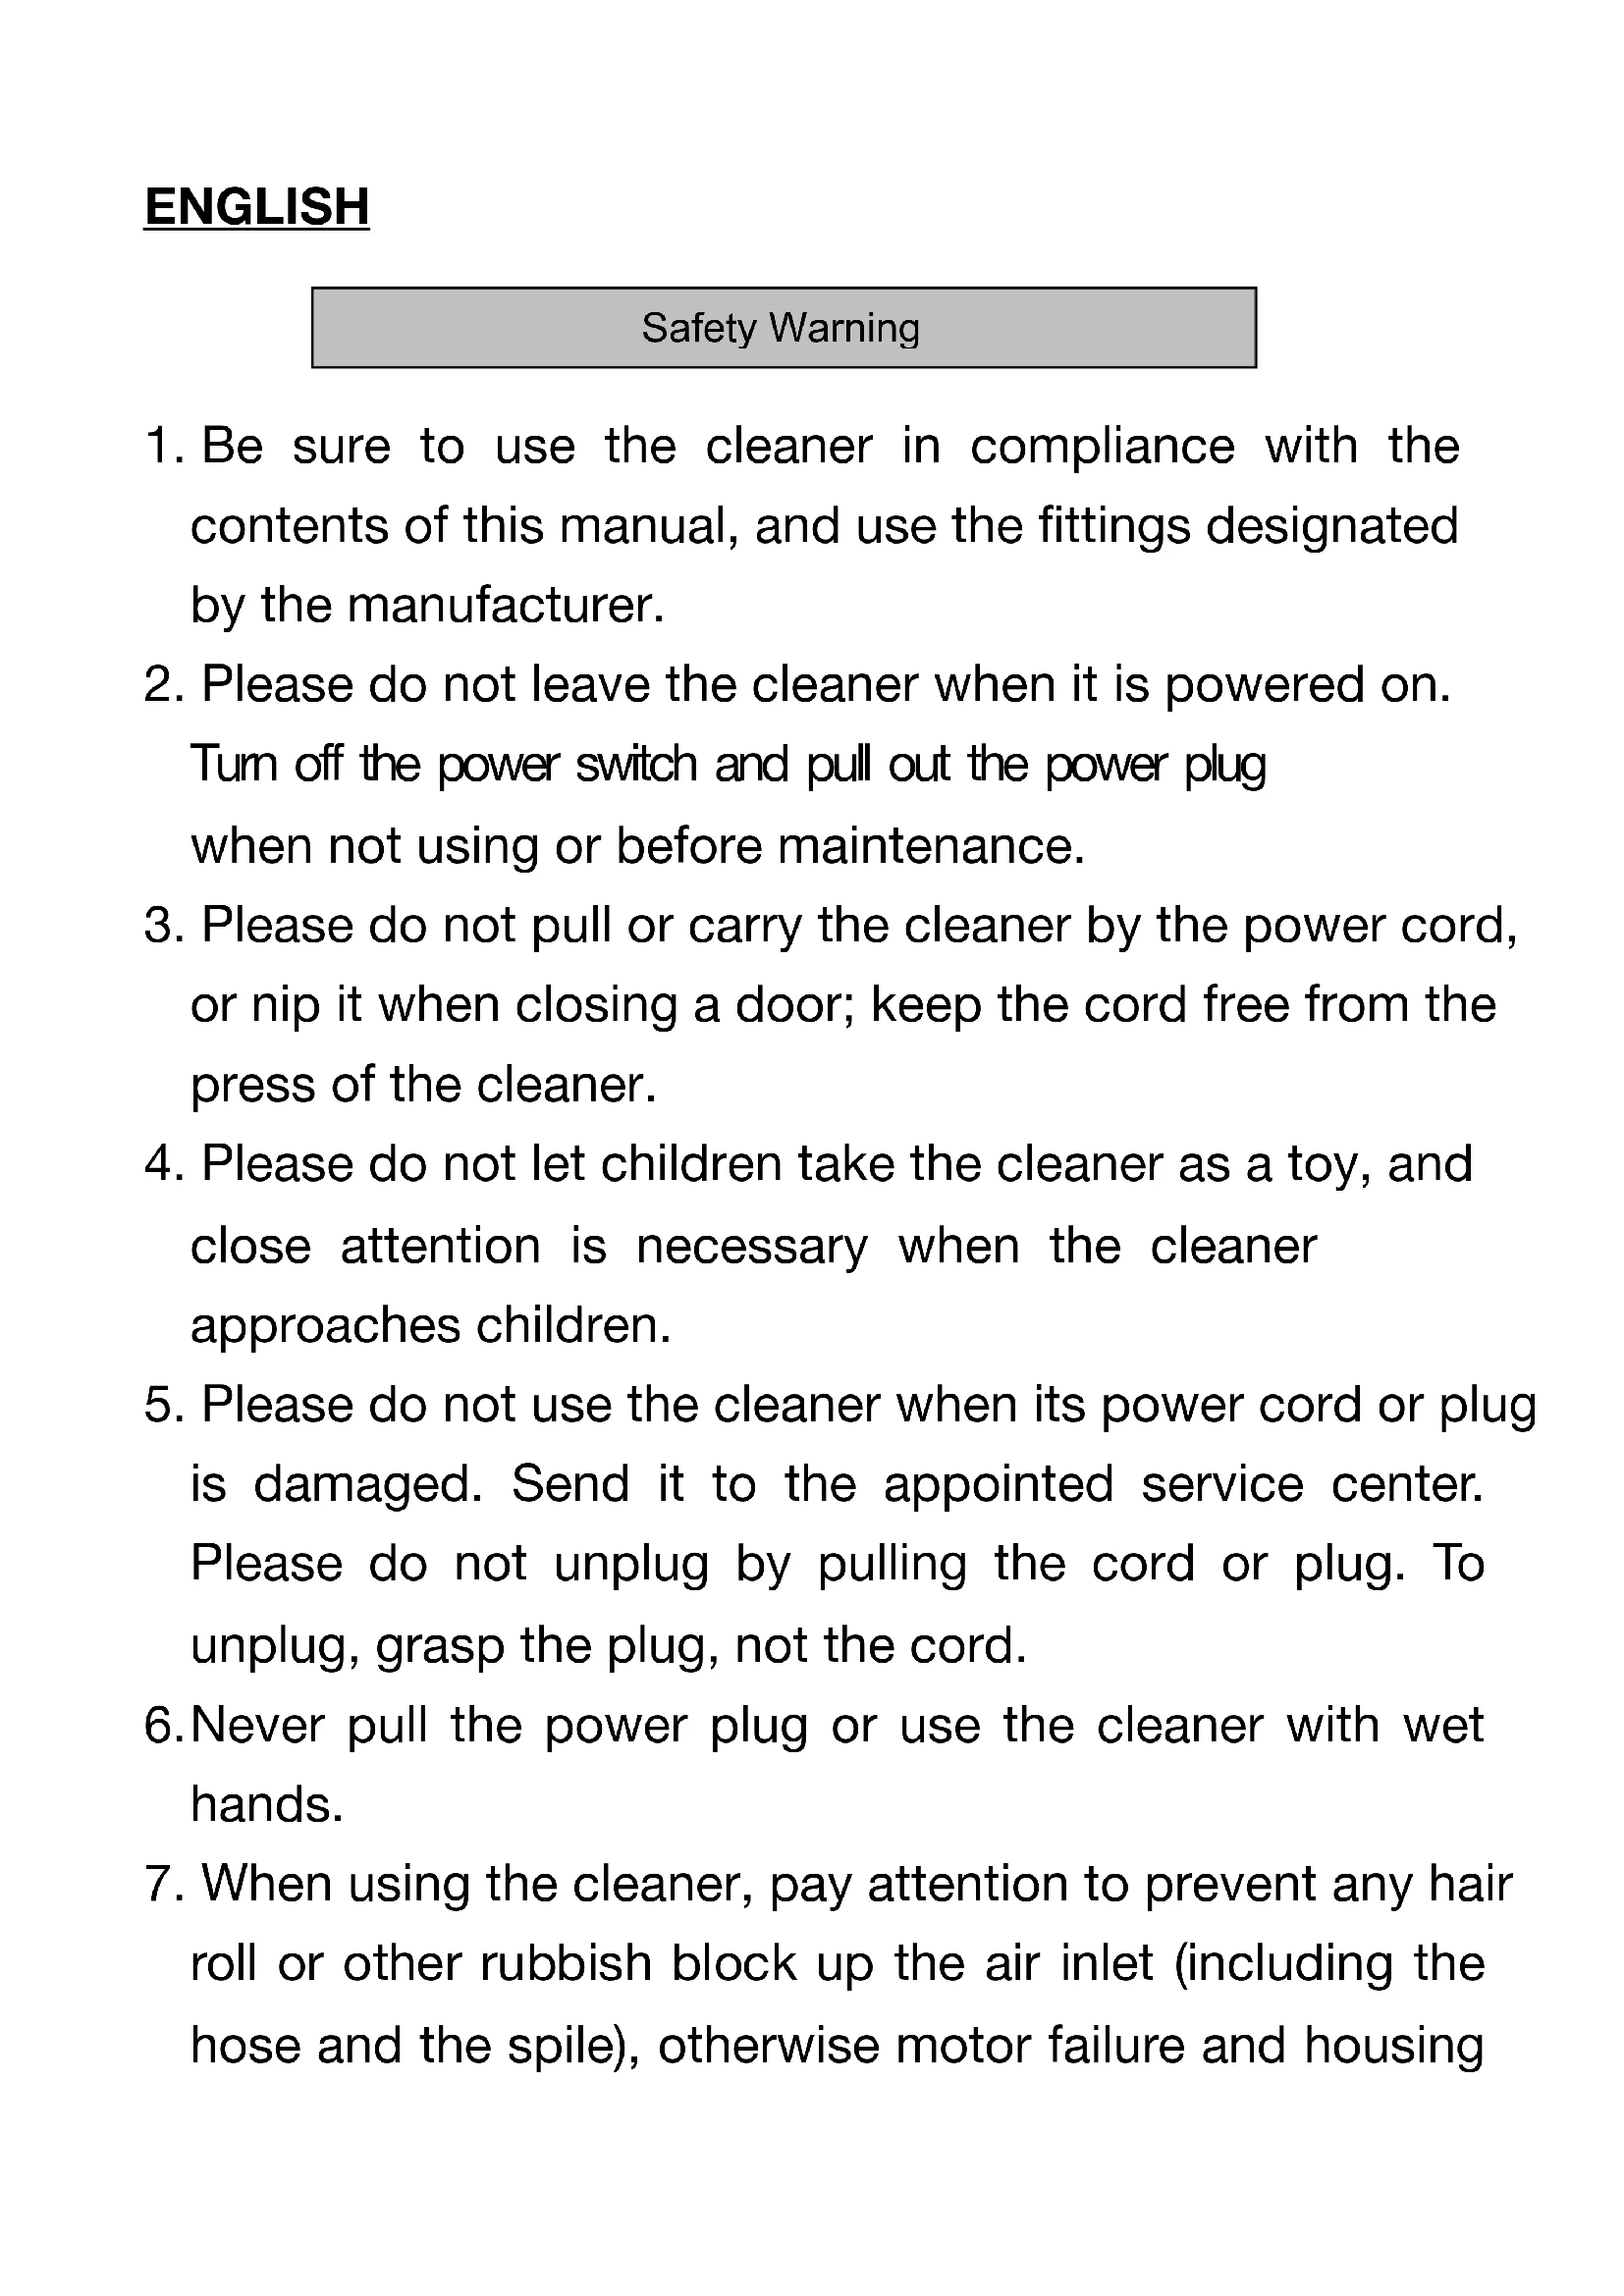
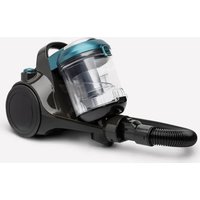
Names of Parts and Components
-
Power plug
-
Cord reeling pedal
- Cyclone dust barrel
- Hose
- Accessory Bracket
- Handle
- Air Escape Push button
- Metal extension pipe
- Switch Pedal
- Air outlet grid
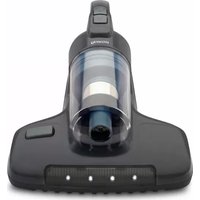
- Ordinary floor brush
Assembly Instructions
- Before assembling the cleaner, please confirm all parts and components for the cleaner are received by referring to Parts and Components List.
- Please remember to cut off the power supply before assembly.
Assembly of hose
- As is shown in Figure (3), insert the hose into the duct inlet of the machine body in horizontal direction. Please pay attention to the alignment of two projecting parts. Turn the hose right when it is pushed into the bottom, a click of inserting sound may be heard, i.e. the hose is assembled into the machine body completely.
Figure (3)
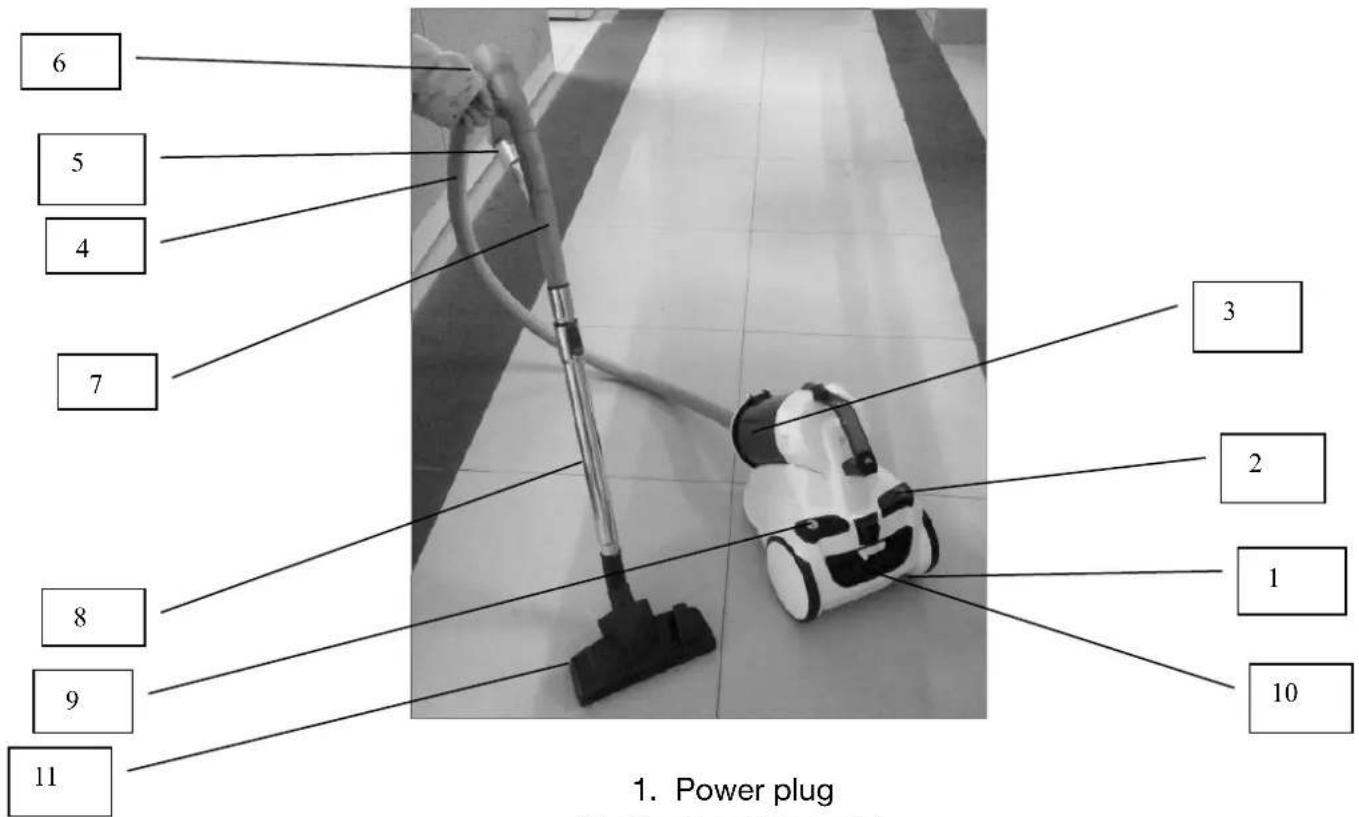
2. Assembly and Removal of dust barrel
As is shown in Figure (4), place the bottom of the dust barrel on the projecting part at the front end of the machine body, and press down the dust barrel. When the front-end hook is entered into the corresponding part of the machine body completely, and a click of inserting sound is heard, which indicate that the dust barrel is assembled in place. To remove the dust barrel, press down the handle of the dust barrel; when the handle is pressed down to the bottom, the dust barrel can be lifted to remove.
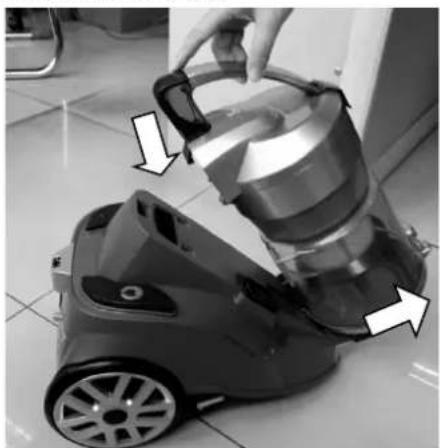
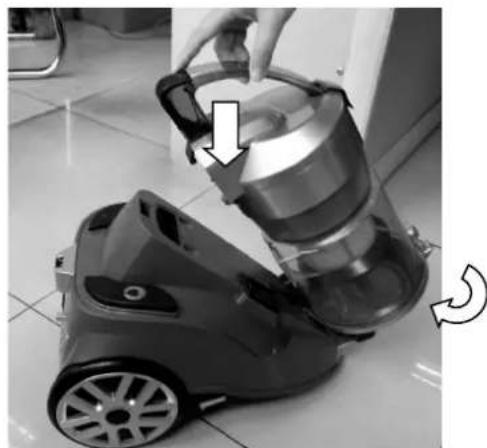
Figure (4)
Assembly of metal extension pipe and floor brush
Insert the front end of the hose handle into the metal extension pipe according to Figure (5); then insert the other end of the metal extension pipe into the rounded inlet of the floor brush, and adjust to the proper direction. At this time, the assembly of the whole machine is completed.
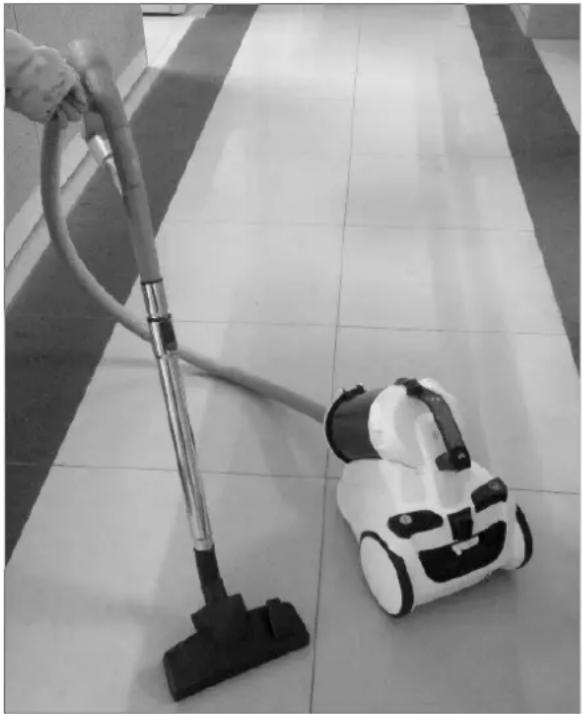
Figure (5)
Operation Instructions
How to start
- First of all, pull out the power cord from the cord reel to the needed length; insert the power cord plug into the power socket, and press down the power switch button with finger or step on it with foot; then you can control the start and stop of the cleaner.
- The yellow mark on the power cord indicates its desired length. Never pull out the power cord to the length exceeding the red mark.
Protective devices of motor
- There is a temperature controller designed in the body of cleaner motor, which can automatically cut off the power supply of motor to prevent overheating. When the air-inlet or air-outlet pipe is overloaded or blocked, the temperature of motor rises, then the temperature controller cuts off the power supply of motor automatically to make the motor cool, preventing the cleaner from being damaged.
- If the temperature controller is cut off, stop the cleaner immediately and pull out the power plug to make the cleaner cool, and check and remove the hair roll or other roll-like rubbish blocking the air inlet (including the hose and the splice), and replace the filter HEPA or filter gauze when necessary.
- After cooling the motor for 30mins, plug in the power plug and check whether the temperature controller has been reset. If the power supply of the cleaner hasn't been cut off, the temperature controller of the motor won't be reset even when the motor has become cool.
Maintenance of the Cleaner
- All the day-to-day maintenance and repair jobs should be done after the power plug has been pulled out.
- Frequently remove the rubbish from the dust barrel, so as to avoid the failure of the cleaner.
- Never wipe the surface of the cleaner with gasoline or oily liquid. Wipe it with water or neutral detergent. Caution: be sure to wring out the wiping cloth dry for wiping, it is prohibited for water to infiltrate into electrical elements of the cleaner.
- When the cleaner is placed idle not in use, it should not be put directly in the sun or in a damp place.
Storage of the Cleaner
- Upon the completion of the operation of the cleaner, turn off its power supply, and pull the power plug out of the power socket, then step on the cord reeling button to reel in the power cord fully. Hang the floor brush onto the floor brush hook, as is shown in Figure (6).
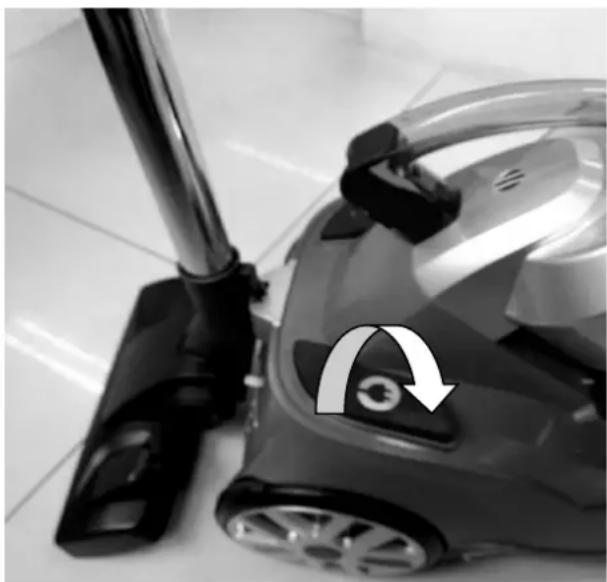
Figure (6)
- Place the cleaner in the dry indoor environment.
Cleaning of the Dust Barrel
Remove the rubbish in the dust barrel frequently to avoid the failure of the cleaner.
- Clean the dust barrel only after the power plug of the cleaner has been pulled out;
- Put the dust barrel over the rubbish bin (bag), press down the releasing button of the dust barrel, the bottom cover of the dust barrel will automatically fall down, and clear and empty the dust barrel, as is shown in Figure (7).
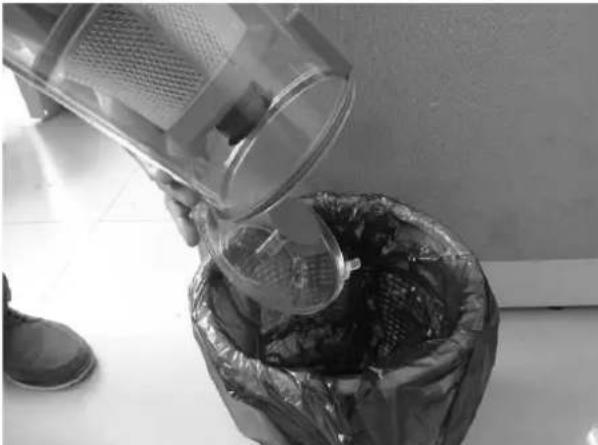
Figure (7)
Cleaning of front filter for motor:
Warning: please make sure the power supply of the cleaner has been cut off before carrying out the following steps:
1.Pull out the power cord plug of the cleaner from the power socket.
2. Press down the handle of the dust barrel to remove the dust barrel, and remove the cover of the front filter for motor, and then use the brush to clean the filter (sponge and filter gauze with composite coating) or place it under the cock to clean, as is shown in Figure (8/9).
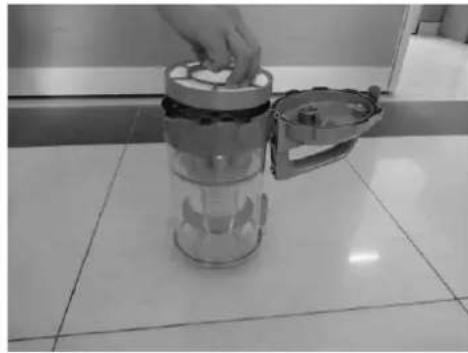
Figure (8)
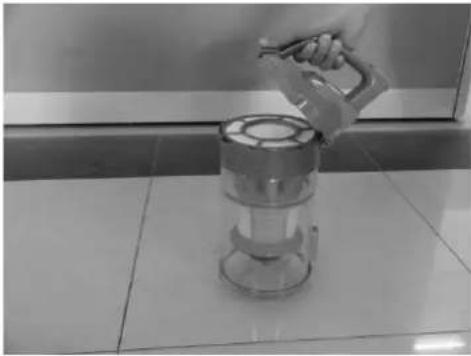
Figure (9)
Caution:
It is normal that the white central filter in the dust barrel may change color, which cannot affect its filtration performance. If the hose and the central filter are difficult to clean, we recommend that you use water to flush them; however, please be sure to place them in the dry air for at least 24 hours after they are flushed by water.
Key Points:
Please note: when the dust collecting barrel or the filter cover is not installed in place, the operation status will be invalid, and the cleaner will have no dust absorption capacity. At this time, you need to check carefully whether the dust collecting barrel and the filter cover have been installed in place.
Caution: please keep the suction passage unobstructed, otherwise the motor may become overheating or even be damaged.
Replacement of rear filter for motor
The rear filter for motor is installed behind the air outlet grid, which can be washed due to the materials used. When the surface is jammed seriously by dust, the filter should be replaced by a new one or washed by water to maintain enough suction force. (Figure 10/11)
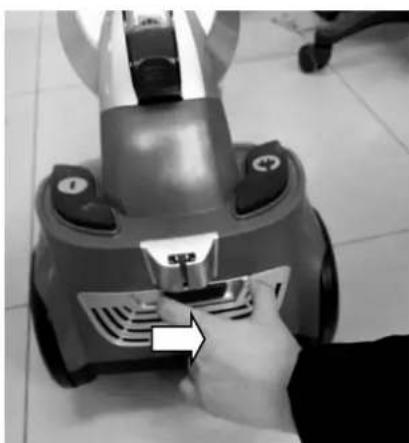
Figure (10)
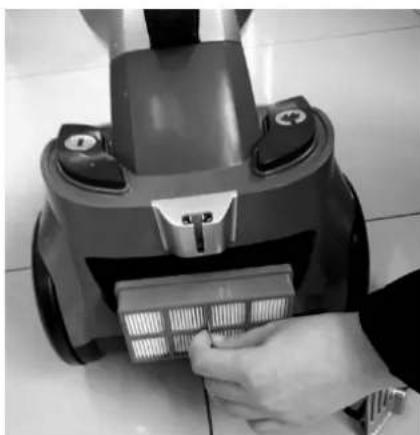
Figure (11)
It is usually necessary to clean and replace the filters for motor only after they have been used for 6 months to 12 months. Please remember to confirm that all filters have been correctly installed into the machine before turning on the cleaner to use.
Key Points:
The power supply of the cleaner must be cut off before replacing any filter!
Faults and repair
In case of abnormality with this product, please treat it in the way as stated hereinafter; if the cleaner still refuses to work normally, please contact the stop from where this product was bought or with the appointed service point.
| Fault | Treatment |
| The cleaner cannot operate. | 1. Check whether the power plug is inserted securely; pull out the plug and then reinsert it in the power socket;2. Check whether the power socket is electrified;3. Check whether the switch of the cleaner is in “ON” position. |
| The suction force is reduced. | 1. Check whether the floor brush, the hose and the splice are jammed, and remove any blockage immediately;2. Check whether the air-inlet filter gauze is dusty; frequently clean rubbish or replace air-inlet and air-outlet HEPA; |
| There is abnormal sound when the motor is under operation. | 1. Stop the cleaner immediately;2. Check whether the floor brush, the hose and the splice are jammed, and remove any blockage immediately. |
After-sale service
When abnormalities or problems are found with the product in use, please contact the appointed service point for consultation or repair.
WARRANTY
The warranty period for our products is 2 years, unless otherwise stated, starting from the date of initial purchase or the date of delivery.
If you have any problems or questions, you can easily access our help pages, troubleshooting tips, FAQ, and user manuals on our service site: https://sav.hkoenig.com.
By typing the reference name of your device in the search bar, you can access all available online support, designed to best meet your needs.
If you still cannot find an answer to your question or problem, then click on "Did the answer solve your problem?" This will direct you to the Customer Support Request Form, which you can fill out to validate your request and get help.
WARRANTY CONDITIONS
The warranty covers all failures occurring under normal use, in accordance with the usage and specifications in the user's manual.
This warranty does not apply to packaging or transportation problems during shipment of the product by the owner. It also does not include normal wear and tear of the product, nor maintenance or replacement of consumable parts.
EXCLUSION OF WARRANTY
- Accessories and wearing parts (^*)
- Normal maintenance of the device.
-
All breakdowns resulting from improper use (shocks, failure to comply with power supply recommendations, poor conditions of use, etc.), insufficient maintenance or misuse of the device, as well as the use of unsuitable accessories.
-
Damage of external origin: fire, water damage, electrical surge, etc.
- Any equipment that has been disassembled, even partially, by persons other than those authorized to do so (notably the user).
- The products whose serial number would be missing, deteriorated or illegible that would not allow its identification.
- The products subjected to leasing, demonstration, or exhibition.
(*) Some parts of your device, called wear parts or consumables, deteriorate with time and frequency of use of your device. This wear and tear are normal but can be accentuated by poor conditions of use or maintenance of your device. These parts are therefore not covered by the warranty. The accessories supplied with the device are also excluded from the warranty. They cannot be exchanged or refunded. However, some accessories can be purchased directly through our website: https://sav.hkoenig.com/.
ENVIRONMENT
CAUTION :

Do not dispose of this product as it has with other household products. There is a separation of this waste product into communities, you will need to inform your local authorities about the places where you can return this product. In fact, electrical and
electronic products contain hazardous substances that have harmful effects on the environment or human health and should be recycled. The symbol here indicates that electrical and electronic equipment should be chosen carefully, a wheeled waste container is marked with a cross.
Adeva SAS / H.Koenig Europe - 8 rue Marc Seguin, 77290 Mitry-Mory, France www.hkoenig.com - https://en.hkoenig.com - Tél: +33 1 64 67 00 05
INSTRUCTIONS DE SÉCURITÉ
Maintenance of the Cleaner
CONDITIONS DE GARANTIE
Replacement of rear filter for motor

- Names of Parts and Components
- Assembly Instructions
- Assembly of hose
- Assembly and Removal of dust barrel
- Assembly of metal extension pipe and floor brush
- Operation Instructions
- How to start
- Protective devices of motor
- Maintenance of the Cleaner
- Storage of the Cleaner
- Cleaning of the Dust Barrel
- Cleaning of front filter for motor:
- Caution:
- Key Points:
- Replacement of rear filter for motor
- Faults and repair
- After-sale service
- WARRANTY
- WARRANTY CONDITIONS
- EXCLUSION OF WARRANTY
- ENVIRONMENT
- INSTRUCTIONS DE SÉCURITÉ
- CONDITIONS DE GARANTIE
Brand : H.KOENIG
Model : AXO940
Category : Vacuum Cleaner