
IAN 290255 - Camping shelter CRIVIT - Free user manual and instructions
Find the device manual for free IAN 290255 CRIVIT in PDF.
| Product type | Camping shelter (awning) |
| Brand | Crivit |
| Model | IAN 290255 |
| Dimensions (W x H x D) | 250 x 220 x 250 cm |
| Weight | Approx. 8.8 kg |
| Roof material | Polyester with UV protection (UPF 30+) |
| Pole material | Steel and fiberglass |
| Peg material | Galvanized steel |
| Rope material | PP (polypropylene) |
| Intended use | Outdoor sun and rain protection, temporary use |
| Delivery contents | 1 awning, 4 universal roof poles, 4 corner poles, 2 roof poles, 4 feet, 8 pegs, 4 guy ropes, 3 storage bags |
| Recommended number of people for assembly | 2 adults |
| Minimum distance between two awnings | 3 meters |
| Maximum hook load | 500 g |
| Warranty | 3 years |
| Care and cleaning | Damp cloth and mild detergent, waterproofing spray possible |
| Storage | Dry and clean in a temperate room |
| Wind warning | Do not use if wind > 40 km/h |
| Manufacturing date | 01/2018 |
Frequently Asked Questions - IAN 290255 CRIVIT
User questions about IAN 290255 CRIVIT
0 question about this device. Answer the ones you know or ask your own.
Ask a new question about this device
Download the instructions for your Camping shelter in PDF format for free! Find your manual IAN 290255 - CRIVIT and take your electronic device back in hand. On this page are published all the documents necessary for the use of your device. IAN 290255 by CRIVIT.
USER MANUAL IAN 290255 CRIVIT
natural_image
3D rendered image of a modern table with four legs and a curved top, no visible text or symbols on the object itself.SHELTER SHELTER
ABRI DE CAMPING
DF AT CH
SHELTER
Bedienungsanleitung
①
ABRI DE CAMPING
Instructions for use
NL ME
SHELTER
Opbouwinstructies
19
CARPA
Before reading, fold out the illustration page and get to know all of the functions of your unit.
图 10
GS/IE Instructions and Safety Notice Page 13
Safety Instructions 13 - 14
Danger to life! 13
Danger of injury! 13 - 14
Location selection 14
Construction 14 - 15
Dismantling 15 - 16
Cleaning and Care 16
Care instructions 16
Storage 16
Disposal 16
Notes on the guarantee and
service handling 16 - 17
FR BE
natural_image
Pure geometric line drawings of five symbols (three circles, two triangles, one cross) without any text or labelsLagerung
Congratulations! With your purchase you have decided on a high-quality product. Get to know the product before you start to use it.
Carefully read the following instructions for use.
Use the product only as described and only for the given areas of application. Keep these instructions safe. When passing the product on to a third party, always make sure that the documentation is included.
⚠️ Please read all the safety notes and instructions.
Failure to observe them can lead to serious injury.
Contents (Fig. A)
1 x Shelter roof (1)
4 x Roof rods with universal joint (2)
4 x Corner pole (3)
2 x Roof frame (4)
4 x Supporting foot (5)
8 x Tent peg (6)
4 x Guy rope (7)
1 x Carrying bag (8)
1 x Storage bag (9)
1 x Bag for roof frame (10)
1 x Bag for tent pegs (11)
1 x Instructions for use
Technical Data
Dimensions: 250 x 220 x 250cm (B x H x T)
Weight: approx. 8.8kg
Material:
• Frame: Steel and fibreglass
- Roof: Polyester, protective factor (UPF) 30+
- Guy rope: PP
- Tent peg: Steel, galvanised

Date of manufacture (month/year): 01/2018
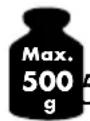
Maximum load on hook: 500g
Intended Use
This product has been conceived for protection from the sun and rain in the outdoors. It is not envisaged for continuous use in the outdoors, since it is only weather-resistant to a limited extent. It is not intended for industrial use.
Safety Instructions
⚠️ Danger to life!
- Never leave children unattended with the packing material. There is a danger of suffocation.
⚠️ Danger of injury!
- The product must not be used in adverse weather conditions like strong wind, rain or snow.
- It must be dismantled if wind speeds of 40km/h or higher are expected (fresh wind, large branches and trees swaying and the wind is clearly audible).
- Dismantle the shelter if the wind is freshening or if the weather conditions are adverse otherwise.
- Be particularly careful about your fingers when assembling and dismantling the shelter. There is a danger of injury from crushing.
- Set up the shelter on a plain, even surface.
- Draw attention to the guy ropes and the consequent danger of stumbling.
- Ensure that the shelter has been fully stretched out before you use it.
- The shelter may only be used under the supervision of adults and not as a toy.
- Examine the product before every use for damage or wear.
- Check before every use that all the parts have been properly assembled.
If the assembly is not done correctly, the safety and working can be adversely affected. - No naked flames, grills or heating mantles inside or in the vicinity of the product. If the product catches fire nonetheless, leave it immediately.
Extinguish the fire with a fire extinguisher or water. If required, immediately notify the fire brigade.
- Individual shelters must not be joined or fastened to one another. A minimum distance of 3m must be kept between two individual shelters.
- Any build-up's of water must be removed!
Location selection
- The product has dimensions of 2.5 × 2.5m , and in addition, space is required for the guy ropes.
- As far as possible, deploy the product in a place that is protected from the wind.
- The ground must be even and give the tent pegs enough grip.
Construction
Step 1
Remove the product from the various individual bags.
Step 2
Unfold the four roof rods with universal joints (2). Fit the colour-coded ends of the rods into the colour-coded openings of the universal joints. Ensure that the locking buttons (2a) fit into the holes both visibly and with an audible click (Fig. B).
Caution! Danger of getting stuck.
Step 3
Push the four corner poles (3) into the universal joints. Ensure that the locking buttons (3a) fit into the holes both visibly and with an audible click.
Caution! Danger of getting stuck.
Unfold the upper segments of the corner poles (Fig. C).
Step 4
Put the shelter roof (1) over the frame. Fasten the shelter roof with the help of the pre-fitted hook-and-loop fasteners (1a) to the corner poles (Fig. D).
Step 5
Unfold the lower segments of the corner poles. Fit one supporting foot (5) each into them. Fasten the pre-fitted eyelets (1b) into the hooks (5a) provided for the purpose on the supporting feet (Fig. E).
Step 6
Fit the segments of the roof frame (4) together. Push the rods in succession diagonally onto the metal pins (2b) of the universal joint.
Fasten the shelter roof by means of the pre-fitted hook-and-loop fasteners (1c) to the rods. Fix both the rods with the hook-and-loop fastener (1d) (Fig. F).
Step 7
Thread a tent peg (6) through the loop (1e). Anchor every supporting foot with the help of the tent pegs. To that end, use the openings in the supporting feet (Fig. G).
Attention! Check for firm fitting of the tent pegs.
Step 8
Knot one guy rope (7) each with every loop (1f) at the outermost corners of the shelter. Stretch out the ropes and fasten each of the ends to a tent peg. The length of the guy ropes can be adjusted with a tightener (7a) Fig. G).
Attention! Here, too, pay attention to firm fitting of the guy ropes.
Dismantling
Step 1
Loosen the tent pegs of the guy ropes and supporting feet.
Step 2
Loosen the hook-and-loop fasteners at the roof frame. Remove the two rods from the metal pins.
Step 3
Unhook the shelter roof at the supporting feet. Fold up the lower segment of the corner poles and remove the shelter roof.
Step 4
Press the locking buttons to loosen the corner poles from the universal joints. Fold up the corner poles.
Caution! Danger of getting stuck.
Step 5
Press the locking buttons at the roof frame and dismantle the rods with corner joints. Fold up the rods.
Caution! Danger of getting stuck.
Step 6
Pack the product after drying and cleaning back into the storage pouches.
Cleaning and Care
Care instructions
Clean the article with a damp cloth and a mild cleaning agent.
Do not use petrol, solvents or harsh cleaners.
The roof of the shelter can be treated with impregnation spray.

natural_image
Pure geometric line drawings of six abstract symbols (no text or labels)Storage
To be able to enjoy this article for a long time we recommend always storing the clean and dry pavilion in a tempered location.
Disposal
Dispose of the article and the packaging materials in accordance with current local regulations. Packaging materials such as foil bags are not suitable to be given to children. Keep the packaging materials out of the reach of children.
Notes on the guarantee and service handling
The product was produced with great care and under constant supervision. You receive a three-year warranty for this product from the date of purchase. Please retain your receipt.
The warranty applies only to material and workmanship and does not apply to misuse or improper handling. Your statutory rights, especially the warranty rights, are not affected by this warranty.
With regard to complaints, please contact the following service hotline or contact us by e-mail. Our service employees will advise as to the subsequent procedure as quickly as possible. We will be personally available to discuss the situation with you.
Any repairs under the warranty, statutory guarantees or through goodwill do not extend the warranty period. This also applies to replaced and repaired parts. Repairs after the warranty are subject to a charge.
IAN: 290255
GB Service Great Britain
Tel.: 0871 5000 720
(£ 0.10/Min.)
E-Mail: deltasport@lidl.co.uk
IE Service Ireland
Tel.: 1890 930 034
(0,08 EUR/Min., (peak))
(0,06 EUR/Min.,
(off peak))
E-Mail: deltasport@lidl.ie
natural_image
Pure geometric line drawings of five abstract symbols (three circles, two triangles, one cross) without any text or labelsStockage
natural_image
Five abstract geometric symbols arranged horizontally: three circles, two triangles, one square, and one cross (no text or labels)Lager
natural_image
Five abstract geometric symbols arranged horizontally: three crossed-out triangles, one square with crosshairs, one crossed out of a circle (no text or labels)Uskladnění
natural_image
Five abstract geometric symbols arranged horizontally: three circles, two triangles, one square, and one cross (no text or labels)Almacenamiento
natural_image
Five abstract geometric symbols arranged horizontally: three circles, two triangles, one square, and one cross (no text or labels)Armazenamento

- SHELTER SHELTER
- ABRI DE CAMPING
- FR BE
- Lagerung
- Carefully read the following instructions for use.
- ⚠️ Please read all the safety notes and instructions.
- Contents (Fig. A)
- Technical Data
- Intended Use
- Safety Instructions
- ⚠️ Danger to life!
- ⚠️ Danger of injury!
- Location selection
- Construction
- Step 1
- Step 2
- Caution! Danger of getting stuck.
- Step 3
- Step 4
- Step 5
- Step 6
- Step 7
- Attention! Check for firm fitting of the tent pegs.
- Step 8
- Attention! Here, too, pay attention to firm fitting of the guy ropes.
- Dismantling
- Cleaning and Care
- Care instructions
- Storage
- Disposal
- Notes on the guarantee and service handling
- Stockage
- Lager
- Uskladnění
- Almacenamiento
- Armazenamento
Brand : CRIVIT
Model : IAN 290255
Category : Camping shelter