
MF 114 - Freezer VESTFROST - Free user manual and instructions
Find the device manual for free MF 114 VESTFROST in PDF.



| Product Type | Vaccine Freezer (Medical) |
| Brand | Vestfrost |
| Model | MF 114 |
| Power Supply | 220-240 V, 50 Hz, protected by 10-13 A fuse |
| Refrigerant | Hydrocarbons (R600a) |
| Temperature Range (Vaccine Compartment) | -15°C to -25°C |
| Thermostat Setting | Mechanical, positions 1 (min cold) to 8 (max cold) |
| Number of Compartments | 2: vaccines and cold accumulators |
| Defrosting Method | Manual, recommended every 3 months |
| Cleaning | Warm water and mild unscented detergent |
| Voltage Stabilizer | Recommended to protect against fluctuations |
| Ventilation | Ventilation grille must be kept clear |
| Included Accessories | Basket with handle, keys, drain plugs |
| Spare Parts | Complete list included (compressor, thermostat, etc.) |
| Warranty | Does not cover damage due to incorrect use |
| After-Sales Service | Use authorized repair technicians |
| Disposal | Compliant with WEEE and used battery directives |
Frequently Asked Questions - MF 114 VESTFROST
User questions about MF 114 VESTFROST
0 question about this device. Answer the ones you know or ask your own.
Ask a new question about this device
Download the instructions for your Freezer in PDF format for free! Find your manual MF 114 - VESTFROST and take your electronic device back in hand. On this page are published all the documents necessary for the use of your device. MF 114 by VESTFROST.
USER MANUAL MF 114 VESTFROST
Vestfrost Solutions is working towards reaching the UN Global Sustainable Development Goals by 2030.
The Sustainable Development Goals are the blueprint to achieve a better and more sustainable future for all.
In order to implement Goal no 12 "Responsible Consumption and Production", this manual has been printed on recycled paper.

Vaccine and Icepack Freezer MF 114
GB Instructions for use
As the appliance contains flammable refrigerant, as stated on nameplate, it is essential to ensure that the refrigerant pipes are not damaged.
The quantity and type of the refrigerant used in your appliance is indicated on the rating plate.
Standard EN378 specifies that the room in which you install your appliance must have a volume of 1 m³ per 8 g of hydrocarbon refrigerant used in the appliances. This is to avoid the formation of flammable gas/air mixtures in the room where the appliance is located in the event of a leak in the refrigerant circuit.
WARNING:
Ventilation openings in the appliance or in built-in structures must be kept clear.
WARNING:
Do not use other mechanical devices or means to accelerate the defrosting process or to remove rime other than those recommended by the manufacturer.
WARNING:
Do not damage the refrigerant system.
WARNING:
The appliance may not be exposed to rain.
WARNING:
This appliance is not intended for use by persons (including children) with reduced physical, sensory or mental capabilities, or lack of experience and knowledge, unless they have been given supervision or instructions concerning use of the appliance by a person responsible for their safety. Children should be supervised to ensure that they do not play with the appliance.
WARNING:
Children must not play with, on, or around the appliance.
WARNING:
Children must not clean the appliance or carry out general maintenance unless they are at least 8 years old and are being supervised.
WARNING:
Always keep the keys in a separate place and out of reach of children.
WARNING:
Before servicing or cleaning the appliance, switch off the circuit breaker.
WARNING:
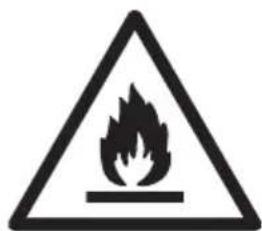
Danger: risk of fire or explosion. Flammable refrigerant used, as stated on the nameplate. To be repaired only by trained personnel.
WARNING:
Do not store explosive substances such as aerosol cans with a flammable propellant in this appliance.
WARNING:
When positioning the appliance, ensure the power cord is not trapped or damaged.
WARNING:
Do not locate multiple portable socket-outlets or portable power supplies at the rear of the appliance.
WARNING:
Appliance uses flammable insulation blowing gas.
For information about safe disposal, please contact your local disposal service.
See section for Disposal.
Contents
WARNING 2
Get to know your Freezer 5
General information 6
Unpacking and installation 6
Voltage stabilizers 7
Electrical connection 7
Cool down of the appliance 8
Temperature adjustment 8
Loading the appliance 9
Defrosting and cleaning 9
Trouble shooting 11
Warranty, spare parts and service 12
Spare parts list 14
Wire-diagram 15
Disposal 16
Get to know your Freezer
Fig. 1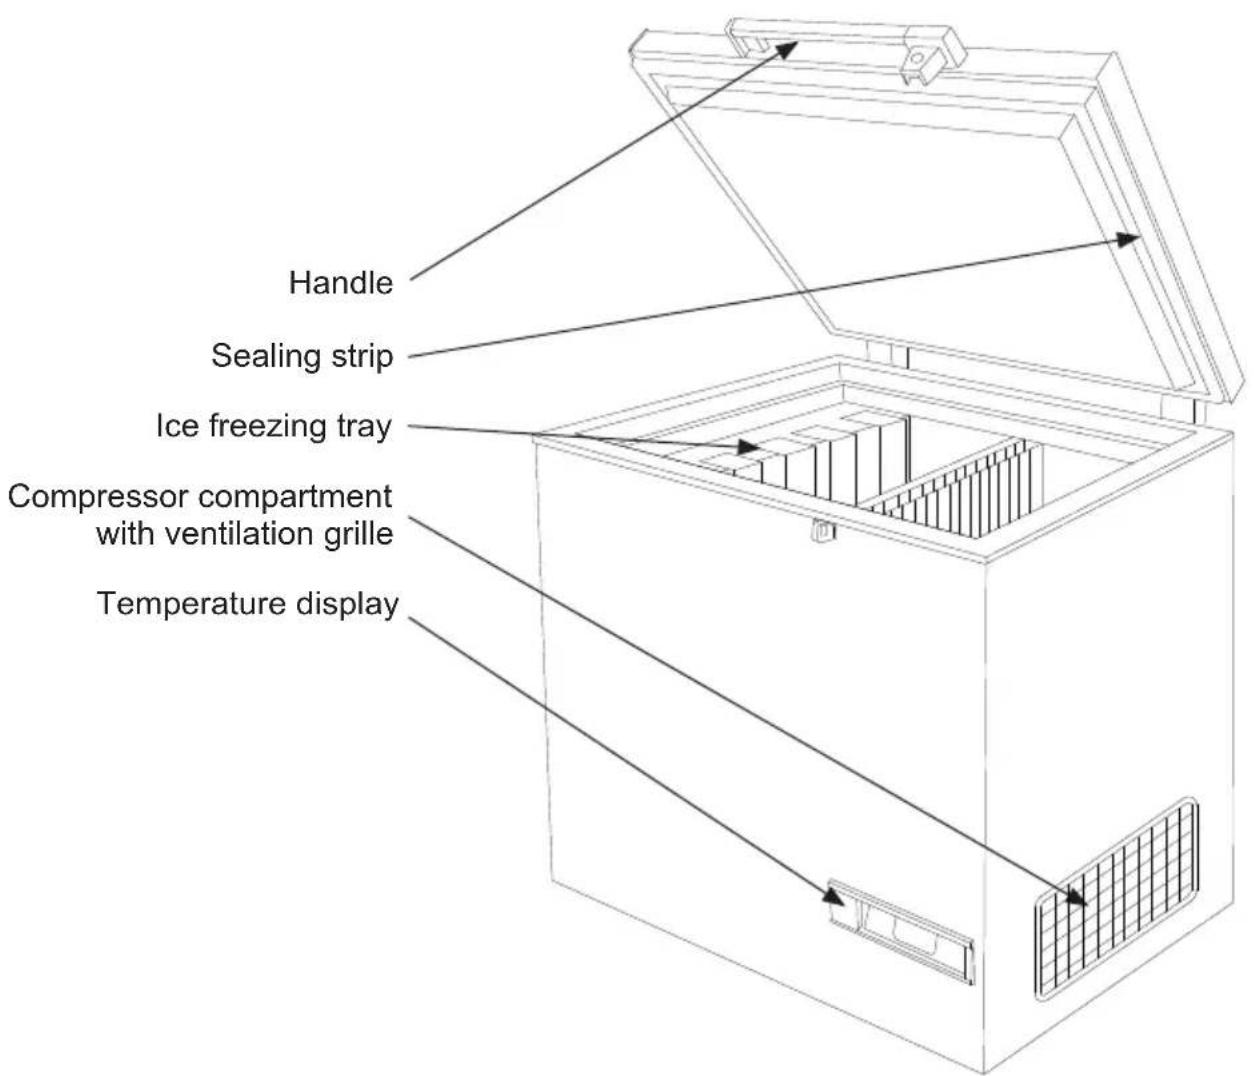
| PQS Code | Model PQS Performance specifications Specification reference: | PQS Independent type-testing protocol Product verification protocol: | |
| E003/024 MF 114 E003/FZ01.2 E003/FZ01-VP.2 | |||
General information
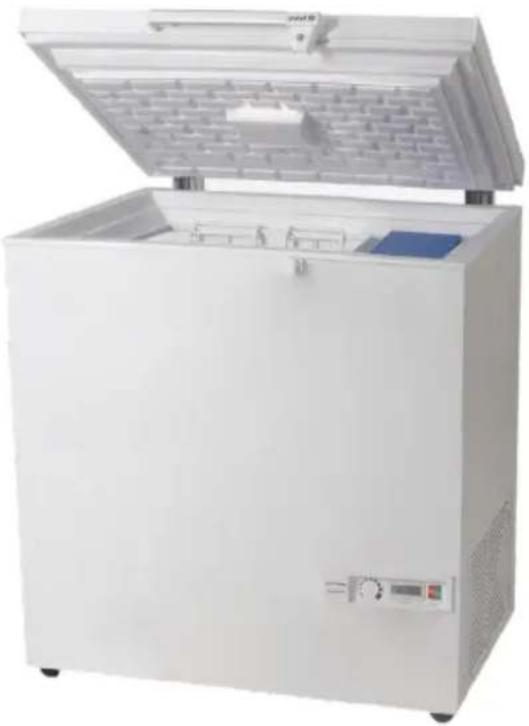
MF-Model is a vaccine storage freezer and icepack freezer. It has two compartments; one for vaccine storage and one for icepack freezing.
Power supply
The MF vaccine freezer is equipped with a heavy-duty compressor that can operate at voltages 22% below nominal voltage. See the rating plate. If voltage variations go beyond this range it is recommended to use an automatic voltage stabilizer.
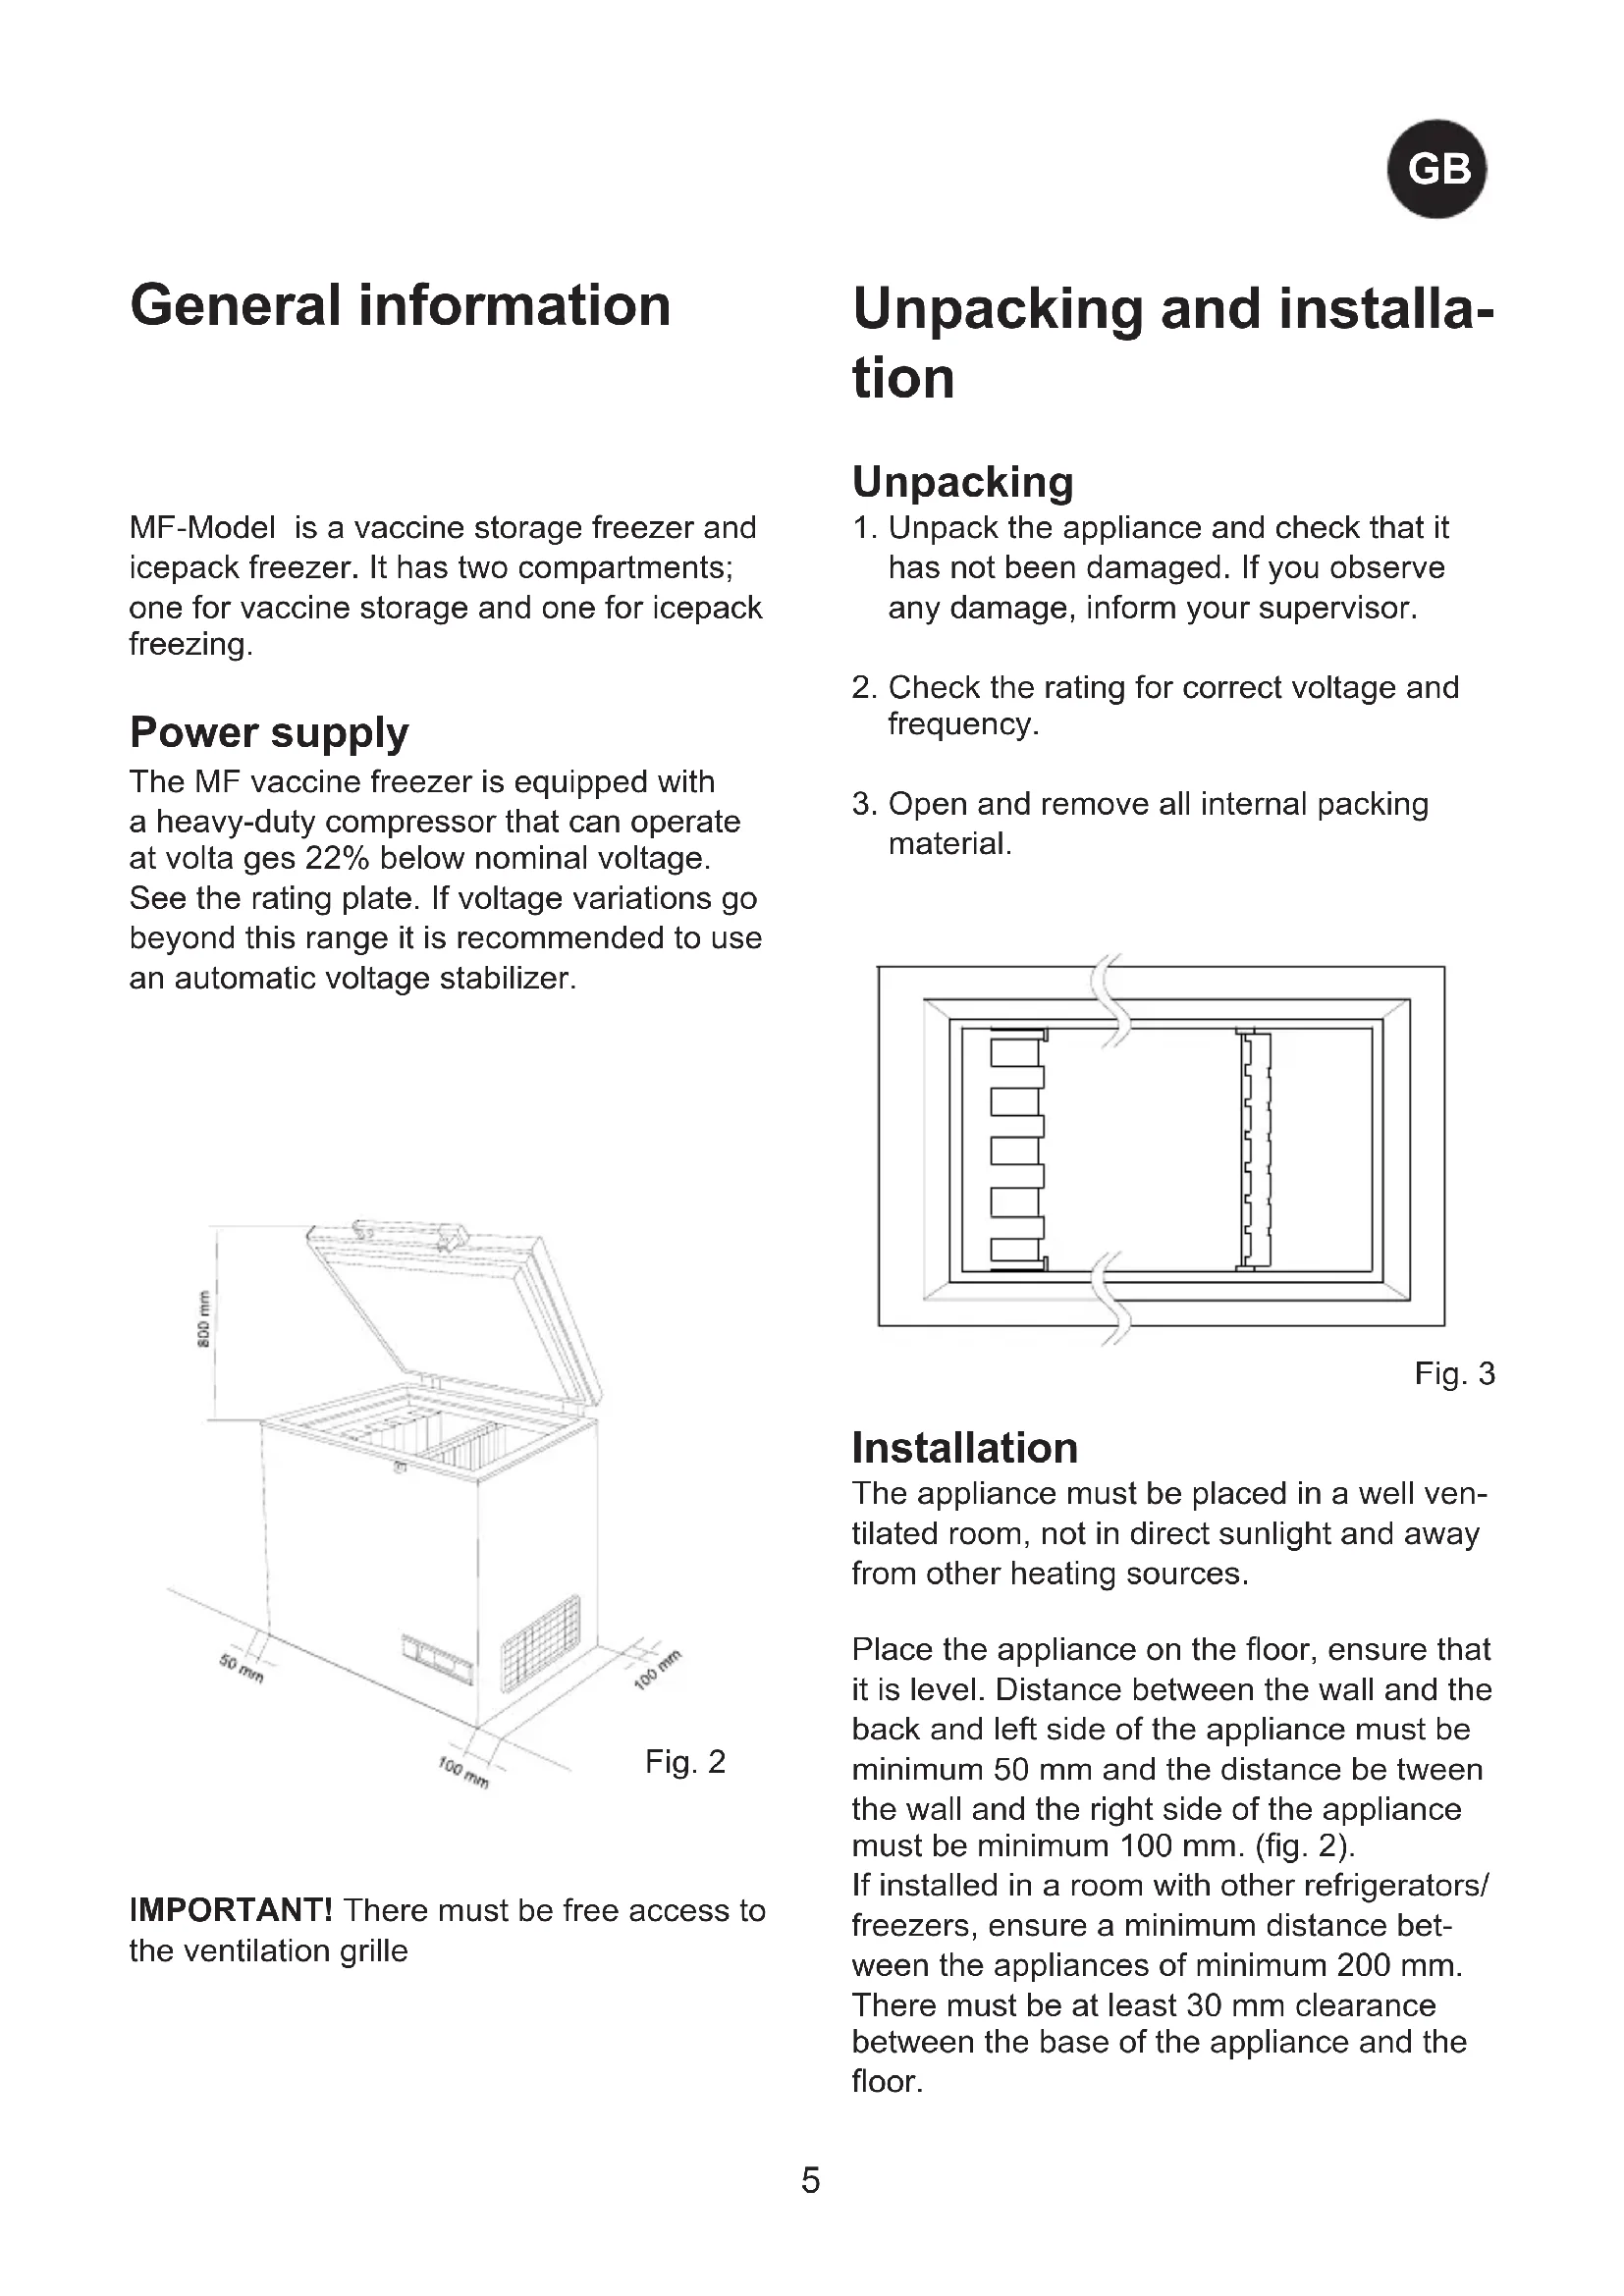
Fig. 2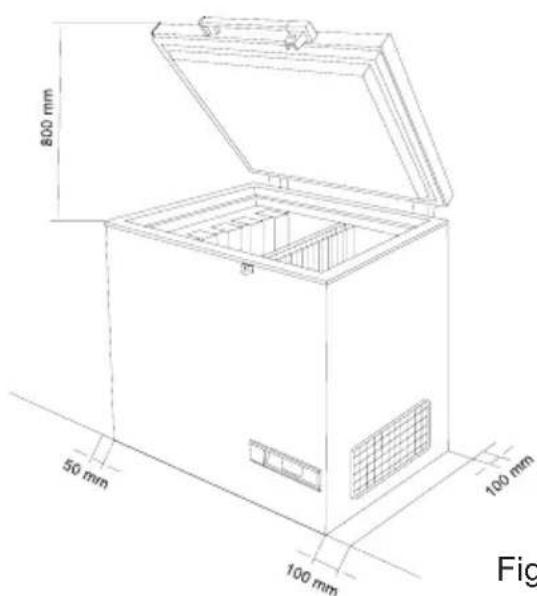
IMPORTANT! There must be free access to the ventilation grille
Unpacking and installation
Unpacking
- Unpack the appliance and check that it has not been damaged. If you observe any damage, inform your supervisor.
- Check the rating for correct voltage and frequency.
- Open and remove all internal packing material.
Fig. 3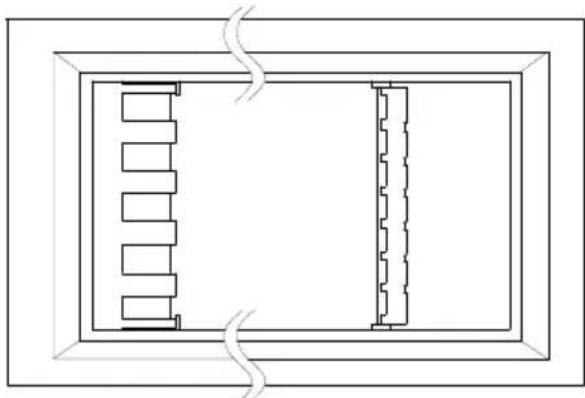
Installation
The appliance must be placed in a well ventilated room, not in direct sunlight and away from other heating sources.
Place the appliance on the floor, ensure that it is level. Distance between the wall and the back and left side of the appliance must be minimum 50 mm and the distance between the wall and the right side of the appliance must be minimum 100 mm. (fig. 2). If installed in a room with other refrigerators/freezers, ensure a minimum distance between the appliances of minimum 200 mm. There must be at least 30 mm clearance between the base of the appliance and the floor.
Voltage stabilizers
It is highly recommended that all cold chain equipment running on AC current is installed with a voltage stabilizer, in order to safeguard the equipment against voltage fluctuations.
Stabilizers should be selected and installed as per the input voltage available.
Instructions to User:
- Every refrigeration unit must be connected to an individual stabilizer.
- Bypassing of Stabilizer is not recommended, as such practice may lead to damage of the CCE & in turn safety of vaccines & hence must be avoided.
- Proper earthing should be available and connected.
- Emphasize on repairing stabilizers immediately. Identify authorized Vestfrost service provider in case of technical assistance is required.
The voltage stabilizer is also provided with arrangement to cut off its output voltage to the Vaccine/waterpacks freezer in case the mains voltage goes below or above as per designed input voltage range. The output is restored automatically after the factory set delay 3 to 6 minutes (WHO/PQS E007/VS01.4 specifications) when the mains voltage is within the recommended range and remains within.
Electrical connection
Wiring and connections in power supply systems must be all applicable (local and national) electrical codes. Consult these codes lengths and sizes prior to cabinet installation.
This device complies with relevant EU directives including Low Voltage Directive 2014/35/EU and Electromagnetic Compatibility Directive 2014/30/EU
The socket should be freely accessible.
Connect the appliance only to 220/240 V 50Hz alternating current via a correctly installed earthed socket.
The socket must be fused with a 10-13 A fuse.
If the appliance is to be operated in a non-European country, check on the rating plate whether the indicated voltage and current type correspond to the values of your mains supply.
Information regarding voltage, current or power are given on the rating plate.
The power cord may be replaced by a technician only.
Check that the plug fits your type of socket. If it does not fit, have a qualified electrician to fit the plug. This appliance must be earthed.
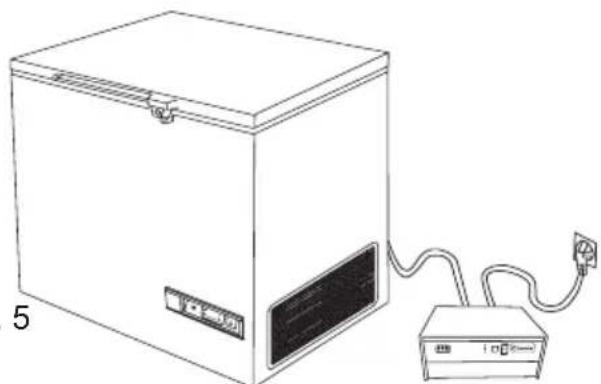
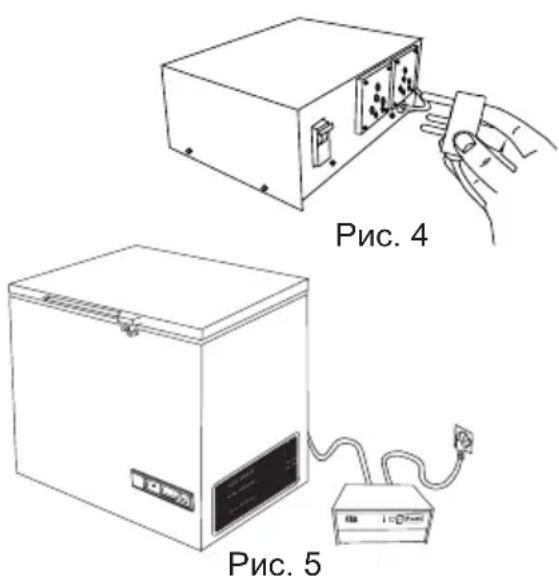
Connect the appliance to voltage stabilizer and connect voltage stabilizer to wall socket. (Fig 4 + 5)
Fig. 4 Fig. 5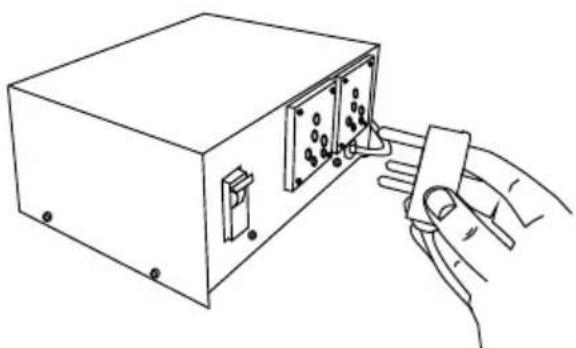
Cool down of the appliance
Fig. 6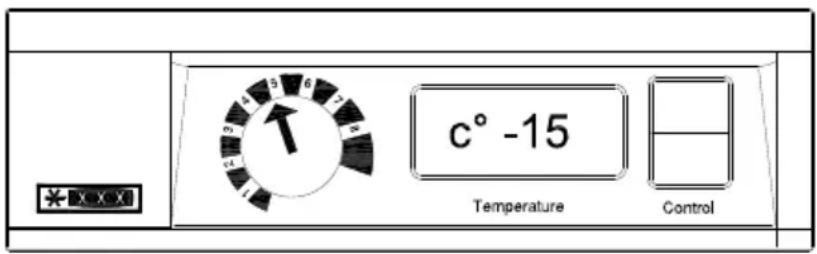
Before the appliance is loaded with vaccines ensure that the temperature is below -15°C.
- Set the thermostat at position 5.
- Check the temperature on the thermometer.
- If the temperature in the vaccine compartment is above -15°C the thermostat should be adjusted. The temperature in the vaccine compartment must always be monitored on the thermometer and be within the range -15 to -25°C.
Due to the mechanical tolerance of the thermostats you should always control the temperature during cool down.
Temperature adjustment
This appliance is equipped with one thermostat. See Fig. 6 and Fig. 7.
Fig. 7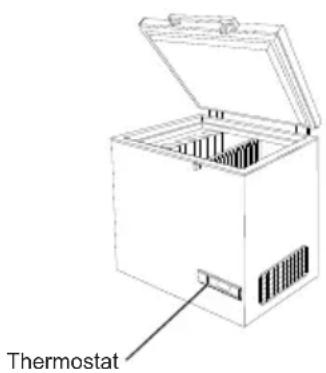
The thermostat is an electronic thermostat that controls the temperature in the vaccine and icepack freezing compartments. Setting 1 applies minimum cold and setting 8 maximum cold.
Loading the appliance
Loading vaccines
When the temperature in the freezer has stabilized, i.e. the temperature should be below -15 to -25°C and the compressor stops and starts, vaccines can be loaded. The vaccines should be placed in the mid part.
Loading and freezing of icepacks
The icepacks should be placed in the icepack compartment and the suspended tray. Make sure you have a good contact between the icepack and the evaporator surface. Fig. 8
Fig. 8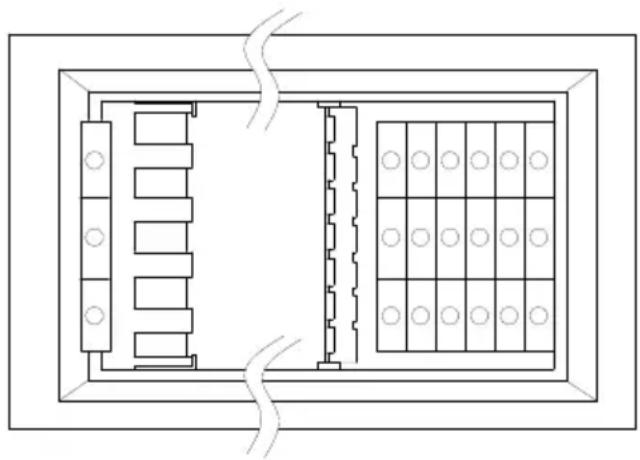
If thermostat is set to a warmer position, remember to check the temperature in the vaccine compartment.
Defrosting and cleaning
For the appliance to operate well and to save energy, it is important that it is cleaned and defrosted regularly.
When opening the appliance, moisture enters and settles on inner cold surfaces and forms a layer of frost or ice.
The layer of ice makes the freezer less efficient and must be removed, "defrosted".
It is recommended that the appliance be defrosted every third month.
Defrosting
The water-packs stored and the humidity of the air gradually causes frost and ice to form in the freezer compartment. A thin layer of frost or ice does not affect freezer performance, but a thick layer could cause the freezer not to cool water-packs satisfactory. Small amounts of loose frost can be removed using a plastic scraper.
Never use electrical apparatus or sharp implements as these may damage the inside of the appliance.
When the layer of frost and ice exceeds 4 - 5 mm the freezer should be completely defrosted.
Proceed as follows:
- Before defrosting, vaccines and/or water-packs must be moved to another working freezer or cold box with icepacks.
- Switch off the appliance.
- Open the drainage plug placed inside the freezer compartment.
- Place a tray under the defrost water drain.
- Place a bowl of hot (but not boiling) water in the freezer, close the lid and wait approx. 30 minutes before removing loose frost with the plastic scraper.
- To prevent water from damaging the floor during defrosting, it is advisable to check the defrost water tray from time to time and to cover the floor around the defrost water drain to protect against ice and splashes. When all the frost and ice have melted, clean the inside cabinet, as well lid, lid gasket, and outside of the cabinet using water with a mild, perfume-free detergent.
- Dry the freezer with a soft cloth, and make sure no moisture is remaining after cleaning.
- Reinsert the internal drainage plug, and check lid gasket is not faulty.
- Switch on the appliance, and make sure it is freezing (temperatures decreasing).
- Check that water-packs are not leaking before returning them to the freezer compartment. Store water-packs and vaccines according to instructions, approximately 5 minutes after having switched it on. Close the lid.
Cleaning
- Once the appliance is defrosted, it must be cleaned.
- Clean the inside of the appliance with a mixture of lukewarm water and a mild detergent.
- Allow the cleaned parts to dry completely.
- Clean the outside of the appliance with a mixture of lukewarm water and a mild detergent or soap. 5. Close the lid and follow the procedures in "Cool down of the appliance" on page 7.
Troubleshooting
| Fault Possible cause | Remedy | |
| Compressor is not running, and the ice packs are not cold | Be patient, it is most likely that the compressor will start within a few minutes. | If this is not the case, check the following: - Check that power is connected. - Check the fuse and replace it if necessary. - If the above is OK, call technical supervisor. |
| Compressor is running, and the temperature is too high | The ventilation grille is blocked. The lid is not closed properly. The temperature in the room in which the appliance is installed is too high. | Ensure unhindered air circulation. Ensure that the lid is closed properly. Shield the appliance against direct sun light and ensure more ventilation to the room. |
| No temperature is displayed | The thermometer is broken. There is not enough light for the solar sensor. | Change the thermometer. Turn on the light. |
Warranty, spare parts and service
Warranty disclaimer
Faults and damage caused directly or indirectly by incorrect operation, misuse, insufficient maintenance, incorrect building, installation or mains connections. Fire, accident, lightning, voltage variation or other electrical interference, including defective fuses or faults in mains installations, are not covered by the warranty.
Repairs performed by others than approved service centres and any other faults and damage that the manufacturer can substantiate are caused by reasons other than manufacturing or material faults are not covered by the warranty.
Please note that changes to the construction of the appliance or changes to the component equipment of the appliance will invalidate warranty and product liability, and the appliance cannot be used lawfully. The approval stated on the rating plate will also be invalidated.
Transport damage discovered by the buyer is primarily a matter to be settled between the buyer and the distributor, i.e. the distributor must ensure that such complaints are resolved to the buyer's satisfaction.
Before calling for technical assistance, please check whether you are able to rectify the fault yourself. If your request for assistance is unwarranted, e.g. if the appliance has failed as a result of a blown fuse or incorrect operation, you will be charged the costs incurred by your call for technical assistance.
Spare parts
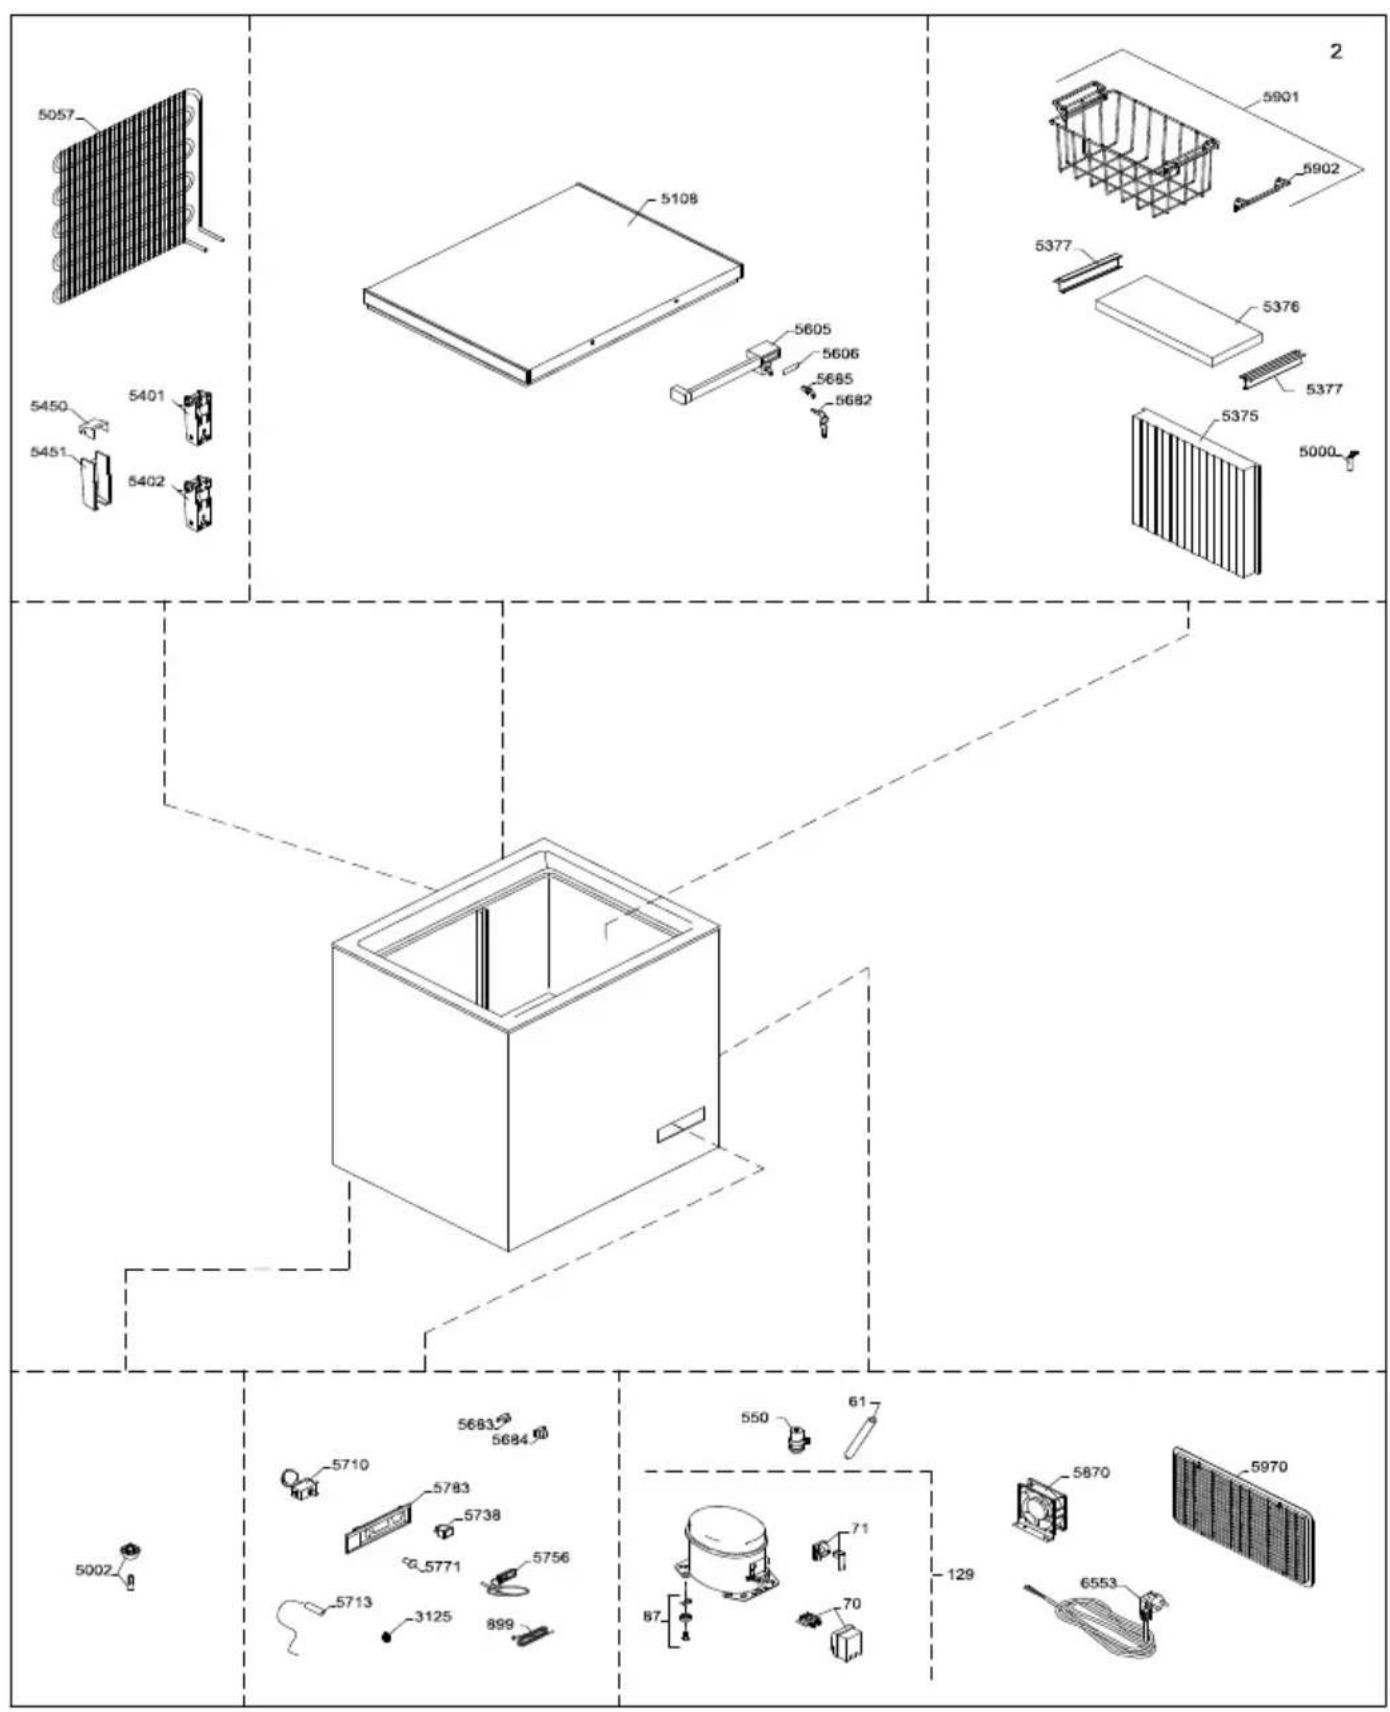
When ordering spare parts, please state the type, serial and product numbers of your appliance. This information is given on the rating plate. The rating plate contains various technical information, including type and serial numbers.
Fig 9
Spare parts list
Position Item number Item name
0061 0-6538001 Filter drier,
0070 A921001 Cover + wiring clamp
0071 A921115 Starting device, 103N0021
0087 0-6038175 Base plate fittings, complete
0129 8-036038255 Compressor - NLE 9KTK , Complete, R600a
0550 6520317 Run cap. 117-7119 4uF/4.8 receptacles
0899 7020983 Sensor
3125 3010457 Pipe holder Ø6
5000 3010049 Drain plug
5002 6000959 Foot with pin
5057 6010084 WOT condenser
5108 5000917670 Lid foamed without handle/hinges
5375 6000965 Partition, complete
5376 5020105 Lid for fast freeze compartment
5377 3020245-23 Handle
5401 1510133 Hinge
5402 1510136 Hinge with spring
5450 3011135-01 Top part for hinge cover
5451 3010032-01 Bottom part for hinge cover
5605 304090501 Handle with lock (push and turn)
5606 8090342-94 Inlay for handle,
5682 1510046 Key, set -2pc.
5683 2040145 Catch for handle
5684 3010265-01 Cover for catch
5685 600098801 Lock with keys (push and turn)
5707 7020248 Voltage stabilizer
5710 7020239 Thermostat, freezer
5713 7020960 Sensor NTC S1, Cool
5738 7010027 Pilot lamp, green
5756 7020164 Thermometer, solar
5771 3010051-01 Thermostat knob
5783 3040146 Control panel
5870 6000308 Fan
5901 353090001 Basket with handle, white
5902 3010107-01 Spare handle for basket
5970 3010308-01 Motor screen
6553 7535360 Mains lead, Schuko, 3G1/2600
Wire-diagram
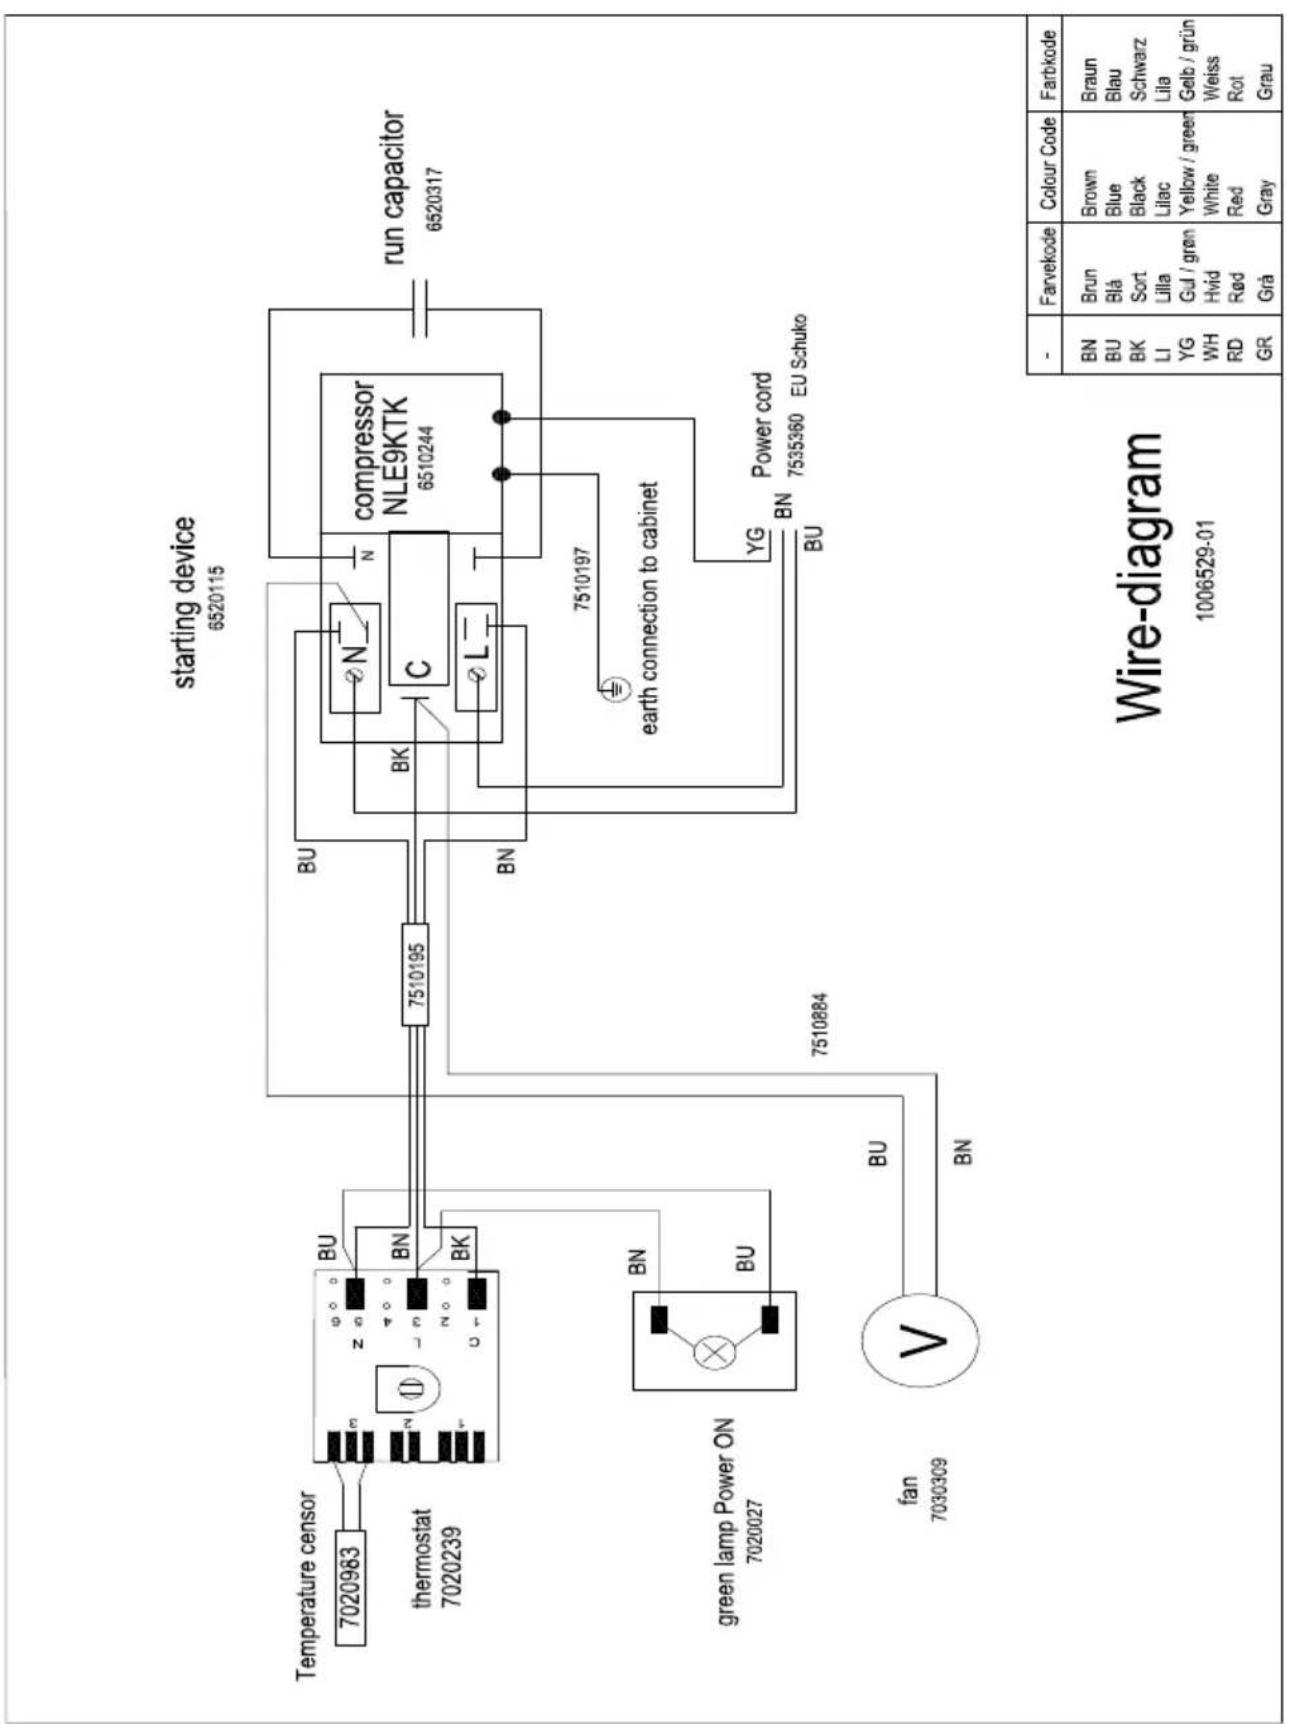
Disposal
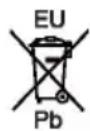
Information for Users on Collection and Disposal of Old Equipment and used Batteries

These symbols on the products, packaging, and/or accompanying documents mean that used electrical and electronic products and batteries should not be mixed with general household waste. For proper treatment, recovery and recycling of old products and used batteries, please take them to applicable collection points, in accordance with your national legislation and the Directives 2012/19/EU and 2006/66/EC.
By disposing of these products and batteries correctly, you will help to save valuable resources and prevent any potential negative effects on human health and the environment which could otherwise arise from inappropriate waste handling.
For more information about collection and recycling of old products and batteries, please contact your local municipality, your waste disposal service or the point of sale where you purchased the items.
Penalties may be applicable for incorrect disposal of this waste, in accordance with national legislation.
For business users in the European Union.
If you wish to discard electrical and electronic equipment, please contact your dealer or supplier for further information.
[Information on Disposal in other Countries outside the European Union]
These symbols are only valid in the European Union. If you wish to discard this product, please contact your local authorities or dealer and ask for the correct method of disposal.
Note for the battery symbol:
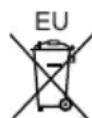
This symbol might be used in combination with a chemical symbol. In this case it complies with the requirement set by the Directive for the chemical involved.
Warning
CAUTION: Do not leave the product unattended
CAUTION:
Do not play with
the device.
CAUTION:
Cleaning and maintenance of the device should not be performed by children. This is allowed only if they are over 8 years old and are supervised by adults.
CAUTION:
Protect the refrigerator casing from damage.
CAUTION:
Do not store explosive substances, such as aerosol cans with flammable propellant, in this device.
CAUTION:
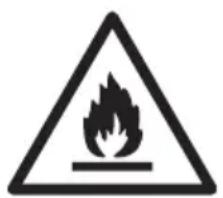
There is a risk of fire or explosion if the refrigerant circuit is damaged. It must only be repaired by specially trained personnel.
CAUTION:
When installing the device, make sure that the power cord is not damaged.
CAUTION:
Do not place portable sockets or portable power sources on the rear panel of the device.
CAUTION:
The appliance uses flammable refrigerant gas. For safety information, contact your local utility service. See the "Disposal" section.
Contents
Safety precautions 2
Getting to know your refrigerator 5
General information 6
Unpacking and installation 6
Voltage stabilizers 7
Electrical connection 7
Cooling 8
Temperature adjustment 8
Loading the refrigerator 9
Defrosting the freezer 9
Troubleshooting ...11
Warranty, spare parts and service ....12
Disposal 16
Familiarize yourself with your refrigerator
Fig. 1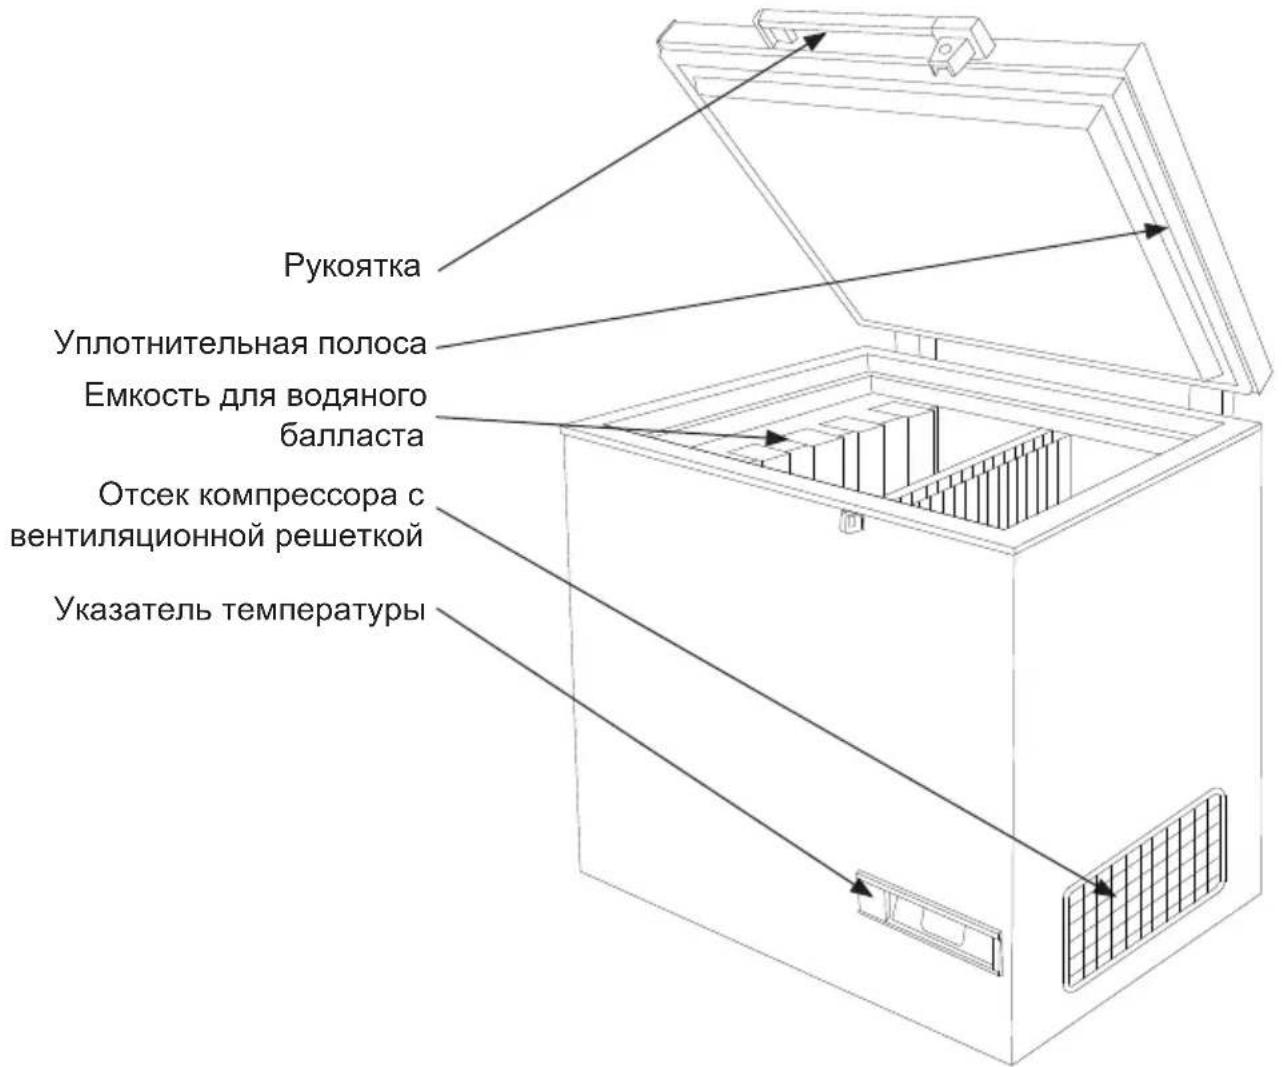
| PQS Code | Model PQS Performance specifications Specification reference: | PQS Independent type-testing protocol Product verification protocol: | |
| E003/024 MF 114 E003/FZ01.2 E003/FZ01-VP.2 | |||
General information
Model MF is a two-compartment refrigerator for storing and freezing food. It has two compartments: one for storing and the other for freezing food.
Electrical connection
The MF freezer is equipped with a powerful compressor capable of operating at voltage drops of up to 22% below the nominal voltage. See the table with technical data. For more severe voltage fluctuations, it is recommended to use an automatic voltage stabilizer.
The table with nameplate data contains various technical information, as well as the model and serial number.
Fig. 2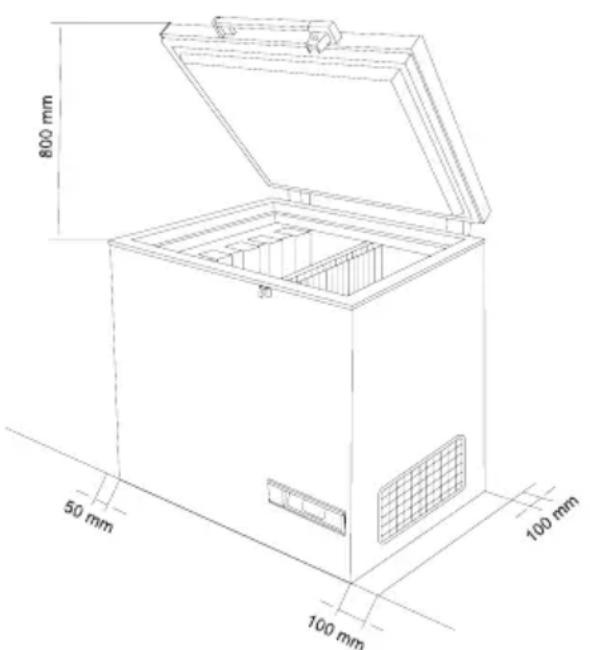
NOTE: It is necessary to ensure free access to the ventilation grille.
Unpacking and installation
Unpacking
- Unpack the device and check it for any damage. If any damage is found, report it to the management.
- Compare the data in the table with the voltage and frequency of your network. 3. REMOVE THE INTERNAL PACKAGING MATERIAL FROM THE DEVICE.
Fig. 3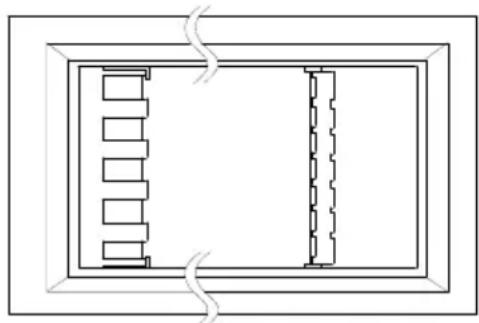
Installation
The appliance must be installed in a well-ventilated room, protected from direct sunlight and away from other heat sources.
Make sure the appliance stands level on the floor. The distance between the wall and the back and left side of the appliance must be at least 50 mm, and the distance between the wall and the right side of the appliance must be at least 100 mm. Fig. 2
If there are other refrigerators or freezers in the room, they must be placed at a distance of at least 200 mm from each other.
There must be a gap of at least 30 mm between the bottom of the appliance and the floor.
Voltage stabilizers
It is highly recommended that all refrigeration equipment operating on alternating current be installed with a voltage stabilizer to protect the equipment from voltage fluctuations.
Stabilizers should be selected and installed in accordance with the available parameters
of the input voltage. User instructions:
Each refrigeration unit must be connected to a separate stabilizer.
It is not recommended to use one stabilizer for multiple units, as this practice may lead to damage to the refrigeration equipment, which in turn may pose a threat to the safety of vaccines. Therefore, this should be avoided.
Proper earthing must be available and connected.
Pay attention to the necessity of promptly restoring the working condition of the stabilizers. In case of need for technical assistance, contact the authorized service provider Vestfrost.
The voltage stabilizer is also equipped with a device for disconnecting the output voltage to the refrigerator immediately in case the mains voltage falls below or rises above the specified input voltage range. The output voltage is automatically restored after a delay set at the factory from 3 to 6 minutes (specification WHO/PQS E007/VS01.4), when the voltage returns and remains within the recommended range.
Information about voltage, current, or power is given on the rating plate.
Data regarding voltage and power consumption / current are given on the rating plate.
Connect the appliance to a stabilizer, then connect the stabilizer to a wall outlet. (Fig. 4+5)
Cooling of the unit
Fig. 6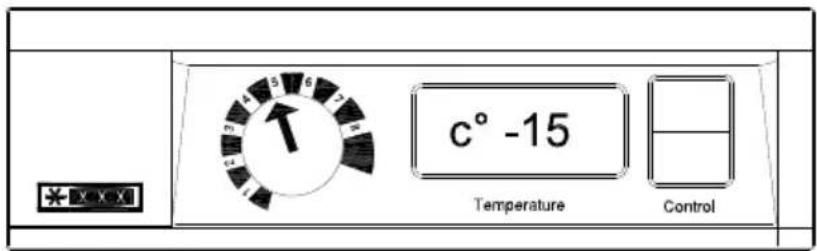
Before loading the vacuum chambers, make sure that the temperature is below -15 °C;
- Set the thermostat to position 5
- Check the temperature with a thermometer
- If the temperature in the vacuum chamber storage compartment is above -15°C, the thermostat should be adjusted. The temperature in the vacuum chamber compartment must be constantly checked with a thermometer. It should be in the range from -15 to -25°C
Due to the manufacturing tolerance of the thermostat, it is always necessary to control the temperature during cooling.
Temperature adjustment
This unit is equipped with one thermostat. See Fig. 6 and Fig. 7
Fig. 7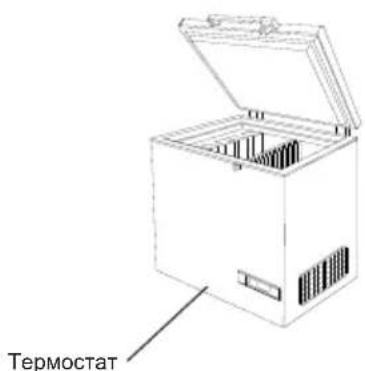
The electronic thermostat maintains the temperature in the vacuum chamber storage and freezing compartments of the cold accumulators.
In position 1, cooling is minimal; in position 8, it is maximum.
Loading the unit
Loading with vacuum chambers
Once the temperature in the freezer stabilizes, i.e., drops to -15... -25°C, and the compressor stops and restarts, you can load the vaccines. The vaccines should be placed in the middle part.
Loading and freezing cold accumulators
Cold accumulators are placed in the cold accumulator compartment on the hanging shelf. Make sure there is good contact between the cold accumulator and the evaporator surface. Fig. 8
Defrosting the freezer
For the freezer to work well and save energy, it must be cleaned and defrosted.
When you open the freezer, moisture enters and settles on the cold internal surfaces, forming a layer of ice and frost.
The ice layer makes the freezer less efficient and must be removed by defrosting.
It is recommended to defrost the freezer once every 3 months.
Fig. 8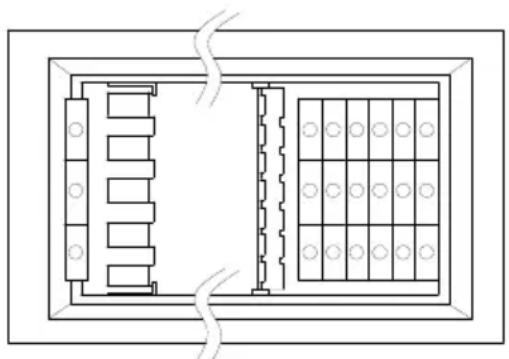
If the thermostat is set to a higher temperature, do not forget to check the temperature in the vaccine storage compartment.
Defrosting
1. Before defrosting, move the vaccines along with the cold accumulators to another working freezer and cold room. 2. Turn off the freezer and completely disconnect it from the power supply. 3. Remove the drain plugs. They are located inside the freezer compartment. 4. Place a tray under the drain to collect thawing water. 5. Place a container of hot (but not boiling) water in the freezer, close the lid, and wait about 30 minutes before removing the ice layer with a plastic scraper. 6. To prevent water from damaging the floor during defrosting, it is recommended to periodically check the tray and drain, and cover the floor around the drain with a cloth to protect it from ice and splashes. When all the ice has melted, clean the internal surfaces of the compartment, as well as the lid, gasket
lid, and external surfaces of the compartment, using a solution of water with a mild detergent without fragrance.
- Wipe the freezer dry with a cloth and make sure no moisture remains afterwards.
- Insert the drain plugs back into place inside the freezer compartment and on the outside, and check the condition of the lid gasket.
- Switch on the appliance and make sure it freezes (the temperature drops).
- Make sure the containers with water do not leak before returning them to the freezer. Place the containers with water according to the instructions, 5 minutes after switching on. Close the lid.
Cleaning
- After defrosting, the steam cleaner must be washed.
- The steam cleaner is washed from the inside with a solution of a non-abrasive cleaning agent in warm water.
- The washed parts must dry completely.
- The steam cleaner is washed from the outside with a solution of a non-abrasive cleaning agent or soap in warm water.
- Close the lid and perform the actions described in the section "Cooling the steam cleaner" on page 7.
5377 3020245-23 to be processed
5401 1510133 hinge
Information on collection and recycling of old electrical appliances and batteries
These symbols, placed on the product, packaging, and/or accompanying documents, indicate that electrical appliances and batteries should not be disposed of with household waste. For proper treatment, recovery, and recycling, please take these products to designated collection points, where they will be accepted free of charge. In accordance with national legislation and European Directives 2012/19/EU and 2006/66/EC, dispose of them separately.
By following the instructions for correct disposal of such appliances and batteries, you help to conserve natural resources and prevent potential negative effects on human health and the environment. For more information, contact your local council or the store where you purchased the product to obtain details of the nearest collection point or facility for recycling old electrical appliances and batteries.
In case of incorrect disposal of the appliance, you may incur penalties in accordance with national legislation.
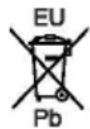
If you need to dispose of unwanted electrical equipment, contact your local supplier for more information.
Information for countries in the European Union
This symbol is valid only within the European Union. For information on the correct disposal of such waste, contact your local authorities or the distributor.
Battery symbol note:
These symbols may be used together with chemical symbols. In such cases, they comply with the requirements set by the directive for the corresponding chemical.
Warning
J.S. Schuko, 3G1/2600
00610-65380C
j4 = s
5000917670
3020245-23
20
3011135-01
3010032-01
304090501
8090342-94
3010265-01
600098801
Therefore, the area of quadrilateral COBD = area of triangle COD + area of triangle BDO.
3010051-01
353090001
3010107-01
3010308-01
0071
00870-603817
01298-036038
05506520317
08997020983
31253010457
50003010049
50026000959
50576010084
5108
53756000965
53765020105
5377
54011510133
54021510136
5450
5451
5605
5606
56821510046
56832040145
5684
5685
57077020248
57107020239
57137020960
57387010027
57567020164
5771
57833040146
58706000308
5901
5902
Therefore, a1 < a2 < a3 and ai = aj.
- When k = 1, the equation has two real roots;
- 0 Therefore, ai = bi = 1/2. 1 Y jieyj dyj A. jie 1ai A. loaagg aalul oIooSJI atss A. with N - material exchange.
- Since SΔADB = 1/2 · AB · DB = 1/2 11 1 17 1
| PQS Code | Model PQS Performance specifications Specification reference: | PQS Independent type-testing protocol Product verification protocol: | |
| E003/024 MF 114 E003/FZ0 | 1.2 E003/FZ01-VP.2 | ||
MF 114

ARA

- VACCINE AND ICEPACK FREEZER MF
- WARNING
- CONTENTS
- GET TO KNOW YOUR FREEZER
- GENERAL INFORMATION
- POWER SUPPLY
- UNPACKING AND INSTALLATION
- UNPACKING
- INSTALLATION
- VOLTAGE STABILIZERS
- ELECTRICAL CONNECTION
- COOL DOWN OF THE APPLIANCE
- TEMPERATURE ADJUSTMENT
- LOADING THE APPLIANCE
- LOADING VACCINES
- LOADING AND FREEZING OF ICEPACKS
- DEFROSTING AND CLEANING
- DEFROSTING
- CLEANING
- TROUBLESHOOTING
- WARRANTY, SPARE PARTS AND SERVICE
- WARRANTY DISCLAIMER
- SPARE PARTS
- SPARE PARTS LIST
- WIRE-DIAGRAM
- DISPOSAL
- CAUTION
- FAMILIARIZE YOURSELF WITH YOUR REFRIGERATOR
- INFORMATION ABOUT VOLTAGE, CURRENT, OR POWER IS GIVEN ON THE RATING PLATE
- COOLING OF THE UNIT
- LOADING THE UNIT
- LOADING WITH VACUUM CHAMBERS
- LOADING AND FREEZING COLD ACCUMULATORS
- DEFROSTING THE FREEZER
- THEREFORE, A1 < A2 < A3 AND AI = AJ
Brand : VESTFROST
Model : MF 114
Category : Freezer