CECTG4GFVW - Cooker CONTINENTAL EDISON - Free user manual and instructions
Find the device manual for free CECTG4GFVW CONTINENTAL EDISON in PDF.
User questions about CECTG4GFVW CONTINENTAL EDISON
0 question about this device. Answer the ones you know or ask your own.
Ask a new question about this device
Download the instructions for your Cooker in PDF format for free! Find your manual CECTG4GFVW - CONTINENTAL EDISON and take your electronic device back in hand. On this page are published all the documents necessary for the use of your device. CECTG4GFVW by CONTINENTAL EDISON.
USER MANUAL CECTG4GFVW CONTINENTAL EDISON
CECTG4GFVB / CECTG4GFVW
CECTG4VW
Directive ErP: Commission Regulation (EC) No. 66/2014
EN 30-2-1:2015
Directive RoHS: IEC 62321-1:2013; IEC 62321-2:2013 ;
IEC 62321-3-1:2013, IEC 62321-4:2013; IEC 62321-5:2013
IEC 62321-6:2013 IEC 62321-7-1 :2015
IDENTIFICATION DU SIGNATAIRE: Importateur
CECTG4GFVB / CECTG4GFVW
CECTG4VW
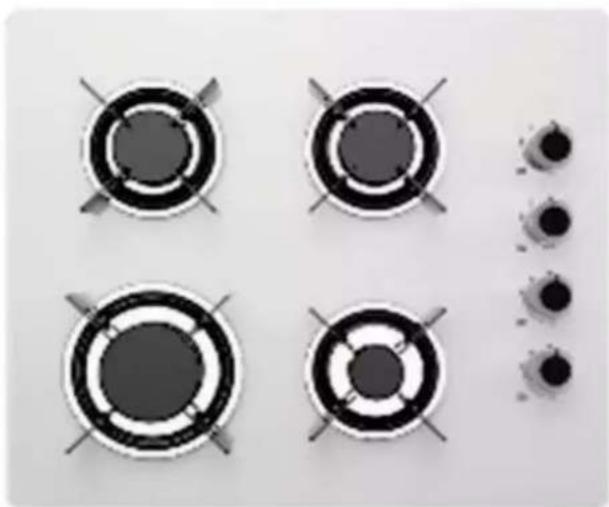
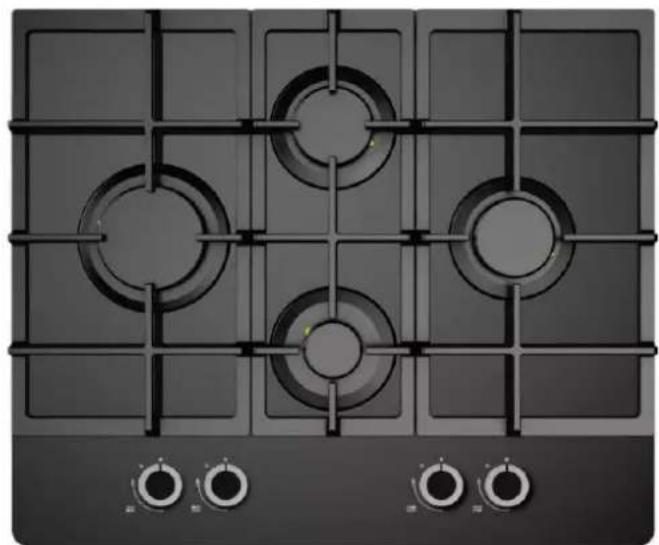
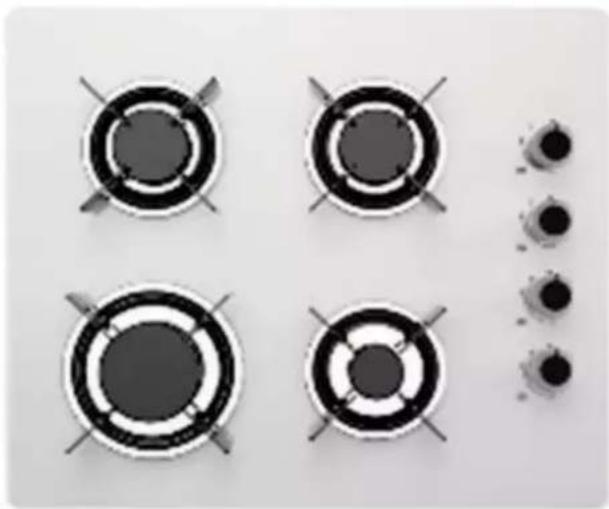
Gas hob
USER MANUAL
IMPORTANT WARNINGS AND SAFETY ADVICE
We encourage you to read this user guide carefully and completely before installing and using your device.
It is important that this user guide is kept with the device for any new consultation. If this unit is to be transferred to another person, make sure that the user guide follows the unit so that the new user can be informed of the operation of the unit.
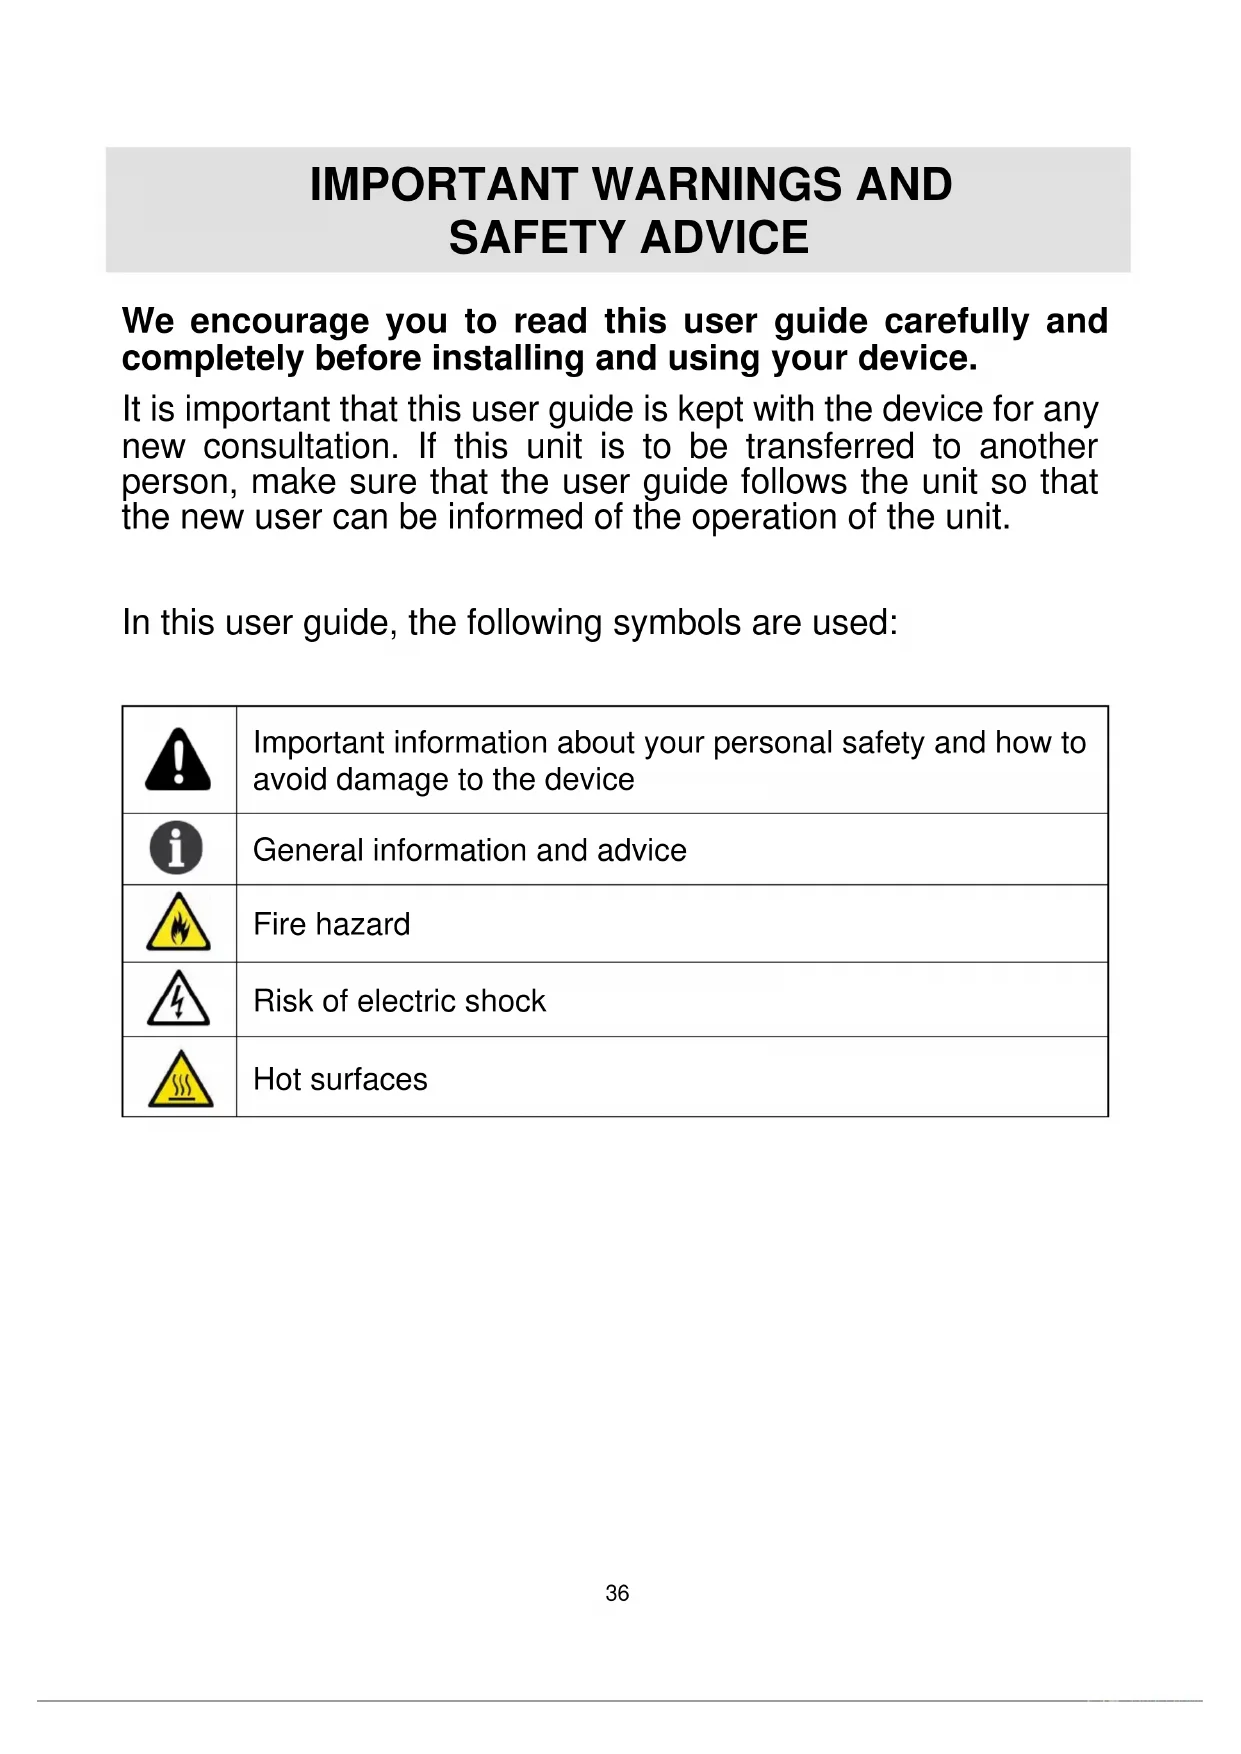
In this user guide, the following symbols are used:
| Important information about your personal safety and how to avoid damage to the device | |
| i | General information and advice |
| Fire hazard | |
| Risk of electric shock | |
| Hot surfaces |
Important safety tips
Warnings
- This appliance must be installed in accordance with current regulations and used only in a well ventilated area.
- Before installation, make sure that the gas and electricity supply complies with the type indicated on the rating plate.

- When this unit is installed in a boat or caravan, it must not be used as a heater.
- The gas pipe and electrical cable must be installed in such a way that they do not touch any part of the appliance.

Warning
- The appliance must be installed by a qualified technician or installer.
- The setting conditions for this device are indicated on the rating label or on the data sheet.
- Remove all packing materials before using the unit.
- After unpacking the unit, make sure that the product is not damaged and that the power cable is in perfect condition. If not, contact your dealer before installing the unit.
- The adjacent furniture and all materials used in the installation must be resistant to a minimum temperature of 85^ above the ambient temperature of the room where the appliance is used.
If a burner flame accidentally turns off, turn off the burner and do not turn on the burner again for at least one minute. - The use of a gas cooker produces heat and moisture in the room where it is installed. Make sure the kitchen is well ventilated. Keep the natural vents open or install a mechanical ventilation device (mechanical extraction hood).
- Intensive and prolonged use of the appliance may require additional ventilation, for example opening a window, or more efficient ventilation, for example by increasing the level of mechanical ventilation, if necessary.
Safety of children and people
Warning
This device is designed for use by adults.
Children can also be injured by pulling pots or pans out of the appliance.
This device may be used by children 8 years of age or older, and those with reduced physical, sensory or mental capacity or lack of experience or knowledge, if they are properly supervised. s or if instructions for the safe use of the device have been given to them and the risks involved have been apprehended. Children should not play with the device. Cleaning and maintenance by the user should not be done by unattended children.
Do not allow children to play near or with the device.
The device becomes hot during use. Children should be away from the appliance until it has cooled down.
CAUTION: This appliance is for cooking purposes only. It must not be used for other purposes, such as heating the room.
!Warnings
- Use the appliance only for cooking food.
-
Do not modify this unit. The control panel is not designed for use with an external timer or remote control system.
-
The use of a gas cooker produces heat and moisture in the room in which it is installed. Make sure the kitchen is well ventilated. Keep all natural ventilation openings open or install a mechanical ventilation device (mechanical extraction hood).
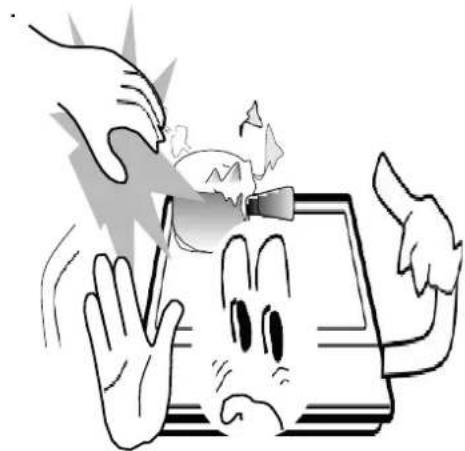
- Do not use this appliance if it comes in contact with water. Do not use this appliance with wet hands. Do not use this appliance if it comes into contact with water. Do not use this unit with wet hands.
!Warnings
- Heating and cooking surfaces become hot when in use; take all necessary precautions.
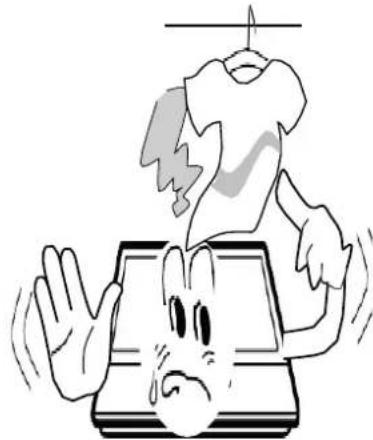
- Do not use large fabrics, tea towels or any similar product as the ends may touch the flames and catch fire.
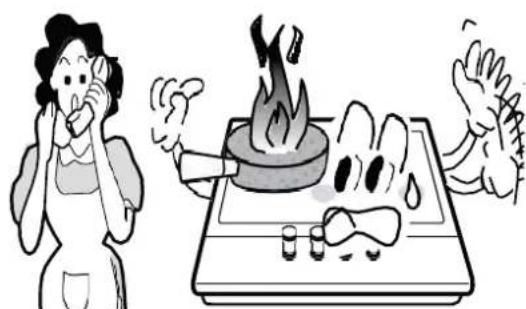
- Never leave the appliance unattended while cooking.
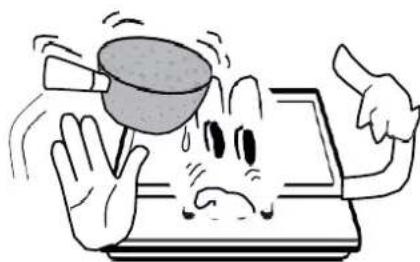
- Do not use unstable or deformed cookware as it may cause an accident by tipping over or spilling the contents.

Warnings
- Do not use or store flammable materials in a storage drawer near this unit.
-
Perishable foods, plastic items and aerosols may be affected by heat and should not be stored above or below the appliance.
-
Do not spray aerosols in the vicinity of this unit while it is operating.

Make sure the control knobs are set in the position when the unit is not in use.

Warning
This appliance is designed for domestic cooking only. It is not designed for commercial or industrial use.
■ Prolonged intensive use of the device may require additional ventilation, such as opening a window or increasing the level of mechanical ventilation if present.
- Use heat-resistant potholder or gloves to handle hot pots and pans.
- Do not let the hot pad near naked flames when you lift the kitchen utensil.
Take care not to allow the potholder or gloves to get wet or wet, as this will transfer heat through the material faster with the risk of burning you.
Light the burners only after placing the pot or pan on it. Do not heat an empty pot or saucepan.
- Never use plastic or foil dishes on the appliance.
- When using other electrical appliances, check that the cable does not come into contact with the surfaces of the cooking appliance.
If you wear mechanical parts, such as an artificial heart in your body, consult a doctor before using the device.
- Do not use cloth or similar materials in place of a hot pad. These fabrics can catch fire on a hot burner.
- When using a glass cookware, make sure it is suitable for cooking on this appliance. If the glass surface is cracked, turn off the power to prevent electric shock.
- To minimize the risk of burns, ignition of flammable materials and overturning utensils, turn cookware handles to the side or center of the cooktop without reaching adjacent burners.
Always turn off the burner control knobs before removing the utensil. - Carefully supervise frying foods when the burner flame is high.
Always heat the fat slowly and watch for process. - Food for frying should be as dry as possible. Frost on frozen foods or moisture on fresh foods can produce bubbles on hot grease and on the sides of the pan.
- Never attempt to move a pan of hot oil, especially a fryer. Wait until the fat has cooled completely.
If the appliance is connected to a power supply, the data sheet must include a connection diagram (for the purpose of connection) unless the appliance is equipped with the cord provided with its connection plug. - Operating instructions should state that the use of unsuitable shielding for hot plates can cause accidents.
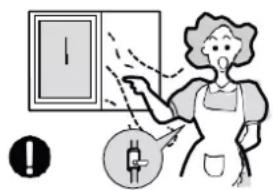
If you smell gas \* seems to run away, do the following:
- Do not turn on the light.
- Do not turn on or turn off electrical appliances or touch the electrical outlet.
-
Do not use a phone.
-
Stop using the product and close the central valve.
- Open the window to ventilate.
- Contact the after-sales service using an outside phone.


0
- The combustible gas contains an odorous addict, so you can feel a gas leak.
For installation, handling, cleaning and disposal of the device, refer to the following chapters of the User's Guide.
If the power cable is damaged, it must be replaced by the manufacturer, its after-sales service or similarly qualified persons in order to avoid a hazard.
Information on the meaning of the conformity marking

The marking indicates that the product meets the main requirements of the European Directives 2014/35/EU (Low Voltage), 2014/30/EU (Electromagnetic Compatibility), 2011/65/EU (Reduction of the use of certain hazardous substances in EEA).
SUMMARY
Important warnings and safety tips 36
I.Description of the device 47
II. Technical characteristics 48
III. Installation 49
IV.Before first use 52
V. Instructions to use 53
VI. Maintenance and cleaning 61
VII. Trouble shooting guide 64
VIII. Warranty 67
IX. Disposal 68
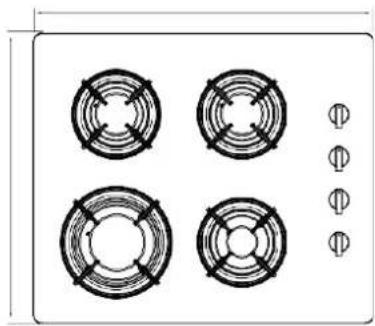
I. DESCRIPTION OF THE DEVICE
Accessories
Fixation (4)

Adhesive foam (4)
Screw (4)

Injector (4)
Angle gas pipe (1)
User manual (1)
II. TECHNICAL CHARACTERISTICS
| Model | CECTG4GFVB / CECTG4GFVW (60G40ME086-GFN-R02) | CECTG4VW (60G40ME403-GFN-R02) |
| Kitchen utensil | Cast iron Enamel | |
| Wok support | N/A | |
| Upper plate | Glass | |
| Dimensions (Width * Diameter * Height) | 600*510*110 | |
| Ignition device | Continuous ignition type | |
| Gas connection | G1 / 2 thread | |
| Power supply | 220-240V~ 50/60 Hz, 0.6W | |
| Burner functions | Fast (1), Semi fast (2), Auxiliary (1) | |
| ΣQn 7.5 KW 7.5 KW | ||
III. INSTALLATION
Positioning
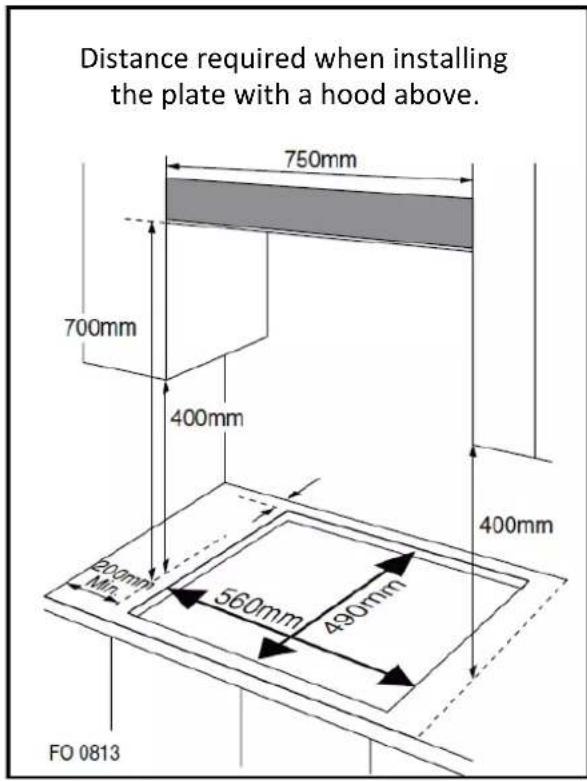
This appliance must be integrated in a kitchen unit or a 600mm worktop, respecting the following minimum distances:
The edges of the cooktop must be at least 60~mm from the side or rear walls.
0.700mm between the highest point of the hob (including the burners) and the bottom of any horizontal surface directly above it.
0.400mm between the surfaces of the hob, provided that the lower part of the horizontal surface is aligned with the outer edge of the hob. If the bottom of the horizontal surface is less than 400mm , it must be at least 50mm distant from the outer edges of the cooktop.
0.50mm of space around the appliance and between the cooking surface and combustible materials.
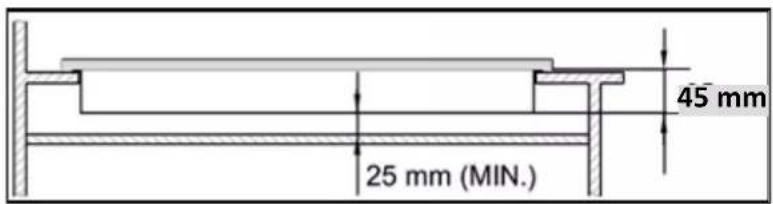
o You must leave a gap of at least 25mm and up to 74mm between the underside of the unit and any surface below it.
- An oven must be equipped with forced ventilation to install a cooktop above.
- Check the oven dimensions in the installation guide.
- The cut size must respect the indications.
Installing the device
- Remove the cookware holder, burner cover, and flame spreader, and carefully place the appliance upside down by placing it on a soft surface.
Make sure that the ignition and safety devices are not damaged during this process. - Apply the supplied adhesive foam around the edge of the unit.
- Do not leave any gap with the sealant and do not overlap the thickness.
Adhesive foam: The thickness of the foam is 3 mm. The width of the foam is 10 mm.
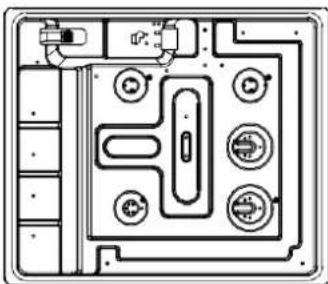
Bottom view
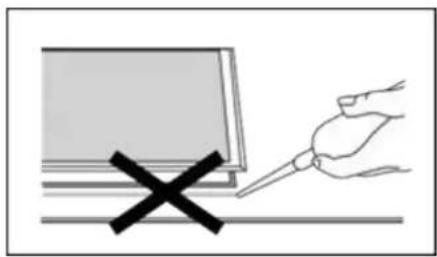
Do not use silicone sealant to seal the unit against opening. It will be difficult harder to remove the unit from the opening in the future, especially if it needs to be repaired.
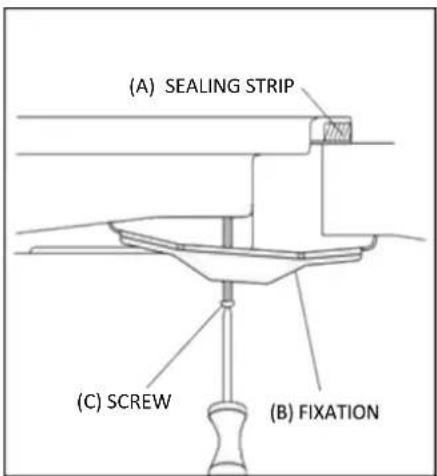
- Place the bracket (B) in the holes corresponding to the size of the screws. There are screw holes in each corner of the cooktop (H). Lightly tighten a screw (C) through the fastener (B) so that the attachment is attached to the plate but you can still adjust the position.
- Carefully put the plate back in place and then gently lower it into the opening you cut.
- Under the hob, adjust the brackets to a position that suits your work surface. Then tighten the screws (C) to secure the cooktop in position.
Unpacking the device and scrapping the packaging

- Cartonboard and sheets of paper are recyclable. They must be thrown in the collection bins provided for this purpose.
- The materials bearing the symbol are recyclable, for example:
PE < = polyethylene; > PS < = polystyrene; > PP < = polypropylene ...
This means that they can be recycled by depositors in appropriate collection containers.
- Other packaging elements (adhesive, fasteners, etc.) must be disposed of with household waste.
For more information: www.quefairedemesdechets.fr
V. INSTRUCTIONS TO USE
How to use your device
The following symbols appear on the control panel, next to each control button:
Large flame: maximum setting
Small flame: minimum setting
Black circle: gas disconnected
The minimum setting is at the end of the counterclockwise rotation of the control handle.
All operating positions must be selected between the maximum and minimum positions.
- The symbol on the control panel next to the control knob will indicate that the burner is operating.
Automatic ignition with the safety device
The apparatus is equipped with a safety device in case of non-ignition of the flame on each burner, which is designed to stop the diffusion of the gas towards the burner head if the flame is not lit.
Automatic ignition with safety device
The apparatus is equipped with a safety device in case of non-ignition of the flame on each burner, which is designed to stop the diffusion of the gas towards the burner head if the flame is not lit.
To light the burner:
o Press the burner control knob you want to turn on and turn it counterclockwise to the maximum position.
o If you hold down the control button, the automatic burner ignition will work.
o You must hold the control button down for 15 seconds once the burner flame is on. If after 15 seconds the burner has not been lit, stop operating the device and open the compartment door and / or wait at least 1 minute before attempting to light the burner again.
o After this 15 second interval, to regulate the flame, you must continue turning the control knob counterclockwise until the flame is at an appropriate level. The operating position must be at a position between the maximum and minimum position.
To turn off the burner, turn the control knob fully clockwise until the gas is turned off.
o In the event of a power failure, the burners can be lit using a match.
Tips on safety and energy saving
The diameter of the bottom of the pan must correspond to the diameter of the burner.
| BURNER | COOKWARE | |
| Min Max | ||
| Triple Crown | 200 mm | 240 mm |
| Fast | 200 mm | 240 mm |
| Semi Fast | 160 mm | 180 mm |
| Auxiliary | 120 mm | 160 mm |

Do not use utensils that straddle the edge of the burner.
| NO YES | |||
| Do not use small saucepans on large diameter burners. The flame should never cover the sides of the cookware. | Always use utensils that are appropriate for each burner, to avoid wasting gas and discolouring utensils. | ||
| Avoid cooking without a lid or half-lid as this wastes energy. | Place a lid on the cooking utensil. | ||
| Do not use cookware with a convex or concave bottom. | Use only pots, pans and frying pans with a thick flat bottom. | ||
| Do not place the cookware on one side of a burner as it may tip over. | Always place cookware just above the burners, not on one side. | ||
| Do not use large diameter cookware on burners near control knobs, which, when placed in the middle of burner may touch controls or be so close that it will increase the temperature of this zone and could cause damage. | |||
| Never place a cookware directly on the burner. | Place the cookware on the burner peg. | ||
| Do not place anything, for example, a flame reducer or asbestos mat between the utensil and the utensil holder as this could cause serious damage to the appliance. | |||
| Do not place excessive weight or hit the cooktop with heavy objects | Handle cookware carefully when on the burner. | ||
Operation of the device

Warnings
- Do not modify this unit.
This appliance must be installed by a qualified technician or installer. - Before installation, make sure that the local conditions of distribution (type of gas and gas pressure) and the setting of the appliance are compatible.
The setting conditions for this unit are indicated on the label (or data sheet).
This appliance is not connected to a flue gas vent. It must be installed and connected in accordance with the applicable installation rules. Special attention should be paid to the relevant requirements for ventilation.
Before installation, turn off the gas and the power supply to the unit.
All devices containing electrical components must be earthed. - Make sure that the gas pipe and electrical cable are installed so that they do not touch any parts of the appliance that may become hot.
The gas hose or connector must not be twisted or blocked by other devices. - Check the dimensions of the appliance and the dimensions of the space to be cut in the kitchen worktop.
-
Panels above the worktop or adjacent to the appliance must be made of non-flammable materials. The laminate coating and the adhesive used for fixing must be resistant to heat, to prevent deterioration.
1) Turn the appliance tap to turn it on and to light each burner
2) Check for a clear blue flame without yellow tilting.
3) If the burners are defective, please check the following: -
The lids of the burners are correctly placed.
- The flame diffuser is positioned correctly
-
The burner is aligned vertically with the tip of the injector
-
A complete operational test and test for possible leaks must be performed by the installer after installation.
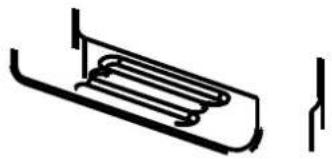
The flexible hose must be installed in such a way that it can not come into contact with a moving part of the housing and does not pass through a space that may become congested.
Parts have been factory lubricated to meet all cooktop standards.
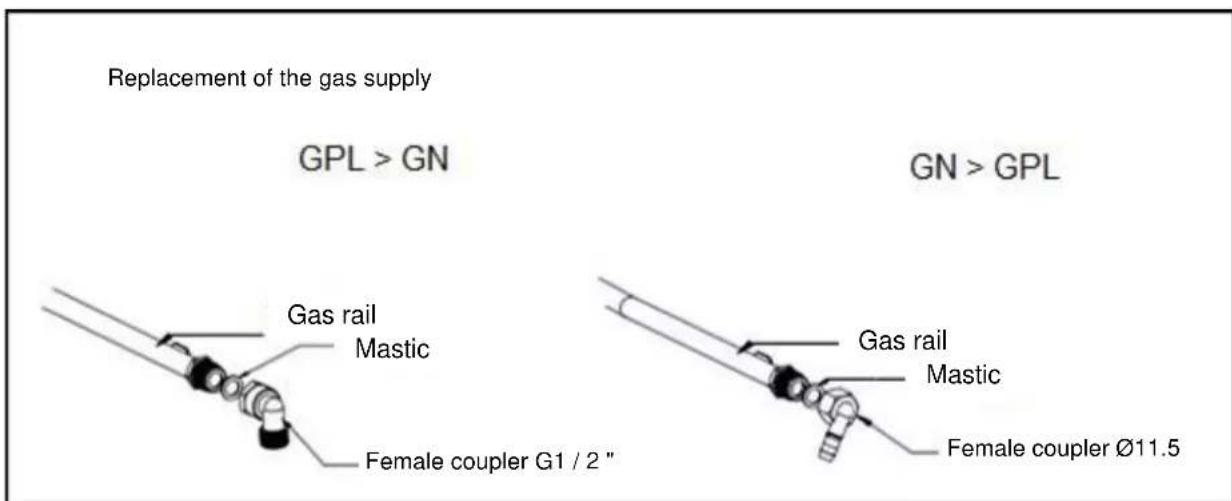
Gas connection

- This appliance must be installed and connected in accordance with the installation standards in force in the country in which the appliance is used.
- This unit is designed to be powered by GLP (Bottle) and Natural Gas (NG). Any conversion to use LPG (cylinder) or natural gas (NG) must be performed by a qualified technician.
o By law, all gas appliances must be installed by qualified persons in accordance with the current edition of the Safe Gas Operation and Installation Regulations.
o It is in your interest and that of safety to ensure the compliance assigned by law.
In the United Kingdom, GasSafe approved installers work according to safety standards. The cooktop must also be installed in accordance with the current edition of BS 6172. Failure to properly install the cooktop could void the warranty, damages and legal action.
Categories of gases, types of gas and country of destination (for all models)
| I3+(28-30/37) | Butane G30 at 28-30mbar and Propane G31 at 37mbar | BE, CH, CY, CZ, ES, FR, GB, GR, IE, IT, LT, LU, LV, PT, SK, SI |
| I2H/I2E/I2E+ | Methane G20 at 20mbar | AT,CH,CZ,DK,ES,FI,GB,GR,IE,IS,IT,PT, SE, SI,SK,DE,LU,GE,FR |
| II2E+3+ | G20 / G25 at 20 / 25mbar, Butane G30 at 28-30mbar and Propane G31 at 37mbar | BE, FR |
| II2E+3+ | I2E: Methane G20 at 20mbar I3+: Butane G30 at 30mbar and propane G31 to 37mbar | BE, FR |
Gas Specifications
| Model No. | Type of gas & pressure | Power supplies | Heat input and hole size (mm) | Total heat input | |||
| Wok burner | Fast burner | Semi rapid burner | Quick auxiliary | ||||
| 60G40ME403-GFN-R02 | / | 220-40V~50/60Hz | / | 3.0kW (219g/h) | 1.75kW (127g/h) | 1.0kW (73g/h) | 7.5kW (546g/h) |
| G31 37mbar | / | 0.85 | 0.65 | 0.50 | NA | ||
| 60G40ME086-GFN-R02 | G30 29mbar | / | 0.85 | 0.65 | 0.50 | ||
| G20 20mbar | / | 1.30 | 0.97 | 0.72 | |||
| G25 25mbar | / | 1.22 | 0.95 | 0.70 | |||
Information for domestic gas-fired hobs
| Symbol Value | Unit | ||
| Model identification | CECTG4GFVW & CECTG4FVB | ||
| Type of hob | Gas Hob | ||
| Number of gas burner | 4 | ||
| Energy efficiency per gas burner | EE gas burner | Fast Burner: 59.1 Semi Fast Burner 1: 61.1 Semi Fast Burner 2: 60.6 Auxiliary Burner: 52.4 | |
| Energy efficiency for the gas hob | EE gas hob | 55.1% | |
Electrical connection
This appliance must be connected to earth.
This unit is designed to be connected to a 220 - 240V 50 / 60Hz AC power supply.
- The unit must be installed so that the mains plug is easily accessible.
- If the supply cord is damaged, it must be replaced by the manufacturer, its service agent or similarly qualified persons in order to avoid a hazard.
Gas adjustment

Take precautions on the operations and adjustments to be made when converting from one gas to another.
All work must be performed by a qualified technician.
Before you start, turn off the gas and electricity that powers the unit.

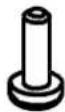
Change the injector for burners
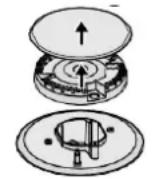
Remove the cookware holder, burner cover and flame diffuser.
Unscrew the injector using a 7mm socket wrench and replace it with the injector provided for the new gas supply. Reassemble carefully all the components.
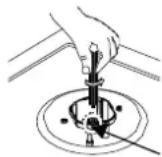
Once the injectors are replaced, it is advisable to firmly tighten the injector in place.
Injector
Set the flame to the minimum level

2
-
Turn the taps to the minimum level
-
Remove the faucet knob and place a small screwdriver in the center of the faucet shaft.
-
The correct setting is obtained when the flame has a length of 3 to 4mm
-
For butane / propane gas, the adjusting screw must be firmly tightened.
-
Replace the adjustment knob.
-
Make sure the flame does not go out quickly from maximum flow to minimum flow. If this is the case, remove the knob and make further adjustments to the gas flow and test again after the adjustment has been made.
-
Repeat this procedure for each of the gas faucets.

- Do not disassemble the valve shaft: in the event of a malfunction, replace the entire valve.
Before putting the burners back on the cooktop, make sure that the injector is not blocked.
A complete operational test and test for possible leaks must be performed after the gas conversion (such as the soapy water test or with a gas detector).
■ After completing the conversion, a qualified technician or installer must mark "V" on the correct gas category corresponding to the setting on the Material Safety Data Sheet. Remove the previous "V" mark.
VI. MAINTENANCE AND CLEANING

Warnings
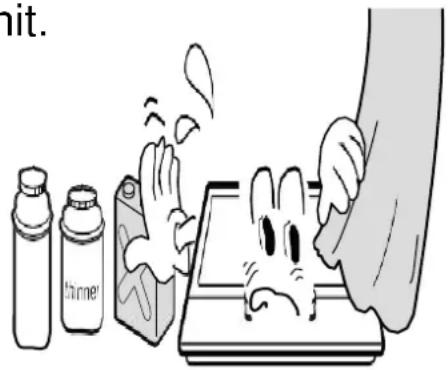
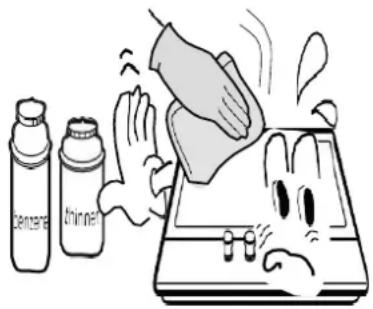
- Never use abrasive or caustic cleaning agents.
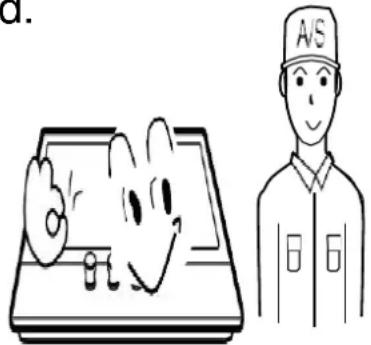
This appliance must only be repaired or serviced by an authorized technician and only approved replacement parts must be used.

Warning
Before cleaning the unit, unplug it from the power outlet and wait for it to cool down.
- Do not use a jet of steam or other high pressure cleaning equipment to clean the unit.

- It is not recommended to use roasters, frying pans or grill stones heated on multiple burners at the same time because heat build up could damage the appliance.
- Do not touch the top plate and the chevrette for a period of time after use.

As soon as the liquids begin to boil, lower the heat so that the liquid continues to simmer.

- Cleaning operations should only be carried out after the appliance has completely cooled down.
The appliance must be unplugged from the mains before cleaning.
Clean the device regularly, preferably after each use. - Abrasive cleaners or sharp objects can damage the surface of the machine; you must clean it with water and a little dishwashing liquid.
| Suitable utensils Unsuitable utensils | |||
| Soft clothNeutral detergent | Nylon brushEdible oilAbrasive product | Metal brushAcid / alkalinedetergentThinner / Benzene | |
Utensil holder, control handles
Remove the utensil holder.
- Clean these brackets and control handles with a damp cloth, washing up liquid and warm water. For stubborn stains, soak beforehand.
Dry all these parts with a soft, clean cloth.
Upper plate support
Regularly wipe the top plate with a soft, well-wrung cloth in warm water to which a little dishwashing liquid has been added.
Dry the top plate completely after cleaning.
- Carefully remove salted food and liquids from the cooktop as soon as possible to avoid corrosion.
- Parts of the stainless steel appliance may become discolored over time. This is normal because of high temperatures. Whenever the appliance is used, these parts must be cleaned with a product suitable for stainless steel.
Burners
- Remove the burner covers and flame spreaders by pulling them up and away from the top plate.
Soak them in hot water and some detergent or dishwashing liquid.
After cleaning and washing, wipe and dry thoroughly. Make sure the flame holes are clean and completely dry.
Wipe the fixed parts of the burner cup with a damp cloth and then dry them.
Gently wipe the ignition and the safety device with a well wrung cloth and wipe with a clean cloth.
Before replacing the burners on the top plate, make sure that the injector is not blocked.
Replace the auxiliary burners, semi-rapid, fast and triple crown as below:
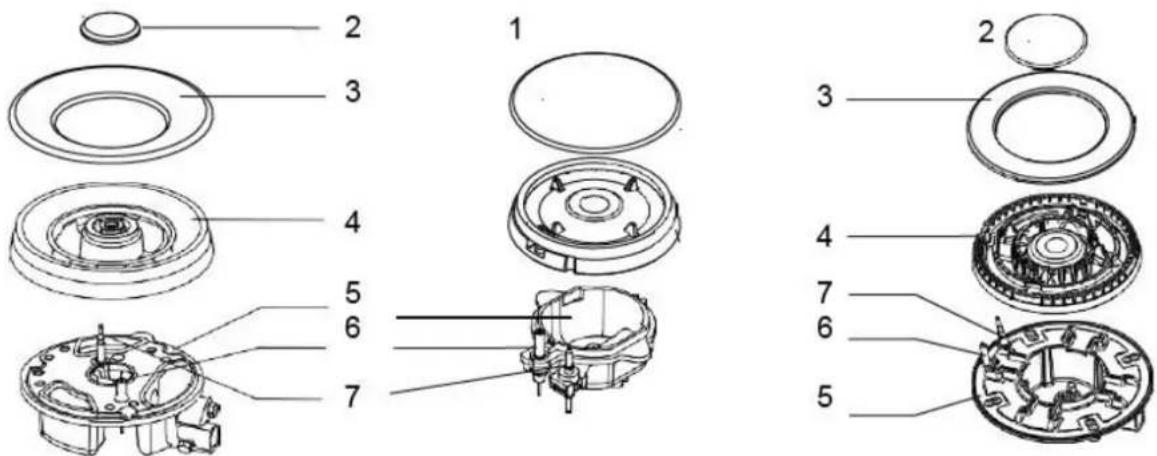
a. Place the flame diffuser (4) on the burner cup (5) so that the igniter and the safety device pass through their respective holes in the flame diffuser. The flame spreader must snap into place correctly.
b. Position the burner cover (1, 2, 3) on the flame diffuser (4) so that the retaining rods fit into the respective holes.

Replace the parts correctly in order after cleaning.
- Do not mix the top and bottom parts.
- The retaining rods must fit exactly into the grooves.
VII. TROUBLESHOOTING GUIDE
This appliance should only be repaired by a qualified service person. Incorrect repairs can result in considerable risk to the user.
However, some minor issues can be resolved as below:
| Problem | Possible Cause | Solution |
| Burners do not light | No spark Check the power supply | |
| The burner lid is not correctly assembled. | Assemble the lid correctly | |
| The gas supply is not activated. | Open the gas supply completely. | |
| Ignition is not satisfactory | The gas supply is not open. Open the gas supply completely. | |
| The burner lid is not correctly assembled. | Assemble the lid correctly | |
| The ignition socket is contaminated by substances. | Remove the substances with a dry cloth. | |
| The burners are wet Dry the burner lids thoroughly | ||
| The holes in the flame diffuser are clogged | Clean the flame diffuser. | |
| There is noise when a burner is lit | The burner lid is not correctly assembled. | Assemble the cover correctly. |
| The flame goes out when using | The safety device is contaminated by substances. | Clean the safety device. |
| Cooking foods boiled and overflowed and extinguished the flame. | Turn off the burner. Wait a minute before relighting the burner. | |
| A strong draft blew on the flame and extinguished it. | Please turn off the burner and check the cooking zone to stop the draft, like an open window. Wait a minute before relighting the burner. | |
| Yellow flame | The holes in the flame diffuser are clogged | Clean the flame diffuser. |
| A different gas is used | Check the type of gas used. | |
| Unstable flame | The burner lid is not correctly assembled. | Assemble the lid correctly |
| Smell of gas | Gas leak | Stop using the product and close the central valve. Open the window to ventilate. Contact our after-sales service from an outside phone. |

For any other problem occurring on your device: contact the After-Sales Service.
VIII. WARRANTY
WARRANTY EXCLUSIONS:
The warranty does not cover the wear parts of the product, nor the problems or damages resulting from:
(1) surface deterioration due to normal wear and tear of the product;
(2) defects or deterioration due to contact of the product with food or liquids and due to corrosion caused by rust or the presence of insects;
(3) any incident, misuse, misuse, alteration, disassembly or unauthorized repair;
(4) any unsuitable maintenance operation, use that is not in accordance with the product instructions or incorrect voltage connection;
(5) any use of accessories not supplied or approved by the manufacturer.
The warranty will be void if the nameplate and / or serial number of the product is removed.
IX. DISPOSAL
This appliance carries the selective sorting symbol for waste electrical and electronic equipment (WEEE). This means that this product must be supported by a selective collection system in accordance with the EU Directive 2012/19 / EU so that it can either be recycled or dismantled in
order to reduce any impact on the environment.
For more information, you can contact your local (city hall) or regional administration.
Electronic products that have not been sorted are potentially dangerous for the environment due to the presence of hazardous substances.
Under no circumstances should you throw this unit on public roads.
Continental Edison - 120-126 Quai de Bacalan - CS 11584 - 33000 Bordeaux
Imported by SCHNEIDER CONSUMER GROUP
12, rue Jules Ferry, 93110 Rosny-sous-Bois, FRANCE