CECVBF - Steam cleaner CONTINENTAL EDISON - Free user manual and instructions
Find the device manual for free CECVBF CONTINENTAL EDISON in PDF.

| Product type | Steam cleaner (steam station) |
| Brand | Continental Edison |
| Model | CECVBF |
| Power supply | 220-240 V ~ 50-60 Hz |
| Rated power | 2000-2400 W |
| Water tank capacity | 1.3 L |
| Continuous steam flow | 100 g/min |
| Ironing functions | Dry ironing, steam ironing, vertical ironing, vertical steaming |
| Temperature settings | Thermostat: Min, Synthetic, Silk/Wool, Cotton/Linen, Max |
| Anti-scale system | Automatic descaling after 36 hours of use |
| Indicator lights | Power indicator, empty tank indicator, cleaning indicator |
| Warranty | Limited warranty (excluding wear parts and improper use) |
| Safety instructions | Do not immerse, avoid contact with hot surfaces, do not direct steam at people |
| Maintenance | Clean with a damp cloth, descale regularly, empty tank after use |
Frequently Asked Questions - CECVBF CONTINENTAL EDISON
User questions about CECVBF CONTINENTAL EDISON
0 question about this device. Answer the ones you know or ask your own.
Ask a new question about this device
Download the instructions for your Steam cleaner in PDF format for free! Find your manual CECVBF - CONTINENTAL EDISON and take your electronic device back in hand. On this page are published all the documents necessary for the use of your device. CECVBF by CONTINENTAL EDISON.
USER MANUAL CECVBF CONTINENTAL EDISON
natural_image
Abstract geometric shapes in gray, no text or symbols presentContinental Edison
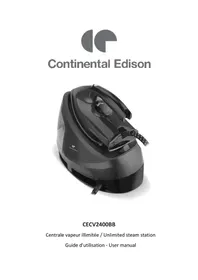
natural_image
Black and white photo of a steam iron with visible branding and control buttons (no text or symbols)CECVBF
Centrale vapeur / Steam generator
- FR (version originale)
- EN (translated from the original)
natural_image
Line drawing of a hand pouring liquid into a bag (no text or symbols)natural_image
Line drawing of a hand using a power iron to press down a piece of paper (no text or symbols)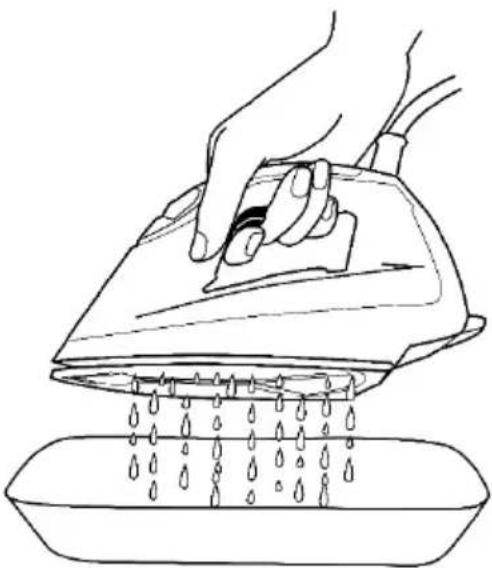
natural_image
Line drawing of a hand using a power iron to clean water from a basin (no text or symbols)natural_image
Symbol of a trash bin crossed with a diagonal line, no text or numbers presentWe encourage you to read this user guide carefully and completely before installing and using your device.
It is important that this user guide is kept with the device for any new consultation. If this unit is to be transferred to another person, make sure that the user guide follows the unit so that the new user can be informed of the operation of the unit.
In this user guide, the following symbols are used:
 | Important information about your personal safety and how to avoid damage to the device |
 | General information and advice |
 | Risk of electric shock |
 | Hot surfaces |
 | Do not cover the device |

Safety Instructions:
- Before using your steam generator, read these instructions carefully.
- This device is intended for domestic and indoor use only.
- Do not submerge the device in water or other liquid.
- Before plugging in the device, make sure that the current is corresponds to that recommended for your device and your wall outlet is properly grounded.
- Turn off the device before plugging or unplugging the device.
- Do not let the power cord contact with hot surface.
- Unplug the device when it is not in use.
- The iron must not be used if it has been dropped, if there are visible signs of damage or if it is leaking.
- Do not dismantle the device by yourself if the device is damaged or malfunctioned. Please contact for
after-sales service, qualified electrician or person with similar qualifications.
-
Never leave your device unattended when connected to power.
-
The iron must be used and rested on a flat and stable surface.
-
Always place the iron on its stand and never let the cord touch hot surfaces.
-
Do not touch the hot metal parts, hot water or the steam while using.
-
Do not face the steam directly.
-
Do not twist the power cord.
-
Do not leave your device unattended when connected to power.
-
Allow the unit to cool for a few minutes before filling the tank if the iron is hot. The plug must be removed from the socket before filling the water tank.
-
When the iron is put back on its base, make sure that the surface
that supports the base is flat and stable.
-
This device may be used by children 8 years of age or older and by persons with reduced physical, sensory or mental abilities or lack of experience or knowledge, if they are properly supervised if instructions for the safe use of the apparatus have been given to them and the risks involved have been apprehended. Children should not play with the device. Cleaning and maintenance by the user should not be done by unattended children.
-
Keep the iron and its cord out of reach of children under 8 years old when it is being fed or cooling.
-
If the power cable is damaged, it must be replaced by the manufacturer, its after-sales service or similarly qualified persons in order to avoid a hazard.
IMPORTANT
IT IS STRICTLY FORBIDDEN TO REPLACE YOU EVEN THE POWER CABLE. IF IT IS DAMAGED IT MUST BE REPLACED BY THE AFTER-SALES YOUR DEALER STORE, THE MANUFACTURER, ITS CUSTOMER SERVICE PERSON OR SIMILAR QUALIFICATION TO AVOID A HAZARD.
IF THE IRON OR UNIT FALL HOME, DO IT CONSIDERED BY A PROFESSIONAL PUTTING BEFORE POWER. INTERNAL DAMAGE MAY REPRESENT A RISK OF ACCIDENT.
FOR ANY PROBLEM OR REPAIR, PLEASE CONTACT THE CUSTOMER SERVICE STORE YOUR DEALER, THE MANUFACTURER, ITS CUSTOMER SERVICE PERSON OR SIMILAR QUALIFICATION TO AVOID A HAZARD.
For installation, handling, cleaning and disposal of the device, refer to the following chapters of the User's Guide.
Information on the meaning of the conformity marking
The marking C€ indicates that the product meets the main requirements of the European Directives: 2014/35/EU (Low Voltage), 2014/30/EU (Electromagnetic Compatibility), 2011/65/EU (Restriction of use of certain substances in equipment electronic)
SUMMARY
Important warnings and safety advice -20-
I. Description of the device -27-
II. Technical characteristics -28-
III. Before first use -29-
IV. Instructions to use -30-
V. Cleaning and maintenance -33-
VI. Warranty -35-
VII. Disposal -36-
I. DESCRIPTION OF THE DEVICE
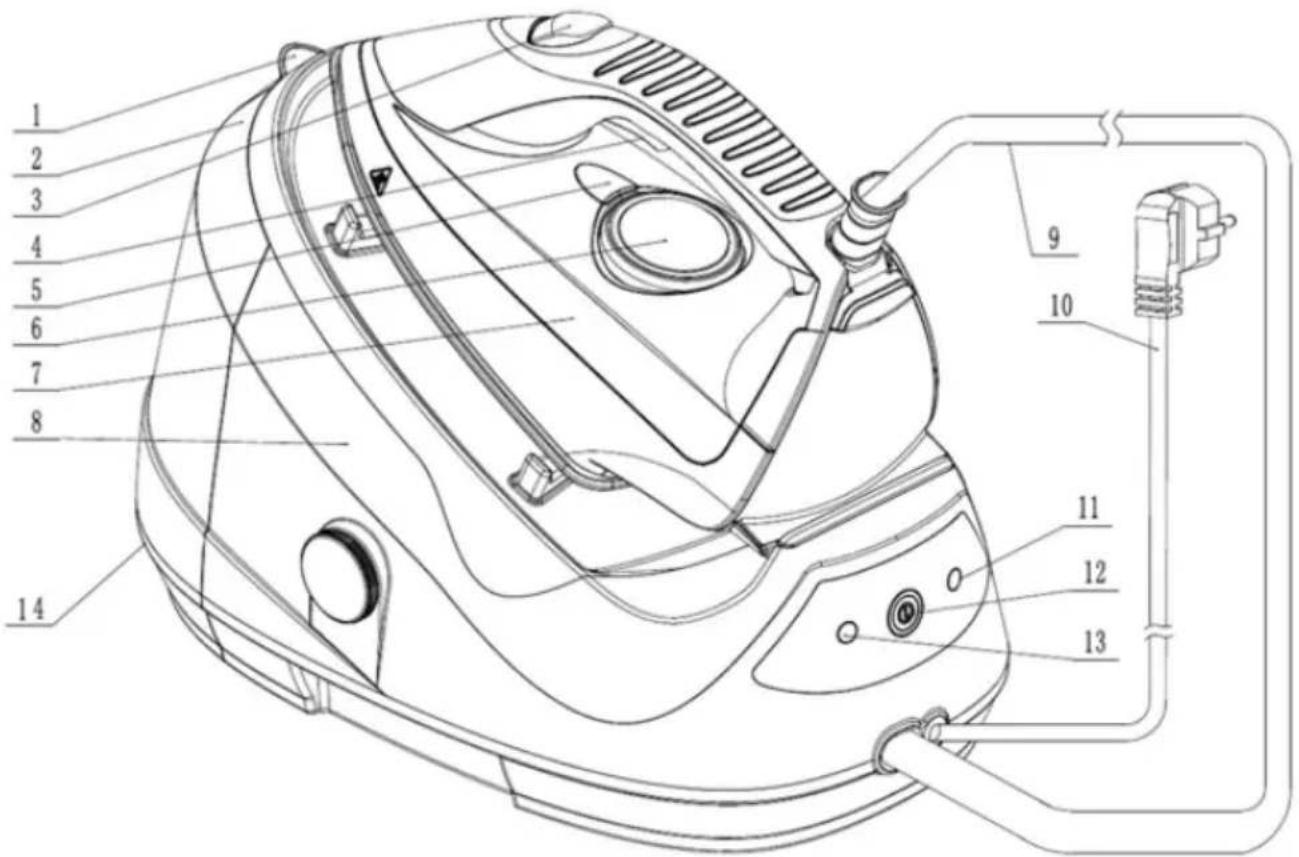
- Water Tank Inlet
- Water Tank
- Steam Button (continuous steam flow)
- Steam Trigger (intermittent steam flow)
- Operating Indicator Light
-
Temperature Control Knob
-
Ir on
- Station
- Steam Hose
- Power Cord
- Cleaning Indicator Light
- ON/OFF Button
- "Empty tank" indicator
- Water Tank release button
II. TECHNICAL CHARACTERISTICS
Technical data:
| Mark | Continental Edison |
| Reference | CECVBF |
| Model | HG-6209NP27-22P |
| Voltage | 100-240V~ 50-60Hz |
| Rated Input Power | 2000-2400W |
| Capacity of the tank: | 1.3l |
| Steam rate: | 100g / min |
- Remove all packing material around the appliance and the protective elements inside the appliance compartments.
- Cartonboard and sheets of paper are recyclable. They must be
thrown in the collection bins provided for this purpose.
- Materials bearing the symbol ↩ are recyclable:
PE <= polyethylene; > PS <= polystyrene; > PP <= polypropylene
This means that they can be recycled by depositing them into appropriate collection containers.
- Other packaging elements (adhesive, fasteners, etc.) must be disposed of with household waste.
To know more: www.quefairedemesdechets.fr
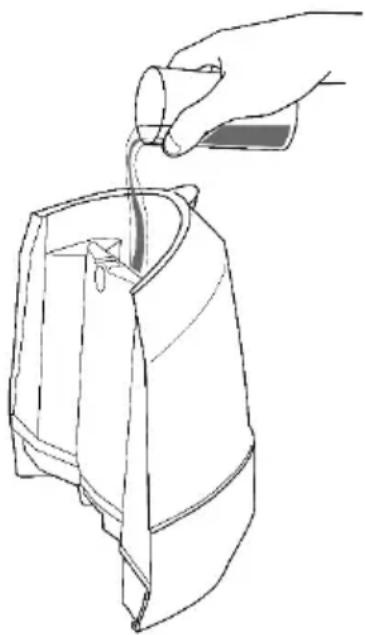
B. Fill the water tank

Unplug the unit from the electrical outlet before filling the water tank.
- Unhook the water tank from the unit by pressing the release button under the tank.
- Open the tank filler opening, and fill the tank with tap or demineralized water.
- When the filling light comes on, fill the water tank immediately
- Empty the tank when you have finished using the unit.
Tips on water to use
We recommend using 50% tap water mixed with 50% demineralised water. If tap water in your area is very calcareous, increase the proportion of demineralised water.
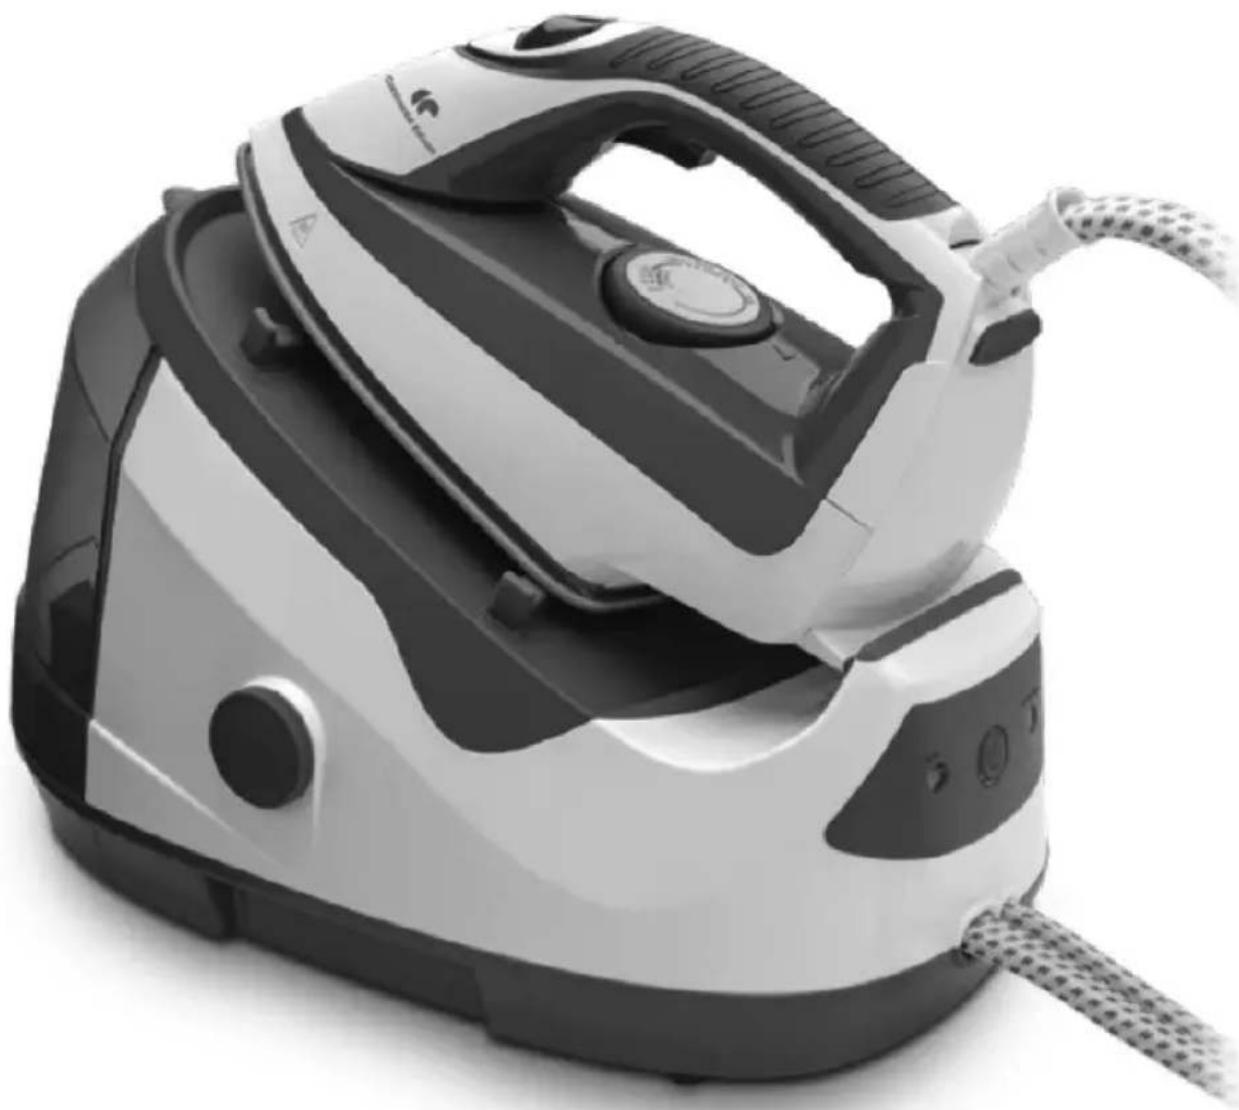
natural_image
Line drawing of a hand pouring liquid into a bag (no text or symbols)Never use demineralised water alone as this can seriously damage your device.
Warning ! Do not exceed the maximum level "MAX" indicated.
The maximum capacity of the tank is 1.3l.
When using your device, place it on a flat, stable surface that is resistant to heat.
IV. INSTRUCTIONS TO USE
When using your device, place it on a flat, stable surface that is resistant to heat.
IMPORTANT: check the washing labels on clothing and follow the ironing instructions indicated by the following similar symbols:
Symbols ironing fabrics
 | Warm iron (one dot)Maximum temperature of the sole of 110 °CFor dry ironing |
 | Hot iron (2 points)Maximum temperature of the sole of 150 °CFor dry ironing and medium steam |
 | Very hot iron (3 points)Maximum temperature of the sole of 210 °CFor dry ironing and strong steam flow |
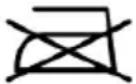 | Do not iron |
A. DRY IRONING
- Follow the instructions in the "Filling the Tank" section.
- Connect the device and turn it on by pressing the on / off button. The power indicator lights up
- Adjust the thermostat knob according to the type of fabric being ironed. To do this, check the washing labels on the garments and follow the ironing instructions indicated by the following similar symbols:
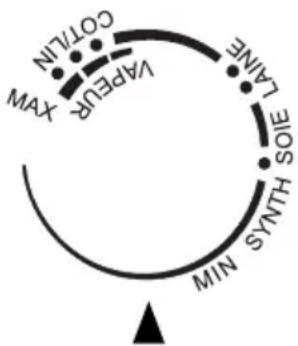
flowchart
graph TD
    A["CO/TLIN"] --> B["XAW"]
    C["LAFER"] --> D["CA/TAI"]
    E["LA/NT"] --> F["SOE"]
    G["SYNTHS"] --> H["MIM"]
    I["CO/TLIN"] --> J["XAW"]
- When the power indicator light turns off, the unit is ready for use.
During operation, the power indicator light turns on and off intermittently. This is normal, it means that the iron is heated up intermittently to maintain the desired temperature.
Note: When changing from a high temperature setting to a lower temperature setting, wait until the iron cools down before you continue ironing as you may damage your clothes. It takes a few minutes for the iron to return to a lower temperature.
B. STEAM IRONING
-
Follow the instructions in the "Filling the Tank" section.
-
Connect the device and turn it on by pressing the on / off button. The power indicator lights up.
-
For steam ironing, set the temperature to maximum.
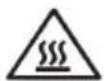
HOT SURFACES
flowchart
graph TD
    A["LAINE"] --> B["SIOE"]
    B --> C["SOUTH"]
    C --> D["MIN"]
    D --> E["SYNTH"]
    E --> F["MAX"]
    F --> G["VAPEUR"]
    G --> H["COT/LIN"]
    H --> I["▲"]
- Adjus t the steam flow with the thermostat knob.
Press the steam button (3) to continuously steam. To stop, press the steam trigger (4).
If you want to emit steam intermittently, press the steam trigger (4).

WARNING! RISKS OF BURNS!
Warning ! Never direct the jet of steam at people.
- If the steam does not come out, it may mean that the tank is empty. To continue ironing, follow the instructions in the "Filling the Tank" section.
C. VERTICA L IRONING OR VERTICAL DEFROSTING
- Follow the instructions in the "Filling the Tank" section.
- Connect the device and turn it on by pressing the on / off button. The power indicator lights up.
- Adjust the steam flow with the thermostat knob.
- Hang the garment on a hanger and lightly stretch the fabric with one hand.
- Hold the iron upright at a minimum distance of 20-30 cm from the fabric. In a up and down motion, press the steam button (3) to continuously steam. To stop, press the steam trigger (4).
If you want to emit steam intermittently, press the steam trigger (4).

WARNING! RISKS OF BURNS!
Warning ! Never direct the jet of steam at people.
- If the steam does not come out, it may mean that the tank is empty. To continue ironing, follow the instructions in the "Filling the Tank" section.

CAUTION: RISK OF BURNS!
Warning ! Iron emits hot steam. Never attempt to remove wrinkles from clothing directly on the wearer. Do not throw steam near your hands or anyone else's.

Do not apply steam to clothing or fabrics worn directly by people.
The temperature of the steam is very high.

HOT SURFACES
D. ST OP FROM THE STEAM CENTRAL
- Turn the thermostat knob counterclockwise and set it to "Min." To turn off the iron
- Press the on / off button to turn off the control panel.
- Place the iron on its support and let the central unit (iron and boiler) completely cool before storing it in a safe place.

flowchart
graph TD
    A["Max"] --> B["VAPPEUR"]
    B --> C["CO/T/LN"]
    C --> D["SOIE LAINE"]
    D --> E["SYNTH"]
    E --> F["MIN"]
    F --> G["△"]
V. CLEANING AND MAINTENANCE

Before cleaning, unplug the appliance from the power outlet.
A. CLEANING
- Unplug the iron and allow it to cool for at least 60 minutes.
- Empty the tank after each use.
- Clean the device with a cloth slightly moistened with water. Do not use detergent.
-
Clean the sole regularly to ensure optimal glide. To easily and effectively remove stains, heat the soleplate and put the iron on a damp cloth.
-
Do not use any cleaning or descaling products to clean the soleplate or power station.
- Never put the iron or power station under tap water.
- Clean the sole regularly with a non-metallic sponge.
- Clean the plastic parts from time to time with a soft, slightly damp cloth
B. CLEANING AND DESCALING
Before proceeding with the cleaning and descaling of your steam generator, it is imperative to let it cool for more than 1 hour, to avoid any risk of burning.
- Do not introduce descaling products (vinegar, industrial detergents ...) to rinse the boiler: they could damage it.
- Do not leave the appliance unattended while descaling.
To maintain the performance of the steam unit, this unit has a smart reminder that tells you to clean and descale the unit.
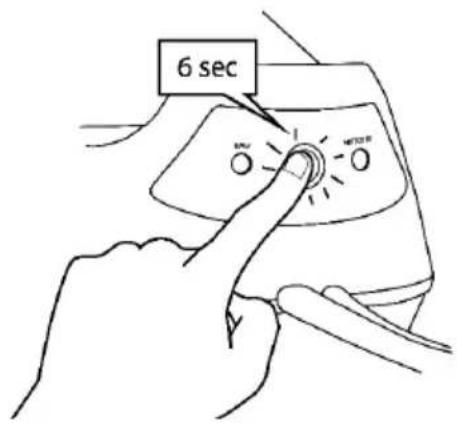
After 36 hours of use, the power indicator flashes and a buzzer sounds 3 times to remind you to descale the steam unit and proceed as follows.
-
F ill the water tank to the max.
-
Make sure the device is plugged in and turned on
CAUTION: During the cleaning process, the iron will discharge water and scale through the holes in the soleplate.

CAUTION: RISK OF BURNS!
-
Place the steam generator on the side of your sink, and hold the iron over the sink.
-
Press the on / off button for 6 seconds until 3 beeps sound.
-
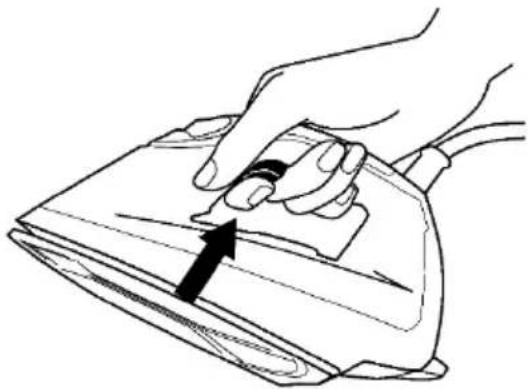
Press the steam trigger to activate descaling.
-
Wait at least 1 minute.
-
At the end of the process, the power indicator will stop blinking and a beep will sound 3 times.
-
Wipe the iron with a cloth and replace it on the control panel.
natural_image
Line drawing of a hand using a power tool to press down a piece of wood (no text or symbols)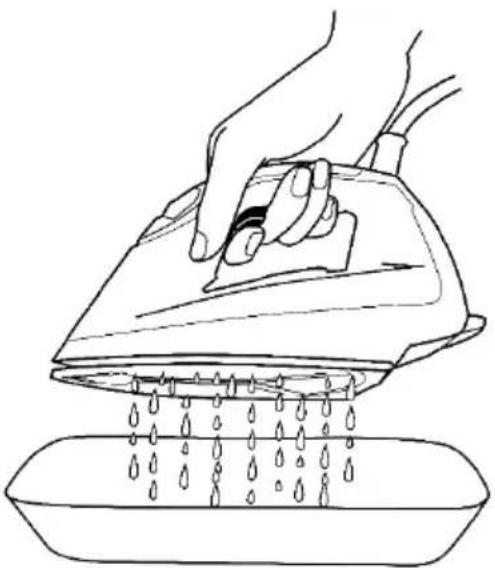
natural_image
Line drawing of a hand using a power iron to clean water from a basin (no text or symbols)If you need to stop the cleaning process, press and hold the power button for 6 seconds until the power indicator stops blinking and the buzzer sounds 3 times.
VI. WARRANTY
Warranty does not cover product wear parts, problems or loads
- superficial damage to the normal wear and tear of the product;
- defects or deterioration due to product contact with liquids and corrosion caused by rust or the presence of insects;
- any incident, misuse, misuse, alteration, disassembly or unauthorized repair;
- any maintenance not in accordance with the instructions for the product or connection to incorrect voltage;
- any use of accessories not supplied or not approved by the manufacturer.

The warranty will be void if the nameplate and / or serial number of the product is removed.
VII. DISPOSAL
natural_image
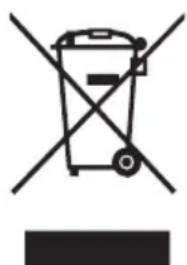
Symbol of a trash bin with crossed lines indicating no waste or restriction, accompanied by a solid black rectangle below (no text or symbols present)This logo affixed to the product means that it is a device whose treatment as waste falls within the framework of the directive 2012/19 / EU of July 4th, 2012, relative to the waste of electrical and electronic equipment (WEEE). This means that this product must be supported by a selective collection system in accordance with the European directive mentioned above in order to be either recycled or dismantled in order to reduce any impact on the environment.
Hazardous substances in electrical and electronic equipment can have potentially harmful effects on the environment and human health.
Thus, at the end of the life of this appliance, it must not be disposed of with unsorted municipal waste. Recovery and collection systems are made available to you by local authorities (waste disposal centers) and distributors.
This device must not be thrown on public roads. You have the obligation to use the selective collection systems available to you.

natural_image
Abstract geometric shapes resembling partial arcs or circles, no text or symbols presentContinental Edison
www.continentaledison.fr