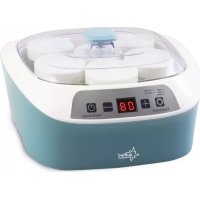
YOG8588 Digital - Yogurt maker SUNTEC - Free user manual and instructions
Find the device manual for free YOG8588 Digital SUNTEC in PDF.


| Product type | Digital yogurt maker |
| Brand | Suntec |
| Model | YOG8588 Digital |
| Power supply | 220-240 V ~ 50/60 Hz, 20 W |
| Capacity | 6 glass jars of 170 ml each (1020 ml total) |
| Dimensions (approx.) | 30 x 20 x 20 cm |
| Weight (approx.) | 2 kg |
| Functions | Yogurt (F1), Natto (F2), Kimchi (F3), Rice wine (F4), Wine (F5) |
| Settings | Adjustable timer per function: 1-24h (yogurt), 1-36h (natto, kimchi), 1-48h (rice wine), 1-9 days (wine) |
| Temperature | Adjustable (default 45°C for yogurt) |
| Display | LED screen with remaining time |
| Material | Plastic housing, glass jars |
| Cleaning | Jars and lids dishwasher-safe; exterior cleaned with a damp cloth |
| Safety | Automatic shut-off at end of program, protection against electric shock (do not immerse) |
| Warranty | 24 months |
| Spare parts | Set of 6 glass jars (ref. YOG-CUP-6-SET-8687) |
| Manufacturer | Suntec Wellness GmbH, Holzstraße 2, 40221 Düsseldorf, Germany |
| Environmental information | Do not dispose of with household waste; recycle via WEEE collection points |
Frequently Asked Questions - YOG8588 Digital SUNTEC
User questions about YOG8588 Digital SUNTEC
0 question about this device. Answer the ones you know or ask your own.
Ask a new question about this device
Download the instructions for your Yogurt maker in PDF format for free! Find your manual YOG8588 Digital - SUNTEC and take your electronic device back in hand. On this page are published all the documents necessary for the use of your device. YOG8588 Digital by SUNTEC.
USER MANUAL YOG8588 Digital SUNTEC
Joghurtmaker
YOG-8588 digital
Bedienungsanleitung
Sicherheitshinweise
VORSICHT!
Yoghurt maker YOG-8588 digital
Instruction manual
Safety Precautions
CAUTION!
This appliance can be used by children aged from 8 years and above and persons with reduced physical, sensory and mental capabilities or lack of experience and knowledge if they have been given supervision or instruction concerning use of the appliance in a safe way and understand the hazards involved. Cleaning and user maintenance shall not be made by children without supervision. Children of less than 3 years should be kept away unless continuously supervised.
Children aged from 3 years and less than 8 years shall only switch on/off the appliance provided that it has been placed or installed in its intended normal operating position and they have been given supervision or instruction concerning use of the appliance in a safe way and understand the hazards involved.
Children aged from 3 years and less than 8 years shall not plug in, regulate and clean the appliance or perform user maintenance.
- Before connecting the appliance to the power supply, check that the voltage indicated on the appliance corresponds with the voltage at your home.
- Please refrain from further usage if the power cord, power plug or the appliance are damaged and contact your seller.
- Please do not use the appliance for other than its intended use. Other uses may cause fire. The appliance is not suitable for commercial use. For
domestic indoor use only.
- Only operate the appliance on a flat and stable surface.
- Please remove the appliance from the wall socket when it is not in use, before cleaning and in case of malfunctions. Do not pull on the cord but on the power plug. Make sure that your hands are dry.
- Please do not insert any foreign objects into the appliance as this may cause electric shocks, fire or damages to the appliance.
- Please keep the unit away from water and heat sources. There must be no alcohol, petrol or other flammable materials in the container of the unit.
- Please do not leave the appliance unattended.
- Do not attempt to repair, disassemble or change the appliance by yourself.
- The usage of accessories not provided by SUNTEC may cause harm.
- Please keep the power cord from table edges, working surfaces or any hot surfaces.
- Never immerse the appliance, its power cord and plug in water or other liquids to prevent electric shocks.
- Do not use extension cords and multiple plugs.
- External control units such as timers must not be used.
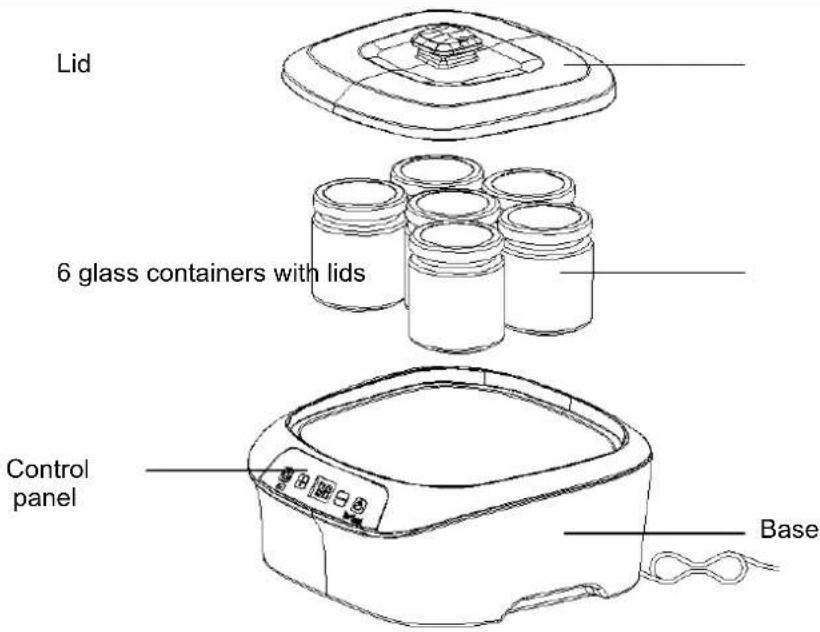
Components
Operation
- Operating voltage: 220-240V\~, 50/60Hz, 20W
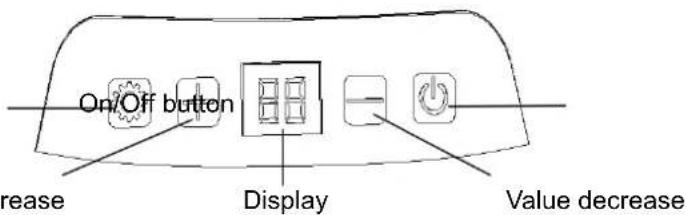
- Control panel:
Function selection (F1 - F5)
• The glass containers each hold 170ml (1020ml in total) and are only suitable for yoghurt preparation.
- Please disinfect the glass containers before initial operation by filling them with boiling water. Please rinse them out after one minute. The glass container lids can be cleaned with warm water and detergent. Please dry the glass containers and lids.
- If you want to prepare other food or beverages, the used containers must also be disinfected and dried beforehand like the glass containers.
- By selecting the appropriate function, you can prepare the following food and beverages as seen below:
| Food/Beverage | Function | Adjustable time |
| Yoghurt | F1 | 1-24 h |
| Natto | F2 | 1-36 h |
| Kimchi | F3 | 1-36 h |
| Rice wine | F4 | 1-48 h |
| Wine | F5 | 1-9 days |
Making of yoghurt (F1)
- Preparation:
- For the yoghurt preparation we recommend the following ingredients at room temperature:
■ 1L UHT milk, 3.5% fat
■ 1 cup natural yoghurt (approx. 150ml), 3.5% fat
- You can use yoghurt cultures instead of natural yoghurt. Please follow the respective manufacturer's instructions for the dosage of your yoghurt cultures. The following steps are based on the preparation with natural yoghurt and can also be used for the preparation with yoghurt cultures. Please note that low-fat ingredients are less suitable for yoghurt preparation.
Please make sure that both the glasses and the ingredients are at room temperature. Please rinse the glasses with warm water and dry them. The ingredients should be taken out of the fridge at least half an hour before preparation. This step is important so that the yoghurt cultures in the yoghurt can convert the milk into yoghurt.
Please spread the natural yoghurt evenly over the six glasses (approx. 2 teaspoons per glass) and fill the glasses with the milk up to the bend in the glass, below the lid thread. Please do not fill the jars completely to the edge of the jar, otherwise the yoghurt may overflow.
- Stir the mixture slowly with a teaspoon until the natural yoghurt is evenly distributed in the jars.
- Please screw the corresponding lids onto the glasses.
- Operation:
Place the device in a place where room temperature (approx. 20°C) and no draughts prevail during operation. Please make sure that the filled jars and the yoghurt maker filled with the jars are not moved too much during the entire preparation time. Shocks can affect the result so the yoghurt may not solidify otherwise.
Carefully place your filled and screwed jars in the yoghurt maker and place the lid on the device. The unit must never be used without a lid, otherwise the heat will escape.
Please connect the device to the power supply. An acoustic signal sounds and the display shows"- -". Each further operation on the control panel is accompanied by an acoustic signal.
o Press the on/off key. "00" appears on the display, see fig. 1.
- Press the function key as shown in fig. 2. "F1" appears on the display for yoghurt preparation.
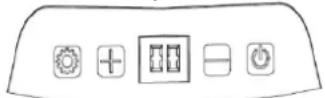
Fig. 1
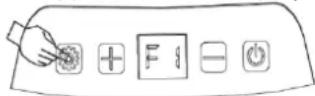
Fig. 2
To set the time, press either the "+" or "-" button to display the preset time of 8 hours. You can now set the time between 1 and 24 hours using the "+" and "-" buttons. Each press increases or decreases the value by one hour. For our recommended yoghurt recipe, please increase the time from 8 to 11 hours.
Press the "+" and "-" keys simultaneously to set the temperature. The display shows the preset temperature of 42°C. Please change the temperature to 45°C and press the on/off button to start the yoghurt making.
When switched on, the yoghurt maker starts to heat up the glasses and their contents to keep them at a constant temperature of approx. 45° C. Yoghurt cultures need the heat for a long time to convert the milk into yoghurt. The display shows the remaining time.
To shorten the time, you can add warm water to surround the glasses with max. 1-2cm height. You can also add water if the ambient temperature is less than 20° C.
When the time is over, an acoustic signal sounds and the preparation process is finished. Press the on/off button to turn off the unit and unplug the power cord.
Please remove the glass containers from the yoghurt maker and place them directly in the refrigerator for at least 3-4 hours to increase the firmness of the yoghurt. Please do not let the yoghurt cool down at room temperature, otherwise the yoghurt may become sour.
Tip: If the yoghurt has not reached the desired consistency after 11 hours, you can continue the preparation by putting the device back into operation. Select a shorter time setting, e.g. 2-3 hours. Please note that the preparation process can only be continued if the yoghurt has not been cooled in the meantime. If you have pressed the on/off button by accident before completing the settings, remove the device from the power supply and start the operation again.
Making of natto (F2)
- Preparation:
For the preparation of natto you will need a low bowl made of glass or stainless steel which can be placed into the device, soybeans and natto starter culture. For the dosages, please follow the manufacturer's instructions of your natto starter culture.
Please soak the soybeans in water for several hours, then boil or steam them until they are cooked. Put the soybeans in the bowl and let them cool to room temperature.
- Please add the natto starter culture and mix it with the soybeans.
- Operation:
Place the bowl in the device and put on the lid. Natto requires moisture and oxygen during the fermentation process. The container must therefore not be hermetically sealed.
○ Connect the device to the power supply. An acoustic signal sounds and the display shows"- -". Each further operation on the control panel is accompanied by an acoustic signal.
- Please press the on/off key. "00" appears on the display.
- Press the function key twice so "F2" appears for preparing natto.
To set the time, press either the "+" or "-" button to display the preset time of 18 hours. The temperature can be set by pressing both buttons simultaneously.
- Press the on/off button to start the preparation. The display shows the remaining time.
When the time is over, an acoustic signal sounds and the preparation process is finished. Please press the on/off button to turn off the unit and unplug the power cord. Remove the bowl from the device.
- The finished natto can be stored airtight in the refrigerator.
Making of kimchi (F3)
- Preparation:
For the preparation of kimchi you need Chinese cabbage, spices of your choice, kimchi starter culture as well as a low, airtight sealable container, which can be put into the device. For the dosages, please follow the manufacturer's instructions of your kimchi starter culture.
○ Wash the Chinese cabbage thoroughly with water and then dry it completely. If necessary, you can cut the cabbage into small pieces beforehand. Please rub the cabbage with salt and spices, e.g. chilli powder, and place the cabbage in your container.
- Please add your kimchi starter culture and mix it with the cabbage.
- Operation:
- Please place the container in the device and put on the lid. Kimchi must be hermetically sealed during the fermentation process.
○ Connect the device to the power supply. An acoustic signal sounds and the display shows"- -". Each further operation on the control panel is accompanied by an acoustic signal. - Press the on/off key. "00" appears on the display.
- Please press the function key three times so "F3" appears for kimchi preparation.
To set the time, press either the "+" or "-" button to display the preset time of 28 hours. The temperature can be set by pressing both buttons simultaneously. - Press the on/off button to start the preparation. The display shows the remaining time.
When the time is over, an acoustic signal sounds and the preparation process is finished. Press the on/off button to turn off the unit and unplug the power cord. Please remove the container from the device. - The finished kimchi can be stored airtightly in the refrigerator.
Making of rice wine (F4)
- Preparation:
To make rice wine you will need distillery yeast and sticky rice or rice as well as a low, airtight sealable container, which can be put into the device. For the dosages, please follow the manufacturer's instructions of your distillery yeast.
○ Wash the rice with water and soak it in clean water for several hours (approx. 5-7 hours in summer, approx. 10-20 hours in winter) until it can be crushed with your fingers. This step helps to cook the rice better in the further process.
- Please steam the rice in water until it is soft and then drain the water.
○ Loosen and distribute the rice in your container. Please add the distillery yeast and mix them together. Please allow the mixture to cool to room temperature and press the rice against the bottom of the container.
- Add cool, boiled water and press a hole in the middle of the pressed rice so the water and distillery yeast gather in the hole.
- Operation:
- Place the container in the device and put on the lid. Rice wine must be hermetically sealed during the fermentation process.
○ Connect the device to the power supply. An acoustic signal sounds and the display shows"- -". Each further operation on the control panel is accompanied by an acoustic signal. - Please press the on/off key. "00" appears on the display.
- Press the function key four times so "F4" appears for rice wine preparation.
To set the time, press either the "+" or "-" button to display the preset time of 36 hours. The temperature can be set by pressing both buttons simultaneously. - Press the on/off button to start the preparation. The display shows the remaining time.
When the time is over, an acoustic signal sounds and the preparation process is terminated. Press the on/off button to turn off the unit and unplug the power cord. Please remove the container from the device.
The rice wine is ready when it has a sweet and alcoholic taste. The rice wine can be enjoyed warm immediately after preparation or after cooling. Rice wine should not be stored in the refrigerator for more than 13 days.
Making of wine (F5)
- Preparation:
For wine you will need ripe grapes, gauze, distillery yeast and a low container which can be placed into the device. The colour of the grapes influences the colour of the wine. For the dosages, please follow the manufacturer's instructions of your distillery yeast.
Separate the ripe grapes from the stems carefully with scissors and make sure that the skin is not damaged. Please wash the grapes several times and then immerse them in clean water for 2 hours. If there is light powder on the grape skin, do not remove it, as the powder is a natural fermenting agent. Please air-dry the grapes.
Crush the clean grapes by hand or with a juicer, then put them into the container. Please add the distillery yeast and mix it.
- Please use the gauze to close the container.
- Operation:
-
Place the container with the gauze into the device. The lid of the device is not required when making wine.
Please connect the device to the power supply. An acoustic signal sounds and the display shows"- -". Each further operation on the control panel is accompanied by an acoustic signal. -
Press the on/off key. "00" appears on the display.
- Please press the function key five times so that "F5" appears for the wine preparation.
To set the time, press either the "+" or "-" button so the preset time of 7 days "7d" appears on the display. The temperature can be set by pressing both buttons simultaneously. - Press the on/off button to start the preparation. The display shows the remaining time.
When the time is over, an acoustic signal sounds and the preparation process is finished. Please press the on/off button to turn off the unit and unplug the power cord. Please remove the container from the device. - Filter the finished wine with the help of the gauze and fill it into a clean, airtight container. Please dispose the leftovers. The gauze can be reused after cleaning.
- Please store the wine in a cool place (ideal temperature 13°C).
Cleaning
- Always disconnect the appliance from the power outlet and let it cool before cleaning. Never immerse the appliance in water to prevent electric shocks.
- Wipe over the exterior of the appliance with a soft wet cloth and then wipe dry with a dry cloth.
- The glass containers and their lids are dishwasher-safe and must be cleaned after each use. Alternatively, you can clean them with warm water and detergent.
- Please do not use any aggressive or chemical cleaning agents or abrasive cleaning agents, such as steel wool.
- The unit and its components must be completely dry and clean before storage. Avoid ultraviolet light.
• You can purchase the glasses as a set from your seller:
○ Item number.: 28687
- Item description: YOG-CUP-6-SET-8687
○ Brand: Suntec
In case of complaint
• You can claim the device within 24 months from date of purchase (receipt).
- A free replacement or repair will be excluded from prior improper product handling.
- Defects in wear parts, consumables, as well as cleaning, maintenance or replacement of said parts are therefore with costs.
- If you want to make a complaint, please bring the entire device in its original packaging and with proof of purchase to your dealer. For a timely and convenient service register, visit our website www.suntec-wellness.de and learn more.
• Without a proof of purchase, generally there will be no repair or replacement.
- In the event that the complaint case is analogous to our terms of service, all defects of the device or its accessories due to material or manufacturing defects will be eliminated by repair or, at our discretion, replacing the unit.
- The damage of accessories does not automatically lead to a free exchange of the whole device. In these cases, please contact your dealer. Glass breakage, or breakage of plastic parts are always to charge.
- The dealer or repair service can perform the repair after the expiration of warranty against charge.
Note concerning protection of environment
This product must not be disposed of via normal household waste after its service life, but must be taken to a collection station for the recycling of electrical and electronic devices. The symbol on the product, the operating instructions or the packaging indicates such disposal procedures. The materials are recyclable in accordance with their respective symbols. By means of re-use, material recycling or any other form of recycling old appliances you are making an important contribution to the protection of our environment.
Please ask your local council where your nearest disposal station is located.
As part of our extended producer responsibility, this product is indicated in accordance to the European Directive 2002/96/EC on Waste Electrical and Electronic Equipment (WEEE). The aim is to avoid, reduce, and environmentally friendly disposal of electronic waste. Please help actively to protect the environment and dispose electronic waste through local collection points. The packaging and this manual can be recycled.
EC declaration of conformity
The device meets the essential health and safety requirements of the European Union. The EC declaration of conformity is the basis for CE marking this unit.
With publication of this manual supersedes all previous their validity. SUNTEC, SUNTEC Wellness, KLIMATRONIC and the Sun-Logo are registered trademarks. © 2018/02 SUNTEC WELLNESS GMBH Liability is excluded for all printing errors and omissions.
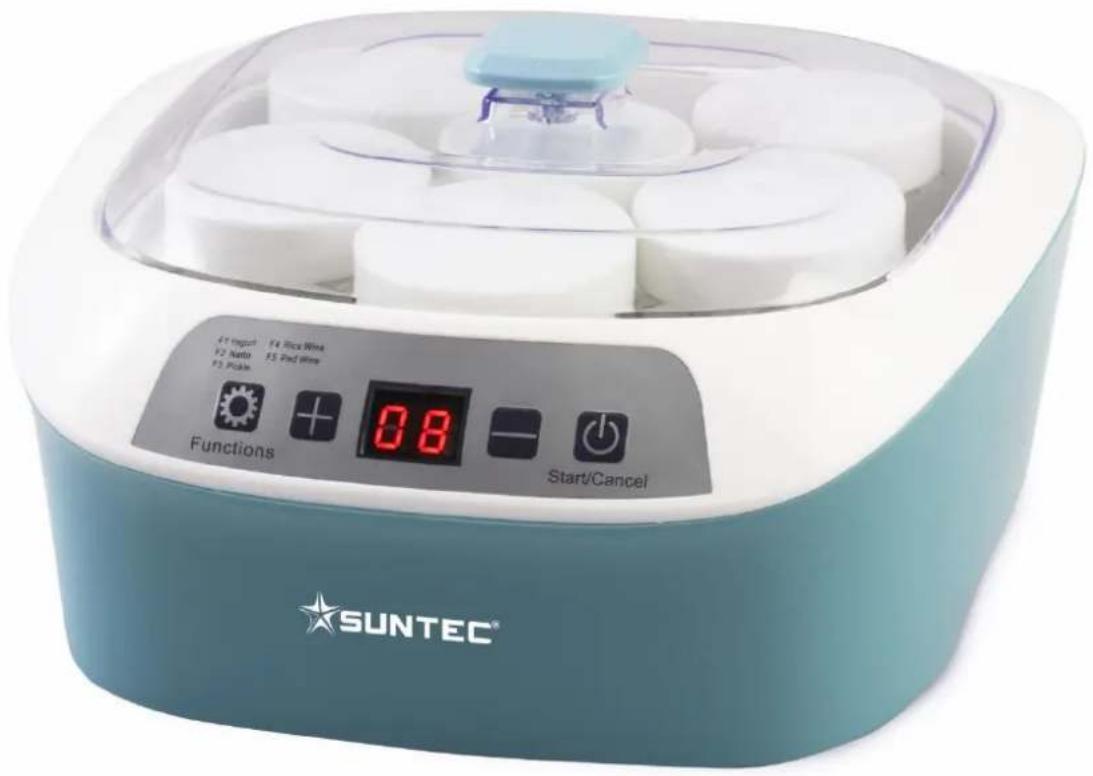
Yogurtiera
YOG-8588 digital
Yaourtière
YOG-8588 digital
Mode d'emploi
Yogurtera
YOG-8588 digital
For this appliance we assure 24 months warranty.
During the 24 months warranty we guarantee to repair your appliance free of charge or to provide your seller the spare parts free of charge if the appliance fails to work due to production failure.
Other claims are excluded from this warranty. We will not be liable for any defects caused by acts of nature, improper use, neglection of the instruction manual, damage from continuous use and damages during transportation.
This warranty card is only applicable with the according invoice.
In case of service please bring your purchased product to your seller.
Product name:
Serial number:
Name of buyer:
Date of purchase:
Stamp and signature of seller:
Manufacturer:
Suntec Wellness GmbH
Holzstraße 2
40221 Düsseldorf
Germany
IT


Garanzia


- JOGHURTMAKER
- YOG-8588 DIGITAL
- BEDIENUNGSANLEITUNG
- SICHERHEITSHINWEISE
- VORSICHT
- YOGHURT MAKER YOG-8588 DIGITAL
- SAFETY PRECAUTIONS
- CAUTION
- COMPONENTS
- OPERATION
- MAKING OF YOGHURT (F1)
- MAKING OF NATTO (F2)
- PREPARATION
- MAKING OF KIMCHI (F3)
- MAKING OF RICE WINE (F4)
- MAKING OF WINE (F5)
- CLEANING
- IN CASE OF COMPLAINT
- NOTE CONCERNING PROTECTION OF ENVIRONMENT
- EC DECLARATION OF CONFORMITY
- YOGURTIERA
- YAOURTIÈRE
- MODE D'EMPLOI
- YOGURTERA
- GARANZIA
Brand : SUNTEC
Model : YOG8588 Digital
Category : Yogurt maker