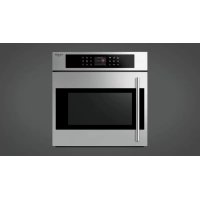
FQSO 4505 MT X - Oven Fulgor Milano - Free user manual and instructions
Find the device manual for free FQSO 4505 MT X Fulgor Milano in PDF.
Download the instructions for your Oven in PDF format for free! Find your manual FQSO 4505 MT X - Fulgor Milano and take your electronic device back in hand. On this page are published all the documents necessary for the use of your device. FQSO 4505 MT X by Fulgor Milano.
USER MANUAL FQSO 4505 MT X Fulgor Milano
FOUR A VAPEUR 45 AVEC GRILL
Dear Customer, We would like to thank you and congratulate you on your choice. This new product has been carefully designed and built using top quality materials, and meticulously tested to ensure that it meets all your culinary requirements. Please read and observe these simple instructions, which will enable you to achieve excellent results from the very rst time you use it. This state-of-the-art appliance comes to you with our very best wishes. IMPORTANT INSTRUCTIONS AND SAFETY WARNINGS, READ CAREFULLY AND
IMPORTANT INSTRUCTIONS AND SAFETY
READ CAREFULLY AND KEEP
THIS PRODUCT IS DESIGNED FOR DOMESTIC USE. THE MANUFACTURER DECLINES ALL RESPONSIBILITY FOR PERSONAL INJURY OR PROPERTY DAMAGE DERIVING FROM INCORRECT INSTALLATION OR IMPROPER, ERRONEOUS OR UNSUITABLE USE. THE APPLIANCE MUST NOT BE USED BY PEOPLE (INCLUDING CHILDREN) WITH PHYSICAL, SENSORIAL OR MENTAL IMPAIRMENTS, OR BY PEOPLE WITHOUT THE NECESSARY EXPERIENCE OR KNOWLEDGE, UNLESS THEY ARE SUPERVISED OR INSTRUCTED IN THE USE OF THE APPLIANCE BY A PERSON RESPONSIBLE FOR THEIR SAFETY. CHILDREN MUST BE SUPERVISED TO ENSURE THAT THEY DO NOT PLAY WITH THE APPLIANCE. DO NOT PLACE ALUMINIUM FOIL, POTS OR SIMILAR OBJECTS IN CONTACT WITH THE BASE INSIDE THE OVEN FOR COOKING. THE APPLIANCE GETS VERY HOT DURING USE. WARNING: DON’T TOUCH THE HEATING ELEMENTS INSIDE THE OVEN. ATTENTION: - If the door or the gasket seals of the door are damaged, the oven may not be used until it is repaired by a qualied service technician; - This appliance and its internal components, especially electried parts, may only be repaired, modied or customized by the manufacturer, its service department or similarly qualied persons. Incompetent repairs can cause serious accidents, damage to the appliance and its surroundings and malfunctions. Remember that even the replacement of the lamp inside the oven must be performed by qualied personnel who will rst disconnect the appliance from the mains. - If the appliance fails to operate or requires repair, contact our service department. - Use only original replacement part. IMPORTANT: - As a safety precaution, before cleaning the oven, always disconnect the plug from the outlet or remove the appliance’s power cord. - In addition, avoid using acid or alkaline substances (such as lemon, vinegar, salt, tomatoes, etc.). Avoid using products containing chlorine, acids or abrasives, especially for cleaning painted parts. CARE AND MAINTENANCE - Although the cooking chamber is made of high-quality steel, incorrect maintenance can cause corrosion; - The oven must be cleaned periodically and all food residues must be removed; - Do not clean the oven immediately after the dish has been removed because the residual drops of steam are still very hot (danger of burns). - Take care when opening the door when the oven is on because the exiting steam can cause burns.21
- Do not use rough abrasives or sharp metal scrapers to clean the glass door of the oven because they could scratch the surface and cause the glass to shatter. - During cleaning, take care that no water enters the appliance. - Use only slightly damp rags. - Never spray water inside or outside of the appliance. - Do not use steam devices for cleaning because water that penetrates could cause damage. - Do not use the appliance for heating or humidifying the room. - The appliance must be installed and used in an ambient temperature between 5 °C and 35 °C. - If there is a risk of frost, the residual water in the pumps could freeze and damage them.22
IMPORTANT The oven’s identication plate is even accessible when the appliance is installed. This identication plate, which is visible when you open the door, shows all the information you will need when requesting replacement parts for the appliance. FIRST USE The oven should be thoroughly cleaned with soap and water and carefully rinsed. Heat the oven for about 30 minutes at the maximum temperature; this eliminates all the residual manufacturing oils that could cause unpleasant odours during cooking. Use the electric grill function without accessories in the oven. Before using the accessories for the rst time, clean them carefully with a very hot alkaline washing solution and a soft cloth.
USING THE FLAT GRILL
To remove the at grill, pull the grill towards you until it stops and then lift, by pulling upwards, until it comes completely out. To insert the at grill, slide it in at an angle of 45° until it locks and then lower it horizontally and push it all the way in. If the at grill has a low drip tray, to remove it lift it slightly and slide it towards you. To reinsert it, slide it back until it is correctly seated.23
USING THE PERFORATED TRAY
This tray is used for steam cooking and is positioned on the at grill together with its support. We recommend also using it in combination with the drip tray to catch everything the drips from the food during cooking.
RESPECT FOR THE ENVIRONMENT
The documentation for this appliance is printed on paper bleached without chlorine or recycled paper to contribute to protecting the environment. The packaging was designed to prevent damage to the environment; they are ecological products that can be recovered or recycled. Recycling the packing saves raw materials and reduces the volume of industrial and domestic waste. THE PACKING MATERIAL is 100% recyclable and marked with the recycling symbol. Dispose of in conformity with local law. The packing material (plastic bags, polystyrene parts, etc.) must be kept out of the reach of children because it is potentially dangerous. THIS APPLIANCE is marked in conformity with European Directive 2002/96/EC, Waste Electrical and Electronic Equipment (WEEE). By making sure that this product is disposed of correctly, the user contributes to preventing potential negative consequences for the environment and health. THE SYMBOL on the product or accompanying documentation indicates that this product must not be treated as domestic waste but must be delivered to a suitable collection point for the recycling of electrical and electronic equipment. DISPOSAL MUST BE MADE in conformity with local laws on waste disposal. FOR ADDITIONAL INFORMATION about the treatment, recovery and recycling of this product, contact the local ofce of competence, the domestic waste collection service or the store where the product was purchased. BEFORE SCRAPPING, make it unusable by cutting the electrical cord.24
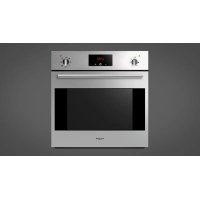
1. Grill cooking function indicator light (red)
2. Grill cooking temperature control knob
5. Steam cooking function indicator light (green)
6. Steam cooking temperature control knob
INSTALLATION AND HOOK-UP
Dear Customer, this oven is a sophisticated electronic appliance, classied as a durable good. Its installation requires qualied professionals for both the hook-up of the power line and its placement in the kitchen counter. (SEE ASSEMBLY INSTRUCTIONS ON PAGE 29) First hook-up The rst time the appliance is connected to the electricity grid, or the case of a prolonged power outage, there may be a continuous alarm signal. In this case, turn the right knob to any position and then back to position 0.25
Setting the clock Press the duration key and the end of cooking key simultaneously, then press the +/- keys to set the time. Manual operation To start cooking without setting end of cooking time, press the manual key . Setting only the duration of cooking in semi-automatic mode To set the duration of cooking, press the duration key and press the +/- keys to set the duration of cooking. A buzzer sounds when the cooking period nishes, and the oven switches itself off. Turn the thermostat and selector knobs back to 0 position and press the manual key. Setting only the end of cooking time in semi-automatic mode To set the end of cooking time, press the end of cooking key and press the +/- keys to set the time at which you want the oven to switch off. A buzzer sounds when the clock reaches the set time, and the oven switches itself off. Turn the thermostat and selector knobs back to 0 position and press the manual key. Fully automatic operation To set the end of cooking time, press the duration key and press the +/- keys to set the duration of cooking. Press the end of cooking key and press the +/- keys to set the time at which you want the oven to switch off. When you nish setting these times, the AUTO symbol ashes and the buzzer sounds. Press any key to silence it. Alarm timer Press the alarm timer key and press the +/- keys to set the required duration of cooking. The buzzer sounds when the cooking time ends. Press any key to silence it. Programming errors You cannot program in a cooking period which starts earlier than the time displayed on the clock. If you try to do so, the buzzer sounds and the AUTO symbol asher. Simply change the duration or cooking time to correct the error. Cancelling a cooking programme To cancel a cooking programme, simply press the manual key.26
Note: always be very careful when opening the door of the appliance because, depending on the case, steam or boiling hot air could come out. ATTENTION: The oven has been designed so that, during cooking, it maintains the right balance between the heat used for the various types of cooking and the steam produced from the foods themselves. This balancing means that, at the end of cooking, you may nd excess cooking condensate (water and melted fats) in the carafe; so, remember to empty and clean it.27
STEAM OPERATION Steam cooking is used most for oriental cuisine but it is certainly very useful for our own. It is fat and has the advantage of preserving the original avour of the food. In this case, the food is not cooked with water but with water vapour. Steam cooking is different than boiling. In fact, the water vapour works on the inside of the cells, which is fundamentally different from the effect of boiling water. In fact, steam also cooks the food completely but, except for the fat, nothing else comes out of the food. The cell walls and tendons gradually soften, the protein coagulates without coming out, the starches swell and combine and the sugars and minerals remain unchanged. The same goes for odours, which are reduced to a minimum, or coloured substances. Only the fat liquees do to the heat and, for this reason, it is almost never a good idea to steam cook large cuts of meat or sh. Vitamins are another story because heat generally tends to destroy them; however, depending on the cooking time, some of them are only slightly altered. So, the foods that lend themselves to this cooking method are, generally, those with no fat such as, for example, sh, some types of meat, legumes, potatoes, cereals, eggs, pudding, etc. It is not good for vegetables with tough bres or fruits in general. Useful tips When using the steam oven, always start with the oven cold. Using steam in a hot oven (immediately after traditional cooking) is not recommended because the benets of cooling with steam will be cancelled out. For steam cooking try to use the perforated stainless steel tray together with the lower stainless steel drip tray as much as possible. The rst, resting with its support on the at grill, allows the steam to fully cook the food while draining everything released by the food during cooking through the holes. The second, lower tray, slid under the grill on its guides, will collect the drippings and keep the oven chamber cleaner. When done cooking, the support of the perforated tray can be used as a support to keep the hot tray off of the counter while you remove the food you just cooked. ATTENTION: you cannot cook with steam and use the grill at the same time. If you press the steam cooking control while cooking with the grill, there will be an error signal (see the table Error Signals and Oven Malfunctions)28
The rst time that the oven is connected to the mains, or in case of a prolonged power failure, the clock timer must be programmed. Otherwise the oven will not work. To do this, press the button once
Steam cooking function This cooking function uses steam for cooking food. During steam cooking, steam ows from the boiler into the oven compartment. The steam heats the oven compartment, cooking the food. This type of cooking is ideal for any kind of vegetables or sh, preserving the colour, taste and goodness of the food. IMPORTANT: the following procedure MUST be followed whenever you are using the steam cooking function. - Fill the water container with distilled water or, if not available, with cold drinking water. IMPORTANT: if tap water is used, lime deposits can build up in the steam boiler. - Fill the water container up to the 1.0-litre notch. DO NOT ll the container to the brim. Otherwise, the water that is pumped back to the container at the end of the cooking cycle could overow. - Put the water in the compartment provided. - Push the water container all the way down, making sure that there is a perfect seal between the tube in the container and the water circuit inside the oven. - Always make sure the stainless steel cooking drip pan ts under the perforated-bottom drip pan. This collects condensate, juices or foods that drip from the perforated-bottom drip pan. - Turn the oven’s steam-cooking thermostat knob (right knob) until you reach the desired temperature. The temperature can be regulated from 50 °C to 100 °C in increments of 5 °C - After 7-8 seconds the operation indicator light of the oven turns on to conrm that the oven is heating up. When cooking is nished and the oven’s thermostat knob is turned to “0”, the operation indicator lamp will turn off. - In steam mode, the operation indicator lamp is green. - When cooking is nished, turn the oven’s thermostat knob to “0”. - When the oven compartment has cooled down sufciently, it is a good idea to use a soft cloth to dry the traces of liquid left inside the oven chamber. IMPORTANT: the water container must be emptied at the end of cooking. Grill cooking function This cooking function uses the upper heating element to cook the food. This type of cooking is ideal for grilling medium or large portions of sausages, bacon, steaks etc. - If you are using the grill function without steam, you can leave the water container inside its compartment. This does not affect the cooking capacity of the oven. - Turn the grill thermostat knob (left knob) until you reach the required temperature. The temperature can be regulated from 80 °C to 250 °C in intervals of +40 °C (so, 80, 120, 160 up to a max of 200) - After 7-8 seconds the operation indicator light of the grill (red light) turns on to conrm that the grill is in use. When cooking is nished and the grill’s thermostat knob is turned to “0”, the operation indicator lamp will turn off.29
Cooking tips - Refer to the information on the packaging of the food to check temperatures and cooking times. Once you are familiar with the performance of the appliance, temperatures and times can be changed according to personal preference. - Make sure that frozen foods have completely thawed before cooking, unless the instructions on the packaging indicate the possibility of cooking the food while frozen. - The oven should be preheated. Do not put food in the oven until the preheating time is ended. - Before cooking, check that there are no unused accessories in the oven. - Avoid opening the oven door to watch the dishes. The table below shows the results of the cooking tests conducted in our laboratories by a professional cook. In any case, these are only indicative and the values that we have selected are only a starting point for you to experiment with your own recipes to obtain better results!
GRILL MAX Grill + Perforated Tray + Drip-pan below
CAULIFLOWER AU GRATIN
GRILL MAX Grill + Perforated Tray + Drip-pan below
ERROR NO. 1: door open error (attention to steam) - this occurs when you open the door during steam cooking and there is probably steam coming out - it is indicated by the lighting of the green indicator light (5), 2 ashes + a pause of 5 seconds + 2 ashes + pause, etc. The buzzer will sound in sync with the light for a maximum of 180 seconds. Then, only the signal light will continue. - it is reset when the door is closed ERROR NO. 2: boiler temperature error - it occurs when water carafe is not in its seat and/or the pitcher has no water and/or the o-ring is not present on the tube of the carafe - it is indicated by the lighting of the green light (5) and 3 consecutive beeps + a pause of 5 seconds + 3 beeps, etc., for a maximum of 180 seconds. Then, only the signal light will continue. - when the door is opened, it becomes error 1 ERROR NO. 3: boiler pump error: - it occurs after no. 4 alarms of type 2 error or if the boiler temperature and higher than 220 °C - it is indicated by the lighting of the green light (5) with cycles of 1 ash in sync with the indicator light for a maximum of 180 seconds - when the door is opened, it becomes error 1 ERROR NO. 4: probes/potentiometers: - this occurs because of a problem with the probes or potentiometers - it is indicated by the lighting of the green light (5) with cycles of 1 ash and a continuous fast beep - it cannot be reset until the fault is xed - CONTACT SUPPORT AS SOON AS POSSIBLE. DISCONNECT THE OVEN FROM THE POWER SUPPLY ERROR NO. 5: both grill and steam knobs on - this occurs if both the grill and steam commands are on - it is indicated by a beep for 5 seconds + a pause of 10 seconds + plus a beep for 5 seconds, etc., until it is reset. - it is reset by turning one of the controls (grill or steam) to 0 ERROR NO. 6: Blackout - this occurs in the case of a power failure during cooking - it is indicated by the lighting of the green lights and a continuous beep - it is reset to 0 by turning the active command to 0 (turning cooking off) and then turning it on again31
IMPORTANT: The oven lamp must have precise characteristics: a) Structure suitable for high temperatures (up to 300 °C); b) Power supply: see the V/Hz value on the serial number plate; c) power 25 W; d) Type G9 connector. Attention: make sure the appliance is off before replacing the lamp to avoid the possibility of electric shock. - To avoid damage, spread a tea towel for pots and pans inside the oven; - Remove the screws holding the steel frame; - Remove the old lamp by sliding it out of its seat and taking care not to break it; - Insert the new bulb taking care not to touch it with your hands (we recommend using a disposable latex glove); - Replace the stainless steel frame taking care not to pinch the silicone gasket seal; - Screw in the stainless steel screws you previously removed - Connect the appliance to the power line.32
Installing the oven in a cabinet The oven must be installed under a cook top, in a column, or combined with the relative food-warmer drawer. The dimensions of the space must be those shown in the gure. The cabinet material must be able to withstand the heat. The oven must be centred within the walls of the cabinet and xed with the screws and bushings that are provided.
ELECTRICAL HOOK-UP Before connecting to the electricity, make sure that: - the characteristics of the electrical system satisfy what is shown on the serial number plate applied to the front of the oven; - the system has an effective earth connection compliant with current standards and laws. The earth connection is required by law. The cable must not, at any point, reach a temperature greater than 50 °C above the ambient temperature. This oven must be connected to the electricity through a power supply cable and plug that is compatible with the outlet of the electrical system that powers this oven. If a xed appliance does not have a power cord and plug, or another device that ensures disconnection from the mains, with an opening distance of the contacts that allows complete disconnection under the conditions of excessive voltage category III, such disconnection devices must be provided in the power supply mains conforming to the installation rules. The omnipolar socket or switch must be easy to reach when the appliance is installed. Note: The manufacturer declines all liability if the usual accident prevention standards and the above instructions are not followed. TYPE AND MINIMUM DIAMETER OF THE CABLES SASO H05RR-F 3x1,5 mm² H05RR-F 3x2,5 mm² H05VV-F 3x1,5 mm² H05VV-F 3x2,5 mm² H05RN-F 3x1,5 mm² H05RN-F 3x2,5 mm² H05V2V2-F 3x1,5 mm² H05V2V2-F 3x2,5 mm²34 GB35