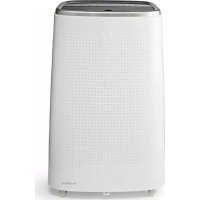
WIFIACMB1WT16 - Air-conditioner NEDIS - Free user manual and instructions
Find the device manual for free WIFIACMB1WT16 NEDIS in PDF.
User questions about WIFIACMB1WT16 NEDIS
0 question about this device. Answer the ones you know or ask your own.
Ask a new question about this device
Download the instructions for your Air-conditioner in PDF format for free! Find your manual WIFIACMB1WT16 - NEDIS and take your electronic device back in hand. On this page are published all the documents necessary for the use of your device. WIFIACMB1WT16 by NEDIS.
USER MANUAL WIFIACMB1WT16 NEDIS
Wi-Fi Smart Air Conditioner
with thermostat, app and voice control
WIFIACMB1WT16
natural_image
Line drawing of a portable electronic device with grid pattern and control panel (no text or symbols)
Quick start guide 4

Kurzanleitung 7

text_image
Exploded diagram of an air conditioner unit with numbered parts for identification and assembly reference.B
text_image
1 2 3 8 11 13 5 7 6 10 14 12 9 4 SWING TIMER SPEED UP DOWN MODE SLEEP POWER WIFI Cool Fan Day 25°C Swing Slot 9 + 4 2 7 1 3 8 T=0 11C

text_image
Diagram showing installation of air conditioning units with a magnified inset highlighting the component's detail.D
text_image
Sunny M-3°C Sunset 10:4:20 Air Living Room Master School Add Device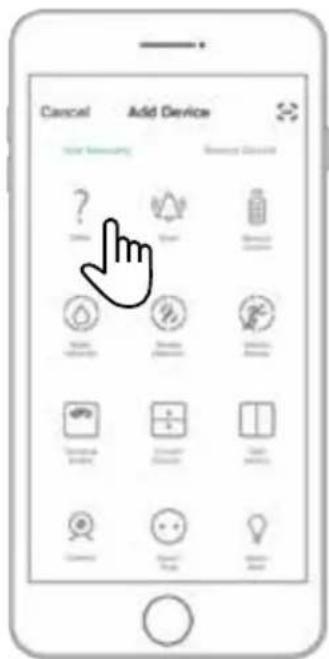
text_image
Cancel Add Device Your Security Security Devices ? - - - - - - - - - - - - - - - - - - - - - - - - - - - - - - - - - - - - - - - - - - - - - - - - - - - - - - - - - - - - - - - - - - - - - - - - - - - - - - -
Quick start guide
Wi-Fi Smart Air Conditioner
WIFIACMB1WT16

For more information see the extended manual online: ned.is/wifiacmb1wt16
Intended use
The Nedis WIFIACMB1WT16 is a local air conditioner used for cooling and dehumidifying rooms.
The product is exclusively intended as a local air conditioner for domestic, indoor use.
The product is not intended for professional use.
This product can be used by children aged from 8 years and above and persons with reduced physical, sensory or mental capabilities
or lack of experience and knowledge if they have been given supervision or instruction concerning use of the product in a safe way and understand the hazards involved. Children shall not play with the product. Cleaning and user maintenance shall not be done by children without supervision.
This product is intended for use in household environments for typical housekeeping functions that may also be used by non-expert users for typical housekeeping functions, such as: shops, offices other similar working environments, farm houses, by clients in hotels, motels and other residential type environments and/or in bed and breakfast type environments.
Any modification of the product may have consequences for safety, warranty and proper functioning.
Specifications
| Product Wi-Fi Smart Air Conditioner | |
| Article number WIFIACMB1WT16 | |
| Dimensions (l x w x h) 480 x 780 x 390 mm | |
| Weight 35 kg | |
| Input voltage 220 – 240 V ~ 50 Hz | |
| Required power 1800 W | |
| Energy class A | |
| Energy efficiency ratio (EER) 2.61 | |
| Noise level < 65 dB | |
| Cooling capacity 16000 BTU | |
| Room size capacity * 20 - 35 m^2 | |
| Air circulation 500 m | ^3/h |
| Dehumidification 40 l/day | |
| Refrigerant R290 / 290 g | |
| Power plug Schuko CEE 7/7 | |
* The performance of the air conditioner is subjected to many factors like floor space, ceiling height, level of isolation and number of windows. The data mentioned is based on a space with low heat loads.
Main parts (image A)
① Swing louvers
② Display
③ Handle
④ Exhaust nozzle
⑤ Exhaust hose
⑥ Window kit
⑦ Window kit fasteners
⑧ EVA-filter frame
⑨ Control panel
⑩ EVA-filter screen
⑪ Continuous drainage outlet
⑫ Air outlet
⑬ CON-filter frame
⑭ Manual drainage outlet
⑮ Power cable
⑯ Exhaust hose connector
⑰ Remote control
⑱ Exhaust nozzle screw
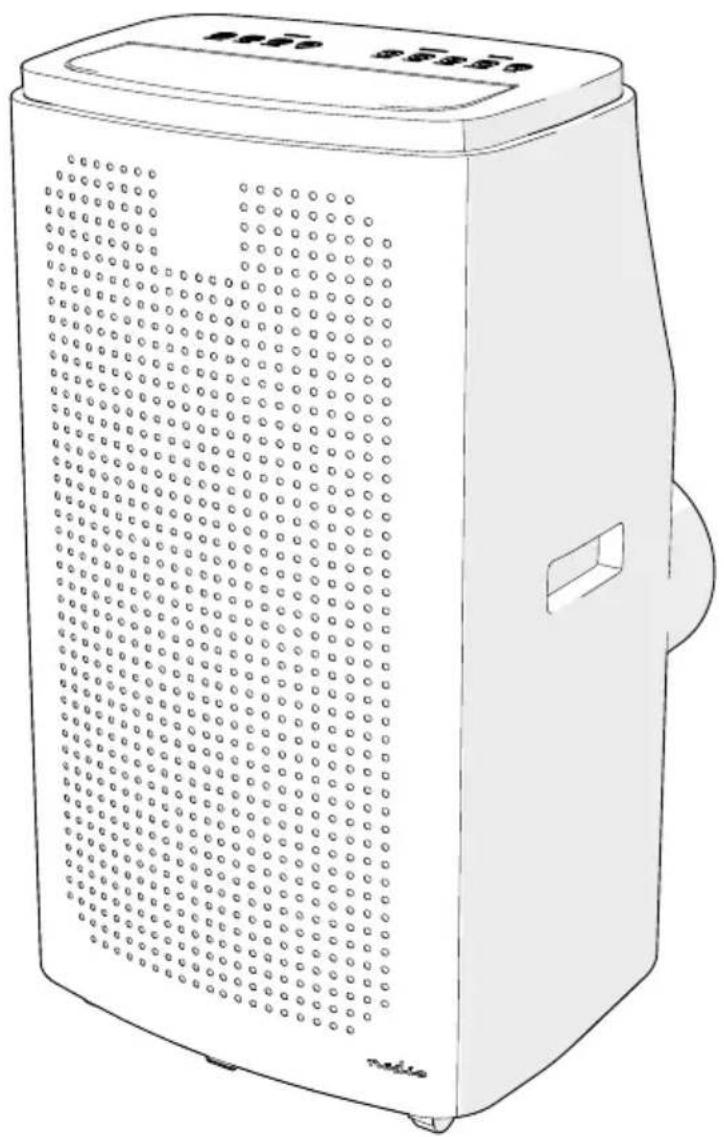
Control panel and remote control (Image B)
① Swing button
② Timer button
③ Fan speed indicator
④ Fan speed button
⑤ Up button
⑥ Display
⑦ Down button
⑧ Mode indicators
⑨ Mode button
⑩ Sleep mode button
⑪ Power indicator / Full indicator
⑫ Power button
⑬ Wi-Fi indicator LED
⑭ Wi-Fi button
⑮ Temperature button
Safety instructions
WARNING
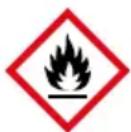
Contains one or more (extremely/highly) flammable components.
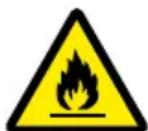
Contains one or more (extremely/highly) flammable components.
- Ensure you have fully read and understood the instructions in this document before you install or use the product. Keep the packaging and this document for future reference.
- Only use the product as described in this manual.
- This product can be used by children aged from 8 years and above and persons with reduced physical, sensory or mental capabilities
or lack of experience and knowledge if they have been given supervision or instruction concerning use of the product in a safe way and understand the hazards involved. Children shall not play with the product. Cleaning and user maintenance shall not be done by children without supervision.
- Close supervision is necessary when the product is used by or near children, animals or infirm persons. Do not allow children to play with it or touch it.
- Keep the product out of reach from children.
- Do not use a damaged or defective product, but return it for repair or replacement.
- Do not expose the product to water, rain, moisture or high humidity.
- If the product is immersed in water, do not touch the product or the water.
- Shut off the main power grid and carefully remove the plug from the power outlet.
• After the product has been immersed or covered in water or other liquids, do not use the product again. - Keep the product away from heat sources. Do not place the product on hot surfaces or near open flames.
- Do not use the product near explosive or flammable materials.
- Do not insert any objects into the product.
- Do not obstruct or cover the product's air inlet or outlet grid.
- The appliance shall be installed in accordance with national wiring.
- Always disconnect the product from the power outlet when cleaning or moving the product.
- Do not pull the power cable to move the product.
- Unplug the product from the power source and other equipment if problems occur.
- Do not unplug the product by pulling on the cable. Always grasp the plug and pull.
- Switch off the main power switch before unplugging the power cord.
- Do not use the product when the cord or plug is damaged.
- Make sure that the electrical supply in your area matches a voltage of 220 – 240 VAC and a frequency of 50 Hz.
- Connect to a grounded socket only.
- If necessary, use an earthed extension cable of a suitable diameter.
- Fully extend the power cord and make sure the power cord does not contact the product.
- When using an extension cord, use one which is as short as possible and fully extended.
- Do not use external timers or remote control systems to switch the product on or off.
- Ensure people do not trip over the cord.
- Make sure that the power cable cannot become entangled and does not hang over the edge of a worktop.
- Do not leave the product unattended when switched on.
- R290 is a refrigerant gas that complies with the European directives on the environment.
- Be aware that refrigerants can be odorless.
- Place the product in an area without any continuous sources of ignition (for example: open flames, gas or electrical appliances in operation).
- Only install, operate and store the product in a room with a floor area above 7m^2 .
- Only store the product in a well-ventilated area.
- Store the product in such a way as to prevent mechanical failure.
- When the product is installed, operated or stored in a non-ventilated area, make sure the room is designed to prevent the accumulation of refrigerant leaks resulting in a risk of fire or explosion due to ignition of the refrigerant caused by electric heaters, stoves, or other sources of ignition.
- Only persons with a current valid certificate from an
industry-accredited assessment authority, which authorizes their competence to handle refrigerants safely in accordance with an industry recognized assessment specification, can work on or break into a refrigerant circuit.
- Servicing can only be performed as recommended by the equipment manufacturer. Maintenance and repair requiring the assistance of other skilled personnel can only be carried out under the supervision of the person competent in the use of flammable refrigerants.
- When defrosting and cleaning the product, do not use any means other than those recommended by the manufacturing company.
- Do not puncture or heat any part of the refrigerant circuit.
- This product may only be serviced by a qualified technician for maintenance to reduce the risk of electric shock.
Installing the product
Place the product on a stable and flat surface.
Cany move the product in an upright position.
Leave a minimum of 0.5 m space around the air inlet and outlet to allow a good circulation of airflow.
I like product has been tilted, allow it to stand upright for 2 hours before plugging it in.
Only install, operate and store the product in a room with a floor area above 7 m².
Keep the product at a distance from flammable objects such as furniture, curtains and similar.
not block ventilation openings and make sure that there is enough space around the product.
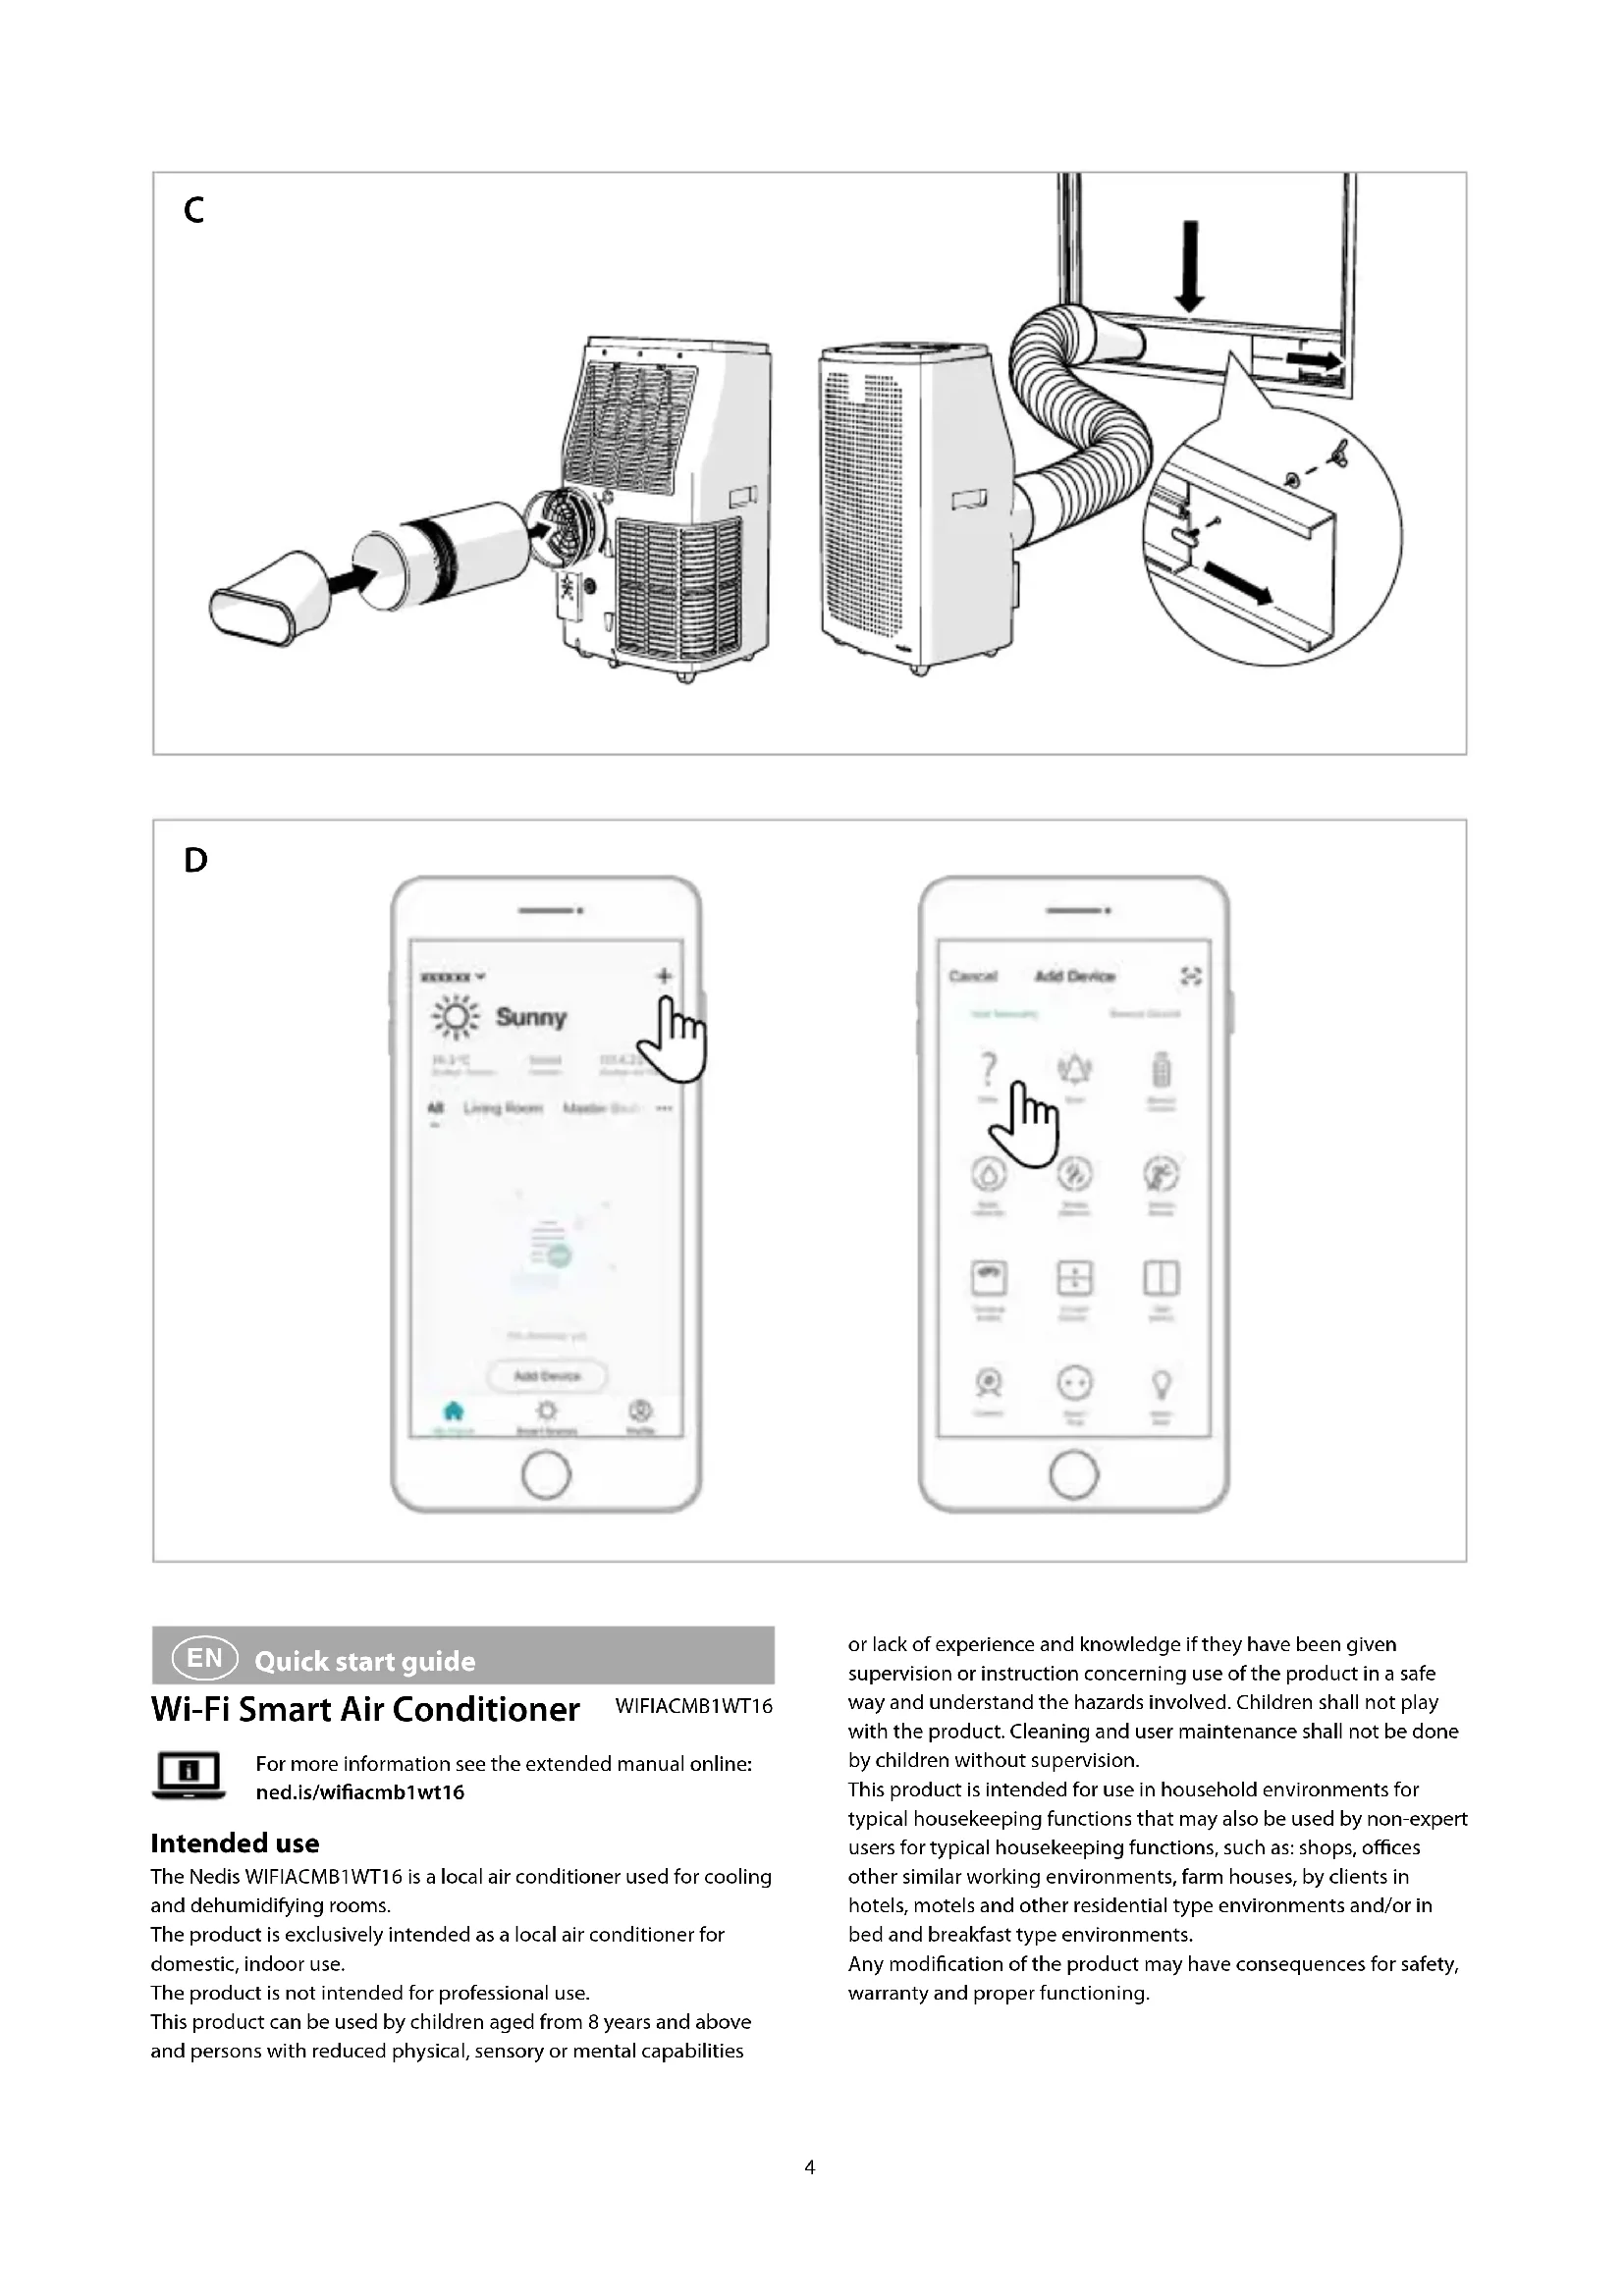
Assembling the exhaust (image C)
Only use the provided exhaust hose.
I don't block the exhaust hose, this may cause overheating.
-
Assemble the exhaust hose A⑤, the exhaust nozzle A④ and the exhaust hose connector A⑰.
-
Connect A ^17 to the air outlet A ^12 .
- Extend A⑤ up to 1500 mm.
I don't twist the exhaust hose.
Ensure that the exhaust hose does not kink.
-
Assemble the window kit A⑥ with the fasteners A⑦.
-
Install A⑥ in the window opening.
The window kit can be placed in horizontal and vertical direction.
- Tighten A⑦.
- Snap A④ into A⑥ and fasten with the exhaust nozzle screw A⑲.
Place the product on a flat and dry surface.
Assembling the continuous drainage (optional)
Works only in dehumidifying and heating mode.
- Open the continuous drainage outlet A⑪.
- Connect A ^⑪ to a water container or drainage system (not included).
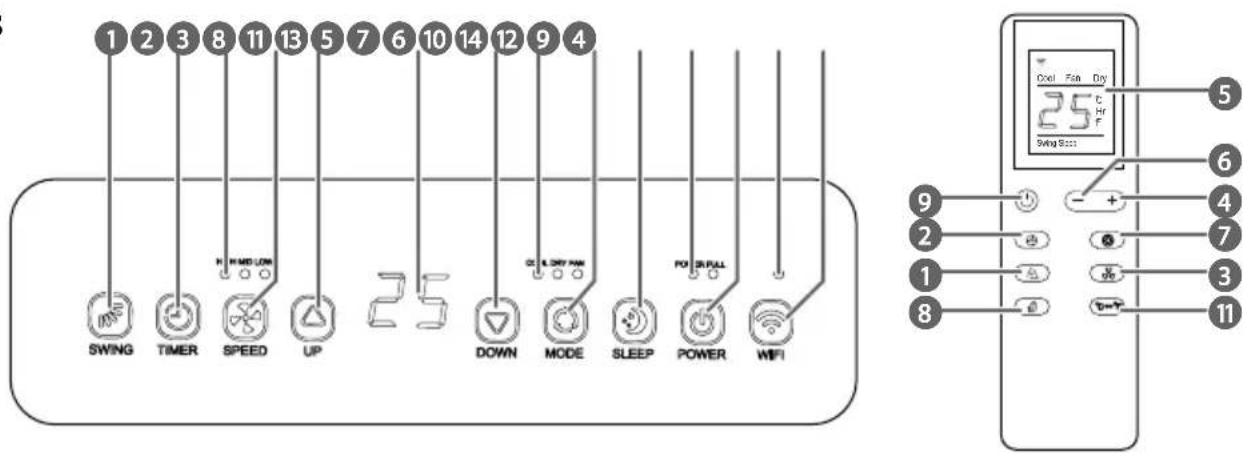
Installing the Nedis SmartLife app
- Download the Nedis SmartLife app for Android or iOS on your phone via Google Play or the Apple App Store.
- Open the Nedis SmartLife app on your phone.
- Create an account with your mobile phone number or your e-mail address and tap Continue.
- You will receive a verification code on your mobile phone or e-mail address.
- Enter the received verification code.
- Create a password and tap Done.
- Tap Add Home to create a SmartLife Home.
- Set your location, choose the rooms you want to connect with and tap Done.
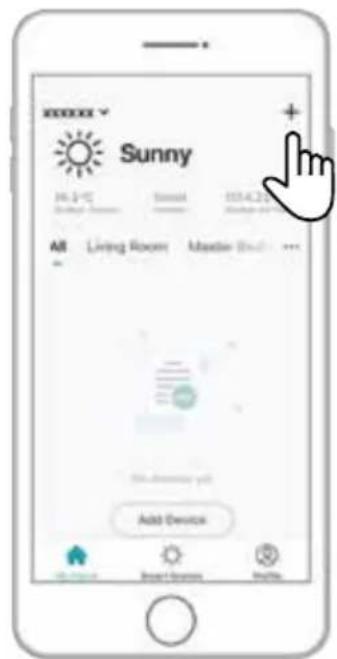
Adding the product to the SmartLife app
(image D)
- Switch on the product.
- Tap + in the Nedis SmartLife app.
- Select the device type you want to add from the list.
- Confirm the Wi-Fi indicator LED B ^13 is blinking fast, or hold the Wi-Fi button B ^14 for 5 seconds to reset the product.
- Follow the instructions in the Nedis SmartLife app.
Make sure you connect the product to a 2.4 GHz Wi-Fi network.
- Rename the product after it has been found and added.
- After confirming you can control the product with your smartphone.
To connect your SmartLife account to Amazon Alexa and/or Google Home, set it up using the "Smart Life" action or skill. For more details check the instruction on either Amazon or Google.
Using the control panel and remote control (image B)
| Button Function | |
| Swing button B1 | Switch the oscillation on or off.Change the orientation of the louvers. |
| Timer button B2 | Press to set the timer. Use B4 and B6 to set the duration of cooling. |
| Fan speed indicator B3 | Indicates the current fan speed. |
| Fan speed button B4 | Press repeatedly to select the fan speed.(Not available in sleep and dehumidifying mode). |
| Up button B5 | Increase values. |
| Display B6 | |
| Down button B7 | Decrease values. |
| Mode indicators B8 | Indicates the current fan mode. |
| Mode button B9 | Repeatedly press the button to select the mode: Cooling mode / Dehumidifying mode / Fan mode. |
| Sleep mode button B10 | Activate sleep mode. Only works in cooling mode. After one hour the set temperature increases 1 °C and again after 2 hours. |
| Power indicator / Full indicator B11 | Indicates that the water reservoir in the product is full. |
| Power button B12 | Switch the product on or off. |
| Wi-Fi indicator LED B13 | Indicates if the product is connecting or connected with Wi-Fi. |
| Wi-Fi button B14 | Press to connect the product to a Wi-Fi network. |
| Temperature button B15 | Switch between Celsius and Fahrenheit. |
Declaration of Conformity
We, Nedis B.V. declare as manufacturer that the product WIFIACMB1WT16 from our brand Nedis ^® , produced in China, has been tested according to all relevant CE standards and regulations and that all tests have been passed successfully. This includes, but is not limited to the RED 2014/53/EU regulation.
The complete Declaration of Conformity (and the safety datasheet if applicable) can be found and downloaded via: nedis.com/wifiacmb1wt16#support
For additional information regarding the compliance, contact the customer service:
Web: www.nedis.com
E-mail: service@nedis.com
Nedis B.V., de Tweeling 28
5215 MC 's-Hertogenbosch, the Netherlands

Kurzanleitung
5215 MC 's-Hertogenbosch, the Netherlands

5215 MC 's-Hertogenbosch, the Netherlands

Rýchly návod
WIFIACMB1WT16