
B032HUA2 - Switch Tripp Lite - Free user manual and instructions
Find the device manual for free B032HUA2 Tripp Lite in PDF.
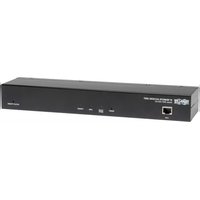
| Product Type | HDMI 2-Port KVM Switch |
| Brand | Tripp Lite |
| Model | B032-HUA2 |
| Number of Computer Ports | 2 |
| Console Connectors | 2x USB-A (keyboard/mouse), 1x HDMI, 2x 3.5mm mini-jack (audio) |
| Computer Connectors | 4x USB-A Male, 2x HDMI Male, 4x 3.5mm Mini-Jack Male (built-in cables) |
| Maximum Video Resolution | 1920 x 1200 (1080p) |
| Built-in Cable Lengths (KVM) | 2 x 1.2 m (4 ft) |
| Remote Selector Cable Length | 1.8 m (6 ft) |
| Port Selection | Remote pushbutton, mouse switching, keyboard hotkeys |
| Keyboard/Mouse Emulation | USB (can be disabled) |
| Audio Functions | Independent switching possible, 2.1 channel support |
| Power | 5 V DC, 2.65 W (via USB, no external adapter required) |
| Dimensions (L x W x H) | 6.65 x 8.23 x 2.46 cm |
| Weight | 0.41 kg |
| Operating Temperature | 0 to 50 °C |
| Storage Temperature | -20 to 60 °C |
| Operating Humidity | 0 to 80% RH, non-condensing |
| Housing Material | Plastic |
| Supported Operating Systems | Windows, Mac, Linux |
| Compatibility | HDCP, multimedia keyboards, wireless mice |
| Package Contents | B032-HUA2 Switch, user manual |
| Warranty | 1-Year Limited |
Frequently Asked Questions - B032HUA2 Tripp Lite
User questions about B032HUA2 Tripp Lite
0 question about this device. Answer the ones you know or ask your own.
Ask a new question about this device
Download the instructions for your Switch in PDF format for free! Find your manual B032HUA2 - Tripp Lite and take your electronic device back in hand. On this page are published all the documents necessary for the use of your device. B032HUA2 by Tripp Lite.
USER MANUAL B032HUA2 Tripp Lite
2-Port USB/HD Cable KVM Switch with Audio
Model: B032-HUA2
Register your product for quicker service and ultimate peace of mind.
You could also win an ISOBAR6ULTRA
surge protector—a $100 value!
www.triplite.com/warranty


Manufacturing
Excellence.
1111 W. 35th Street, Chicago, IL 60609 USA
www.triplite.com/support
Copyright © 2016 Tripp Lite. All rights reserved.
Product Features
- Control two computers or devices from a single USB keyboard, mouse and HDMI monitor
- Compact design features built-in 4 ft. KVM and audio cables
- The KVM and audio can be switched independently of each other, so you can access one computer while listening to audio from another at the same time*
Audio provides a full bass response for rich 2.1-channel surround sound - USB mouse port can be used to connect a USB 2.0 hub for peripheral sharing
Supports video resolutions up to 1920 x 1200 (1080p) - KVM stores the monitor's EDID information to optimize display resolution
- Power on detection automatically switches to the powered-on computer when the other one powers off
- Console mouse port emulation/bypass feature supports most mouse drivers and multifunction mice
Supports gaming keyboards and wireless keyboard/mouse - Features Remote, Hotkey and Mouse Port Switching
Supports Windows, Mac, and Linux
Mac keyboard support and emulation** - No external power required
- HDCP compatible
-
Firmware upgradable
-
Audio through the HDMI monitor's built-in speakers cannot be switched independently
** PC keyboard combinations emulate Mac keyboards; Mac keyboards only work with their own computers
Package Contents
B032-HUA2
- Owner's Manual
Optional Accessories
P568-Series High Speed HDMI Cables
U222-004-R 4-Port USB 2.0 Hub
U222-007-R 7-Port USB 2.0 Hub
U222-010-R 10-Port USB 2.0 Hub
U022-Series USB 2.0 A/B Device Cables
U030-Series USB 2.0 Mini-B Cables
U050-Series USB 2.0 Micro-B Cables
System Requirements
HDMI monitor
USB Keyboard
- USB Mouse
- Computer with a HDMI and USB port
Installation
Note: Make sure the power to all devices is turned off prior to installation. You must unplug the power cords of any computers that have the Keyboard Power On function.
- Plug your USB keyboard, mouse and HDMI monitor into the console ports on the unit.
Note: If using a wireless keyboard and mouse, the dongle must plug into the unit's keyboard port in order to use the hotkey function. - (Optional) A USB 2.0 hub can be connected to the USB console mouse port, allowing you to add multiple USB peripherals to your installation.
Note: To ensure proper functionality, use a hub with an external power supply. Also, the KVM's Mouse Emulation Mode must be disabled (see the Keyboard Hotkey Commands section of this manual for details) when connecting a hub. - (Optional) Plug your speakers and/or microphone into the audio jacks on the side of the unit.
- Plug the connectors of the built-in cables into their respective ports on the computers you are installing.
- Power on your devices.
Note: The unit's power on default is to link to the first computer that is powered on.
Operation
There are three ways of accessing computers and devices connected to the KVM switch: Manual Remote Switching, Mouse Port Switching and Keyboard Hotkeys.
Note: When switching ports, wait a few seconds for the selected computer's video to display on the console monitor prior to switching ports again. Do not switch ports when a USB peripheral device is in operation.
Manual Remote Port Selection
Press the port selection pushbutton on the Remote Port Selector to toggle the KVM and Audio focus between the two computers. The LED lights on the unit will indicate which computer is selected.
Mouse Port Switching Functionality
Note: Mouse port switching is disabled by default, and must be enabled via keyboard hotkey command. In addition, it is only supported when the KVM's mouse emulation mode is enabled, which is enabled by default (see the Keyboard Hotkey Commands section for details). Only 3-key scroll wheel mice are supported.
When enabled, the Mouse Port Switching Functionality allows users with scroll mice to simultaneously switch the focus of the KVM and Audio between ports by double-clicking the scroll wheel on their mouse.
Keyboard Hotkey Commands
Hotkeys allow you to switch functionality focus between ports using only the keyboard, as well as perform other functions on the KVM switch. All hotkey operations begin by tapping the Scroll Lock key twice. See the Keyboard Hotkey Commands table for full details. To switch the KVM and Audio between the two ports, press the [Scroll Lock] key twice, and then the [Enter] key. If the [Scroll Lock] [Scroll Lock] hotkey conflicts with other programs running on your computer, it can be switched to [Ctrl] [Ctrl] via Hotkey command. (See the Keyboard Hotkey Commands table for details). The keyboard hotkey can also be switched by pressing and holding the Remote Port Selector switch for 3 seconds.
Operation
Keyboard Hotkey Commands
The following table lists the keyboard hotkey commands available for use on the KVM switch.
| Combination Function | ||
| [Scroll Lock] [Scroll Lock]+ | [Enter] Toggles the KVM and Audio focus between the two ports Note: If the KVM and Audio focus are on different ports, only the KVM focus switches | |
| [k] [Enter] Toggles the KVM focus only | ||
| [s] [Enter] Toggles the Audio focus only | ||
| [a] [Enter] Starts Auto Scan. The KVM focus cycles from port to port at 5 second intervals | ||
| [a] [Enter] [n] Starts Auto Scan. The KVM focus cycles from port to port at n second intervals Note: Replace n with a number between 1 and 4 (1 = 3 sec; 2 = 5 sec (default); 3 = 10 sec; 4 = 20 sec) To exit Auto Scan, press [Esc] or [Spacebar]. Auto Scanning stops when you exit Auto Scan mode | ||
| [x] [Enter] Toggles the hotkey invocation key between [Scroll Lock] and [Ctrl] | ||
| [m] [Enter] Enables/disables mouse emulation function | ||
| [n] [Enter] Enables/disables keyboard emulation | ||
| [w] [Enter] Enables/disables mouse port-switching function | ||
| [F2] [Enter] Activates Mac keyboard mapping | ||
| [F10] [Enter] Automatically detects and sets the keyboard operating platform | ||
| [F4] [Enter] Lists current switch settings via the paste function of a text editor Note: To perform this hotkey, you must first have a text editor or word processor (such as Microsoft Word) open, with the cursor in the page window. Upon performing this hotkey, the KVM's current settings will be displayed. | ||
| [F5] [Enter] Performs a USB keyboard and mouse reset | ||
| [F6] [nn] [Enter] Sets the keyboard language layout Note: nn is a two digit number that represents one of the following keyboard language codes: US English 33; French 08; Japanese 15 | ||
Operation
| Combination Function | ||
| [Scroll Lock] [Scroll Lock]+ | [d] [Enter] Invokes the Video Sync function, which allows the KVM to store the monitor's EDID information to optimize display resolution | |
| [e] [Enter] Enables/disables the Power on Detection feature | ||
| [r] [Enter] Resets hotkeys to the default setting | ||
Firmware Upgrade Utility
To update the B032-HUA2's firmware, perform the following:
- From a computer that is not part of the KVM installation, download the latest Firmware Upgrade package for the B032-HUA2 from Tripp Lite's support site, www.triplite.com/support.
- Disconnect the B032-HUA2 from your KVM installation. Press and hold the Remote Port Selector's pushbutton. While you are still holding the pushbutton, connect the KVM cable's purple USB connector to a USB port on the computer to which you have downloaded the Firmware Upgrade package.
- The B032-HUA2 now enters Firmware Upgrade Mode. The two port LED's flash together to indicate the unit is in Firmware Upgrade Mode.
Note: While the B032-HUA2 is in Firmware Upgrade Mode, normal keyboard and mouse functions are suspended. You must complete the firmware upgrade or exit Firmware Upgrade Mode to regain normal control of the console.
- Run the Firmware Upgrade Package file; the Firmware Upgrade Utility main screen appears.
- Click Next to perform the upgrade. As the upgrade proceeds, status messages appear in the Status Messages panel and the progress towards completion is shown in the Progress bar.
- After the upgrade has completed, a pop-screen appears to inform you that the procedure to upgrade was successful. Click Finish to close the Firmware Upgrade Utility.
- Set up your KVM installation again.
Operation
Firmware Upgrade Utility-Failed
If the Upgrade Succeeded screen does not appear, the upgrade failed to complete successfully, in which case you should perform the following:
- Disconnect the USB connectors on the KVM cables from the computer.
- Press and hold the Remote Port Selector's pushbutton. While still pressing the pushbutton, reconnect the KVM cable's USB connectors to the computer.
- Power on the B032-HUA2. It will now work with the factory default firmware. Follow the steps in the Firmware Upgrade Utility section to upgrade the firmware.
Troubleshooting
| Symptom Possible | Cause Action | |
| Monitor does not display after the KVM cable set is hot-plugged | HD audio/video graphics card is not compatible with cable set hot-plugging | Power off all devices on the installation; power off the B032-HUA2; confirm all KVM cables are properly connected; power on the B032-HUA2; power on the computers |
| Graphics card driver is not up-to-date | Upgrade to the latest graphics card driver | |
| Mouse and/or keyboard is not responding | Switch needs to be reset | Power off all devices on the installation; power off the B032-HUA2; wait five seconds; power on the B032-HUA2 |
| Mouse port-switching function is not responding | Mouse does not support this function | This feature is only supported by USB 3-key scroll wheel mice |
| Mouse emulation is disabled | Enable mouse emulation. See Hotkey Summary table for details | |
| Cannot switch ports by pressing [Scroll Lock] twice | Keyboard is incompatible with [Scroll Lock] invocation | Switch to the alternate HSM invocation keys |
Specifications
| Computer Connections 2 | |
| Console Connections 1 | |
| Port Selection Remote Port Selector, Mouse, Hotkeys | |
| Connectors (Console Ports) Keyboard and Mouse: 2x USB Type A Female Video: HDMI Female Speakers/Microphone: 2x 3.5mm Mini-Stereo Female | |
| Connectors (KVM Ports) Keyboard and Mouse: 4x USB Type A Male Video: 2x HDMI Male Speakers/Microphone: 4x 3.5mm Mini-Stereo Male | |
| LED Quantity and Color (KVM) | 2x Green |
| Built-In Cable Length (KVM) 2x | 4 ft. (2x 1.2 m) |
| Built-In Cable Length (Remote Port Selector) | 6 ft. (1.8 m) |
| Emulation (keyboard/Mouse) USB | |
| Video Resolution 1920 x 1200 (1080p) | |
| Scan Interval 3, 5, 10, 20 seconds (default: 5 seconds) | |
| Power Consumption DC 5V, 2.65 W | |
| Operating Temperature 32° to 122°F (0° to 50°C) | |
| Storage Temperature -4° to 140°F (-20° to 60°C) | |
| Humidity 0% to 80% RH, Non-Condensing | |
| Housing Material Plastic | |
| Weight | 0.9 lb. (0.41 kg) |
| Dimensions (L x W x H) | 2.62 x 3.24 x 0.97 in. (6.65 x 8.23 x 2.46 cm) |
Appendix
Mac Keyboard Emulation
The PC compatible (101/104 key) keyboard can emulate the functions of the Mac keyboard using the PC keystrokes in the table below.
Note: When more than one key is required on the PC Keyboard to emulate the Mac keyboard, press and release the first key, and then press and release the second key.
| PC Keyboard Mac Keyboard |
| [Shift] Shift |
| [Ctrl] Ctrl |
| [Ctrl], [1] |
| [Ctrl], [2] |
| [Ctrl], [3] |
| [Ctrl], [4] |
| [Alt] Alt |
| [Print Screen] F13 |
| [Scroll Lock] F14 |
| = |
| [Enter] Return |
| [Backspace] Delete |
| [Insert] Help |
| [Ctrl], F15 |
Factory Default Settings
| Setting Default | |
| Hotkey Invocation Key [Scroll Lock] [Scroll Lock] | |
| Auto Scan Interval 5 seconds | |
| Keyboard Operating Platform PC Compatible | |
| Mouse Emulation | Enabled |
| Keyboard Emulation | Enabled |
| Mouse Port Switching | Disabled |
| Power on Detection | Enabled |
Warranty & Product Registration
1-Year Limited Warranty
TRIPP LITE warrants its products to be free from defects in materials and workmanship for a period of one (1) year from the date of initial purchase. TRIPP LITE's obligation under this warranty is limited to repairing or replacing (at its sole option) any such defective products. To obtain service under this warranty, you must obtain a Returned Material Authorization (RMA) number from TRIPP LITE or an authorized TRIPP LITE service center. Products must be returned to TRIPP LITE or an authorized TRIPP LITE service center with transportation charges prepaid and must be accompanied by a brief description of the problem encountered and proof of date and place of purchase. This warranty does not apply to equipment, which has been damaged by accident, negligence or misapplication or has been altered or modified in any way.
EXCEPT AS PROVIDED HEREIN, TRIPP LITE MAKES NO WARRANTYES, EXPRESS OR IMPLIED, INCLUDING WARRANTYES OF MERCHANTABILITY AND FITNESS FOR A PARTICULAR PURPOSE.
Some states do not permit limitation or exclusion of implied warranties; therefore, the aforesaid limitation(s) or exclusion(s) may not apply to the purchaser.
EXCEPT AS PROVIDED ABOVE, IN NO EVENT WILL TRIPP LITE BE LIABLE FOR DIRECT, INDIRECT, SPECIAL, INCIDENTAL OR CONSEQUENTIAL DAMAGES ARISING OUT OF THE USE OF THIS PRODUCT, EVEN IF ADVISED OF THE POSSIBILITY OF SUCH DAMAGE. Specifically, TRIPP LITE is not liable for any costs, such as lost profits or revenue, loss of equipment, loss of use of equipment, loss of software, loss of data, costs of substitutes, claims by third parties, or otherwise.
Product Registration
Visit www.triplite.com/warranty today to register your new Tripp Lite product. You'll be automatically entered into a drawing for a chance to win a FREE Tripp Lite product!*
- No purchase necessary. Void where prohibited. Some restrictions apply. See website for details.
FCC Notice, Class B
This device complies with part 15 of the FCC Rules. Operation is subject to the following two conditions: (1) This device may not cause harmful interference, and (2) this device must accept any interference received, including interference that may cause undesired operation.
Note: This equipment has been tested and found to comply with the limits for a Class B digital device, pursuant to part 15 of the FCC Rules. These limits are designed to provide reasonable protection against harmful interference in a residential installation. This equipment generates, uses and can radiate radio frequency energy and, if not installed and used in accordance with the instructions, may cause harmful interference to radio communications. However, there is no guarantee that interference will not occur in a particular installation. If this equipment does cause harmful interference to radio or television reception, which can be determined by turning the equipment off and on, the user is encouraged to try to correct the interference by one or more of the following measures:
Reorient or relocate the receiving antenna.
- Increase the separation between the equipment and receiver.
- Connect the equipment into an outlet on a circuit different from that to which the receiver is connected.
- Consult the dealer or an experienced radio/TV technician for help.
Any changes or modifications to this equipment not expressly approved by Tripp Lite could void the user's authority to operate this equipment.
Warranty & Product Registration
WEEE Compliance Information for Tripp Lite Customers and Recyclers (European Union)
Under the Waste Electrical and Electronic Equipment (WEEE) Directive and implementing regulations, when customers buy new electrical and electronic equipment from Tripp Lite they are entitled to:
- Send old equipment for recycling on a one-for-one, like-for-like basis (this varies depending on the country)
- Send the new equipment back for recycling when this ultimately becomes waste
Use of this equipment in life support applications where failure of this equipment can reasonably be expected to cause the failure of the life support equipment or to significantly affect its safety or effectiveness is not recommended.
Tripp Lite has a policy of continuous improvement. Specifications are subject to change without notice.

1111 W. 35th Street, Chicago, IL 60609 USA www.triplite.com/support
1111 W. 35th Street, Chicago, IL 60609 EE UU www.triplite.com/support
1111 W. 35th Street, Chicago, IL 60609 EE UU www.triplite.com/support
Manufacturing Excellence
1111 W. 35th Street, Chicago, IL 60609 USA www.triplite.com/support
1111 W. 35th Street, Chicago, IL 60609 USA www.triplite.com/support
PykoBoDCTBO N0JIb30BaTeЯ
2-нортовий KBM-
pepeKJIouaTeIb
cka6eIaMn USB/HD n
aydnokahanom
Mоделы: B032-HUA2
Manufacturing Excellence.
1111 W. 35th Street, Chicago, IL 60609 USA · www.triplite.com/support
OxpanaTcA BTOpcknmpabOM © 2016 Tripp Lite. Nepeneatka 3anpeaaetca.
XapakTepeNTKn npOdykTa
- 06ecneuBaet Bo3MoXHoCTb ynpaBHeHn yBmKOMNbIePam nnn yCtpoiCTBaMn c eINHOJ USB-KnaBnatpybl, mbuHn HDMl-MOnHTopa
KOMnakTHa KOnCTpyKcua npedymatpnaet haunue BMOHTnpoBaHHbIX KBM- u aynoka6ene nnHoh1,2 M
KBM-moynb n ayinoyctpoictBO moryt nepeknioaibcna3abncmo npyrot pyra, TTO no3BolarenoKnouaTbc K ODHOMy KOMnbIoTepy c oDHOBpeMeHHbIM npocnyuINBaHmE aynO c dpyroro* - Aydnokahan nonhoctbO OXBtBtBAeT dnaana30H Hn3Knx yactOT, o6ecneuBaJ HaCbIeHHbIM 06beMHbI 3ByK B cTahdape 2.1
- IopT USB ДЯ Мьши может Испьзоваься ДЯ подкючени КонцentpaTopa USB 2.0 В сени COBmecTHORO ИСпьзовая Нерифериного obopydobahna
-Подержka Bиdeopазewenno 1920x1080(1080p) - KBM-nepeknioateIb coxpaHReT B namrnpacwnpeHHbIe daHHbIe ndHTnphiKaun (EDID) moHntopa c ceIbIO ONTUMN3aUN EKpaHHorO pa3peWeHn
-Функця paCno3HaBaHnB BKNIOueHHOrO nITAHnOBecneuHBaET aBTOMaTNUeCKoe nepeKIOUeHHe Na KOMNbIbTeP C BKNIOueHHbIM nITAHmE, eCIN nITAHnE dpyrO KOMNbIOTePa OTKIOUeHO
-Функця Emyua/06xoda nopTa DЯ Mbln obecneuBaet noDepkky 60nbHnCTBa npaBepOB Mbln IMHOfoYHKUHOHaJIbHbIX MbIWe - PoiDepKka nIgPoBbIX KJIaBnAtyp 6ecInpOBoNDbIX KJIaBnAtyp/MbIwei
- Bo3MOxHocTb nepeKIOUeHnI nopTOB B DnCTaHcNOHOM pexKlme, C nCNoJIb3OBAHnEM "ToprHuX" KlaBnI Nm MbIbIbI
- Повдержka onepaционьх сстем Windows , Mac « Linux
- Póndeppka i éMylauqna KlaBnataypbI Mac**
- OTCYCTBNE Heo6xOIMOCTN BO BHeuHem IcToUHKe NITAHIN
CobmeTmocb c cncteMaHDCP (3aunTa ufoBoro u npokonolochoro KOHTeHTa)
B03MOXHOCTb 6OBHJIeHnI pOoiNBK
* He3aBncmOe nepeKIOueHne ayINOuycTpoCtBa uepe 3 BCTpoEHbIe dHaMnKu HDMl-MoHITopa HeBo3MOxHO
**3mynaKnaBnAtyp Mac ocyueCTbIeTc coyeTaHmMknabuHaKnabNAtype PI;KnabNAtpybl Mac yHKUHOHPyIOT TOnbKO cCBOMn CO6CTBeHHbIMN KOMNbIOTepaMNI
CopexHmoe ynaKOBKn
- UCTPOBBO B032-HUA2
PykoBoOCTBO nIb30BaTeTn
OnuohbHbIe KOMnKeKtYuOuNe
- BbICOKoCKOpocThbIe HDMI-Ka6eJIncepn P568
- 4-nopToBbI KOHcEHTpaTOp USB 2.0 MoI. U222-004-R
- 7-nopToBbI KOHcEHTpaTOp USB 2.0, MoI. U222-007-R
- 10-nopTobbl konhentpaTop USB 2.0 MoJ. U222-010-R
Ka6eIu USB 2.0 A/B cepu U022 nIy noKJIOUeHn yCTPOICTB
Ka6eN USB 2.0 Mini-B cepuU030
Ka6enn USB 2.0 Micro-B cepnn U050
CnCTeMHbIe Tpe6OBaHnA
HDMI-MOHHTop
USB-KnabnAtypa
USB-Mbluib
KoMnBIOTeP c npTAMn HDMI u USB
yctahOBka
IpmeaHne. Pepe nayanom yctahOBKn BCE yCTpoiCTBa doJXhbl 6bItb oecToeHbI. Heo6xOIMo OTOeINHTb Hypbl NtAHnA liobix KOMNbIoTePOb, IMeoux xfHKuIO BKIOueHnA NtAHnC KNaBnAtypbl.
1.Подклioчnte USB-KnaBnAtpу,MbIbHDMI-MOHHTOPK KOHCoIbHbIM NOPaTm yCTpOiCTBa.
PnmeHne.Bcnyae nCnoB3OBAHna 6ecnpoBOHO KnabNAtpybIMbIIN Bpa3beM yCTpoCTBa, npedHa3HaeeHHbI IaNOKIIIOeHnRAKnabNAtpyb,IOnKeH 6bTB BCTABNeH 3aUNTHbIKIOU,No3BOJIOU INCnOB30BaTbFyHKuHIO"rOpaHx"KnabH.
- (Heo63aTeBho) B KOHcOJIbHbI USB-nOpT dJaMbIuM MoKeT 6bITb BKIOueH xa6 USB 2.0, o6ecneuBAIOUm BO3MOXHOCTb NOKIIIOeHnK YcTaHOBKe HeCKoJIbKnx nepuΦepuHbIX USByCTpOJCTB.
PnmeHne. nIy oecneeynae Hndnxaee FyHKUHOHaBbOCTn CneJeT NcNoB3oBaTB xa6 CBHeHIM nToCHNKOM nITAHN. Kpome toro, npn noKIOyeHN X6a bMeounc B KBM-nepeKIOuate ne pekm 3MyJau mbln dONXeH 6bIT 3a6NOKPOBaH (noDpo6He cM. B pa3dene "KomahdbI h3 kOm6Naun "TopaHx" Knabu", npedctabJIeHHOM daJeB B HactOnuem pyKOBoIDCTBe).
-
(Heo6aTeBho) BkHouHTe KOONKn n/nn MmKpOfoh Baynopa3bEmbl Ha 6okobn naHenn yCTpoNCTBa.
-
BCTaBbTe pa3beMbI BMOHTnpoBaHHbIX Ka6eNe B COOTBeTCTByIOUne NOpTbI YCTaHAbNBAeMbIX KOMNbIOTEPOB.
5.BkIOUHTe NITaHHe yCTPOIcTB.
PpmeHne. nTaHne yCToBbNo yMOnuHaHIO Noaetc H a NepBbI KOMNbIeTp, BKJIOuaEmbl KHONKo nTaHn.
Ytuneta 6HOBHeHn npOuBKn: He BbInonHeHa
Ecnn 3kpan, nHphiopmpyuO u6 ycneuHOM 6HOBNEHn, He noRbIeTcA, 3TO O3Haayet, YTO 6HOBHeHne He BblONHeHo. B 3To m cnyae Heo6xOIMo npou3BeCTn CNe dyUoJe DeiCTBn:
- OToeHnHTe USB-pa3bEmbl KBM-ka6enei ot KOMNbIOpeta.
- HaxMMTe u ydepxuBaTe KhoNky ductaHcnoHoro ceneKTopa nopToB. YdepXuBaJ daHHyO KHonKy, CHOba noKnouHTe USB-pa3bembl KBM-ka6ena K KomnbioTepy.
- BkHouHTe nHTaHHe yCTpoCTBa B032-HUA2. Tenepb OHO 6yJeT pa6oTaTb c npOuHBKo, yCTaHOBHeHHo Ha 3aBOe-3nroTOBHTeJe. IJa o6HOBHeHHa PPOuNBKn BbINOHNte DeIcTBn, n3IOKeHHbE B pa3DeJe "YTuTTa 06HOBHeHHa PPOuNBKn".
BbIaBHeHne n yCTpaHHeHne HncpapBHOtei
TapaHTnHbIe 06aTeJIbCTBa
HnphiMaNo BbInOnHeHHIO Tpe6oBaHN DInpeKTHBbI WEE INa NOKyNaTeNe INepepa6OuKOB IpOdyKmN KOMNaHNN Tripp Lite (AIBNAIOxCA pe3UeHTAMN EBponeckoro co103a)

COrIaCHO nIOJKeHnM DInpeKTHBbO 6yTmN3aun OTOxOoB 3NeKTpueeCKoro 3NeKTPOHHORO 06OpdyOBaHn (WEEE) INcnoHITeNbHbIX paONopjExeHn no ee npImHeHIO, pni NOKynke Notpe6HTeMaHn HOBOr 3NeKTpueeCKoro nn 3NeKTPOHHORO 06OpdyOBaHn npOn3BODCTBA KOMnAHn Tripp Lite OHn nonyaAOT npABo HA:
- PpOdaJy Cstaporo OobpyoBaHnno PnpHcHny "OINH K OOnHOMy" H/INn HA 3KBnBaJIeHTHOI OCHOBE (B 3aBNCIMOCTHOT KOHKpeTHOH CTpaHbI)
- Otnpabky HOBORO 60bpyoBaHnHa Npepa60Ky nocne oKOHaTeJbHoB Bbpa60K er opecypca
He peKoMeHnyetcNcNoIb3OBAHme DaHnHO O6OpyDObAHn B CnCTeMax Xn3HeOBeCnepeHn, f ne erO BbIXoN 3 cTPO npEtnoJOnXtTeNbHO MoKET nPnBecTN K nepe6oM B pa6ote o6OpYobAHn Xn3HeOBeCnepeHn Nm B 3NaHTeNbHO Mepe CHN3NTb erO 6e30NaCHOCTb Nm 3ΦΦeKTHBHOCTb.
KOMnHn TrippLite noCToHNO COBepHeCTByeT CBOIO npOdykuHIO.B CBA3N C3TUM BO3MOxHO N3MeHeHNE TexHuecknx XapakTepuCTMK 6e3 npedBapntbHoro yBeDoMnHn.

1111 W. 35th Street, Chicago, IL 60609 USA · www.triplite.com/support


- 2-Port USB/HD Cable KVM Switch with Audio
- Product Features
- Package Contents
- Optional Accessories
- System Requirements
- Installation
- Operation
- Manual Remote Port Selection
- Mouse Port Switching Functionality
- Keyboard Hotkey Commands
- Firmware Upgrade Utility
- Firmware Upgrade Utility-Failed
- Troubleshooting
- Specifications
- Appendix
- Mac Keyboard Emulation
- Warranty & Product Registration
- 1-Year Limited Warranty
- Product Registration
- FCC Notice, Class B
- WEEE Compliance Information for Tripp Lite Customers and Recyclers (European Union)
- PykoBoDCTBO N0JIb30BaTeЯ
- 2-нортовий KBM-
- pepeKJIouaTeIb
- cka6eIaMn USB/HD n
- aydnokahanom
- XapakTepeNTKn npOdykTa
- CopexHmoe ynaKOBKn
- OnuohbHbIe KOMnKeKtYuOuNe
- CnCTeMHbIe Tpe6OBaHnA
- yctahOBka
- Ytuneta 6HOBHeHn npOuBKn: He BbInonHeHa
- BbIaBHeHne n yCTpaHHeHne HncpapBHOtei
- TapaHTnHbIe 06aTeJIbCTBa
Brand : Tripp Lite
Model : B032HUA2
Category : Switch