DO1027GO - Oven DOMO - Free user manual and instructions
Find the device manual for free DO1027GO DOMO in PDF.
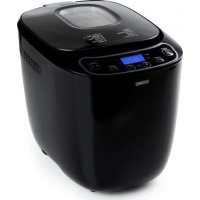
| Product type | Countertop oven |
| Brand | DOMO |
| Model | DO1027GO |
| Temperature range | 70 to 230 °C |
| Timer | 0 to 120 minutes |
| Cooking functions | Top heat, bottom heat, top and bottom heat, rotisserie function (spit) |
| Interior light | Yes, with on/off button |
| Included accessories | Baking grid, baking tray, crumb tray, spit with holding clips, spit handle, grid and tray handle |
| Grid heights | 3 possible positions |
| Material | Metal, glass (window) |
| Power supply | 220-240 V ~ 50/60 Hz (European standard) |
| Power | Not specified in the manual |
| Dimensions (W x D x H) | Not specified in the manual |
| Weight | Not specified in the manual |
| Warranty | 2 years from the date of purchase |
| Maintenance | Clean interior with a damp cloth after each use; removable parts washable in hot water with mild detergent |
| Safety | Automatic shutdown by timer; do not use with an external timer; do not immerse; do not cover cooking surfaces with aluminium foil |
| Usage | Household use only; do not use outdoors; keep a distance of 10 cm around for ventilation |
| Customer service | +32 14 21 71 91, info@linea2000.be, Monday to Thursday 8:30 AM - 12:00 PM and 1:00 PM - 5:00 PM, Friday 8:30 AM - 12:00 PM and 1:00 PM - 4:30 PM |
Frequently Asked Questions - DO1027GO DOMO
User questions about DO1027GO DOMO
0 question about this device. Answer the ones you know or ask your own.
Ask a new question about this device
Download the instructions for your Oven in PDF format for free! Find your manual DO1027GO - DOMO and take your electronic device back in hand. On this page are published all the documents necessary for the use of your device. DO1027GO by DOMO.
USER MANUAL DO1027GO DOMO
natural_image
Black and white DomO oven with open lid and control knobs (no visible text or symbols)DO1027GO-BF
| Handleiding Oven | |
| Mode d'emploi Four | |
| Gebrauchsanleitung Backofen | |
| Instruction booklet Oven | |
| Manual de instrucciones Horno | |
| Istruzioni per l'uso Forno | |
| Návod k použití Elektrická | trouba s otočným grilem |
| Návod na použitie Elektrická rúra s otočným grilom | |

natural_image
Two black-and-white icons: a warning triangle with an exclamation mark and an open book (no text or symbols)natural_image
Two views of a refrigerator interior showing internal compartments and a labeled component (no text or symbols present)natural_image
Exterior view of a modern kitchen oven with a dog on the door (no visible text or symbols)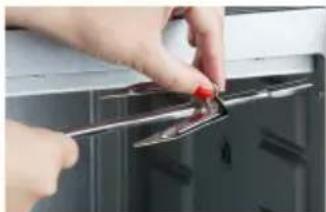
natural_image
Close-up of hands using a tool to adjust or install a small electronic component on a cabinet (no visible text or symbols)
natural_image
Hand holding a screwdriver inserted into a control panel (no visible text or symbols)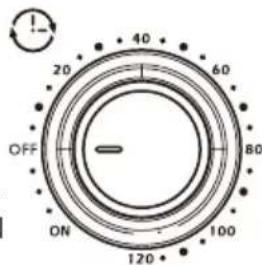
text_image
OFF ON 120 40 60 80
text_image
Prohibition sign with crossed-out trash bin and no text, indicating no waste or disposal restrictionnatural_image
Recycling symbol icon with three chasing arrows forming a triangle (no text or labels)natural_image
Two views of a refrigerator interior showing internal compartments and labeled parts (8 and 15), no text or symbols present.AVANT LA PREMIÈRE UTILISATION
natural_image
Exterior view of a modern kitchen toaster oven with a baked chicken inside (no visible text or symbols)
natural_image
Close-up of hands installing a metal clip on a kitchen appliance (no text or symbols visible)
natural_image
Close-up of a hand holding a small tool near a dark panel (no visible text or symbols)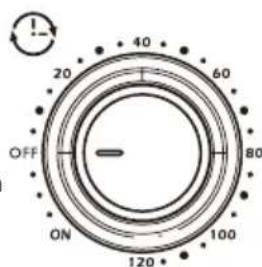
text_image
OFF ON 120° 100 80 60 40 20
text_image
Prohibition sign with crossed-out trash bin and no text, indicating no waste or disposal restrictionnatural_image
Recycling symbol icon with three chasing arrows forming a triangle (no text or labels)natural_image
Exterior view of a modern kitchen oven with a roasted chicken on the door (no visible text or symbols)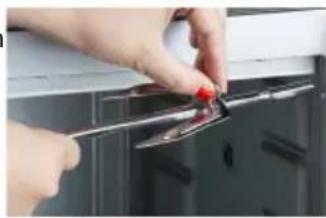
natural_image
Close-up of hands using a tool to adjust or install a metal component on a kitchen appliance (no visible text or symbols)
natural_image
Close-up of a hand holding a small tool near a dark panel (no visible text or symbols)TIMER EINSTELLEN

text_image
Prohibition sign depicting a trash bin crossed out by a diagonal line, with a blank rectangular base below.natural_image
Recycling symbol icon with three chasing arrows forming a triangle (no text or labels)All of our products are always submitted to a strict quality control before they are sold to you.
Should you nevertheless experience problems with your device, we sincerely regret this.
In that case, we kindly request you to contact our customer service.
Our staff will gladly assist you.

+32 14 21 71 91

info@linea2000.be
Monday – Thursday: 8.30 – 12.00 and 13.00 – 17.00
Friday: 8.30 - 12.00 and 13.00 - 16.30
This appliance has a two year warranty period. During this period the manufacturer is responsible for any failures that are the direct result of construction failure. When these failures occur the appliance will be repaired or replaced if necessary. The warranty will not be valid when the damage to the appliance is caused by wrong use, not following the instructions or repairs executed by a third party. The guarantee is issued with the original till receipt. All parts, which are subject to wear, are excluded from the warranty. If your device breaks down within the 2-year warranty period, you can return the device together with your receipt to the shop where you purchased it.
The guarantee on accessories and components that are liable to wear-and-tear is only 6 months.
The guarantee and responsibility of the supplier and manufacturer lapse automatically in the following cases:
· If the instructions in this manual have not been followed.
· In case of incorrect connection, e.g., electrical voltage that is too high.
· In case of incorrect, rough or abnormal use.
· In case of insufficient or incorrect maintenance.
· In case of repairs or alterations to the device by the consumer or non-authorised third parties.
- If the customer used parts or accessories that are not recommended or provided by the supplier / manufacturer.
SAFETY INSTRUCTIONS
When using electrical appliances, basic safety precautions should always be taken, including the following:
- Read all instructions carefully. Keep this manual for future reference.
- Make sure all packaging materials and promotional stickers have been removed before using the appliance for the first time. Make sure children cannot play with the packaging materials.
· This appliance is intended to be used in household and similar applications such as:
· staff kitchen areas in shops, offices and other working environments;
· farm houses;
- by clients in hotels, motels and other residential type environments;
- bed and breakfast type environments.
· Children should be supervised to ensure that they do not play with the appliance.
This appliance can be used by children aged from 16 years and above and persons with reduced physical, sensory or mental capabilities or lack of experience and knowledge if they have been given
supervision or instruction concerning use of the appliance in a safe way and understand the hazards involved. Children shall not play with the appliance. Cleaning and user maintenance shall not be made by children unless they are older than 16 and supervised.
- Keep the appliance and its cord out of reach of children younger than 16 years.
- Keep the appliance and its cord out of reach of children younger than 16 years.
- If the electrical cord is damaged, it must be replaced by the manufacturer, its after-sales service or an equivalent qualified person in order to prevent accidents.
- Note: the machine may not be used with an external timer or another remote control.
- Do not touch any hot parts, use the handles and knobs.
- To protect against electrocution, do not immerse the cord, plug or any other part of the oven in water or any other liquid.
- Do not allow the cord to hang over the edge of a table worktop, or come into contact with hot surfaces.
· The use of accessories not recommended by the manufacturer may cause damage and injuries.
· Do not position the machine near a hotplate, burner, oven or microwave oven.
- When using the oven, ensure you have a clearance of minimum 10 cm around every side to allow air to circulate freely around the machine.
- The machine must not be used in an enclosed space (such as a cupboard, for example).
- Remove the plug from the socket when not using the machine or when cleaning the machine. Allow the machine to cool down before removing or returning certain accessories and before cleaning the machine.
- To switch the machine off: turn the control knob to "off/o", then remove the plug from the socket. Never pull on the cord to remove the plug from the outlet.
- Extreme care should be taken when moving a machine that contains hot oil or any other hot liquid.
- Never cover the machine's plate and grill with aluminium foil. This could cause the oven to overheat.
- Do not use metal scourers to clean the oven. Small particles of the scourer may break loose and land on the heating element.
- To not put foods or metal accessories that are too big in the oven as they may cause fire or electrocution.
- A fire may be caused if the machine comes into contact with or is covered with flammable materials during operation, such as oven gloves, curtains, wall, etc. Do not place any objects on top of the oven when it is in use.
· Take great care when using dishes made entirely of metal or glass.
· Do not place any of the following materials in the oven: cardboard, plastic, paper or similar.
- Store only oven parts in the machine when it is not in use.
· Always use oven gloves when placing or removing items in the oven.
- Do not use the machine outside.
- Only use the machine for its intended purpose.
· The machine is intended for household use only.
- The oven can get hot during use. Keep the electrical cord away from hot parts and do not cover the oven.
Check that the voltage and the frequency are the same as those indicated on the label of the appliance.
- The plug must be connected to a suitable outlet that is installed and earthed according to all local standards and requirements.
RETAIN THESE INSTRUCTIONS FOR FUTURE REFERENCE.
PARTS
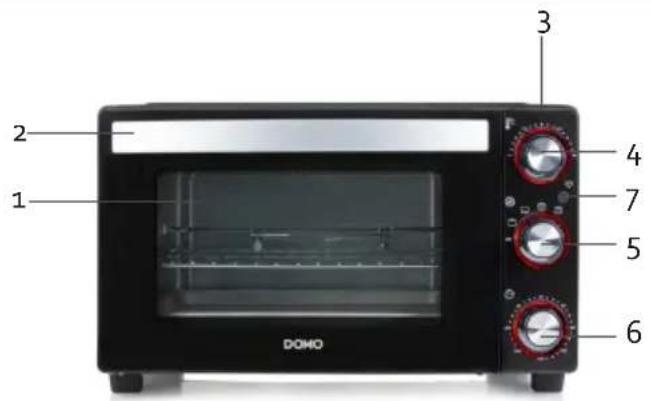
- Observation window
- Handle
- Control panel
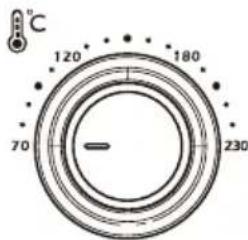
- Temperature setting: 70-230 °C
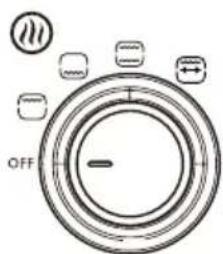
- Set functions
- Timer: 0-120 mins.
- On/off button light inside unit
- Heating elements
- Grill rack
- Baking sheet
- Crumb tray
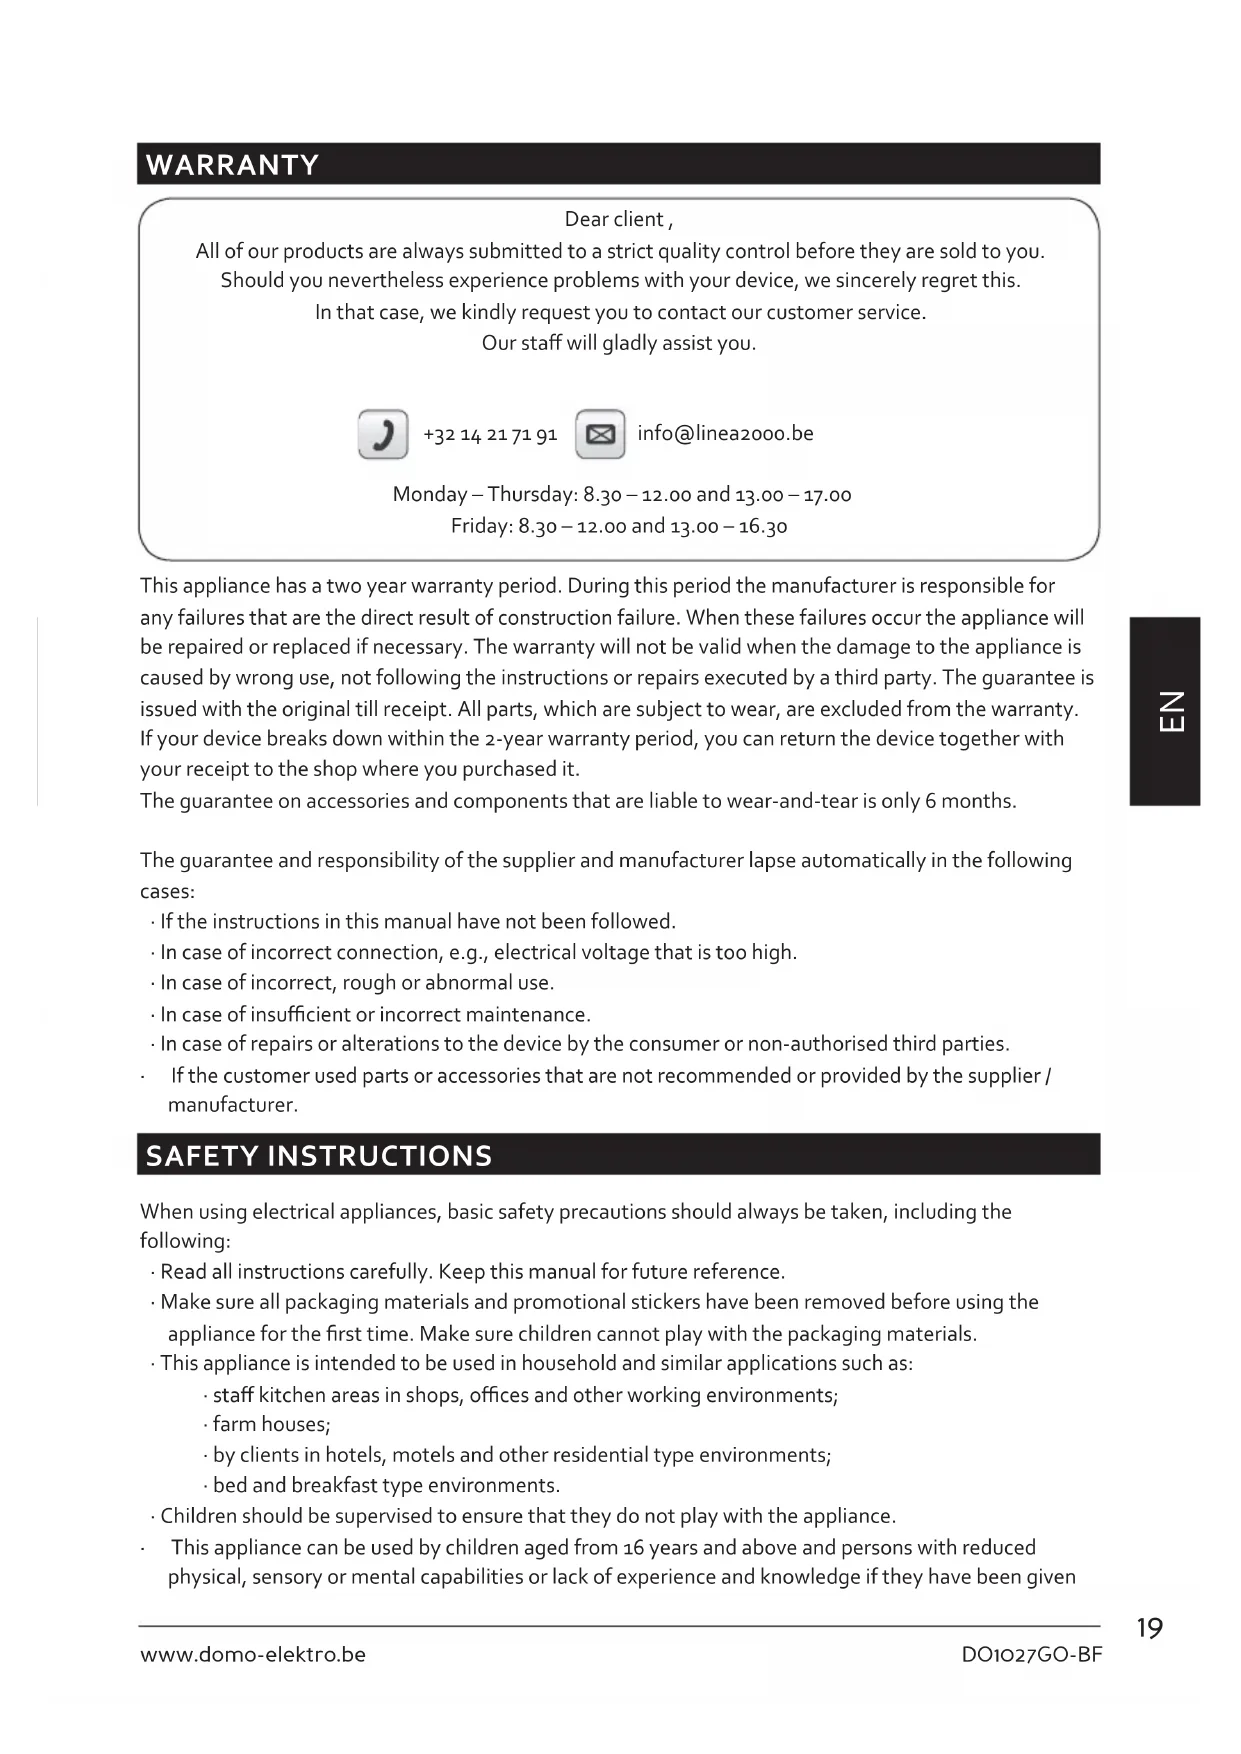
- Grill spit with meat holders
- Handle to remove grill spit
- Ventilation openings
-
Cable storage
-
Handle for removing the grill rack or baking tray
text_image
1 2 3 4 5 6 DOHO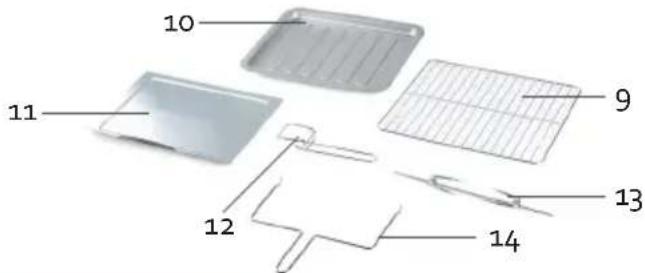
text_image
10 11 9 12 13 14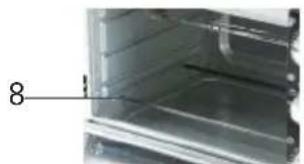
natural_image
Close-up of a metallic refrigerator interior with a numbered label pointing to the door (no visible text or symbols)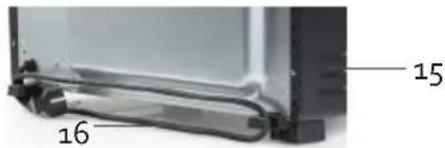
text_image
15 16BEFORE THE FIRST USE
Remove all packaging materials and wipe the machine with a damp cloth. Wash all removable parts in warm soapy water and dry thoroughly. Make sure that the parts are completely dry before using the machine again.
USE
Insert the baking tray or grill rack in the oven in one of the three available levels. This of course depends on the height of the dish. Never allow the dish to come into contact with the heating element.
SET THE TEMPERATURE

Select the required temperature by rotating the knob. The maximum temperature is 230^ C. Remember to preheat the oven for 5 to 10 minutes prior to use so that the oven is at the right temperature before food is placed in the oven.
text_image
°C 120° 180° 70° 230°SET FUNCTIONS

Turn this knob to the required position.
- Top heating : on this setting, the heating element heats from the top of the oven.
- Bottom heating : on this setting, the heating element heats from the bottom of the oven.
- Top and bottom heating : this setting, the heating element at both the bottom and at the top heat up to cook the dish evenly.
text_image
OFF- Rotisserie function : the grill spit with meat holders is used for grilling meat and poultry by rotating it (rotisserie). To do this, slide the meat or poultry onto the spit and secure it with the help of the two meat holders located on the spit. Always make sure that the meat does not touch the heating element and that the spit can rotate freely. For poultry, the thighs and wings must be additionally held in place using roulade skewers or the like, so that they do not restrict the rotation while cooking. Now place the rotisserie spit in the holders inside the oven. Place the long end in the recess provided on the right side, so that the other end can then rest in the holder on the left side. Place the baking tray under the spit so that the fat or jus from the meat does not drip onto the heating element. Use the handle provided to remove the grill spit from the oven after grilling.
natural_image
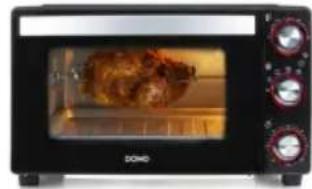
Front view of a modern kitchen oven with a baked rooster inside (no visible text or symbols)
natural_image
Close-up of hands using a tool to adjust or install a component on a cabinet (no visible text or symbols)
natural_image
Close-up of a hand holding a screwdriver inserted into a device (no visible text or symbols)SET THE TIMER

Set the timer by rotating the knob. If the required time is less than 15 minutes, first rotate the button past the 15 minutes and then turn the button back to the required time. The maximum amount of time that can be set is 120 minutes. A bell will ring when the time has expired. The oven will not work if the timer has not been set. If you do not want to set a timer, turn the knob to the left (ON). This will enable you to use the oven.
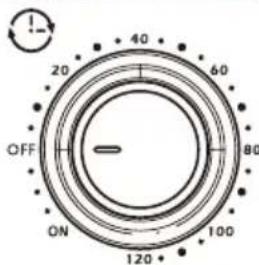
text_image
OFF ON 120 100 80 60 40 20The indicator lights around the buttons turn red to indicate that the unit is switched on.
Note: the machine will not begin to work until the temperature, timer and function have been set. You can always change the time during the cooking process if required.
Press the on/off button to turn on the lights inside the oven. This makes it easy to follow a dish's baking process without having to open the door constantly. Press this button again to turn off the light.
The table below shows a few dishes, and their recommended settings. Recommendation: pre-heat the oven for 10 minutes.
| Preparation Temperature setting Preparation time Function | |||
| Fresh pizza 200°C 25 min. |  | ||
| Frozen pizza 220°C 15 min. |  | ||
| Cake 200°C 35 min. |  | ||
| Lasagne 200°C 40 min. |  | ||
| Vegetable casserole 200°C 30 min. |  | ||
| Meat 220°C 20 min. |  | ||
| Apple cake | 190°C 90 min. |  | |
- Note: the machine will not begin to work until the temperature, timer and function have been set.
· After use, turn all the knobs back to OFF before switching the machine off. - Use the handle to remove the grill rack or baking tray from the appliance after use.
CLEANING AND MAINTENANCE
· Always make sure you remove the plug from the socket before cleaning the appliance.
· Clean the inside of the appliance after every use with a slightly damp cloth.
· Clean the parts in warm water with a mild detergent.
· The door and the control panel can be cleaned with a slightly damp cloth.
ENVIRONMENTAL GUIDELINES
text_image
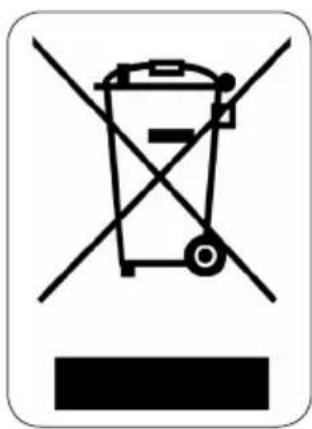
Prohibition sign with crossed-out trash bin and no text, indicating no waste or disposal restrictionThis symbol on the product or on its packaging indicates that this product may not be treated as household waste. Instead it must be brought to the applicable collection point for recycling of electrical and electronic equipment. By ensuring this product is disposed of correctly, you will help prevent potential negative consequences for the environment and human health, which could otherwise be caused by inappropriate waste handling of this product. For more detailed information about recycling of this product, please contact your local city office, your household waste disposal service or the shop where you purchased the product.
natural_image
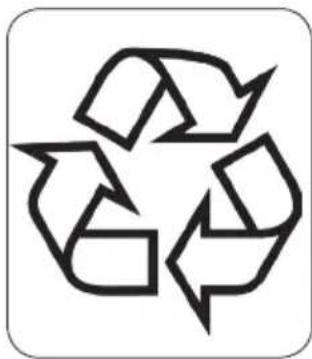
Recycling symbol icon with three chasing arrows forming a triangle (no text or labels)The packaging is recyclable. Please treat the packaging ecologically.
GARANTIA
natural_image
Two views of a transparent enclosure with labeled parts (8 and 15), showing internal structure and wiring (no text or symbols beyond labels)natural_image
Exterior view of a modern kitchen oven with a roasted chicken on the door (no visible text or symbols)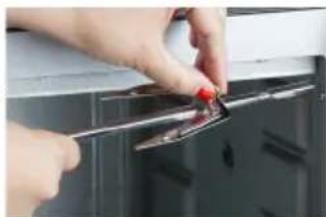
natural_image
Close-up of hands using a tool to adjust or install a metal component on a dark cabinet (no visible text or symbols)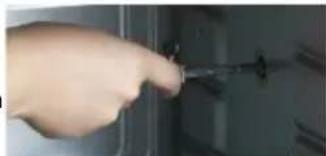
natural_image
Hand holding a screwdriver inserted into a device (no visible text or symbols)text_image
Prohibition sign with crossed-out trash bin and no text, indicating no waste or disposal restrictionnatural_image
Recycling symbol icon with three chasing arrows forming a triangle (no text or labels)natural_image
Two views of a refrigerator interior showing internal components and labeled parts (8 and 15), no text or symbols present.PRIMA DELL'USO
natural_image
Exterior view of a modern kitchen oven with a dog inside, no visible text or symbols on the appliance.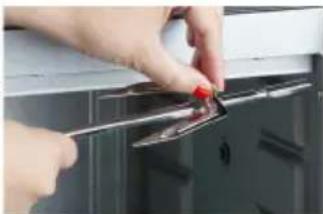
natural_image
Close-up of hands using a tool to adjust or install a small electronic component on a cabinet (no visible text or symbols)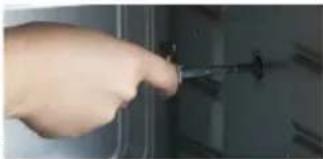
natural_image
Hand holding a screwdriver inserted into a device (no visible text or symbols)IMPOSTAZIONE TIMER

text_image
Prohibition sign depicting a trash bin crossed with a diagonal line, indicating no waste or discharge.natural_image
Recycling symbol icon with three chasing arrows forming a triangle (no text or labels)TENTO NÁVOD USCHOVEJTE I PRO PŘÍPADNÉ DALŠÍ NAHLÉDNUTÍ NEBO PRO DALŠÍHO UŽIVATELE.

ČÁSTI
natural_image
Two views of a refrigerator interior showing front and side views with numbered labels (8, 15, 16) — no text or symbols present.PŘED PRVNÍM POUŽITÍM
natural_image
Front view of a small black and white oven with a cooked dish inside, no visible text or symbols on the appliance.
natural_image
Close-up of hands using a tool to adjust or install a small electronic component on a dark surface (no visible text or symbols)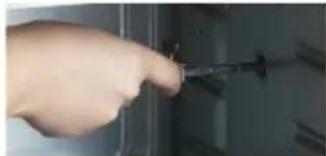
natural_image
Close-up of a hand holding a screwdriver inserted into a device (no visible text or symbols)NASTAVENÍ ČASOVAČE

OHLED NA ŽÍVOTNÍ PROSTŘEDÍ

text_image
Prohibition sign with a trash bin crossed out by two crossed lines, indicating no waste or discharge.natural_image
Recycling symbol icon with three chasing arrows forming a triangle (no text or labels)natural_image
Two views of a refrigerator interior showing internal compartments and labeled parts (8 and 15), no text or symbols present.PRED PRVÝM POUŽITÍM
natural_image
Exterior view of a black and white Domino microwave oven with a roasted chicken on the screen (no visible text or symbols)
natural_image
Close-up of hands using a tool to adjust or install a metal clip on a kitchen appliance (no text or symbols visible)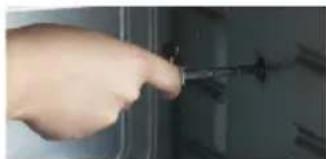
natural_image
Hand inserting a screwdriver into a door panel (no visible text or symbols)NASTAVENIE ČASOVAČA