One Eco Maxi 1P & EBD - High chair Bobike - Free user manual and instructions
Find the device manual for free One Eco Maxi 1P & EBD Bobike in PDF.
Download the instructions for your High chair in PDF format for free! Find your manual One Eco Maxi 1P & EBD - Bobike and take your electronic device back in hand. On this page are published all the documents necessary for the use of your device. One Eco Maxi 1P & EBD by Bobike.
USER MANUAL One Eco Maxi 1P & EBD Bobike
FR. INDEX DES IMAGES
FR. OK ! CORRECTEMENT ASSEMBLÉ
FR. INDEX DU PRODUIT
Specific Instructions for Mounting the Seat 4 X4 X
How to Place and Secure the Child in the Seat
How to Remove the Seat from the Bicycle
I125 Instructions for the Padlock X X X
I. Opening and clamping jaw
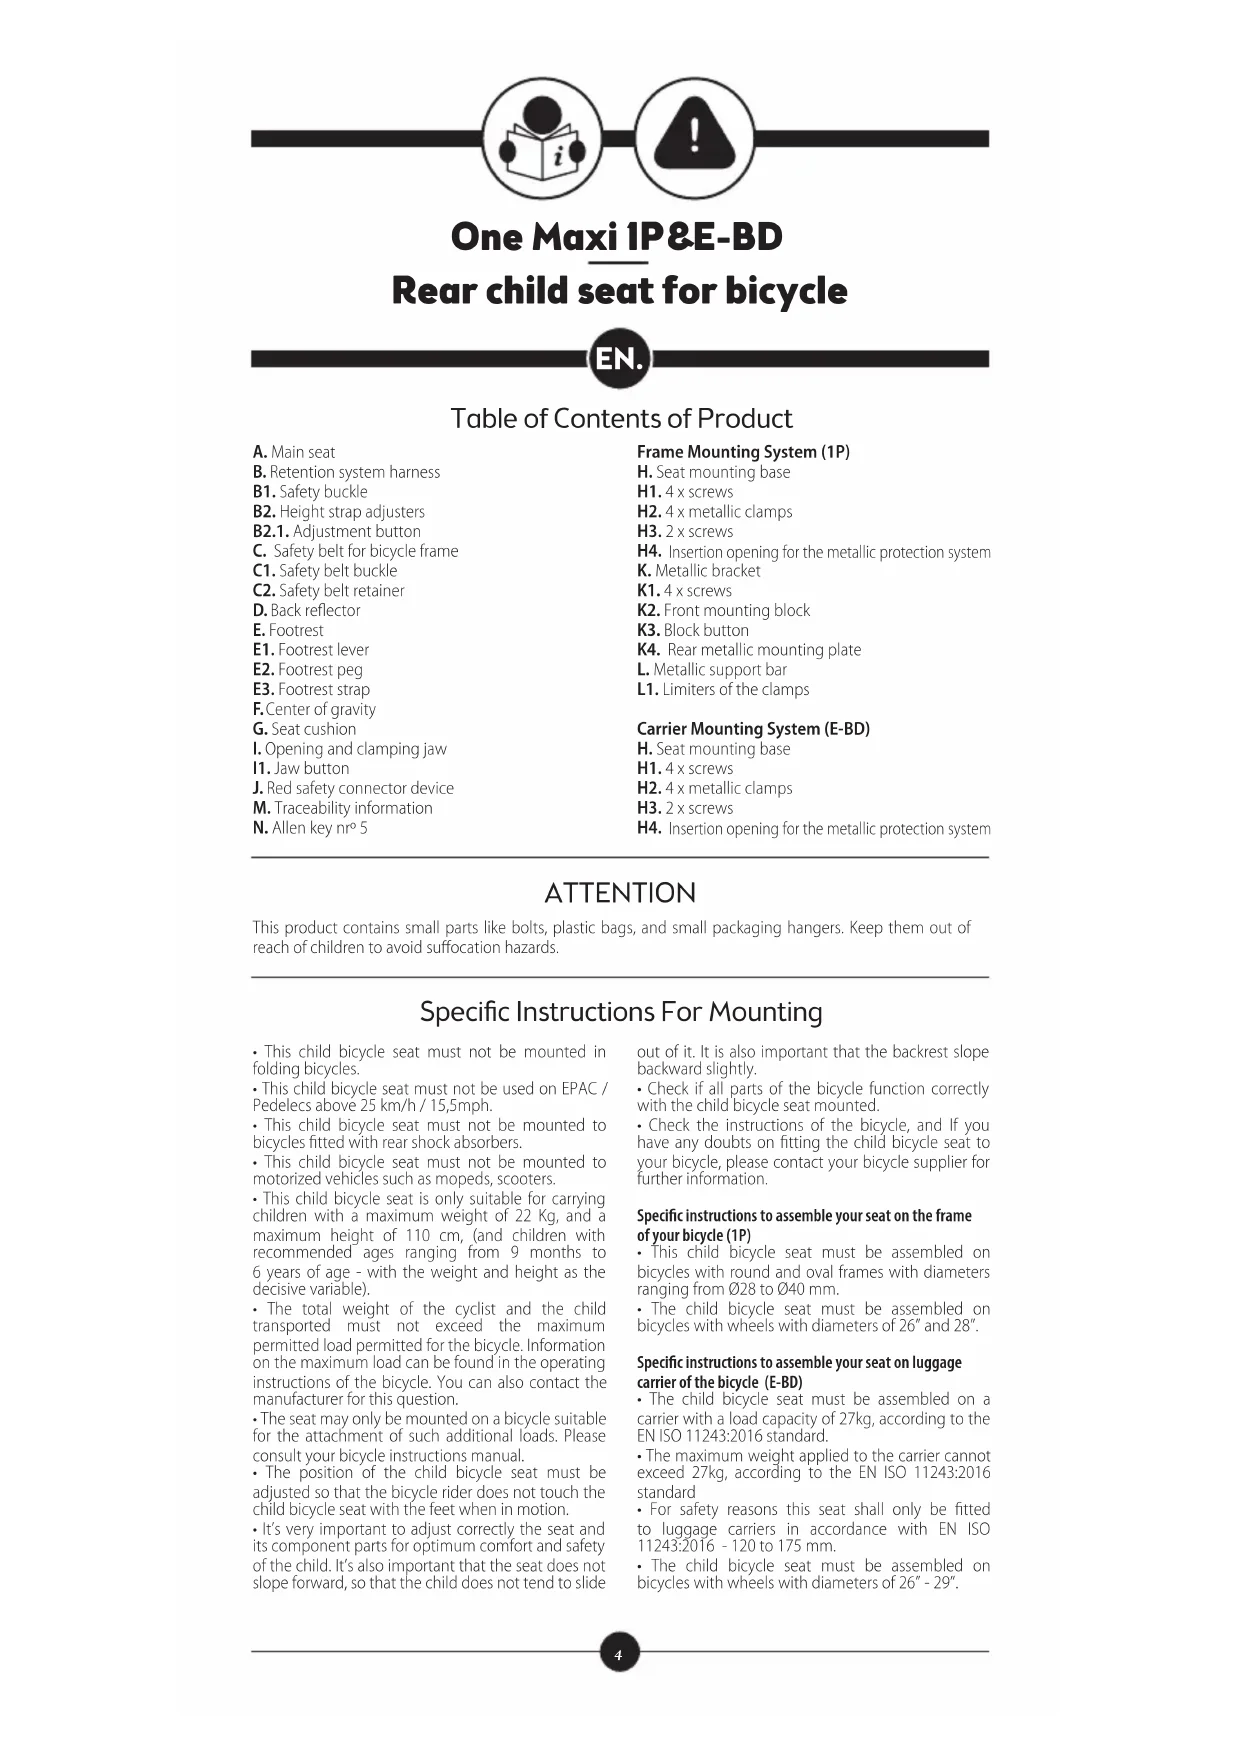
I1. Jaw button J. Red safety connector device M. Traceability information N. Allen key nrº 5 Frame Mounting System (1P) H. Seat mounting base H1. 4 x screws H2. 4 x metallic clamps H3. 2 x screws H4. Insertion opening for the metallic protection system K. Metallic bracket K1. 4 x screws K2. Front mounting block K3. Block button K4. Rear metallic mounting plate L. Metallic support bar L1. Limiters of the clamps Carrier Mounting System (E-BD) H. Seat mounting base H1. 4 x screws H2. 4 x metallic clamps H3. 2 x screws H4. Insertion opening for the metallic protection system
- This child bicycle seat must not be mounted in folding bicycles.
- This child bicycle seat must not be used on EPAC / Pedelecs above 25 km/h / 15,5mph.
- This child bicycle seat must not be mounted to bicycles fitted with rear shock absorbers.
- This child bicycle seat must not be mounted to motorized vehicles such as mopeds, scooters.
- This child bicycle seat is only suitable for carrying children with a maximum weight of 22 Kg, and a maximum height of 110 cm, (and children with recommended ages ranging from 9 months to 6 years of age - with the weight and height as the decisive variable).
- The total weight of the cyclist and the child transported must not exceed the maximum permitted load permitted for the bicycle. Information on the maximum load can be found in the operating instructions of the bicycle. You can also contact the manufacturer for this question.
- The seat may only be mounted on a bicycle suitable for the attachment of such additional loads. Please consult your bicycle instructions manual.
- The position of the child bicycle seat must be adjusted so that the bicycle rider does not touch the child bicycle seat with the feet when in motion.
- It’s very important to adjust correctly the seat and its component parts for optimum comfort and safety of the child. It’s also important that the seat does not slope forward, so that the child does not tend to slide out of it. It is also important that the backrest slope backward slightly.
- Check if all parts of the bicycle function correctly with the child bicycle seat mounted.
- Check the instructions of the bicycle, and If you have any doubts on fitting the child bicycle seat to your bicycle, please contact your bicycle supplier for further information. Specific instructions to assemble your seat on the frame of your bicycle (1P)
- This child bicycle seat must be assembled on bicycles with round and oval frames with diameters ranging from Ø28 to Ø40 mm.
- The child bicycle seat must be assembled on bicycles with wheels with diameters of 26” and 28”. Specific instructions to assemble your seat on luggage carrier of the bicycle (E-BD)
- The child bicycle seat must be assembled on a carrier with a load capacity of 27kg, according to the EN ISO 11243:2016 standard.
- The maximum weight applied to the carrier cannot exceed 27kg, according to the EN ISO 11243:2016 standard
- For safety reasons this seat shall only be fitted to luggage carriers in accordance with EN ISO 11243:2016 - 120 to 175 mm.
- The child bicycle seat must be assembled on bicycles with wheels with diameters of 26” - 29”. Table of Contents of Product Specific Instructions For Mounting This product contains small parts like bolts, plastic bags, and small packaging hangers. Keep them out of reach of children to avoid suffocation hazards. ATTENTION One Maxi 1P&E-BD Rear child seat for bicycle5
1. Remove the metallic bracket (K) from the metallic
support bar (L). To do that, you should press the metallic bracket button (K3) and simultaneously pull the metallic support bar (L) up.
2. Remove the screws (K1) on the metallic bracket (K),
with the Allen key No. 5 (N).
3. The correct positioning of the metallic bracket (K)
is extremely important. Make sure it is positioned in the bicycle frame according to the picture - from the front and assembled on the seat tube and never assembled on the seat post. Place the body of the front mounting block (K2) on the bicycle frame from the front. Insert 4 screws (K1) in the block to tighten the rear metallic mounting plate (K4). Tighten the screws, with the Key (N), so that the metallic bracket (K) is secured but not fully tightened so that, if necessary, you can adjust the height later. However, note that it should be tight to make it easier to complete the next step. You need to tighten the 4 screws diagonally and in stages.
4. Place the edges of the metallic support bar (L)
at the holes of the metallic bracket (K) until you hear a click indicating the lock, and until the centre button (K3) shall be level with the exterior of the hose metallic bracket. Centre and adjust the metallic support bar (L) at a height above the rear wheel, so that later, when you add the weight of the child, the child bicycle seat does not touch the wheel. Note that the metallic support bar (L) should be positioned at a maximum of 10cm away from the wheel. Never use the metallic support bar (L) to carry other loads than this child seat, as indicated in this manual.
5. Press the jaws button (I1) downward and pull
outward to unlock the base (H). Pull the base (H) outward to detach it from the seat (A).
6. Freeing the metallic clamps (H2) is necessary. To
achieve this, utilize the Allen key nrº5 (N) to relieve only, in cross, the (H1) screws. Then also relieve the screws (H3).
7. Ensure the base (H) is centered diagonally and
vertically on the metallic support bar (L). If the base shifts during tightening, re-center it to maintain proper alignment. Proper centering of the base is crucial for child/adult safety. Proceed assuring that the front metallic clamps (H2), close to Bobike logo, are positioned between the designated space limiters (L1) indicated by the arrow in the Quick- Guide picture. Do not place the front metallic clamps (H2) outside this area and notice that the seat shall be installed as close to the saddle as possible. While assuring center alignment with the support bar (L), start by tightening the two screws (H3) with a torque of 2 N.m. Next, tighten the four screws (H1) in a cross pattern with the Allen Key (N). Apply sufficient torque 6 N.m to securely fasten the base to the support bar (L).
8. Please note that the safety of the child/adult
is of paramount importance when following this step. Hold the safety belt (C). Make sure that you first fit the red metal connector device (J) into the corresponding slot (H4) of the base (H) near the Bobike Logo. Then, pull the seat down firmly so that the claws (I) connect fully to the base (H). When you do this correctly you will hear 2 clicks. To ensure that the seat is correctly and securely connected at both points – (H4) and (I), push the seat firmly forward and pull it firmly backward to make sure that the connection was successful. Both action points (I1) and (J) are red for your awareness.
9. The child seat has a centre of gravity (F) (inscribed
on the child seat) that must be positioned in front of the rear wheel axle. If it is positioned behind the axle, the distance must not exceed 10 cm. Special care must also be taken when positioning the child seat to ensure that the cyclist does not touch the child seat with his feet when cycling. Note: In Germany, according to the German Traffic Law StVZO, bicycle seats may only be fixed so that 2/3 of the seat depth or the Gravity Center of the seat is located between the front and rear axle of the bicycle.
10. After adjusting the height and positioning of
the seat (A), hand tighten with the Allen Key (N) the metallic bracket (K) to ensure that it cannot move. You need to hand tight the screws (K1) diagonally, with the same force and in stages, with a torque of 8 N.m.
11. Shake the seat (A) and apply forward pressure as
well as backward pulling to verify that all mounting systems are securely fastened, and the seat is firmly attached to each of them. Conducting this verification is of utmost importance for the safety of both the cyclist and the child.
12. Start to open the safety belt buckle (C1) and
pass it around the bicycle frame. Adjust the belt it as shown in the picture, under tension. Make sure that remain loosen belt is not in contact with the wheel, so pass it through the Safety belt retainer (C2). This step is extremely important for the cyclist and child safety. Specific Instructions for Mounting the Seat in the Frame of your Bicycle (1P)
1. Press the jaws button (I1) downward and pull
outward to unlock the base (H). Pull the base (H) outward to detach it from the seat (A).
2. Freeing the metallic clamps (H2) is necessary. To
achieve this, utilize the Allen key nrº5 (N) to relieve only, in cross, the (H1) screws. Then also relieve the screws (H3).
3. Ensure the base is centred on the luggage carrier.
If the base shifts during tightening, re-center it to maintain proper alignment. While assuring center alignment with the luggage carrier, start by tightening the two screws (H3) with a torque of 2 N.m. Next, tighten the four screws (H1) in a cross pattern with the Allen Key (N). Apply sufficient torque 6 N.m to securely fasten the base to the luggage carrier.
4. Please note that the safety of the child/adult
is of paramount importance when following this step. Hold the safety belt (C). Make sure that you first fit the red metal connector device (J) into the corresponding slot (H4) of the base (H) near the Bobike Logo. Then, pull the seat down firmly so that the claws (I) connect fully to the base (H). When you do this correctly you will hear 2 clicks. Specific Instructions for Mounting the Seat in the Luggage Carrier of your Bicycle (E-BD)6
1. Press the button to unlock the padlock. While
pressing the button, set and save your new code. Close the padlock. Change the numbering to hide your new code. To unlock the padlock, simply enter your new code again, and then press the button. Please make sure that the padlock is always kept away. Note: The lock should only be used when the bike is parked and not in use as an anti-theft device. OPTION A - REMOVE THE BABY SEAT + BASE +
METALLIC SUPPORT BAR
1. Detach the safety-belt (C) in order to remove the
baby seat. Then press the block button (K3) of the metallic bracket (K) and simultaneously pull the metallic support bar (L) up and back as shown in the image. Ensure the padlock is stored in a secure location, out of children’s reach, to prevent potential strangulation hazards. Keep the padlock close and under adult supervision when in use, such as attaching it to a belt loop or keeping it in a secured pocket. Following these technical measures can help mitigate the risk of strangulation and ensure the padlock is used safely and responsibly. OPTION B - REMOVE THE BABY SEAT FROM THE BASE, LEAVING THE SUPPORT BAR + BASE
INSTALLED ON THE BICYCLE
1. Detach the safety-belt (C) in order to remove the
2. Press the jaws (I) and pull both of them out. At the
same time, pull the baby seat up and back. How to set your Bobike padlock How to Remove the Seat from the Bicycle Frame (1P)
1. To safely place the child on the seat you must place
the bicycle on flat and solid ground for maximum bicycle stability. Even if your bicycle offers robust quick stands, you must always hold the bicycle, while placing/ removing the child. You must carry your child in your lap and safely place him on the seat. It´s forbidden for the child to climb alone on the bicycle or using the footrests to reach the seat. To place the child in the seat, first fully extend the retention system harness (B), by pressing the adjuster button (B2.1) of the belt guide (B2), then pull it up - this makes it easier to put the child in the seat. Then, open the safety buckle (B1) by pressing the safety buckle button. After releasing the buckle, detach both sides by sliding one up and the other down. Seat the child, place the shoulder straps and then connect it by sliding the two parts of the buckle together and close the safety buckle. Before fastening the buckle, ensure that both sides are securely connected. Close the safety buckle, adjust the belt length using the strap adjusters, so that your child is securely restrained. Before starting the journey, always check that the child is secured and that the belt is snug but not so tight that it hurts the child. According to the child growth, current height, and weight, you can adjust the height of the retention system harness (B) on all the strap adjusters (B2), by pulling up or down the straps until reaching the desired size.
2. Adjust the height of the footrest according to the
size of the child. To do this, raise the lever (E1) and slide it up or down for the required height. After deciding on the correct height, lower the lever (E1) to lock in place.
3. To remove the footrest strap (E3), lift it slightly
to release it from the footrest peg (E2) and slide it upwards to disengage it from the footrest slot. Then pass the thin end of the plastic strap through the hole in the footrest, as shown in the picture. Once the strap is correctly positioned, it can be easily slid up or down according to the child’s foot. Next slot one of the openings in the strap over the foot support peg. If you want to remove the strap (E3), twist it slightly to loosen it from the foot support peg (E2). How to safely place and secure the child on the seat To ensure that the seat is correctly and securely connected at both points – (H4) and (I), push the seat firmly forward and pull it firmly backward to make sure that the connection was successful. Both action points (I1) and (J) are red for your awareness.
5. The child seat has a centre of gravity (F) (inscribed
on the child seat) that must be positioned in front of the rear wheel axle. If it is positioned behind the axle, the distance must not exceed 10 cm. Special care must also be taken when positioning the child seat to ensure that the cyclist does not touch the child seat with his feet when cycling. Note: In Germany, according to the German Traffic Law StVZO, bicycle seats may only be fixed so that 2/3 of the seat depth or the Gravity Center of the seat is located between the front and rear axle of the bicycle.
6. Shake the seat (A) and apply forward pressure as
well as backward pulling to verify that all mounting systems are securely fastened, and the seat is firmly attached to each of them. Conducting this verification is of utmost importance for the safety of both the cyclist and the child.
7. Start to open the safety belt buckle (C1) and pass it
around the bicycle frame. Adjust the belt it as shown in the picture, under tension. Make sure that remain loosen belt is not in contact with the wheel, so pass it through the Safety belt retainer (C2). This step is extremely important for the cyclist and child safety.
1. Detach the safety-belt (C) in order to remove the
2. Press the jaws (I) and pull both of them out. At the
same time, pull the baby seat up and back. How to Remove the Seat from the Bicycle Luggage Carrier (E-BD)7 Make sure you have followed and fulfilled all the instructions given. When done so, the child bicycle seat is ready for use. IT IS MANDATORY TO READ the following chapter on safety instructions about using your child bicycle seat. Attention
- The rider must be at least 16 years of age.
- Check for any laws and regulations that might be in force in your country, relating to the carrying of children in seats attached to cycles.
- Carry only children that can sit unaided for a longer period, at least as long as the intended cycle journey.
- Do not carry a child less than 9 months of age in this child bicycle seat. To be a passenger, the child must be able to sit up straight with the head held upright while wearing a bicycle helmet. A doctor should be consulted if the child’s growth is questionable.
- Make sure that the weight and height of the child do not exceed the maximum capacity of the seat, and check this at regular intervals. Check the weight of the child before using the child seat. Under no circumstances should you use the child bicycle seat to transport a child whose weight is above the permissible limit.
- Make sure to check from time to time that the weight and height of the child do not exceed the maximum permissible load of the seat.
- Make sure that it is not possible for any part of the child’s body or clothing to come into contact with moving parts of the seat or bicycle and check this as the child grows.
- You must cover any sharp or pointy objects on the bicycle (e.g frayed cables) that may be reached by the child, in any situation.
- A wheel protector is mandatory to prevent the child from inserting its feet or hands between the spokes. The use of protection underneath the saddle or the use of a saddle with internal springs is mandatory. Make certain that the child is not able to hinder the brakes, thus avoiding accidents. These adjustments should be revised with child´s growth.
- Cover any exposed rear saddle springs.
- When the child bicycle seat is not in use, fasten the waist buckle of the security harness to prevent the straps from dangling and entering in contact with some turning part of the bicycle as wheels, brakes, etc. as these may be a hazard to the cyclist.
- Secure the child into child bicycle seat ensuring that all the safety belts and straps applied firmly but not so tight as to cause discomfort to the child.
- Check the security of fastners frequently.
- You must ensure that you always use the restraint system, and that the child is secured in the seat.
- Dress the child in proper clothes according to weather conditions.
- Children in child seats need to be more warmly dressed than riders of cycles and should be protected from rain.
- Remove the seat when transporting the bicycle by car (outside the car). Air turbulence might damage the seat or loosen its fastenings or other suspended elements, which could lead to an accident.
- Accompanying persons should carefully consider stability / balance when placing the child on the bike in the seat.
- Make sure that children wear a suitable helmet that complies with EN 1078:2012+A1:2012 while riding in the seat. Not wearing a helmet exponentially increases the risk of death, long-term disability, head trauma, or other injuries. As bicycle seat manufacturers, we care about the safety of seat passengers, so we strongly recommend that children and all passengers wear properly fitted and fastened bicycle helmets.
- The seat and cushion can get hot if under the sun for a long time. Make sure that they are not too hot before seating the child.
- This child seat is not suitable for use during sporting activities, or in extreme conditions as per example: enduro, hard mountain biking, big road holes, jumps and off-road ways.
- When riding for the first time with the seat fitted - to test ride the cycle in a safe/quiet environment before riding on the highway. Specific Instructions for Use
WARNING: Do not attach any additional
luggage to the child seat. If you carry extra luggage, the bicycle’s carrying capacity must not be exceeded, and we recommend that it be placed at the front of the bike.
WARNING: Do not modify the seat.
WARNING: The cycle could behave
differently with a child in the seat particularly with regarding to balance, steering and braking.
WARNING: Never leave the cycle
parked with a child in the seat unattended.
WARNING: For any form of crack or if
the surface starts to deconstruct, WARNINGS8 To keep the child bicycle seat in good working condition and to prevent accidents we recommend the following:
- Regularly check the mounting system of the seat to the bicycle to make sure it is in perfect condition.
- Check all the components to see if they work properly. Do not use the seat if any of the components are damaged. Damaged components must be replaced. To replace them you need to visit your local authorized Bobike dealer to get the correct components for replacement. You can find them on the website: www.bobike.com.
- If you have suffered an accident with your bicycle and safety seat, we advise you to get a new safety seat. Even if there is no visible damage to the seat.
- Clean the seat with soap and water (do not use abrasive, corrosive, or toxic products). Leave it to dry at room temperature. Maintenance Failure to comply with these operating instructions can lead to serious injury or death of the bicycle operator and/or child. Bobike is not liable for any damage to the product or persons resulting from improper installation, storage, or assembly (non-compliance with assembly instructions), improper maintenance, misuse or use not in compliance with the technical or use specifications (non-compliance with maintenance and care instructions), modifications or repairs made by you or a third party. If you have any doubt, please get in contact with us or with your local shop so that we can assist you to assure you and your child safety while riding with the bicycle seat. Attention this indicates that the life of the seat has been reached and it should be replaced. A professional shall be contacted in case of doubt.
WARNING: Always check the surface
temperature of the seat before any use.
WARNING: This child seat is not suitable
for use during sporting activities.
WARNING: Always ensure that the
head of your child is supported in reclined position.
WARNING: Additional security
devices are always to be attached. WARNING (E-BD): The seat must not be used as a luggage carrier and must not carry any load other than that stated in this manual: a child. WARNING (E-BD): Never place the elastic bands originally provided in the bicycle carrier on the seat or placed behind it, since the continuous pressure exerted by these elastic bands could damage the child seat's fastening system and endanger the child and the cyclist. WARNINGS Warranty 3-YEAR WARRANTY: All mechanical components against manufacturer defects only. Register your product at www.bobike.com. + 1 EXTRA WARRANTY YEAR: Register your seat at www.bobike.com and get one more warranty year. Important: you must register within 2 months of the date of purchase to receive the Bobike Extra Year Warranty. WARRANTY CLAIMS To obtain warranty service, you must have your original sales receipt. Items returned without a sales receipt will assume that the warranty begins on the date of manufacture. All warranties will be void if the product is damaged due to user crash, abuse, system modification, or used in any way not intended as described in this operating manual. To make sure you have all the required information to activate the warranty you need to keep the information that you have in your Traceability information label (M). You can also record here the info. O.F _______________________________Date