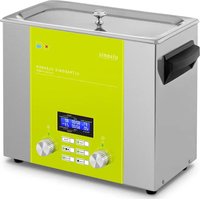
PROCLEAN 15.0H ECO - Ultrasonic cleaner Ulsonix - Free user manual and instructions
Find the device manual for free PROCLEAN 15.0H ECO Ulsonix in PDF.
User questions about PROCLEAN 15.0H ECO Ulsonix
0 question about this device. Answer the ones you know or ask your own.
Ask a new question about this device
Download the instructions for your Ultrasonic cleaner in PDF format for free! Find your manual PROCLEAN 15.0H ECO - Ulsonix and take your electronic device back in hand. On this page are published all the documents necessary for the use of your device. PROCLEAN 15.0H ECO by Ulsonix.
USER MANUAL PROCLEAN 15.0H ECO Ulsonix
text_image
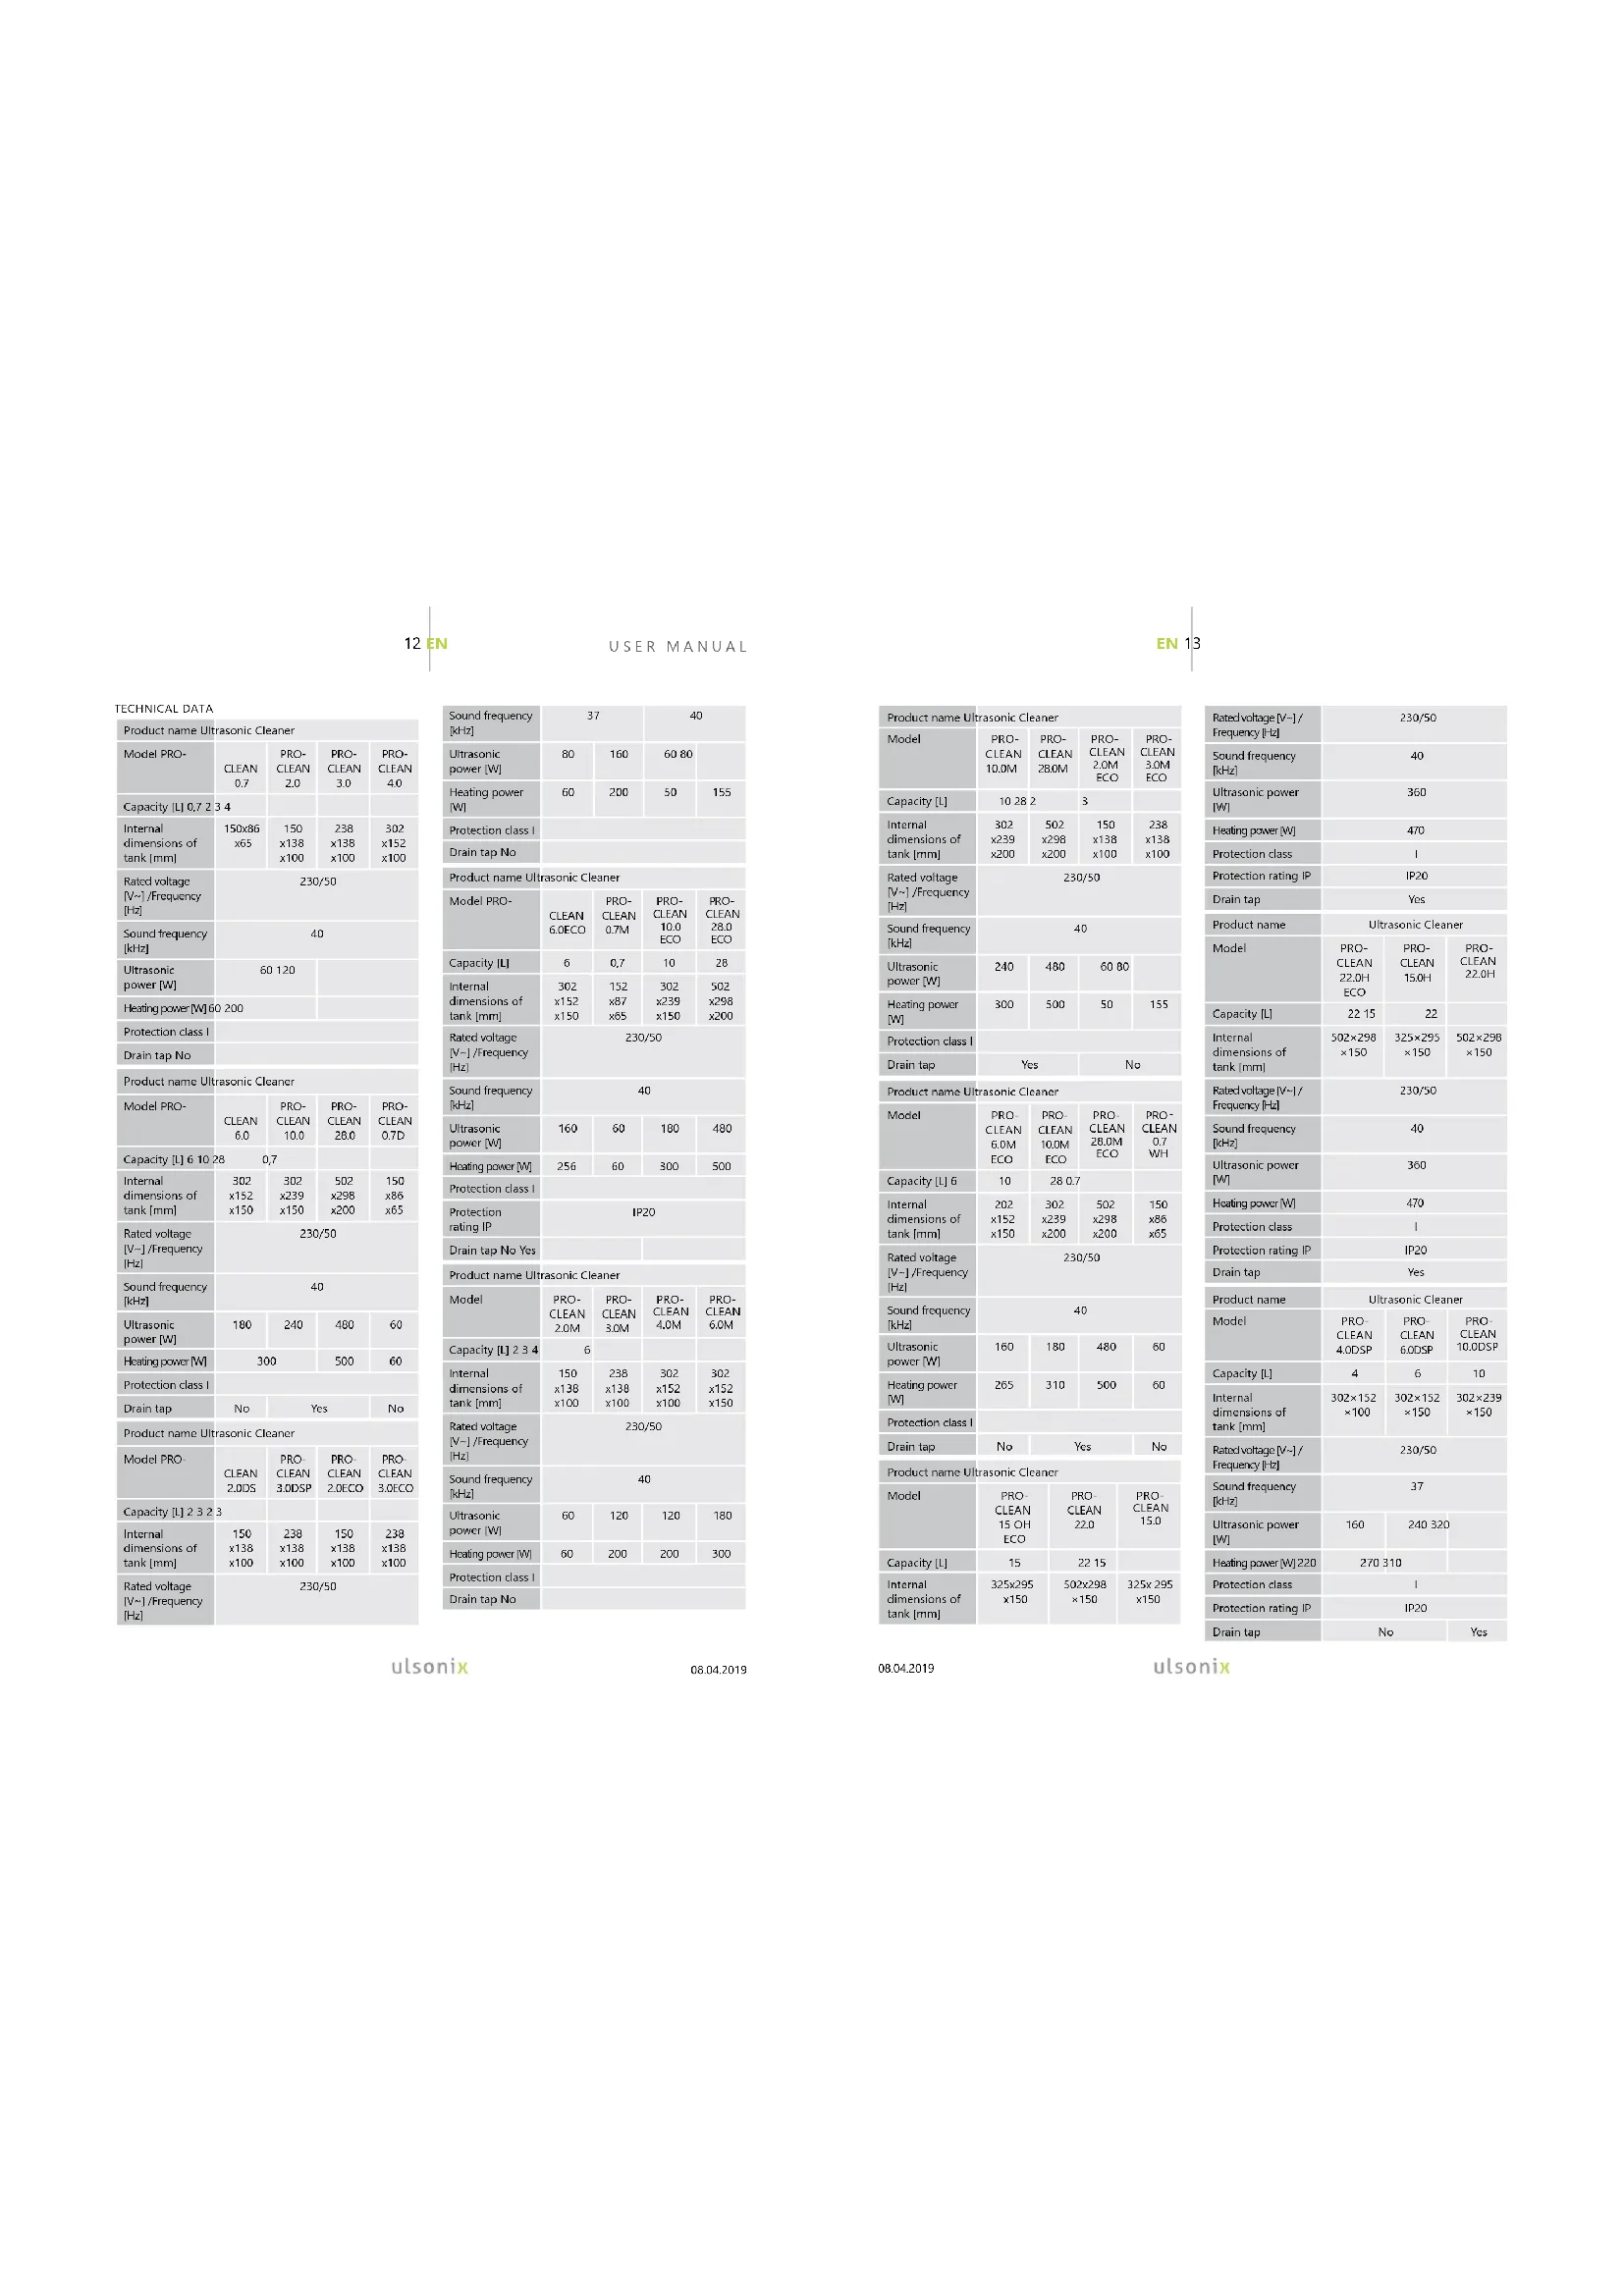
Diagram of a circuit board layout with numbered components and labeled terminals| Product name Ultrasonic Cleaner | ||||
| Model PRO- | CLEAN0.7 | PRO-CLEAN2.0 | PRO-CLEAN3.0 | PRO-CLEAN4.0 |
| Capacity (L) 0.7 2.3 4 | ||||
| Internal dimensions of tank [mm] | 150x86x65 | 150x138x100 | 238x138x100 | 302x152x100 |
| Rated voltage[V/-]/Frequency [Hz] | 230/50 | |||
| Sound frequency[kJx] | 40 | |||
| Ultrasonic power [W] | 60 120 | |||
| Heating power [W] 60 200 | ||||
| Protection class I | ||||
| Drain tap No | ||||
| Product name Ultrasonic Cleaner | ||||
| Model PRO- | CLEAN6.0 | PRO-CLEAN10.0 | PRO-CLEAN28.0 | PRO-CLEAN0.7D |
| Capacity (L) 6 10 28 | 0,7 | |||
| Internal dimensions of tank [mm] | 302x152x150 | 302x259x150 | 502x298x200 | 150x86x65 |
| Rated voltage[V/-]/Frequency [Hz] | 230/50 | |||
| Sound frequency[kHz] | 40 | |||
| Ultrasonic power [W] | 180 | 240 | 480 | 60 |
| Heating power [W] | 300 | 500 | 60 | |
| Protection class I | ||||
| Drain tap | No | Yes | No | |
| Product name Ultrasonic Cleaner | ||||
| Model PRO | CLEAN2.0DS | PRO-CLEAN3.0DSP | PRO-CLEAN2.0ECO | PRO-CLEAN3.0ECO |
| Capacity (L) 2 3 2 3 | ||||
| Internal dimensions of tank [mm] | 150x136x100 | 238x136x100 | 150x138x100 | 238x138x100 |
| Rated voltage[V/-]/frequency [Hz] | 230/50 | |||
| Sound frequency [kHz] | 37 | 40 | ||
| Ultrasonic power [W] | 80 | 160 | 60 80 | |
| Heating power [W] | 60 | 200 | 50 | 155 |
| Protection class I | ||||
| Drain tap No | ||||
| Product name Ultrasonic Cleaner | ||||
| Model PRO- | CLEAN6.0ECO | PRO-CLEAN0.7M | PRO-CLEAN10.0 ECO | PRO-CLEAN28.0 ECO |
| Capacity [L] | 6 | 0,7 | 10 | 28 |
| Internal dimensions of tank [mm] | 302x152x150 | 152x87x65 | 302x239x150 | 502x298x200 |
| Rated voltage[V-/]/Frequency [Hz] | 230/50 | |||
| Sound frequency [kHz] | 40 | |||
| Ultrasonic power [W] | 160 | 60 | 180 | 480 |
| Heating power [W] | 256 | 60 | 300 | 500 |
| Protection class I | ||||
| Protection rating IP | IP20 | |||
| Drain tap No Yes | ||||
| Product name Ultrasonic Cleaner | ||||
| Model | PRO-CLEAN2.0M | PRO-CLEAN3.0M | PRO-CLEAN4.0M | PRO-CLEAN6.0M |
| Capacity (L) 2 3 4 | 6 | |||
| Internal dimensions of tank [mm] | 150x138x100 | 238x138x100 | 302x152x100 | 302x153x150 |
| Rated voltage[V-/]/Frequency [Hz] | 230/50 | |||
| Sound frequency [kHz] | 40 | |||
| Ultrasonic power [W] | 60 | 120 | 120 | 160 |
| Heating power [W] | 60 | 200 | 200 | 300 |
| Protection class I | ||||
| Drain tap No | ||||
| Product name Ultrasonic Cleaner | ||||
| Model | PRO-CLEAN10.0M | PRO-CLEAN28.0M | PRO-CLEAN2.0M ECO | PRO-CLEAN3.0M ECO |
| Capacity (L) | 10 28 2 | 3 | ||
| Internal dimensions of tank [mm] | 302x259x200 | 502x298x200 | 150x158x100 | 258x138x100 |
| Rated voltage[V-]/Frequency [Hz] | 230/50 | |||
| Sound frequency[kHz] | 40 | |||
| Ultrasonic power [W] | 240 | 480 | 60 80 | |
| Heating power[W] | 300 | 500 | 50 | 155 |
| Protection class I | ||||
| Drain tap | Yes | No | ||
| Product name Ultrasonic Cleaner | ||||
| Model | PRO-CLEAN6.0M ECO | PRO-CLEAN10.0M ECO | PRO-CLEAN28.0M ECO | PRO-CLEAN0.7 WH |
| Capacity (L) 6 | 10 | 28 0.7 | ||
| Internal dimensions of tank [mm] | 202x152x150 | 302x259x200 | 502x298x200 | 150x86x65 |
| Rated voltage[V-]/Frequency [Hz] | 230/50 | |||
| Sound frequency[kHz] | 40 | |||
| Ultrasonic power [W] | 160 | 180 | 480 | 60 |
| Heating power[W] | 265 | 310 | 500 | 60 |
| Protection class I | ||||
| Drain tap | No | Yes | No | |
| Product name Ultrasonic Cleaner | ||||
| Model | PRO-CLEAN15 OH ECO | PRO-CLEAN22.0 | PRO-CLEAN15.0 | |
| Capacity (L) | 15 | 22 15 | ||
| Internal dimensions of tank [mm] | 325x295x150 | 502x296x150 | 325x 295x150 | |
| Rated voltage (V-/-)/ Frequency [Hz] | 230/50 | ||
| Sound frequency [kHz] | 40 | ||
| Ultrasonic power [W] | 360 | ||
| Heating power [W] | 470 | ||
| Protection class | 1 | ||
| Protection rating IP | IP20 | ||
| Drain tap | Yes | ||
| Product name | Ultrasonic Cleaner | ||
| Model | PRO-CLEAN 22.0H ECO | PRO-CLEAN 15.0H | PRO-CLEAN 22.0H |
| Capacity [L] | 22 15 | 22 | |
| Internal dimensions of tank [mm] | 502×298 ×150 | 325×295 ×150 | 502×298 ×150 |
| Rated voltage (V-/-)/ Frequency [Hz] | 230/50 | ||
| Sound frequency [kHz] | 40 | ||
| Ultrasonic power [W] | 360 | ||
| Heating power [W] | 470 | ||
| Protection class | 1 | ||
| Protection rating IP | IP20 | ||
| Drain tap | Yes | ||
| Model | PRO-CLEAN 4.0DSP | PRO-CLEAN 6.0DSP | PRO-CLEAN 10.0DSP |
| Capacity [L] | 4 | 6 | 10 |
| Internal dimensions of tank [mm] | 302×152 ×100 | 302×152 ×150 | 302×239 ×150 |
| Rated voltage (V-/-)/ Frequency [Hz] | 230/50 | ||
| Sound frequency [kHz] | 37 | ||
| Ultrasonic power [W] | 160 | 240 320 | |
| Heating power [W] 220 | 270 310 | ||
| Protection class | 1 | ||
| Protection rating IP | IP20 | ||
| Drain tap | No | Yes | |
- GENERAL DESCRIPTION
The user manual is designed to assist in the safe and trouble-free use of the device. The product is designed and manufactured in accordance with strict technical guidelines, using state-of-the-art technologies and components. Additionally, it is produced in compliance with the most stringent quality standards.
DO NOT USE THE DEVICE UNLESS YOU HAVE THOROUGHLY READ AND UNDERSTOOD THIS USER MANUAL.
To increase the product life of the device and to ensure trouble-free operation, use it in accordance with this user manual and regularly perform maintenance tasks. The technical data and specifications in this user manual are up to date. The manufacturer reserves the right to make changes associated with quality improvement. The device is designed to reduce noise emission risks to a minimum, taking into account technological progress and noise reduction opportunities.
LEGEND

The product satisfies the relevant safety standards.

Read instructions before use.

The product must be recycled

WARNING! or CAUTION! or REMEMBER! Applicable to the given situation (general warning sign).

Use ear protection. Exposure to loud noise may result in hearing loss.

ATTENTION! Electric shock warning!

Class II protection device with double insulation.

ATTENTION! Hot surface, risk of burns!

Only use indoors.

Caution, hot surface

PLEASE NOTE! Drawings in this manual are for Illustration purposes only and in some details may differ from the actual machine.
The original operation manual is in German. Other language versions are translations from German.
- USAGE SAFETY

ATTENTION! Read all safety warnings and all instructions. Failure to follow the warnings and instructions may result in an electric shock, fire and/or serious injury or even death.
The terms 'device' or 'product' are used in the warnings and instructions to refer to
2.1 ELECTRICAL SAFETY
a) The plug must fit the socket. Do not modify the plug in any way. Using original plugs and matching sockets reduces the risk of electric shock.
b) Avoid touching earthed elements such as pipes, heaters, boilers and refrigerators. There is an increased risk of electric shock if the earthed device is exposed to rain, comes into direct contact with a wet surface or is operating in a damp environment. Water getting into the device increases the risk of damage to the device and of electric shock.
c) Do not touch the device with wet or damp hands.
d) Use the cable only for its designated use. Never use it to carry the device or to pull the plug out of a socket. Keep the cable away from heat sources, oil, sharp edges or moving parts. Damaged or tangled cables increase the risk of electric shock.
e) If using the device in a damp environment cannot be avoided, a residual current device (RCD) should be applied. The use of an RCD reduces the risk of electric shock.
f) Do not use the device if the power cord is damaged or shows obvious signs of wear. A damaged power cord should be replaced by a qualified electrician or the manufacturer's service centre.
g) To avoid electric shock, do not immerse the cord, plug or device in water or other liquids. Do not use the device on wet surfaces.
2.2. SAFETY IN THE WORKPLACE
a) Make sure the workplace is clean and well lit. A messy or poorly lit workplace may lead to accidents. Try to think ahead, observe what is going on and use common sense when working with the device.
b) If you discover damage or irregular operation, immediately switch the device off and report it to a supervisor without delay.
c) If there are any doubts as to the correct operation of the device, contact the manufacturer's support service.
cl) Only the manufacturer's service point may repair the
e) In case of fire, use a powder or carbon dioxide (CO₂) fire extinguisher (one intended for use on live electrical devices) to put it out.
f) Children or unauthorised persons are forbidden to enter a work station. (A distraction may result in loss of control over the device).
g) Use the device in a well-ventilated space,
h) Regularly inspect the condition of the safety labels. If
the labels are illegible, they must be replaced.
i) Please keep this manual available for future reference. If this device is passed on to a third party, the manual must be passed on with it.
j) Keep packaging elements and small assembly parts in a place not available to children.
k) Keep the device away from children and animals
REMEMBER! When using the device, protect children and other bystanders.
2.3. PERSONAL SAFETY
a) Do not use the device when tired, ill or under the influence of alcohol, narcotics or medication which can significantly impair the ability to operate the device.
b). The device is not designed to be handled by persons (including children) with limited mental and sensory functions or persons lacking relevant experience and/or knowledge unless they are supervised by a person responsible for their safety or they have received instruction on how to operate the device.
c) The device can be handled only by physically fit persons who are capable of handling it, properly trained, familiar with this manual and trained within the scope of occupational health and safety.
d) When working with the device, use common sense and stay alert. Temporary loss of concentration while using the device may lead to serious injuries.
c) To prevent the device from accidentally switching on, make sure the switch is on the OFF position before connecting to a power source.
f) Do not overestimate your abilities. When using the device, keep your balance and remain stable at all times. This will ensure better control over the device in unexpected situations.
g) The device is not a toy. Children must be supervised to ensure that they do not play with the device.
2.4.SAFE DEVICE USE
a) Do not overload the device. Use the appropriate tools for the given task. A correctly-selected device will perform the task for which it was designed better and in a safer manner.
b) Do not use the device if the ON/OFF switch does not function properly (does not switch the device on and off). Devices which cannot be switched on and off using the ON/OFF switch are hazardous, should not be operated and must be repaired.
c) Disconnect the device from the power supply before commencement of adjustment, cleaning and maintenance. Such a preventive measure reduces the risk of accidental activation.
d) When not in use, store in a safe place, away from children and people not familiar with the device who have not read the user manual. The device may pose a hazard in the hands of inexperienced users.
e) Keep the device in perfect technical condition. Before each use check for general damage and especially check for cracked parts or elements and for any other conditions which may impact the safe operation of the device. If damage is discovered, hand over the device for repair before use.
b) Keep the device out of the reach of children.
g) Device repair or maintenance should be carried out by qualified persons, only using original spare parts. This will ensure safe use.
h) To ensure the operational integrity of the device, do not remove factory-fitted guards and do not loosen any screws.
i) When transporting and handling the device between the warehouse and the destination, observe the occupational health and safety principles for manual transport operations which apply in the country where the device will be used.
j) Do not move, adjust or rotate the device in the course of work.
k) Do not leave this appliance unattended while it is in use.
1) Clean the device regularly to prevent stubborn grime from accumulating.
m) The device is not a toy. Cleaning and maintenance may not be carried out by children without supervision by an adult person.
n) Before adjusting, replacing accessories, or storing the appliance, unplug the appliance from the power source. This will decrease the possibility of accidentally switching it on.
o) Do not run the device when empty.
p) It is forbidden to interfere with the structure of the device in order to change its parameters or construction.
q) Do not dive parts of the body or parts of living things (animals, plants) into the basin, especially when the unit is in operation.
1) Avoid the contact with eyes or skin of the detergents used.
s) Do not inhale the detergent.
t) Do not use the device if it's empty
a) Do not fill the tank with water above 50°C.
v) Do not place items that have been in contact with acids, chloride ions and other aggressive substances in the basin.
w) Do not use flammable liquids or other chemicals containing chloride ions, or leading to their release (such as some disinfectants, detergents or dishwashing liquids).
x) Check when unpacking the unit that it suffered no damage during the transport. If so, please contact us immediately. Keep in all cases the original packagin
y) During the heating of the cleaning liquid, be sure to stir the liquid every 15 minutes so as to avoid overheating and boiling.
z) During ultrasonic cleaning, you will hear the sounds of cavitation. When using the device for a long time, please wear hearing protection within a radius of 2m around the device.
aa) The cleaning fluid heats up when it is used long: watch the temperature if you clean objects sensitive to heat.

ATTENTION! Despite the safe design of the device and its protective features, and despite the use of additional elements protecting the operator, there is still a slight risk of accident or injury when using the device. Stay alert and use common sense when using the device.
3. USE GUIDELINES
The ultrasonic cleaner is a device used to remove operational dirt from surfaces, tools and functional parts of machines.
This appliance is intended to be used in household and similar applications such as:
- staff kitchen areas in shops, offices and other
working environments
- farm houses
• by clients in hotels, motels, etc.
• bed and breakfasts or boarding houses
The user is liable for any damage resulting from unintended use of the device.
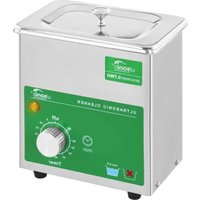
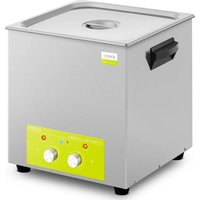
3.1 DEVICE DESCRIPTION
The pictures present the "name" model. Other models have a similar design. An important difference is the control panel. The differences are described later in this manual.
natural_image
Six different laboratory equipment cases with numbered labels, showing various containers and components (no visible text or symbols)- Handle
- Cover
- Control panel (varies depending on model)
- Power socket and fuse socket
- Portable rack
- Tub
- Drain plug
3.2. PREPARING FOR USE
APPLIANCE LOCATION
The temperature of environment must not be higher than 40°C and the relative humidity should be less than 85%. Ensure good ventilation in the room in which the device is being used. There should be at least 10 cm distance between each side of the device and the wall or other objects. The device should always be used when positioned on an even, stable, clean, fireproof and dry surface, and be out of the reach of children and persons with limited mental and sensory functions. Position the device such that you always have access to the power plug. The power cord connected to the appliance must be properly grounded and correspond to the technical details on the product label.
ASSEMBLING THE APPLIANCE
1. Unpack the device.
2 Check that the device is undamaged and that all components are included in the set. If it is damaged or any elements are missing, contact the manufacturer.
3. Place the portable rack into the tub
- Connect the power cable to the device socket.
5. Place the lid on top of the device to cover the tub.
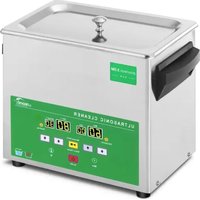
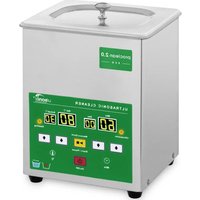
3.3. DEVICE USE
Depending on the model, please refer to the appropriate instructions for use provided below:
BASIC/BASIC ECO

text_image
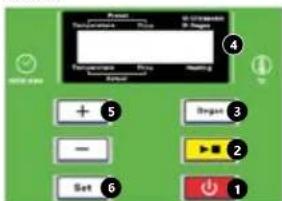
ULTRASONIC CLEANER ulsonix ② ① ③ ④- Heating ON/OFF heating setting
- Indicator for heating in process.
- Timer ON/OFF; Timer setting
- Indicator for ultrasonic cleaning in process.
HOW TO USE THE DEVICE
- Once the switch is rotated clockwise, the machine will enter into the time operating mode. The time can be freely modified in accordance with the indication at the edge of rotary switch on the panel.
- The green work indication lamp will turn on and the ultrasonic will send out the working sound of "squeak" and the machine will start working.
- The cleaning machine will turn off automatically when time is up.
- Rotate the switch anticlockwise to start long-term operating mode. The infinity mark is indicated in the panel.
- Green working indicator lamp is on and the ultrasonic sends out the working sound of "squeak" and starts working and will continue working.
- When cleaning is completed, in order to power off please rotate the switch clockwise to the 'off' manually.
- Rotate the heating switch clockwise to start heating the cleaning fluid. The heating temperature can be selected in accordance with the indication at the edge of rotary switch on the panel.
- The green heating indicator lamp will turn on and the cleaning fluid will be heated.
- When the temperature reaches the set value, the green heating indicator lamp will turn off and heating will stop.
- When the temperature of the fluid will be lower than set value on the rotary switch on the panel, then device will start heating again. This way, the device will maintain the set temperature.
- To stop heating, the rotary switch must be turned to OFF position anticlockwise.
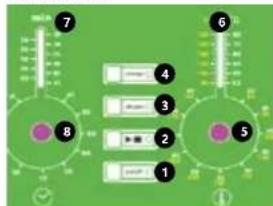
- On/Off button
- START/PAUSE & Memory button
- Temperature control buttons
-
Heating process LED
-
Current temperature indicator for the cleaning liquid
-
Set temperature indicator for the cleaning liquid
- Time indicator: displays the set time or remaining time in minutes
- Cleaning process LED
- Remaining cleaning time counter
- Cleaning time adjustment buttons
HOW TO USE THE DEVICE
- All buttons are tactile. A simple touch is enough. Press the button No. 1 to turn on. The cleaning process begins. You can now set the desired temperature and time.
- Temperature set: Display No.5 shows the temperature of the cleaning liquid. To heat the liquid, use arrows No.3 (up to raise the temperature, down to lower it). If the temperature is higher than the current temperature, the unit starts to heat up and the LED lights up. Once the desired temperature is reached, the diode turns off. To terminate the heating process, adjust the current temperature setting to '00'.
- Time set: When the device is on, you see on display number 7 the time set in the previous cleaning. Press No.10 to set the time (up to increase, down to lower)
- After selling the time, press START (No. 2) to begin the cleaning. A red LED turns on. When the countdown begins (No. 9), the cleanup is almost complete. The cleaning will stop automatically at the end of programmed time. The time programmed by the last use appears (No. 7).
- Pause function and memory: Press the green button Start / Pause (No. 2) to activate the memory function. When the time is up and you touch the green button, the programmed time is saved. If the cleaning process is underway and you press the green button, the cleaning is paused. To restart, repress the green button.
- When cleaning is finished, press the ON/OFF (No. 1) button to turn off the device. Remember to unplug it after use. Empty the basin so that the unit is completely empty.
LCD DEGAS
text_image
Power Print Copy Paste Copy Settings Reset Set Reset 3 Set 6 1- On/Off button
- START/PAUSE & Memory button
- Degas button
- LCD display
- Up/Down control buttons
- Set button
HOW TO USE THE DEVICE
- All the buttons are touch buttons which only require a light touch. To activate the device and start the cleaning process, touch the power button (#1) at the front of the device. You can then select the required temperature and time settings.
- Setting the temperature: The current temperature is shown on the LCD display. The display will flash when you press the Set button (#5) and you can now set the required temperature by pressing the Up/Down control buttons (#5). Touch the Up or Down buttons to increase or lower the temperature setting as desired. If the set temperature is higher than the actual temperature the device will start to heat up immediately. Once the required temperature is reached, it will be maintained at this level. To terminate the heating process, adjust the current temperature setting to '00'.
- Setting the time: Press the Set button (*6). The display will start flashing. You can now program the cleaning time by pressing the Up/Down control buttons (*5) to increase or decrease the time.
- After setting the time press the Start button (#2) to initiate the cleaning process. The display shows 'U' while cleaning is in progress. Once the cleaning time has expired, cleaning will automatically stop. The display will now show the last saved time setting (Memory feature).
- Memory&Pause: Touch the green Start/Pause button (#2) to activate the Memory feature. When cleaning is complete and the green button is pressed the previous time setting is saved so that the time does not have to be re-set every time. If the green button is pressed while cleaning is still in progress, cleaning will be paused. To restart the cleaning process, press the green button again.
- Degassing: During this process ultrasound is used to expel gases (e.g. carbon dioxide) from the liquid. The number of cavitation bubbles that are required for efficient cleaning can only be formed in degassed liquids. To activate this feature press the Set button (#6). The display will show 'D'. You need to press the Set button again to stop degassing. The display will then show 'U'.
- Once cleaning is complete, switch the device off (power button #1). Remember to unplug the device after use. Empty any liquids from the tank and remove any objects.
LCD DEGAS SWEEP
text_image
Diagram of a circuit board layout with numbered components and labeled connections18 EN
EN
- On/Off button
- START/PAUSE & Memory button
- Degas button
- Sweep button
- Temperature control knob
- Temperature indicator
- Remaining cleaning time indicator
- Timer control knob
HOW TO USE THE DEVICE
- All the buttons are touch buttons which only require
a light touch. To activate the device and start the cleaning process, touch the power button (#1) at the front of the device. You can then select the required temperature and time settings. - Setting the temperature: If the device is switched on, a flashing LED indicates the actual temperature of the cleaning liquid. To set the desired temperature, turn the temperature control knob (°S) clockwise. A green LED indicator illuminates while the device is heating up. Once the set temperature is reached it will be maintained until the device is switched off. To switch off the heating function, turn the control knob anti-clockwise to the zero position.
- Setting the time: Tum the Timer control knob (#8) to set the desired cleaning time. Pressing the Start button (#2) will activate the device and the cleaning process will start. A flashing LED indicates the remaining cleaning time. At the end of the cleaning time the cleaning process will stop automatically. The display will now show the last saved time setting (Memory feature)...
- Pause: if you press the Pause button (#2) the cleaning process will be interrupted until the Pause button is pressed again.
- Degassing: During this process ultrasound is used to expel gases (e.g. carbon dioxide) from the liquid. The number of cavitation bubbles that are required for efficient cleaning can only be formed in degassed liquids. To activate this feature press the Degas button (#3). Press the button again to stop degassing.
- Sweep: This optional Sweep feature optimises the sound field distribution in the cleaning liquid through frequency modulation. Pressing the Sweep button ( #4 ) will activate the feature. To turn the feature off, press the button again.
- Once cleaning is complete, switch the device off (power button #1). Remember to unplug the device after use. Empty any liquids from the tank and remove any objects.
MULTIFUNCTION
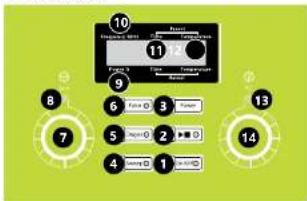
- On/Off button
- START/RAUSE & Memory button
- Ultrasonic Power setting button
- Sven button
- Decor button
- Pulse button (wave frequency setting)
- Time control knob (cleaning time setting)
- Christian luxury LTD
- Lower indicators
- Cleaning frequency indicator
- Cleaning time indicator
- Temperature indicates for the cleaning liquid
- Heating process LED
- Temperature control knob (cleaning liquid
(temperature setting)
HOW TO USE THE DEVICE
- All the buttons are touch buttons which only require a light touch. To activate the device and start the cleaning process, touch the power button ( 1 ) at the front of the device. You can then select the required temperature and time settings.
- Setting the temperature: If the device is switched on, the actual temperature of the cleaning liquid is indicated on the display. Turn the control knob (#14) to set the required temperature. The heating process will start automatically and the display will indicate that heating is in progress. The set temperature is maintained as long as the device is switched on. To stop the heating, turn the Temperature control knob and-clockwise to the zero position.
- Setting the time: Turn the Timer control knob (#7) to set the desired cleaning time. Pressing the Start button (#2) will activate the device and the cleaning process will start. The remaining time is shown on the display. At the end of the cleaning time the cleaning process will stop automatically. The time display now shows the last saved time setting (Memory feature).
- Pause: If you press the Pause button (#2) the cleaning process will be interrupted until the Pause button is pressed again.
- Degassing: During this process ultrasound is used to expel gases (e.g. carbon dioxide) from the liquid. The number of cavitation bubbles that are required for efficient cleaning can only be formed in degassed liquids. To activate this feature press the Degas button (#5). The corresponding LED will illuminate. To disable degassing press the button again. The corresponding LED will go off.
- Sweep: This optional Sweep feature optimises the sound field distribution in the cleaning liquid through modulation of frequencies. Press the Sweep button (#4) to enable this feature. The corresponding LED will light up. To disable the feature press the Sweep button again. The corresponding LED will go off.
- Setting the wave frequency: Pressing the Pulse button (#6) increases the wave frequency to 120% of the default value. The corresponding LED light will illuminate. Pressing the Pulse button again will reduce the value to 100%. The corresponding LED will go off.
- Setting the ultrasonic power: The default value is set to 40% and can be increased to 70% or 100%. To change the value, press the Power button ( ^* 9) until the desired value is displayed.
- Once cleaning is complete, switch the device off (power button #1). Remember to unplug the device after use. Empty any liquids from the tank and remove any objects.
BASIC WITHOUT HEATER
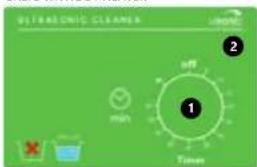
text_image
Ultrasonic Clean Area OFF min Times-
Turning the timer ON/OFF setting the timer.
-
Operation under way indicator - ultrasonic cleaning is in progress.
HOW TO USE THE DEVICE
-
Once the switch is rotated clockwise, the machine will enter into the time operating mode. The time can be freely modified in accordance with the indication at the edge of rotary switch on the panel.
-
The green work indication lamp will turn on and the ultrasonic will send out the working sound of 'squeak' and the machine will start working.
-
The cleaning machine will turn off automatically when time is up.
-
Rotate the switch anticlockwise to start long-term operating mode. The infinity mark is indicated in the panel.
-
Green working indicator lamp is on and the ultrasonic sends out the working sound of 'squca' and starts working and will continue working.
-
When cleaning is completed, in order to power off please rotate the switch clockwise to the "off" manually.
3.4. CLEANING AND MAINTENANCE
a) Unplug the mains plug and allow the device to cool completely before each cleaning, adjustment or replacement of accessories, or if the device is not being used.
b) Use only non corrosive cleaners to clean the surface.
c) After cleaning the device, all parts should be dried completely before using it again.
d) Do not spray the device with a water jet or submerge it in water.
c) Do not allow water to get inside the device through vents in the housing of the device.
B) The device must be regularly inspected to check its technical efficiency and spot any damage.
q) Use a soft cloth for cleaning.
h) Do not use sharp and/or metal objects for cleaning (e.g. a wire brush or a metal spatula) because they may damage the surface material of the appliance.
DANE TECHNICZNE
text_image
Play Performance Tide B. Paran Temperature Temp Heating Follow + - Set Stages 1 2 3 4 5text_image
Diagram of a circuit board layout with numbered components and labeled connectionstext_image
Music Control Panel Dr. Ringer Tobacco Audio Recovery + 5 Shoga 3 - - Set 6 1text_image
Diagram of a circuit board layout with numbered components and labeled pinstext_image
Circuit board diagram with numbered components and labeled connectionstext_image
10 Power Supply 11 12 Current Control 8 9 13 7 6 5 4 14natural_image
Four views of a stainless steel laboratory appliance with labeled parts (no visible text or symbols)text_image
Power Battery Battery 1 Battery 2 Battery 3 + 5 Ships 3 - - Set 6 Button 2 Button 1natural_image
Two stainless steel laboratory equipment cases: one with green control panel and labeled parts (1, 2, 3, 4), no visible text or symbols on the devices themselves.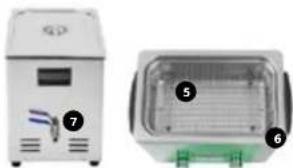
natural_image
Two views of a microwave oven: one with a digital display and labeled components, the other showing a closed storage chamber (no text or symbols visible)text_image
Circuit diagram with numbered components and labeled terminals, likely representing a power or signal measurement setup.NAMEPLATE TRANSLATIONS
ulsonix
CLEANING INSTRUMENTS
① PRODUCT NAME
2 MODEL
3 ULTRASONIC POWER
4 HEATING POWER
5 TANK DIMENSIONS
6 TANK CAPACITY
7 PRODUCTION YEAR
8 SERIAL NO.
⑨ BEWARE
10 ELECTRIC SHOCK | DON'T OPEN
ATTENTION: THIS MACHINE MUST BE GROUNDED!
12 BEWARE: TO MINIMIZE THE RISK OF ELECTRIC SHOCK, PLEASE DON'T REMOVE ANY SCREWS OR THE HOUSING! PLEASE DON'T REPLACE ANY PARTS YOURSELF. TO BE REPLACED ONLY BY A CERTIFIED SPECIALIST? TO PREVENT THE RISK OF THE FIRE AND ELECTRIC SHOCK. PLEASE DO NOT EXPOSE THE MACHINETO RAIN OR MOISTURE!
13 POWER SUPPLY: 230 V\~ / 50 Hz
14 Importer: expondo Polska sp. z o.o. sp. k.
ul. Nowy Ksielin-Innowacyjna 7, 66-002 Zielona Góra | Poland, EU


expondo.de
| 12345 | |||||
| DE | Produktname Modell Ultraschallstärke Heizfunktion Innenmaßedes Behalters | ||||
| EN | Product name | Model | Ultrasonic power | Heating | Tank dimensions |
| PL | Nazwa produktu | Model | Mac ultradzvięków | Funkcja podgrzewania | Wymiary pojemnika |
| CZ | Název výroku | Model | Sila ultrazviku | Funkce topeni | Rozměry nádoby |
| FR | Nom du produit | Modèle | Force d'ultrasons | Fonction chauffe | Dimensions du bassin |
| IT | Nome del prodotto | Modello | Potenza ultrasuoni | Funzione di riscaldamento | Dimensioni del contenitore |
| ES | Nombre del producto | Modelo | Intensidad de los ultrasonidos | Función de calentamiento | Dimensión del recipiente |
| 6 | 7 | 8 | 9 | 10 | |
| DE | Kapazitat | Produktionsjahr | Ordnungsnummer | Achtung | Stromschlaggefahrt Nicht öffnen! |
| EN | Capacity | Production year | Ordnungsnummer | Beware | Do not open! Risk of electric shock! |
| PL | Pojemnoisć | Rok produkcji | Serial no. | Uwaga | Parażenie prądem! Nie obwieraści! |
| CZ | Kapacita | Rak výroby | Numer serii | Pozor | Neotvirejt! Nebzspęti úrazu elektrickym proudem! |
| FR | Capacité | Année de production | Sériove číslo | Attention | Risque de choos electriques ! Ne pas ouvrir ! |
| IT | Capacità | Anno di produzione | Numero de serie | Attenzione | Rischio di scossa eletrical: Non aprin! |
| ES | Capacidad | Año de producción | Numero di serie | Atención | Peligro de descarga eléctrica! No abrir! |
| 1 | 2 | |
| DE | ACHTUNG: DIESE MASCHINE MUSS GEERDET WERDEN! | VORSICHT: UM DAS RISIKO EINES STROMSCHALGS ZU MINIMIEREN BITTE KEINE SCHRAUBEN ODER DAS GEAHAUSE ABNEHMENTI BITTE KEINE TELE VON ALLLENE WEchselNI DAS DART NUR VON EINEM ZERTIFIZIERTEN FACHMANN DURCHGEFÜHRIT WERDEN. UM DAS RISIKO VON FEUER ODER STROMSCHLAG ZU VERHINDERN, DIE MASCHINE VOR REGEN ODER NASSE SCHÜTZEN. |
| EN | ATTENTION: THIS MACHINE MUST BE GOURNDED! | BEWARE: TO MINIMIZE THE RISK OF ELECTRIC SHOCK, PLEASE DO NOT REMOVE ANY SCREWS OR THE HOUSING: PLEASE DO NOT REPLACE ANY PARTS YOURSELF; PARTS MAY BE REPLACED ONLY BY A CERTIFIED SPECIALIST. TO PREVENT THE RISK OF FIRE AND ELECTRIC SHOCK, PLEASE DO NOT EXPOSE THE MACHINE TO RAIN OR MOISTURE. |
| PL | UWAGA: TO URZADZENIE MUSI BYC UZEMIONE! | UWAGA: ABY ZMINIMALIZOWAK RZYKO PORAZENIA PRASEM, PROSIZE, NIE WYIMOWAĆ ZADNYCH SRUB LUB ELEMENTOW OBUDOWY! PROSIZE, NIE WYMIENIC JAKICHKOLWIEK CZĘŚCI. MOGA ONE BYC WYMIENIONY TYLKO PRZEZ CERTITYKOWANEGO SPECIALISTA! ABY UNIKNĄC RYZTKA POZARU I PORAZENIA PRASEM, NIE NAŁEZY NARAŻAĆ MASZINY NA DZALANIE DESZCU ZUB WILGOCI. |
| CZ | POZORI TOTO ZAŘÍZENÍ MUSÍ BÝT UZEMNĚNE! | POZOR: ABYSTE MINIMALIZOWALI RIZIKO ÚRAZU ELEKTRICKÝM PRODUDEM, NEODNIMEITE ŽADNÉ SROUBY ANÍ CÁSTI KRYTU! NEVYMĚNUATE ŽADNÉ CÁSTI SAMÍ TO SMÍ PROVÁDĚT POUZE CERTIFIKOVANY SPECIALISTA, ABYSTE MINIMALIZOWALI RIZIKO POŽÁRU NEBO ÚRAZU ELEKTRICKÝM PRODUDEM, CHRAŃTE ZAŘÍZENÍ PŘED DEŠTĚM A VLHKOSTÍ. |
| FR | ATTENTION: CETTE MACHINE DOIT ÊTRE MISE A LA TERRE! | ATTENTION: AFIN DE MINIMISER LE RISQUE DE CHOCS ÉLECTRIQUES, NE RETIREZ AUCUNE VIS ET NE DĚPOSEZ PAS LE BOTIER DE LA MACHINE! NE ENPLACEZ AUCUN COMPOSANT VOUS-MÈME! LES REPARATIONS DOIVENT UNIQUENMENT ÊTRE EFFECTUÉES PAR DES TECHNICIENS CERTIFÉS. AFIN DE PRÉVENIR LES RISQUES D'INCENDIE ET DE CHOCS ÉLECTRIQUES, GARDEZ LA MACHINE À L'ABRI DE L'HUMIDITE ET DE LEAU. |
| IT | ATTENZIONE: QUESTA MACCHINA DEVE ESSERE MESSA A TERBA! | ATTENZIONE: PER DIMINUIRE IL RISCHIO DI SCOSCA ELETTRICA, NON RIMUOVERE ALCUNA VITE O ALLOGGIAMENTI NON CAMBIARE ALCUINA PARTE DA SOULI LA SOSTITUZIONE DEVE ESSERE ESEGUITA SOLAMENTE DA UN TÉCNICO CERTIFICATO. PER RIDURRE IL RISCHIO DI INCENDI O SCOSSE ELETTRICHE, LA MACCHINA DEVE ESSERE PROTETTA DALLA PIOGGIA E DALL UMIDITA. |
| ES | ATENCIÓN: JESTA MÁQUINA DEBE ESTAR CONECTADA A TIERRAI! | ATENCIÓN: PARA MINIMIZAR EL RIESGO DE DESCARGA ÉLECTRICA, NO RETIRE NINGÚN TORNILLO NI ABRIA LA CARÇASA, POR TAVOR, NO CAMBIE NINGUNA PIEZA POR SU CUENTA! ESTO SÓLO PUEDE SER LLEVADO A CABO POR UN ESPECIALISTA CERTIFICADO: CON EL FIN DE EVITAR EL RIESGO DE INCENDIO O DESCARGA ÉLECTRICA, PROTEJA LA MÁQUINA DE LA LLUVIA O LA HUMEDAD. |
| 13 | 14 | |
| DE Spannung / Frequenz | Importeur | |
| EN Voltage / Frequency | Importer | |
| PL Napięcio/ Czestotliwość | Importer | |
| CZ Napęti / Freqvence | Dovozce | |
| FR Tension / Fréquence | Importateur | |
| IT Tensione / Frequenza | Importatore | |
| ES Voltaje/ Frecuencia | Importador | |
NOTES/NOTIZEN NOTES/NOTIZEN
For the disposal of the device please consider and act according to the national and local rules and regulations.
CONTACT
expondo Polska sp. z o.o. sp. k.