
SC12F50 - Vacuum Cleaner SAMSUNG - Free user manual and instructions
Find the device manual for free SC12F50 SAMSUNG in PDF.
| Brand | Samsung |
| Model | SC12F50 (H, P, V series) |
| Product Type | Canister vacuum cleaner |
| Usage | Household use only |
| Suction Power | Variable depending on setting (MAX/MIN) |
| Power Control | Via radio frequency remote control on handle or button on body |
| Motorized Brush | Yes, with overload protector (SC12F50P series) |
| Dust Container | Transparent, removable, visible capacity (fill line) |
| Dust Filter | Washable, dry for 12 hours minimum before reassembly |
| Exhaust Filter | HEPA (non-washable) + micro filter |
| Cord Length | Approximately 7 meters (estimate, check manual) |
| Included Accessories | Telescopic tube, crevice tool, dusting brush, parquet brush, blanket brush (depending on series) |
| Additional Options | Mini turbo brush, special pet hair brush |
| Brush Maintenance | Regular disassembly and cleaning of entangled threads and hair |
| Power Supply | Polarized wall outlet (100-240 V AC, variable frequency) |
| Handle Batteries | 2 AAA batteries (replacement) |
| Noise Level | Not specified, but compliant with applicable standards |
| Safety | Automatic shut-off after 30 minutes of inactivity, brush overload protector |
| Replacement Parts | Available from Samsung distributor (filters, brushes, belts) |
Frequently Asked Questions - SC12F50 SAMSUNG
User questions about SC12F50 SAMSUNG
0 question about this device. Answer the ones you know or ask your own.
Ask a new question about this device
Download the instructions for your Vacuum Cleaner in PDF format for free! Find your manual SC12F50 - SAMSUNG and take your electronic device back in hand. On this page are published all the documents necessary for the use of your device. SC12F50 by SAMSUNG.
USER MANUAL SC12F50 SAMSUNG
Vacuum Cleaner user manual
* Before operating this unit, please read the instructions carefully.
* For indoor use only.
English
imagine the possibilities
Thank you for purchasing a Samsung product.
To receive a more complete service,
please register your product at
www.samsung.com/register
SAMSUNG
safety information
SAFETY INFORMATION

- Before operating the appliance, please read this manual thoroughly and retain it for your reference.

- Because these following operating instructions cover various models, the characteristics of your vacuum cleaner may differ slightly from those described in this manual.
CAUTION/WARNING SYMBOLS USED
| WARNING | Indicates that a danger of death or serious injury exists. |
| CAUTION | Indicates that a risk of personal injury or material damage exists. |
OTHER SYMBOLS USED
| Represents something you must NOT do. | |
| Represents something you must follow. | |
| Indicates that you must disconnect the power plug from the socket. |

This vacuum cleaner is designed for household use only.
Do not use this vacuum cleaner to clean building waste and debris.
Regularly keep the filters in clean conditions to prevent of collecting fine dust in them.
Do not use this vacuum cleaner with any of the filters removed.
Failure to meet these requirements could cause damage to the internal parts and void your warranty.
State of California Proposition 65 Warning (US only)

This product contains chemicals known to the State of California to cause cancer and reproductive toxicity.
IMPORTANT SAFETY INSTRUCTIONS
When using an electrical appliance, you should always follow these basic precautions:
READ ALL INSTRUCTIONS BEFORE USING YOUR CANISTER VACCUM
WARNING – TO REDUCE THE RISK OF FIRE, ELECTRIC SHOCK, OR INJURY:
- Do not leave the appliance unattended when it is plugged in. Unplug from the outlet when not in use and before servicing.
- Do not use outdoors or on wet surfaces.
- Do not allow the vacuum to be used as a toy. Pay close attention when the vacuum is used by or near children.
- Use only as described in this manual. Use only manufacturer's recommended attachments.
- Do not use with a damaged cord or plug. If the appliance is not working as it should, has been dropped, damaged, left outdoors, or dropped into water, bring it to a service center.
- Do not pull or carry by the cord, use the cord as a handle, close a door on the cord, or pull the cord around sharp edges or corners. Do not run appliance over the cord. Keep the cord away from heated surfaces.
- Do not unplug by pulling on the cord. To unplug, grasp the plug, not the cord.
- Do not handle the plug or appliance with wet hands.
- Do not put any object into openings. Do not use with any opening blocked. Keep free of dust, lint, hair, and anything that may reduce air flow.
- Keep hair, loose clothing, fingers, and all parts of your body away from openings and moving parts.
- Turn off all controls before unplugging.
- Use extra care when cleaning on stairs.
- Do not use to pick up flammable or combustible liquids, such as gasoline, or use in areas where they may be present.
- Do not pick up anything that is burning or smoking, such as cigarettes, matches, or hot ashes.
- Do not use without the dirt cup and/or filters in place.
-
Do not use the vacuum cleaner in an enclosed space filled with vapors given off by oil base paint, paint thinner, some moth proofing substances, flammable dust, or other explosive or toxic materials.
-
Do not pick up hard or sharp objects such as glass, nails, screws, coins, etc.
-
The hose contains electrical wires. Do not use when damaged, cut, or punctured. Avoid picking up sharp objects.
-
Always turn off this appliance before connecting or disconnecting either the hose or motorized nozzle.
-
Unplug before connecting the motorized nozzle.
-
Hold the plug when rewinding onto the cord reel. Do not allow the plug to whip when rewinding.
SAVE THESE INSTRUCTIONS
POLARIZED PLUG INSTRUCTIONS
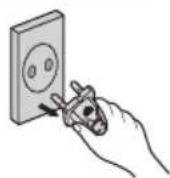
- To reduce the risk of electric shock, this appliance has a polarized plug (one blade is wider than the other). This plug will fit in a polarized outlet only one way. If the plug does not fit fully in the outlet, reverse the plug. If it still does not fit, contact a qualified electrician to install the proper outlet. Do not change the plug in any way.
ASSEMBLING THE CLEANER
06
10 Power brush (SC12F50P Series)
MAINTAIN TOOLS AND FILTER
11
11 Power brush (SC12F50P Series)
13 Using accessory
15 Maintain floor tools
17 Emptying the dust bin
18 Cleaning the dust filter
19 Cleaning the dust filter
20 Cleaning the outlet filter
20 Changing the battery
TROUBLESHOOTING
21
assembling the cleaner
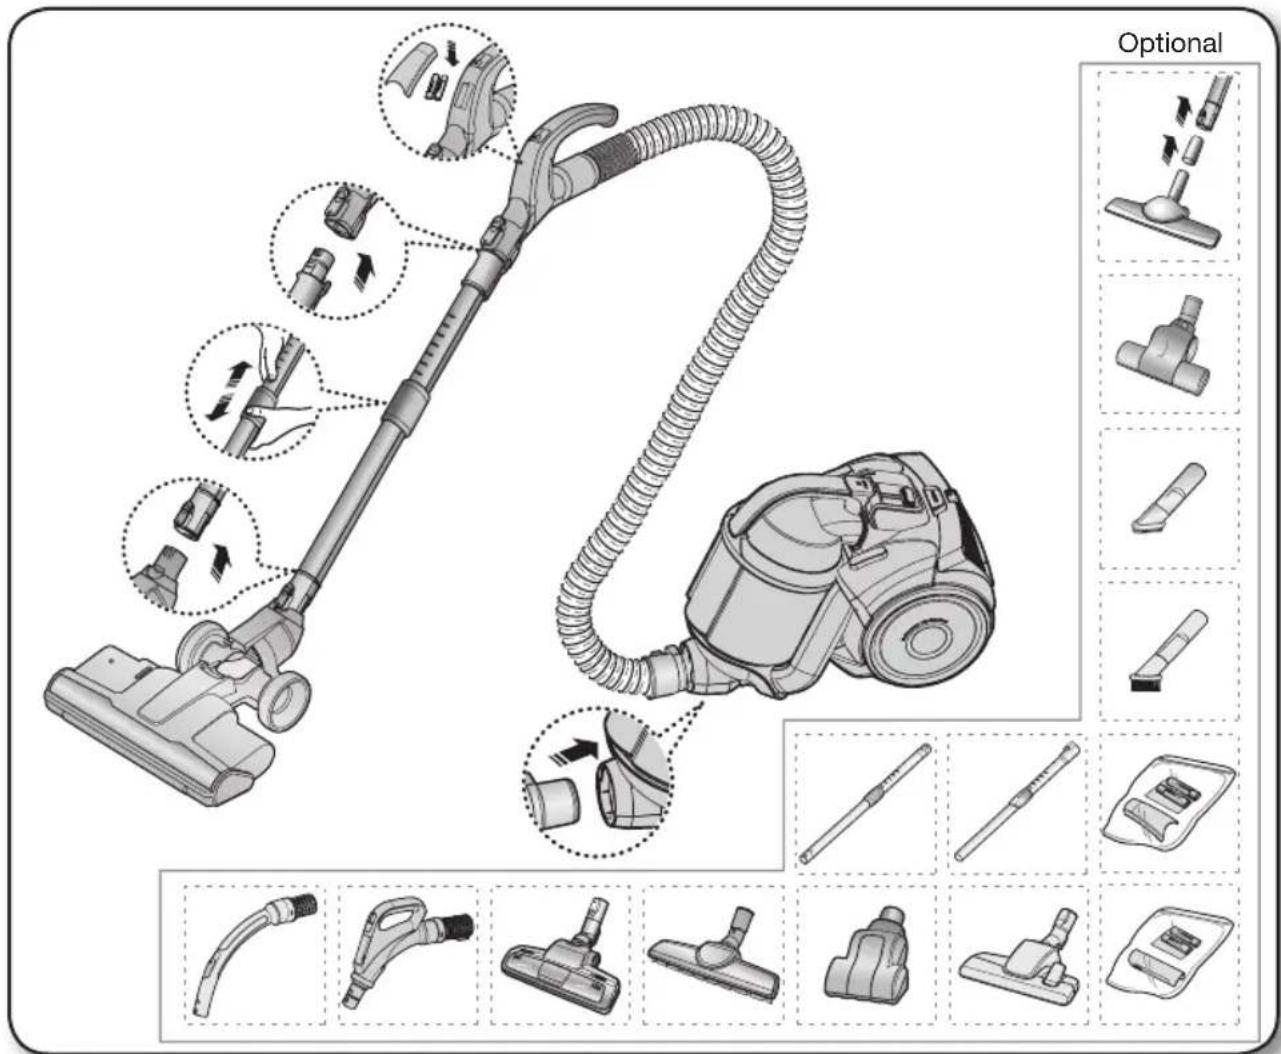

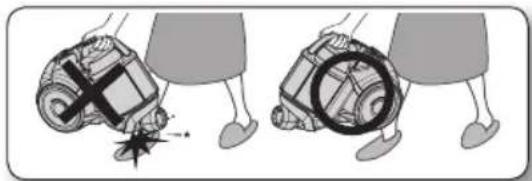
- Please do not press the button of dust bin handle when carrying machine.

- For storage, upright the pipe on the floor. (SC12F50P Series)

- For storage, park the floor nozzle. (SC12F50H, SC12F50V Series)
natural_image
Illustration of two hands holding a camera with a cross symbol and a magnifying glass, no text or symbols present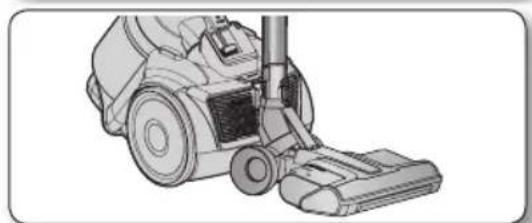
natural_image
Line drawing of a vacuum cleaner with attached pump (no text or symbols)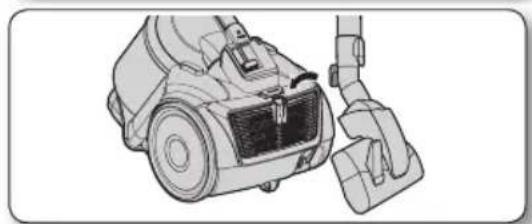
natural_image
Line drawing of a vacuum cleaner device with attached clamped components (no text or symbols)operating the cleaner
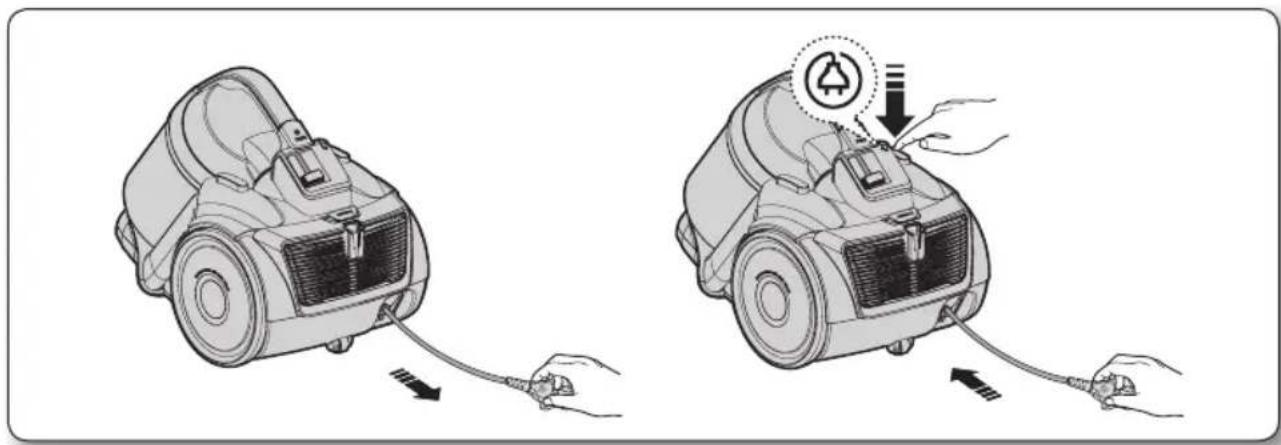
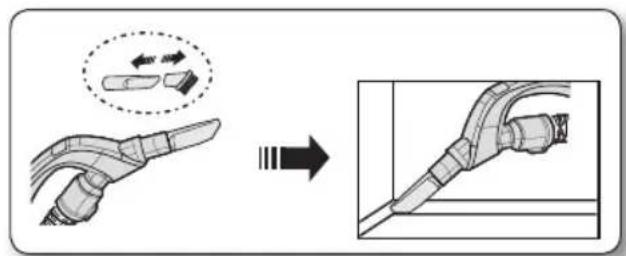
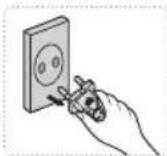
POWER CORD
natural_image
Illustration of two different vacuum cleaner setups with hands connecting cables (no text or symbols)
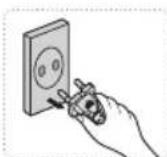
- When removing the plug from the electrical outlet, grasp the plug, not the cord.
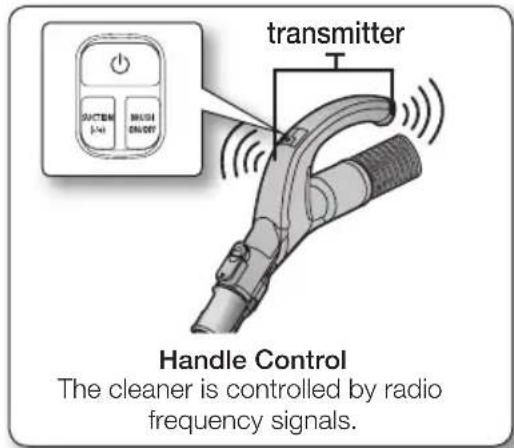
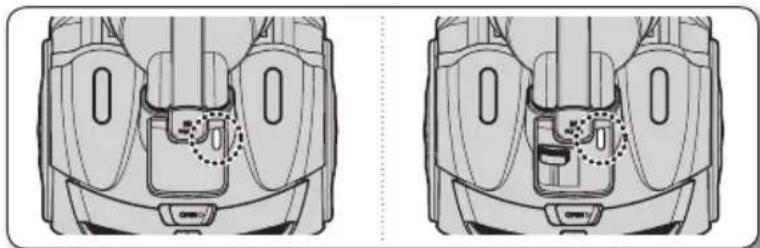
POWER CONTROL
Radio frequency remote-control (SC12F50H Series)
HOSE (SC12F50H Series)
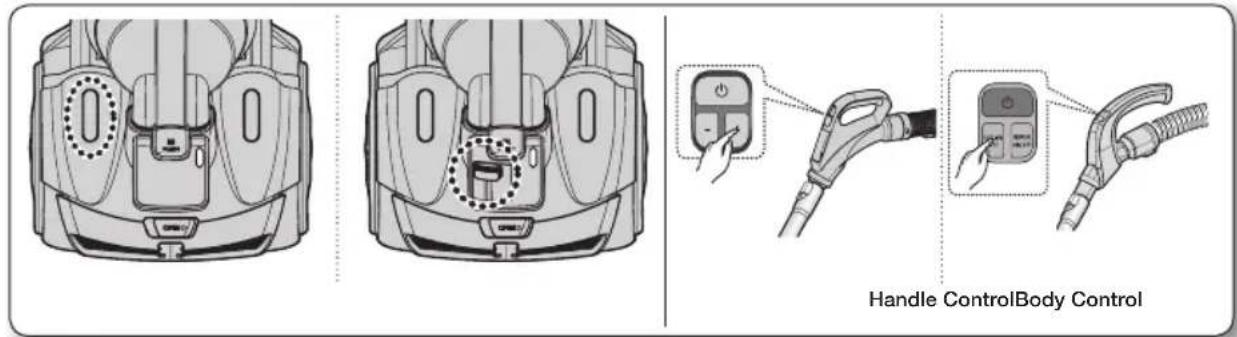
1. ON/OFF [ ⏻ Button
- Press the [ ] button to operate the vacuum cleaner. Press again to stop the vacuum cleaner.
2. Suction [+], [-] Button
- Press the [+] button to operate the vacuum to high suction power. Press the [-] button to operate the vacuum to low suction power.
![SAMSUNG SC12F50 - Suction [+], [-] Button - 1](/content/2026/03/519541/images/672f1722f76f221bcaa8a959cfdc9bbc2f45b06a337a5ca29fea6fb4d0604b1e.jpg)
natural_image
Electric vehicle charging plug with power button icon and warning symbol (no text or labels)Handle Control
The cleaner is controlled by radio frequency signals.
![SAMSUNG SC12F50 - Suction [+], [-] Button - 2](/content/2026/03/519541/images/67763da6fd204871f27c845a627dd76968d089de043ea890f0e647df8b073bfd.jpg)
If no button is pressed for 30 minutes while cleaning, the safety device is activated and the power is cut off.
In this case, press the [Power] button on the main unit or unplug and then plug the power cord in again.
operating the cleaner
HOSE (SC12F50P Series)
1. Vacuum cleaner ON/OFF( ⏻)
- Press the ON/OFF button to operate the vacuum cleaner. Press again to stop the vacuum cleaner.
2. Vaccum cleaner suction(-/+)
- Press the SUCTION (+/) button to increase or decrease the suction power. Each time you press the button, you gradually increase the suction power. After the suction power reaches its maximum, the next time you press the button, you return the suction power to its minimum.
3. BRUSH ON/OFF
- Press the BRUSH ON/OFF button to operate the Power Brush. Press again to stop the Power Brush.

Don't cover the handle transmitter when you use a handle control button.
FCC NOTICE / FCC ID : A3LROH20S
This device complies with part 15 of the FCC Rules. Operation is subject to the following two conditions:
- This device may not cause harmful interference, and
- This device must accept any interference received, including interference that may cause undesired operation.
BODY
Press the power ON/OFF button repeatedly to start and to stop the vacuum cleaner. (OFF → ON → OFF)

If the remote handle control is not working, the cleaner can be operated using the ON/OFF button on the body of the machine.
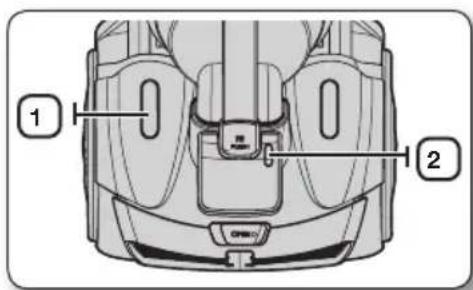
 | The ON/OFF button operates the vacuum cleanser or stops it. |
 | The filter light is illuminated when the dust pack requires checking or emptying. |
- HOSE
To reduce suction for leaning draperies, small rugs, and other light fabrics, pull the tap air until the hole is open

natural_image
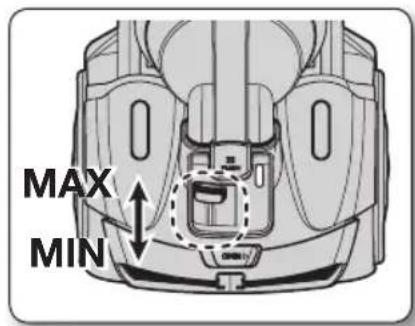
Diagram of a curved mechanical component with directional arrows indicating movement (no text or symbols)- BODY
To control power level, just slide the power control up and down.
MIN = For delicate fabrics, e.g. net curtains.
MAX = For hard floors and heavily soiled carpets.
operating the cleaner
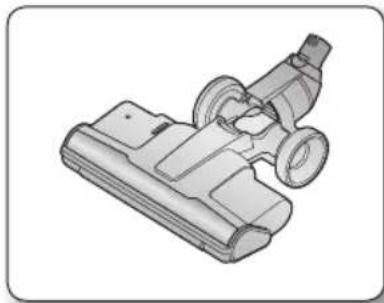
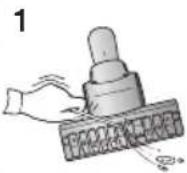
POWER BRUSH (SC12F50P SERIES)
Vacuuming with the power brush
1. Attaching the power brush
The hose must be plugged into the canister and the power brush must be plugged into the hose and extension wand.
2. Vacuuming
- For best results, move the power brush slowly using short, overlapping strokes.
- For heavily soiled areas, repeat strokes in several directions.
natural_image
Technical illustration of a mechanical component with no visible text or symbols
Do not invert the power brush while it is running.
3. Checking the Performance of the power brush
You can check whether the power brush is operating correctly by lifting up the extension tube slightly to view the back of the brush.
The power brush will not operate when it is jammed or the unit is turned off.
If the power brush is jammed, unplug the power cord from the electrical outlet.
Turn the power brush over and remove the jammed object.
Turn the power brush back to the vacuuming position and resume vacuuming.
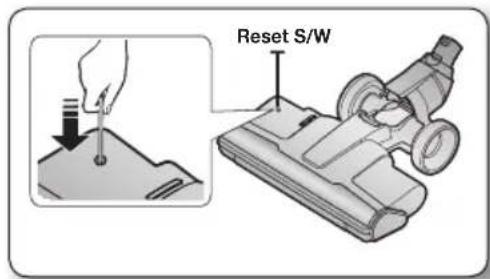
Overload protector
The overload protector shuts off the brush motor if the floor brush becomes obstructed. The floor brush will stop, but the suction motor will continue to run. To reset the overload protector, turn the vacuum off and unplug it. Clear the obstruction from the floor brush area. Use a pen tip to press down the reset switch. Turn the vacuum on and continue cleaning.
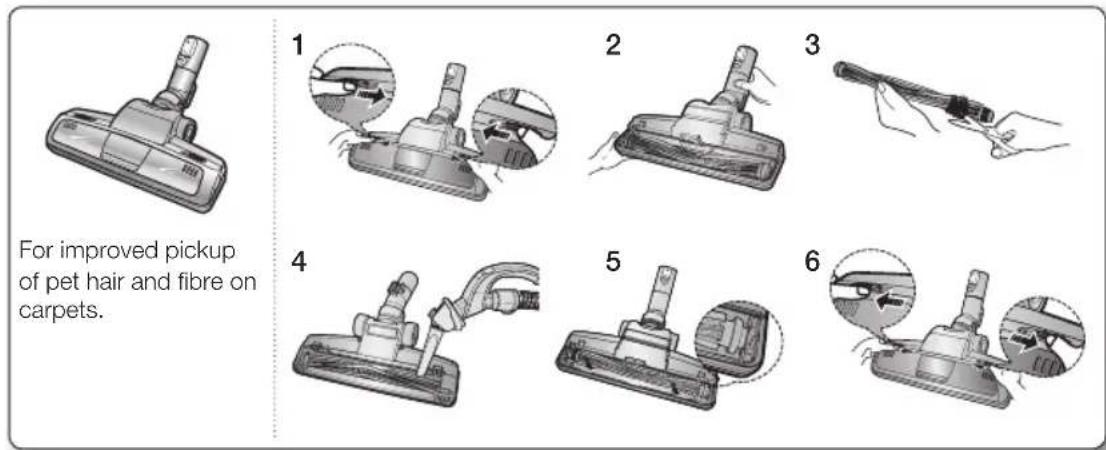
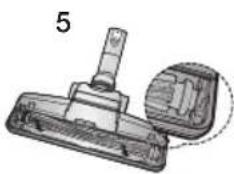
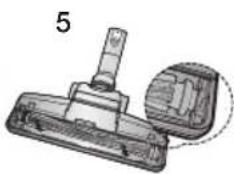
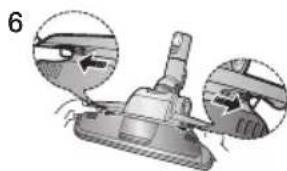
maintain tools and filter
POWER BRUSH (SC12F50P SERIES)
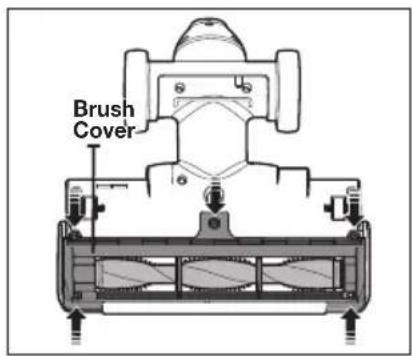
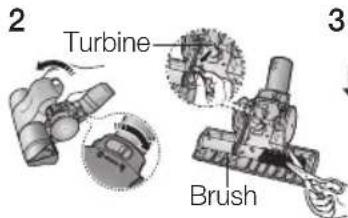
CHECKING the Rotating Floor Brush and Drive Belt
You should check your vacuum cleaner's rotating floor brush and drive belt regularly for wear or damage. You should also clean strings, hair, and carpet fibers off the brush and brush ends. These can wrap around the brush and hamper its ability to effectively clean your carpet. Also remove any debris that has accumulated under the brush cover.
- Unplug the vacuum from the electrical outlet.
- Place the handle in low position and turn the vacuum cleaner over so the bottom side is up.
- Remove the five screws (at arrows, right) with a screwdriver.
- Remove the brush cover from the floor brush.
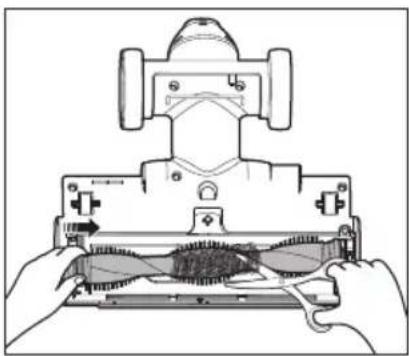
- Grasp the rotating floor brush at both ends and lift.
- Clean string, hair and other debris off the rotating floor brush, paying particular attention to brush ends.
- Clean string, hair and other debris off the motor pulley and drive belt areas.
- Check the drive belt carefully for wear, cuts or stressed areas.
- Check the air passageway for obstructions. Remove debris from this area.

The rotating floor brush could cause the fringe of a rug to become tangled within the vacuum.
Use caution and turn off the floor brush when vacuuming throw rugs with fringe.
natural_image
Illustration of hands operating a mechanical device with a tool handle (no text or symbols visible)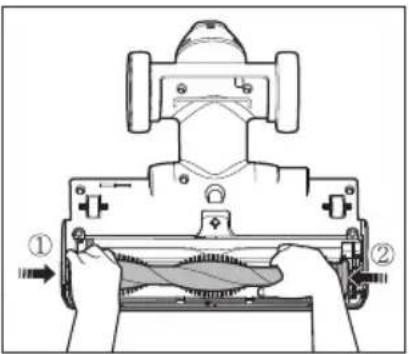
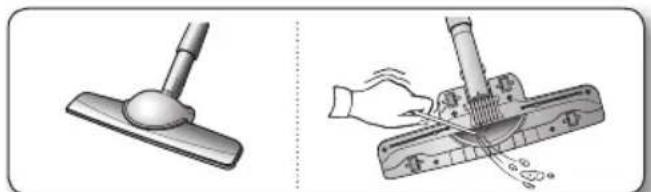
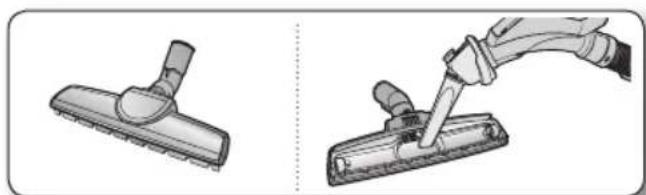
maintain tools and filter
Parquet brush (OPTIONAL)
• Vacuums dust in a wide area at once.
- Remove waste matter completely from the inlet if the inlet is blocked.
natural_image
Illustration showing a hand using a brush to clean or adjust a surface with a tool, alongside a close-up of the brush tip (no text or symbols present)Blanket brush (OPTIONAL)
For picking up pet hair and fibre on upholstery and bed linen.

natural_image
Illustration of a robotic arm with motion arrows and a close-up inset showing the joint detail (no text or symbols)- Remove waste matter completely when inlet is blocked.
- Turn the lock button to ( ), and remove.
- To reassemble, align the cover to the front of the main body and close. After closing the cover, ensure that the lock button is turned to the ( 🔍 ) position.

Use for bedclothes only. Be careful not to damage the brush during unclogging.
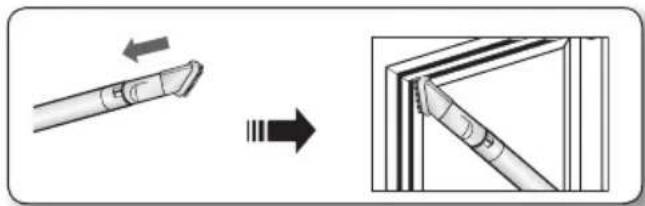
USING ACCESSORY
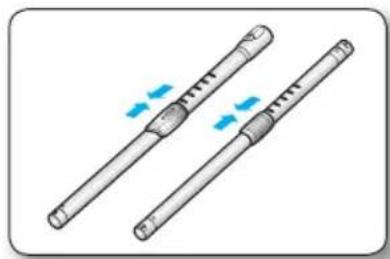
Pipe
- Adjust the length of the telescopic pipe by sliding the length control button located in the center of the telescopic pipe back and forth.
natural_image
Illustration of two cylindrical mechanical components with blue directional arrows indicating motion or force (no text or symbols)- To check for blockages, separate the telescopic pipe and adjust to shorten. This allows for easier removal of waste clogging the tube.
natural_image
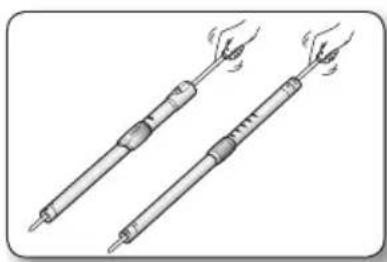
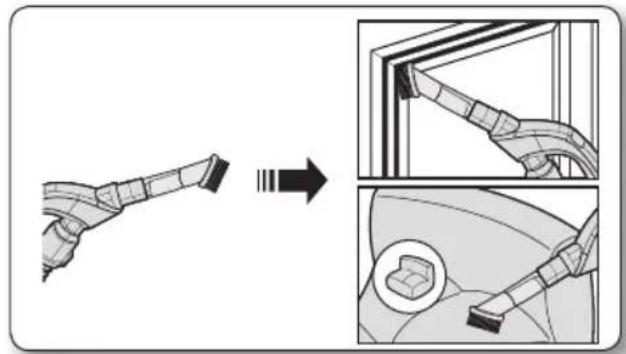
Illustration of two soldering iron tools with handles and cooling effect (no text or symbols)Accessory (SC12F50H, SC12F50V Series)
- To use the upholstery tool, push the accessory on to the end of the hose handle.
natural_image
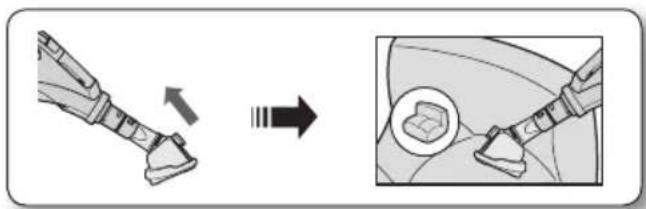
Diagram showing a mechanical assembly with an arrow indicating direction and a close-up of a component (no text or symbols present)- Pull out the button, to use the dusting brush.
- To use the crevice tool, push the accessory on to the end of the hose handle in the opposite direction.
natural_image
Illustration of a tool being inserted into a component, showing a step and magnified detail (no text or symbols)maintain tools and filter
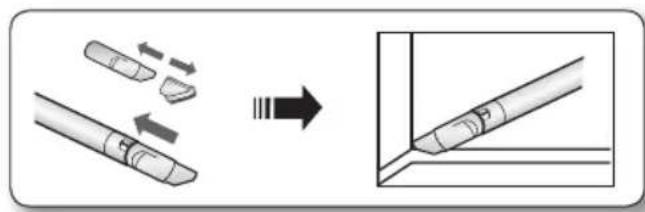
Accessories (SC12F50P Series)
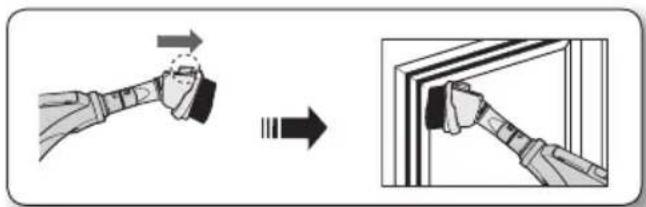
- Push the accessory onto the end of the hose handle.
natural_image
Diagram showing a robotic arm joint before and after assembly, with close-up views of the component (no text or symbols)- Pull out the dusting brush to use the crevice tool.
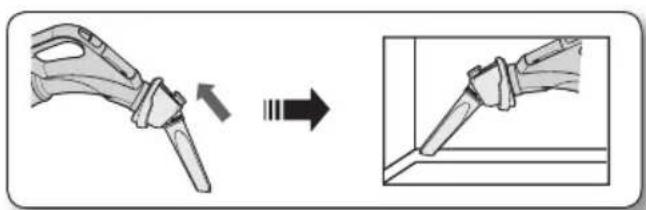
- Push the accessory onto the end of the pipe.
natural_image
Diagram showing a pen tip being inserted into a corner with an arrow indicating direction (no text or symbols present)- Pull out the dusting brush to use the crevice tool.
natural_image
Diagram showing a mechanical component before and after assembly, with no visible text or symbolsMAINTAIN FLOOR TOOLS
2-Step Brush (Optional)

- Adjust the inlet lever according to the floor surface.
- Remove waste matter completely if the inlet is blocked.
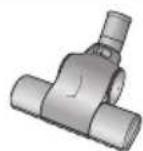
Power Pet Plus Brush (Optional)
Frequent vacuuming of hair or pet fur may cause a falling-off of the rotation due to matters tangled around the drum. In this case, clean the drum with care.
- Push the Open button of the transparent screen cover to separate the cover.
- Remove the brushbar from the transparent screen.
- Remove waste matter such as dust and hair tangled around the brushbar using scissors.
- Remove dust inside the brush housing using a dry duster or crevice tool.
- Insert brushbar into rotating belt and assemble.
- Click the transparent screen cover back into place to reassemble.
Parquet Master Brush (Optional)
• Vacuum dust in wide area at once.
- Remove waste matter completely if the inlet is blocked.
natural_image
Illustration of two different cleaning or repair tools: a brush and a tool, both without any text or symbols.maintain tools and filter
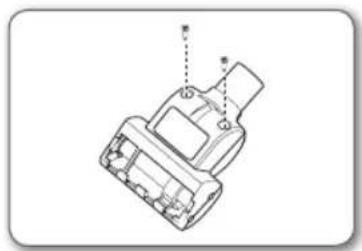
Mini turbo brush (Optional)
- To replace brushroll
-
If a clog is present or debris is visible, unscrew the two screws on the back of the Mini turbo brush to remove the faceplate and clear any obstructions.
-
Inspect condition of brushroll. Replace brushroll if brushes are worn down. To remove brushroll, pull up and out of end slots in nozzle housing. Insert ends of brushroll into same slots to replace.

Inspect belt to ensure that it is in good condition.
If belt is broken or cracked, replace belt according to To Replace Belt instructions.
- Using at MAX. Press the MAX button to operate the vacuum at maximum intake.
natural_image
Technical line drawing of a mechanical component with no visible text or symbols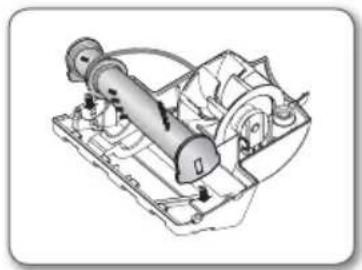
natural_image
Mechanical assembly diagram showing a motor and gear assembly (no text or labels)
natural_image
Diagram of a mechanical assembly with a hand holding a tool, showing internal components and motion direction (no text or labels)- To replace belt
-
Remove bottom plate. See figure in to replace brushroll instructions.
-
Loop one end of new belt around shaft of pulley.
-
Loop other end of belt around designated area for it on brushroll. Insert brushroll into slots in nozzle housing. See figure in to replace brushroll instructions.
-
Fit Mini turbo brush back together as described in to replace brushroll instructions.
natural_image
Illustration of hands assembling a mechanical component into a plastic housing (no text or symbols)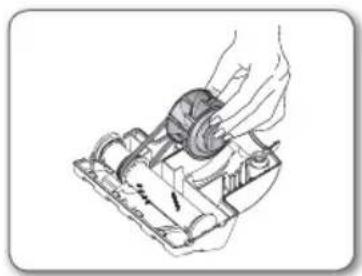
natural_image
Line drawing of a hand using a tool to adjust or install a mechanical component (no text or symbols visible)1 2 3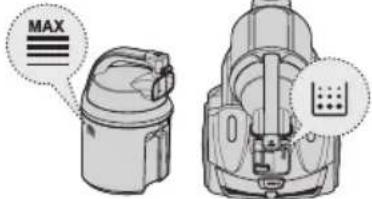 | 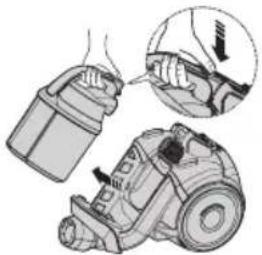 | 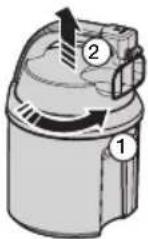 |
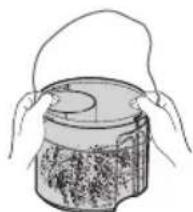
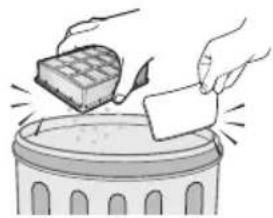
| Once dust reaches the dust full mark, empty the dust bin. | Take the dust bin out by pushing the button. | Separate the dust bin cover. |
4 5 6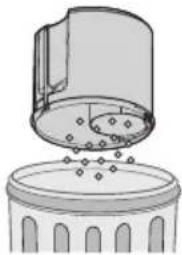 | 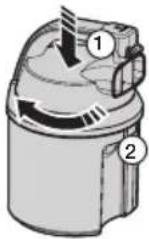 | 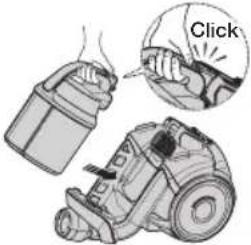 |
| Throw the dust away in the bin. Close the dust bin cover. | Before use, push the dust bin into the main body of the vacuum cleaner until you hear the “click” sound. | |
• Empty into a plastic bag. (recommended for asthma/allergy sufferers)
natural_image
Line drawing of a hand holding a container with a handle, no text or symbols present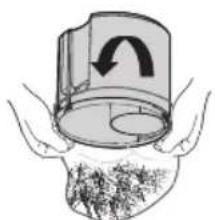
natural_image
Illustration of hands holding a cylindrical container with an arrow indicating rotation (no text or symbols)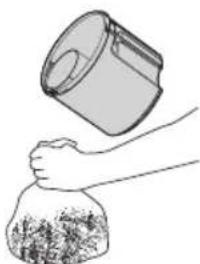
natural_image
Illustration of a hand pouring liquid into a container with a textured base (no text or symbols)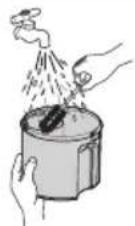


You may rinse the dust bin with cold water.
maintain tools and filter
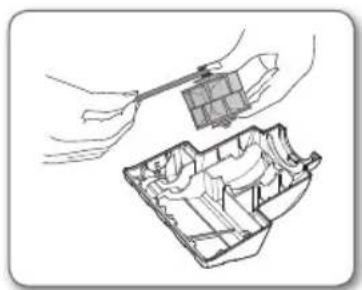
CLEANING THE DUST FILTER
When to clean the dust filter
- The lamp will turn red when suction is reduced. If the light comes on, please clean the dust filter.
natural_image
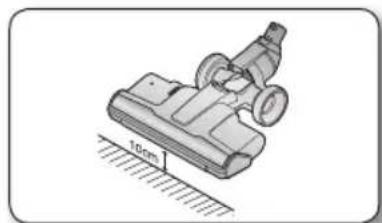
Technical line drawing of a mechanical component with two views (front and side), no visible text or symbols- Turn the vacuum power to 'MAX'.
- If the filter check indicator turns red with the inlet floating 10cm above flat floor, clean the dust pack.
natural_image
Illustration of a vacuum cleaner with a 10mm scale indicator (no text or symbols on the device itself)
When suction is noticeably reduced continuously or vacuum cleaner abnormally overheats, please clean the dust pack.
1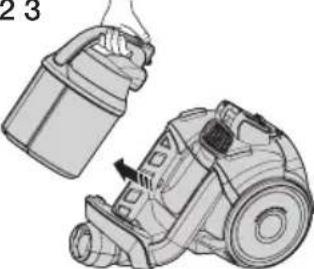 Take the dust bin out. Pull the dust bin cover to open. Take the dust bin out. Pull the dust bin cover to open. | 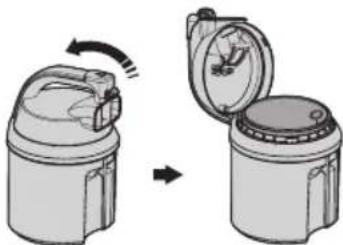 | 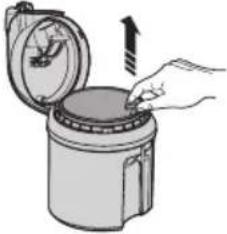 Remove the filter from the dust bin. Remove the filter from the dust bin. |
4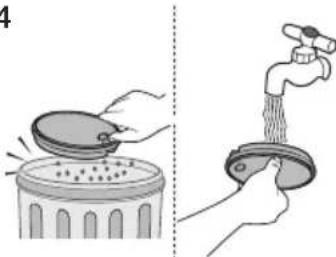 Shake the filter over a garbage can to remove loose dust, then wash the filter with water. Shake the filter over a garbage can to remove loose dust, then wash the filter with water. | 5 Let the filter dry in the shade for more than 12 hours. Let the filter dry in the shade for more than 12 hours. | 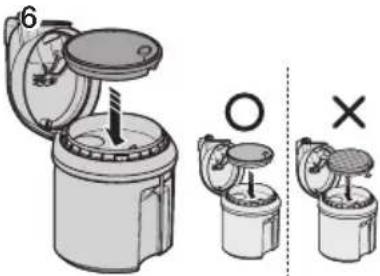 Put the filter into the dust bin. Put the filter into the dust bin. |
7 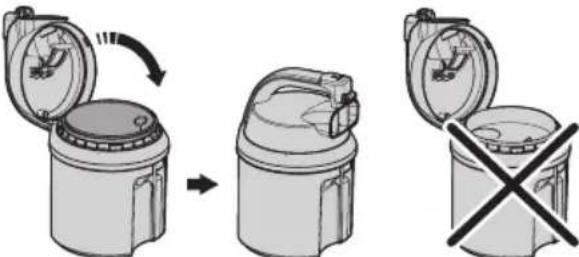 Close the dust bin cover. To close the dust bin cover, filter should be assembled. Close the dust bin cover. To close the dust bin cover, filter should be assembled. | 8 Before use, push the dust bin into the main body of the vacuum cleaner until you hear the “click” sound. Before use, push the dust bin into the main body of the vacuum cleaner until you hear the “click” sound. | |

Make sure the filter is completely dry before putting it back into the vacuum cleaner. Allow 12 hours for it to dry.

12~ Remove the fixed frame part at the back of the main body. Remove the fixed frame part at the back of the main body. | 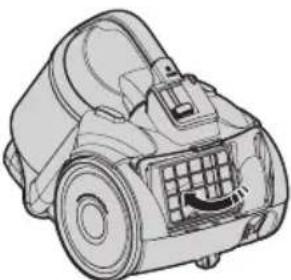 Pull out the HEPA filter using the tab. Pull out the HEPA filter using the tab. | 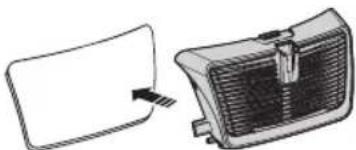 Pull out the micro filter Pull out the micro filter |
4 Clean the filter. Put the HEPA filter and frame part into the main body. Clean the filter. Put the HEPA filter and frame part into the main body. | 5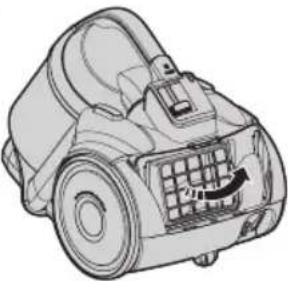 | 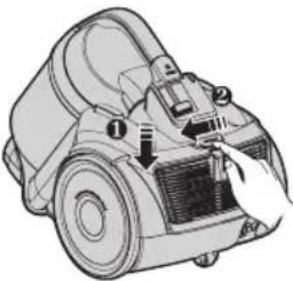 |

- When suction is noticeably reduced continuously or vacuum cleaner abnormally overheats, please clean the outlet filter. Note. Do not wash HEPA filter.
If cleaning does not resolve the problem Please replace blocked out filter. - Replacement filters are available at your local Samsung distributor.
CHANGING THE BATTERY

- If the vacuum cleaner does not work, replace the batteries in the handle.
If the problem persists, please contact an authorized dealer.
- Use 2 AAA batteries.

- Never disassemble or recharge the batteries.
- Never heat up the batteries or throw them into a fire.
- Do not reverse the (+), (-) poles.
- Dispose of the batteries property.

natural_image
Technical illustration of a mechanical tool or connector assembly (no text or symbols visible)BATTERY TYPE : AAA Size

troubleshooting
| PROBLEM SOLUTION | |
| Motor does not start. | Check cable, pulg and socket.Leave to cool. |
| Suction force is gradually decreasing. | Check for blockage and remove. |
| Cord does not rewind fully. | Pull the cord out 2-3 m and push down the cord rewind button. |
| Vacuum cleaner does not pick up dirt. | Check hose and replace if required. |
| Low or decreasing suction. | Please check filter and, if required, clean as illustrated in the instructions. if filters are out of condition change them to new ones. |
| Body overheating. | Please check filters, if required clean as illustrated in the instruction. |
| Static electricity discharge. | Please decrease power suction.This can also occur when air in the room is very dry.Please ventilate the room to air humidity become a normal. |
memo
memo
SAMSUNG
INSTRUCTIONS DES PRISES POLARISÉES
natural_image
Illustration of two hands holding a camera with a cross symbol and a magnifying glass, no text or symbols present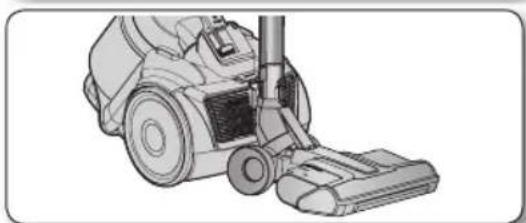
natural_image
Line drawing of a vacuum cleaner with attached pump (no text or symbols)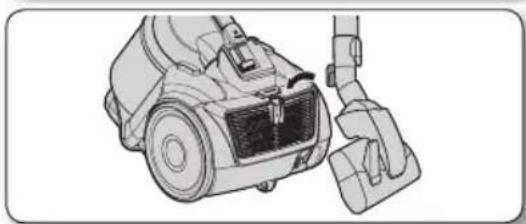
natural_image
Line drawing of a vacuum cleaner device with attached clamped components (no text or symbols)natural_image
Illustration of two different vacuum cleaner setups with hands connecting cables, showing wiring and a warning symbol (no text or labels)
2. Bouton Aspiration [+], [-]
natural_image
Illustration of an electric vehicle charging plug with a control panel and power button (no text or symbols)NORME fCC/ffC ID : A3LROH20S
natural_image
Diagram of a curved mechanical component with directional arrows indicating movement (no text or symbols)- CORPS DE L'ASPIRATEUR
natural_image
3D rendering of a handheld vacuum cleaner component (no text or symbols visible)
natural_image
Illustration of hands operating a mechanical device with a handle and blade (no text or symbols visible)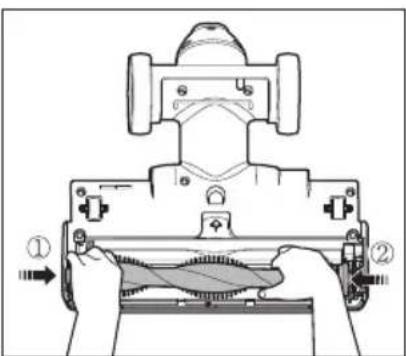
natural_image
Illustration of a hand using a tool to cut or mark a mechanical component (no text or symbols visible)natural_image
Mechanical assembly diagram showing a hand operating a device with a close-up inset (no text or symbols)natural_image
Illustration of two cylindrical mechanical components with blue directional arrows indicating motion or force (no text or symbols)natural_image
Illustration of two different types of soldering tools with visible heat dissipation (no text or symbols)Accessoire (Série SC12f50H, SC12f50V)
natural_image
Diagram showing a mechanical assembly with an arrow indicating direction and a close-up of a component (no text or symbols present)natural_image
Illustration of a hand holding a tool with an arrow indicating process (no text or symbols)natural_image
Diagram showing a robotic arm joint before and after assembly, with close-up views of the component (no text or symbols)natural_image
Diagram showing a pen tip being inserted into a corner panel, with an arrow indicating the process (no text or symbols present)natural_image
Diagram showing a mechanical assembly process with arrows indicating direction and a close-up of a pipe joint detail (no text or symbols)ENTRETIEN DES BROSSES
Brosse 2 positions (en option)

natural_image
Diagram of a vacuum cleaner with two views showing internal components (no text or labels)
natural_image
Illustration of a mechanical clamp or fixture with a coiled tube and lever (no text or symbols)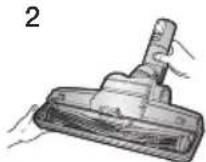
natural_image
Technical illustration of a mechanical component with a pin and housing (no text or symbols)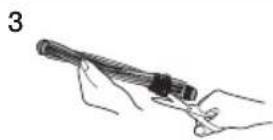

natural_image
Illustration of a vacuum cleaner with two close-up insets showing mechanical components (no text or symbols)natural_image
Illustration of two different hair cleaning techniques: a brush and a tool, both without any text or symbols.natural_image
Technical line drawing of a mechanical component with no visible text or symbols
natural_image
Mechanical assembly diagram showing a motor and gear assembly (no text or labels)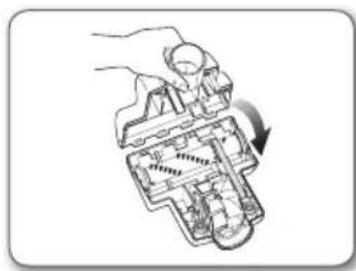
natural_image
Diagram of a hand turning a mechanical component with an arrow indicating rotation (no text or symbols present)natural_image
Illustration of hands assembling a mechanical component into a plastic housing (no text or symbols)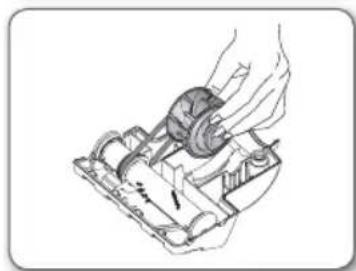
natural_image
Technical line drawing of a mechanical assembly with hands operating a component (no text or symbols visible)natural_image
Line drawing of a hand holding a container with a handle (no text or symbols)
natural_image
Illustration of hands holding a cylindrical container with an arrow indicating rotation (no text or symbols)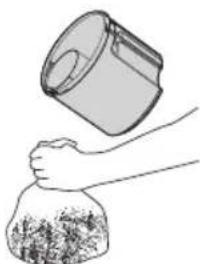
natural_image
Illustration of a hand pouring liquid into a bag with textured contents (no text or symbols)


natural_image
Technical line drawing of a mechanical component with two views (front and side), no text or symbols present.natural_image
Illustration of a vacuum cleaner with a 10cm height measurement indicator (no text or symbols on the device itself)
natural_image
Technical illustration of a mechanical device with handle, clasp, and connector (no text or symbols)TYPE DE PILE : type AAA

dépannage
natural_image
Illustration of two hands holding a camera with a cross symbol and a magnifying glass, no text or symbols present
natural_image
Line drawing of a vacuum cleaner with attached pump (no text or symbols)
natural_image
Line drawing of a vacuum cleaner device with attached clamped components (no text or symbols)natural_image
Illustration of two different vacuum cleaner setups with hands connecting cables (no text or symbols)
natural_image
Electric vehicle charging plug with control panel and power button icon (no text or symbols)Control de la manija
natural_image
Diagram of a curved mechanical component with directional arrows indicating movement (no text or symbols)- CUERPO
natural_image
3D rendering of a handheld vacuum cleaner component (no text or symbols visible)
natural_image
Illustration of hands operating a mechanical device with a tool, no text or symbols visible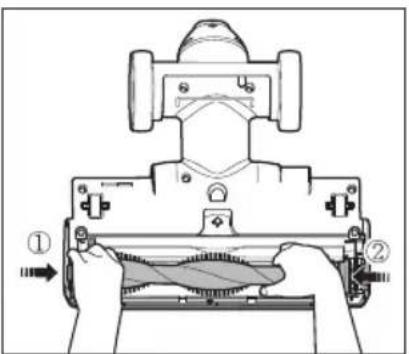
natural_image
Illustration showing a hand using a tool to cut the edge of a vacuum cleaner (no text or symbols present)natural_image
Mechanical assembly diagram showing a hand holding a device with a magnified inset detail (no text or symbols)natural_image
Illustration of two cylindrical mechanical components with blue directional arrows indicating motion or force (no text or symbols)natural_image
Illustration of two different types of soldering tools with visible heat dissipation (no text or symbols)Accesorio (series SC12f50H, SC12f50V)
natural_image
Diagram showing a mechanical assembly before and after modification, with no visible text or symbolsnatural_image
Diagram showing a hand holding a tool with an arrow indicating process, alongside a close-up of the tool's tip (no text or symbols present)natural_image
Diagram showing a pen tip being inserted into a corner panel, with an arrow indicating the process (no text or symbols present)natural_image
Illustration of a vacuum cleaner with two close-up views showing internal components (no text or symbols)
natural_image
Illustration of a mechanical clamp or fixture with tubing and a base plate (no text or symbols)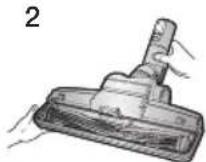
natural_image
Technical illustration of a mechanical component with a handle and side view (no text or symbols)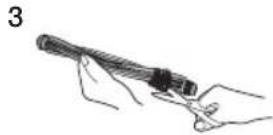
natural_image
Illustration of a vacuum cleaner with two close-up insets showing mechanical components (no text or symbols)natural_image
Illustration of a hairdryer tool and its application in a manual setting (no text or symbols)natural_image
Technical line drawing of a mechanical component with no visible text or symbols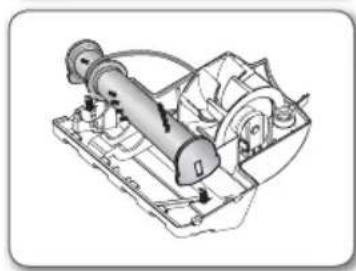
natural_image
Mechanical assembly diagram showing a motor and gear assembly (no text or labels)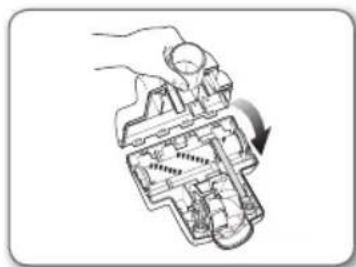
natural_image
Diagram of a mechanical device with internal components and a hand holding a tool, showing a rotation arrow (no text or symbols)natural_image
Illustration of hands assembling a mechanical component into a 3D model (no text or symbols)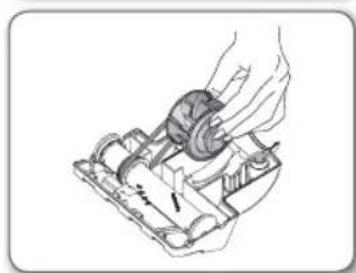
natural_image
Illustration of a hand using a mechanical device to adjust or install a component (no text or symbols visible)natural_image
Illustration of hands holding a container with a handle, containing a textured surface (no text or symbols visible)
natural_image
Illustration of hands holding a cylindrical container with an arrow indicating rotation (no text or symbols)
natural_image
Illustration of a hand pouring liquid into a container with a bag (no text or symbols)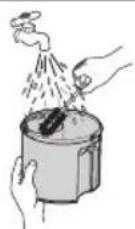


natural_image
Technical line drawing of a mechanical component with two views (front and side), no visible text or symbolsnatural_image
Diagram of a mechanical device with a 10cm height measurement indicated, showing no text or symbols beyond the scale.
natural_image
Line drawing of a vacuum cleaner device with control panel and keypad (no text or symbols)natural_image
Diagram showing a car hood with a rectangular panel and a heat sink (no text or symbols)Extraiga el microfiltro.
4
natural_image
Illustration of hands using a tool to cut a rectangular object into a container (no text or symbols)natural_image
Line drawing of a vacuum cleaner with internal grid and control panel (no text or symbols)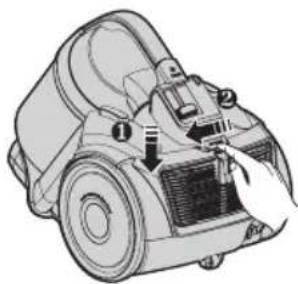
natural_image
Illustration of a vacuum cleaner with labeled parts (no text or symbols present)
natural_image
Technical illustration of a mechanical tool with attached parts (no text or symbols)If you have any questions or comments relating to Samsung products, please contact the SAMSUNG customer care center.
| Country | Customer Care Center 📞 | Web Site |
| U.S 1-800-SAMSUNG www.samsung.com | ||
| CANADA 1-800-SAMSUNG (726-7864) www.samsung.com | ||