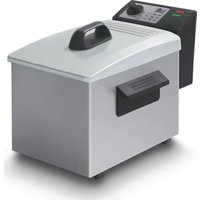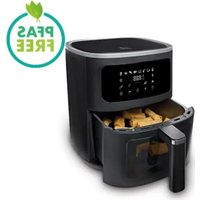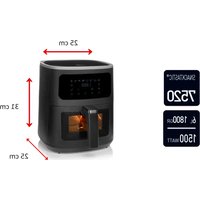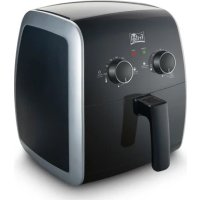
Snacktastic 4802 - Deep fryer FRITEL - Free user manual and instructions
Find the device manual for free Snacktastic 4802 FRITEL in PDF.


User questions about Snacktastic 4802 FRITEL
0 question about this device. Answer the ones you know or ask your own.
Ask a new question about this device
Download the instructions for your Deep fryer in PDF format for free! Find your manual Snacktastic 4802 - FRITEL and take your electronic device back in hand. On this page are published all the documents necessary for the use of your device. Snacktastic 4802 by FRITEL.
USER MANUAL Snacktastic 4802 FRITEL
Read the user manual attentively before using this appliance. Keep the manual carefully.
GEBRAUCHSANLEITUNG
DESCRIPTION OF THE APPLIANCE
- Basket
- Release button
- Basket handle
- Air inlet
- Operation display
- Safety switch
- Pan
- Ventilation grid
- Cable storage
- Extractable cable
We reserve the right to execute technical modifications.
Congratulations! You just bought a quality baking oven that will guarantee you a lot of snack pleasure for many years.
For further information and useful tips, we advise you to have a look at our website www.fritel.com or www.facebook.com/snacktasticfritel. All persons who have NOT read this user manual are NOT allowed to use this deep fryer. Pay attention to the guarantee conditions!
1. SAFETY PRESCRIPTIONS
This product was built in accordance with the European CE-safety standards. As for all electrical household appliances, all safety measures have to be taken, in order to prevent and/or to avoid damages to your baking oven.
ATTENTION please! Burning danger! Due to the use of the flame the surface becomes hot. Only touch the handle or the control buttons when the appliance is in action.
- ATTENTION please! After switching off the appliance surfaces stay hot which causes burning danger. Let the appliance cool down completely before replacing it, cleaning it or putting it away.
- This appliance shall not be used by children from 0 year to 8 years.
This appliance can be used by children aged from 8 years and above if they are continuously supervised. This appliance can be used by people with reduced physical, sensory or mental capabilities or lack of experience and knowledge if they have been given supervision or instruction concerning the use of the appliance in a safe way and understand the hazards involved. Keep the appliance and its cord out of reach of children aged less than 8 years. Cleaning and user maintenance shall not be made by children.
- Cooking appliances should be positioned in a stable situation with the handles (if any) positioned to avoid spillage of the hot liquids. - This appliance is intended to be used in household and not applications such as: staff kitchen areas in shops, offices and other operating environments; farm houses; by clients in hotels, motels and other residential type environments; bed and breakfast type environments.
- This appliance is intended to be used at room temperature. NEVER use the appliance outdoor.
- A damaged power cord can cause electric shocks. NEVER use the appliance if it is damaged, fallen or shows a malfunction, or if the power cord or plug are damaged. In all these cases return the appliance to your sales point or recognized after sales service.
- NEVER touch the operation display, the electrical cord or the plug with wet hands, and NEVER immerse them in water or any other liquid. They are only to be cleaned with a damp cloth. Should they get wet anyway, immediately pull out the plug from the socket.
- NEVER use separate timers or remote control systems.
- Immediately switch off the appliance and pull out the plug: after use or when the appliance is NOT in use, if the appliance does not function properly and when cleaning the appliance.
- NEVER cover the ventilation grid when the appliance is operating.
NEVER put oil in the pan. This may cause fire. -
NEVER touch the inside or the appliance while it is operating.
-
While baking, hot steam might come out of the openings of the appliance. ALWAYS keep hands and face at a safe distance from the steam. Also, ALWAYS be careful when you remove the pan when the appliance is operating, steam might come out.
- IMMEDIATELY unplug the appliance if dark smoke comes out of it. Only remove the pan when no more smoke is coming out.
- ALWAYS place the appliance on a stable and flat surface, such as a kitchen counter or table, so that the appliance won't move or turn over.
- NEVER pull the power cord, only the plug to unplug the appliance.
- NEVER use extension cords or sockets. Place the appliance near a power point and connect it directly. ALWAYS unroll the power cord completely.
NEVER let the cord hang over the edge of the table or the counter.
NEVER place the power supply cord near heat sources such as cookers,加热器 or ovens. - NEVER place the appliance near curtains, wall decoration, clothing, towels or other inflammable objects. Always make sure to have 10 cm on all sides of the appliance.
NEVER place anything on top of the appliance.
Only use the baking oven with 230 Volt AC.
In accordance with the legal safety standards, the baking oven must always be plugged into an earthed socket. - For your own safety, the appliance will only work if it has been assembled correctly. Check that all parts were assembled correctly.
- Only use this appliance to fry without oil, bake and roast food.
NEVER leave the appliance unattended and NEVER move it when plugged in. - ALWAYS let the appliance cool down entirely before moving it.
Always unroll the cord completely. NEVER turn the power cord around the baking oven, NEVER bend it on squeeze it. - ALWAYS switch off the appliance and pull out the plug: after use or when the appliance is not in use, if the appliance doesn't work properly and when cleaning the appliance.
NEVER use accessories or spare parts from other appliances or brands. - Repairs may only be done by a recognized repairer or service center.
| Symbol | Command | |
| ON/OFF On/Off | Press the ON/OFF symbol to get the appliance out of, or to put it in standby mode. When the appliance is out of standby mode, a o will be shown on the display. | |
| Temperature | Press the symbol to set the temperature. Then press or to set the desired temperature. | |
| Time | Press the symbol to set the baking time. Then press or to set the desired time. | |
| START/PAUSE Start/Pause | Press the START/PAUSE symbol to start the appliance. Press the START/PAUSE symbol to interrupt the started function. If no time or temperture are set before pressing the appliance will start at 180°C for 10 minutes. This button only works if the pan and the basket are correctly placed in the appliance. | |
| PRE-HEAT Preheat function | Press the PRE-HEAT symbol, the tekst Pre-Heat lights up Set the temperature by pressing the symbol. Then press the or to set the desired temperature. Press the START/PAUSE symbol to start the preheating. | |
| MENU Menu | Press the MENU symbol to select a preprogrammed function. Press 1 x: Program for fries Press 2 x: Program for frozen fries Press 3 x: Program voor poultry Press 4 x: Program for snacks Press 5 x: Program for frozen snacks Press 6 x: Program for cupcakes To start the selected program press * | |
| If the closed lock is illuminated (blue) the pan is placed correctly in the appliance. | ||
| If the open lock is illuminated (red) the pan is not placed correctly in the appliance. The appliance will not function. | ||
- For the content of each function, see Point 6 – Preprogrammed functions
3. BEFORE FIRST USE
- Remove all packaging and stickers.
- Keep all packing material out of children's reach.
- Check the appliance and the power cord for any damage. Do not use the baking oven and return it to the sales point in case of damage.
Before using the baking oven for the first time, it is recommended to clean the pan and the basket. (See 7. MAINTENANCE)
Clean the pan and the basket with hot soapy water and a soft sponge. These pieces are dishwasher proof. - Ensure that the voltage marked on the appliance is the same as your main voltage.
4. SETTINGS
The chart below indicates which settings should be used for which food.
ATTENTION: these settings are merely indicative. Since each ingredient may differ from kind to kind, brand to brand, but also from size, shape, content... it is possible that the indicated settings don't always entirely correspond.
TIPS:
Smaller ingredients often require a shorter baking time than larger ingredients.
- Shaking small ingredients during the baking process might improve the final result. (See 6. USE).
- Add a little bit of oil on fresh potatoes for a crispier result. Add the oil before putting the ingredients in the basket. Bake the ingredients within a few minutes after adding the oil.
Snacks that can be prepared in a traditional oven can be prepared in the SnackTastic®. Snacks or fries only meant to be prepared in a deep fryer will not always provide the desired result.
| Min-Max capacity (gram) | Time (minutes) | Temperature (°C) | Shake | Other | |
| Potatoes and fries | |||||
| Thin fries | 300-1000 | 9-19 | 200 | Shake ** | |
| Thick fries | 300-1000 | 12-22 | 200 | Shake ** | |
| Homemade fries (8*8mm) | 300-1200 | 18-30 | 180 | Shake ** | Add 1/2 tbs oil |
| Potato wedges | 300-900 | 18-24 | 180 | Shake** | Add 1/2 tbs oil |
| Potato cubes | 300-750 | 12-18 | 180 | Shake** | Add 1/2 tbs oil |
| Rösti | 250 | 15-18 | 180 | * | |
| Potato gratin | 500 | 18-22 | 180 | * | |
| Meat and poultry | |||||
| Steak | 100-600 | 8-12 | 180 | ||
| Pork chops | 100-500 | 10-14 | 180 | ||
| Hamburger | 100-500 | 7-14 | 180 | ||
| Meat loaf | 100-500 | 18-22 | 180 | ||
| Drumstick | 100-500 | 18-22 | 180 | ||
| Chicken breast | 100-800 | 10-15 | 180 | ||
| Snacks | |||||
| Meat balls | 240 | 7 | 200 | * | |
| Spring rolls | 100-400 | 8-10 | 200 | Shake** | * |
| Chicken Nuggets | 100-500 | 6-10 | 200 | Shake** | * |
| Fish Fingers | 100-400 | 6-10 | 200 | * | |
| Bread crumbed cheese snack | 100-400 | 8-10 | 180 | * | |
| Vegetables | 100-400 | 10 | 160 | ||
| Cake | |||||
| Quiche | 400 | 20 | 190 | Use the baking tin | |
| Muffins | 400 | 15 | 180 | Use the baking tin | |
| Cake | 500 (total weight of the dough) | 65 | 150 | Use the baking tin | |
TIP: oven suited food always work, however, the time or temperature needed are less.
NOTE: add 3 minutes to the baking time if the appliance is cold.
NOTE: * Check if the ingredients are suited for preparation in the oven.
** See 6. Use – Personal settings – point 7
Homemade fries
For the best result, we advise to use prebaked fries (e.g. frozen fries). If you want to make homemade fries, follow steps below.
- Peel the potatoes and cut them into fries.
- Soak the fries in a bowl of water for at least 30 minutes, take them out and dry them properly with some paper towel.
- Pour 12 spoon of oil in a bowl, add the fries and mix carefully until all fries are equally covered with oil.
- Remove the fries from the bowl with your hands or a kitchen utensil so redundant oil stays behind in the bowl. Put the fries in the basket.
NOTE: don't pour the fries from the bowl into the basket to avoid redundant oil from ending up in the pan.
- Bake the fries as mentioned earlier.
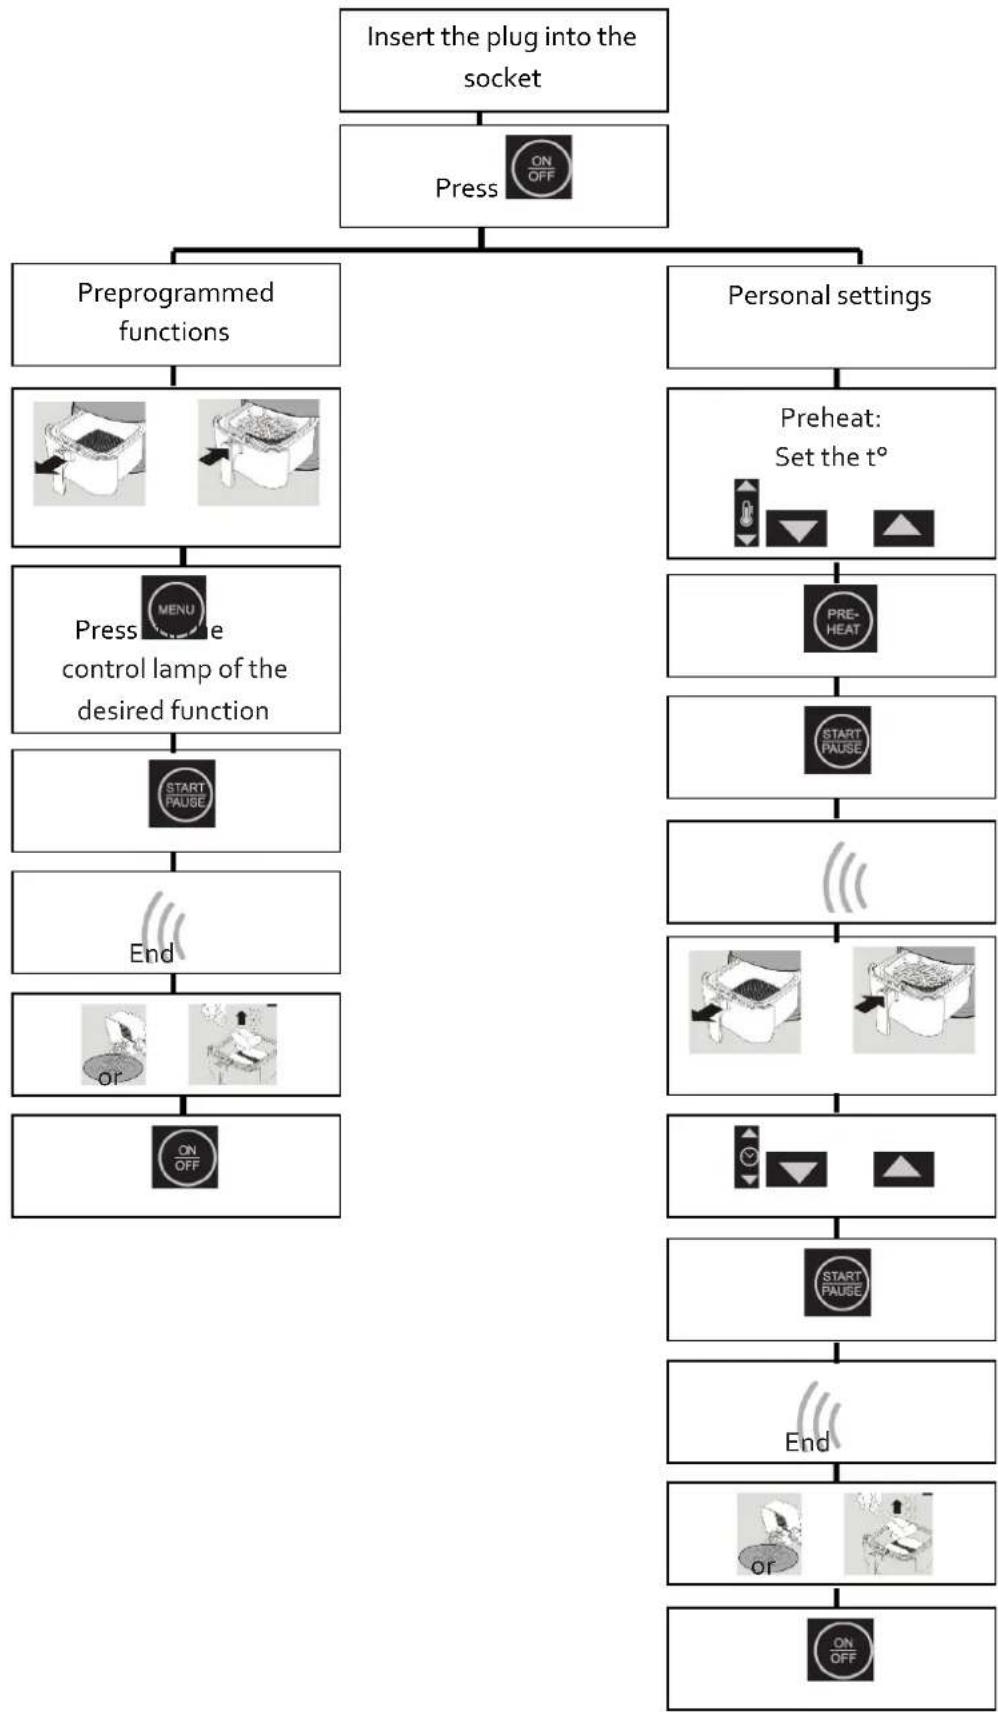
5. QUICK START
6. USE
- Place the appliance on a stable, flat and heat resistant surface.
- Place the basket correctly in the pan and the pan in the baking oven.
- Pull the cord entirely out of the cable storage.
CAUTION: Do not put oil or any other liquid in the pan.
CAUTION: Don't put anything on top of the appliance. - Put the plug into the socket. You will hear a sound signal.
- Press the On/Off Symbol to turn the appliance on.
PREPROGRAMMED FUNCTIONS

Press the tool to select a preprogrammed function.
Press 1 x: Program for fries
Press 2 x: Program for frozen fries
Press 4 x: Program for snacks
Press 5 x: Program for frozen snacks
Press 6 x: Program for cupcakes
To start the selected program press

| Function | Time | Temperature |
| Fries | 25 min. | 180°C |
| Frozen fries | 16 min. | 200°C |
| Poultry | 20 min. | 180°C |
| Snacks | 15 min. | 180°C |
| Frozen Snacks | 10 min. | 200°C |
| Cup cakes | 18 min. | 160 °C |
ATTENTION: these settings are merely indicative. Since each ingredient may differ from kind to kind, brand to brand, but also from size, shape, content... it is possible that the indicated settings don't always entirely correspond.
PERSONAL SETTINGS

- Press the symbol and set the desired temperature by pressing the or symbol. (Standard

temperature is set on 180^) Press the HEAT symbol and then on the PAUSE symbol to start preheating.
- When the preheating is completed you will hear a sound signal. Without operation within 5 minutes, the appliance will go back into standby mode.
- Carefully pull the pan out of the appliance. You will hear a sound signal.
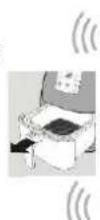
NOTE: always completely remove the pan from the appliance before adding ingredients to the basket. Don't push on the release button to do so.
- Place the food into the basket.
NOTE: Do not fill the basket more than 4/5 , or the mentioned amount indicated in the above grid. Larger quantities will give a lesser result.
CAKE FUNCTION: put the cake dough into the baking tin, the baking tin into the basket and place the basket in the pan.
- Put the pan back into the appliance. Never use the pan without accessory with handle.
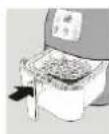
CAUTION: Don't touch the pan during or for some time after use, as it gets very hot. Only hold the pan by the handle.
- Set the baking time for the ingredients with the symbol Standard it will start at 10 minutes. Press or to adjust the baking time. Add 3 minutes to the advised baking time if the appliance is cold.
NOTE: Press to start the appliance after setting the time. Time and temperature can be adjusted while operating. The system starts 5 seconds after confirmation of the settings.
- Some ingredients require shaking halfway through the baking process. To shake the food, take the handle, pull the pan out of the appliance and shake. Then replace the pan into the
appliance. There is no need to interrupt the baking process by pressing it stops automatically when the pan is removed and starts again automatically when the pan is put back. The display now shows a 5. The appliance will count down from 5. If the pan is placed in the appliance again within 5 minutes, the program will simply pick up where it left off. However, if the pan is not placed back into the appliance within 5 minutes the appliance will go into standby mode.
NOTE: do not press the release button on the basket while shaking.
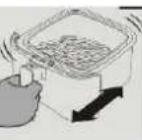
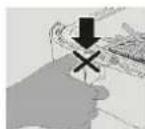
TIP: to minimize the weight, you can remove the basket out of the pan and only shake the basket. To do so, remove pan with basket from the appliance, place on a heat resistant surface, and press the release button to release the basket.
-
When you hear the sound signal 3 times, the set program is finished. The word "End" appears on the screen and the appliance goes into standby mode. Remove the pan from the appliance and put it on a heat resistant surface.
-
Check if the ingredients are ready. If not, put the pan back in the appliance and set a few more minutes.
-
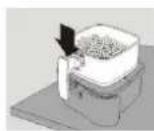
To remove small ingredients out of the basket (e.g. fries), press the release button and remove the basket from the pan.
Do not turn the basket upside down when it is still in the pan. Any redundant oil or residues that fell in the pan could fall on your ingredients.
After use, the pan and the ingredients are still very hot. Depending on the type of ingredients steam may escape from the pan.
TIP: To remove large or fragile food, it is best to use a kitchen pincers.
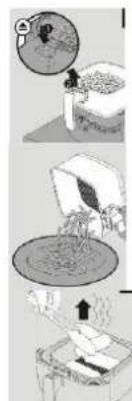
- When a serving of ingredients is ready, the baking oven is instantly ready for preparing another serving. Push the ON/OFF button to re-activate the appliance and the proceed as mentioned above.
Automatic shut off after 2 hours of non-use.
7. MAINTENANCE
- Clean the appliance after each use.
- The pan, basket and inside of the appliance have a non-stick coating. Do not use metal kitchen ware or abrasive cleaning materials to clean them. This may damage the non-stick coating.
- First remove the plug from the socket and let the baking oven cool down completely before cleaning. TIP: in order to make the appliance cool down more quickly you can remove the pan.
- Only clean the housing with a moist cloth.
- The basket and the pan can be cleaned with hot soapy water and a cleaning brush.
TIP: The basket and the pan are dishwasher proof.
TIP: Use the FRITEL fat dissolver to remove remains.
TIP: If the food sticks to the basket or to the pan: put the basket in the pan and let it soak for about 10 minutes in water.
- The inside of the appliance can be cleaned with warm water and a soft sponge.
- Clean the heating elements with a cleaning brush to remove sticking residues.
8. STORAGE
- Pull the plug from the socket and let the appliance cool down completely.
- Make sure all parts are clean and dry.
- Store the cord in the cable storage and fix the cord by inserting it into the cord fixing slot.
9. TROUBLE SHOOTING
| Problem | Possible cause | Solution |
| The SnackTastic® does not work. | The plug is not plugged in. | Insert the plug into the socket. |
| The "ON/OFF" symbol wasn't pressed. | Press "ON/OFF" after having chosen all settings to start the appliance. | |
| There is no pan in the appliance or the pan is not correctly placed. | Put the pan (correctly) in the appliance. | |
| The ingredients are not done. | There are too much ingredients in the basket. | Put smaller quantities at once in the basket. |
| The set temperature is too low. | Increase the temperature. | |
| The baking time is too short. | Increase baking time. | |
| The ingredients are not equally baked. | Some ingredients need to be shaken halfway through the baking process. | Shake ingredients which are piled up (f. ex. fries) halfway through the baking process. |
| The fried ingredients are not crispy. | You used snacks only suited for a traditional or a cool zone deep fryer. | Use oven snacks or slightly grease the ingredients with oil for crispier result. |
| I cannot slide the pan into the appliance properly. | There are too much ingredients in the basket. | Fill maximum 4/5 of the basket. |
| The basket is not correctly placed in the pan. | Press the basket until you hear a click. |
| White smoke coming out of the appliance. | You're using very greasy ingredients. | When baking greasy ingredients, the redundant oil drips on the hot pan and causes smoke. This will not affect the final cooking result. | |
| There are some residues from prior bakings in the pan. | The smoke is caused by greasy residues heating up. Carefully clean the pan after each use. | ||
| Fries are fried unequally. | You used the wrong kind of potato. | Use another kind of potato. | |
| You didn't use any oil or didn't spread them equally. | Use some oil (see point 4.Homemade fries)Spread them equally in the basket. | ||
| Color depends on the amount of water and oil in the fries. | Carefully dry the fries before you grease them with oil. | ||
| The fries are not crispy. | The crispiness depends on the amount of water and oil in the fries. | Cut smaller fries.Grease with a little bit more oil, see point 4. | |
| If the dysfunction is not remedied too, bring the appliance to your sales point. | |||
| Error code | |||
| E1 | E2 | E3 | |
| Bring the appliance to your sales point. | Bring the appliance to your sales point. | Bring the appliance to your sales point. | |
The appliance has been developed for household use. When using it for professional purpose, the conditions of warranty will change. Any damage caused due to incorrect use (non-observation of this user manual) will invalidate the warranty.
10. WARRANTY CONDITIONS
Your warranty starts on the day of purchase. Warranty period: 2 years. In order to apply for warranty, please keep your purchase invoice.
- The warranty covers every repair and / or replacement free of charge of the parts recognized defective by our technical department and for which the defects are caused by material-, construction- or production defects.
The warranty is only valid for the original user. - Carriage both ways is for the purchaser's account.
- The warranty only applies after submitting the purchase invoice.
The warranty cannot be invoked for normal wear and tear.
The warranty does not apply in the following cases:
Incorrect connection, e.g. electric voltages.
Abnormal use, misuse handling or professional use.
Lack of care. - Modifications or repairs made to the appliance by persons not authorized by us as manufacturer.
- When reference numbers are altered or removed.
- When the instructions in this user manual are not followed.
11. ENVIRONNEMENT
Do not throw the appliance away with the normal household waste at the end of its life, but hand it in at an official collection point for recycling. By doing so, you will help to preserve the environment.
12. LIABILITIES
All liabilities, towards both consumer(s) and third parties, which could result from not observing all the safety regulations prescribed in this user manual, shall under no circumstances be charged to the manufacturer. In case of non-observation of these safety regulations, the user of the appliance, or any other person not having observed these safety regulations, protects the manufacturer from all responsibilities that he could be charged with.
GEBRAUCHSANLEITUNG
DE
For all supplementary information, recipes and practical tips about all our appliances please visit our website www.fritel.com!
Find us on facebook: www.fb.com/fritel.vanratingen!