
SUFL71M - TV Stand SONY - Free user manual and instructions
Find the device manual for free SUFL71M SONY in PDF.
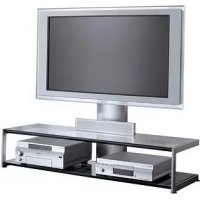
| Product type | TV stand |
| Brand | Sony |
| Model | SUFL71M |
| Dimensions (W x D x H) | 1022 x 600 x 400 mm |
| Weight | 45 kg |
| Main material | Tempered glass and steel |
| Maximum load capacity of the shelf | 2 kg (for center speaker) |
| TV compatibility | Sony LCD screens from 32 to 46 inches (models listed in the manual) |
| Wall mounting required | Yes, for safety |
| Recommended number of people for assembly | 2 |
| Tools required | Star screwdriver (Torx) |
| Recommended tightening torque | 1.5 N·m |
| Maintenance | Soft dry cloth, mild soap solution |
| Safety | Do not stand on the stand, do not use if cracked, anchor to wall |
| Package contents | Bases, uprights, panels, screws, cable holder, etc. |
| TV height adjustment | Yes, 3 positions |
| Cable management | Strap and cable holder |
| Optional accessory | Center speaker support (arm and shelf) |
Frequently Asked Questions - SUFL71M SONY
User questions about SUFL71M SONY
0 question about this device. Answer the ones you know or ask your own.
Ask a new question about this device
Download the instructions for your TV Stand in PDF format for free! Find your manual SUFL71M - SONY and take your electronic device back in hand. On this page are published all the documents necessary for the use of your device. SUFL71M by SONY.
USER MANUAL SUFL71M SONY
Thank you for purchasing this product. Products by Sony are designed with safety in mind. Incorrect use may result in a serious injury through fire, electric shock, the product toppling over, or the product being dropped. Be sure to observe the precautions for safety to prevent such accidents.
For customers
For secure installation, this product should only be installed by qualified Sony service representatives, as it requires two or more people, special care, safety, and technique.
This instructions manual shows the correct handling of the product and important precautions necessary to prevent accidents. Be sure to read this manual thoroughly and use the product correctly. Keep this manual available for future reference.
For Sony dealers
Installation of a TV requires two or more people, special care and technique. When installing a TV, refer to this manual carefully. Sony is not liable for any accidents or damages caused by incorrect installation or handling. Please provide this manual to the customer after installation.
CAUTION
Specified products
The following products are subject to change without notice. Certain models may be out of stock or discontinued, or may not be available in certain regions.
Do not install other than the specified products. It could cause injury or damage.
| LCD color TV | |
| SU-FL71M | KDL-46Z4100/46XBR6 KDL-46WL140/46W4150/46W4100 KDL-46V4100/46SL140/46S4100 KDL-42V4100 KDL-40Z4100/40XBR7/40XBR6 KDL-40WL140/40W4100/40V4150 KDL-40V4100/40SL140/40S4100 KDL-40M4000 KDL-37XBR6/37NL140/37N4000 KDL-37M4000/37L4000/37FA400 KDL-32XBR6/32VL140/32NL140 KDL-32N4000/32M4000/32L4000 KDL-32FA400 |
(As of July 2008)
This stand is designed for use with the products specified above. For other TVs, refer to their operating instructions, or the supplied leaflet to verify that the stand can be used.
WARNING
If the following precautions are not observed, serious injury or death can result through fire, electric shock, or the product toppling over.
Be sure to attach the stand securely by following the instructions.
If a screw is not tightened securely or it has fallen out, it may cause the stand to topple over or the TV may fall. This may cause damage or injury.
Be sure to take measures to prevent the stand from toppling over.
If you fail to do so, the stand may topple over or the TV may fall and cause injury. Anchor the TV to a wall, pillar, etc., to prevent it from toppling over.
Be sure to install the stand on a solid and level floor.
Do not install the stand so that it leans in one direction. If you do so, it may topple over or the TV may fall. This may cause injury or damage.
If you install the stand on a soft surface such as a mat or carpet, lay a board over the designated location to stabilize the floor beforehand.
Do not use a cracked stand.
Do not use the stand if it has sustained any cracks. The glass may break and cause the TV to topple over, which could cause serious injury or damage.
Do not climb on the stand and do not use the stand as a footstool.
Serious injury or death can result if the glass breaks or the stand and the TV topple over.
Do not pinch the AC power cord or the connecting cable.
Do not allow the AC power cord or the connecting cable to be pinched when you install the TV on the stand or move the stand. If the AC power cord or the connecting cable is damaged, this may result in fire or electric shock.
Do not move the stand with the TV attached or with connected equipment inside.
Moving excessive weight may cause physical injuries or cause the stand to topple over. Also, any connected equipment within may fall and cause the glass shelf to break or other property damage.
CAUTION
If the following precautions are not observed, injury or property damage may occur.
Be sure that two or more people do the assembly and installation.
If one person does the installation work alone, this may result in an accident or injury. Be sure to keep children away during the installation.
Do not modify the stand.
It may fall and cause injury.
Do not place anything hot directly on the stand.
The heat may cause discoloration or deformation of the stand.
NOTE ON USE
Notes on installation
- When assembling, lay the packing materials on the floor to avoid damage to the floor.
- Before assembling the stand, decide on the installation location.
About load capacity
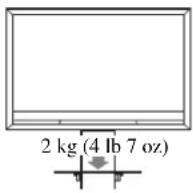
Do not place any equipment exceeding the maximum weight capacity on the shelf as indicated by the illustration or it may break.
When moving the stand
Trying to move the stand alone, may cause injury. To avoid this, be sure to follow the advice given below.
- Do not drag the stand. The base parts of the stand may disassemble and damage the floor.
- Be careful not to allow your hands or feet to be pinched under the bottom plate.
How to clean the stand
Occasionally wipe it with a dry soft cloth. Stubborn stains may be removed by wiping with a cloth slightly dampened with mild soap. Be sure to dry the area afterwards with a dry soft cloth. Do not use chemicals, such as alcohol, thinner or benzine, as they damage the finish of the stand.
Preparing for assembly
Before assembling
- Be sure to have a Phillips screwdriver that fits the screws prior to the assembly.
- When using an electric screwdriver, set the torque setting to approximately 1.5N· m {15 kgf·cm}.
Specifications
d
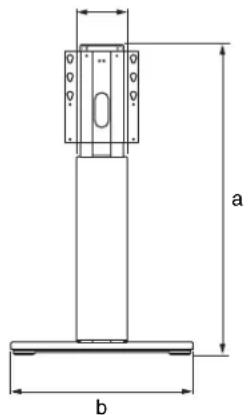
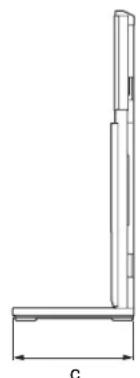
| Dimensions: mm (inches) | a 1,022 (40 1/4) |
| b 600 (23 5/8) | |
| c 400 (15 3/4) | |
| d 163 (6 1/2) | |
| Weight: 45 kg (99 | |
Design and specifications are subject to change without notice.
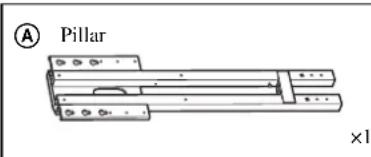
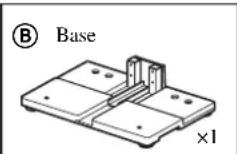
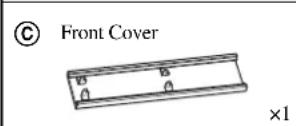
Checking the parts
- Verify that all parts are included.
- The parts bags are labeled alphabetically.
Installing
The installation should be handled by more than two people.
1Assembling the floor stand
1 Attach Pillar A to Base B.
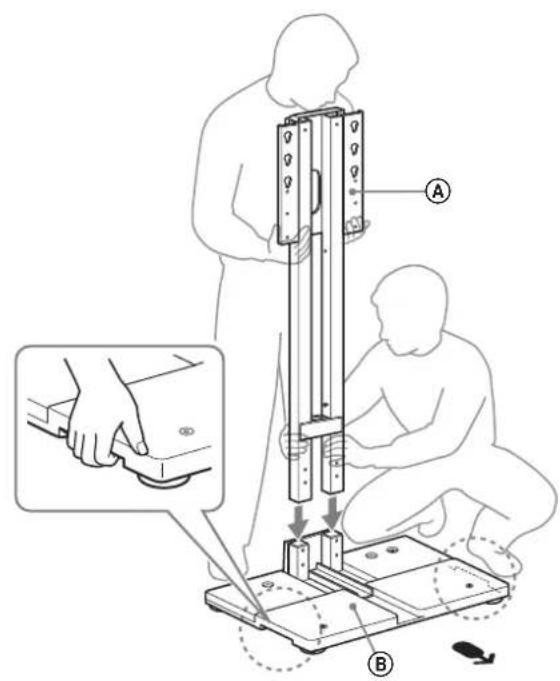
Arrow direction points to the front of the floor stand.
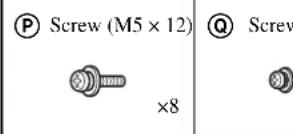
2 Secure Pillar A and Base B with Screw (M5× 12) P (eight).
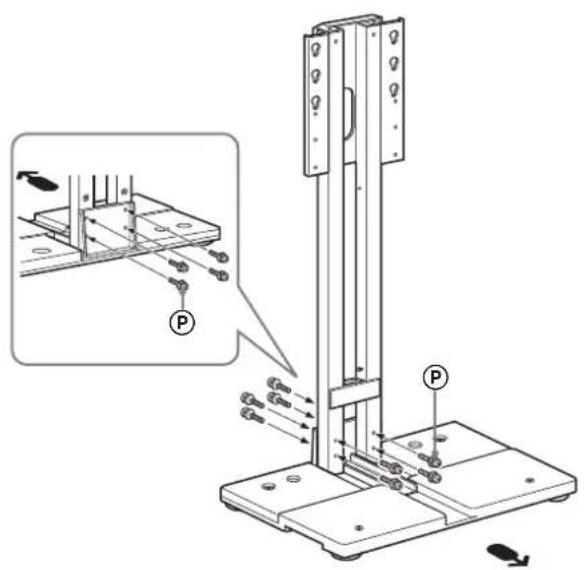
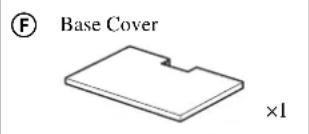
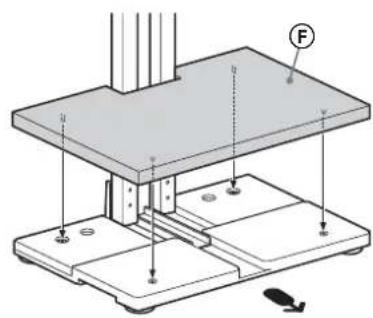
3 Attach Base Cover F to Base B.
4 Attach Front Cover to Pillar A.
Screw 2 Lock Screws to Pillar A. Do not over tighten.
Attach Front Cover to Pillar A.
Secure Lock Screw (two) tighten firmly.

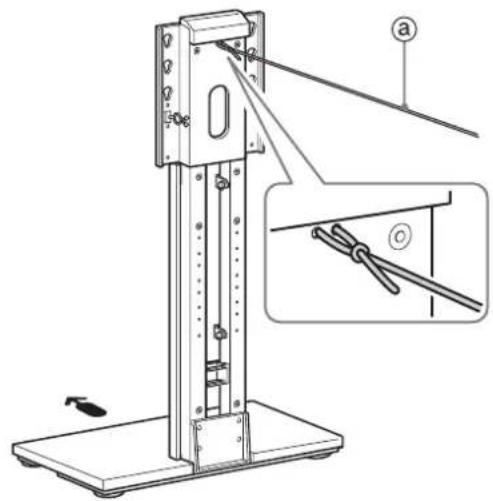
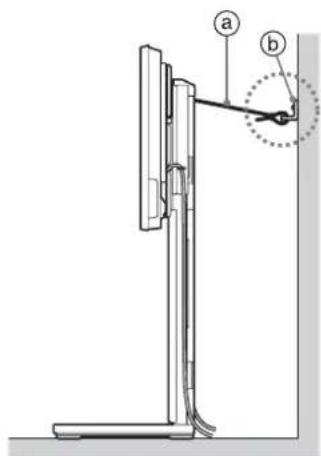
5 Secure Pillar ④ with strong rope or chain ⑧ (sold separately) to the wall.
- Be sure to take measures to prevent the floor stand from toppling over before attaching the TV to the floor stand. You cannot secure a A .
2 Preparing for the installation of the TV The parts installation differs depending on your TV screen size.
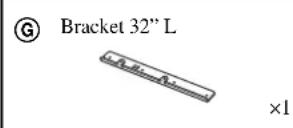
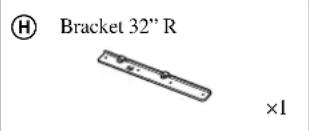
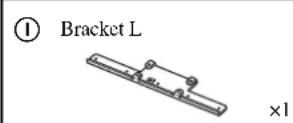
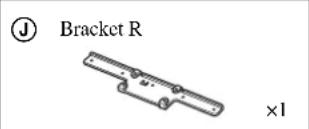
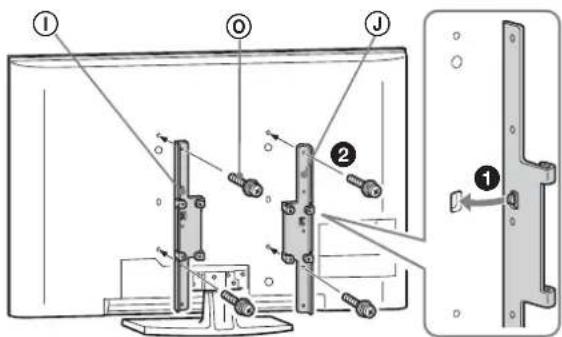
1 Attach 32" bracket or Bracket ①② to the TV.
A For 37 inch to 46 inch:
Align the tab on the rear of Bracket ①② to the square hole on the rear of the TV.
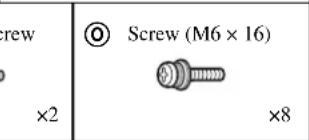
2 Secure them with Screw (M6× 16) (four).
B For 32 inch:
Align the tab on the rear of 32" bracket ⑥ to the square hole on the rear of the TV.
2 Secure them with Screw (M6× 16) (four).
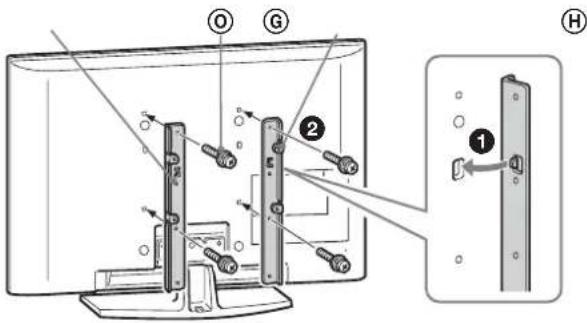
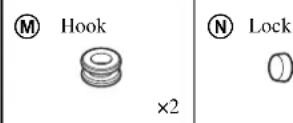
2 Attach Hook M to 32" bracket G or Bracket ①.
A For 37 inch to 46 inch:
Adjust Hook with Screw (M6× 16) two to the top position (inner side).
B For 32 inch:
Adjust Hook with Screw (6× 16) two to the top position.
3 Connecting the AC power cord and the other cables to the TV.

- If the AC power cord is already connected to the TV, connect the other cables only.
- The cables connecting position differs depending on the TV model. Be sure to read the operating instructions of your TV.
- Depending on the TV model, you may not be able to connect the cables to the TV after installing it to the floor stand.
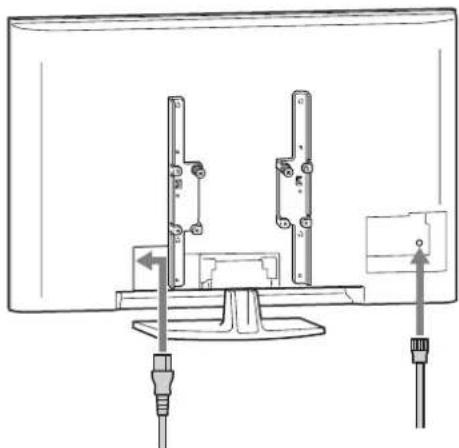
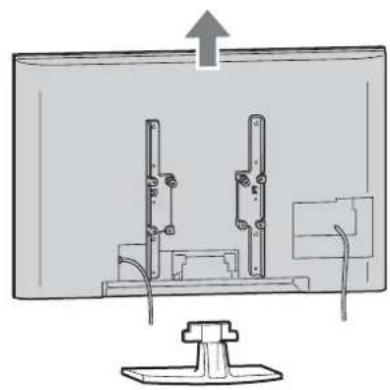
4 Detach the Table-Top Stand from the TV.
Refer to the operating instructions supplied with your TV for information on how to remove the Table-Top Stand from the TV.
The number and position of the screws on the rear of the TV differs, depending on the model of TV; be sure to read the operating instructions of your TV.
- Do not attach the stand rear covers (if supplied with the TV).
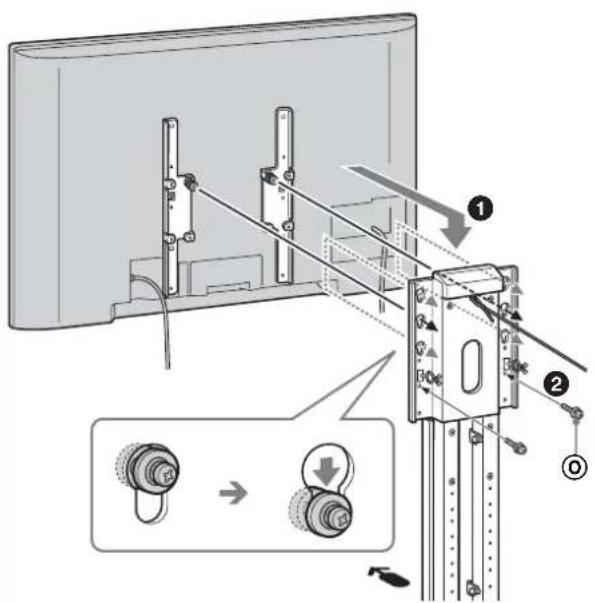
3 Installing the TV
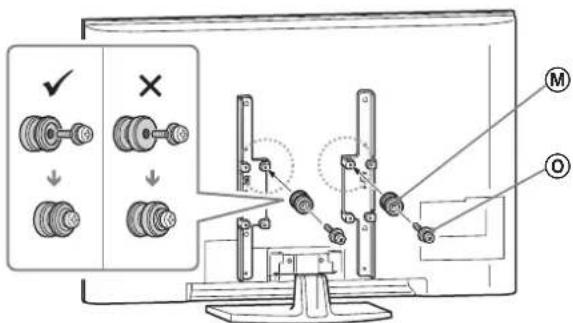
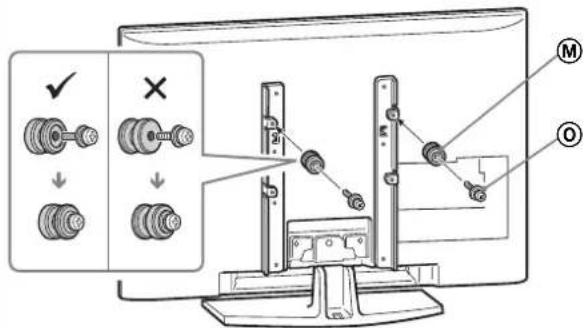
1 Attach Pillar A to the TV.
Insert Hook M which is attached to the TV into the holes of Pillar A. The floor stand is adjustable to 3 heights.
- Be careful not to pinch the AC power cord between the Front Cover © and the TV.
2 Secure the TV and Pillar A with Screw (M6× 16) (two).
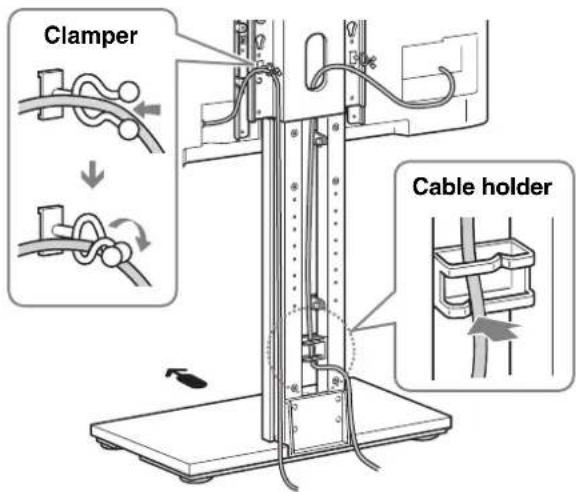
4 Bundling the cables
1 After connecting the cables to the TV, bundle the cables.
Secure the AC power cord in the clampper, and bundle the other cables in the cable holder.
- Do not bundle the AC power cord with the cable holder.
5 Safety measures to prevent toppling over
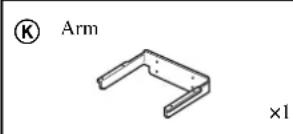
For the Center Speaker users:
Attach Arm ⑧ and Shelf ① first, then take measures to prevent toppling over. (Refer to "Installing the Center Speaker table (For Home Theatre Systems only).")
1 Secure Pillar A to the wall.
Secure wall anchor bracket (solid separately) to a solid wall and secure with strong rope or chain
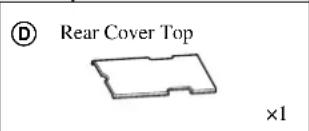
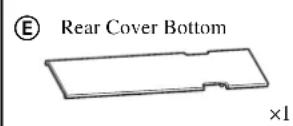
2 Attach Rear Cover Top ① and Rear Cover Bottom E to Pillar A.
1 Attach Rear Cover Top to Pillar A. 2 Attach Rear Cover Bottom to Pillar A.

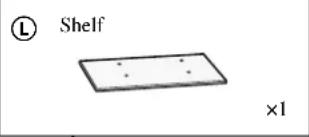
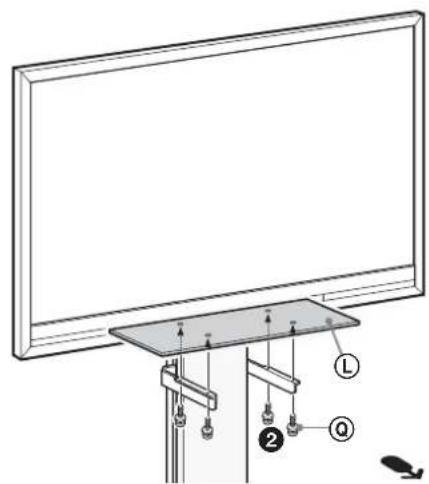
Installing the Center Speaker Table (For Home Theatre Systems only)
Attach Arm K to Pillar A with Screw (M4× 8) (four). Arm K is adjustable to 4 heights.
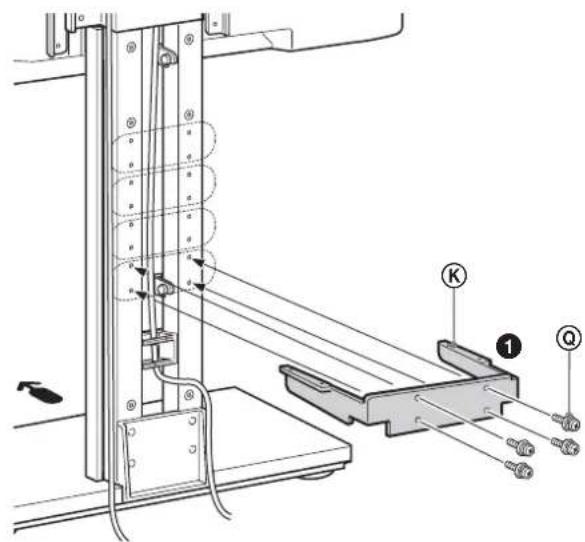
2 Secure Shelf with Screw (M4× 8) (four).

- Do not use an electric screwdriver when securing the acrylic board since it may break if the tightening strength is excessive.
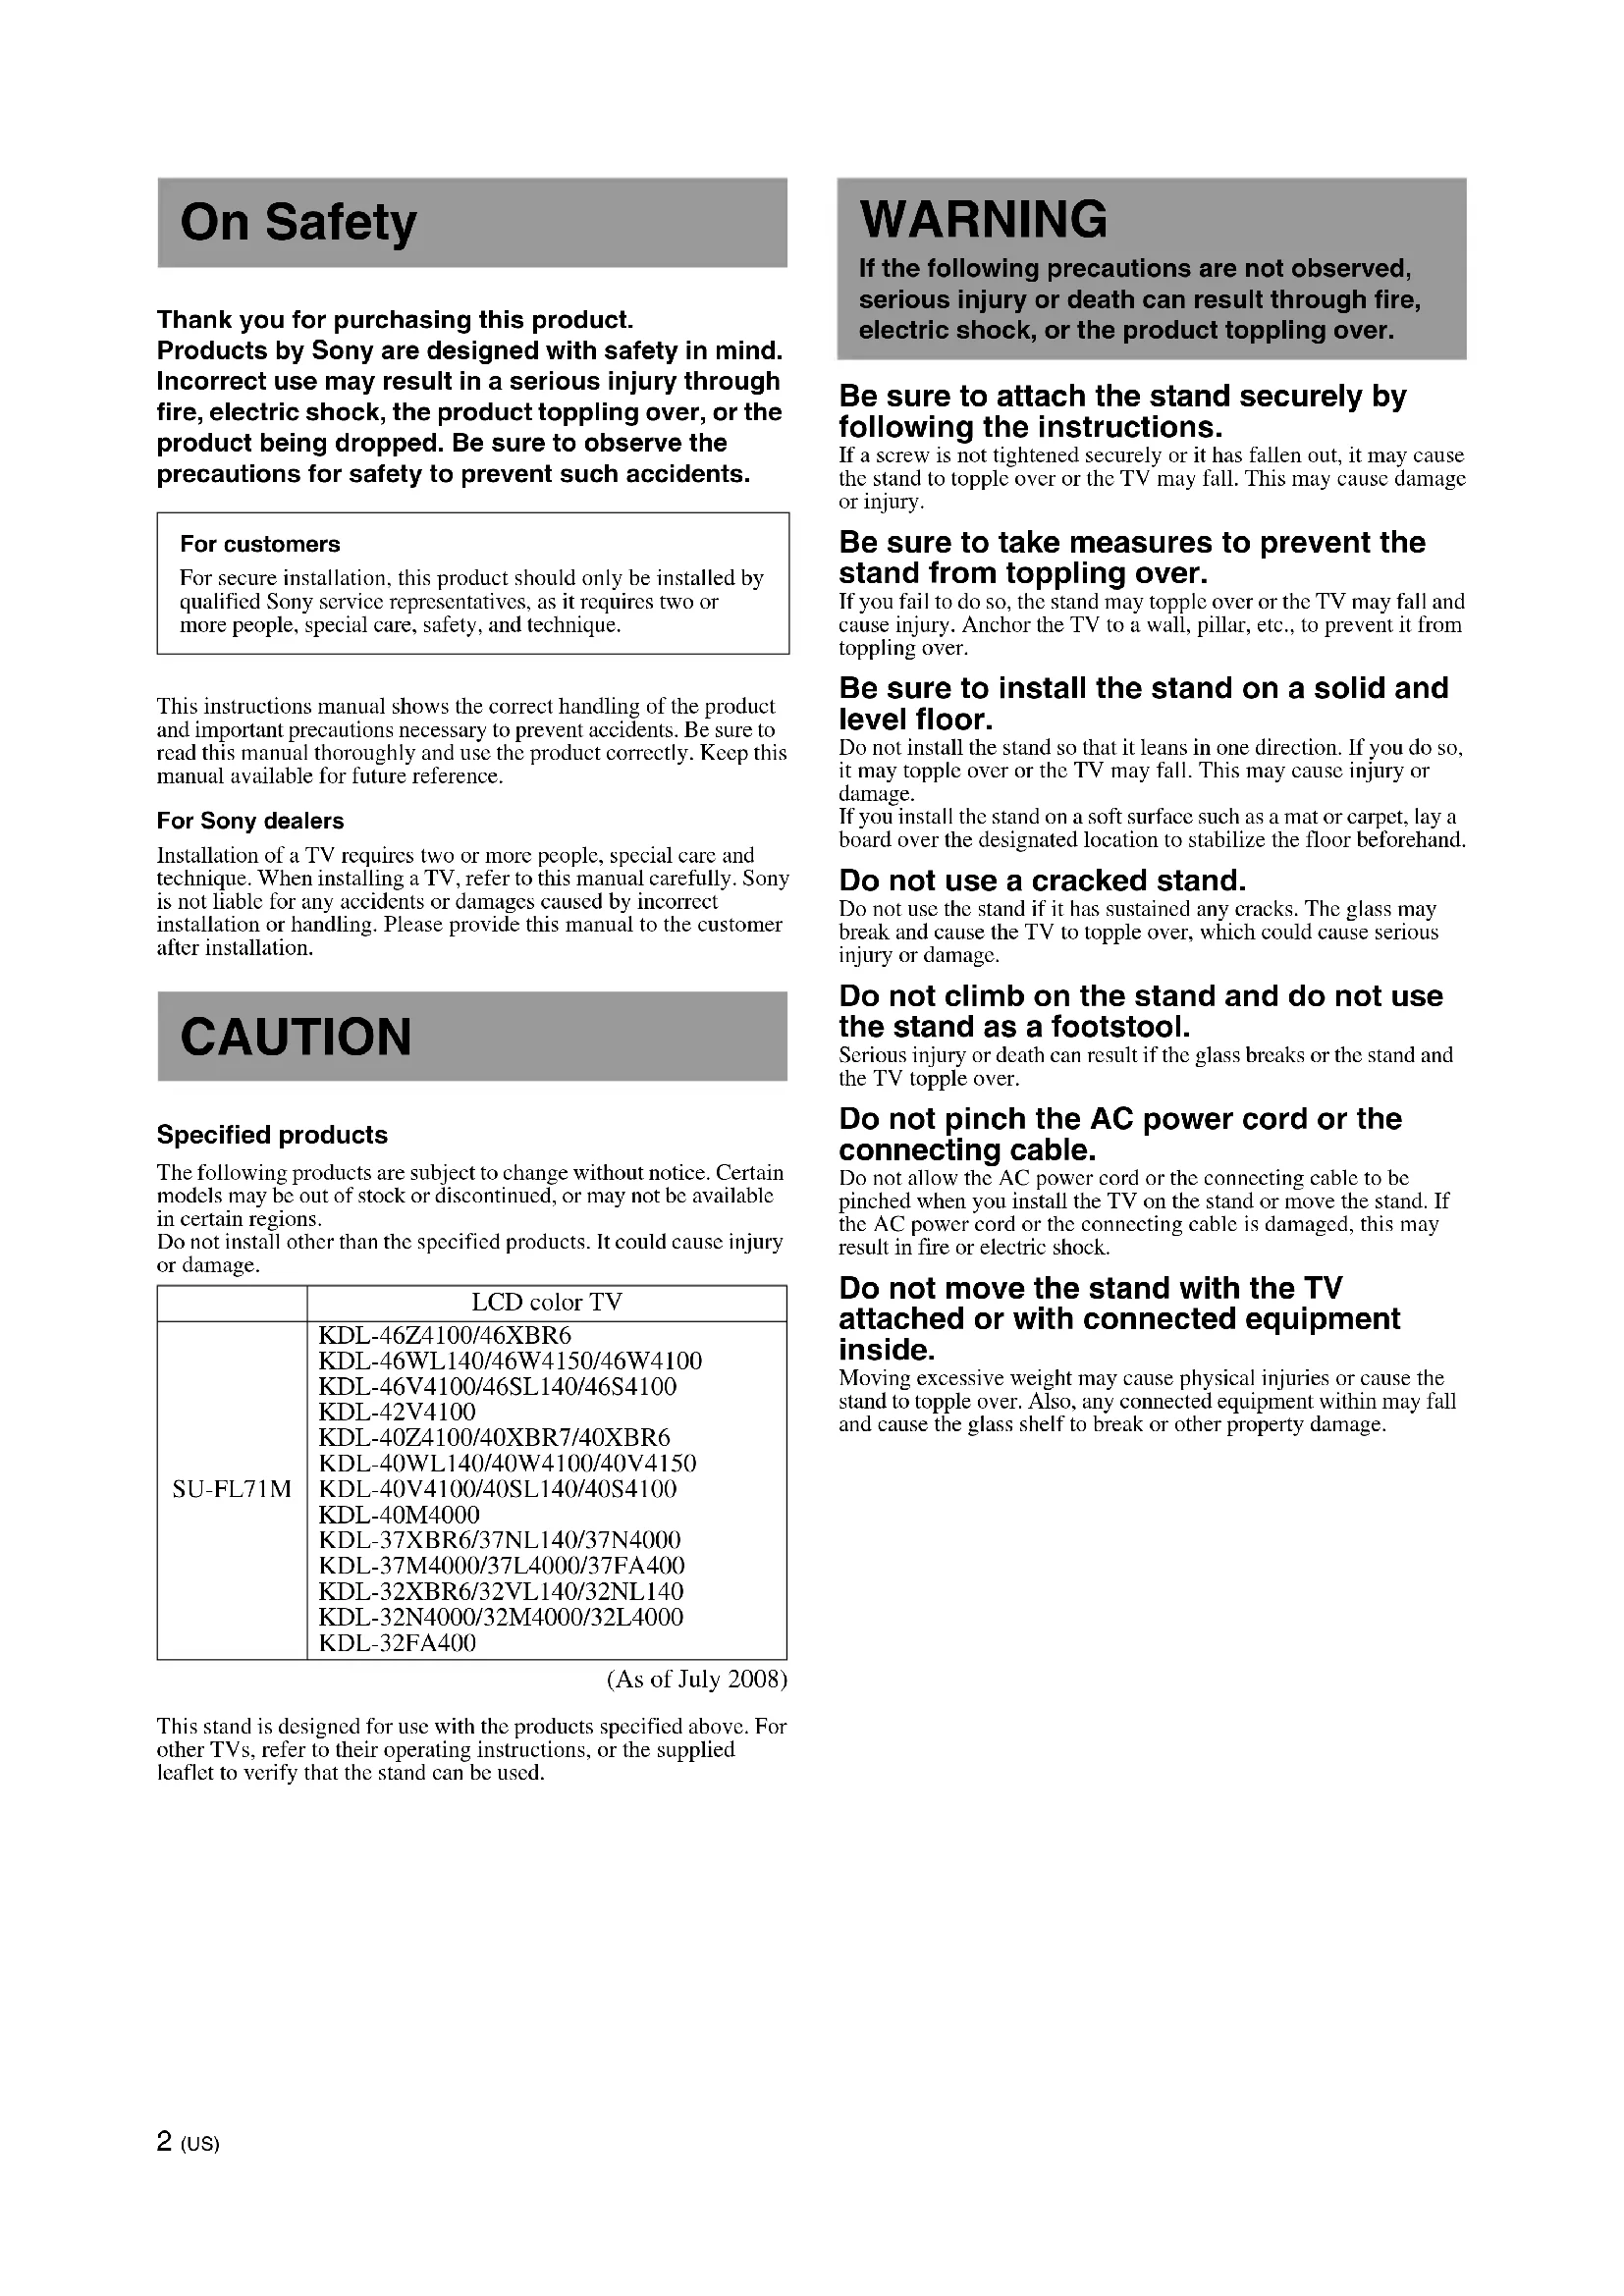
The maximum weight capacity is 2kg (4 lb 7 oz). Do not place any equipment which exceeds 2kg (4 lb 7 oz) or 380 mm (15 inches) plate width.

- For customers
- For Sony dealers
- CAUTION
- Specified products
- WARNING
- Be sure to attach the stand securely by following the instructions.
- Be sure to take measures to prevent the stand from toppling over.
- Be sure to install the stand on a solid and level floor.
- Do not use a cracked stand.
- Do not climb on the stand and do not use the stand as a footstool.
- Do not pinch the AC power cord or the connecting cable.
- Do not move the stand with the TV attached or with connected equipment inside.
- Be sure that two or more people do the assembly and installation.
- Do not modify the stand.
- Do not place anything hot directly on the stand.
- NOTE ON USE
- Notes on installation
- About load capacity
- When moving the stand
- How to clean the stand
- Preparing for assembly
- Before assembling
- Specifications
- Checking the parts
- Installing
- 1Assembling the floor stand
- Preparing for the installation of the TV The parts installation differs depending on your TV screen size.
- Attach 32" bracket GH or Bracket ①② to the TV.
- A For 37 inch to 46 inch:
- B For 32 inch:
- Attach Hook M to 32" bracket G or Bracket ①.
- Connecting the AC power cord and the other cables to the TV.
- Detach the Table-Top Stand from the TV.
- Installing the TV
- Attach Pillar A to the TV.
- Bundling the cables
- After connecting the cables to the TV, bundle the cables.
- Safety measures to prevent toppling over
- For the Center Speaker users:
- Secure Pillar A to the wall.
- Attach Rear Cover Top ① and Rear Cover Bottom E to Pillar A.
- Installing the Center Speaker Table (For Home Theatre Systems only)
Brand : SONY
Model : SUFL71M
Category : TV Stand