
SRHZ106 - Rice cooker PANASONIC - Free user manual and instructions
Find the device manual for free SRHZ106 PANASONIC in PDF.
| Product type | Induction Rice Cooker |
| Brand | Panasonic |
| Model | SR-HZ106 |
| Capacity (white rice) | 0.5 to 5.5 cups (max. ~1.0 L) |
| Dimensions (W × D × H) | 25.0 × 32.1 × 20.1 cm |
| Weight | 4.7 kg |
| Power supply | 120 V ~ 60 Hz |
| Power consumption (cooking) | 1,200 W |
| Power consumption (keep warm) | 700 W (29.8 Wh) |
| Power cord length | 1.0 m |
| Cooking functions | White rice, rinse-free, delicious, eco, quinoa/quick, 1-2 servings, sushi/curry, frozen, mix, glutinous rice, porridge, brown rice, multigrain |
| Timer | 2 programmable timers up to 13 hours |
| Keep warm | Automatic up to 12 hours, manual reheating possible |
| Heating type | Induction |
| Included accessories | Measuring cup, rice paddle, ladle, paddle rest, steam vent cap, inner lid |
| Inner pot material | Non-stick coating |
| Cleaning | Inner pot, inner lid, cap hand washable; automatic cleaning function (45 min) |
| Safety | Automatic shut-off, pot detection, lid lock, overheat protection |
| Backup battery | Lithium battery for time memory (non-user replaceable) |
| Warranty | 2 years (parts and labor) in Canada |
| Intended use | Household use only |
Frequently Asked Questions - SRHZ106 PANASONIC
User questions about SRHZ106 PANASONIC
0 question about this device. Answer the ones you know or ask your own.
Ask a new question about this device
Download the instructions for your Rice cooker in PDF format for free! Find your manual SRHZ106 - PANASONIC and take your electronic device back in hand. On this page are published all the documents necessary for the use of your device. SRHZ106 by PANASONIC.
USER MANUAL SRHZ106 PANASONIC
The modal number and serial number of this product can be found on the back of the main body.
DEALER'S ADDRESS
TELEPHONE NUMBER
Homologation
NUMERO DE MODELE DATE D'ACHAT
NUMERO DE SERIE DÉTAILLANT
Panasonic Corporation of North America
Two Riverfront Plaza, Newark, NJ 07102-5490
Panasonic Canada Inc.
5770 Ambler Drive, Mississauga, Ontario L4W 2T3
RZ19AH63
S0916T0
Printed in Japan
Imprimé au Japon
USA/CAN

Thank you for purchasing this Panasonic product.
This product is intended for household use.
Please read the operating instructions carefully and ensure safe and sound operation.
Before use, he can to mod "IMPORTAN
SAFEGUARDS"and"SafetyProvisions"
SAFEGOARDs and Safety Precautions . (Page 3.7)
Keep the operating instructions and the w
for future use.
Included Limited Warranty
Panasonic
Operating Instructions
Electronic Rice Cooker /Warmer
Household Use Only
1.0L model
Model No.
SR-HZ106
Contents
page
IMPORTANT SAFEGUARDS
3
Safety Precautions .
4
Notes on Use.
8
Part Names/Accessories
9
Cooking Rice
10
(When you wish to cook immediately)
tely)
Using the Settings Correctly
12
Using Different Settings...
14
Keeping Warm
15
Keep Warm/Reheat
Using the Timer
16
When the current time is incorrect
correct
R
Gomoku Rice/Sekihan
Sushi Rolls/Chaqayu (Tea Porridge) 18
Soybean and Hijiki Mixed Rice
Multigrain Rice Salad 19
Cleaning 20
When using for the first time & on every use
Regular checks
- When the cleanliness of the Rice Cooker is a concern
Does my Rice Cooker have a fault? 22
What does this mean? 23
What to do when 24
Specifications 28
IMPORTANT SAFEGUARDS
When using electrical appliances, basic safety precautions should always be followed, including the following:
- Read all instructions.
- Do not touch hot surfaces. Use handles or knobs.
- To protect against electrical shock, do not immerse cord, plugs, or appliance in water or other liquid.
- Close supervision is necessary when any appliance is used by or near children.
- Unplug from outlet when not in use and before cleaning. Allow to cool before putting on or taking off parts.
- Do not operate any appliance with a damaged cord or plug or after the appliance malfunctions or has been damaged in any manner. Return appliance to the nearest authorized service facility for examination, repair, or adjustment.
- The use of accessory attachments not recommended by the appliance manufacturer may cause injuries.
- Do not use outdoors.
- Do not let cord hang over edge of table or counter, or touch hot surfaces.
- Do not place on or near a hot gas or electric burner, or in a heated oven.
- Extreme caution must be used when moving an appliance containing hot oil or other hot liquids.
- To disconnect, turn any control to "off", then remove plug from wall outlet.
- Do not use appliance for other than intended use.
- This product is intended for household use only.
15. SAVE THESE INSTRUCTIONS.
CAUTION:
a. A short power-supply cord is provided to reduce the risk resulting from becoming entangled in or tripping over a longer cord.
b. The cord should be arranged so that it will not drape over the countertop or tabletop where it can be pulled on by children or tripped over unintentionally.
c. The use of extension cords is not recommended.
This appliance has a polarized plug (one blade is wider than the other). To reduce the risk of electric shock, this plug is intended to fit into a polarized outlet only one way. If the plug does not fit fully into the outlet, reverse the plug. If it still does not fit, contact a qualified electrician. Do not attempt to modify the plug in any way.
Safety Precautions
In order to prevent accidents or injuries to the user, other people, and damage to property, please follow the instructions below.
The following charts indicate the degree of damage caused by wrong operation.

WARNING: Indicates serious injury or death.

CAUTION: Indicates risk of injury or property damage.
These symbols are classified and explained as follows:

This symbol indicates prohibition.

This symbol indicates requirement that must be followed.
WARNING

- Do not use the appliance if the power cord or power plug is damaged or the power plug is loosely connected to the power outlet.
If the supply cord is damaged, it must be replaced by the manufacturer, its service agent or similarly qualified persons in order to avoid a hazard.
Do not damage the power cord or power plug.
The following actions are strictly prohibited.
Damaging, modifying, touching on or placing near healing elements, forcefully bending, twisting, pulling, pulled over sharp edges, putting heavy objects on top, bundling, pinching the power cord and carrying the equipment.
(It may cause a fire or electric shock due to damage to the power cord or power plug.)
-Do not plug or unplug the power plug with wet hands.
Always ensure that hands are dry before handling the power plug or switching on the appliance.
(It may cause an electric shock or injury.)
Do not insert any object in the vent or gaps.
- Especially metal objects such as pins or wires.
It may cause an electric shock, or injury caused by malfunction.

—Exhaust Vent
Intake Vent
- Do not wash the main body with water, immerse the appliance in water or splash it with water.
It may cause an electric shock, or fire caused by short circuit.)
Please contact an authorized service center if water gets inside the appliance.

WARNING

Do not modify, disassemble, or repair the appliance.
It may cause a fire, electric shock or injury.)
Please contact an authorized service center for a repair.
Do not use the appliance for any purpose other than those described in these
instructions.
It may cause a fire, burn, injury or electronic shock.
- Panasonic will not accept any liability if the appliance is subject to improper use, or failure to comply with
these instructions.
Do not expose your face close to the Steam Vent or the Steam Cap or touch them with your hand while cooking or immediately after cooking.
Pay extra attention to infants.
It may cause a bum.)

Steam Vent
-Do not put anything in the Inner Pan to block the hole
in the Inner Lid.
(Steam may leak or cooking contents may expel, causing a burn or injury.)
Cooking with the ingredients or seasonings in a plastic bag
Cooking by using aluminum foil etc. to cover the ingredients directly.
Hole in the Inner Lid :

Do not open the Outer Lid or carry the appliance while cooking.
(Steam may leak or cooking contents may expel, causing a burn or injury.)

This appliance is not intended for use by persons (including children) with reduced physical, sensory or mental capabilities, or lack of experience and knowledge, unless they have been given supervision or Instruction concerning use of the appliance by a person responsible for their safety. Children should be supervised to ensure that they do not play with the appliance.
It may cause a burn, injury or electric shock.)
- Use only a power outlet rated at 15 Amperes minimum and alternating electric current at 120 Volts.
(Plugging other devices into the same outlet may cause electric overheating, which may cause a fire.)
Insert the power plug completely.
(It may cause smoking, a fire or electric shock.)
Clean the power plug regularly.
(A soiled power plug may cause insufficient insulation due to the moisture, and int build-up, which may cause a fire.
Unplug the power plug, and wipe with a dry cloth.
Safety Precautions
WARNING
Discontinue use of the appliance immediately and unplug when abnormality or breaking down occurs. (It may cause smoking, a fire or electric shock.)
e.g. for abnormality or breaking down:
The power plug and the power cord become abnormally hot.
The power cord is damaged or power failure happens when the power cord is touched.
The main body is deformed or is abnormal
- Smoke emanates from the main body or a burning odor is detected
The main body is cracked, is loose or rattles.
The fan in the bottom does not rotate while cooking
Please contact an authorized service center for inspection or repair immediately.
Close the Outer Lid firmly until it clicks.
To prevent a burn or injury by steam leaking or the opening of the
Outer Lid.
To ensure that the Outer Lid can be closed, remove foreign objects such
as rice grains on the Stainless Steel Rim, Gasket of Inner Lid, or inner surface
of Outer Lid.
Inner surface of
Outer Lid
Gasket

Stainless Steel Rim
-Keep the power cord out of reach of children.
- Do not let the power cord hang over the edge of the table or countertop.
(Pulling on the power cord may result in the appliance falling from the table or countertop, causing an injury.)
Always keep children away from the appliance.
It may cause a burn, injury or electric shock.
Children do not realize dangers that are likely to occur because of improper use
of electrical appliances

- Be careful not to trip over or become entangled with the power cord while in use.
(Otherwise it may result in an injury, or the damaged power cord causing a fire or electric shock.)
CAUTION

Do not expose the power plug to steam.
- Do not expose the power plug to steam when it is plugged in.
(It may cause an electric shock, or fire caused by short circuit.)
When using a cabinet with sliding table, use the appliance where the power plug cannot be exposed to steam.
Do not use a deformed Inner Pan or an unspecified pan.
(It may cause a burn or injury due to overheat or malfunction.)
CAUTION
Do not touch heating elements while the appliance is in use or after cooking.
The Steam Cap, Inner Lid and metal parts, such as the Stainless Steel Rim, near the
Inner Pan.
I may cause a burn.) Use a dry cloth or oven mitts when removing the inner Pan while it is hot.
Do not touch the Hook Button while moving the appliance.
It may cause the Outer Lid to open, resulting in a burn.)
Do not use the appliance on following places.
- Places where it may be splashed with water or near a heat source.
It may cause an electric shock, electrical leakage or fire.
- On an uneven surface or on non-heat-resistant carpet.
It may cause an injury, burn or fire.
- Near a wall or furniture
- It may puncture dimensional
(If may cause discoloration, deformation or damage.)
- On aluminum sheet or electronic carpet.
(Aluminum materials may generate heat and cause smoking or a fire.)
Do not turn on the appliance without rice and water inside.
It may cause a bum.)

- Be sure to hold the power plug when unplugging the power plug. (Otherwise it may cause an electric shock, or fire caused by short circuit.)
Always switch off and unplug the appliance from the power outlet when it is not in use or before removing the Inner Pan.
(Otherwise it may cause a burn, injury, or electric shock or fire caused by short circuit due to insulation) (deterioration)
Unplug and allow the appliance to cool down fully before cleaning and storing it.
- Do not move the appliance while it is hot. (Touching hot elements may cause a burn.)
If using the appliance on a kitchen shelf etc., ensure that the steam is not confined
within a closed space
(If may cause discoloration or deformation.)
If using a slide-out shelf, pull the shelf out fully to ensure that the shelf above is not exposed to steam.
- Please consult a doctor if you are using an implanted pacemaker.
The operation of this appliance may affect your pacemaker.
If the power stops during use
Includes if the power plug is removed, or the power circuit breaker is tripped during use.
If power is interrupted, the Rice Cooker will return to the state it was in before interruption.
If the power stops for a long period of time, the Rice Cooker will return to the following state when power resumes.
Cooking: Continues cooking. Keeping warm: Continues keeping the rice warm.
The rice may be cooked in an unsatisfactory way.
It will start cooking immediately if the set time of the timer has elapsed. The rice may not be cooked by the set time.
For further details on "Timer Setting Restriction", see P. 28.
Notes on Use
To keep the Rice Cooker in good condition over the long term, please observe the following.
About the Rice Cooker
If placing the Rice Cooker on a slide-out shelf, be sure to check that it is strong enough to bear the load.
If it is not, the Rice Cooker may fall. When adding water and rice to the Rice Cooker:
15 lbs./7 kg approx.
Do not cover the top of the Ric
Cooker when it is in use.
Dishcloths etc.
Steam may be confined near the Rice Cooker, causing deformations of the Outer Lid and buttons or faults in the display.
Do not use in a location subject to direct sunlight. (Doing so may result in discoloration.)
- Do not use in a location (on a carpet, plastic bag, aluminum foil, fabric etc.) where the bottom of the Rice Cooker (the Intake and Exhaust Vents) is restricted.
(Doing so may damage the Rice Cooker.)
Periodically check the Intake and Exhaust Vents at the bottom of the Rice Cooker. Remove any dust etc. (P.21)
About the Inner Pan
■ Do not
Do not use on a gas hob or IH hob, or in a microwave.
e Rice Cooker.

■Do not strike against hard objects.
Doing so may scratch or dent the outer surface.

■Observe the following to prevent peeling or scratching of the inner coating.
During preparation

Do not use a whisk or other tool when washing the rice.
Do not allow a metal strainer etc. to contact the internal coating.
When rice is cooked
Do not mix vinegar with the rice while it is in the Inner Pan (for sushi etc.). Do not use a metal ladle (for porridge etc.). Do not tap or hit the Inner Pan (when serving etc.).
When cleaning (P.20-21)
Do not use as a wash bowl. Do not put spoons or other cutlery into the inner Pan.

After cooking with seasoning, do not leave the food in the Inner Pan. After cooking mixed rice etc., remove it from the Inner Pan as soon as possible and wash the Inner Pan.
- not use a dish dryer or dishwasher/dryer.
-
After washing, do not leave on other crockery to dry.
-
Do not wash or scrub with an abrasive, a metal scourer, a nylon scourer etc. Wash using a soft sponge.
Do not wash using the scouring pad.
Note
The following do not affect performance or human [Outer surface] Shallow scratches, small dents or cracks on the surface.
A new Inner Pan can be purchased from an authorized service center if the Inner Pan has changed shape or you are concerned about the condition of the Inner Pan.
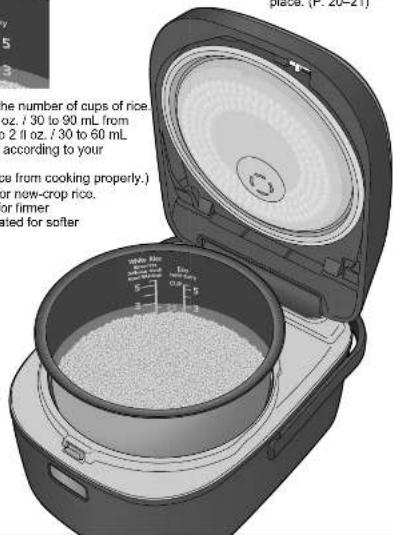
Part Names/Accessories
Before using the Rice Cooker for the first time, please wash the accessories, Inner Pan, Inner Lid and Steam Cap. (P. 20-21)

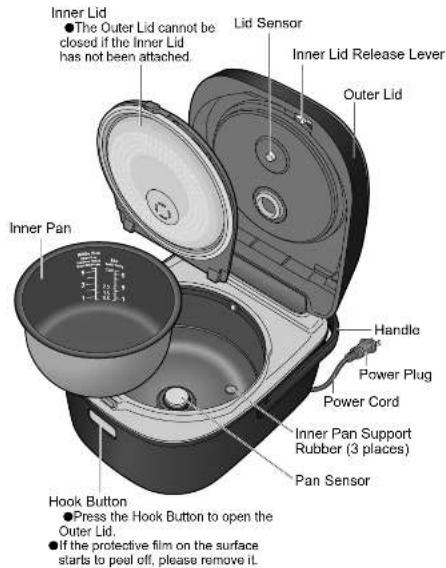
Attaching the Rice Scoop Holder
Attach the Rice Scoop Holder to the indented section of the Handle.

It can be attached to the left or right side.
Note
As an aid for the visually impaired, the "Start" and "Cancel/Off" buttons have raised parts * and
Cooking Rice
When you wish to cook immediately
Washing the rice and adding water
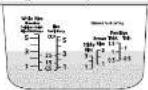
Measure the rice
Measure by levelling off in the supplied measuring cup.
(Approx. 6.1 f oz. 180 mL per cup)
Wash the rice
① First, add plenty of water, stir, and quickly throw away the water.
Repeat this process 2 to 5 times, stirring gently to wash the rice each time.
'It is acceptable if the cooking water is slightly cloudy.
- Stir the rinse-free rice gently from the bottom.
In order to allow water to penetrate rinse-free rice more easily.
Precaution
Do not leave the rice in a strainer for any length of time.
The rice grains may break, causing the rice to stick or burn when cooked.
Add water
Add water up to the mark (Water Level) for the desired cooking setting. (P. 12)
Ensure that the Inner Pan is on a level surface and check the marks on both sides.
Add the correct amount of water for the number of cups of rice. Adjust water by approximately 1 to 3 fl oz./30 to 90 mL from the Water Level for "Eco" setting, or 1 to 2 fl oz./30 to 60 mL from the Water Level for other settings, according to your preference.
(Adding too much water may prevent rice from cooking properly.) 2. Use a little less water than indicated for now, green rice.
- Use a little less water than indicated for flow-up crop rice and use a small more water than indicated for rice and a little more water than indicated for softer
Ensure the rice is even.
Soaking the rice is not required. (When the 'Start' button is pressed the water will be absorbed automatically.)
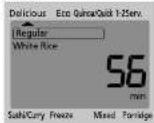
Using the "White Rice/Delicious" setting with 3 cups of rice
Setting up
4 Set the Inner Pan evenly
(Check that it is not tilted.)
Wipe away any waler etc. on the outside of the Inner Pan. Check that the Inner Lid and Steam Cap are set in place.(P.20-21)
5 Insert the Power Plug
Make sure the Power Plug is firmly connected.

Cooking
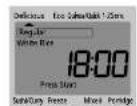
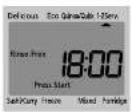
6 Check the setting and press the "Start" button
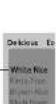
By default, rice is set as "White Rice" and menu is set as "Delicious (Regular)" at the time of purchase. When changing: (P. 14)
Press Start

Cooking starts.
When the buzzars sound after cooking, the steaming stage has finished. Mix the rice immediately. (This is to allow excess moisture to evaporate.)


Moasure out the water and rice correctly.

Wash the rice gently. Heavily-handed washing of the rice can result in the grains splitting, causing the rice to stick or burn.
Use suitable water. We recommend the use of tap water or filtered tap water.
- Use of alkaline water (with a pH higher than 9) may result in sticky or yellow-colored rice.
- Use of hard mineral water (with hardness of 100 or above) may result in dry or hard rice.

Things to look out for!
Where possible, choose recently processed rice.
After opening a bag of rice, use it promptly.
- Keep rice in the fridge.
Using the Settings Correctly
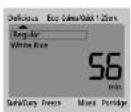
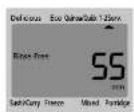
| Rice Select | Menu Select | Water Level | Cooking time (approx.) | |
| Best flavor | Delicious Regular Hard Soft | Delicious | Regular/Soft: 56 min Hard 52 min | |
| Regular cooking (Time and power-saving) | ||||
| Cook quinoa or quick cooking | Eco | Eco 44 min | ||
| Quinoa/Quick Quinoa can only be cooked one cup at a time. Rice will be slightly firmer. You can soften the rice by soaking it before quick cooking. | Quinoa : —*1 | 28-32 min | ||
| Quick : Quick 23-33 min | ||||
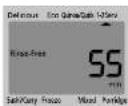
| Cook small amount | 1-2 Serv. (0.5 to 1.5 cups) | White Rice 55 | min | |
| Cook sushi rice or rice for curry | Sushi/Curry | Sushi · Curry | 47 min | |
| Cook rice for freezing | Freeze | White Rice 53 | min | |
| Cook mixed rice or sticky rice | Mixed | Mixed 48-55 min | ||
| When cooking sticky rice: Sticky Rice | 43-51 min | |||
| Cook parridge | Porridge You can cook two kinds of porridge, thick or thin. | Porridge (Thick / Thin) | 52-68 min | |
| Cook brown rice | No selection available Brown | Rice* 2 | 103-112 min | |
| Cook rice of various grains | Multi Grain | Rice* 2 | 50-55 min | |
One cup of quinoa requires two cups of water.
For correct water level, follow package instructions if they are available. The water quantities can be adjusted according to personal preference.
Do not mix brown and white rice (rinse-free rice included). (The two kinds of rice will not cook properly.)

■ Cooks rice slowly for the best flavor.
Draws out sweetness and flavor.
●Allows you to select the hardness of the cooked rice.
Try "Regular" at first and then adjust to laslin.
Regular
Hard
Soft

Hardness Selection
Cooks rice as quickly and with as little power as possible.
If the rice feels hard, perform the following to soften it.
After cooking and mixing the rice, allow it to sit
The next time you cook rice, add more water. (Fill to approximately 1 to 3 ft oz.)
/30 to 90 mL above the water level marking.)
After soaking the rice for 30 minutes to 2 hours, press the "Start" button.
| Power Consumption Comparison | ||
| Eco | Delicious (Regular) | |
| For 3 cups of rice | 153 Wh | 218 Wh |
Measurement conditions: room temperature 73.4 ± 3.6^ F / 23 ± 2^ C .
water temperature 73.4 ± 1.8^ F / 23 ± 1^ C

How to Thaw (Warm) Rice
Cooks rice that avoids clumping and can be easily fluffed when frozen and then thawed in the microwave.
| How to Freeze |
| ① While the rice is still warm, scoop it out in approximately 2/3 cup (approx. 5.3 oz. / 150 g) portions atop plastic wrap, gently flatten out the portions and then wrap them. (Approx. 1 in. / 3cm thickness) |
Once the portions have cooled to room
temperature, put them in the freezer.
(Tips for Freezing)
Freeze the rice quickly
(Because keeping the cooked rice warm for a long period of time diminishes its flavor.)
Put the rice on an aluminum tray and then freeze it to help preserve its quality.
(Because this will make it freeze more quickly.)
-Please follow your microwave's operating instructions.
If thawing (warming) rice is not addressed in the operating instructions, use the approximate heating times below as a guide and adjust based on how done the rice is.
| Approximate Heating Time | |
| 1 portion: approx. 2/3 cup (approx. 5.3 oz. / 150 g) | 2-3 min |
| 2 portions: approx. 1:1/3 cups (approx. 10.6 oz. / 300 g) | 4-5 min |
Values shown for 600W microwave
Using Different Settings
Using "Delicious" setting Selectin
1 Select "White Rice" or "Rinse-Free"
Press


The option is selected when it is f ashing.

2 Sel

Pres


directly moves to "Delicious."
To change the hardness Press delouag again to selec
Press the "Start" button Flashing

Cooking starts.
When the buzzer sounds after cooking, the steaming stage has finished. Mix the rice immediately.
(This is to allow excess moisture to evaporate.)
pe of rice and menu
1 Select a type of rice


The option is selected when it is a ashing.

For "White Rice" or "Rinse-Free" setting, Select a menu


Press the "Start" button Flashing

Cooking starts.
When the buzzer sounds after cooking, the steaming stage has finished. Mix the rice immediately.
(This is to allow excess moisture to evaporate.)
Notes
-White Rice' and Rinse-Free settings are stored. ("Delicious" and "Eco" settings will also be stored.)
RegularHardSoft and Clean will be displayed when selected. To make it easier to distinguish between decision points (for instance
to make it easier to distinguish between decision points (for instance, the "Menu Select" button being at "Delicious"), the beeping sound has been changed to "beep-beep".
From the point that the cooking starts, the Rice Cooker displays the time until the rice is ready. Note that for the "Quinoa/Quick", "Mixed", "Porridge", "Brown Rice" and "Multi Grain" settings, the Rice Cooker will display the current time until approximately 10 minutes before the rice is ready. It will then switch to show the time until the rice is ready.
Keeping Warm
Keep Warm (Automatic)
Once cooking finishes, settings automatically switch to the keep warm function. (Please mix the rice immediately after cooking ends.)

To reheat from the keep warm state To return to the keep warm state
| ○ | ●Delicious ●Eco ●Quick ●1-2 Serv. ●Sushi/Curry ●Freeze (P. 13) Freezing the rice quickly is recommended to avoid diminishing its flavor and texture. |
| The Rice Cooker will switch automatically to the keep warm function, but we do not recommend this. | ●Mixed Use of the keep warm function can also cause the Inner Lid to stain, and adversely affect the flavor of the rice. ●Porridge If Porridge is kept warm, it may become very sticky. ●Quinoa ●Sticky Rice ●Brown Rice ●Multi Grain Flavor can be adversely affected. |
Precautions
Do not use the keep warm function for more than 12 hours.
To prevent odor and condensation during the keep warm state:
Do not cancel the keep warm function or remove the Power Plug while leaving the rice in the Rice Cooker.
To prevent odor:
Do not use the keep warm function with the Rice Scoop still in the Rice Cooker.
Notes
A keep warm time of up to 23 hours is displayed in 1 hour units (0^ is displayed for times of less than 1 hour). After 24 hours, the display returns to the current time.
Reheat (Manual)
Rice to be heated to high temperature from the keep warm state.
In the keep warm state Mix the rice
Notes
Press the "Keep Warm/Reheat" button


Flashing(Approx.5-7min)


When the buzzer sounds, mix the rice immediately. The rice is now ready to be eaten.
- Reheat cannot be used in the following situations.
- When the rice is cold (buzzer beeps 4 times).
- When the keep warm function is not in use.
- Reheating two or more times will adversely affect the flavor of the rice.
Using the Timer

Timer
Two timers can be set. (These are stored until changed.) You may find it convenient to store often used times, using, for example, "Timer 1" for breakfast and "Timer 2" for your evening meal.
For example: Setting to 7:30 am.
1 Check that the current time is correct if the time is incorrect, set it by following the procedure on the right.
2 Check the setting (Set to desired setting, Step 1-2 on P. 14)
Select "Timer 1" or "Timer 2" Press Timer12 Each press of the button changes the selection. Press Start Press Press Press Flashing
4 Set the time at which the rice is to be ready 10:30 7:30 10:30 15:30 20:30 25:30 30:30 35:30 40:30 45:30 50:30 55:30 60:30 65:30 70:30 75:30 80:30 85:30 90:30 95:30
Flashing
Press the "Start" button Flashing Press Start

Setting ends.
When the buzzer sounds after cooking, the steaming stage has finished. Mix the rice immediately. (This is to allow excess moisture to evaporate.
OffLighting

When the current time is incorrect,
The time is displayed in 24-hour clock format. Insert the Power Plug

Hold down 30 Minu
Release your finger when you hear a "beep".
Set the time
Non-Forward (units of 1 hour)
Mines Forward (units of 1 min)
When the 1 ashing stops, the time is set.
The lime cannot be set in use as such as cooking/the keep warm state/the timer setting.
When the lithium battery runs down, removing the Power Plug will result in the loss of stored data such as the battery's memory.
The lithium battery is fixed inside the main body and cannot be replaced by the user. For a replacement of lithium battery, please consult an authorized service center.
This product contains a CR Coin Cell Lithium Battery which contains Perchlorate Material - special handling may apply. See www.dtsc.ca/goychazardouswaste/perchlorate
To see the current time after setting the timer.
Lighting
Press Timer1-2 Press and hold to display.
Notes
If there is insufficient time for the timer setting, the timer will not allow the setting, and cooking will start immediately. (See "Timer Setting Restriction" on P. 28.)
The timer cannot be used with the "Quinoa/Quick" or "Mixed" setting.
If the timer setting is 13 hours or longer (8 hours or longer when the water temperature is high), the nice may ferment, then generate undesirable odor.
When cooking with the timer, the time until the rice is ready is not displayed.
When cooking with the timer, the rice may absorb excess water. This can result in the rice becoming soft or burnt.
Reduce the amount of water slightly if the rice is soft.
(Reduce water by approximately 1 to 2 l oz. / 30 to 60 mL from the Water Level.)
Recipes
For Mixed and Sticky Rice...
Make sure to have the right amount of water before adding toppings.
Use 75 g or less of toppings per cup of rice. (Too much will keep it from cooking well.)
Cut the toppings into small pieces and place them on top of the rice.
(Mixing them in will keep the rice from cooking well.)
Gomoku Rice
Ingredients Single serving: 300 kcal (servings 6)
White rice. 3 cups Toppings
Burdock, konnyaku 30 g each Dried @hikata 2 pieces
Dried shiwi 2 pieces
Chicken, carrot 50 g each
Seasoning This season, you
Thin soy sauce, sake. 1bs each
Minn. % tsp Salt, instant soup stock . % tsp each
1 Preparation
Burdock ... Slice thinly and add to the water.
Konnyaku ... Boil and chop finely.
Dried shlitake ... Chop finely after soaking in lukewarm water.
Deep-fried tofu ... Apply boiling water to remove the oil and then chop fi nely.
Chicken...Chup finally
Carrot...Cut into thin strips
Wash the white rice, add the seasoning and water up to the "Water Level: Mixed 3" level, mix everything together and ensure the rice is evenly flat.
Add the toppings on top of the white rice. (Do not mix the ingredients into the rice.)

Select the
Rice Select White Rice or Rinse-Free
1 + u1 - 1 = ( 1 + u) u1 < 1 = u
Finish
When the buzzer sounds, turn over the rice to loosen and fluff it.
Sekihan
Ingredients (sorves 5) Single serving: 295 kcal
Sticky rice 3 cups
Azuki beans. cup (50 g)
Azuki bean broth (for cooking the rice)
Gamlish
Gomashio . As required
1 Boil
Boil the azuki beans in a plenty of water and then, once boiled, pour off the broth.
Add water again and boil over a weak flame to maintain a slight
firmness in the beans.
Once the beans are boiled, pour the broth into a separable container to cool. Put the beans into a colander and cover with a damp cloth.
Cooking Preparation
Wash the sticky rice, put it into a colander and cover it with a damp cloth. Wait about 30 minutes for the water to drain.
Put the sticky rice in the Inner Pan and add azuki bean broth up to the
Water Level, Sticky Rice 3 level, and ensure the rice is evenly flat.
If you do not have enough broth, make up for it by adding wat
Put the azuki beans on top of the sticky rice. (Do not mix the ingredients into the rice.)
Select the setting and press the "Start" button
Birg Select
Menu Select
V
4 Finish
When the buzzer sounds, turn over the rice to loosen and fluff it, put
it on a plate and sprinkle with some gomashio.
Recipes
For Sushi Rice...
To ensure full flavor penetration of the rice, transfer the rice while it is still hot to the sushi rice bowl and mix in the sushi vinegar. (Do not mix in the sushi vinegar while the rice is in the Inner Pan.)
To preserve the sheen of the rice, cool quickly using fan
To prevent stickiness, set the rice scoop at a shallow angle and mix quickly with a chopping motion.
Sushi Rolls

Ingredients (serves 4)
White rice 3 cups Konou 5× 5 cm Nori sheets .As required
Sushi Vinegar
Vinegar 90 mL
Sugar 2½tbs
Salt 1½sp
Toppings
Tuna, squid, shrimp, salmon, salmon roe, cucumber, eggs, pickled daikon radish, leafy vegetables, avocado, and any other desired toppings. As required

1 Wash the white rice, add water up to 'Water Level: Sushi Curry 3' level and ensure the rice is evenly flat at.
9 Select the setting and press the "Start" button
Rice Select White Rice or Rinse-Free Start Menu Select Sushi/curry
Making the Sushi Rice
Put the "A" ingredient in a pan and warm gently to make the sushi vinegar. Moisten the inside of the sushi rice bowl with water.
When the buzzer sounds, remove the konbu and transfer the cooked rice to the sushi rice bowl.
Pour the sushi vinegar evenly over the rice, then use a chopping motion to mix the rice while cooling it with a fan.
To ensure that the sushi rice does not dry out, cover it with a damp cloth.
4 Rolling the Sushi
Spread the sushi rice over a nori sheet and put your desired toppings on it and then roll the nori sheet.
For Porridge...
- There are water level markings for Porridge (Thick and Thin) to allow you to make your porridge to your preferred consistency. (Thin will have a more watery consistency.)
Do not use any milk products. (Otherwise the rice will not cook well.)
Flavorings should be added after the rice has been cooked. (Otherwise the seasonings will settle out and keep the rice from cooking well.)
Use 150 g or less of toppings per cup of rice. (Too much will keep it from cooking well.)
This Rice Cooker cannot be used to make porridge from cooked rice. Do not use brown rice. (Otherwise the porridge will not cook well.)
Chagayu (Tea Porridge)

Ingredients (sorves 4) Single serving: 133 kcal
White rice. 1 cup
Strong, roasted green tea. 1100 mL
Seasoning Salt. A dash
Garnish Tea leaves. As required.

Wash the white rice, add cool, roasted green tea up to "Water Level: Porridge (Thin)" level and ensure the rice is evenly flat.
2 Select the setting and press the "Start" button
Rice Select White Rice or Rinse-Free Start Menu Select Porridge
Finish
When the buzzer sounds, add salt, stir everything together, pour into a bowl and sprinkle with tea leaves.
For Brown Rice...
Because the cooking time of this rice is long, it can be cooked together with dried pulses without first needing to rehydrate them.
When doing this, add water up to the cup level for brown rice and pulses combined.
Make sure to have the right amount of water before adding toppings.
- Use 75 g or less of toppings per cup of rice. (Too much will keep it from cooking well.) Cut the toppings into small pieces and place them on top of the rice. (Mixing them in will keep the rice from
cooking well.)
Soybean and Hijiki Mixed Rice
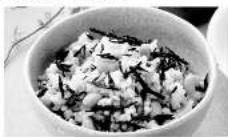
Ingredients Single serving: 260 kcal
(serves 6)
Brown rice 2½ cups
Soybeans (dried) 1/2 cup (65 g)
Toppings
Mo-hijiki (dried) 15g
Deep-fried tofu (thinly sliced) 1 piece
Seasoning Dark soy sauce 3 tbsp
Sall oil . . . . . . . . . . . . . . . . . . . . . . . . . . . . . . . . . . . . . . . . . . . . . . . . . . . . . . . . . .

Lightly wash the brown rice and soybeans, put them into the Inner Pan, add water up to "Water Level: Brown Rice 3" level and ensure the rice is evenly flat.
Select the setting and press the "Start" button
Rice Select Brown Rice Start
Topping Preparation
Me-hiji...Rehydrate in water for 20 minutes until soft. Fry the me-hiji in oil and then just cover with water to boil. Once the water has evaporated, add the deep-fried tofu and seasoning and boil again until the liquid is gone.
Finish
When the buzzer sounds, mix in the toppings and add salt to taste. (Do not perform this mixing in the Inner Pan.)

Ingredients Single serving: 285 kcal (serves 4)
White rice. 1 cup
Multigrain rice 30g
eepns
onrnnnne nnnnne nnnnne nnnnne nnnnne nnnnne nnnnne nnnnne nnnnne nnnnne nnnnne nnnnne nnnnne nnnnne nnnnne nnnnne nnnnne nnnnne nnnnne nnnnne nnnnne nnnnne nnnnne nnnnne nnnnne nnnnne
Cucumber, processed cheese . . . 50 g each Red leaf lettuce
Black lce 20x
Dressing
Bineing Wine vinegar 3 tbs
Salt 1%
Pepper A dash
Olive oil 1 tbs
Onion (nely chopped)

Wash the white rice, add water up to "Water Level: White Rice 1"
level and ensure the rice is evenly fl at.
Put the multigrain rice on top of the white rice.
For correct water level, follow package instructions if they are
a
D Select the setting and press the "Start" button
Rice Select Multi Grain Start
Mixing the Dressing
Make the dressing and mix it into the cooked rice.
Do not perform this mixing in the Inner Pan.
4 Finish
Cut all toppings other than the red-leaf lettuce into approximately 5
mm cubes, and then mix these into the cooled rice.
Line a plot with the red-leaf lettuce leaves and artfully arrange the rice atop them.
Cleaning
- For cleaning, remove the Power Plug and ensure that the main body has cooled down.
- The Gasket attached to both the main body and the Inner Lid cannot be removed. Do not pull by using excessive force or puncture with sharp-pointed objects.
This may cause defects, delamination a After washing, wipe with a dry cloth.
When using for the first time & on every use
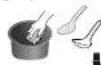
After removing, wash with a soft sponge.

Inner Pan Rice Scoop Ladle Inner Lid Steam Cap Rice Scoop

After using seasoning, such as mixed rice, wash promptly.
(Since this can cause odor, rot, or rust.)
Do not use any of the following Metal scourers, nylon scourcers etc.
Do not wash using the scouring pad Benzine, thinner, polish, bleach, antibacterial alcohol etc.
Dishwasher/ dryer or dish dryer


Steam Cap
Remove and rinse.
- Dow and dirt tend to in the Steam Cap, so a wash it after each use. (This may cause) odor or rot.


Do not disassemble.
■Removing
1Pull up to remove. 2 Open the lever while holding
Tab Lever

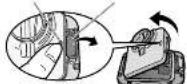
■Attaching (In the reverse order to removing.)
① Insert the shaft and close the lover securely until you hear a
念 Attach on the
Outer Lid.
Ensure that it been attached

Shaft
Precautions
Do not remove the Gasket.
This may cause steam to leak.
If the Gasket c along the groove

18/19

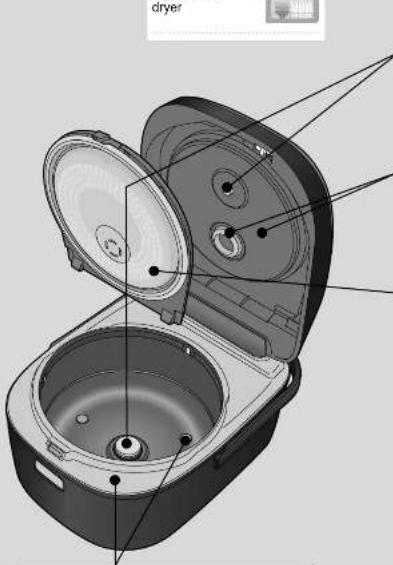
Stainless Steel Rim
Inner Pan Support Rubber (3 places)
Wipe with a damp cloth.
Do not wash by pouring in water etc.
Inner Pan (P.8) Rice Scoop • Ladle
Rice Scoop Holder
Wash with a mild dishwashing liquid.
Precaution
Do not use the Inner Pan as
a wash bowl.
Since this may result in
peeling of the inner coating.
Lid Sensor · Pan Sensor
Wipe with a damp cloth.
If the dirt is hard to remove, dab a mild dishwashing liquid on a nylon scourer and wipe gently.
Note
Using the Lid Sensor or Pan Sensor while they are
ditty may result in the nice being burnt or cooked in an unsatisfactory way.
Inner Surface of Outer Lid · Gasket
Wipe with a damp cloth.
-Remove the Steam Cap and wipe the inner surface
of the Outer Ltd, the attaching portion of the Steam Cap and the Gasket.
Inner Lid
Remove and wash with a mild dishwashing
Inner Lid Release Lever
■Removing


1 Move the Inner Lid Release Lever to the right.
(The Inner Lid tilts forward.)
Pull out.
■ Attaching
Insert the Inner Lid into
the grooves.Both sides
Press into the Outer Line until you have a "click"
"Can't you read a letter?"

Precaution
After cooking with seasoning (for mixed rice etc.),
please wash prompty
(Since this may cause odor, rot, or rust.)
Regular checks
Check around once a month and clean if dirty!
Bottom of Rice Cooker
(Intake/Exhaust Vents)
Remove dust and foreign
objects using a vacuum
cleaner etc.
When the cleanliness of the
Rice Cooker is a concern
Cleaning function
If odor is hard to remove or the dirt does not come off the Inner Lid or Steam Vent...
Preparation (1) Pour water into the Inner Pan
(White Rice'Water Level:3-4)
② Put the Inner Pan in the main body and close the Outer Lid.
Display "Clean"

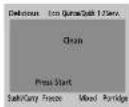
Press the "Start" button
Flashing

Cleaning function starts.
2 When the buzzer sounds after
approximately 45 minutes, press the
"Cancel/Off" button

After the water has cooled, pour it away.
Notes
It may be effective to cut a lemon into slices and add them to the water.
It may not be possible to completely remove odor or
air
Does my Rice Cooker have a fault?
Check the following before asking for a service
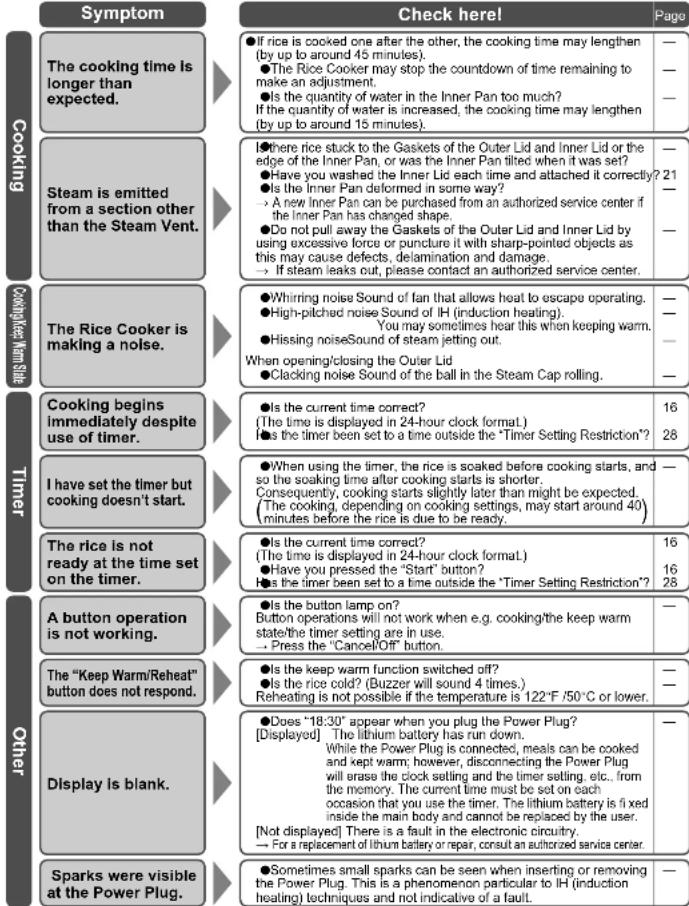
If you mistakenly add water or rice to the main body, please unplug and contact an authorized service center.
What does this mean?

What to do when... The Rice Cooker does not have a fault. Check the following before asking for a service.
Too sticky (soft)
Have you measured the quantities of rice and water correctly? (P. 10)
Are there many broken grains in the rice?
Have you been soaking the rice for long periods? (When using the timer, for example.)
(Reduce water by approximately 1 to 2 fl oz, (30 to 60 mL from the Water Level.)
-
Are you using hot water to wash the rice?
-
Are you using more than the specified amount of rice with the "1-2 Serv." setting for small amounts? (0.5-1.5 cups)
- When the rice is cooked, are you mixing it immediately?
- When cooking new-crop rice, are you using less water than normal?
(Reduce water by approximately 1 to 2 ft oz./30 to 60 mL from the Water Level.)
Are you leaving the rice in the strainer after washing?
(P. 10 This may cause the rice grains to break, and the rice may be sticky when cooked.)
Do you prefer it mer here?
(Reduce water by approximately 1 to 2 fl oz./30 to 60 mL from the Water Level.)
Try using the "Delicious (Hard)" setting.

Too hard (dry)
Have you measured the quantities of rice and water correctly? (P.10)
Are you using the Eco" or Quinoa/Quick setting? (P.12)
Rinse-free rice tends to be drier and harder.
For softer cooked rice, soak the rice in water before cooking it.
Do you prefer softer rice?
Increase the amount of water slightly.
Increase water by approximately 1 to 3 fl oz./30 to 90 mL from the Water Level
for the "Eco" setting and 1 to 2 f oz, 30 to 60 mL for other settings.
Try soaking the rice (for 30 minutes to 2 hours) before cooking.
Try using the "Delicious (Soft)" setting.
Rice is burnt
Has the rice been processed and washed properly?
Is there dirt or foreign object stuck to the Lid Sensor, Pan Sensor, bottom of the Inner Pan or inside the main body?
Are you using rinse-free rice? Rinse-free rice tends to burn more easily.
Before cooking the rice, give it a gentle rinse in water to soften it.
Select "Rinse-Free" when cooking the rice.
Are you using the timer?Have you been soaking the rice for long periods?
Are there many broken grains in the rice?
- Are you leaving the rice in the strainer after washing?
(P. 10 This may cause the rice grains to break, and the rice may burn when cooked.)
- Cooking rice with seasoning such as mixed rice may be easily burnt.
A golden brown color on the rice at the bottom of the Inner Pan is not indicative of a fault.
If there is no improvement after following the above-described steps, see "If burning is a concern". (P. 27)
Symptom
Condensation appears.
Rice smells odor.
Rice has a yellow color.
Rice is dry.
Porridge is sticky.
A thin film is formed.
Rice sticks to the Inner Pan
The surface of the cooked rice is uneven.

Check here!
When the rice is cooked, are you mixing it immediately?
During the keep warm slate, did you turn the keep warm function off with rice still in the Rice Cooker, or remove the Power Plug and leave the rice in the Rice Cooker?
During the keep warm state, did you turn the keep warm function off with rice still in the Rice Cooker, or remove the Power Plug and leave the rice in the Rice Cooker?
- Has the keep warm function been in operation for 12 hours or more?
- After cooking rice with seasoning such as mixed rice, an odor may remain.
- Did you add cold rice during the keep warm state?
- Are you using the keep warm function with the Rice Scoop still in the Rice Cooker?
Are you cleaning and maintaining your Rice Cooker correctly each time you use it?
Failure to correctly clean and maintain your Rice Cooker may spoil the aroma and flavor of your meals.
Continuing to use your Rice Cooker without cleaning it correctly will spoil your meals.
When the smell becomes noticeable,
Carefully wash the Inner Pan, Inner Lid and Steam Cap.
If this does not remove the odor, use the cleaning function. (P. 21)
Has the keep warm function been in operation for 12 hours or more?
Has the nce been processed and washed properly?
With certain types of rice, a yellow color will be left on the rice after cooking
Has the keep warm function been in operation for 12 hours or more? Have you reported repeatedly?
Have you failed repeatedly? Is the Steam Can attached correctly?
Thereice stuck to the Gaskets of the Outer Lid and Inner Lid or the edge of the
Inner Pan, Is the Inner Pan deformed, or was the Inner Pan tilted when it was set?
Have you been soaking the rice for long periods?
(When using the timer, for example.)
Have you used the keep warm function on the porridge?
Are you washing the rice too much, causing the rice grains to break?
Has the rice been washed properly?
Starch in the rice dissolves and reforms as a thin film on the surface. It is not harmful.
Depending on the type of rice, soft rice or sticky rice may stick easily.
Was the rice spread evenly before cooking?
This may be caused by the strong heating power that is characteristic of IH
(Induction Heating). This is not a malfunction.
An uneven surface may be formed under the following conditions.
The rice has not been washed properly.
There is a large quantity of broken rice grains.
The rice grains have become broken due to heavy-handed washing of the
rice.
The cooking quantity is too low.
What to do when...
If the suggestions on P. 24-25 do not bring about any improvement, you can change the settings.
-Steps 2, 3 and 4 must each be completed within 16 seconds. When no operation is performed for 16 seconds, the display returns to the current time. (Setting cannot be made.) Please repeat the procedure.
After the setting is completed, the display returns to the current time.
To go back to the previous setting, follow the procedure again.
If you want to change the keep warm temperature. (74 76 72)


Specifications
| Rice Select | Menu Select | Approximate cooking time | Keep Warm Function1 | Timer Setting Restriction | Cooking Capacity (Cup) () is for when other ingredients are added. |
| White Rice Rinse-Free | Delicious | Regular: 56 min | ○ | From 70 min before done | 0.5-5.5Hard: 52 min |
| Soft: 56 min | |||||
| Eco 44 min | ○ | From 60 min before done | 0.5-5.5 | ||
| Quinoa/Quick | Quinoa: 28-32 min | × | - | 1 | |
| Quick: 23-33 min | ○ | 0.5-5.5 | |||
| 1-2 Serv. 55 min | ○ | From 70 min before done | 0.5-1.5 | ||
| Sushi/Curry 47 min | ○ | From 60 min before done | 1-5.5 | ||
| Freeze 53 min | ○ | From 70 min before done | 0.5-5.5 | ||
| Mixed | 48-55 min | × | - | 1-4 | |
| Sticky Rice: 43-51 min | 1-3 | ||||
| Porridge 52 | -68 min | × | From 80 min before done | Thick 0.5-1.5 (0.5-1) | |
| Thin 0.5-1 (0.5) | |||||
| Brown Rice -2 | 103-112 min | × | From 130 min before done | 1-3 (1-2) | |
| Multi Grain | -2 | 50-55 min | × | From 60 min before done | 0.5-4 |
*With × ,the Rice Cooker will switch automatically to the keep warm function, but we do not recommend this. (P. 15)
*You cannot select menus ('Delicious', 'Porridge', etc.).
| SR-HZ106 | |
| Power source | 120 V ~ 80 Hz |
| Power consumption Cooking | 1200 W |
| Length of the Power Cord (approx.) | 700 W (29.8 Wh*1) |
| Weight (approx.) | 39.3 in. / 1.0 m |
| Size (Width × Depth × Height) (approx.) | 10.4 lbs. / 4.7 kg |
| 9.8 in. × 12.6 in. × 7.9 in. (1.4 ft*2) / 25.0 cm × 32.1 cm × 20.1 cm (43.4 cm*2) |
The power consumed per hour during the keep warm state. (Room temperature 88^ / 20^ , maximum amount of rice.)
The height with the Outer Lid open.
Power consumption is the maximum instantaneous electric capacity.
- When the power is 'Off', the Rice Cooker consumes approximately 1.0 W (plugged in state).
This product is not suitable for use in countries or regions of differing mains frequency or voltage. Moreover, after sales service is not available.
Checks

Check your well-used IH Electronic Rice Cooker /Warmer
Have you noticed any of the following?
The power plug and the power cord become abnormally
hol
The power cord is damaged or power failure happens
when the power cord is touched.
The main body is deformed or is abnormally hot.
Smoke emanates from the main body or a burning odor is
detected
The main body is cracked, is loose or rattles.
The fan in the bottom does not rotate while cooking.
Stop using the Rice Cooker
To prevent accidents, stop using the Rice Cooker, remove the power plug, and ask an authorized service center to perform inspection.
MercdavoiracheteceproductPanasonic.
plaque de cui sion a induction.
davon fuoxi mino cede
cu sans on four a micro-bases.

La culsson commence.
La culsson commence.
Lorsque lesignalsonoreletentapres la
Sushi/Curry (Sushi / Curry)
Quick (Cuisson rapide)
Le culseur de fiZ
White Rice (Rice bran) Rice-Free (Serving Size) Sushi/Curry (Sushi / Curry)


-Selectionner Quinoa/Quick (Quinoa / Cuisson (rapido) sous "White Rice (Riz blanc)" ou "Rinse-Free (Sans rincage)"
2 Appuye
*量油服:至内应73.4±3.6°F/23±2°C·水73.4±1.8°F/23±1°C

Rice Select Multi Grain (什米)
(204)MolGraH(T
nuSelect
2 混合調味沙拉酱
perchlorate and, requires phosphorus replacement.
Consulate, www.dfs.cn.gov/gazharidouwaste/
perchlorate
Apagadoluminaion
m = 311
esuche un "pitido".
Parpaedeando

juste el tiempo.

on "Cancel/Off (Cancelar/APagar)"


"Quinoa/Quick (Quinoa/Rapida)"
-Selezione "Quinoa/Quick (Quinoa/Rapida)" e "White Rice (Arroz bianco)" o "Rinse-Free (Sin enjaguad)."
2 Presione


No esucharuna nifid.
Limited Warranty (ONLY FOR U.S.A.)
Panasonic Products Limited Warranty
Limited Warranty Coverage (For USA Only)
If your product does not work properly because of a defect in materials or workmanship, Panasonic Consumer Electronics Company (referred to as "the warrantor"), will, for the length of the period indicated on the chart below, which starts with the date of original purchase ("warranty period"), at its end, with a repair your product with new or refurbished parts. (b) replace it with a new or a refurbished equivalent value product, or (c) refund your purchase price. The decision to repair, replace or refund will be made by the warrantor.
| Product or Part Name | Labor | Parts |
| Sural Appliances | 1 yr. | 1 yr. |
| Large Capacity Rice Cookers (SR 42 series) | 6 Months | 6 Months |
During the "Labor" warranty period there will be no charge for labor. During the "Parts" warranty period, there will be no charge for parts.
This warranty only applies to products purchased and serviced in the past 12 months. This is an express warranty, not a warranty used only by the original purchaser of this new product which was not sold as part of
Mail-In Service - Online or Telephone Repair Request
Online Repair Request
To submit a new repair request, and for quick repair status visit our Web Site at http://shop.panasonic.com/support
When shipping the unit, carefully pack and send it prepaid in the original (or suppliase) carton. Include a letter detailing the complaint along with the bill of sales and provide a daytime phone number where you can be reached. A valid registered receipt is required under the Limited Warranty. When shipping Lithium Ion batteries please visit our web site at http://www.lithiumion.com/6002 as Paraasiot is committed to providing the most up to date information.
IF REPAIR IS NEEDED DURING THE WARRANTY PERIOD, THE PURCHASER WILL BE REQUIRED TO FURNISH A SALES RECEIPT/PROOF OF PURCHASE INDICATING DATE OF PURCHASE. AMOUNT PAID AND PLACE OF PURCHASE CUSTOMER WILL BE CHARGED FOR THE REPAIR OF ANY UNIT RECEIVED WITHOUT SUCH PROOF OF PURCHASE.
Limited Warranty Limits And Exclusions
This warranty ONLY COVERS failures due to defects in materials or workmanship, and does NOT COVER glass, plastic parts, temperature probes (if included) and normal wear and tear or cosmetic damage. The warranty ALSO DOES NOT COVER damages which occurred in shipment, or failures which are caused by products not supplied by the warrantyor, or any other reason for the product's failure. This warranty includes: installation, mishandling, misapplication, alteration, faulty installation, setup adjustments, maimodustment of consumer controls, improper maintenance, power line surge, lightning damage, modification, or commercial use (such as in a hotel, office, restaurant, or other business), rental use of the product, service by anyone other than a factory service carrier or other authorized representative of the manufacturer, or similar acts of God. THERE ARE NO EXPRESS WARRANTY EXCEPTION AS LISTED UNDER "LIMITED WARRANTY COVERAGE".
THE WARRANTYOR IS NOT LIABLE FOR INCIDENTAL OR CONSEQUENTIAL DAMAGE RESULTING FROM THE USE OF THIS PRODUCT, OR ASRUNG OUT OF ANY BREACH OF THIS WARRANTY. (As examples, this exhausts damages for lost time; travel to and from this vehicle; loss or damage to materials or images, data, or other memory; and recorded content. The items listed are not exclusive, but, for illustration only.)
ALL EXPRESS AND IMPLIED WARRANTYES, INCLUDING THE IMPLIED WARRANTY OF THE PROPERTY, ARE LIMITED TO THE PERIOD OF THE LIMITED WARRANTY.
This warranty gives you specific legal rights and you may also have other rights which vary from state to state. If a problem with this product develops or comes after the warranty period, you may contact your dealer directly at Customer Center if the problem is not hardened to your satisfaction, then write to:
Consumer Affairs Department
Parasite Corporation of North America 511 Inocoproces Hua
Chesapeake, VA 23320
PARTS AND SERVICE, WHICH ARE NOT COVERED BY THIS LIMITED WARRANTY, ARE YOUR RESPONSIBILITY.
Shop
Accessories!
for all your Panasonic gear
Go to
http://shop.panasonic.com/support
Get everything you need to get the most out of your Panasonic products
Accessories & Parts for your Camera, Phone, A/V products, TV, Computers & Networking, Personal
Care, Home Appliances, Headphones, Batteries,
Backup Chargers & more.
Customer Services Directory
For Product Information, Operating Assistance,
Parts, Owner's Manuals, Dealer and Service info
go to http://shop.panasonic.com/support
For the hearing or speech impaired TTY: 1-877-833-8855
As of June 2015
Panasonic Canada Inc.
5770 Ambler Drive, Mississauga, Ontario L4W 2T3
PANASONIC PRODUCT - LIMITED WARRANTY
Panasonic Canada Inc. warrants this product to be free from defects in material and workmanship under normal use and for a period as stated below from the date of original purchase agrees to, at its option either (a) repair your product with new or refurbished parts, (b) replace it with a new or a refurbished equivalent value product, or (c) refund your purchase price. The decision to repair, replace or refund will be made by Panasonic Canada Inc.
| Category Service type Parts Labour | ||
| Induction Rice Cooker Carry-in 2 Year 2 Year |
In-home Service will be carried out only to locations accessible by roads and within 50km of an authorized Panasonic service facility.
This warranty is given only to the original purchaser, or the person for whom it was purchased as a gift, of a Panasonic brand product mentioned above sold by an authorized Panasonic dealer in Canada and purchased and used in Canada, which product was not sold "as is", and which product was delivered to you in new condition in the original packaging.
IN ORDER TO BE ELIGIBLE TO RECEIVE WARRANTY SERVICE HEREUNDER, A PURCHASE RECEIPT OR OTHER PROOF OF DATE OF ORIGINAL PURCHASE, SHOWING AMOUNT PAID AND PLACE OF PURCHASE IS REQUIRED
LIMITATIONS AND EXCLUSIONS
This warranty ONLY COVERS failures due to defects in materials or workmanship, and DOES NOT COVER normal wear and tear or cosmetic damage. The warranty ALSO DOES NOT COVER damages which occurred in shipment, or failures which are caused by products not supplied by Panasonic Canada Inc., or failures which result from accidents, misuse, abuse, neglect, mishandling, misapplication, alteration, faulty installation, set-up adjustments, misadjustment of consumer controls, improper maintenance, power line surge, lightning damage, modification, introduction of sand, humidity or liquids. commercial use such as hotel, office, restaurant, or other business or rental use of the product, or service by anyone other than a Authorized Servicer, or damage that is attributable to acts of God.
THIS EXPRESS, LIMITED WARRANTY IS IN LIEU OF ALL OTHER WARRANTYES. EXPRESS OR IMPLIED, INCLUDING ANY IMPLIED WARRANTYES OF MERCHANTIABILITY AND FITNESS FOR A PARTICULAR PURPOSE. IN NO EVENT WILL PANASONIC CANADA INC. BE LIABLE FOR ANY SPECIAL, INDIRECT OR CONSEQUENTIAL DAMAGES RESULTING FROM THE USE OF THIS PRODUCT OR ARISING OUT OF ANY BREACH OF ANY EXPLISS OR IMplied WARRANTY. (As examples, this warranty excludes damages for lost time, travel to and from the Authorized Servicer, loss of or damage to media or images, data or other memory or recorded content. This list of items is not exhaustive, but for illustration only.)
In certain instances, some jurisdictions do not allow the exclusion or limitation of incidental or consequential damages, or the exclusion of implied warranties, so the above limitations and exclusions may not be applicable. This warranty gives you specific legal rights and you may have other rights which vary depending on your province or territory.
WARRANTY SERVICE
PRODUCT OPERATION ASSISTANCE
For product information and operation assistance, please visit our Support page: www.panasonlc.ca/english/support
PRODUCT REPAIRS
Please locale your nearest Authorized Servicentre: panasonic.ca/english/support/servicantrelocator
IF YOU SHIP THE PRODUCT TO A SERVICENTRE
Carefully pack and send prepaid, adequately insured and preferably in the original carton. Include details of the defect claimed, and proof of date of original purchase.
Panasonic Canada Inc.
5770, Ambler Drive, Mississauga (Ontario) L4W 2T3