
SR-CN188 - Rice cooker PANASONIC - Free user manual and instructions
Find the device manual for free SR-CN188 PANASONIC in PDF.


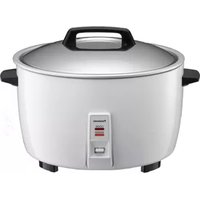
| Product Type | Electric Rice Cooker |
| Model | SR-CN188 |
| Brand | Panasonic |
| Capacity | 1.8 L (10 cups uncooked rice) |
| Power Consumption | Approx. 650 W |
| Voltage | 220-240 V, 50/60 Hz |
| Dimensions (W x D x H) | Approx. 27.5 x 28.5 x 28.5 cm |
| Weight | Approx. 2.8 kg |
| Cooking Functions | Cook, Keep Warm |
| Inner Pot Material | Non-stick coated aluminum |
| Lid Type | Detachable inner lid for easy cleaning |
| Control Type | Mechanical switch (press-type) |
| Indicators | Cook and Warm indicator lights |
| Accessories | Measuring cup, rice spatula, inner pot |
| Auto Keep Warm | Yes, automatically switches to warm after cooking |
| Safety Features | Auto shut-off, overheat protection |
| Cleaning | Detachable inner lid, non-stick pot easy to wipe |
| Spare Parts Availability | Inner pot, lid, measuring cup, spatula |
| Repairability | Moderate; components replaceable by authorized service |
| Warranty | Typically 1 year (check local warranty) |
Frequently Asked Questions - SR-CN188 PANASONIC
User questions about SR-CN188 PANASONIC
0 question about this device. Answer the ones you know or ask your own.
Ask a new question about this device
Download the instructions for your Rice cooker in PDF format for free! Find your manual SR-CN188 - PANASONIC and take your electronic device back in hand. On this page are published all the documents necessary for the use of your device. SR-CN188 by PANASONIC.
USER MANUAL SR-CN188 PANASONIC
MAL/SIN (DBD)/SIN (RBD)/AST/NZ
Operating Instructions
Electronic Rice Cooker / Warmer Household Use

Illustrations of the SR-CX108 are used throughout this Operating Instructions.
1.0 L model
Model No.
SR-CX108
SR-CN108
1.8 L model
Model No.
SR-CX188
SR-CP188
SR-CN188
Contents
Safety Precautions....2
Notes on Use....5
Part Names/Accessories .....6
Thank you for purchasing this Panasonic product.
●This product is intended for household use only.
- Please read the operating instructions carefully to ensure safe and correct operation before use.
●Before use, be sure to read "Safety Precautions"
(Pages 2–4)
- Keep the operating instructions and the warranty for future use.
Warranty appended
Cooking Rice....8
Using the Settings Correctly...10
Using Different Settings.....11
Timer
Cleaning 12
Troubleshooting....14
Error Indications
Specifications....18
Panasonic Corporation
Web Site: http://www.panasonic.com
© Panasonic Corporation 2018
Printed in China
RZ19MK83
F1018T0
Safety Precautions

WARNING
Failure to follow these instructions may cause death or serious injury.
- This appliance is not intended for use by persons (including children) with reduced physical, sensory or mental capabilities, or lack of experience and knowledge, unless they have been given supervision or instruction concerning use of the appliance by a person responsible for their safety. Children should be supervised to ensure that they do not play with the appliance.
- This appliance is intended to be used in household and similar applications such as: -staff kitchen areas in shops, offices and other working environments; -farm houses; -by clients in hotels, motels and other residential type environments; -bed and breakfast type environments.
- If the supply cord is damaged, it must be replaced by a special cord or assembly available from the manufacture or its service agent.
- Do not spill water or other liquid on the connector such as the instrument plug to avoid electric shock, or fire caused by short circuit.
- Never use this appliance to cook any food that may jam the Steam Vent: foliaceous food (e.g., laver, Chinese cabbage) or strip food (e.g., kelp) and fragmentary foods (e.g., corn grit), as this may cause accidents or damage to the appliance.
- During operation, never have your face or hands close to the Steam Vent in order to avoid burns.
- Please use an individual earthed power outlet of 10 A rated current, and joint use of the same power outlet with other appliances may cause fire.
- No reconstruction. Any person other than a repair technician is not allowed to dismantle or repair the appliance to avoid fire, electric shock, or injury.
- Make sure the voltage indicated on the label of the appliance is the same as your local supply. Never use a damaged power cord.
- Do not do any of the following to avoid fire and electric shock due to damaged power cords: modifying, forcefully bending, placing near heating elements, bundling, putting heavy objects on top, etc.
- Any dust in the power plug must be cleaned in a timely manner to avoid fire.
- The instrument plug and power plug must be inserted into the socket and power outlet thoroughly to avoid fire, electric shock, or short circuit.
- When the power cord or power plug is damaged or the power plug is loosely connected to the power outlet, never use the appliance to avoid fire, electric shock, or short circuit.
- Never pull off the power plug with a wet hand to avoid electric shock and injury.
- During operation, do not move or shake the appliance.
- Do not let a child operate the appliance unattended. Put it out of the reach of babies to avoid electric shock, burns, and other dangerous accidents.
- Do not place the appliance on a location which is unstable or wet or approaches fire or heat source, otherwise this may cause damage or accident.
- Never soak or dip the appliance in water.
- Never insert a pin, wire or other object into Intake Vent, Exhaust Vent or gaps on the bottom of the appliance to avoid electric shock.
- Discontinue using the appliance immediately and unplug when abnormality or breaking down occurs to avoid smoking, fire or electric shock. e.g. for abnormality or breaking down: The power plug and the power cord become abnormally hot; The power cord is damaged or power failure happens when the power cord is touched; The main body is deformed or is abnormally hot; Smoke emanates from the main body or a burning odour is detected; The main body is cracked, is loose or rattles.
- Close the Outer Lid slowly and firmly until it clicks to prevent burn or injury by steam leaking or the opening of the Outer Lid.
- Keep the power cord out of the reach of children. Do not let the power cord hang over the edge of the table or countertop. Pulling on the power cord may result in the appliance falling from the table or countertop, causing injury.
- Be careful not to trip over or become entangled with the power cord while in use to avoid injury, or the damaged power cord causing fire or electric shock.
- Do not use the appliance for any purpose other than those described in these instructions to avoid fire, burn, injury or electric shock. Panasonic will not accept any liability if the appliance is subject to improper use, or failure to comply with these instructions.
Safety Precautions

CAUTION
Failure to follow these instructions may cause injury or property damage.
- The appliance must match the supplied Inner Pan to avoid overheat or abnormal circumstance.
- During use or immediately after use, do not touch the Inner Pan with hands to avoid burn due to high-temperature.
- Do not use the cord set (for an instrument plug and power plug) that is not specified for use with this appliance also do not transfer it to avoid electric shock, electrical leakage or fire.
- Be sure to hold the power plug or the instrument plug when unplugging the power plug or the instrument plug to avoid electric shock, or fire caused by short circuit.
- Always switch off and unplug the appliance from the power outlet when it is not in use or before removing the Inner Pan to avoid burn, injury, or electric shock or fire caused by short circuit due to the insulation deterioration.
- Unplug and allow the appliance to cool down fully before cleaning and storing it to avoid burns. Do not move the appliance while it is hot.
Notes on Use
- Before the Rice Cooker works, check that the Inner Pan and Steam Cap are in place to avoid any malfunction.
- During use, the Rice Cooker may generate a tiny sound of "click" or "sizz", which is a normal sound of operation, and do not panic.
- Never have the Rice Cooker operate again immediately after cooking. Wait at least 15 minutes so as to have the heating plate cool down.
- Never cook rice with hot water as this may affect the temperature judgment by the thermostat thus degrading cooking effect.
- In operation, never cover the top of the Rice Cooker with a cloth, as this may cause accidents or damage to the Rice Cooker.
- Do not let the Inner Pan fall off, as this may cause deformation.
- Do not hit the Inner Pan with a hard object to avoid deformation.
- Before the Rice Cooker works, be sure to wipe away the water outside the Inner Pan to avoid any fault.
- Before the Rice Cooker works, please remove water drops and rice grains between the Inner Pan and heating plate to avoid any malfunction.
- The coating on the bottom of the Inner Pan may wear off depending on usage frequency, but this does not affect performance.
- Hold the Handle when moving the Rice Cooker.
- Do not use the Rice Cooker outdoors.
Part Names/Accessories
■ Paper located between the Inner Pan and the Heating Plate should be removed before use.

* The shape of the Power Plug may differ from the illustration.


"Menu Select" button
● This button is used to select the desired menu.

"Keep Warm" button
● After cooking, the "Keep Warm" indicator automatically turns on.
● This button is used to start the keep warm function.

"Timer" button
● This button is used to set the timer.

"Cooking Timer" button
- When selecting "Porridge", this button is used after pressing the "Timer" button to go back to set the cooking time.
● This button is used to confirm the cooking time in timer status.

"◀," ▶ button
● These buttons are used to set the time.
: Decreasing : Increasing
- Press and hold this button to quickly add or subtract time.

"Start" button
● This button is used to start cooking.
● This button is used to end the setting of the timer.

"Off" button
● This button is used to cancel incorrect operation.
● This button is used to turn off the keep warm function.
Cooking Rice
1 Weigh out required rice (A measuring cup of rice is about 150 g);
● Wash rice in another
container and make sure
to wash it clean.
● It is better not to wash rice
directly inside the Inner
Pan in order to avoid
scuffing the Inner Pan.


2 Put the cleaned rice into the Inner Pan and fill it with water to a corresponding water level (e.g., if cooking 3 cups of white rice, water should be added to Mark 3 of the Water Level (White Rice)). The water quantity can be increased or decreased reasonably according to personal preference.
● Never exceed the highest Water Level.

The Inner Pan in the
illustration is the 1.0 L
model.
3 Wipe up the external surface of Inner Pan with dry cloth, putting it into the Rice Cooker. Then press down the Outer Lid until a sound of "click" is heard.
● Never heat the Inner Pan on other stoves to avoid deformation caused by high temperatures; it is not allowed to use any other container, instead of the Inner Pan, on the Heating Plate.

4 Connect the Instrument Plug to the body first and then connect the Power Plug.
● Make sure that both plugs are firmly connected.


5 Press the "Start" button to enter the working process of a corresponding menu. The "Start" indicator lights up.
- By default, "White Regular" is selected. When changing it, see page 11.
- When using the timer, see page 11. ● Entering state of stewing rice. The display shows remaining stewing time in countdown.
- According to the judgment of rice and water quantity by the computer program during cooking rice, the stewing time is automatically set to 5 min or 10 min.
6 After cooking, automatically switches to the keep warm function.
● To prevent the rice from sticking together and reducing its taste, it is best to loosen the rice immediately. - Please use the attached Rice Scoop to fill rice instead of a metal spoon, which may scratch the Inner Pan.
7 After use, press the "Off" button to enter standby mode, and then unplug the Rice Cooker.
Cooking times for various functions (for reference only):
Function "Soft" cooking "Quick" cooking
Time (min) Approx. 50 Approx. 30

The cooking times in the above table may vary with voltage, water quantity, rice quantity, water temperature, and rice quality.
Using the Settings Correctly Using Different Settings
| Menu | Water Level of Inner Pan | Keep Warm Function*1 | Timer Setting Restriction*2 | ||
| Cook white rice in different textures | White | Regular | White Rice | ○ | From 60 min before done |
| Soft White | Rice | ○ | From 60 min before done | ||
| Hard | White Rice | ○ | From 60 min before done | ||
| Quick cooking or cook quinoa | Quick' | White Rice | ○ | — | |
| Quinoa | —*3 | × | — | ||
| Cook brown rice | Brown | Brown Rice | × | From 180 min before done | |
| Cook rice of various grains | Multi Grain | Multi Grain | × | From 60 min before done | |
| Cook jasmine rice | Jasmine | Jasmine Rice | ○ | From 60 min before done | |
| Cook sticky rice | Sticky | Sticky Rice | × | From 60 min before done | |
| Cook porridge | Porridge | Porridge | × | Cooking time + 10 min or more before done | |
| Cook clay pot rice | Clay Pot | White Rice | × | — | |
| Cook soup or slow cooking | Soup/Slow Cook | —*4 | × | — | |
| Bake a cake or bread | Cake/Bread | —*5 | × | — | |
| Steam | Steam | —*6 | × | — | |
*1 •With “X”, the Rice Cooker will switch automatically to the keep warm function, but we do not recommend this. - Do not use the keep warm function for more than 12 hours. - A keep warm time of up to 23 hours is displayed in 1-hour units ("0" is displayed for times less than 1 hour). The keep warm function will continue for more than 24 hours. *2 Timer Setting is not available for menus marked with “—”. *3 One cup of quinoa requires two cups of water. Quinoa can only be cooked one cup at a time. Use the supplied Measuring Cup. *4 The total amount of ingredients and water shall not exceed the maximum water level for "White Rice". *5 The maximum allowable weight (total weight of the ingredients) is 500 g. *5 Use the supplied Measuring Cup and fill with 3 cups of water for 1.0 L model, 4 cups of water for 1.8 L model.
1 Select a menu.
Press the "Menu Select" button to select a menu.
The menu with the indicator on is selected.
- When selecting "Porridge", "Soup/Slow Cook", "Cake/Bread" or "Steam", set the cooking timer.
Press the “◀” or “▶” button to set the desired cooking time.
| Menu Default setting Allowable timer setting Unit | |||
| Porridge 1 h 00 min | 1 h 00 min – 4 h 00 min 30 min | ||
| Soup/Slow Cook 1 h 00 min | 1 h 00 min – 12 h 00 min 30 min | ||
| Cake/Bread 40 min | 20 min – 65 min | 5 min | |
| Steam* | 10 min | 1 min – 60 min | 1 min |
*Countdown of the steam setting time begins when the Rice Cooker starts releasing steam.
2 Press the "Start" button.
- Once the rice is cooked, the program switches to the keep warm function automatically.
- Using the keep warm function is not recommended for "Quinoa", "Brown", "Multi Grain", "Sticky", "Porridge", "Clay Pot", "Soup/Slow Cook", "Cake/Bread" or "Steam".
Please press the "Off" button to turn off the keep warm function.
Timer
1 Press the "Menu Select" button to select a menu. - When "Porridge" is selected, set the cooking time. 2 Press the "Timer" button to set preset mode. 3 Press the "◀" or "▶" button to adjust the desired time.
- Timer can be set in 10 minute units between the start of timer setting to 24h00min .
● Preset time is the working completing time. ● The "Timer" button also works the same as the "button in preset mode.
4 Press the "Start" button to start presetting mode.
- When the preset mode is started, the indicator of a menu and the "Timer" indicator turn on.
- When the Rice Cooker starts cooking, the "Timer" indicator turns off and the "Start" indicator turns on.
Cleaning
■ Unplug before cleaning and ensure that body has cooled down.

Pan Sensor/Heating Plate
Wipe with a well-wrung cloth.
- If an object has become stuck to the Pan Sensor/Heating Plate, slightly polish it off using fine sandpaper (of about #600) or steel wool.
Upper Frame
Wipe with a well-wrung cloth.
● Do not pour water directly on the Upper Frame.
● Rice grains can be removed with a toothpick.
Inner Lid
Remove and wash with a mild washing-up liquid.
■Removing
Hold the two tabs, then pull them towards you.
■Attaching
① Insert the protruding part into the latch on the Outer Lid in a tilted way. ② Press the tabs (both sides) inwards the Outer Lid side until the click sound is heard.
Protruding part
Notes
- Do not remove the Packing. - If the Packing came off, please reattach it.
Push this groove into the Inner Lid
Steam Cap*
*Steam Cap is different according to the model of Rice Cooker.
Remove and rinse.
- Please wash it after every use.
Notes
- Do not remove the Packing. ● If the Packing came off, please reattach

Packing

Packing
■Removing
① Pull up to remove.


② Open it.
Open while pressing the button.
Turn it in the direction of the arrow and pull it.
■Attaching (In the reverse order to removing.)
① Close it.

Insert the shaft and close firmly until it clicks. Fold and press it firmly. When a clear sound is heard, it indicates completion of assembly.
② Attach on the Outer Lid.
Accessories
Wash with a mild washing-up liquid.
Rice Scoop Ladle
Rice Scoop Holder
Measuring Cup
Steaming Basket*


* Steaming Basket is different according to the model of Rice Cooker.
Troubleshooting
When you find the cooking is in any abnormal conditions, please check the root cause of the failure.
Rice Cooking
| Symptom Probable cause | Cooking rice problem Keep warm problem | ||||||||||||||
| Too Hard | Too soft | Not cooked rice | No smell | Rice sticked in Inner Pan | Rice crust, Rice burnt | Rice crust, Rice burnt | Overflow | Too thick | Lack of boiling | Don't keep warm | Smell of | Colour | Rice too dry | Water drips | |
| Rice and water volume is not correct. | ● | ● | ● | ● | ● | ● | ● | ● | |||||||
| Exceeds the maximum amount. | ● | ● | ● | ● | ● | ● | ● | ||||||||
| Whether the function was chosen correctly. | ● | ● | ● | ● | ● | ● | ● | ● | |||||||
| Whether any distortion on the Inner Pan and uneven on the bottom. | ● | ● | ● | ● | ● | ● | |||||||||
| Cooking with hot water or cooking continuously without cooling down. | ● | ● | ● | ● | ● | ||||||||||
| Whether grains of rice or foreign objects are on the inner Pan base, heating plate and Control Panel. | ● | ● | ● | ● | ● | ● | ● | ● | ● | ● | ● | ||||
| Whether power cut off. | ● | ● | ● | ● | ● | ● | ● | ● | ● | ● | ● | ||||
| The rice was not loosened after cooking was completed. | ● | ● | ● | ● | ● | ||||||||||
| Whether the Steam Cap has been fixed properly. | ● | ● | ● | ||||||||||||
| Excessive long hours on preset timer. | ● | ● | ● | ● | |||||||||||
| Whether the Outer Lid has been closed properly. | ● | ● | ● | ● | ● | ● | |||||||||
| Did not wash the rice fully. | ● | ● | ● | ● | ● | ● | ● | ||||||||
| Grain of rice or foreign objects stayed at the Packing & Inner Pan border areas. | ● | ● | ● | ||||||||||||
| Excessive long hours on keep warm function. | ● | ● | ● | ● | ● | ||||||||||
| Symptom Probable cause | Cooking rice problem Keep warm problem | |||||||||||||||
| Too Hard | Too soft | Not cooked rice | No smell | No smell | Rice sticked in Inner Pan | Rice crust, Rice burnt | Rice crust, Rice burnt | Overflow | Too thick | Lack of boiling | Don't keep warm | Smell of | Colour | Rice too dry | Water drips | |
| Did not set keep warm but rice kept in the Inner Pan for long hours. | ● | ● | ● | ● | ● | |||||||||||
| Did not clean the Inner Pan. | ● | ● | ||||||||||||||
| Placing the Rice Scoop in the Inner Pan. | ● | ● | ● | ● | ||||||||||||
| Mixture of water and rice are uneven. | ● | |||||||||||||||
Please send to an authorised service centre for repair if the unit is found to be defective after the inspection carried out on the table above.
Troubleshooting
Cake / Bread Baking
| Probable cause\Symptom | Baking cake / bread problem | |||||||
| Undone cake /\bread | Undercookedcake /\bread | Wet cake /\bread | The cake /\bread sticks to thebase of the inner Pan | The cake /\bread burnt | Bottom of the cake /\bread burnt | Not fluffed | Crumbly | |
| Too much dough. | ● | ● | ||||||
| Not enough mixing before baking. | ● | ● | ● | |||||
| Used with incompatible cake mix. | ● | ● ● | ● | |||||
| Used with cake mix that contains toomuch chocolate, sugar or fruitingredients. | ● | ● ● | ● | |||||
| Outer Lid not close while cooking. | ● | ● ● | ||||||
| Foreign matters between the InnerPan and Heating Plate. | ● | ● ● | ● ● | |||||
| Not enough butter or cooking oilapplied to the bottom of the Inner Pan. | ● | |||||||
| Cake / bread left in the Inner Pan too long. | ● | ● | ||||||
| Inadequate mixing or mixed too long. | ● | ● | ||||||
| Wrong ingredient quantity. | ● | ● ● | ● | |||||
Please send to an authorised service centre for repair if the unit is found to be defective after the inspection carried out on the table above.
Others
| Symptom Probable cause | |
| Strange sound occurs | Sound occurs because of water that has stuck to the Inner Pan. |
| No power Pull out the Power Plug and check the power outlet. | |
Please send to an authorized service center for repair if the unit is found to be defective after the inspection carried out on the table above.
Error Indications
| Indication Probable cause | |
| U14 | Has the keep warm function been in use for more than 96 hours?→Press the “Off” button. |
| H01 | Please consult an authorised service centre and inform the error code (the two-digit number after the “H”). |
| H02 | |
| H31 | |
Specifications
| Model | Rated Voltage | Rated Power (W) | Cooking Capacity (L) | Rice Quantity (Cup) | Heating Model | L × W × H (mm) | Weight (kg) |
| Malaysia | |||||||
| SR-CX108 | 240 V ~ 4.50 Hz | 765 1.0 | 5.5 | Direct Heating | 352 × 251 × 214 | 3.5 | |
| SR-CX188 | 910 1.8 | 10 | 387 × 284 × 249 | 4.5 | |||
| SR-CP188 | |||||||
| SR-CN188 | |||||||
| Singapore (Domestic) | |||||||
| SR-CX108 | 280 V ~ 50 Hz | 700 1.0 | 5.5 | Direct Heating | 352 × 251 × 214 | 3.5 | |
| SR-CN108 | |||||||
| SR-CX188 | 835 1.8 | 10 | 387 × 284 × 249 | 4.5 | |||
| SR-CN188 | |||||||
| Singapore (Re-export) | |||||||
| SR-CX188 | 220 V ~ 50 Hz | 765 1.8 | 10 | Direct Heating | 387 × 284 × 249 | 4.5 | |
| SR-CP188 | |||||||
| SR-CN188 | |||||||
| Australia / New Zealand | |||||||
| SR-CX108 | 220–240 V ~ 50 Hz | 640–765 | 1.0 | 5.5 | Direct Heating | 352 × 251 × 214 | 3.5 |
| SR-CN108 | |||||||
| SR-CN188 | 765–910 | 1.8 | 10 | 387 × 284 × 249 | 3.8 | ||

Outer Cover/Body

"Menu Select (Function Selection)" key
- This key is used to select functions.

"Keep Warm" key


- OPERATING INSTRUCTIONS
- CONTENTS
- PANASONIC CORPORATION
- SAFETY PRECAUTIONS
- WARNING
- CAUTION
- NOTES ON USE
- PART NAMES/ACCESSORIES
- COOKING RICE
- USING THE SETTINGS CORRECTLY USING DIFFERENT SETTINGS
- SELECT A MENU
- PRESS THE "START" BUTTON
- TIMER
- CLEANING
- PAN SENSOR/HEATING PLATE
- WIPE WITH A WELL-WRUNG CLOTH
- UPPER FRAME
- INNER LID
- REMOVE AND WASH WITH A MILD WASHING-UP LIQUID
- REMOVING
- ATTACHING
- NOTES
- STEAM CAP
- REMOVE AND RINSE
- ACCESSORIES
- WASH WITH A MILD WASHING-UP LIQUID
- TROUBLESHOOTING
- OUTER COVER/BODY
Brand : PANASONIC
Model : SR-CN188
Category : Rice cooker