PSB379 - Soundbar Proscan - Free user manual and instructions
Find the device manual for free PSB379 Proscan in PDF.
| Brand | Proscan |
| Model | PSB379 |
| Product type | Soundbar with wireless subwoofer |
| Power supply (soundbar) | DC adapter 13V-1.8A |
| Power supply (subwoofer) | DC adapter 18V-3A |
| Mains voltage | 100-240V~50/60Hz |
| Power consumption (soundbar) | 20W (4x5W) |
| Connectivity | Bluetooth, FM, AUX 1 (3.5mm), AUX 2 (RCA), Optical (PCM) |
| Functions | FM radio, Bluetooth, equalizer (Pop/Jazz/Classic/Rock/Normal), remote control |
| Included accessories | Remote control (CR2025 battery included), RCA cable, wall plugs x2, screws x2, power adapters x2, user manual |
| Mounting | On table or wall (screws provided, distance 78 cm) |
| Bluetooth range | Up to 10 m |
| Remote control range | Up to 4.5 m |
| FM band | 87.5-108 MHz |
| Remote control battery | CR2025 (included) |
| Maintenance | Clean with a dry cloth, unplug before |
| Safety | Do not expose to water, follow the instructions in the manual |
Frequently Asked Questions - PSB379 Proscan
User questions about PSB379 Proscan
0 question about this device. Answer the ones you know or ask your own.
Ask a new question about this device
Download the instructions for your Soundbar in PDF format for free! Find your manual PSB379 - Proscan and take your electronic device back in hand. On this page are published all the documents necessary for the use of your device. PSB379 by Proscan.
USER MANUAL PSB379 Proscan
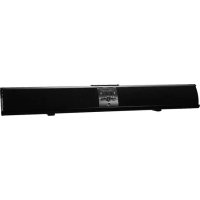
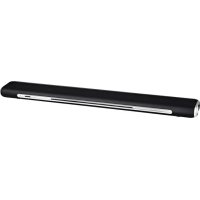
39 INCHES BLUETOOTH SOUND BAR SPEAKER WITH WIRELESS SUBWOOFER
MODEL:PSB379
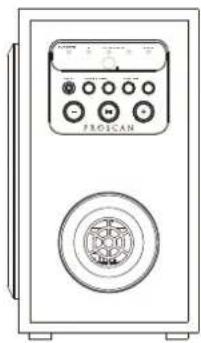
natural_image
Front view of a white electronic device with control panel and circular vent (no visible text or symbols)
natural_image
Front view of a rectangular electronic device with four ventilation slots and indicator lights (no text or symbols visible)INSTRUCTION MANUAL
PLEASE READ CAREFULLY BEFORE OPERATING AND KEEP FOR FUTURE REFERENCE
IMPORTANT SAFETY INSTRUCTION

CAUTION
RISK OF ELECTRIC SHOCK DO NOT OPEN

CAUTION: TO REDUCE THE RISK OF ELECTRIC SHOCK, DO NOT REMOVE COVER (OR BACK). NO USER-SERVICEABLE PARTS INSIDE. REFER SERVICING TO QUALIFIED SERVICE PERSONNEL.
FCC NOTICE:
This equipment has been tested and found to comply with the limits for a Class B digital device, pursuant to part 15 of the FCC Rules. These limits are designed to provide reasonable protection against harmful interference in a residential installation. This equipment generates, uses and can radiate radio frequency energy and, if not installed and used in accordance with the instructions, may cause harmful interference to radio communications.
However, there is no guarantee that interference will not occur in a particular installation. If this equipment does cause harmful interference to radio or television reception, which can be determined by turning the equipment off and on, the user is encouraged to try to correct the interference by one or more of the following measures:
• Reorient or relocate the receiving antenna.
- Increase the separation between the equipment and receiver.
- Connect the equipment into an outlet on a circuit different from that to which the receiver is connected.
- Consult the dealer or an experienced radio/TV technician for help.
FCC WARNING:
To assure continued compliance, follow the attached installation instructions and use only shielded cables when connecting to other devices. Modifications not authorized by the manufacturer may void user's authority to operate this device.

The lighting flash with arrowhead symbol within an equilateral triangle is intended to alert the user to the presence of uninsulated "dangerous voltage within the product's enclosure that may be of sufficient magnitude to constitute a risk of electric shock to persons.
The exclamation point within an equilateral triangle is intended to alert the user to the presence of important operating and maintenance (servicing) instructions in the literature accompanying the appliance.
WARNING:
TO REDUCE THE RISK OF FIRE OR ELECTRIC SHOCK, DO NOT EXPOSE THIS PRODUCT TO RAIN OR MOISTURE.
WARNING:
TO REDUCE THE RISK OF FIRE OR ELECTRIC SHOCK, AND ANNOYING INTERFERENCE, USE THE RECOMMENDED ACCESSORIES ONLY.
WARNING:
To reduce the risk of fire or electric shock, do not expose this apparatus to rain or moisture. The apparatus shall not be exposed to dripping or splashing and that objects filled with liquids, such as vases shall not be placed on apparatus.
IMPORTANT SAFETY INSTRUCTION
Before using the unit, be sure to read all operating instructions carefully. Please note that these are general precautions and may not pertain to your unit.
For example, this unit may not have the capability to be connected to an outdoor antenna.
1) Read these instructions.
All the safety and operating instructions should be read before the product is operated.
2) Keep these instructions.
The safety and operating instructions should be retained for future reference.
3) Heed all warnings.
All warnings on the product and in the operating instructions should be adhered to.
4) Follow all instructions.
All operating and use instructions should be followed.
5) Do not use this apparatus near water.
Do not use this product near water and moisture, for example: near a bathtub, washbowl, kitchen sink or laundry tub; in a wet basement; or near a swimming pool.
6) Clean only with dry cloth.
Unplug this product from the wall outlet before cleaning. Do not use liquid cleaners or aerosol cleaners. Use a dry cloth for cleaning.
7) Do not block any ventilation openings. Install in accordance with the manufacturer's instructions.
Slots and openings in the cabinet and in the back or bottom are provided for ventilation, to ensure reliable operation of the product and to protect it from overheating. These openings must not be blocked or covered. The openings should never be blocked by placing the product on a bed, sofa, rug or other similar surface. This product should never be placed near or over a radiator or heat source. This product should not be placed in a built-in installation such as a bookcase or rack unless proper ventilation is provided or the manufacturer's instructions have been adhered to.
8) Do not install near any heat sources such as radiators, heat registers, stoves, or other apparatus (including amplifiers) that produce heat.
9) Do not defeat the safety purpose of the polarized or grounding-type plug. A polarized plug has two blades with one wider than the other. A grounding type plug has two blades and a third grounding prong. The wide blade or the third prong are provided for your safety. If the provided plug does not fit into your outlet, consult an electrician for replacement of the obsolete outlet.
10) Protect the power cord from being walked on or pinched particularly at plugs, convenience receptacles, and the point where they exit from the apparatus.
11) Only use attachments/accessories specified by the manufacturer.
12) Use only with the cart, stand, tripod, bracket, or table specified by the manufacturer, or sold with the apparatus. When a cart is used, use caution when moving the cart/apparatus combination to avoid injury from tip-over.
An appliance and cart combination should be moved with care. Quick stop, excessive force and uneven surfaces may cause the appliance and cart combination to overturn.

13) Unplug this apparatus during lightning storms or when unused for long periods of time.
To protect your product from a lightning storm, or when it is left unattended and unused for long periods of time, unplug it from the wall outlet and disconnect the antenna or cable system. This will prevent damage to the product due to lightning and power-line surges.
14) Refer all servicing to qualified service personnel. Servicing is required when the apparatus has been damaged in any way, such as power-supply cord or plug is damaged, liquid has been spilled or objects have fallen into the apparatus, the apparatus has been exposed to rain or moisture does not operate normally, or has been dropped.
15) Power source
This product should be operated only from the type of power source indicated on the marking label. If you are not sure of the type of power supply to your home, consult your appliance dealer or local power company. For products intended to operate from battery power, or other source, refer to the operation instructions.
PLACING AND MOUNTING
1. Placing the device on table
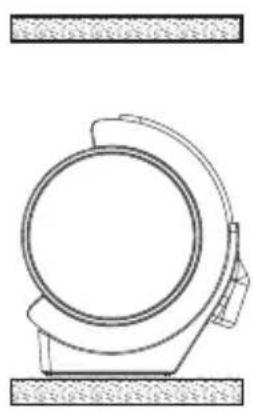
Ventilation
When placing the Sound Bar on an entertainment center, bookshelf, or any type of enclosed space, be sure to allow space around the Sound Bar for ventilation.
If the Sound Bar is enclosed in a tight space, without ventilation, heat generated from the Sound Bar could produce a potential heat hazard.
natural_image
Technical line drawing of a mechanical component with circular and rectangular features (no text or symbols)2.1 Mounting to the wooden wall

text_image
Mark and drill 2 holes with 30.9 inches distance in same horizontal level. supplied screwA. Mark the position of the mounting holes on the wall using a pencil.
B. Drill appropriate holes by powerful electric drill on wall.
C. Mounted the supplied Metallic Brackets to the holes with supplied screws.
D. Put the unit to the Metallic Brackets and make it firm.
PLACING AND MOUNTING
2.2 Mounting to the brick wall

text_image
Mark and drill 2 holes with 30.9 inches distance in same horizontal level. supplied plastic insert supplied screwA. Mark the position of the mounting holes on the wall using a pencil.
B. Drill appropriate holes by powerful electric drill on wall.
C. Insert the supplied plastic inserts into the holes by hammer.
D. Mounted the supplied Metallic Brackets to the holes with supplied screws.
E. Put the unit to the Metallic Brackets and make it firm.
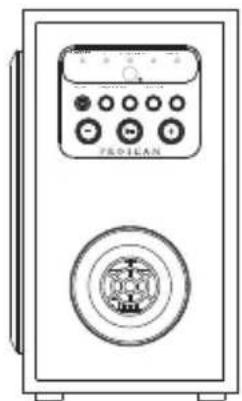
PRODUCT OVERVIEW
SOUND BAR
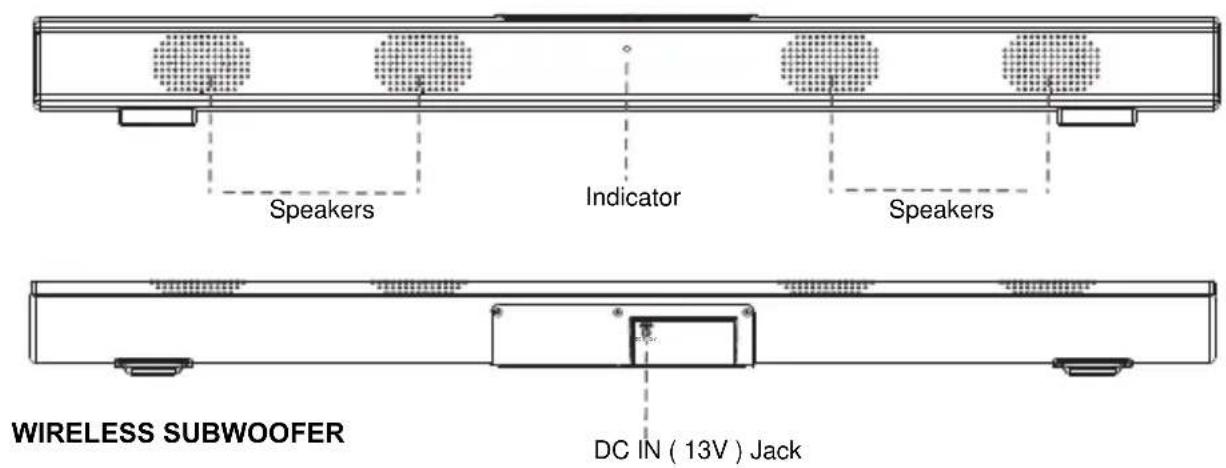
text_image
Speakers Indicator Speakers WIRELESS SUBWOOFER DC IN ( 13V ) Jack
text_image
POWER/FM BT AUX IN 1 AUX IN 2 OPTICAL AUX IN 1 POWER SOURCE SCAN PAIR PROSCAN 3 4 5 6 7 8 9 10 ANT R L DC IN OR VCAL IN 11 12 13 14- INDICATORS
- REMOTE SENSOR
- AUX IN 1 JACK
- VOLUME-
-
POWER BUTTON
-
PLAY/PAUSE BUTTON
- SOURCE BUTTON
- SCAN BUTTON
- VOLUME+
-
PAIR BUTTON
-
ANTENNA
- OPTICAL IN JACK
- AUX IN 2 JACK
- DC IN (18V) JACK
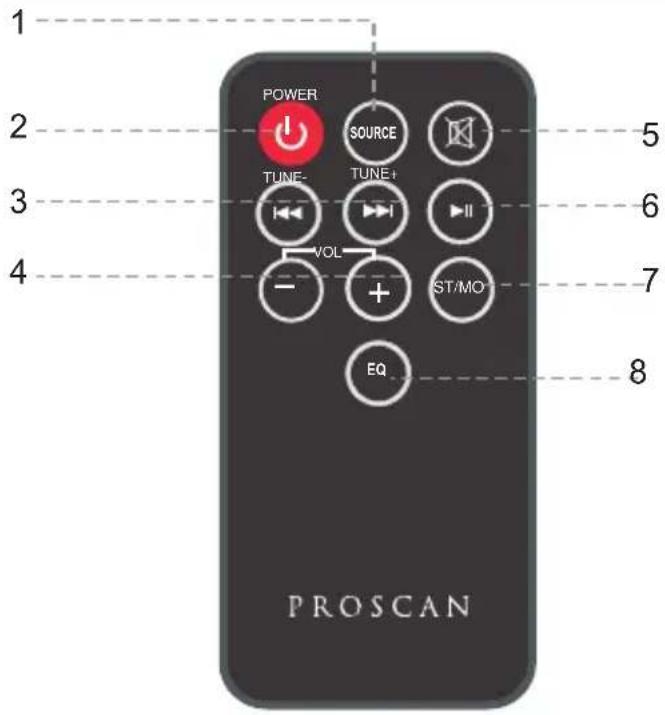
REMOTE CONTROL
- SOURCE Butto n
- Standby Button
- (Previous) TUNE-(Tune Down) (Next) TUNE+(Tune Up)
- VOL-/+ (Volume Down/Up)
- Mute Button
- ▶ P lay/Pause Button
- ST/MO(Stereo/Mono) Button
- EQ(Equalizer)
text_image
POWER SOURCE TUNE- TUNE+ VOL- EQ PROSCAN 5 6 7 8BATTERY INSTALLATION
- Before installation
Remove and discard the insulation tab. Out of the box the Remote Control has a battery and will be usable after the tab is removed.
-Replace battery for the remote control
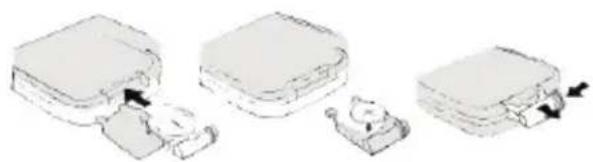
- Push and slide out the battery holder as Figure 1 below.
- Replace the battery with a new CR2025 button cell with the polarity (+)
side upward.
- Slide into the battery holder.
natural_image
Illustration of three different storage or packaging devices with arrows indicating movement (no text or symbols)Battery precautions
- Never recharge the batteries, apply heat to them or take them apart.
- Battery shall not be exposed to excessive heat such as sunshine, fire or the like.
- Do not throw the batteries in fire!
- Attention should be drawn to the environmental aspects of battery disposal.
- If the remote control is not going to be used for a long time, remove the battery to avoid damage caused by battery leakage corrosion.
POWER CONTROL
- To turn the unit on
- Connect the supplied AC/DC adapter.
- Press STANDBY button to turn on the unit.
- To turn the unit off
- Press STANDBY button on the remote control.
NOTE:
If the unit is not used for a long period of time, disconnect the power adapter.
GENERAL OPERATION
-
Insert both AC/DC Adapter plug of the wireless subwoofer and the sound bar into a conveniently located AC outlet having 100-240V\~50/60Hz.
-
Press the Power button on the subwoofer or remote control to power on the unit.
-
Press the SOURCE button repeatedly to switch to desired mode. The color of Indicator turns to corresponding color as below:
\~ Red.....POWER/FM
\~ Blue...... Bluetooth
\~ Red....AUX IN 1
\~ Red.....AUX IN 2
\~ Red....OPTICAL
NOTE:
A. Plug the Adaptor to the AC outlet, the POWER/FM indicator will blink, press POWER Button on main unit or remote control, the POWER/FM indicator will stay lighting up.
B. Make the main unit to standby mode and then power on, the indicator light will stay at the position of last set mode.
C. Unplug the adaptor, the indicator will be back to POWER/FM position.
4. During Playback:
\~ Press the VOL-/+ buttons to adjust volume level as desired.
\~ Press the EQ button on remote control repeatedly to select and set equalizer mode.
\~ Press 📂(Mute) button on the Remote Control to turn off the sound. Press again to resume.
\~ Press the ◀◀ or ▶▶ button to skip track.
\~ Press the ▶(Play/Pause) button to pause. Press again to resume normal playback.
\~ Press the ST/MO(Stereo/Mono) button to select stereo or mono mode.
NOTE:
Pull out the AC/DC Adapter plug to shut off the unit if no using for long period of time.
FM RADIO
Power on the unit and external sound bar, press the SOURCE Button repeatedly to turn to FM mode until the POWER/FM indicator color turns Red.
- Press ◀◀/TUNE- or ▶▶ TUNE+ button on remote control to search manually to play the searched station.
- Press and hold ◀◀ /TUNE- or ▶◀/TUNE+ on remote control to search station automatically until a station is found and it will play automatically.
- Press the SCAN button on the unit to search the station manually.
- Press and hold the SCAN button on the unit to search the station automatically until a station is found, and it will play automatically.
NOTE:
If the reception is not good, please extend or relocate the antenna to get better reception.

text_image
Technical diagram of a rectangular device with four labeled panels and mounting points, likely a control panel or display.EXTERNAL SOUND BAR
NOTE:
If there is no signal received, the indicator of the sound bar will blink. If there is signal received, the indicator of the sound bar will stay lighting up.
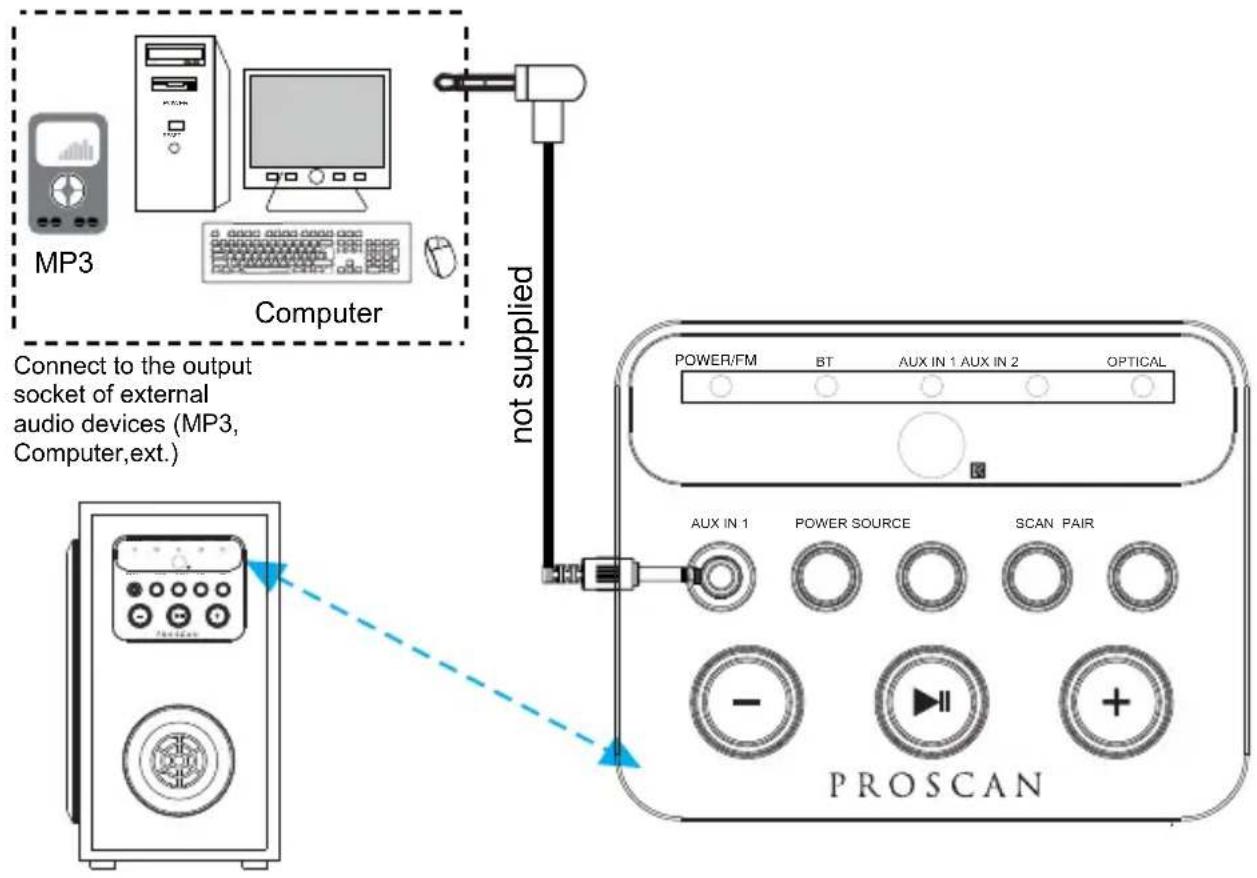
AUX IN 1
AUX IN 1 sources may include:
- Personal audio players
- Personal computers or laptops
AUX IN 1 connection
- Connect a stereo 3.5mm jack cable between the headphone or LINE/Audio output of the personal audio player and the AUX IN 1 jack on the unit.
- Power on the unit and external sound bar press SOURCE button repeatedly until the AUX IN 1 indicator color turns Red. Set your personal audio player/computer to play.
NOTE: If there is no sound or if the volume is not loud enough, you may adjust the volume level.
flowchart
graph TD
    A["MP3"] --> B["Computer"]
    B --> C["PROSCAN"]
    D["Power/FM"] --> E["AUX IN 1"]
    E --> F["POWER SOURCE"]
    F --> G["SCAN PAIR"]
    G --> H["OPTICAL"]

If there is no signal received, the indicator of the sound bar will blink. If there is signal received, the indicator of the sound bar will stay lighting up.
AUX IN 2
AUX IN 2 sources may include:
- TV/DVD/VCR
- Connect the Audio cable to audio output jack(white jack=L, red jack=R) on DVD Player and AUX IN 2 jack on the rear of the unit.
- Power on the unit and external sound bar, press SOURCE button repeatedly until the AUX IN 2 indicator color turns Red. Set your DVD or TV, etc to play.
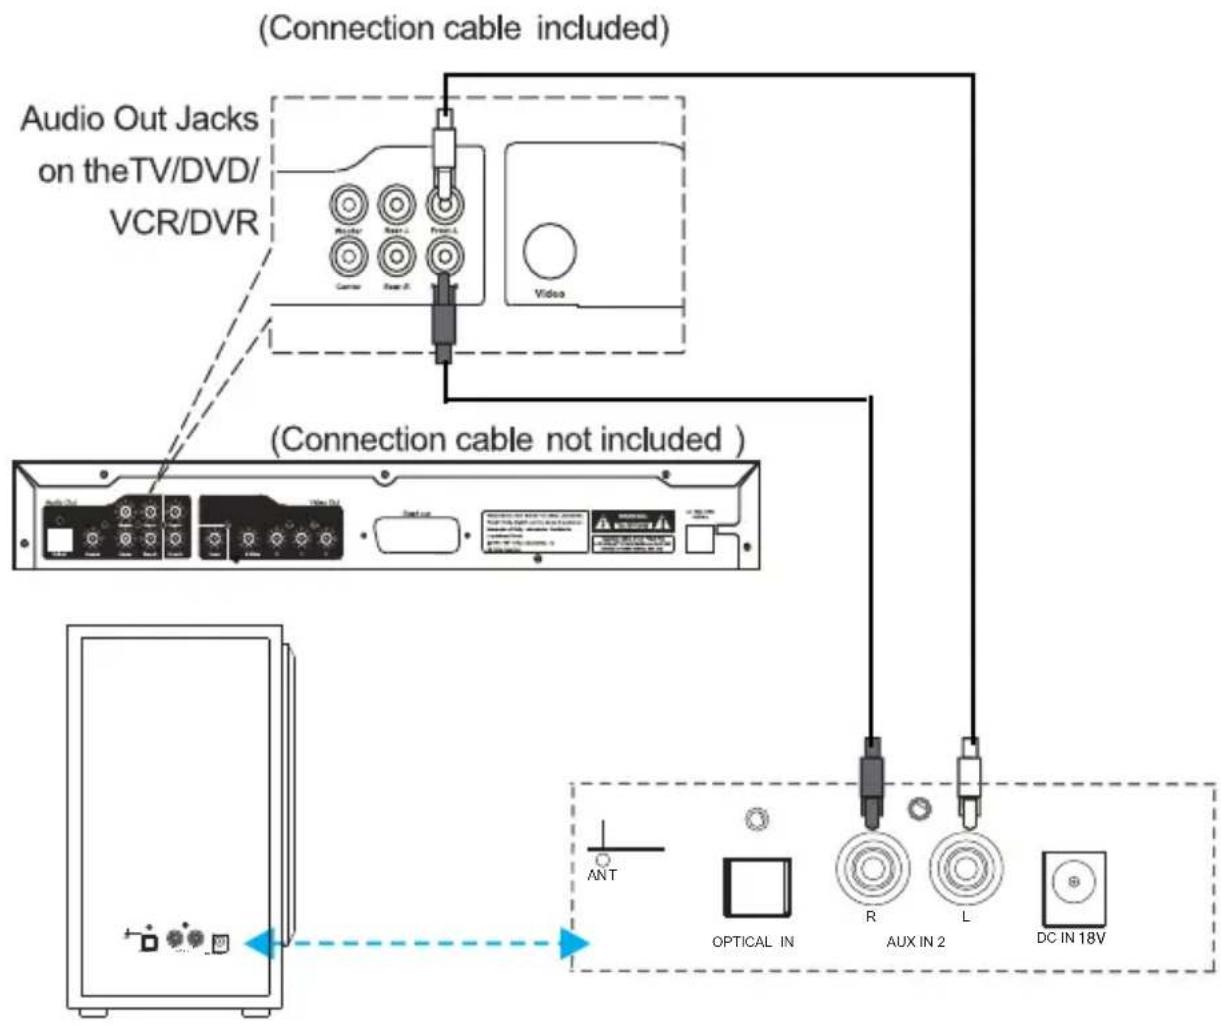
text_image
(Connection cable included) Audio Out Jacks on theTV/DVD/ VCR/DVR (Connection cable not included ) ANT OPTICAL IN R AUX IN 2 L DC IN 18V
text_image
Technical diagram of a device panel with labeled components and status indicatorsEXTERNAL SOUND BAR
NOTE:
If there is no signal received, the indicator of the sound bar will blink. If there is signal received, the indicator of the sound bar will stay lighting up.
OPTICAL IN
- Power on the unit and sound bar and press SOURCE Button on unit or remote control to turn to Optical mode, and the Indicator color will be Red.
- Follow the figure below to make the connections. (For PCM format only.)
DVD or TV, etc.
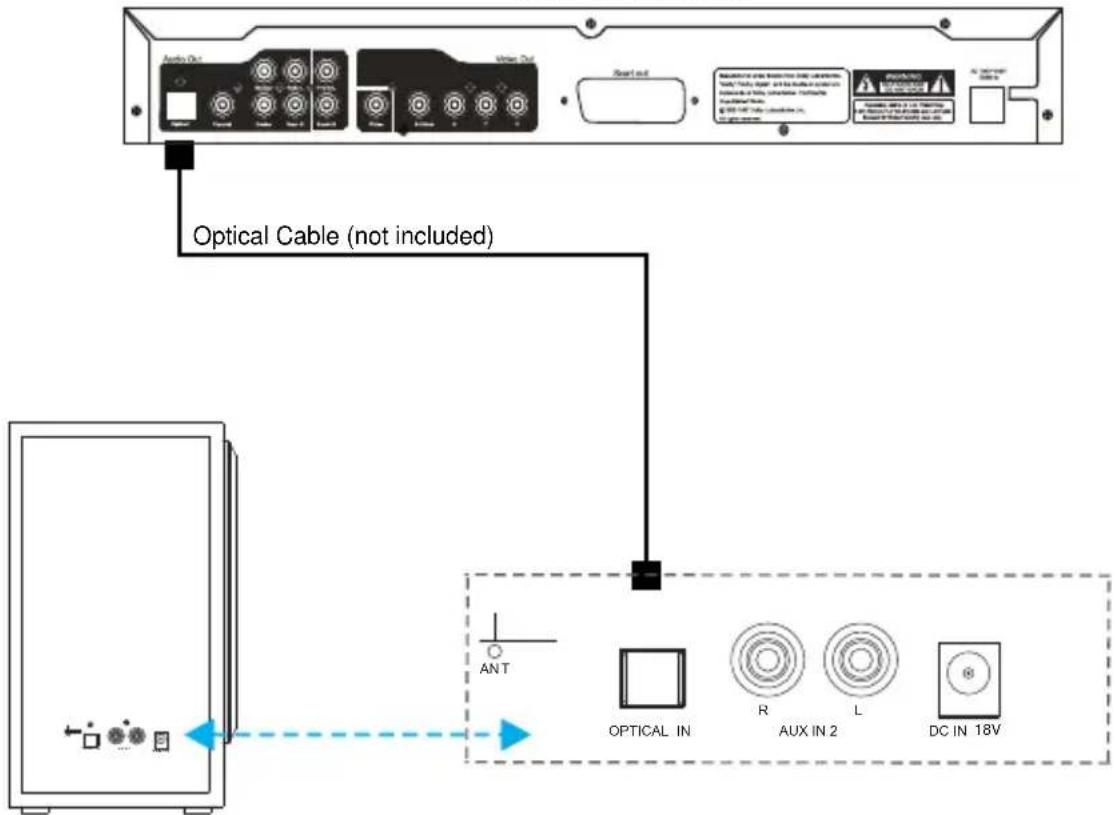
text_image
Audio Out Wire Out Start out Optical Cable (not included) OPTICAL IN R AUX IN 2 L DC IN 18VREAR PANEL OF WIRELESS SUBWOOFER

text_image
Technical diagram of a device panel with labeled components and status indicatorsEXTERNAL SOUND BAR
NOTE:
If there is no signal received, the indicator of the sound bar will blink.
If there is signal received, the indicator of the sound bar will stay lighting up.
BLUETOOTH
- Paring:
- Power on the unit and the external sounbar and press SOURCE Button on unit or remote control repeatedly to turn to Bluetooth mode, and the Indicator color will be Blue.
- Turn off the Bluetooth functionality of other devices that are paired with your unit. Only one device can be used with the Bluetooth function at a time.
- Turn on Bluetooth functionality on your Bluetooth device. Typically, Bluetooth controls are found on the device's tools or settings menu (see your user manual). Turn on Bluetooth connectivity and make your device "discoverable".
- Choose "add a new Bluetooth device" or "setup Bluetooth device" on your device. It will start to search. Once " "show 379 your device, select it. If your device prompts you for a pass code, please enter 0000. If the pairing attempt fails or times out, please start pairing procedure again.
- After your device and the unit have connected each other, a sound can be heard.
- Press PAIR Button to disconnect the current connection if you want to pair another external device.
NOTE:
The unit will automatically reconnect the last paired device when Bluetooth mode is reselected from other mode. If for some reason the Bluetooth connection is lost due to external factors or will not auto reconnect, you must clear the first Bluetooth Devices list and begin the pairing process again.
-During playback:
Make sure the Bluetooth connection between the unit and the device is activated.

text_image
Diagram of a device panel with labeled ports and indicator lights, showing internal structure and status indicators.EXTERNAL SOUND BAR
NOTE:
If there is no signal received, the indicator of the sound bar will blink. If there is signal received, the indicator of the sound bar will stay lighting up.
TROUBLESHOOTING GUIDE
| Check the followings before requesting service | ||
| SYMPTOM POSSIBLE CAUSE POSSIBLE SOULTION | ||
| No power | AC/DC adapter plug not connected to the wall outlet | Plug to the wall outlet. |
| No sound | Volume in minimum position | Raise volume level by pressing the VOL (Volume) + button |
| The connected device is not in payback mode | Play the music/movie in the connected device as usual and make sure the volume level of it is in high level | |
| Input source incorrect | Press the SOURCE button repeatedly to set the input source to the desired mode | |
| Bad Radio Reception | Antenna unextended | Extend the Antenna or relocate it |
| Sound distortion | Volume level too high | Reduce the volume level by pressing the VOL (Volume) - button |
| Remote not working | The battery is consumed | Replace with new battery |
| Bluetooth reception failure | The external device is far from the unit | Put the external BT device close to the unit |
| Have not paired | Pair both units as BT pairing page | |
SPECIFICATIONS
Output of AC/DC adaptor(Soundbar)....DC 13V = 1.8A ⊙ ⊕ ⊕
Output of AC/DC adaptor(Subwoofer).....DC 18V = 3A
Power Consumption(Soundbar)....4x5W
Power Consumption(Subwoofer)....50W
Bluetooth Working Rang..... Up to 10m
Radio Coverage.....FM 87.5 -108.0 MHz
Remote Working Distance....Up to 15 feet
Bluetooth is a registered trademark of Bluetooth SIG Inc. Other trademarks and trade names are those of their respective owners.
ACCESSORIES
1 x Instruction Manual
1 x Remote Control
1 x CR 2025 button cell (Already installed in the remote control)
1 x RCA audio cable
2 x Plastic Inserts
2 x Screws
2 x Adaptors
PROSCAN
HAUT-PARLEUR BARRE DE 39 POUCES AVEC CAISSON DE BASSES SANS FIL
MODÈLE : PSB379
natural_image
Front view of a portable electronic device with control panel and circular vent (no visible text or symbols)
natural_image
Technical line drawing of a mechanical component with circular and ring features (no text or symbols)text_image
POWER-FM 1 2 AUX IN 1 AUX IN 2 OPTIONAL AUX IN 1 POWER SOURCE SCAN PAIR PROSCAN 3 4 5 6 7 8 9 10 Q ANT OPTIONAL IN R L DC IN 10V 11 12 13 14- VOYANTS
- CAPTEUR DE LA TÉLÉCOMMANDE
- PRISE AUX IN 1
- VOLUME-
- BOUTON MARCHE/ARRÊT
- BOUTON LECTURE/PAUSE
- BOUTON SOURCE
- BOUTON RECHERCHE
- VOLUME+
- BOUTON DE JUMELAGE
- ANTENNE
- PRISE D'ENTRÉE OPTIQUE
- PRISE AUX IN 2
- PRISE ALIMENTATION(18V)
TÉLÉCOMMANDE
natural_image
Illustration of three different storage or packaging designs with arrows indicating movement, no text or symbols present.Raccordement AUX IN 1
natural_image
Front view of a rectangular electronic device with four circular vented indicators on both sides (no text or symbols)BARRE SON EXTERNE
REMARQUE :
Consommation (caisson de basses)....50W