
60LX540S - Television LG - Free user manual and instructions
Find the device manual for free 60LX540S LG in PDF.

| Product Type | LED TV (LCD screen with LED backlight) |
| Brand | LG |
| Model | 60LX540S |
| Screen Size (Diagonal) | 152 cm (60 inches) |
| Screen Resolution | 1920 x 1080 pixels (Full HD) |
| Backlight Type | LED |
| VESA Standard (Wall Mount) | 300 x 300 mm |
| Input Connectors | HDMI, USB, Composite, Component, SCART, LAN, CI+, RF Antenna, Satellite (depending on model) |
| Audio Output | 3.5 mm stereo jack (volume control) |
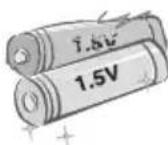
| Remote Control | Yes, with AAA batteries |
| Audio Functions | Dolby Digital, Dolby Digital Plus, MPEG, HE-AAC |
| Video Functions | DivX, MPEG-2/4, H.264, VC-1, AVS (depending on supported formats) |
| USB Compatibility | Playback of video, audio and photo files |
| Power Supply | AC 100-240 V, 50/60 Hz |
| Standby Power Consumption | Low (automatic standby mode) |
| Operating Temperature | 0 °C to 40 °C |
| Operating Humidity | Less than 80% |
| Security System | Kensington Lock (connector at the rear) |
| Recommended Cleaning | Unplug, wipe with a soft, dry or slightly damp cloth (water or mild detergent), dry immediately. Do not spray liquid. |
| Repairability | Contact an authorized LG service center. Do not disassemble yourself. |
Frequently Asked Questions - 60LX540S LG
User questions about 60LX540S LG
0 question about this device. Answer the ones you know or ask your own.
Ask a new question about this device
Download the instructions for your Television in PDF format for free! Find your manual 60LX540S - LG and take your electronic device back in hand. On this page are published all the documents necessary for the use of your device. 60LX540S by LG.
USER MANUAL 60LX540S LG
Safety and Reference
LED TV*
- LG LED TV applies LCD screen with LED backlights.
Please read this manual carefully before operating your set and retain it for future reference.
Safety instructions
Please read these safety precautions carefully before using the product.


WARNING
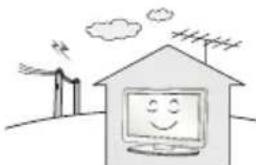
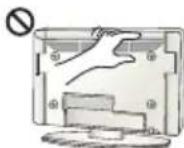
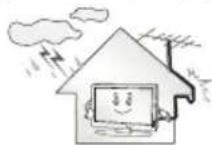
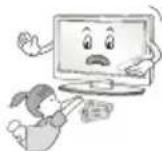
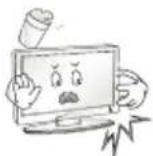
Do not place the TV and/or remote control in the following environments:
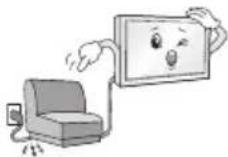
A location exposed to direct sunlight
An area with high humidity such as a bathroom
Near any heat source such as stoves and other devices that produce heat
Near kitchen counters or humidifiers where they can easily be exposed to steam or oil
An area exposed to rain or wind
Near containers of water such as vases
Otherwise, this may result in fire, electric shock, malfunction or product deformation.
Do not place the product where it might be exposed to dust. This may cause a fire hazard.
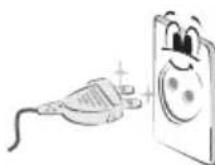
Mains Plug is the TV connecting/disconnecting device to AC mains electric supply. This plug must remain readily attached and operable when TV is in use.
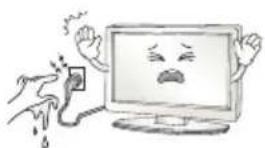
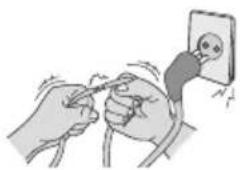
Do not touch the power plug with wet hands. Additionally, if the cord pin is wet or covered with dust, dry the power plug completely or wipe dust off. You may be electrocuted due to excess moisture.

Make sure to connect Mains cable to compliant AC mains socket with Grounded earth pin. (Except for devices which are not grounded on earth.) Otherwise possibility you may be electrocuted or injured.

Insert power cable plug completely into wall socket otherwise if not secured completely into socket, fire ignition may break out.

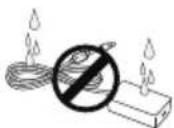
Ensure the power cord does not come into contact with hot objects such as a heater. This may cause a fire or an electric shock hazard.
Do not place a heavy object, or the product itself, on power cables. Otherwise, this may result in fire or electric shock.
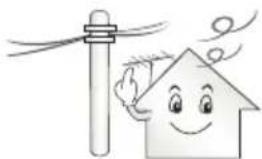
Bend antenna cable between inside and outside building to prevent rain from flowing in. This may cause water damaged inside the Product and could give an electric shock.
When mounting TV onto wall make sure to neatly install and isolate cabling from rear of TV as to not create possibility of electric shock / fire hazard.
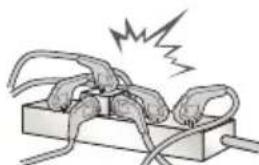
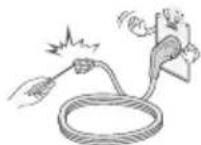
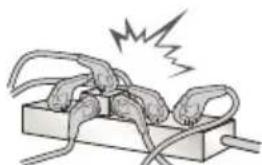
Do not plug too many electrical devices into a single multiple electrical outlet. Otherwise, this may result in fire due to over-heating.
Do not drop the product or let it fall over when connecting external devices. Otherwise, this may result in injury or damage to the product.

Keep the anti-moisture packing material or vinyl packing out of the reach of children. Anti-moisture material is harmful if swallowed. If swallowed by mistake, force the patient to vomit and visit the nearest hospital. Additionally, vinyl packing can cause suffocation. Keep it out of the reach of children.
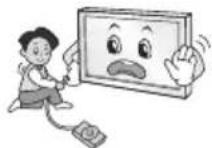
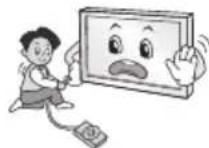
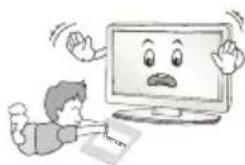
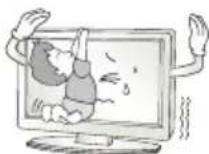
Do not let your children climb or cling onto the TV. Otherwise, the TV may fall over, which may cause serious injury.
Dispose of used batteries carefully to ensure that a small child does not consume them. Please seek Doctor- Medical Attention immediately if child consumes batteries.
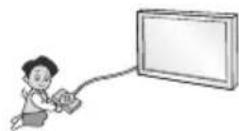
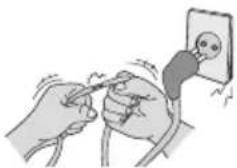
Do not insert any metal objects/conductors (like a metal chopstick/ cutlery/screwdriver) between power cable plug and input Wall Socket while it is connected to the input terminal on the wall. Additionally, do not touch the power cable right after plugging into the wall input terminal. You may be electrocuted. (Depending on model)
Do not put or store inflammable substances near the product. There is a danger of combustion/explosion or fire due to careless handling of the inflammable substances.

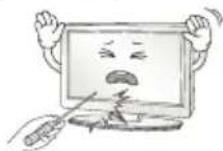
Do not drop metallic objects such as coins, hair pins, chopsticks or wire into the product, or inflammable objects such as paper and matches. Children must pay particular attention. Electrical shock, fire or injury can occur. If a foreign object is dropped into the product, unplug the power cord and contact the service centre.
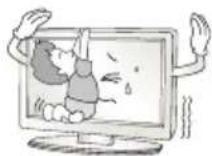
Do not spray water on the product or scrub with an inflammable substance (thinner or benzene). Fire or electric shock accident can occur.

Do not allow any impact, shock or any objects to fall into the unit, and do not drop anything onto the screen. You may be injured or the product can be damaged.
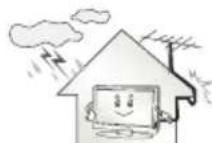
Never touch this product or antenna during a thunder or lighting storm. You may be electrocuted.
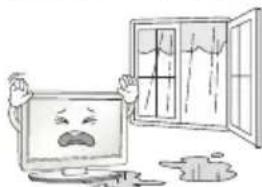
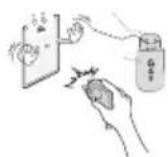
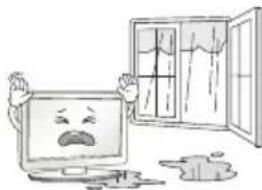
Never touch the wall outlet when there is leakage of gas, open the windows and ventilate. It may cause a fire or a burn by a spark.
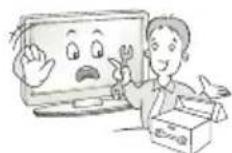
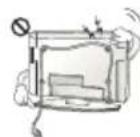
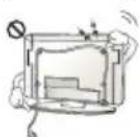
Do not disassemble, repair or modify the product at your own discretion. Fire or electric shock accident can occur. Contact the service centre for check, calibration or repair.


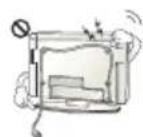
If any of the following occur, unplug the product immediately and contact your local service centre.
The product has been impacted by shock
The product has been damaged
Foreign objects have entered the product
The product produced smoke or a strange smell This may result in fire or electric shock.

Unplug the TV from AC mains wall socket if you do not intend to use the TV for a long period of time. Accumulated dust can cause fire hazard and insulation deterioration can cause electric leakage/shock/fire.
Apparatus shall not be exposed to dripping or splashing and no objects filled with liquids, such as vases, shall be placed on the apparatus.
Do not install this product on a wall if it could be exposed to oil or oil mist. This may damage the product and cause it to fall.
If water enters or comes into contact with TV, AC adapter or power cord please disconnect the power cord and contact service centre immediately. Otherwise, this may result in electric shock or fire.
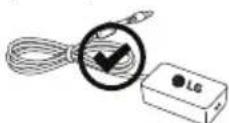
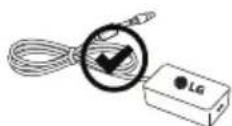
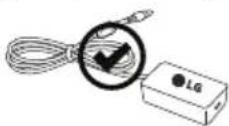
Only use an authorized AC adapter and power cord approved by LG Electronics.
Otherwise, this may result in fire, electric shock, malfunction or product deformation.

Never Disassemble the AC adapter or power cord. This may result in fire or electric shock.
CAUTION
Install the product where no radio wave occurs.
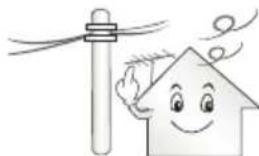
There should be enough distance between an outside antenna and power lines to keep the former from touching the latter even when the antenna falls. This may cause an electric shock.

Do not install the product on places such as unstable shelves or inclined surfaces. Also avoid places where there is vibration or where the product cannot be fully supported. Otherwise, the product may fall or flip over, which may cause injury or damage to the product.
If you install the TV on a stand, you need to take actions to prevent the product from overturning. Otherwise, the product may fall over, which may cause injury.
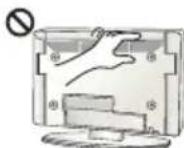
If you intend to mount the product to a wall, attach VESA standard mounting interface (optional parts) to the back of the product. When you install the set to use the wall mounting bracket (optional parts), fix it carefully so as not to drop.
Only use the attachments / accessories specified by the manufacturer.

When installing the antenna, consult with a qualified service technician. If not installed by a qualified technician, this may create a fire hazard or an electric shock hazard.

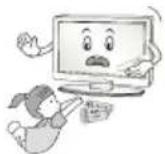
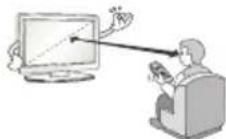
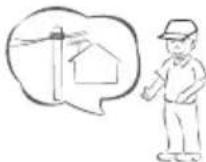
We recommend that you maintain a distance of at least 2 to 7 times the diagonal screen size when watching TV. If you watch TV for a long period of time, this may cause blurred vision.
Only use the specified type of battery. This could cause damage to the remote control.
Do not mix new batteries with old batteries. This may cause the batteries to overheat and leak.
Batteries should not be exposed to excessive heat. For example, keep away from direct Sunlight, open fireplace and electric heaters.
Do not place non-rechargeable batteries in charging device.
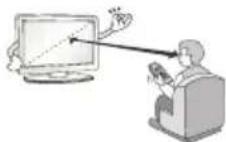
Make sure there are no objects between the remote control and its sensor.

Signal from Remote Control can be interrupted due to external/internal lighting eg Sunlight, fluorescent lighting. If this occurs turn off lighting or darken viewing area.

When connecting external devices such as video game consoles, make sure the connecting cables are long enough. Otherwise, the product may fall over, which may cause injury or damage the product.
Do not turn the product On/Off by plugging-in or unplugging the power plug to the wall outlet. (Do not use the power plug for switch.) It may cause mechanical failure or could give an electric shock.
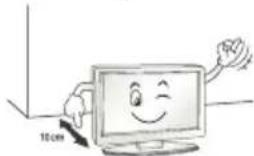
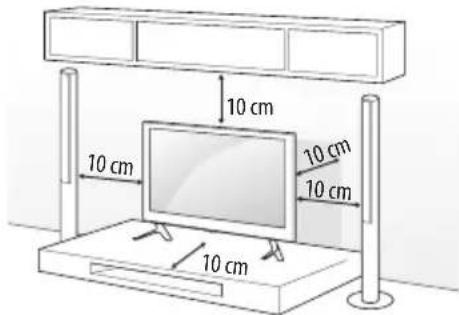
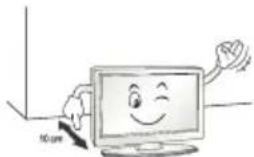
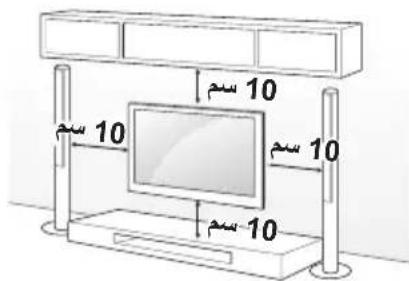
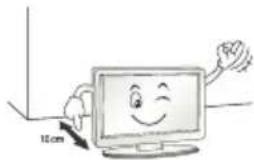
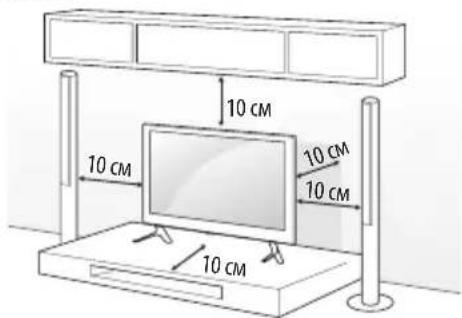
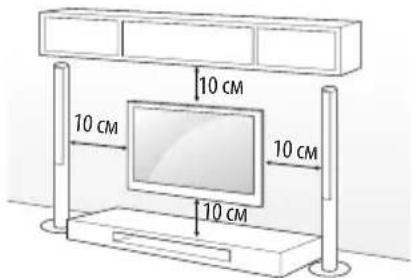
Please follow the installation instructions below to prevent the product from overheating.
The distance between the product and the wall should be more than 10cm
- Do not install the product in a place with no ventilation (e.g., on a bookshelf or in a cupboard).
- Do not install the product on a carpet or cushion.
Make sure the air vent is not blocked by a tablecloth or curtain. Otherwise, this may result in fire.
Take care not to touch the ventilation openings when watching the TV for long periods as the ventilation openings may become hot. This does not affect the operation or performance of the product.
Periodically examine the cord of your appliance, and if its appearance indicates damage or deterioration, unplug it, discontinue use of the appliance, and have the cord replaced with an exact replacement part by an authorized servicer.
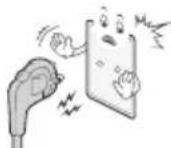
Prevent dust collecting on the power plug pins or outlet. This may cause a fire hazard.

Protect the power cord from physical or mechanical abuse, such as being twisted, kinked, pinched, closed in a door, or walked upon. Pay particular attention to plugs, wall outlets, and the point where the cord exits the appliance.
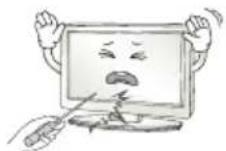
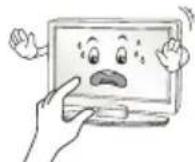
Do not press strongly upon the panel with a hand or sharp object such as nail, pencil or pen, or make a scratch on it, as it may cause damage to screen.
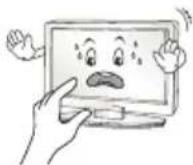
Avoid touching the screen or holding your finger(s) against it for long periods of time. Doing so may produce some temporary or permanent distortion/damage to screen.

When cleaning the product and its components, unplug the power first and wipe it with a soft cloth. Applying excessive force may cause scratches or discolouration. Do not spray with water or wipe with a wet cloth. Never use glass cleaner, car or industrial shiner, abrasives or wax, benzene, alcohol etc., which can damage the product and its panel. Otherwise, this may result in fire, electric shock or product damage (deformation, corrosion or breakage).
As long as this unit is connected to the AC wall outlet, it is not disconnected from the AC power source even if you turn off this unit by SWITCH.
When unplugging the cable, grab the plug and unplug it, by pulling at the plug.
Don't pull at the cord to unplug the power cord from the power board, as this could be hazardous.
When moving the product, make sure you turn the power off first. Then, unplug the power cables, antenna cables and all connecting cables. The TV set or power cord may be damaged, which may create a fire hazard or cause electric shock.

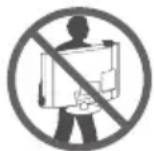
When moving or unpacking the product, work in pairs because the product is heavy. Otherwise, this may result in injury.

Contact the service centre once a year to clean the internal parts of the product.
Accumulated dust can cause mechanical failure.

Refer all servicing to qualified service personnel. Servicing is required when the apparatus has been damaged in any way, such as power supply cord or plug is damaged, liquid has been spilled or objects have fallen into the apparatus, the apparatus has been exposed to rain or moisture, does not operate normally, or has been dropped.
If the product feels cold to the touch, there may be a small "flicker" when it is turned on. This is normal, there is nothing wrong with product.
The panel is a high technology display product with resolution of two million to six million pixels. You may see tiny black dots and/or brightly coloured dots (red, blue or green) at a size of 1 ppm on the panel. This does not indicate a malfunction and does not affect the performance and reliability of the product.
This phenomenon also occurs in third-party products and is not subject to exchange or refund.
You may find different brightness and color of the panel depending on your viewing position(left/right/top/down).
This phenomenon occurs due to the characteristic of the panel. It is not related with the product performance, and it is not malfunction.
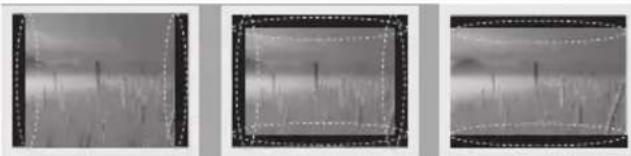
Displaying a still image (e.g., broadcasting channel logo, on-screen menu, scene from a video game) for a prolonged time may cause damage to the screen, resulting in retention of the image, which is known as image sticking. The warranty does not cover the product for image sticking. Avoid displaying a fixed image on your television's screen for a prolonged period. Also, if you watch the TV at a ratio of 4:3 for a long time, image sticking may occur on the borders of the panel. This phenomenon also occurs in third-party products and is not subject to exchange or refund.
Generated Sound
"Cracking" noise: A cracking noise that occurs when watching or turning off the TV is generated by plastic thermal contraction due to temperature and humidity. This noise is common for products where thermal deformation is required. Electrical circuit humming/panel buzzing: A low level noise is generated from a high-speed switching circuit, which supplies a large amount of current to operate a product. It varies depending on the product.
This generated sound does not affect the performance and reliability of the product.
Do not use high voltage electrical goods near the TV (e.g. electric mosquito-swatter). This may result in product malfunction.
Preparing

NOTE
Image shown may differ from your TV.
- Your TV's OSD (On Screen Display) may differ slightly from that shown in this manual.
The available menus and options may differ from the input source or product model that you are using.
New features may be added to this TV in the future.
- The TV can be placed in standby mode in order to reduce the power consumption. And the TV should be turned off if it will not be watched for some time, as this will reduce energy consumption.
- The energy consumed during use can be significantly reduced if the level of brightness of the picture is reduced, and this will reduce the overall running cost.
The items supplied with your product may vary depending on the model.
Product specifications or contents of this manual may be changed without prior notice due to upgrade of product functions.
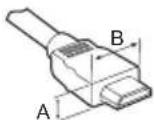
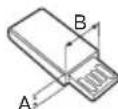
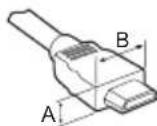
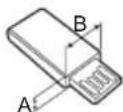
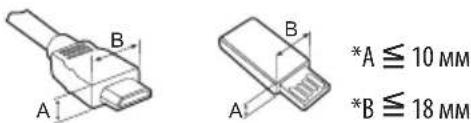
- For an optimal connection, HDMI cables and USB devices should have bezels less than 10mm thick and 18mm width. Use an extension cable that supports USB 2.0 if the USB cable or USB memory stick does not fit into your TV's USB port.
Use a certified cable with the HDMI logo attached.
If you do not use a certified HDMI cable, the screen may not display or a connection error may occur. (Recommended HDMI Cable Types) -High-Speed HDMI/ TM cable (3 m or less)
-High-Speed HDMI™ cable with Ethernet (3 m or less)

CAUTION
- Do not use any unapproved items to ensure the safety and product life span.
Any damage or injuries caused by using unapproved items are not covered by the warranty.
Some models have a thin film attached on to the screen and this must not be removed. - When attaching the stand to the TV set, place the screen facing down on a cushioned table or flat surface to protect the screen from scratches.
Make sure that the screws are fastened completely. (If they are not fastened securely enough, the TV may tilt forward after being installed.) Do not use too much force and over tighten the screws; otherwise screw may be damaged and not tighten correctly.
Separate purchase
Separate purchase items can be changed or modified for quality improvement without any notification. Contact your dealer to buy these items. These devices only work with certain models. The model name or design may be changed depending on the upgrade of product functions, manufacturer's circumstances or policies.
Depending on model)
| LED Clock LEC-003 | LG Audio Device |
| AN-WF500 Wi-Fi/Bluetooth Dongle |
Maintenance
Cleaning your TV
Clean your TV regularly to keep the best performance and to extend the product lifespan.
Make sure to turn the power off and disconnect the power cord and all other cables first.
- When the TV is left unattended and unused for a long time, disconnect the power cord from the wall outlet to prevent possible damage from lightning or power surges.
Screen, frame, cabinet and stand
To remove dust or light dirt, wipe the surface with a dry, clean, and soft cloth.
To remove major dirt, wipe the surface with a soft cloth dampened in clean water or a diluted mild detergent. Then wipe immediately with a dry cloth.
- Avoid touching the screen at all times, as this may result in damage to the screen.
- Do not push, rub, or hit the screen surface with your fingernail or a sharp object, as this may result in scratches and image distortions.
- Do not use any chemicals as this may damage the product.
- Do not spray liquid onto the surface. If water enters the TV, it may result in fire, electric shock, or malfunction.
Power cord
Remove the accumulated dust or dirt on the power cord regularly.
Lifting and moving the TV
Please note the following advice to prevent the TV from being scratched or damaged and for safe transportation regardless of its type and size.
It is recommended to move the TV in the box or packing material that the TV originally came in.
- Before moving or lifting the TV, disconnect the power cord and all cables.
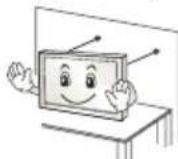
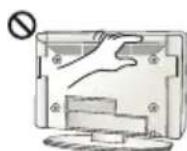
- When holding the TV, the screen should face away from you to avoid damage.
- Hold the top and bottom of the TV frame firmly. Make sure not to hold the transparent part, speaker, or speaker grill area.
- When transporting a large TV, there should be at least 2 people.
- When transporting the TV by hand, hold the TV as shown in the following illustration.
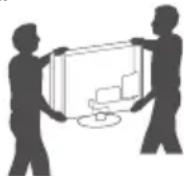
- When transporting the TV, do not expose the TV to jolts or excessive vibration.
- When transporting the TV, keep the TV upright, never turn the TV on its side or tilt towards the left or right.
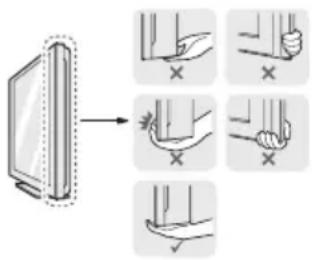
- Do not apply excessive pressure to cause flexing/bending of frame chassis as it may damage screen.
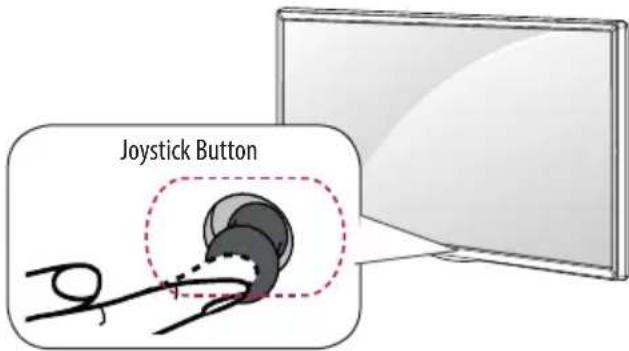
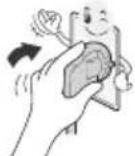
- When handling the TV, be careful not to damage the protruding joystick button. (Depending on model)

CAUTION
- Avoid touching the screen at all times, as this may result in damage to the screen.
- Do not move the TV by holding the cable holders, as the cable holders may break, and injuries and damage to the TV may occur.
Using the joystick button
(Image shown may differ from your TV.)
You can simply operate the TV functions, pressing or moving the joystick button up, down, left or right.
Basic Functions
| Power On | When the TV is turned off, place your finger on the joystick button and press it once and release it. | |
| Power Off | When the TV is turned on, place your finger on the joystick button and press it once for a few seconds and release it. (However, if the Menu button is on the screen, pressing and holding the joystick button will let you exit the Menu.) | |
| Volume Control | If you place your finger over the joystick button and move it left or right, you can adjust the volume level you want. | |
| Programmes Control | If you place your finger over the joystick button and move it up or down, you can scrolls through the saved programmes you want. |
Adjusting the Menu
When the TV is turned on, press the joystick button one time. You can adjust the Menu items moving the joystick button up, down, left or right.
| Turns the power off. | |
| × | Clears on-screen displays and returns to TV viewing. |
| Changes the input source. | |
| Accesses the main menu. |

NOTE
- When your finger over the joystick button and push it to the up, down, left or right, be careful not to press the joystick button. If you press the joystick button first, you may not be able to adjust the volume level and saved programmes.
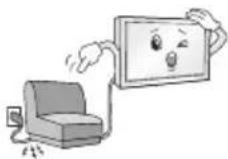
Mounting on a table
(Image shown may differ from your TV.)
1 Lift and tilt the TV into its upright position on a table.
- Leave a 10cm (minimum) space from the wall for proper ventilation.
2 Connect the power cord to a wall outlet.

CAUTION
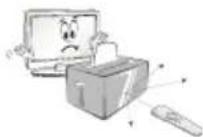
- Do not place the TV near or on sources of heat, as this may result in fire or other damage.
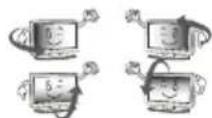
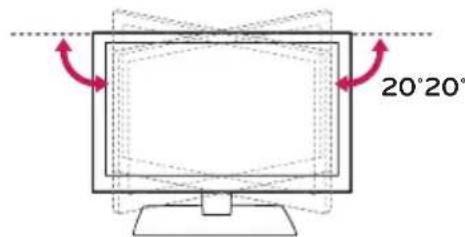
Adjusting the angle of the TV to suit view
Depending on model)
Swivel 20 degrees to the left or right and adjust the angle of the TV to suit your view.


CAUTION
-
When adjusting the angle of the product, watch out for your fingers.
-
Personal injury may occur if hands or fingers are pinched. If the product is tilted too much, it may fall, causing damage or injury.
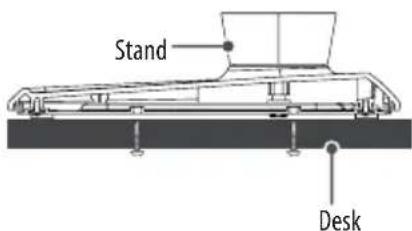
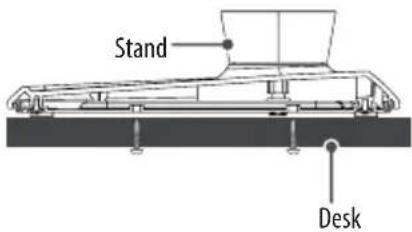
Attaching the TV to a desk
Depending on model)
The TV should be attached to a desk so it cannot be pulled in a forward/ backward direction, potentially causing injury or damaging the product. A type)

4-Screws (Not supplied with TV)

NOTE
- Screw: M5 x L (*L: Table depth + 8~10 mm) ex) Table depth: 15 mm, Screw: M5 x L25
B type)

2-Screws for Stand Fixing,
2-Washers for Stand Fixing,
2-Nuts for Stand Fixing (Supplied with TV)
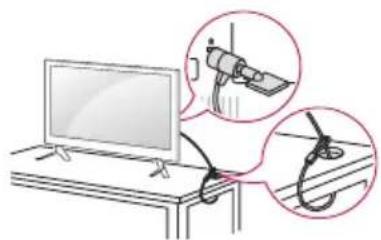
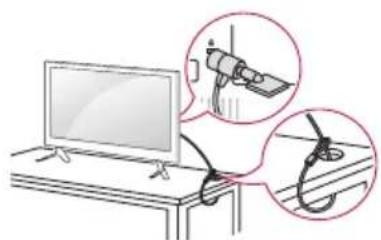
Using the kensington security system
(This is not available for all models.)
- Image shown may differ from your TV. The Kensington security system connector is located at the rear of the TV. For more information of installation and using, refer to the manual provided with the Kensington security system or visit http://www.kensington.com. Connect the Kensington security system cable between the TV and a table.
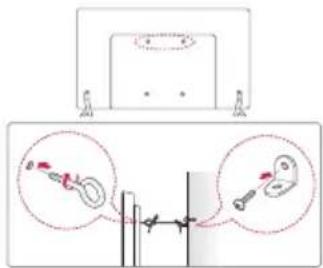
Securing the TV to a wall
(This feature is not available for all models.)
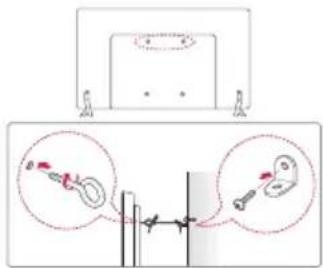
1 Insert and tighten the eye-bolts, or TV brackets and bolts on the back of the TV.
If there are bolts inserted at the eye-bolts position, remove the bolts first.
2 Mount the wall brackets with the bolts to the wall.
Match the location of the wall bracket and the eye-bolts on the rear of the TV.
3 Connect the eye-bolts and wall brackets tightly with a sturdy rope. Make sure to keep the rope horizontal with the flat surface.

CAUTION
Make sure that children do not climb on or hang on the TV.

NOTE
Use a platform or cabinet that is strong and large enough to support the TV securely.
- Brackets, bolts and ropes are not provided. You can obtain additional accessories from your local dealer.
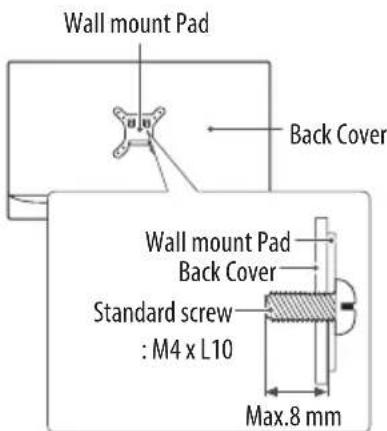
Mounting on a wall
Attach an optional wall mount bracket at the rear of the TV carefully and install the wall mount bracket on a solid wall perpendicular to the floor. When you attach the TV to other building materials, please contact qualified personnel. LG recommends that wall mounting be performed by a qualified professional installer. We recommend the use of LG's wall mount bracket. When you do not use LG's wall mount bracket, please use a wall mount bracket where the device is adequately secured to the wall with enough space to allow connectivity to external devices.

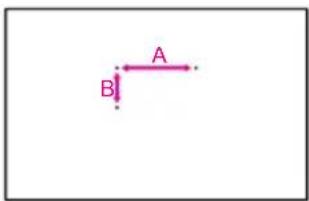
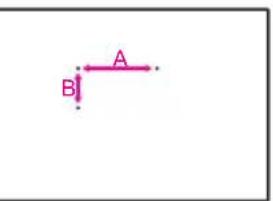
Make sure to use screws and wall mount bracket that meet the VESA standard. Standard dimensions for the wall mount kits are described in the following table.
Separate purchase(Wall Mounting Bracket)
| Model | 22LX32**22LX33**22LX53** | 28LX32**28LX33**28LX53** |
| VESA (A x B) 75 x 75 | 100 x 100 | |
| Standard screw M4 | x L10 M4 x L10 | |
| Number of screws | 4 | |
| Wall mount bracket | LSW140 LSW140 | |
| Model | 32LX32**32LX33**32LX34**32/40/43LX54**43LX31** | 49/55LX34**49/55LX54**49LX31**49LX32** |
| VESA (A x B) 200 x 200 | 00 300 x 300 | |
| Standard screw M6 | M6 | |
| Number of screws | 4 | |
| Wall mount bracket | LSW240BMSW240 | LSW350BMSW240 |
| Model | 60LX34**60LX54** | 42LX32**42LX33**42LX53** |
| VESA (A x B) 300 x 300 | 00 400 x 400 | |
| Standard screw M6 | M6 | |
| Number of screws | 4 | |
| Wall mount bracket | LSW350B | LSW440BMSW240 |

CAUTION
- Disconnect the power first, and then move or install the TV. Otherwise electric shock may occur.
- Remove the stand before installing the TV on a wall mount by performing the stand attachment in reverse.
If you install the TV on a ceiling or slanted wall, it may fall and result in severe injury. Use an authorised LG wall mount and contact the local dealer or qualified personnel. - Do not over tighten the screws as this may cause damage to the TV and void your warranty.
Use the screws and wall mounts that meet the VESA standard. Any damages or injuries by misuse or using an improper accessory are not covered by the warranty. - Screw length from outer surface of back cover should be under 8 mm. (Only 22/28LX32, 22/28LX33, 22/28LX53**)
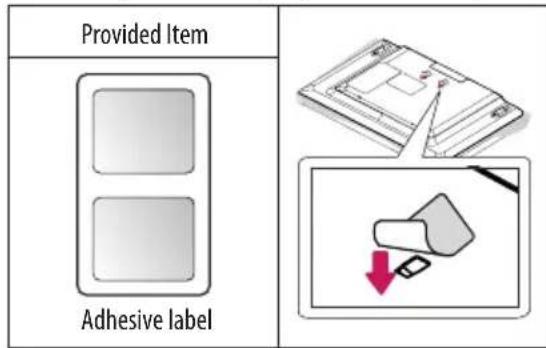
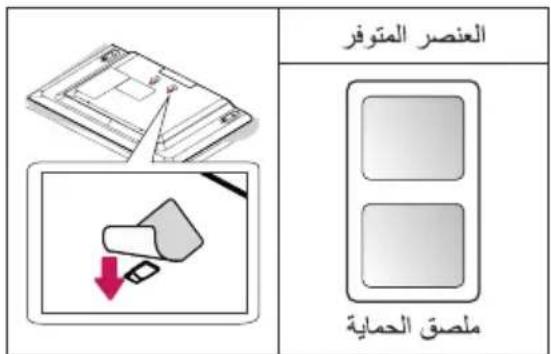
- When installing the wall mounting bracket, use the adhesive label provided. The adhesive label will protect the opening from accumulating dust and dirt. (Only when the label is provided)
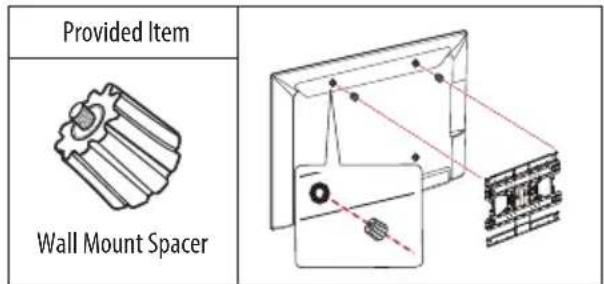
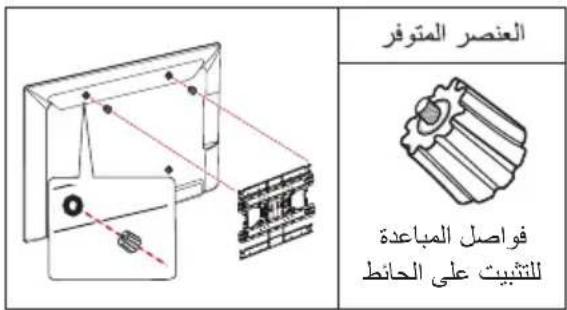
- When attaching a wall mounting bracket to the TV, insert the wall mount spacers into the TV wall mount holes to adjust the vertical angle of the TV. (Only when the item of the following form is provided)

NOTE
- Use the screws that are listed on the VESA standard screw specifications.
- The wall mount kit includes an installation manual and necessary parts.
The wall mount bracket is not provided. You can obtain additional accessories from your local dealer.
The length of screws may differ depending on the wall mount. Make sure to use the proper length. - For more information, refer to the manual supplied with the wall mount.
How to use Dual LockTM
(Only when the item of the following form is provided)
(This feature is not available for all models.)
Fix the set-top box to the TV and use it when you want to.
1 After removing the protection paper from the Dual Lock™, stick it to the TV and the set-top box as shown.
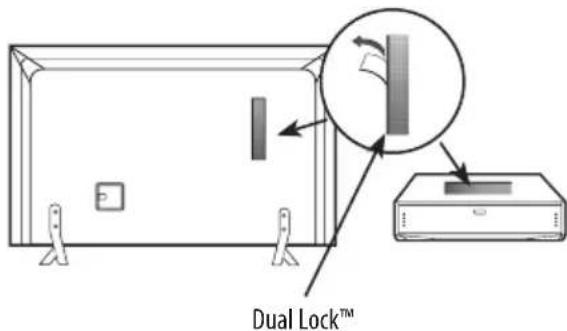
2 Attach the set-top box to the TV by pressing the Velcro strips together.


NOTE
- Please make sure no foreign substances exist on the surface of the product, and then firmly attach the Dual LockTM.
Before attaching the set-top box to the TV set, let the attached Dual Lock™ dry for at least three days.
Connections (notifications)
Connect various external devices to the TV and switch input modes to select an external device. For more information of external device's connection, refer to the manual provided with each device.
Available external devices are: HD receivers, DVD players, VCRs, audio systems, USB storage devices, PC, gaming devices, and other external devices.

NOTE
The external device connection may differ from the model.
- Connect external devices to the TV regardless of the order of the TV port.
If you record a TV program on a DVD recorder or VCR, make sure to connect the TV signal input cable to the TV through a DVD recorder or VCR. For more information of recording, refer to the manual provided with the connected device.
Refer to the external equipment's manual for operating instructions.
If you connect a gaming device to the TV, use the cable supplied with the gaming device.
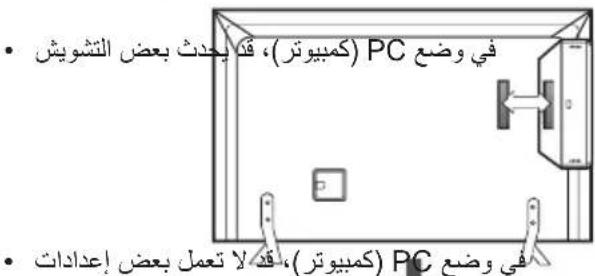
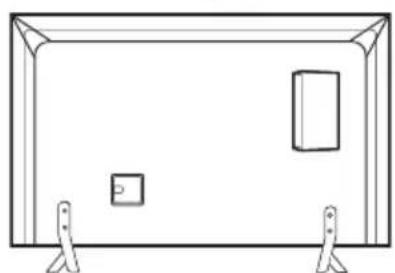
In PC mode, there may be noise associated with the resolution, vertical pattern, contrast or brightness. If noise is present, change the PC output to another resolution, change the refresh rate to another rate or adjust the brightness and contrast on the PICTURE menu until the picture is clear.
In PC mode, some resolution settings may not work properly depending on the graphics card.
Antenna connection
Connect the TV to a wall antenna socket with an RF cable (75Ω).
Use a signal splitter to use more than 2 TVs.
If the image quality is poor, install a signal amplifier properly to improve the image quality.
If the image quality is poor with an antenna connected, try to realign the antenna in the correct direction.
An antenna cable and converter are not supplied.
Supported DTV Audio: MPEG, Dolby Digital, Dolby Digital Plus, HE-AAC
Satellite dish connection
(Only satellite models)
Connect the TV to a satellite dish to a satellite socket with a satellite RF cable (75Ω).
Adapter connection
Depending on model)

CAUTION
- Please be sure to connect the TV to the AC-DC power adapter before connecting the TV's power plug to a wall power outlet.
CI module connection
Depending on model)
View the encrypted (pay) services in digital TV mode.
- Check if the CI module is inserted into the PCMCIA card slot in the right direction. If the module is not inserted properly, this can cause damage to the TV and the PCMCIA card slot.
If the TV does not display any video and audio when Cl + CAM is connected, please contact to the Terrestrial/Cable/Satellite Service Operator.
Euro scart connection
Depending on model)
Transmits the video and audio signals from an external device to the TV set. Connect the external device and the TV set with the euro scart cable.
| Output Type Current input mode | AV1 (TV Out¹) |
| Digital TV Digital TV | |
| Analogue TV, AV | Analogue TVComponent |
| HDMI |
1 TV Out : Outputs Analogue TV or Digital TV signals.
Any Euro scart cable used must be signal shielded.
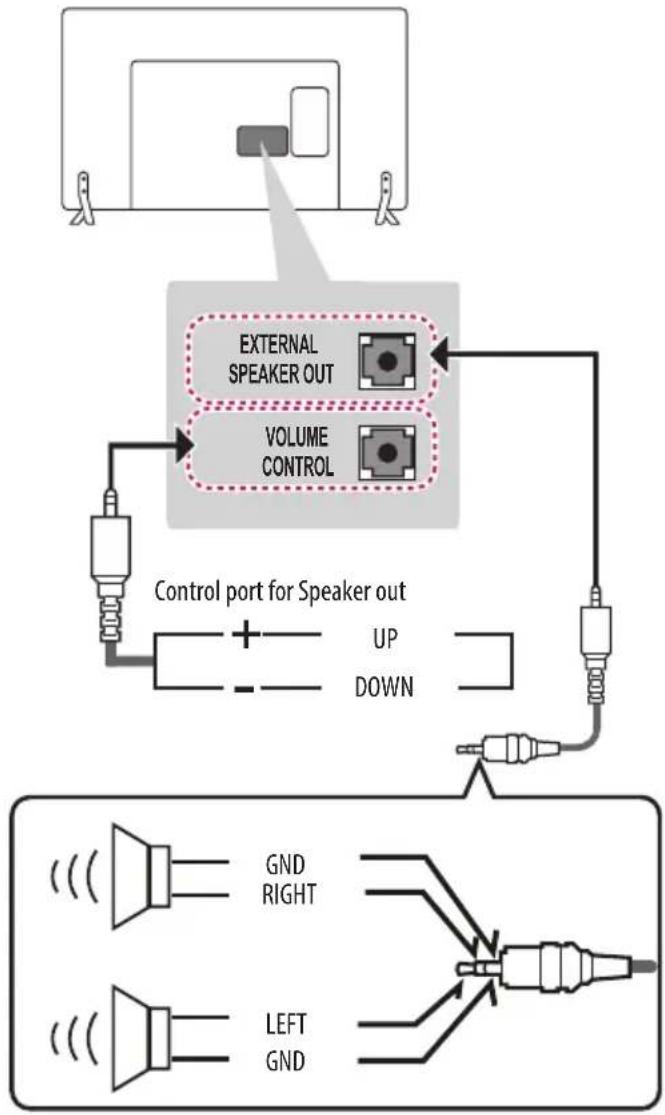
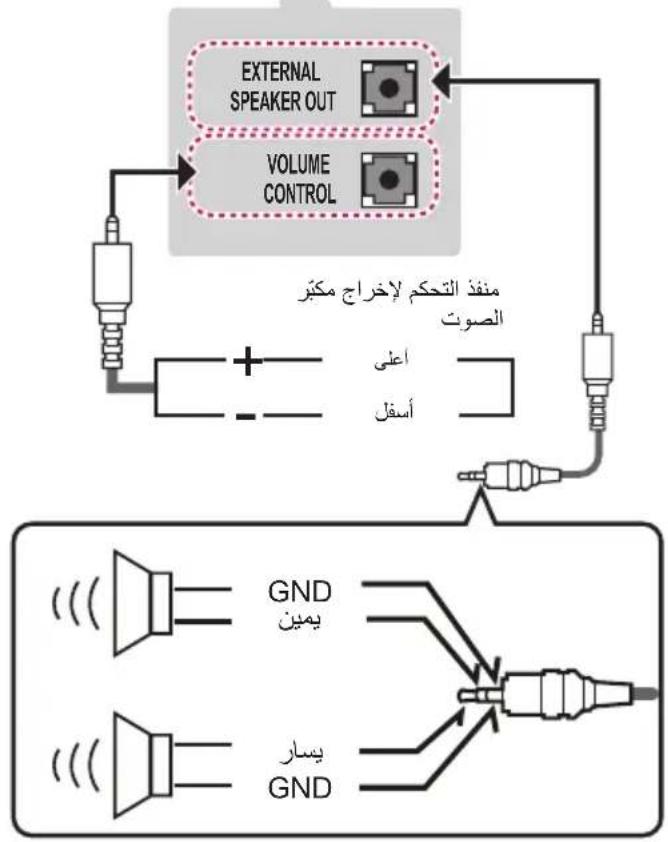
Speaker Output Setup
Method of Volume control port
Cable Spec.
| GND / Up / Down | Each Up / Down pin is pulled to 3.3V with CPU GPIO. |
| CPU detects transition from 3.3V to GND level for volume control. |

NOTE
Use only with the 3 Pole 3.5mm Stereo Jack.
Network setup
Wired network connection
Depending on model)
This TV can be connected to a Pro:Centric server via the LAN port. After making the physical connection, the TV needs to be set up for network communication. Connect the LAN port of the Modem or Router from Pro:Centric server to the LAN port on the TV.


CAUTION
- Do not connect a modular phone cable to the LAN port.
- Since there are various connection methods, please follow the specifications of your telecommunication carrier or internet service provider.
Other connections
Connect your TV to external devices. For the best picture and audio quality, connect the external device and the TV with the HDMI cable. Some separate cable is not provided.
Remote control
Depending on model)
The descriptions in this manual are based on the buttons on the remote control. Please read this manual carefully and use the TV correctly.
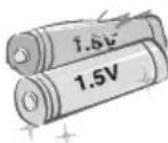
To replace batteries, open the battery cover, replace batteries (1.5 V AAA) matching the end ends to the label inside the compartment, and close the battery cover. To remove the batteries, perform the installation actions in reverse.

CAUTION
- Do not mix old and new batteries, as this may damage the remote control.
The remote control will not be included for all sales market.
Make sure to point the remote control toward the remote control sensor on the TV.

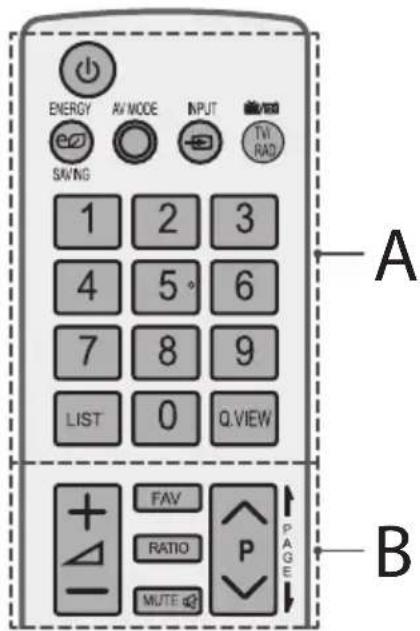
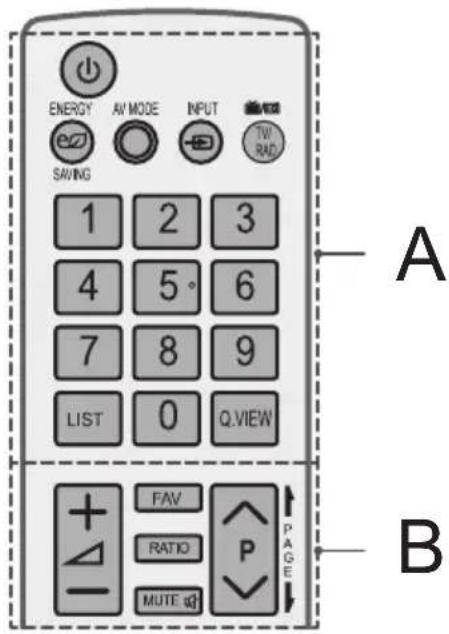
A
(POWER) Turns the TV on or off.
TV/RAD Effects Radio, TV and DTV programme.
SUBTITLE Recalls your preferred subtitle in digital mode.
AV MODE Selects an AV mode.
RAtes an image.
- INOMTges the input source.
Number buttons Enters numbers.
LIST Accesses the saved programme list.
Q.VIEW Returns to the previously viewed programme.
B
+Adjuststhevolumelevel.
FAV Accesses your favourite programme list.
GUIDE Shows programme guide.
MUTE #utes all sounds.
Scrolls through the saved programmes.
PAGE Moves to the previous or next screen.
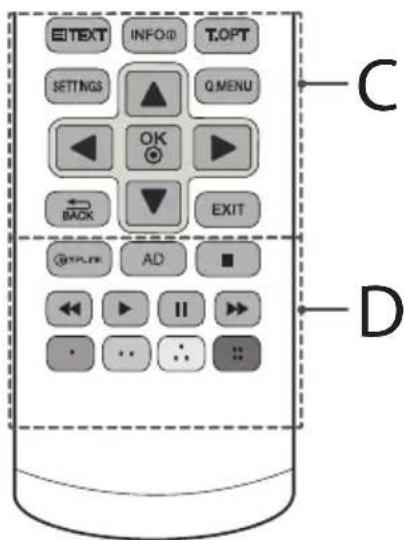
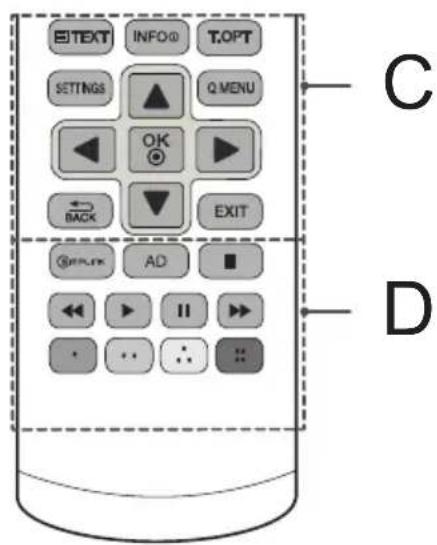
C
Teletext buttons are used for teletext.
INFO Views the information of the current programme and screen.
SETTINS Accesses the main menus.
Q.MENU Accesses the Quick menus.
OK Selects menus or options and confirms your input.
Navigation buttons (up/down/left/right) Scrolls through menus or options.
BARNs to the previous level.
EXIT Clears on-screen displays and returns to TV viewing.
D
Smplink Accesses the AV devices connected with the HDMI cable through HDMI-CEC. Opens the SIMPLINK menu.
AD By pressing the AD button, audio descriptions function will be enabled.
Control buttons Control theMedia
menus or the SIMPLINK compatible devices (USB, SIMPLINK).
Coloured buttons These access special functions in some menus.
:Red:Green:Yellow,Blue)
A
(POWER) Turns the TV on or off.
ENERGY SAVING Adjusts the brightness of the screen to reduce energy consumption.
AV MODE Selects an AV mode.
- INUTges the input source.
TV/RAD Radio, TV and DTV programme.
Number buttons Enters numbers.
LIST Accesses the saved programme list.
Q.VIEW Returns to the previously viewed programme.
B
+Adjuststhevolumelevel.
FAV Accesses your favourite programme list.
RATIO Resizes an image.
MUTE omutes all sounds.
Scrol1s through the saved programmes.
PAGE Moves to the previous or next screen.
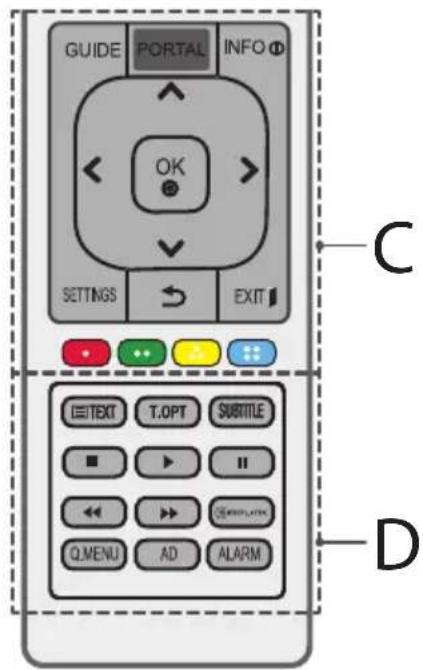
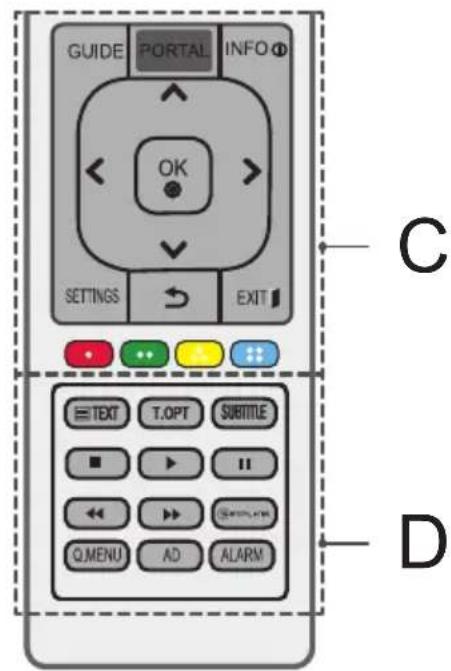
C
GUIDE Shows programme guide.
PORTAL Displays and removes hotel interactive menu.
INFO Views the information of the current programme and screen.
Navigation buttons (up/down/left/right) Scrolls through menus or options.
OK selects menus or options and confirms your input.
SETTINGsAccesses the main menus.
(BACK) Returns to the previous level.
EXIT Clears on-screen displays and return to TV viewing.
Coloured buttons These access special functions in some menus.
:Red:Green;Yellow,Blue)

D
Teletext buttons (3) These are used for teletext.
SUBTITLE Recalls your preferred subtitle in digital mode.
Control buttons Control theMedia
menus or the SIMPLINK compatible devices (USB, SIMPLINK).
SMPLINK Accesses the AV devices connected with the HDMI cable through HDMI-CEC. Opens the SIMPLINK menu.
Q.MENU Accesses the Quick menus.
AD By pressing the AD button, audio descriptions function will be enabled.
ALARM Sets the alarm function. (depending on model)
Licenses
Supported licenses may differ by model. For more information about licenses, visit www.lg.com.
DOLBY. DIGITAL PLUS
Manufactured under license from Dolby Laboratories. Dolby and the double-D symbol are trademarks of Dolby Laboratories.
HOMI H3D-DEFINITION MULTIMEDIA INTERFAGE
The terms HDMI and HDMI High-Definition Multimedia interface, and the HDMI logo are trademarks or registered trademarks of HDMI Licensing LLC in the United States and other countries.
DIVX. HD
This DivX Certified device has passed rigorous testing to ensure it plays DivX® video.
To play purchased DivX movies, first register your device at vod.divx.com. Find your registration code in the DivX VOD section of your device setup menu.
DivX Certified® to play DivX® video up to HD 1080p, including premium content.
DivX, DivX Certified and associated logos are trademarks of DivX, LLC and are used under license.
Covered by one or more of the following U.S. patents: 7,295,673; 7,460,668; 7,515,710; 7,519,274."
Open source software notice information
To obtain the source code under GPL, LGPL, MPL and other open source licenses, that is contained in this product, please visit http://opensource. lge.com.
In addition to the source code, all referred license terms, warranty disclaimers and copyright notices are available for download.
LG Electronics will also provide open source code to you on CD-ROM for a charge covering the cost of performing such distribution (such as the cost of media, shipping, and handling) upon email request to opensource@lge.com. This offer is valid for three (3) years from the date on which you purchased the product.
Troubleshooting
The software version can be updated for improvement in performance.
Customer needs to ensure the compatibility of customer's equipment with LGE software. If needed, please consult with LGE and upload revised software version according to the guidance provided by LGE.
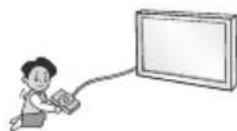
Cannot control the TV with the remote control.
- Check the remote control sensor on the product and try again.
- Check if there is any obstacle between the product and the remote control.
- Check if the batteries are still working and properly installed to +to.
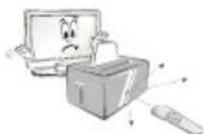
No image display and no sound is produced.
Check if the product is turned on.
- Check if the power cord is connected to a wall outlet.
- Check if there is a problem in the wall outlet by connecting other products.
The TV turns off suddenly.
- Check the power control settings. The power supply may be interrupted.
- Check if the Automatic Standby(Depending on model) / Sleep Timer / Off Time is activated in the TIME settings.
If there is no signal while the TV is on, the TV will turn off automatically after 15 minutes of inactivity.
When connecting to the PC (RGB/HDMI/DVI), 'No signal' or 'Invalid Format' is displayed.
- Turn the TV off/on using the remote control.
- Reconnect the RGB/HDMI cable.
- Restart the PC with the TV on.
Important information
Use this information for LX540S, LX530S series.
You can download the SuperSign Software and TV manual from LG Electronics website.
Visit www.lgecommercial.com/supersign for Software & www.lgecommercial.com/supersigntv for TV manual.
Software: SuperSign W Server Lite vx.x.x_Setup.zip
SuperSign C_v.X.X.X_Setup.zip
SuperSign W_Editor_vx.x_x_Setup.zip
Manual: SuperSign W Server Lite_vx.x.x_Manual.zip
SuperSign W_Editor_vx.x.x_Manual.zip
SuperSign C_vX.X.X_Manual.zip
Specifications
| CI Module Size (W x H x D) 100.0 mm x 55.0 mm | ||
| Environment condition | Operating Temperature | 0 °C to 40 °C |
| Operating Humidity Less than 80 % | ||
| Storage Temperature -20 °C to 60 °C | ||
| Storage Humidity Less than 85 % | ||
| AC/DC Adapter (Only 22/28LX32**, 22/28LX33**, 22/28LX53**) | Manufacturer: Lien chang Model: LCAP39 |
| In: AC 100 - 240 V ~ 50/60 Hz | |
| Out: DC 19 V -- 3.42 A |
| Satellite Digital TV1 | Digital TV Analogue TV | ||
| Television system | DVB-T/T2 | DVB-T | PAL/SECAM B/G/D/K, PAL I/I', SECAM L/L' |
| DVB-C | |||
| DVB-S/S2 | DVB-C | ||
| Programme coverage | VHF, UHF | VHF, UHF | VHF: E2 to E12, UHF: E21 to E69, CATV: S1 to S20, HYPER: S21 to S47 |
| C-Band, Ku-Band | |||
| Maximum number of storable programmes | 6,000 1,500 | ||
| External antenna impedance 75 Ω | |||
1 Satellite and DVB-T2 support models
HDMI/DVI-DTV supported mode
| Resolution | Horizontal Frequency (kHz) | Vertical Frequency (Hz) |
| 720 x 480 | 31.469 | 59.94 |
| 31.5 | 60 | |
| 720 x 576 31.25 | 50 | |
| 1280 x 720 | 37.5 | 50 |
| 44.96 | 59.94 | |
| 45 | 60 | |
| 1920 x 1080 | 28.125 | 50.00 |
| 33.75 | 60.00 | |
| 33.72 | 59.94 | |
| 56.250 | 50.00 | |
| 67.50 | 60.00 | |
| 67.432 | 59.94 | |
| 27.00 | 24.00 | |
| 26.973 | 23.976 | |
| 33.75 | 30.00 | |
| 33.716 | 29.976 |
1:OnlyLX341*,42LX330*,42LX320*,LX31**,LX54**,LX530S
RGB-PC supported mode
(Only LX32, LX33, LX34, LX31, LX540S, LX530S)
| Resolution | Horizontal Frequency (kHz) | Vertical Frequency (Hz) |
| 640 x 350 31.468 | 70.09 | |
| 720 x 400 31.469 | 70.08 | |
| 640 x 480 31.469 | 59.94 | |
| 800 x 600 37.879 | 60.31 | |
| 1024 x 768 48.363 | 60.00 | |
| 1152 x 864 54.348 | 60.053 | |
| 1360 x 768 47.712 | 60.015 | |
| 1280 x 1024(FHD only) | 63.981 60.020 | |
| 1920 x 1080(FHD only) | 66.587 59.934 | |
| 1920 x 1080(FHD only) | 67.50 60.00 |
1:OnlyLX341*,42LX330*,42LX320*,LX31**,LX540S,LX530S
HDMI/DVI-PC supported mode
(Use HDMI IN 1 for PC mode)
(Only LX31, LX32, LX33, LX34, LX53, LX54)
| Resolution | Horizontal Frequency (kHz) | Vertical Frequency (Hz) |
| 640 x 350 31.468 | 70.09 | |
| 720 x 400 31.469 | 70.08 | |
| 640 x 480 31.469 | 59.94 | |
| 800 x 600 37.879 | 60.31 | |
| 1024 x 768 48.363 | 60.00 | |
| 1152 x 864 54.348 | 60.053 | |
| 1360 x 768 47.712 | 60.015 | |
| 1280 x 1024 63.981 | 60.020 | |
| 1920 x 1080 (FHD only) | 67.50 60.00 |
1:Only LX341^* 42LX330*42LX320*LX31**LX54**LX530S
Component port connecting information
| Component ports on the TV Y P | B | PR |
| Video output ports on DVD player | Y | PB | PR |
| Y B-Y | R-Y | ||
| Y Cb | Cr | ||
| Y Pb | Pr |
| Signal | Component |
| 480i / 576i | 0 |
| 480p / 576p | 0 |
| 720p / 1080i | 0 |
| 1080p | 0 (Only 50 Hz / 60 Hz) |
Supported video formats
Maximum: 1920 x 1080 @ 30p (only Motion JPEG 640 x 480 @ 30p)
.asf,wmv
[Video] MPEG-2, MPEG-4 Part2, DivX3.11, DivX4, DivX5, DivX6,
XViD, H.264/AVC, VC1(WMV3, WVC1), MP43
[Audio] WMA Standard, WMA9(Pro), MP3, AAC, AC3, MP3, 3D WMV
Single Stream.
divx.avi
[Video] MPEG-2, MPEG-4 Part2, DivX3.11, DivX4, DivX5, DivX6,
XViD, H.264/AVC
[Audio] HE-AAC, LPCM, ADPCM, MPEG-1 Layer I, MPEG-1 Layer II,
Dolby Digital, MPEG-1 Layer III (MP3), *DTS
. ts,trp,tp,mts.m2ts
[Video] H.264/AVC, MPEG-2, AVS, VC1
[Audio] MPEG-1 Layer I, MPEG-1 Layer II, MPEG-1 Layer III (MP3),
Dolby Digital, Dolby Digital Plus, AAC, HE-AAC, *DTS
.vob
[Video] MPEG-1, MPEG-2
[Audio] Dolby Digital, MPEG-1 Layer I, MPEG-1 Layer II, DVD-LPCM
. m p4,m4v,m o v
[Video] MPEG-2, MPEG-4 Part2, DivX3.11, DivX4, DivX5, DivX6,
XVID, H.264/AVC
[Audio] AAC, MPEG-1 Layer III (MP3), *DTS
. mkv
[Video] MPEG-2, MPEG-4 Part2, DivX3.11, DivX4, DivX5, DivX6,
XVID, H.264/AVC
[Audio] HE-AAC, Dolby Digital, MPEG-1 Layer III (MP3), *DTS, LPCM
motion JPEG
[Video] MJPEG
[Audio] LPCM, ADPCM
.mpg, .mpeg, .mpe
[Video] MPEG-1, MPEG-2
[Audio] MPEG-1 Layer I, MPEG-1 Layer II, Dolby Digital, LPCM
dat
[Video] MPEG-1, MPEG-2
[Audio] MP2
-
[Video] Sorenson H.263, H.264/AVC
[Audio] MP3, AAC, HE-AAC
*rm,*rmbv
[Video] RV30, RV40
[Audio] Dolby Digital, AAC, HE-AAC, RA6(Cook)
3gp,3gp2
[Video] H.264/AVC, MPEG-4 Part2
[Audio] AAC, AMR(NB/WB)
DTS / rm / *rmvb : Depending on model
Supported audio formats
File type:mp3
[Bit rate] 32 Kbps - 320 Kbps
[Sample freq.] 16kHz - 48kHz
[Support] MPEG1, MPEG2, Layer2, Layer3
File Type:AAC
[Bit rate] Free Format
[Sample freq.] 8kHz 48kHz
[Support] ADIF, ADTS
File Type:M4A
[Bit rate] Free Format
[Sample freq.] 8kHz 48kHz
[Support] MPEG-4
File Type:WMA
[Bit rate] 128 Kbps 320 Kbps
[Sample freq.] 8kHz 48kHz
[Support] WMA7, WMA8, WMA9 Standard
File Type:WMA 10 Pro
[Bit rate] 768 Kbps
[Channel / Sample freq.]
M0:up to 2 Channel @ 48 kHz
(Except LBR mode),
M1:up to 5.1 Channel @ 48kHz
M2:up to 5.1 Channel @ 96 kHz
[Support] WMA 10 Pro
File Type:OGG
[Bit rate] Free Format
[Sample freq.] 48kHz
[Support] OGG Vorvis
Supported photo formats
Category:2D (jpeg, jpg,jpe)
[Available file type] SOFO: Baseline,
SOF1: Extend Sequential,
SOF2:Progressive
[Photo size] Minimum: 64 × 64
Maximum: Normal Type: 15360 (W) x 8640 (H),
Progressive Type: 1920 (W) x 1440 (H)
Category:BMP
[Photo size] Minimum: 64 × 64 , Maximum: 9600 × 6400
Category: PNG
[Available file type] Interlace, Non-Interlace
[Photo size] Minimum: 64 x 64, Maximum: Interlace: 1200 x 800,
Non-Interlace : 9600 x 6400
BMP and PNG format files may be slower to display than JPEG.

LG
Life's Good
Record the model number and serial number of the TV.
Refer to the label on the back cover and quote this information to your dealer when requiring any service.
MODEL
SERIAL
(Only DTV)

Digital Video
Broadcasting
g j 111
- 1.1.1.
y 111 111 111 111 111 111 111 111 111 111 111 111 111 111 1
y 111 111 111 111 111 111 111 111 111

y 1
y
aai 1 aai 1 1 1 1 1 1 1 1 1 1 1 1 1 1 1 1 1 1 1
Jie gaiy auii jao xilai jie jia ciic
g dii iuuy 1. jialill jai l jai jc kldl
auiy

y 11 11 11 11 11 11 11 11 11 11 11
Jalai Jai
aalal alalal aalal aalal aalal aalal


J 1 J 1 J 1 J 1 J 1 J 1 J 1 J 1 J 1 J 1 J 1 J 1 J 1 J 1 J 1 J 1 J 1 J 1 J 1 J 1 J 1 J 1 J 1 J 1 J 1 J 1 J 1 J 1 J 1 J 1 J 1 J 1 J 1 J 1 J

a aai 111111111111111111111111111

aaii 1 aai i 1 1 1 1 1 1 1 1 1 1 1 1 1 1 1 1 1 1 1 1 1 1 1
aal gall ygll gell jylll l 124
Lioie IaIyai IaIyai y
Jyai j 100000000000000000000000000000000000000000000000000000000000
jai jia g iie 4g g jiaall b gao pae jai jai aaii aaii
Jg 10000000000000000000000000000000000000000000000000000000000000000000
y j 1 y
Jaiy Jaiy Jaiy Jaiy Jaiy Jaiy Jaiy Jaiy Jaiy Jaiy Jaiy Jaiy Jaiy Jaiy Jaiy

1 2 3 4 5 6 7 8 9


aill 1
g j 111 111 111 111 111 111 111 111 111 111 111 111 111 111 1

J 1 J 1 J 1 J 1 J 1 J 1 J 1 J 1 J 1 J 1 J 1 J 1 J 1 J 1 J 1 J 1 J 1 J 1 J 1 J 1 J 1 J 1 J 1 J 1 J 1 J 1 J 1 J 1 J 1 J 1 J 1 J 1 J 1 J 1 J
LG 100000000000000000000000000000000000000000000000000000000000000000000000000

J 151 151 151 151 151 151 151 151 151 151 151 151 151 151 151 151 151 151 151 151 151 151 151 151 151 15
J 1111 1111 1111 1111 1111 1111 1111 1
ydiolilai gall clll lalj 1
Jgall aalil g jnll gll 5 Jic
aill k aal o 1000000000000000000000000000000000000000000000000
72 jj 1000000000000000000000000000000000000000000000000000000000
gllll 12000000000000000000000000000000000000000000
()
.10
4y 1
y
( 0,12,0) ,( 0,34,0)
.
jolil oalina nie ay gill ciaa aolao 1c jol 1y, aiaw ay gill ciai dai yab ci jai i jai
g a 111 111 111 111 111 111 111 111 111 111

J 1
J 1500000000000000000000000000000000000000000000000000000000000
y j 1
a 251

J 1 J 1 J 1 J 1 J 1 J 1 J 1 J 1 J 1 J 1 J 1 J 1 J 1 J 1 J 1 J 1 J 1 J 1 J 1 J 1 J 1 J 1 J 1 J 1 J 1 J 1 J 1 J 1 J 1 J 1 J 1 J 1 J 1 J 1 J
1 1 1
a a 1000000000000000000000000000000000000000000000000000000000000000000000000000000000
Jdall pddssllg jaaalll alla aiae J 1 1 1 1 1 1 1 1 1 1 1 1 1 1 1 1 1 1 1 1 1 1 1 1 1 1 1 1 1 1 1 1 1 1 1 1

y
jaiie (i) 1 1 1 1

J 1 J 1 J 1 J 1 J 1 J 1 J 1 J 1 J 1 J 1 J 1 J 1 J 1 J 1 J 1 J 1 J 1 J 1 J 1 J 1 J 1 J 1 J 1 J 1 J 1 J 1 J 1 J 1 J 1 J 1 J 1 J 1 J 1 J 1 J


51
aagglgclalg aolizg 0gssg s j
jll 100
a
128 50
aaii jilj jil
.
jlll jll l 1 g. aill bll sIgwl
llippey 1111111111111111111
y
S OBC = S COD + S_ BOC
aillg aegjagaae jnss Jb! 0s
10 USB HDMI 18 USB 2.0
10≥A*
18≥B*


- jilill
aill aill sll slis jas) aill o gus yg 12y
a 4:3 aal
a 2
jaiy juii Jia jie
sulia sic jlll lglll 111111111111111111111111111111111111111
aaii aii iia
HDMI 1
(3) HDMI/ TM 3 Ethernet HDMI/ TM 3
. aieHDMI
y 1


aolll jaiiaoi 100
.
.
必须成立
aag jatll
Jai 1a jy y
Juaia
aJlll lal jol g Jaiill Jia dic
jaiill jaiil jaiil jaiil jaiil jaiill
a a a a a a a a a a a a a a a a a a a
jolil jolil o
3 1
S木弟形 COBD = S COD + S BDO = S COD + S_ BDO
a aai i 1
.

aill bll lgl 1s y jiay cuii i y g uai y jilill n jy bila ie ciuie w g uoy jilill jiy jiy jiy jiy jiy jiy jiy jiy jiy jiy jiy jiy jiy jiy jiy jiy jiy jiy jiy jiy jiy jiy jiy jiy jiy jiy jiy jiy jiy jiy jiy jiy jiy jiy jiy jiy jiy jiy jiy jiy jiy jiy jiy jiy jiy jiy jiy jiy jiy jiy juy
LGG
jglal jglal 5y jzao
LG no bilaIg Cuiill wgi pldiu ygi LG no bilall Cuiill wgi pldiu pdc sic Ksiyaiiai ciitai iia jia bilall icuiy gaiiyaii aiilal
a j 100
15 15
jilill jll jilill jilill jilill jilill jilill jilill jilill
aalaiil ailll 1e cll lssjiie

gssaaal ggllll lalalgo gag aal alal . VESA
- 1
Jusallis
-

()
e 1 1 1 1 1 1 1 1 1 1 1 1 1 1 1 1 1 1 1 1 1 1 1 1 1 1 1 1 1 1 1 1 1 1 1 1 1 1 1 1 1 1 1 1 1 1
Dual LockTM
()
()jllJ5g 0
jailily (set-top box)
eaiiaiaiaiaiaiaiaiaiaiaiaiaiaiaiaiaiaiaiaiaiaiaiaiaiaiaiaiaiaiaiaiaiaiaiaiaiaiaiaiaiaiaiaiaiaiaiaiaiaiaiaiaiaiaiaiaiaiaiaiaiaiaiaiaiaia
1 jiu:
oJoo Joo Joo
a_i = x_i - 1 + x_i

.
J 1
1 + u7 = 7 + 1 > ( 1 + u) u7 = u
DVD
Dual LockTM
jidiill jia li jie
j 1 j 1 j 1 j 1 j 1 j 1 j 1 j 1 j 1 j 1 j 1 j 1 j 1 j 1 j 1 j 1 j 1 j 1 j 1 j 1 j 1 j 1 j 1 j 1 j 1 j 1 j 1 j 1 j 1 j 1 j 1 j 1 j 1 j 1 j
a1 = 2,an + 1 = n1 + an
J 1 J 1 J 1 J 1 J 1 J 1 J 1 J 1 J 1 J 1 J 1 J 1 J 1 J 1 J 1 J 1 J 1 J 1 J 1 J 1 J 1 J 1 J 1 J 1 J 1 J 1 J 1 J 1 J 1 J 1 J 1 J 1 J 1 J 1 J
aaii i j 15
g
RF 1s bll
( ( x,y) = 1,0)
j 1
1
0.123456789
jglg jglg lglg aag oall glls
all oal 1
Jgagglk
Dolby, MPEG
. HE-AAC , Dolby Digital Plus , Digital
i
()
gellll yag gellna yab jalil
(Ω75a)RFgclu jus p
2.1.1.1.1
.
jll jll jll jll jll
四边形 AOBC 为正方形

中
Dual LockTM 3. jalil jll jll jll
Dual LockTM
Jgai Jg
(j)

JAC-DC 1
CI
(j)
a
PCMCIA 1
Jy 1
PCMCIA 1
Lae ci yg yy cie g jy jkldp d
Paii Jia Jia Jia C1+ CAM
al/1/1
Euro Scart
(j)
yj 1
J5 1
Euro Scart
gail gnil gnil jia gnil
Jiai Jie Jgaiy jayjai li y jaiy jaiy jaiy jaiy jaiy jaiy jaiy jaiy jaiy jaiy jaiy jaiy jaiy jaiy jaiy jaiy jaiy jaiy jaiy jaiy jaiy jaiy jaiy jaiy jaiy jaiy jaiy jaiy jaiy jaiy jaiy jaiy jaiy jaiy
B
A
aai 1 jalil (aill) O
· = 0
AV AV MODE
JUINI JUNI JUINI INPUT
jalil, jai TV/RAD
aai jiljilil,
paa 1
LIST
Q.VIEW
all gina bial -4+
ALIaill 1111 FAV
RATIO
MUTE
abgall gol
yai 1
B
all 5nna bual -4+
ailll lll lll FAV
GIGUIE
1
MUTE
aalalalalalalalalalalalalalal
ylll lallll aalllllllllllllllllllllllllllllllllllllllllllllllllllllllllllllllllllllllllllllllllllllllllllllllllllllllllllllllllllllllllllllllllllllllllll
D
C
EXT, T.OPT)
aagaaal gaaill jjj0
A#,a#
SETTING
Q.MENU
OK
7,515,710:7,460,668:7,295,673.7,519,274
C
GUIDE
PORTAL
INFO
OK
SETTINGS
EXIT
Jl
Jr
Jr
D
[Support] ADIF, ADTS
Type de fichier:M4A
[Taux en bits] Format libre
[Freq. d'échantillonnage] 8 kHz ~ 48 kHz
[Support] MPEG-4
[Support] WMA7, 8, 9 Standard
[Support] WMA 10 Pro
Type de fichier:OGG
[Taux en bits] Format libre
1:Nur LX341*,42LX330*,42LX320*,LX31**,LX54**,LX530S
RGB-PC-understützer Modus
(Nur LX32**, LX33**, LX34**, LX31**, LX540S, LX530S)
| Auflösung | Horizontale Frequenz (kHz) | Vertikale Frequenz (Hz) |
| 640 x 350 31,468 | 70,09 | |
| 720 x 400 31,469 | 70,08 | |
| 640 x 480 31,469 | 59,94 | |
| 800 x 600 37,879 | 60,31 | |
| 1024 x 768 48,363 | 60,00 | |
| 1152 x 864 54,348 | 60,053 | |
| 1360 x 768 47,712 | 60,015 | |
| 1280 x 1024 (Nur FHD) | 63,981 60,020 | |
| 1920 x 1080 (Nur FHD) | 66,587 59,934 | |
| 1920 x 1080 (Nur FHD) | 67,50 60,00 |
1:Nur LX341*,42LX330*,42LX320*,LX31**,LX540S,LX530S
1:Nur LX341*,42LX330*,42LX320*,LX31**,LX54**,LX530S
[Bitrate] 32 kbit/s - 320 kbit/s
[Abtastfrequenz] 16 kHz bis 48 kHz
[Bitrate] Freies Format
[Abtastfrequenz] 8kHz 48kHz
[Unterstutzung] ADIF, ADTS
- Dateityp: M4A
[Bitterate] Freies Format
[Abtastfrequenz] 8kHz 48kHz
[Bitrate] Freies Format
[Abtastfrequenz] 48kHz
SOF1: Extend Sequential,
SOF2: Progressive
[BildgroBe] Minimum: 64 × 64
Maximum: Normales Modell: 15360 (B) x 8640 (H),
Progressive: 1920 (B) x 1440 (H)
Kategorie:BMP
[BildgroBe] Minimum: 64 x 64, Maximum : 9600 x 6400
Kategori:PNG
RATAGeI to eyeoC iKovac.
INnyn nncnnc 1060ou.
ApiuNTkauoMia Eaaywn aptouw.
LIST PpObaon atn AioTa anoNKeuEvw npoypaMAtw.
Q.VIEW Emotpoqn oTo npoyouevo npoypaua.
B
+Pouon Tou eunéou Evtaoc tou xou.
KOYMNIATELETEX (EXT/T.OPT) Auta ta koupiia xnpoiopoiovvra yia to teletext.
INFO pOBoAnTwvNAnpOpOpiWtou TpExovToC npoypaatoc KAI TcO 0oVNC.
SETTINGI PooBaaon Ota Kupia evou.
Q.MENU PpObaaon 0ra ypyopa mevo.
OKVepyonoinon evo n emooyov kai eniieoiwn tow kataxwpnoewv.
Kouπaλoynonc (εnaw/katw/apotepa/δεiα) Kluon oτa μevo n tic επλογε.
BAGHtpoepn oTo nponyouevo eniteo.
EXIT iaypaon oawtwovvEvdeEewovn eavicovtai otnv o6yn kai enioppn otny kavoviknpoBn tnAeopaoc.
D
SMPLINK PpObaon otoc oovkevEc AV nov exouv ouvde8ei μe to kaawdio HDMI pEoW HDMI-CEC. AvoivTe oevou SIMPLINK.
AD Natovtac to koumi AD, evpyonoietai n leitovpyia nepiypn iXyou.
[Hxoc] WMA Standard, WMA9(Pro), MP3, AAC, AC3, MP3, 3D WMV Single Stream.
divx,avi
[BivTeo] MPEG-2, MPEG-4 Part2, DivX3.11, DivX4, DivX5, DivX6, XVid, H.264/AVC [Hxoc] HE-AAC, LPCM, ADPCM, MPEG-1 Layer I, MPEG-1 Layer II, Dolby Digital, MPEG-1 Layer III (MP3), *DTS
- .ts, .trp, .tp, .mts, .m2ts
[Bivtεo] H.264/AVC, MPEG-2, AVS, VC1 [Hxoc] MPEG-1 Layer I, MPEG-1 Layer II, MPEG-1 Layer III (MP3), Dolby Digital, Dolby Digital Plus, AAC, HE-AAC, DTS
.vob
[Bivteo] MPEG-1, MPEG-2
[Hxoc] Dolby Digital, MPEG-1 Layer I, MPEG-1 Layer II, DVD-LPCM
. m p4,m4v,m o v
[BivTeo] MPEG-2, MPEG-4 Part2, DivX3.11, DivX4, DivX5, DivX6, XVID, H.264/AVC'
[Hxoc] AAC, MPEG-1 Layer III (MP3), *DTS
. mkv
[BivTeo] MPEG-2, MPEG-4 Part2, DivX3.11, DivX4, DivX5, DivX6, XVID, H.264/AVC
[Hxoc] HE-AAC, Dolby Digital, MPEG-1 Layer III (MP3), DTS, LPCM
motion JPEG
[BivTeo] MJPEG
[Hxoc] LPCM, ADPCM
.mpg, .mpeg, .mpe
[Bivteo] MPEG-1, MPEG-2
[Hxoc] MPEG-1 Layer I, MPEG-1 Layer II, Dolby Digital, LPCM
dat
[Bivteo] MPEG-1, MPEG-2
[Hxoc] MP2 - flv
[Bivεo] Sorenson H.263, H.264/AVC
[Hxoc] MP3, AAC, HE-AAC
*rm,*rmvb
[Bivteo] RV30, RV40
[Hxoc] Dolby Digital, AAC, HE-AAC, RA6(Cook)
3gp,3gp2
[BivTe] H.264/AVC, MPEG-4 Part2
[Hxoc] AAC, AMR(NB/WB)
*DTS/*rm/*rmvb:Avaloya to oovtAo
YnooTnpiOeVcOpqEc nXou
Tunoc apxieou:mp3
[PuOoc bit] 32 Kbps - 320 Kbps
[Σxvónta δεγμatoληψiac] 16 kHz - 48 kHz
[YnootipIe] MPEG1, MPEG2, Layer2, Layer3
Tunoc apxieou: AAC
[Yπoʊτηριεŋ] ADIF, ADTS
Tunoc apxieov: M4A
[PuOc bit] Eεuθepn uopq
[uxvotnta deivmuatoanpsiac]8kHz\~48kHz
[YnooTniPiet] MPEG-4
Tunoc apxieoiw:WMA
[PuOoc bit] 128 Kbps 320 Kbps
[uxvotnta deivmuatoanipiac]8kHz\~48kHz
[YiooTnpiE]WMA7,WMA8,WMA9 Standard
Tunoc apxxiou:WMA 10 Pro
[PuOoc bit] 768 Kbps
[Formati supportati] ADIF, ADTS
Tipodi file:M4A
[Suporte] ADIF, ADTS
PYKOBODCTBO NOIb3OBATEJIa
PykoBoDCTBO O TEXHnKe 6e30paCHOCTN
LED TV*
- B LED-TeJIeBn3ope LG yctaHOBJIeH JK-dIscnJIeN co CBeTOdIOdHOJ NOcCBETKOJ.
Перед наразом诫сплуataци устюства Внимаелов почтente настаяшee руховдстvo и coхсанеeroon зауцero Incpoьзованя.
ПразвILA NOTEXHnKe 6e30napCHOCTN
Ipejde Yem noIb30BaTbc8 yCTpoiCTBOM, BHMaTeNbHO npOHTe daHbIe NHCTpyKuIN NO Texnke 6e3oNaCHOCTN.


PNEyPEXKDEHNE!
Hepa3Meuata TeleBn3Op npbT yB cIeNyUoXmecTx:
NDBO3DcCTBnEMPpMbIXCONHeYbIXLyuei
B MeCTAX C NOBbIeHHoB BnaXHoCTbIO, HApPIMep, B BaHHoKOMHate;
B6n3n NCTOCHKOB TENla, HAnpMep, Neey, o6orpeBaTeeneN Dp;
B6NIM3 KxOHHbIX CTOIOB UIN yBnAkhHtenei, rIe Ha HIX IerKO MoKETNONACTb Nap INN MaCNo;
B MecTaX, He 3aunueHHbIX OTOxJa Nn BETpa;
B6m3n COcyOB C BOIO, HApIMeP, Ba3.
HecobnOeHHe yKa3aHHbIX Mep npedocTopoxHOCTM MoKET npNBcT N Bo3rOpAHIO, nopaxHeHIO 3JIeKTPWueCKNt TOKOM, HcNpabHOCTN nn DeopMaun yCTPOCTBa.

He pa3MeaIte yCTpOcTBo B MeCTax, rDe OHO MOKeT NOBeprHytbcB03dEChTBIO nbIN. 3To MOKeT pNBeCTK NnXapy.
CetebaBnka Cnyknt dna OTKnIOyeHn yCTpOcTbA. Bnka DoNkHa OCTaBaTbca NcnpabHoI.
He npkaTecb K BUNke MOKpbIM pykAMn. Kpme TOrO,ecn HHyp BAnxHbI Nnn NOKpbIT nbIbIO, KaC CleNyET npocyWnte BUnky nn COtpTe Co UHypa PbIb. N36bToOHa Bnara MoKet npBecrN K npapKeHHo 3JeKTpuCeKm TOkOM.
Po3eTka, K KOTopoI NIOKJIIOUaEcra YcToPOCTBO, IOnJXHa 6bITb 3a3eMJIeHa (KpOme He3a3eMIReMbIX YcToPOCTB). B IpOTnBHOM CIIyueae, BO3MOxHNo POpaxHeNt ENeKTpUeCKIM TOKOM ININ INHA TpaBAMa.
ПлOTH BCTaJIЯTe Ka6eJIb NITaHnB pa3bEm. EcIи Ka6eJIb NITaHnB BCTaJIeH HeNtIoTHO, MoKET Bo3HKnHYt b NoJap.

Ka6en nntaHn He dONKeH cOnpKacatbca C TaKMM npedMeTAM, KAK HArpeBaTeH.3To MoKet npBecTu K NoXapy nn NopaxeHHIO 3NeKtpuueckm TokOM.
He cIeJyET CTaBtB TAgKeIbIe NpeDMeTb IIN Cam TeJIeBn3Op Ha UHyp nHTAHN. 3TO MOKET npJBecTN K NOXkapY INN NOPAXEHIO 3JIeKTPuueCKM TOKOM.

Bo n36eKaHHe I nonaHaHn DOxDeBOB BObI NO aHTEHOMy Ka6eHIO, erO cIeDyET BBOInb ChapxN 3aHnB N oMeueHne CHN3y BBepx. InonaHaHHe BObI BHytpb yctpoiCTBa MOKeT npBeCTN Kero nobpeXdEHHIO n nopaxeHHIO 3NeKTPnuyeCKIM TOKOM.
PnMOHTaKe TeneBn3opa Ha cTeHy cIeNyTe y6eDntbca, YTO TeneBn3Op He BcNT Ha KaBepe NITAHN IN CINHnBbIX KaBeJAX.
TO MOKET cTaB nPnHNOJ noXapa nn npaXeHn EneKtpueckm TOKOM.
He noKlOaTe CnHbOM MHOro 3NeKtpueckx yCTpoiCTB K OndH o3eTke Ha HeckolbKO nTope6nteJe. 3To MoKeT npuBeTu K Bo3ropaHmIO npuHne neperpeBa.
PnnoKIOueHm BHeuHx yCTpOcTB CNEIte 3a TEM,HTo6bI TeneBUN3Op He ynaHnn He onpOKHyncra.3TO MoKeT npINBeCTN K HaHeceHNO Bam TpaMbbl NIO NBpeKDeHIO TeneBUN30pa.

Держпг Бларонроницаьу унakobочь матерпани Bннлобую унakовь B Мсес, Heоctунном Дядетe. Blarororloшоши materan monket Haheci Bpe npn nporntbIBaHn. Pn CnyaHOM nonadHm MaTePnana BHyTpB opraH3Ma, CneJyET B13BaTb y NOCTpaIabWero pBOTu N O6paTntcbr B 6nkaJiWee MeDyUpeKdEHe. KpOme TOrO, BnHInOBa YnakOBka MoKet npmbecTN K UdyuShHIO. DeprxHt ee B HeoctyHOM DЯдетe MeCte.
He papeaante Ta3a6npabcnaeepkaTbca 3a Teebn3op. Teebn3op MoKet ynaCTb, YoMoKet npBecNT K TaKeNbIM TpaBMam.
YtIIN3pyuTe NcONb3OBAHHbIe 6aTapeN DoJIKhbIM 6pa3OM n CneIte 3a Tem, YTO6bI Detn He npOrIOTnIn ux. Ecn ITo pOn3oNo, HEmdIeHNO 6paTntEc 3a MedunHCKoI NmOuBIO.
Korda Ka6ebIb NITAHIN BCTaBHeN B po3ETky, He BCTaBJIte npoBOJHnK (HaNPmep, MetaJIneCkyo Cnuy) B pyroI KOHeU Ka6eIa. KpOme TOrO, He pNkacaiTeCb KpyROMy KOUY Ka6eIa NITAHIN, Korda Ka6eIb BCTaBHeN B po3ETky. Bo3MOxHo nopaxEHe NJIekTpuecknM TOKOM.
He pa3MeaIte n He xpaHnTe rOpOuNe BeUeCTBa OKoNo yCToPiCTBa.
IV3-3a HeocTopoXHoro 6bpaueHn C rOpHmN BeUeCTBaM N MoXeT
B03HNKHyTB B3pbIB Nn noXap.
He poHnIte BHytpb yctpoNCTBa MeTaNIIueckne npedMeTbI (MOHeTbI, 3aKoIKN dIy BOIOc, CmUcbl, KcCKn IpoBOda n T.I.) a TaKKe IerKOBCnIaMeHIOuIeCn npedMeTbI (HaNPIMep, bMyary nn cNtKn). CneNyET BHMAtelbHO cNeITb 3a DeTbMn, Korda OHn HaxOJaTcB 6bn3N yCTpoNCTBa. Bo3MoXHo nopaxeHne 3JIeKTPnuEckn TOMok, Noxap NIN NIIbte TpaBMbl. EcnB yCTPOCTBO nonan noCTOpOHn IpedMeT, OTcoEduHIne KaebN PNTaHn IN O6paNTteCb B cepBnChbl ueHTp.

He paCnblIaIe BoDy Ha yCTpOietBO H He OUYIaIe erO rOpUcIMN BeueCTBaMn (6eH3MH NII PaCTBopNTeJIb). Bo3MOxHO nopaXeHne 3NeKTPnueckm TOKOM NII NOkap.

He donyckaIte ydapOB no yctpoiCTBy nnonaHaHnnoctopoHHnx npedMeTOB BHytpb yctpoiCTBa, He cTuYnte no ekpaHy. HecobnOdeHne 3THx MEP npedocToPOXHOCTM MoKETnpNBecTn KaHaHeceHIO Bam TpaMbI INN NOBpeXDeHIO yctpoiCTBa.

He npKacaiTecb KcTpoiCTBy nAHTeHBe BO BpeM rpo3bl Bo3MOxHO nopaeKeHne 3NEKtpueckm TOKOM.
He npkaatecb K cteHHoI po3eB Cnuyae yTeKn r3a. OTkpoTe OKHa I npOBetPte NOMEeHne. NCKpa MoKcT Bb1BaT noXap, N Bbl MOxete NOLyuHTb OXor.
He cIeNyET cAmOCToTeJIbHO pa36HpaTb, pEmOHtnpOBaTb N MoINΦNtIPOBaTb yCTpOJCTBO. Bo3MOxHNO npAxeHne 3JIeKtpnueckm TOKOM IIN NOXap.
Длпюверки, калброви ппpemoHTa yctpoCTBa obpauaTecbВ cepBnchbl ueHtp.

Ecn npon3oJETTO-JIb6n3nepeuCNEHHO,HeMeDnEHNO OTKIOHTe yCTPOCTBOOTJNEKTPocEt mOcbpTteCB CepBNCbI CEHTP:
yctpoictbo6bIIO NOBBePHyTO 3NEKTPueckOMy pa3pIy.
- yctpoictbo 6bIIO NOBpeKdEHO.
ByctpoiCTBO nonannoocToPOHHne npedMebl.
13yctpoictBaJeIdbIMnINCTpaHbI 3anaX.
3TO MOKET pINBECTN K NOXAPY NIN NOPAXEHNO 3JNEKTPNUECKM TOKOM.

EcnBbIeco6npaTeecbno30BaTc8yCTpoiCTBOM B TeueHne DInTeBHO BpeMeHn,OTcoedHnHTe OT Hero Kaebn NtAHn.
IbIbNbNlaRa,MOrYCTaTbPnUHNOyTeKuTOKaHapUWeHNA30JAAUM, YTO MOKeT PnBECTN K NOXAPy NIN NOPaKeHIO 3JIeKTpUeCKM TOKOM.
Ha yctpoiCTBO He doJXHbI nonadatb KaIIIN XnKocT Wn6pbl3r. Henb3a TaKke CTaBt b Ha Hero npeDMetbl, HAnOIHeHHble XnKocTbO (HanpIMep, Ba3bl).
He yctahabmbaite 3to yctpoictBO Ha CTehy, rde OHO MOKeT 6bITb NODBepKeHO BO3dEeCTBmIO MacIaNbIX napOB (HaNPIMep, Ha KxHRe, PAdOM C NnTOn).3to MoKeT NoBpeINTb yctpoictBO n pNBeCTN Kero naDeHHIO.

EcIn B yctpoCTBO (HanpImep, aanTep nepemehHoro TOKA, Kaebn nTaHn, TeleBn3Op) nonaTe BOda Wn Dpyroe BeueCTBO, OTKIOHTe Kaebn nTaHn HemeJeHHo 6paTneCb B cepBnchbl ueHr. B npOTNBOM cnyae 3TO MOxET npINBeCTN K NoXkapy Nn NopaxKeHN ONeKTpuCeKNM TOKOM.
IcnoB3yIe TOnbKO Odo6peHbIe KOMnAHMei LG Electronics aanTep IepemEHoro ToKa N Ka6JIb NiTuHaN. B IpOTNBOM Cnyae 3TO MOxET npUBeCTN K NoXApY, nopaxKeHIO 3NeKTPuYeCKIM TOKOM, NOBpeKDeHIO HIN DeOpMaun yCtpoCTBa.

HkoIgDa He pa36bpaiTe aanTep nepemehHO To Ka6enb nHTAHn. B npotNBOM cnYae 3TO MOKeT npBECTN KnoXapy nn NopaxeHHIO 3JIeKTPnueckm TKOM.

BHIMAHHE!
UCTAHOBHTyeYCTPOINCTBOBMeTe,ΓeHETpaDIOONOMEX.

CneJyTe 0e6cneuTb DoCTaTOHoe paCCToHHe MeKdy HApxHHO aHTeHHo N Ka6eIem NITAHn BO N36ExAHHe IN CoPnKOCHOHn DAnke B Cnyae NaDeEHn AHTeHHbl. 3To MoXeT PpNBecTN K NopaxHIO 3JIeKTPuueCKHM TOKOM.

He yctaHaBnBaIte yCTPOI CTBO Ha HeyCTOuHbIe NONK INN HAKIOHbIe NOBepxHOCTn. TaKKe CNeJyET N36eratb MeCT, rDe yCTPOI CTBO NODBepraTeCBAbpaunM, INN MecT C HENIOHOn ONOpO. HecobIOJeHne Yka3aHHbIX MEP npedeOCToPoxHOCTn MOKe TnpVBectn K TOMy, YTO yCTPOI CTBO YnaTe INN NepeBepHEcTc, YTO MOKeT IOBHeYb 3a Co6o HAHeCEHne Bam TpaBMbl INN NOBpeXdHne yCTPOI CTBa.
Pn yCTaHOBKe TeneBn3Opa Ha nOCTabKy HxKHO ppeIpnHrTb Mepbl no npdeoTBpaueHIO ero onpOKuDlbAHNA. Pn HecobNoeHNyKa3aHHbIX MEP npEoCTOpOXHOCTH uCTpoCTBO MOKeT UNaCTb, YTO MoKET npNBecTN K HAHeceHIO Bam TpaBMbl.
Ecn Tpe6yctc3akpenTb yctpoCTBO Ha CTHe, yCTaHOBtce TaHapThoe VESA-KpenIeHne IJIa MOHTaKa Ha CTHe (dONOHHTenbIhle DeTani)Ha erO 3aHNe nAHeN. PnU yCTAHOBKe yCTPOCTBa Ha CTHe C NOMoIbIO HAcTeHHoro MOHTaXHOro KPOHHTeHa (DOnOHHTenbIhle DeTani)HaJeXHO 3akpenITe erO BO n36exHae naDeHry UcTpoCTBa.
IcnoB3yTe TOnbKO KpePHeHn/AKceccyapbl, peKoMeHDoBaHHbIe N3rTOBHTeNEM.
IyctaHOBKn aHTeHHbI o6paTnTeCb K KBaIIuNpObaHHOMcneuaNCTy.CamocToaTeNbHa yCTaHOBa MoKet npBecTu K NoXapuynn nopaxKeHNIO 3NeKTPnueckm TOKOM.
PnnpocmTope TeneBn3opa peKoMeHnyetc co6NIOaTb paCtOHNHe, paBHoe He MeHee 2-7 DaarOHaJAM EKpaHa TeNeBn3opa. PnpocmTp TeneBn3opa B TeueHne DInTeNbHO BpEmeH MoKeT npNBecTN K CHNXEHIO OCTpoTbI 3peHnA.
IcnoB3yTe TOnbko yKa3aHHb Tn6 6atapeH. Heco6IIOHeHne 3TOrO Tpe6oBaHmMoKet npBecTu K NOBpeXDeHIO pNtTa DY.
He nCnoB3yTe HOBbIe 6aTapeu BmecTe CO CTapbIMN.3To MoKET npNBecrK NpeperpeBy u npoteUkam 6aTapei.
3IeMeHTbI NITAHnHE DoJIXHb IIOBepraTbcHarpReBy OT npMbx COINHeHbIX Lyuey,OrHr nnEneKtpuecknx 60rpeBaTeen.
HE BCTaBnTe Henepe3apJXaembIe 3JIeMeHTbI NITaHnB 3apJdHoe yCTPOCTBO.
Mexny npbTom Dy n daTnKOM He doJxho 6bItb HnKaNX npedMetOB.

CunHanOTyNbTa DY MoKeT 6bITb NODaBHeH CONHeYbIM CBeTom ININ DpyrHM NCTOChNKOM AkrKO rCBeta. B3om CNyue B KOMHaTe CJIeNyET CdelaTb CBet MeHee APKM.
PnnoKIOH BHeHNx yCTPOINCTB, TaNX KAK INrpoBBte KOHCOMN, y6eINTEcB B TOM, YTO NOKIOHaeMbE KaEBN IMeOT DOCTaTOHyO dNNHy. HNaue yCTPOINCTBO MOKeT yNaCTb, YTO npNBEdT K HaHeceHMIO BAM TpaBMbl NIOBpeKJeHMIO yCTPOINCTBa.
He cneyet BKIOUaTb/BbIKIOuATb TeneBUN3Op, NOcOeINHnI INN OTOeINHnBUNKy OT HAcTeHHoP03ETKN (He IcNoJIb3yIte BUNKy IINB KIIIOueHnI). 3TO MOKeT CTaTb PpUHHoM MExaHHueCKOrO OTKa3a INN nopaxhenr 3NeKTPnueckm TOkOM.
Co6nOdaIte uHCTpyKcnn no yctaHOBKe, npuBeDeHHbIe daIee, yTo6bl npedotBpaTb neperpeB yCTpOiCTBa:
PacctoHne MeKdy TeJeBn3Opom n CTeHoI DoJHKHO 6bITb He MeHee 10 cm.
He yctaHabnBaIte yctpoiCTBO B MecTax 6e3 BeHTnlau (HaPIMep, Ha KHNKHOJ NOJIke NINB CepBaHTe).
He yctaHabBaHTe ycTPOCTBO HA KOBep nIIN noDyKy.
Y6eIMTEcB TOM, YTO BEHTNIAUHOHbIe OTBepCTnHE 3aKpbTbCKaTePbIO NII UTOPOI.
B npotNBHOM cnyae, moKet npon30Tu Bo3ropaHne.
He npkacaTecb K BeHTnIauHOBHM OTBepCTNm npnpocmotpe TeeBn3opa B TeueHne DOIgTO BpEmH, NOCKoJIbKy OHN MOrYT cnIbHO Harpetbcr. 3To He BnIaET Ha pa6Otu nn IpOn3BOJNTeBHOCTb yCTpoCTBa.
IepnoDnueckn OcMaTpnaBaiTe Ka6eNb yCtpoiCTBa n B Cnyae BuDMOrO N3HocA mNIOBpeXKeHnBbInbTe erO n03pO3ETn 3aMeHnTe Ha Ka6eNb, peKoMeHDoBaHHbA BTOpN3OBaHHbIM CneuaJIACTOM NO o6CnyKINBaHHIO.

He donyckaIte cKoIIeHnIbIIN Ha KOHTaKTax pa3beMOB IINHa po3eTke.3To MoKeT npUBeCTN K noXapy.
He donyckaIte fni3nuecko ro nnn mexaHneckoro BO3deiCTBna Ha shHy p3NeKtpOnuTaHn, a NMeHHo nepekpyuBaHn, 3aBra3bHaHn, nepernbHn uHypa. He 3axmMaTe shHy dpBbU n He hactynaTe ha Hero. O6paauTe oc06oe BHNMaHne Ha BNKn, HacteHHbIe po3eTkn IN TOOK CoEINHeHn IpOBOda C yCtPoNCTBOM.
He haxmuTe cInbHo Ha naHEnb pyKo nnOcTpbIM npEMeTOM (rBo3dEm, kapaHaJWoM nnpyKo). He cepanaTe naHEnb.
CTapaItecb He npKacatbca K ekpaHy H He depXaTb Ha HEM naBcbl B TeueHne npoJoxitbeHoro nepnoDa BpeMeH. 3To MOKeT Bb3BaTb BpeMeHHbe NCKaKeHnHa 3kpaHe.

IpiuNCTKe yCtpoCTBa u erO KOMnoHEHToB, Chayana, OTOeHNHTe Bnky shypa nHTaHnA OT po3eKn, a 3aTeM npOTpnte yCTpoCTBO MAnKoTKaHbU. IpnMeHeHne N36bItOChbix ycnnm MoXeT IpnBeCTN K NOBHeHIO UapAnH INn oBecueBnBAHIO NOBepxHOCTN. He paCbIbnIte BoDy u He npOTpauTE yCTpoCTBO MOKPO TKAHbU. HIKoRda He NoJb3yITeCB ouNCTNTenAMn DnA CTeKoI, ABTomO6MbHbIMn INn IpOMbIbHeHHbIMn ONIpOJIaMn, abPaNBbIMn CpeCTBAMn INn BOCKOM, 6EH30lOM, CNIptOM nT. n., KOtOpBie MOrY T NobPeINb YcTpoCTBO u erO naHeB. Hec6bIHOHeHne Yka3aHHbIX MEP npEdoCTopoxHOCTN MoXeT IpnBeCTN K BO3rOpAHIO, IopaaHeHIO 3JIeKTPnuCeKN M Tokom INn IOBpeJeHIO yCTpoCTBa (deOpMaun, KoppOznn nn noLOMke).
EcnyycpoCTBO NOdknoyeHo K po3e TKe nepemehHoro ToKa, OHO He OTKIOUaETcO NTocuHnka NHTAHNNEpemehHoro ToKa, DaJke npBbIKIOUeHN C NOMOsbIO nepeKIOUaTeN IITAHN.
Otknoyapnup6op ot 3neKtpuecko p03eTK, bepuTecb pyko 3a Bnky.
OToeHHeHne npoBIOB BHyTpN Ka6eMa MoKeT npNBecn K Bo3rOpaHIO.
Pn nepemeHn yCTPOINCTBA CHaHana y6eINTecb B TOM, YTO OHO OTKIOUeHOOT cTeN.3aTeM OTcoEINHTe Ka6eN NITAHN, AHTEHbIe Ka6eN N OCTaJIbHbIe NODKIIOuaEmble Ka6eN.
TeIeBn3Op NII Ka6eNb NITaHnM OryT 6bITb NOBpeXdeHb, YTO MoKet CO3DaTb ONaCHOCTb BO3rOpaHnN ININ NopaxKeHnE 3JIeKTPuYeCKIM TOKOM.

IepemueHne u npacnakOBky yctpoCTBa cneyet npo3BOaTb DByM IIOJAM, T.K. OHO TAgKeNoe. HNaYe BO3MOxHo NOnyuEHe NTpaMbI.
Pa3B rOJ OTdAbaIte yCTpOJCTBO B cepBnCHbI ueHTp dJa YnCTKn ero BHyTpEHHnx Yacte. HakONMBaIcR nbJIb MoKet npNBecr K MexAHueCKOMY NOBpeXdeHIO.

JIO6oe 06cnyxHBHne DOJNHNbIpOn3BOuNTb KBaJIuΦnUPOBaHHie cneuaHnCTbI. 06cnyxHBHne Tpe6yETc, KOrJa yCtpoiCTBO 6blno NOBpeXJeHO KaKIM-NIO BO 6pa3OM (NOBpeXJeH Ka6JIb NITAHIN INBnKa, IpONITA XnKoCTb, BHyTpB NOnA NocToPOHHN PpeMeT, YCtpoiCTBO NoCTpadaNo OT DoJXn INN BnAIn, YCtpoiCTBO He paBoTaET DOJNHBIM 6pa3OM, INN erO yPoHHn).
Ecnn yctpoiCTBO KaKeTcXoIOHbIM Ha Ouynb, npn erO BKIOueHNN BO3MOxH He6oNbIooe MepaHne. 3To HopMaIbHoe RAJIeHne, C yctpoiCTBOM BCE BnpAJaKe.

KK-nahenb-3TO BbICOKOTEXHONOHHOe N3dJIne C MaTpue c pa3peweHem O2 Do 6 MmIIIOHOB NIKcenei. Ha naHeN MOrYT NOABnTbCMeKNe YepHbe TOUKN/INI RPKNE ZBEHTbE TOKNI (KpaCHBe, CNHe NIN 3eJeHbe) pa3MepoM 1 ppm.3To He ABnTeC HnCnPaBHOCTbIO Hn Be BnReT Hn POn3BOuNTeHbHOCTb Hn AdExHOCTb YCTPOCTBa.
3a np6nema TaKke BCTpeaeTcB CTOpOHmX npOyKtax He ABnEeTc NObOM IJI O6MeHa NIN DeHxHO Bo3MeueHn (DeHxHO KOMnHcaun).

B 3aBcMocTn O T MeTa npocmOtpa (CneBa/cnpaba/Cbepxy/CHN3y) npKoCTb NCBETHOCt b NaHeH MoKET N3MeHARtbcA.
3TOT npOxCoDNT BBNdy Oco6eHHOCTe CTPOEHN NaHEn. 3To HE CB3aHO C pONBDOJNTeNBHOCTbO YCTPOICTBa H He ABnReTCa HEcnpabHOCTbIO.
OTo6paXeHHe HnOaBxHOro N3o6paXeHn (Ha npMep, Iorotna BeuMaHO KaHana, EKpaHHOro MeHIO, CcEHb N3 BUnDeourpbI) B TeueHne DInTeBHorO BpeMeHn MoKeT npUBeCTN K NobpeXeHIO 3KpaHa N NOBLeHIO OCTaTOHoro N3o6paXeHn. HaCTOnaJra pArTHNa Ha YcToiCtBO He paCnPoCtpaHReTc Ha NoAByHeNe OCTaTOHoro N3o6paXeHn.
He donyckaTe OTo6paXeHnCtTuHOro N3O6paXeHnB TeueHne DInTeJbHO BpeMeHn.
Kpome Toro, octaTochoe n3o6paXeHne IIO KpaM 3KpaHa MoXeT NOBtbcn PnI PnOcMoTe n3o6paXeHn B OOpMaTe 4:3 B TeueHne DInTeJbHoro nepNoDa BpeMeHn.
3Ta npo6Iema TaKke BCTpeaetc B CTOpOHnX npOdykTax, H He ABnEeTc NOBOOM DnA O6MeHa Nn DeHeXHOro Bo3MeuEHH.
3Bykn, n3daBaemble yctpoiCTBOM
Tpeck: Tpeck, KOtOpbMy MoKHO yCblIaTb npn npocmoTe mN BbIKIOueHm TeIeBn3Opa, BblBaH TeIIIOBbIM CxkTHeM PnaCTnKa B pe3yIbTaTe N3MeHHeH TemNepaTpby IN BlaxHoCTn. DaHHbI Wym ABnReTc O6bUHbIM ABlHeHMe npu NcNoJIb3OBAHm IpOdyKTOB, NOdBepKeHHbIX TemNepaTpHOn DeOpMaun.
IydeHne 3nEeKpuecko cEN/xyxKaHne naHEn: n3 BbICOKOcPOcTHoKOMMyTaUHOHHo CXEmbI yCTpoiCTBa MoKeT IcxOHTb TuxNtWm, o6pa3OBAHHbI pnp npoxkDeHm 60JIbWoTO kHa6xoDMOrO dJa pa6OBy UcToPcHb.3To 3aBNCtOT yCTpoiCTBa. DaHHb 3ByK He Bmraet Ha pa6Otu HaJeXHoCTb npOdykTA.
He mCnoB3yIte 3JNEKtpOn3dEINBA BcOKoRHO HapRjKeHnB6m3n TeneBn3opa (HaNPmep, 3JNEKtpnueckkyu MyxOboKy). Bpe3yIbTaTe yCTPOCTBO MOKeT 6bITb NOBpeKdEHO.
PndroTOBka

ПРИМЕЧАНЕ
- PpNBBeHnOe N3o6paXeHne MoXeT OtnuAcbr O T Baueero TeJeBu30pa.
3KpaHHoe MeHIO BaIero TeneBn3Opa MoXeT He3HaHTeBHO OTINuAcbcOT N306paXeHHOro Ha pucyHke.
IocTynbIe MeHIO NnapaMetpbl Moryt OTnuaTbcB 3abncmOCTNOTNCIOJIb3yEMOro NCTOCHNkBAxoDa NIM MoEIN yCTPOJCTBa.
Функиусюгьмогутбынзмehь63увдомлень Дальншем.
-ДяСнжehнэЗергонорблелнэпеклчаite TeleEBn3Op BpeKIM OxuaHЯ.Еси Вь He HamepeBaetecb NcNoB3OBAt b yCTpoIcTB BO TteHneДinteJbHorO BpeMeH, CneDyET BbIKIOHTb erO n3 pO3eTKДЯ ChNxkeHry PuckOB Bo3ropaHn I noTpe6eHnna 3heprn.
3HeprnoTope6bHHe BO BpEmNcNoB3OBAHnMoKet 6bItb 3NaHTeJIbHO CHINKeHOnyTeM YMeHbIeHnApKoCTn IIOCTBeTKn N3OpKaJHnHa 3KpaHe.
KOMIIeKTAuIyCTpOuCTBaMOXeTOTINuYaTbCBA3aBNCMocTnOTMOJI.
CneuΦkaun yCTpoiCTBa nnn coepxahne daHHoro pykoBDCTBa moKeTn3MeHantbcra 6e3 npedBapntbHoro yBeOMHeHH BBNy MoepHn3aun fHKn yCTpoiCTBa.
IIOO6eueHNOITMAMJIbHOrOcoEINHeHnKa6eHnHDMIu USB-ycpOInCTBaDOnKHBIMETbKOpNcPa3bemaToIuHnHO He 60lee 10 MM uWupHnOH He 60lee 18 MM. IcnoJb3yUte ydnnHtJIb, KOTpbI NOdepKnBaET USB 2.0, eCNI Ka6eJIb USB nII nn fni-HaKoNTeNB USB He BCTablaerTcB nopt USB Ha BaWe mTeJeBn3ope.
IcnoB3yIe ceptnphiunpoBaHnbKa6ebbcJorotinomHDMI.
- Ppi n cnoB3OBAHn Hc eptnphiuropoBaHHoro Ka6eH HDM 3KpaH MoXeT OTo6paKaTbC HnPpABnBHO, Mu MoXeT BO3HNKHyTB OUn6Ka NOpKnUoyehn. (PeKoMeHdyEmble Tnbl Ka6eNei HDMI)
-BbICOKCKOpocTHoH HDMI/TM-Ka6beNb (3 M mnn Kopoue)
-BbICOKOcKOpocTHoH HDMI/TM-Ka6eJb c Ethernet (3 M nnn Kopooye)

BHIMAHHE!
IIO6epeHn 6eONaCHOCTN npOOnJNTelbHOrO cPoka cnK6bl yCtpoiCTBa He nCnOJIb3yIte DeTAn, He oO6peHHble N3r0TOBHTenEM.
Kakne-ln60 nobpekdeHn nn yuep6,Bb3BaHHbIe nCIOB3OBAHmE DeTaneH He Oo6peHHbIX npou3BOUHTeMe,He ABJIOCTc rapaHTNHBIM CIVyAeM.
Ha 3KpaHe HeKoToPbIX MoJeNe MoKeT 6bItb TOHKA PJIeHKA - HEOTKIFBAAITE FF
PpHaJneJXHocTn, npno6peTaembIe OTdelenbHo
OTdIbHbIe 3nEMeHTbI KATAIOra MOrTy 6bItb N3MeHeHb IINMOnuNcnpoBaHbI 6e3 yBeDOMneHn. IJI npNo6peTeHn ETrnxPpHaadNeXHoCTeO6paTntEcB K DInepy. DaHbIe YcTpoiCTBa pa6oTaOTToIbKo C COBmecTtMbIM MoEJaMM. Ha3BaHne MoEJI NII eeKOHCTpyKUJI M0KeT N3MeHArTbcra B 3aBNCMOCTn OT OyHKUHOHaJIbHbIX6HOBLeHn, peSeHn PPOIN3BOIDTeJI NII OT eRIOJNTIKN.
(B3aBcHMoCTnOT MoJeN)
OCTaBbTe 10cm (MHHmym) 3a3OpOT CTHeI DnA DOCTaTOHOBHTINAAU.
2 PoiKIOHHTe HHP NtAHN K po3EKe.

BHIMAHHE!
He pa3MeaTe TeneBn3Op B6m3n NCTOCHKOB Tenna, TaK KaK 3TO MoKET npVBecT K NOKApy INN DpyrIM NOBpeXKeHnM.
PerynilpoBka yrna 063opa TeJeBn3opa
(B3aBnMoCTOnOT MoDen)
IobepHnTe TeneBn3Op Ha 20 rpaYcoB BneBO nn BnpaBO, YTO6bl ynuuHTb BuIMocTb C MeCTa IPOCMOTpa.

BHIMAHHE!
Pn perynpOBKe yrna 0630pa yctpoiCTBa 6ydbTe octopoKbI, TTO6bHe npuieMHTb naBbI.
-He donyckaTte 3aueemneHn pyk nnn naeb, T.K. 3To MoKet npBecTN K TpaBMe. PpN cnuKOM 60nbom HaKIOHe TeNEBn3Op MoKet ynaCTb, YTO npBBeTe K erO nobpeXeHIO.
3akpenenne TeleBn3opa Ha cToJe
(B3aBnMocTHoMDoJIH)
3aKpennTe TeneBn3Op HcTone nI npedotBpaueHnHaKnHOHaBnepe, nobpexdeHn nToTeHuaNbHortpaBMPOBaHn.
3aKpenIeHnTeIeBn3OpaHaCToJIe BCTaBbTe N3aTAHNTe KOMNJIeKTHbI BnHT Ha 3aDHeN NaHEIN NOCTaBKn.
Tun A)

4 BnHTa
(3TOT KOMNoHEHT DOCTyneH He IaB BCeX MoJeIe.)
- PnBBeHHeN306paXeHHe MoXeTOTnUaTbCn OT BaUero TeneBu3opa.
Pa3bem CNTEmbl 6e3oNaCHOCTN Kensington HaxoHTcH Ha 3aDHei KpbIuke TeneBnO3opa. IOnoJIHITeJIbHa NHOOpMaun O6 yCTaHOBe nICNoJIb3OBaHHI PnIBeHa B pyKOBoIDCTBE K CNTeMe 6e3oNaCHOCTN Kensington mHa caTte http://www.kensington.com. IpoDeBaHne Ka6eJIa CNTEmbl 6e3oNaCHOCTN Kensington Yepe3 TeneBnO3Op INOTBepCTne B CTone.
3aKpeHne TeIeBn3opa Ha CTeHe
(3TOT KOMNHOENT IOCTUEN He IINBCEX MODeJeI.)
1 BCTabbTe n 3aTaNHeTe 6oTbI cyuKAMn uNn 6oTbI kPOHHTeHOB TB Ha 3aDHeN naHeN TeBn3Opa.
ECINB MecTAXIg60NTOBc yuKAMyXe yCTAHOBHeHbIpyrne 60NTbTOChayana BbIBHTNTeNX.
2 3aKpeNTe KpoHHTeHbHa CteHe c NOMOu6oTOB. CoBMeCTe KPOHHTeHn 6oNTbC yUkAmn Ha 3aDHe nAHeNn TeLEBu3Opa.
3 Kpenkum Hhypom HaTeJXo npBraXitc 60ntbI c yuKaMn K KoHHTeHy. Y6eNTecb B Tom, TTO hHyp paCnoIoxHe TOpN3OHTaJIbHO.

BHUMAHNE!
CneIte 3a Tem, yTo6bI DeTu He 3a6upanncb HHe BuceJIN Ha TeneBnOpe.

PIMMEYAHNE
IcnoB3yIte nIaTOpMy IIN IkaΦ DoCTaTOUHO 6oJIbOu IN npouHb, yTO6bI BbIePxAtB BEYCTpOCTBA.
KpoHHTeINbI, BnHTbI u HhypbI He BXoJrT B KOMNKeT NOCTaBKn. DOnonHInTeNbHbIe akceccyapbl MoXHo npNo6peTn y MeCTHO nnepa.
KpenlleHne Ha cTeHe
Octopoxho npKpeHnTe HacteHHbIKpoHHTeH (npno6peTaembl OTdJIbHO) K3aJHeu qactn TebeN30pa n npKpeHnTe ero K npouHcTHe nepEnHmKyIepnO npLy. dJa MoTHaxa TeneBn30pa Ha cTeHb N3 dpynx CTpOnTeNbHbIX MaTePnaIOB o6paauTecb K KBaIIHnIpOBaHHbIM CneuaIaNCTam. KomNaHMa LG peKomeHnyet Bb3bIBaTb KBaIIHnIpOBaHHOrO MaCTepa IJa KpeJIeHn TeneBn30pa K cTeHe. PekomeHnyETcNcNoIb30BaTb KPOHHTeH dJa HacteHHORo KpeJIeHnLG.Ecnn Bbl NcNoIb3yeTe KPOHHTeH dJa HacteHHORo KpeJIeHn dpyrTO ppon3BOIDNTe, peKomeHnyETcNcNoIb30BaTb KPOHHTeH, KOToPi bOecneHuBAeT HAdExHoe KpeJIeHne yCTpOCTBaHa cTeHe n HAnMue DoCTaTOHOro MeCTa 3a YCTpOCTBOM, dJa Ydo6HOro NoCDcoEINHeHRA BCEX BHEUHX yCTpOCTB.
Y6eIMTEcB TOM, YTO BnHTbI N HAcTeHHbI KPOHHTeH OTBeaIO TcAHdaptam VESA.B cneDyUoSe Ta6mue npNBedeHbI CTaHdapTHbI ra6apNTbI dN KOMNKeTOb HAcTeHHOrO KpeNHeHr.
PpHnAdJeXHoCTN, npNo6peTaembIe OTdEJIbHO (KPOHtEnH dJa HAcTeHHoro KpenHeHna)
| Мо德尔 | 22LX32** 22LX33** 22LX53** | 28LX32** 28LX33** 28LX53** |
| VESA (A x B) 75 x 75 | 100 x 100 | |
| Стондэртын BИNT | M4 x L10 M4 x L10 | |
| Колочтва BИNTOB | 4 | 4 |
| Крочтейн Ддя настеного Крочtenя | LSW140 LSW140 | |
| Мо德尔 | 32LX32** 32LX33** 32LX34** 32/40/43LX54** 43LX31** | 49/55LX34** 49/55LX54** 49LX31** 49LX32** |
| VESA (A x B) 200 x 200 | 00 300 x 300 | |
| Стондэртын BИNT | M6 M6 | |
| Колочтва BИNTOB | 4 | 4 |
| Крочтейн Ддя настеного Крочtenя | LSW240B MSW240 | LSW350B MSW240 |
| Мо德尔 | 60LX34** 60LX54** | 42LX32** 42LX33** 42LX53** |
| VESA (A x B) 300 x 300 | 00 400 x 400 | |
| Стондэртын BИNT | M6 M6 | |
| Колочтва BИNTOB | 4 | 4 |
| Крочтейн Ддя настеного Крочtenя | LSW350B | LSW440B MSW240 |

BHIMAHHE!
Ipeed nepemeuenm uYCTAHOBKOn TeneBn3opa OTKNIOHTe Ka6ebnNTaHn. HecO6NIODeHne 3TOrO npabnMoXeT npVBectn K nopaaKeHHIO 3JKeTpueeCKM TOKOM.
OToeMHHTe NOCTabky Npey UcTaHOBKo HAcTeHHOro KpeNHeHn TeneBn3Opa, BblOnHNB PpoueDpyu NOcEOHNHeHn NOCTabKn B 6paTHOMnopAke.
YCTAHOBKaTeJIeBUN3OpaHaNOTONOKHINHAKJIOHHyCTEHMyMOKET PnIBECTKEROIaDEHNOIIOVYEHNIOTPaBMbl.
CneNyET nCnONb3ObaT b Oo6peHHb KpOHHTeH LG dIy HAcTeHHoro KpeIIeHm I o6paNTbCRA K MeCTHO My DInepy NkBaanMupoBaHHOMCY CneuaJIACY.
He 3abopaunBaIte BnHTbI cN36blTOOH CNOI, T.K. 3TO MOKET PnBecTN K NOBpexdeHIO TeEbn3Opa N NOTepe rapaHTM.
CneJyET nCnObl30BaTb BNHTbI Hn HacteHhBie KpeJIeHn,OTBeuAOUme cTaNapTy VESA. IapaHTnHe paCnpoctpaHReTcHa NOBpeKdEHH mN TpaMbI, NOUYeHHbIE B pe3YnbTaTe HnPpAbNbHoro nCnObl30BaHn MIn NCnObl30BaHn HnPpAbNbHbIX akCECCyApOB.
ДиногвintOB CBHeHNe CTOpOHy 3aHNe KpbIuKn He DoJnxHa npeBbIaTb 8 MM. (ToIbKO dJa 22/28LX32, 22/28LX33, 22/28LX53**)
KpoHHTeIN Dnla HacteHHOro KpennenHn
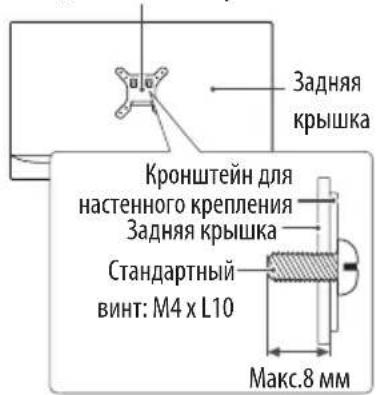

PIMMEAHNE
CneNyETNCN0JIb3OBAbBnHTbl,yKa3aHHbIeBCneuΦnKaunDIN BnHTOBCTAHapTaVESA.
KOMPNEKT KPOHHTeHa Dnla HacteHHOro KpeIeHHaCTcH NHTyKUne IIO MOHTaXy HEO6XOdMbIMN KOMPJIeKTKUOUMM.
HacteHHbI KPOHHTeIN HABJIETCA DOnOHHTeHBIM akceccyapOM. DOnOHHTeHBHbIe akceccyapbl MOxHO npno6peTn Y MeCTHO dJIepa.
HnHa BnHTOB MoKET 3aBNCbT O KPOHtEHa DnHaCTeHHOrO KpennHeNy.86eNTecb B TOM, YTO BnHTbI IMeOT COOTBetCTBYIOYIOIINHy.
- DOnONHHTeBHa HΦOpMaunn PnpBeHb ApyKoBOcTBe K KPOHHTeHny DaHCTeHHOrO KpennHeHn.
Ipyu yctaHOBKe yCTpoiCTBa InHaCteHHoro KpeHneHn HcNoIb3yTe 3aunTHyo 3arnyuKy. 3aynuKa 3aunTIT OTBepCTne OT cKnNBAHn Nbln N 3arpzHeHn. (ToIbKO ecnn npedocTabenEJIeMeHT, npUBeHNbB B CneDyUoJe FOpMe)
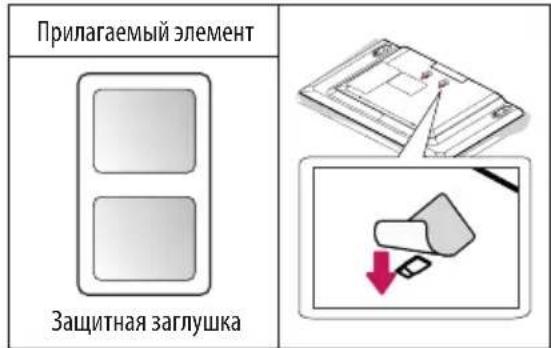
- Ppi KpeIeHn TeneBn30pa K KpoHHTeHy dI NaCTeHHoro KpeIeHn IpyrO npOn3BOJntEBACTaBbTe fIrypHbIe IaIbI HaCTeHHoro KpeIeHn B OTBepCTn IJI KpeIeHn TeneBn30pa K CTHe IJI coXpaHEn Iero BEpTnKaJIbHO rnoJKeHn. (ToIbKO ecNI ppeIOCTaBHe HJIeMeHT, pPiBeJeHbI B CneDyIOUeI φOpMe)
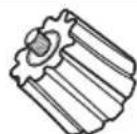
Ppunaraembni 3nemeHT
Hrypnaaia6a HACTeHHOro KpenneHn

1 Pocne ydaJIeHn3aIHTHO6yMaHnJeHTbI Dual LockTM npKNeTe erO K TeneBn3OpU nIuΦpOBn pncTaBKe, KaK Noka3aHo Ha pncyHke.
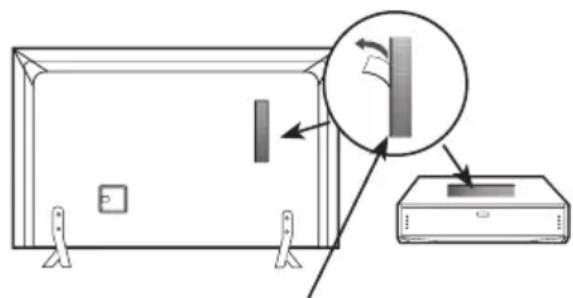
Dual LockTM
2 PnKpeMe npctabky K TeBn3opy c nOMoUbIeHTb Dual Lock.
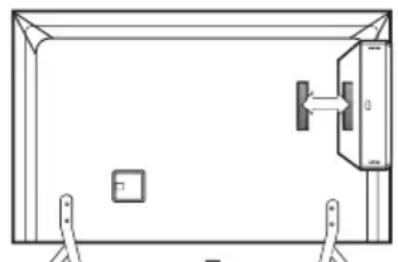

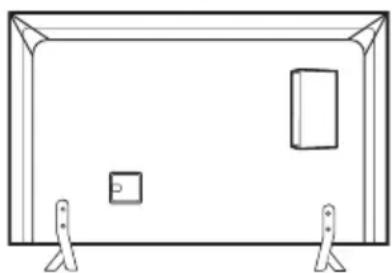

PIMMEUHNE
- 6eINTEcB, yTO Ha NOBepxHocTN yCTpOoiCTBA Het NocToPOHHNX BeueCTB, n3aTEM pIoTHo npICoeHNHTe JeHTy (Dual LockTM)
- Пара псоeHHeHem npuctabKn K TebeB3opy, noJoknte, noka npcoeHHeHHa Jenta Dual LockTM npocoxhet, no KpaHne Mepe, Tpr dHa.
(B3aBcHMoCTnOT MoJeIN)

BHIMAHHE!
- Пожклочи TeJeBn3op KадаNTepу NITaHЯпepMeHHoro TOka,песд Tem KaK Пожклочи Tb WHyp ПИТаHЯ TeJeBn3opa K pOZETke.
PoiKJIoueHneMoDyJnCI
(B3aBcHMoCTnOT MoJeIN)
IpoCmToP 3aKoDnPoBaHbIX (IIaTHbIX) KaHaJIOB BpeXIMe LcΦpOBOr TB.
- PpOBepbTe, npaBnBHO nU yCTaHOBJIe H MOyIb CI B pa3bEm dIa KapTb PCMCIA. HenpaBnBHa YCTaHOBKa MOyIa MoKet pnpBeCTN K NoBpeXdEHHIO TeJeBn3Opa I na Pa3bema Ia KapTb PCMCIA.
EcnB TeneBn3ope OTCyTCTByHT BnDeo36paXeHne N 3Byk npi noKIOueHHOM Cl+ CAM, cBAJNTecb c onepaTopom KIneHTCKo CnyK6bl Ha3emHorO/ka6ebHoRo/cnyTHMKOBOr BeuaHna.
ПовлоченecnomоьEuro CKAPT
(B3aBnCmOCTNOMoEIN)
Ia nepeaun aHaIorOBbIX BnDeo- n ayDIOcHAnOB OT BHeJHero yCTPOINCTBa Ha TeBn3Op. IOnKInOHTe TeneBn3Op K BHeUHemy yCTPOINCTBy c NOMOsbIO Ka6Era Euro ckapt.
IcnoIb3yemblKa6eBckAPTdoJXeHMeTb3aunTyCuHaHa.
Подключене ВhecнхДиHamIKOBΚaydnObblxOу
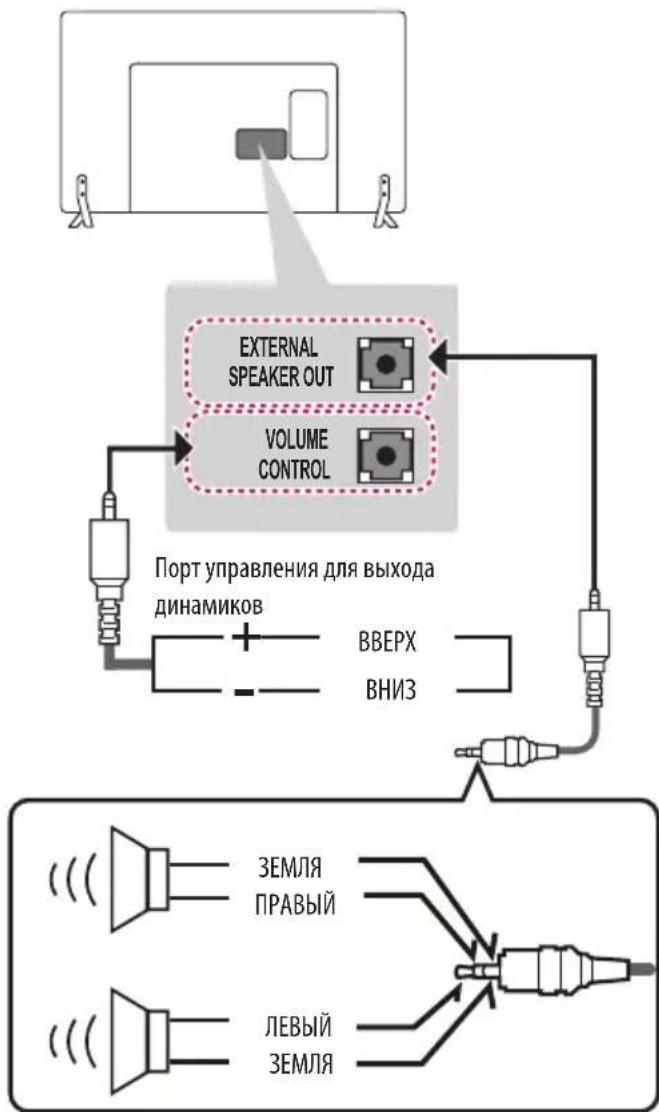
UnpabJIeHne rpoMkoctbIe uepe3 nopT
XapaKTePnTmK Ka6eJr
IcnoB3yTeToBkoC3-KoHTaKTHbIMpa3beMOMCTepeo3,5MM.
Hactpoika cetn
IopklioueHne K npoBoHOcTeN
(B3aBcIMocTnOTMoJeH)
JaHHbI TeBn3Op MoKeT 6bITb NOKJIIOHeH K cepBepy Pro:Centric c nOmoUbIO npTa LAN. Nocne fN3uYeCKoRTO NOKJIIOueHnRA TeBn3Op DOJKeH 6bITb HAcTpoE HnIpa60bI B Cetn. NOKJIIOHTe Ka6eB K npTy LAN moEma nn poyTePa B cepBepe Pro:Centric K npTy LAN TeneBn3Opa.
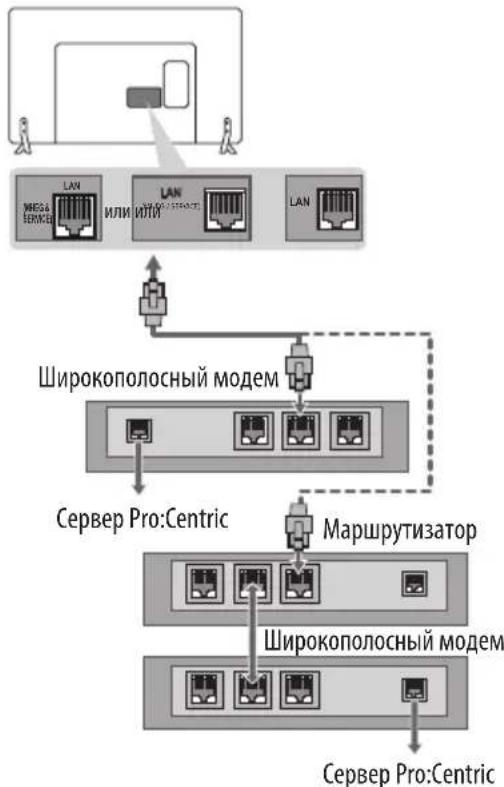

BHIMAHHE!
He noqknouaTe moynbHbI TepeonHbIK a6eBk npTy LAN.
IockoIbky cyueCTbyOT pa3nHbIe cnoCo6bl NOkNIOUeHn, CneDyIte uHCTpyKzIaM BaIero OepaTopa CBa3N IIN INHTepHeT npoBaIdepa.
Дргне подкюець.
IopKnIOuHTe TeneBn3Op K BHeUHEmy ycTpoiCTBy. IInr NOnyuHnHaunnyuIero KaueCTBa n3o6paKeHnN 3Byka POnkIoUHTe TeneBn3OpK BHeUHEmy yCtpoiCTBy HDMI-Ka6enem. He BCE Ka6enn BxOJrT BKOMIIeKT NOCTaBKN.
NylbTДиctaHcNoHHoro ynpablenna (nybT Dy)
(B3aBcMOCHTNOTMODEJIH)
OnucaHnB DaHHOM pyKOBOCTBE OTHOCATK KHOKNKaM Ha NylbTe Dy. BHNMaTeJIbHO npouHTaTE HAcTcHaepyKOBOCTBO dIra npabNlBHorO mNoJIb3OBAHnnybTa Dy.
Yro6b3aMeHntb 6atapen,OTKpoTe KpbIuKy 6atapeHoro OTceKa, 3aMeHnte 6atapen (1,5BAAA)cyuETOMn,ka3aHHbIX Ha MapKnipOBKe B OTEKe, n 3aKpOte KpbIuKy OTceKa. IInn 3BLeueHn8 6atape BblONHtE DeCTBnno INx YcTaHOBKe B o6paTHOM NopRKe.

BHIMAHHE!
He nCnOJb3yIte HOBIIe 6aTapeu BMeCTe CO CTapbIMN,3TO MOKET Bbl3BaTb NOBpeKdEHN EYNbTa IY.
KOMNKeTauNA TB pa3nUHbIM NyIbTaMn Dy, B 3aBcMocTn OT MODEIN IN CTpaHb.
LIST Bbl3bIbAeT CnncOK KaHaIOB.
Q.VIEW Bo3BpaT K npdeIduyueMe My KaHany.
B
+HactpoNka rpoMkoCTn.
FAV Doctyn K Cnncky N36paHHbIX KaHaNoB.
GUIDE Ioka3 nporpaMMbI nepea.
MUTE 1bIKIOueHHe 3Byka.
AHepeKniUOeHne KaHaIIOB.
PAGEVIOCTpaHmHHe npOJIcTBiBaHne B CnIcKe.
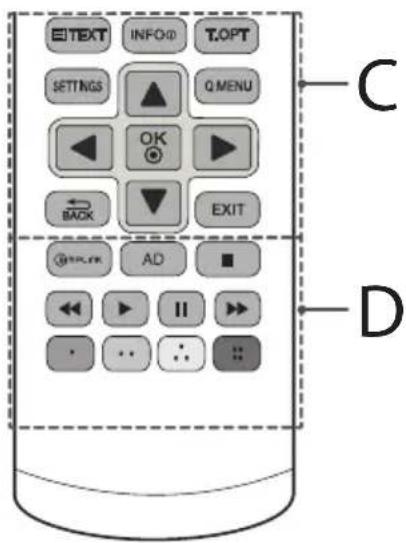
C
KhoNk TEJETEKCTA [EXT/T.0PT) 3TN KhoNk NcNoJIb3yIOTCnIaP6Oblc TeJETEKCTOM.
INFO 0To6paXeHHe INHΦOpMaunn O TeKyuEe nIporpaMMe uBXOJe.
SETTINGSDOCTYINKIIaBHOMy MEHO.
Q.MENU Doctyn K 6bICTpOMy MEHIO.
OKBb6op MeHIOIINI npaMeTpoB IN NOITBePckJdeHne BBOda.
KhONKn Habnraunn (BBepx/Bn3/ BneBo/Bnpabo) PpokpyKa MeHIO Nn npaMeTpOB.
BABbpatHa npebidyuynypoBeHb.
EXIT 3akpbitne okoh npocmotpa Ha ekpahe n Bo3bpaT K npocmotpy TB.
D
MPLINK YnpabHeHne BnDeoyctpoCTBaMn, NOKnIOeHHbIMN
c nomoHIO HDMI ka6eIa, uepe3 fynKcuio HDMI-CEC. OTkpbBaet MeHIO HAcTpoE «SIMPLINK».
AD PnHaKaTm KKnKu AD BkIouaetc FyHKun 3BykoBbIX
ONINCAHNI.
KhOnKn ynpaBneHn(,,II,,)ynpaBneHn BmHo
«MЛьТIMЕДИА» «Ли МЕн�о SIMPLINK-COBМECTMыxучтpoNTCB(USB,SIMPLINK)
UBeTHbIe KnaBmN IOcTyn K CnEuaJIbHbIM OyHKuIaM
HEKOTOpbIX MeHIO.
::KpaHaj,3eHah,XeHTaH
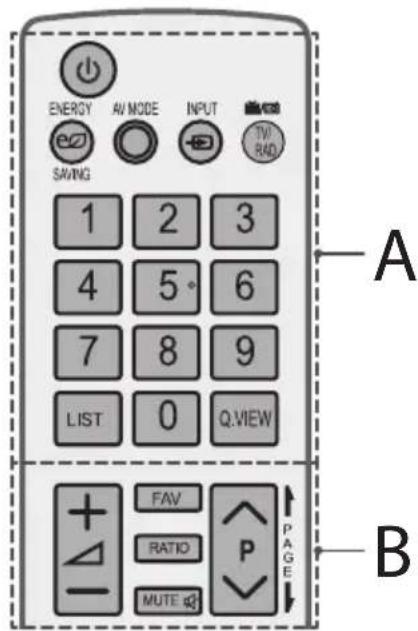
A
(NITAHNE)BkIOUeHne HbIKIOUeHneTeIeEBn30pa.
ENERGYSAVING Perynnpobka npKoctn 3kpaHa n CHNXeHNA 3heprnontpe6neHn.
AV MODE Bb6op aanTnpoBaHbIX K npocMoTypeKmaHa.
INPHeHHeHnIcTOUHnKa BXoHOrO CmHaHa.
TV/RADpeKIOueHne pexMmOB TB/PaIIO.
UHPOBbIe KHOHKn BBOHOMepa KaHana (BBOHcEN).
LIST Bb3bBaeT CnncOK KaHaIOB.
Q.VIEW Bo3BpaT K nppebIyUeMy KaHaNo
B
+HaCtpoKa rpoMkOcTn.
FAV DocTyN CnncKy n36paHHbIX KaHaNoB.
RATIO N3MeHeHHeΦoMaTa ΕΚpHa.
MUTE bIkioueHne 3Byka.
A P V IpeeknueHne KaHaIIOB.
PAGEIoctpaHnHoe npOJIbBaHneB Cnncke.
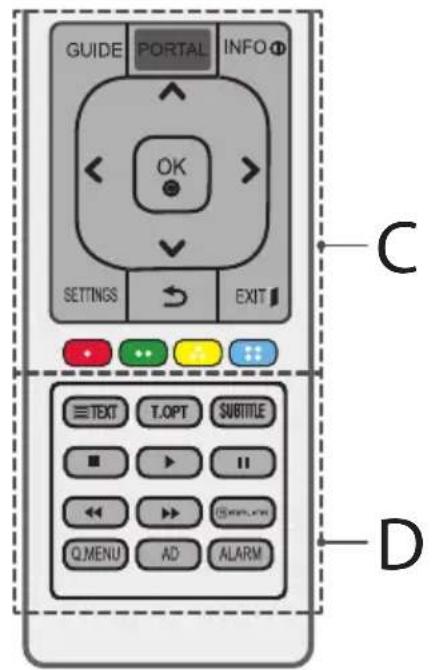
C
GUIDE OTo6paXeHHe nporpaMMbI nepeDaU.
PORTAL OTo6paXeHne nCKpbITNe roCTnHmUHO HHTepaKTNBHO MeHIO.
INFO 0To6paKeHne INΦopMaun O TeKuεη npOrpamme n BxoJe.
KhONKn HABURAQUIN (BBePx/BHn3/ BNeBO/BnpaBO) PpOKpyKa MeHIO NnnapaMeTpOB.
OK GBb6op MeHIOI npaMeTPOB N IOITBePKeHne BBOda.
SETTINGSDoctynKtnaBHOmyMeHIO.
(HA3AД) Bo3BpTaH npebIyuyn ypoBeHb.
EXIT 3aKpbTMe OKOH npocMToPa Ha 3KpaHe N Bo3BpA T K npocMTopy TB.
UBeTHbIe KJIaBnHIN DoCTyn K CneuaNbHbIM FyHKnM HEKOTOpbIX MEHO.
YcTpaHHeH HeNCnPaBHOCTeI
IyuyuweHnKaueCTBa pa6oTbI yctpoiCTBa peKomeHdyetc
OboHBeHne BepnIO (PpOgpaMMHO o6ecneHn). POKyNaTeH
CneHyET y6eHTbcraB COBMecTmOCtN o6OpYOBaHn C npOrpaMMbIM
OeCEneHem LGE. PnHeo6xOImocTn pOKOHcyNbTpPyiTecb
CnpEcdTabnteHem KomnaHn LGE n3arpy3nte nepecmOTpeHHyU
BepnIO IO B cootBcTcbn CpKOBODCTBOM, npEOCTabNeHHbIM LGE.
TeneBn3Op He pearnpyET Ha KOMaHdbI NynbTa DnCTaHNoHHoro ynpabneHn (nybTa DY).
- PpOBeBpTe DaTChk DnHa TeNeBn3OpE NIOBtOpTe NOBtKy.
- 6eIntecb BOTcyTCTBm npenrTCTBm MeKny TepeBu3opom nnybTom y.
- 6eDNTecb, yTo 6aTapeH haojTcB pa6ooyem coCTOHN npabunboYoYCTAHOBHeHb( K, K)
TB He BKNIOUaTeTcra:OTCYTCBlyIOT N3O6paKe-Hne H 3ByK.
Y6eNTecbBTOM,HTOTeJIeBn3OpBKNIOHcN
- Y6eINTecb B TOM, UTO UNHyp NITaHn NOKNIUOeH K PO3eTke.
- Y6eIITecbBTOM,HTo p03ETKa pa60TaET,NOJKNIOUHKB Hei DpyrueyCTpoiCTBa.
TeneBn30p camOpnpu3-BoIbHo BbIKIouaeTcA.
- PpOBePbTe npaMeTpbl ynpaBHeHn3HeprOnTope6HeHnEM Bo3MoXHO, pON30WeI c6oB B CETn 3NeKtpOnTuHaHn.
-Поберпг,Включehалфункua ABr.рж.oxuДаня(B 3aBnCmOCTHOTMoJeN) /TaMep cHa/BpeMa BbIK.B MeHOBPEMa. - EcnTLeEBN3NOHbCnHAnOTcyTCTByetB TeueHne 15 MmHyT, TELEBN3Op BbIKIOaETcABTOMaTHeCKN.
PnnooCoeHHeHH K KombItepy (RGB/HDMI/DVI), oTo6paXaetc coo6ueHne "Het CnHana" nn "HeBepHbI opMaT.
BbIKIOUeHHe/BKIOUeHHe TcEeBUN3opa c NOMOuBIOyNbTa DY.
- Nobtophoe nodkloucheHe Ka6eJI RGB/HDMI.
- Ipees3anyctnte KOMnIbIOpTe, noka TeJIeBn3Op BKNIOueH.
BAKHAR INHΦOPMAÇNIA
IcnoB3yTe 3Tu HnOpMaunIO Jny yctpoiCTB cepu LX540S, LX530S.
Bb mojete 3arpyntb nporpamMHOe oecneueHme SuperSign n pykoBoCTBO n Oeknnyatau TeneBu3opa c Be6-caTa LG Electronics. Nocetnte www.lgecommercial.com/supersign dna 3arpy3kn IIO u www.lgecommercial.com/supersigntv dna 3arpy3kn pykoBoCTBa n Oeknnyatau TeneBu3opa.
IporpammHoe obecneueHne: SuperSign WServer_Lite_vx.x.x_Setup.zip
SuperSign C_v.X.X.X_Setup.zip
SuperSign W_Editor_vx.x.x_Setup.zip
PykoBoCTBO:SuperSign WServer_Lite_vx.x.x_Manual.zip
SuperSign W_Editor_vx.x.x_Manual.zip
SuperSign C_vX.X.X_Manual.zip
TEXHnueCKne XAPAKTEPNUKn
1 TOnbKO DnRA MoDeneC nOeepKkO cnTHNKoBOr TB /ToBko DnRA MoDene C noepKko DVB-T2

[JaTota DaNcKpeTn3aun] 8Kt~48Kt
[Поддөрхка] MPEG-4
ΦopMaT Φaɪna:WMA
[Bunpeit] 128 K6nt/ceK ~ 320 K6nt/ceK
[HaToTaIuKpTeu3aun]8KU\~48KU
[Подэржк] WMA7, WMA8, WMA9 СтандарТ
- DopMaT φaɪna: WMA 10 Pro
[BntpeT] 768 K6nt/cek
[KaHan/chaTota dmCKpeTu3aunm]
M0:2-KaHaNbHbI np4 4K
(Kpome peximma LBR),
M1:5.1-kaHaJIbHbI np48KtU,
M2:5.1-kaHbHb npn 96K
[Подержka] WMA 10 Pro
ΦopMaTφaMn:A:OGG
[BuTpeI] CbO6OaHbIΦOpMaT
[JaTota dNcKpeTn3aun] 48 KfU
[Подөрөлка]OGG Vorvis
IopdepxuBaembl fOpMaTbI n3o6paXeHn
Category:2D (jpeg, jpg,jpe)
[DocTyHbIΦopMaΦaIIOB]SOF0:6a3OBaJIHHNA,
SOF1: nocleobatelbHoe paWippeHne,
SOF2: nporpeccnBha pa3BepTka
[Pa3Mep fTo] MInHmAlnbHy: 64 x 64,
MakcmaIbIhIy:O6bIuHoroTnIa:15360 (W) x 8640 (B),
PorpccBHyTn:1920 (I) x 1440 (B)
KateropnBMP
[Pa3mep foTo] MInHmMaJIbHbIi: 64 x 64, MaKcImaJIbHbIi: 9600 x 6400
Kateropn:PNG
[OctynhbiopMaTfaino]yepeccpoHybnoctpoHyb
[Pa3Mep fOTo] MInHmMaJIbHbI: 64 x 64, MaKcImaJIbHbI:
UpeceIpOHyb:1200x800,IOcTpoHyb:9600x6400
- OopMaTbI n3o6paXeHnBMP n PNG mOryT oTo6paXaTbcR MeJneHHe oOpMaTa JPEG.

LG
Life's Good
MoIeNb n cepuHbH Homep TeIeBn3opa yKa3aHbHa 3aHHe N aHEn YcTpoNCTBa. 3aIIuNTe HxKeyka3aHHbIe daHHbIe, Ha cnya, eCn Bam Notpe6yETc TExHueckoe 06cIyKINBaHne.
MOДЕЛb
CEPNHbIN HOMEP
MANUAL DE USUARIO
[Sopporté] ADIF, ADTS
[Sopporté] WMA 10 Pro
SOF1: extensiono sequencial,
SOF2: progresivo
[Tamano de Foto] Minimo: 64 x 64,
Maximo: Tipo normal: 15360 (ancho) x 8640 (alto),
::Kirmizi, :Yesi,Sar, :Mai
D
TELETEX dugmeleri EXT/T.OPT) Bu dugmeler teletext icin kullanilr.
SUBTITLE Dijital modda tercih ettiiginiz altayzii ciagirr.
(Yalnizca LX32**, LX33**, LX34**, LX31**, LX540S, LX530S)
| Çozünurlük | Yatay Frekans (kHz) | Dikey Frekans (Hz) |
| 640 x 350 31,468 | 70,09 | |
| 720 x 400 31,469 | 70,08 | |
| 640 x 480 31,469 | 59,94 | |
| 800 x 600 37,879 | 60,31 | |
| 1024 x 768 48,363 | 60,00 | |
| 1152 x 864 54,348 | 60,053 | |
| 1360 x 768 47,712 | 60,015 | |
| 1280 x 1024 (Sadece FHD) | 63,981 60,020 | |
| 1920 x 1080 (Sadece FHD) | 66,587 59,934 | |
| 1920 x 1080 (Sadece FHD) | 67,50 60,00 |
1:Yalinizca LX341, 42LX330, 42LX320, LX31*, LX540S, LX530S
HDMI/DVI-PC destekli mod
(PC modu icin HDMI IN 1'i kullannin)
(Yalnizca LX31**, LX32**, LX33**, LX34**, LX53**, LX54**)
| Çozünurlük | Yatay Frekans (kHz) | Dikey Frekans (Hz) |
| 640 x 350 31,468 | 70,09 | |
| 720 x 400 31,469 | 70,08 | |
| 640 x 480 31,469 | 59,94 | |
| 800 x 600 37,879 | 60,31 | |
| 1024 x 768 48,363 | 60,00 | |
| 1152 x 864 54,348 | 60,053 | |
| 1360 x 768 47,712 | 60,015 | |
| 1280 x 1024 63,981 | 60,020 | |
| 1920 x 1080 (Sadece FHD) | 67,50 60,00 |
1:Yalinizca LX341, 42LX330, 42LX320, LX31, LX54*, LX530S
LG Electronics Inc. LG Twin Towers 20, Yeoi-do-dong, Yeongdeungpo-gu, Seoul, KOREA 150-721
Tel:82-2-3777-1114
Yetkili Servisler
Degerli Musterimiz,

- Safety and Reference
- Safety instructions
- WARNING
- CAUTION
- Generated Sound
- Preparing
- NOTE
- Separate purchase
- Maintenance
- Cleaning your TV
- Screen, frame, cabinet and stand
- Power cord
- Lifting and moving the TV
- Using the joystick button
- Adjusting the Menu
- Mounting on a table
- Adjusting the angle of the TV to suit view
- Attaching the TV to a desk
- Using the kensington security system
- Securing the TV to a wall
- Mounting on a wall
- How to use Dual LockTM
- Connections (notifications)
- Antenna connection
- Satellite dish connection
- Adapter connection
- CI module connection
- Euro scart connection
- Network setup
- Wired network connection
- Other connections
- Remote control
- A
- B
- C
- D
- Licenses
- DOLBY. DIGITAL PLUS
- HOMI H3D-DEFINITION MULTIMEDIA INTERFAGE
- DIVX. HD
- Open source software notice information
- Troubleshooting
- Important information
- Specifications
- HDMI/DVI-DTV supported mode
- RGB-PC supported mode
- HDMI/DVI-PC supported mode
- Component port connecting information
- Supported video formats
- Supported audio formats
- Supported photo formats
- Jalai Jai
- aag jatll
- Jai 1a jy y
- Juaia
- ()
- Dual LockTM
- a_i = x_i - 1 + x_i
- g
- i
- YnooTnpiOeVcOpqEc nXou
- PYKOBODCTBO NOIb3OBATEJIa
- PykoBoDCTBO O TEXHnKe 6e30paCHOCTN
- ПразвILA NOTEXHnKe 6e30napCHOCTN
- PNEyPEXKDEHNE!
- BHIMAHHE!
- 3Bykn, n3daBaemble yctpoiCTBOM
- PndroTOBka
- ПРИМЕЧАНЕ
- PpHaJneJXHocTn, npno6peTaembIe OTdelenbHo
- PerynilpoBka yrna 063opa TeJeBn3opa
- 3akpenenne TeleBn3opa Ha cToJe
- 3aKpeHne TeIeBn3opa Ha CTeHe
- BHUMAHNE!
- PIMMEYAHNE
- KpenlleHne Ha cTeHe
- PpHnAdJeXHoCTN, npNo6peTaembIe OTdEJIbHO (KPOHtEnH dJa HAcTeHHoro KpenHeHna)
- PIMMEAHNE
- PIMMEUHNE
- PoiKJIoueHneMoDyJnCI
- ПовлоченecnomоьEuro CKAPT
- Подключене ВhecнхДиHamIKOBΚaydnObblxOу
- UnpabJIeHne rpoMkoctbIe uepe3 nopT
- Hactpoika cetn
- IopklioueHne K npoBoHOcTeN
- Дргне подкюець.
- NylbTДиctaHcNoHHoro ynpablenna (nybT Dy)
- YcTpaHHeH HeNCnPaBHOCTeI
- BAKHAR INHΦOPMAÇNIA
- TEXHnueCKne XAPAKTEPNUKn
- IopdepxuBaembl fOpMaTbI n3o6paXeHn
- MANUAL DE USUARIO
- HDMI/DVI-PC destekli mod
- Yetkili Servisler
Brand : LG
Model : 60LX540S
Category : Television