
FVP1 - Printer SONY - Free user manual and instructions
Find the device manual for free FVP1 SONY in PDF.
| Product Type | Color video printer |
| Brand | Sony |
| Model | FVP-1 / FVP-1E |
| Dimensions (W × H × D) | 301 × 83 × 246 mm (excluding protruding parts) |
| Weight | Approx. 3 kg |
| Power supply | FVP-1: 110-120 V AC, 50/60 Hz; FVP-1E: 220-240 V AC, 50/60 Hz |
| Power consumption | 72 W during printing, 13 W in standby |
| Print method | Thermal dye sublimation transfer (3 passes: yellow, magenta, cyan) |
| Print resolution | 1.41 million pixels (1,376 × 1,024 dots) |
| Maximum print size | 114 × 85 mm |
| Number of gray levels / colors | 256 levels per color (24-bit), approx. 16.77 million colors |
| Print time per sheet | Approx. 100 seconds (excluding data transfer) |
| Supported paper types | Standard, adhesive (1 label or 16 labels per sheet) |
| Print cartridge | Ink ribbon (up to 50 prints) – sold as a set with paper |
| Video input connectors | VIDEO INPUT (1 Vp-p, 75 Ω, unbalanced), SVIDEO INPUT (4-pin DIN) |
| Video output connectors | VIDEO OUTPUT (1 Vp-p, 75 Ω, unbalanced) |
| Floppy disk drive | 3.5-inch, 2HD 1.44 MB, MS-DOS format |
| Optional accessory | Automatic feeder VPF-A1 (up to 25 sheets continuous) |
| Operating temperature | 5 to 35 °C |
| Cleaning and maintenance | Soft dry cloth; mild detergent if necessary; never use solvents |
| Safety | Use only on specified voltage; do not open the case; avoid humidity and dust |
| Consumables (print kits) | VPM-P50STA (standard), VPM-P50WSA (1-label adhesive), VPM-P50S16A (16-label adhesive) |
Frequently Asked Questions - FVP1 SONY
User questions about FVP1 SONY
0 question about this device. Answer the ones you know or ask your own.
Ask a new question about this device
Download the instructions for your Printer in PDF format for free! Find your manual FVP1 - SONY and take your electronic device back in hand. On this page are published all the documents necessary for the use of your device. FVP1 by SONY.
USER MANUAL FVP1 SONY
Digital Color Printer
取叢説明書
JP
你買上上伊的才加怎如怎也。
警告
Operating Instructions
GB
Mode d'emploi
FR

FVP-1/1E
1998 by Sony Corporation
警告
安全のたてに
CAPTURE 23, 26, 31, 39
CLEARALL 32
CLOCK SETpota. 13
D
DATEスイチ 29
E
ENTER 22
F
FD 21,30
1
m = 311
时刻表示的 14
準備する 10
仕樣 50
使用かのロドビ一
10
七
静止画 25
设置上的口注意 42
于
Trelvにつなく 10,11
電源につねく 12
卜
動画 25
同画面分割...31,33
動作中LANP 21
特長 6
時計合わせ 13
取出レバ一 17
二
入力画 21,26
入力为選21
入力切換の 25
业
日付也を予卜する 29
比才画像静止画上
保存 40
比才機器に. 11
比才接续个一. 10
標準徴ト 21
7
複製の禁止事項 43
付属品 7
PLRINTI-1TJ
入る 16
交换的 17
一八一の
組み合わせ 15
Prlntb中兰
23, 27, 39, 46
plinted
taipl 10
PRLFINTBAPCK 15,48
PRLFINTPB-PA 15,19
19
FlrntbM-dy
22,26,30~36
PrlntbM-1d早見表 51
⑤ 裹正处理 26
口口一
画像を複トする .21
插入的 10
取扌上上的口注意 42
Floppb一德斯克尔
Prrnt 34
□口末卜指定 38
分割PRLFUT 30,32
A
一吉切川换.. 22
一八一补充兰
24, 27, 46
M
卡力38
X
M毛一画 23
U
拉比蒙工拉一兰.. 46
↓
連續複製ト 24,28
お問い合わせ用紙
コビ一をとてお使い〈だせい。
To avoid electrical shock, do not open the cabinet. Refer servicing to qualified personnel only.
This symbol is intended to alert the user to the presence of uninsulated "dangerous voltage" within the product's enclosure that may be of sufficient magnitude to constitute a risk of electric shock to persons.

This symbol is intended to alert the user to the presence of important operating and maintenance (servicing) instructions in the literature accompanying the appliance.
- Microsoft, MS, MS-DOS and Windows® are registered trademarks of Microsoft Corporation in the United States and other countries.
- IBM PC/AT is a registered trademarks of IBM Corporation of the U.S.A.
For Customers in the U.S.A.
Owner's Record
The model and serial numbers are located on the bottom. Record the serial number in the space provided below. Refer to this number whenever you call upon your Sony dealer regarding this product.
Model No. FVP-1/1E
Serial No.
WARNING
This equipment has been tested and found to comply with the limits for a Class B digital device, pursuant to Part 15 of the FCC Rules. These limits are designed to provide reasonable protection against harmful interference in a residential installation. This equipment generates, uses, and can radiate radio frequency energy and, if not installed and used in accordance with the instructions, may cause harmful interference to radio communications. However, there is no guarantee that interference will not occur in a particular installation. If this equipment does cause harmful interference to radio or television reception, which can be determined by turning the equipment off and on, the user is encouraged to try to correct the interference by one or more of the following measures:
- Reorient or relocate the receiving antenna.
- Increase the separation between the equipment and receiver.
- Connect the equipment into an outlet on a circuit different from that to which the receiver is connected.
- Consult the dealer or an experienced radio/TV technician for help.
CAUTION
You are cautioned that any changes or modifications not expressly approved in this manual could void your authority to operate this equipment.
CAUTION
To prevent electric shock, match wide blade of plug to wide slot, fully insert.
CAUTION
The nameplate and graphical symbol are located on the bottom enclosure.
Table of contents
Getting Started
Features 4
Unpacking the printer. 5
Identifying the parts. 6
Setting Up
Connecting the printer 8
Inserting the floppy disk 8
Connecting to the video equipment .... 9
Connecting the AC power cord 10
Adjusting the clock 11
Using optional supplies (print packs) 13
Loading the print cartridge 14
Inserting the print paper. 16
Printing
Printing an image recorded on the floppy disk 18
Printing an image from the video equipment 21
Making Various Prints
Printing the date 24
Making split prints 26
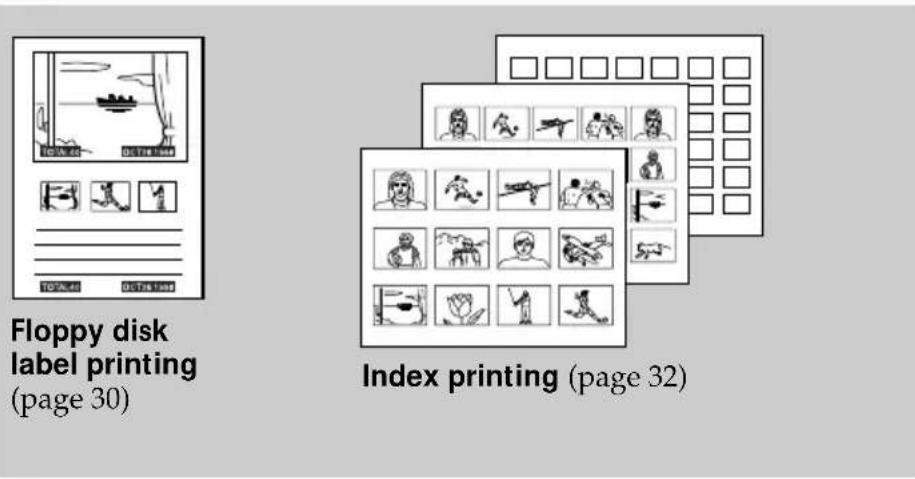
Making a label for a floppy disk. 30
Making an index list of images. 32
Printing images specified with the Printer Utility 34
Recording the video picture as a still image 36
For Your Information
Precautions 38
Troubleshooting 41
Optional supplies (print packs) 46
Specifications 47
Chart for various print mode 48
Index 49
Features
With the Digital Color Printer FVP-1/1E, you can print images from the Digital Mavica and the video equipment such as a VTR or camcorder.
Fine printing with 1.41 million pixels
Since the printer has printing resolution of 1.41 millions pixels, you can print images of small pictures and characters near-photo quality.
Direct printing of the image from the Digital Mavica
You can directly print the images recorded with the Digital Mavica without a PC, by inserting a recorded 3.5-inch floppy disk into the printer. You can also print images which are specified with the Digital Mavica or the supplied printer utility all at once.
Printing and saving images from the video equipment
By connecting the video equipment such as a VTR and camcorder, you can print the input images. You can also save the input images on the floppy disk.
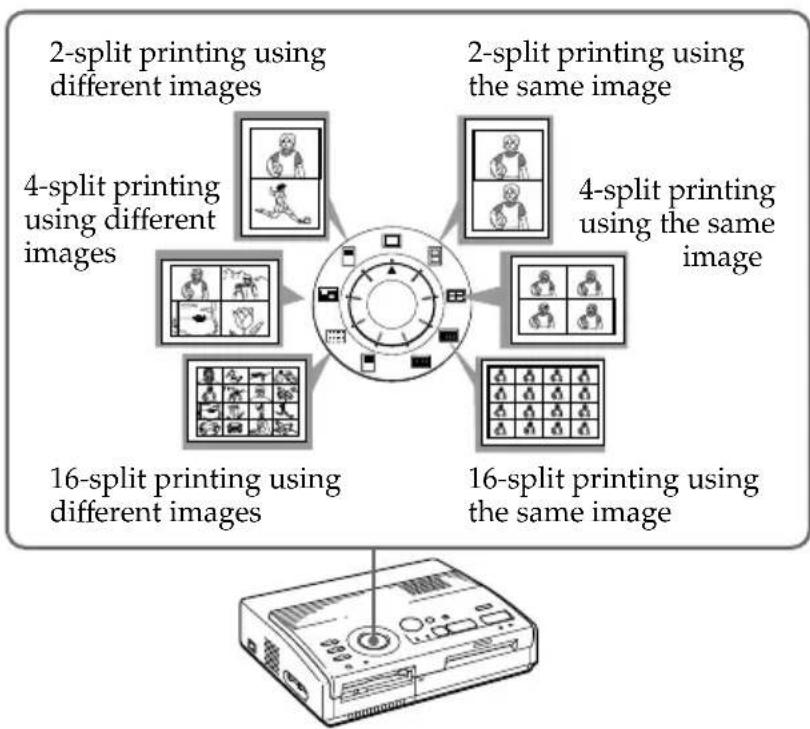
Various types of printing
You can make various prints such as split planes, calendars, labels for floppy disks and an index print of the specified images.
More types of various printing using supplied software
With the supplied printer utility software for Microsoft Windows® 95/98/NT4.0, you can add a frame to the image, make a postcard and a calendar. You can also make images with your PC then store on a floppy disk for printing. For details, refer to the user's guide of the printer utility.
Printing 25 sheets continuously
With the optional Automatic Feeder VPF-A1, you can print up to 25 sheets continuously.
Unpacking the printer
Make sure that the following accessories are supplied with your printer.
- AC power cord (1)
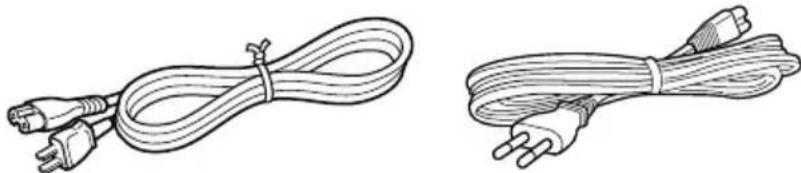
(For the FVP-1) (For the FVP-1E)
Video connecting cable (1)
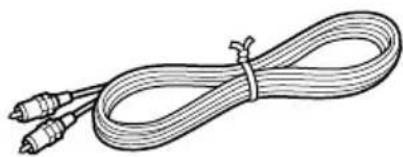
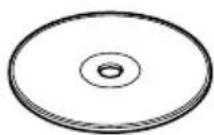
CD-ROM (for Microsoft Windows 95/98/NT4.0) (1)
- Instruction Manual (1)
- User's guide for the printer utility (1)
Warranty (1)
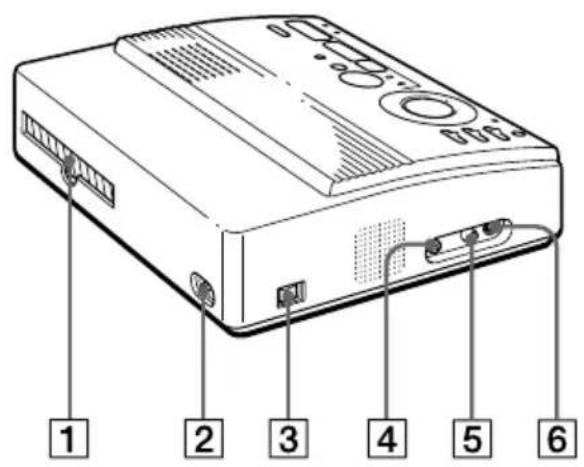
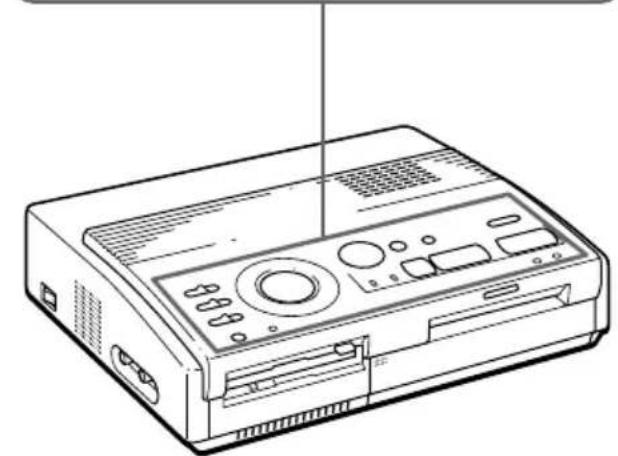
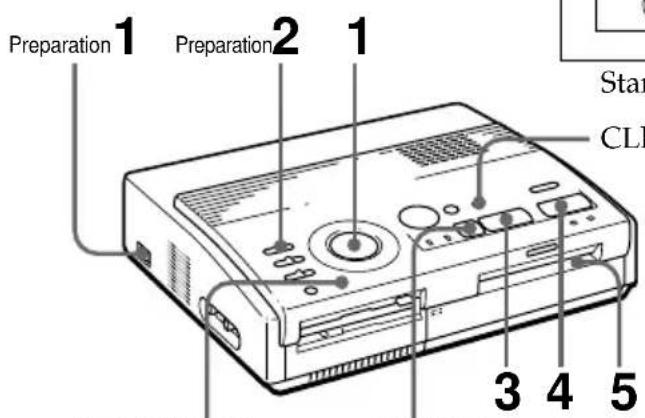
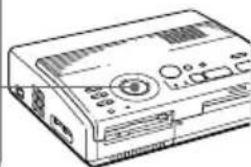
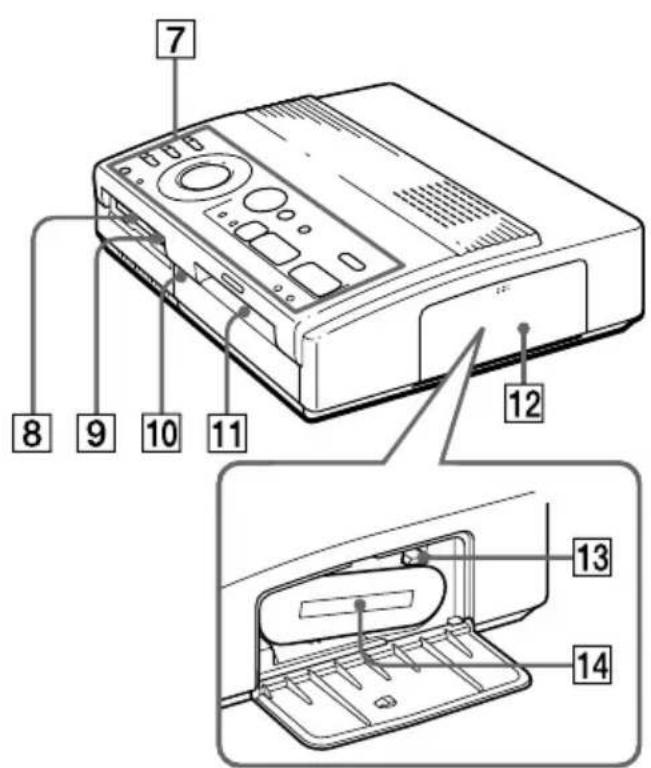
Identifying the parts
See the pages given in parentheses for use of the parts.

Cartridge compartment
1 Paper outlet (page 45)
2 AC power connector (page 10)
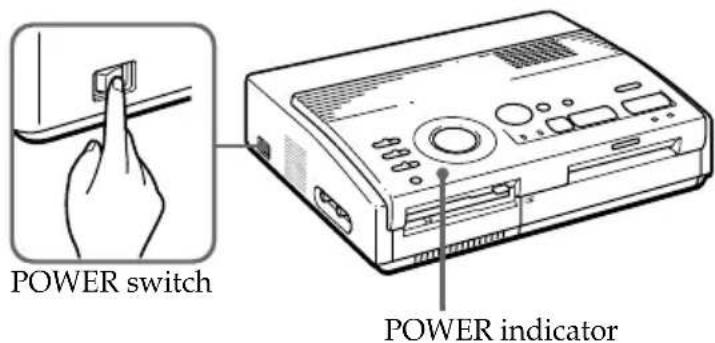
3 POWER switch (page 10)
VIDEO OUTPUT connector (page 8, 9)
VIDEO INPUT connector (page 9)
6 SVIDEO INPUT connector (page 9)
7 Operation panel (page 7)
8 3.5-inch floppy disk insertion slot (page 8)
9 3.5-inch floppy disk eject button (page 8)
10 Cover for the optional automatic feeder (page 17)
11 Paper inlet/outlet for manual feeding (page 16, 45)
12 Cartridge door (page 14, 15)
13 Eject lever (page 15)
14 Print cartridge (page 13, 14) (not supplied)
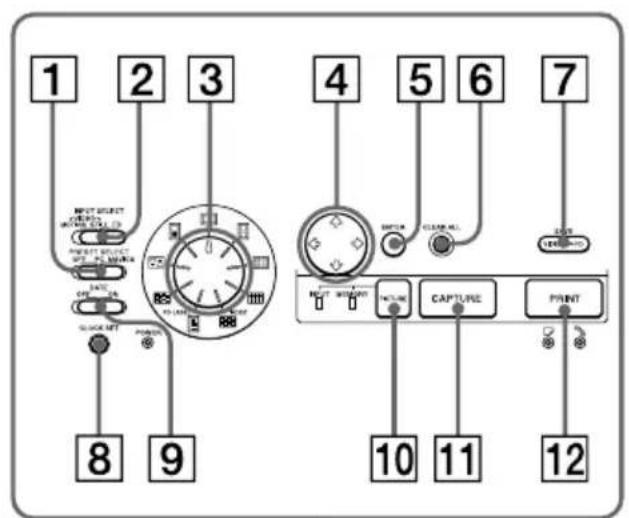

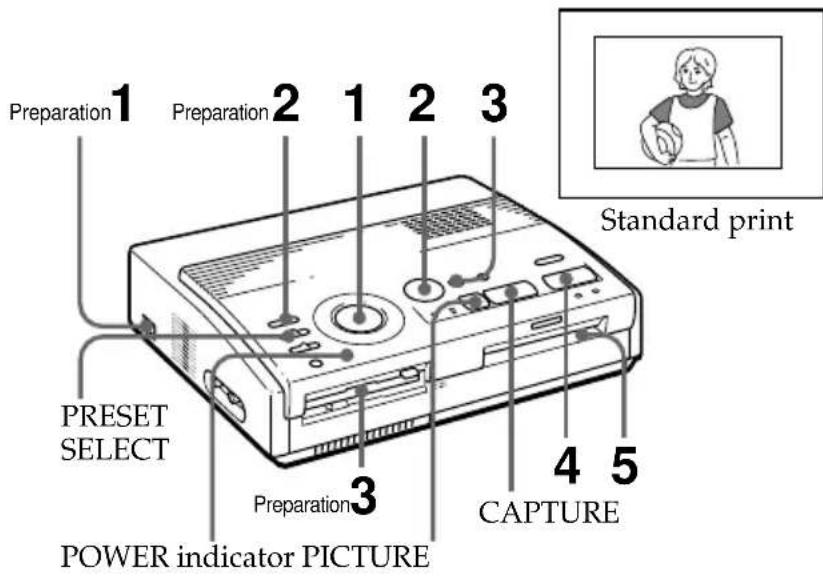
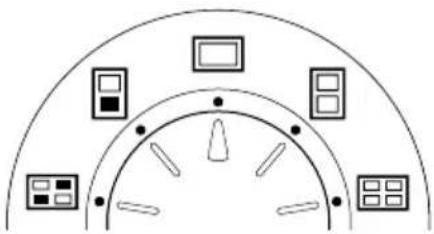
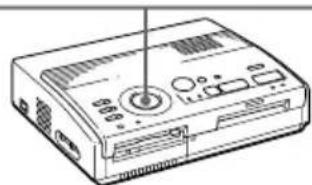
Operation Panel
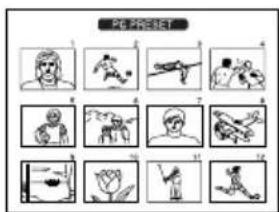
1 PRESET SELECT switch (page 36)
2 INPUT SELECT switch (page 18, 24)
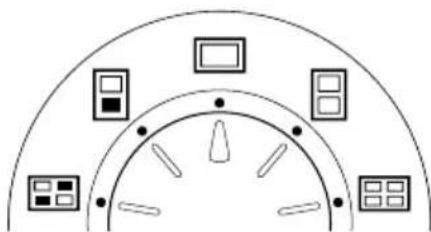
3 Print mode dial (page 19, 22, 26, 28, 30, 32)
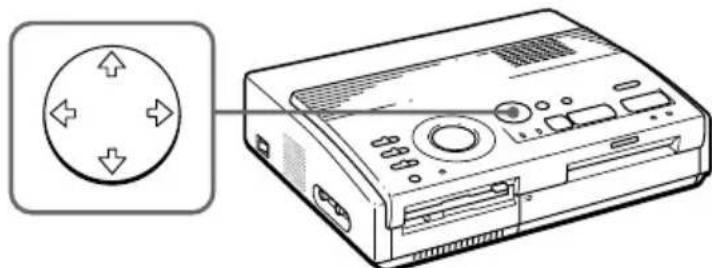
4 Arrow buttons ( / / /) (page 19)
5 ENTER button (page 19)
6 CLEAR ALL button (page 22)
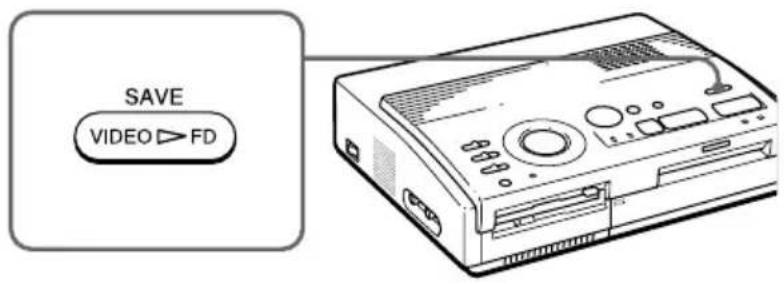
SAVE button (page 37)
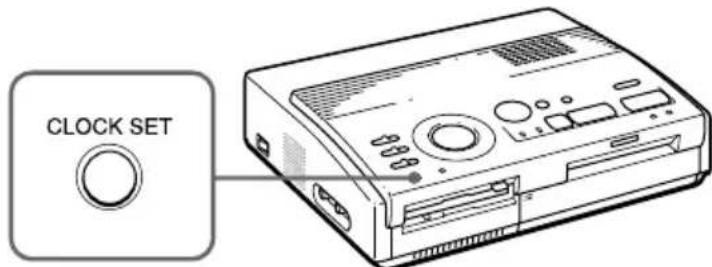
8 CLOCK SET button (page 11)
9 DATE switch (page 24)
10 PICTURE button (page 20, 22)
11 CAPTURE button (page 19, 22)
12 PRINT button (page 20, 23)
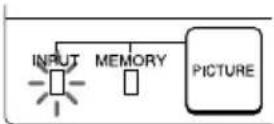
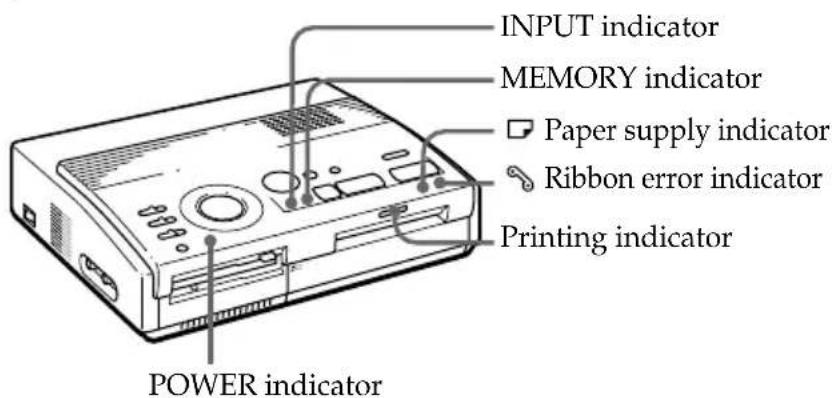
Indicators
1 POWER indicator (page 11)
2 INPUT indicator (page 22, 43)
3 MEMORY indicator (page 22, 43)
4 Print indicator (page 20, 23, 43)
5 Paper supply indicator (page 43)
6 Ribbon error indicator (page 43)
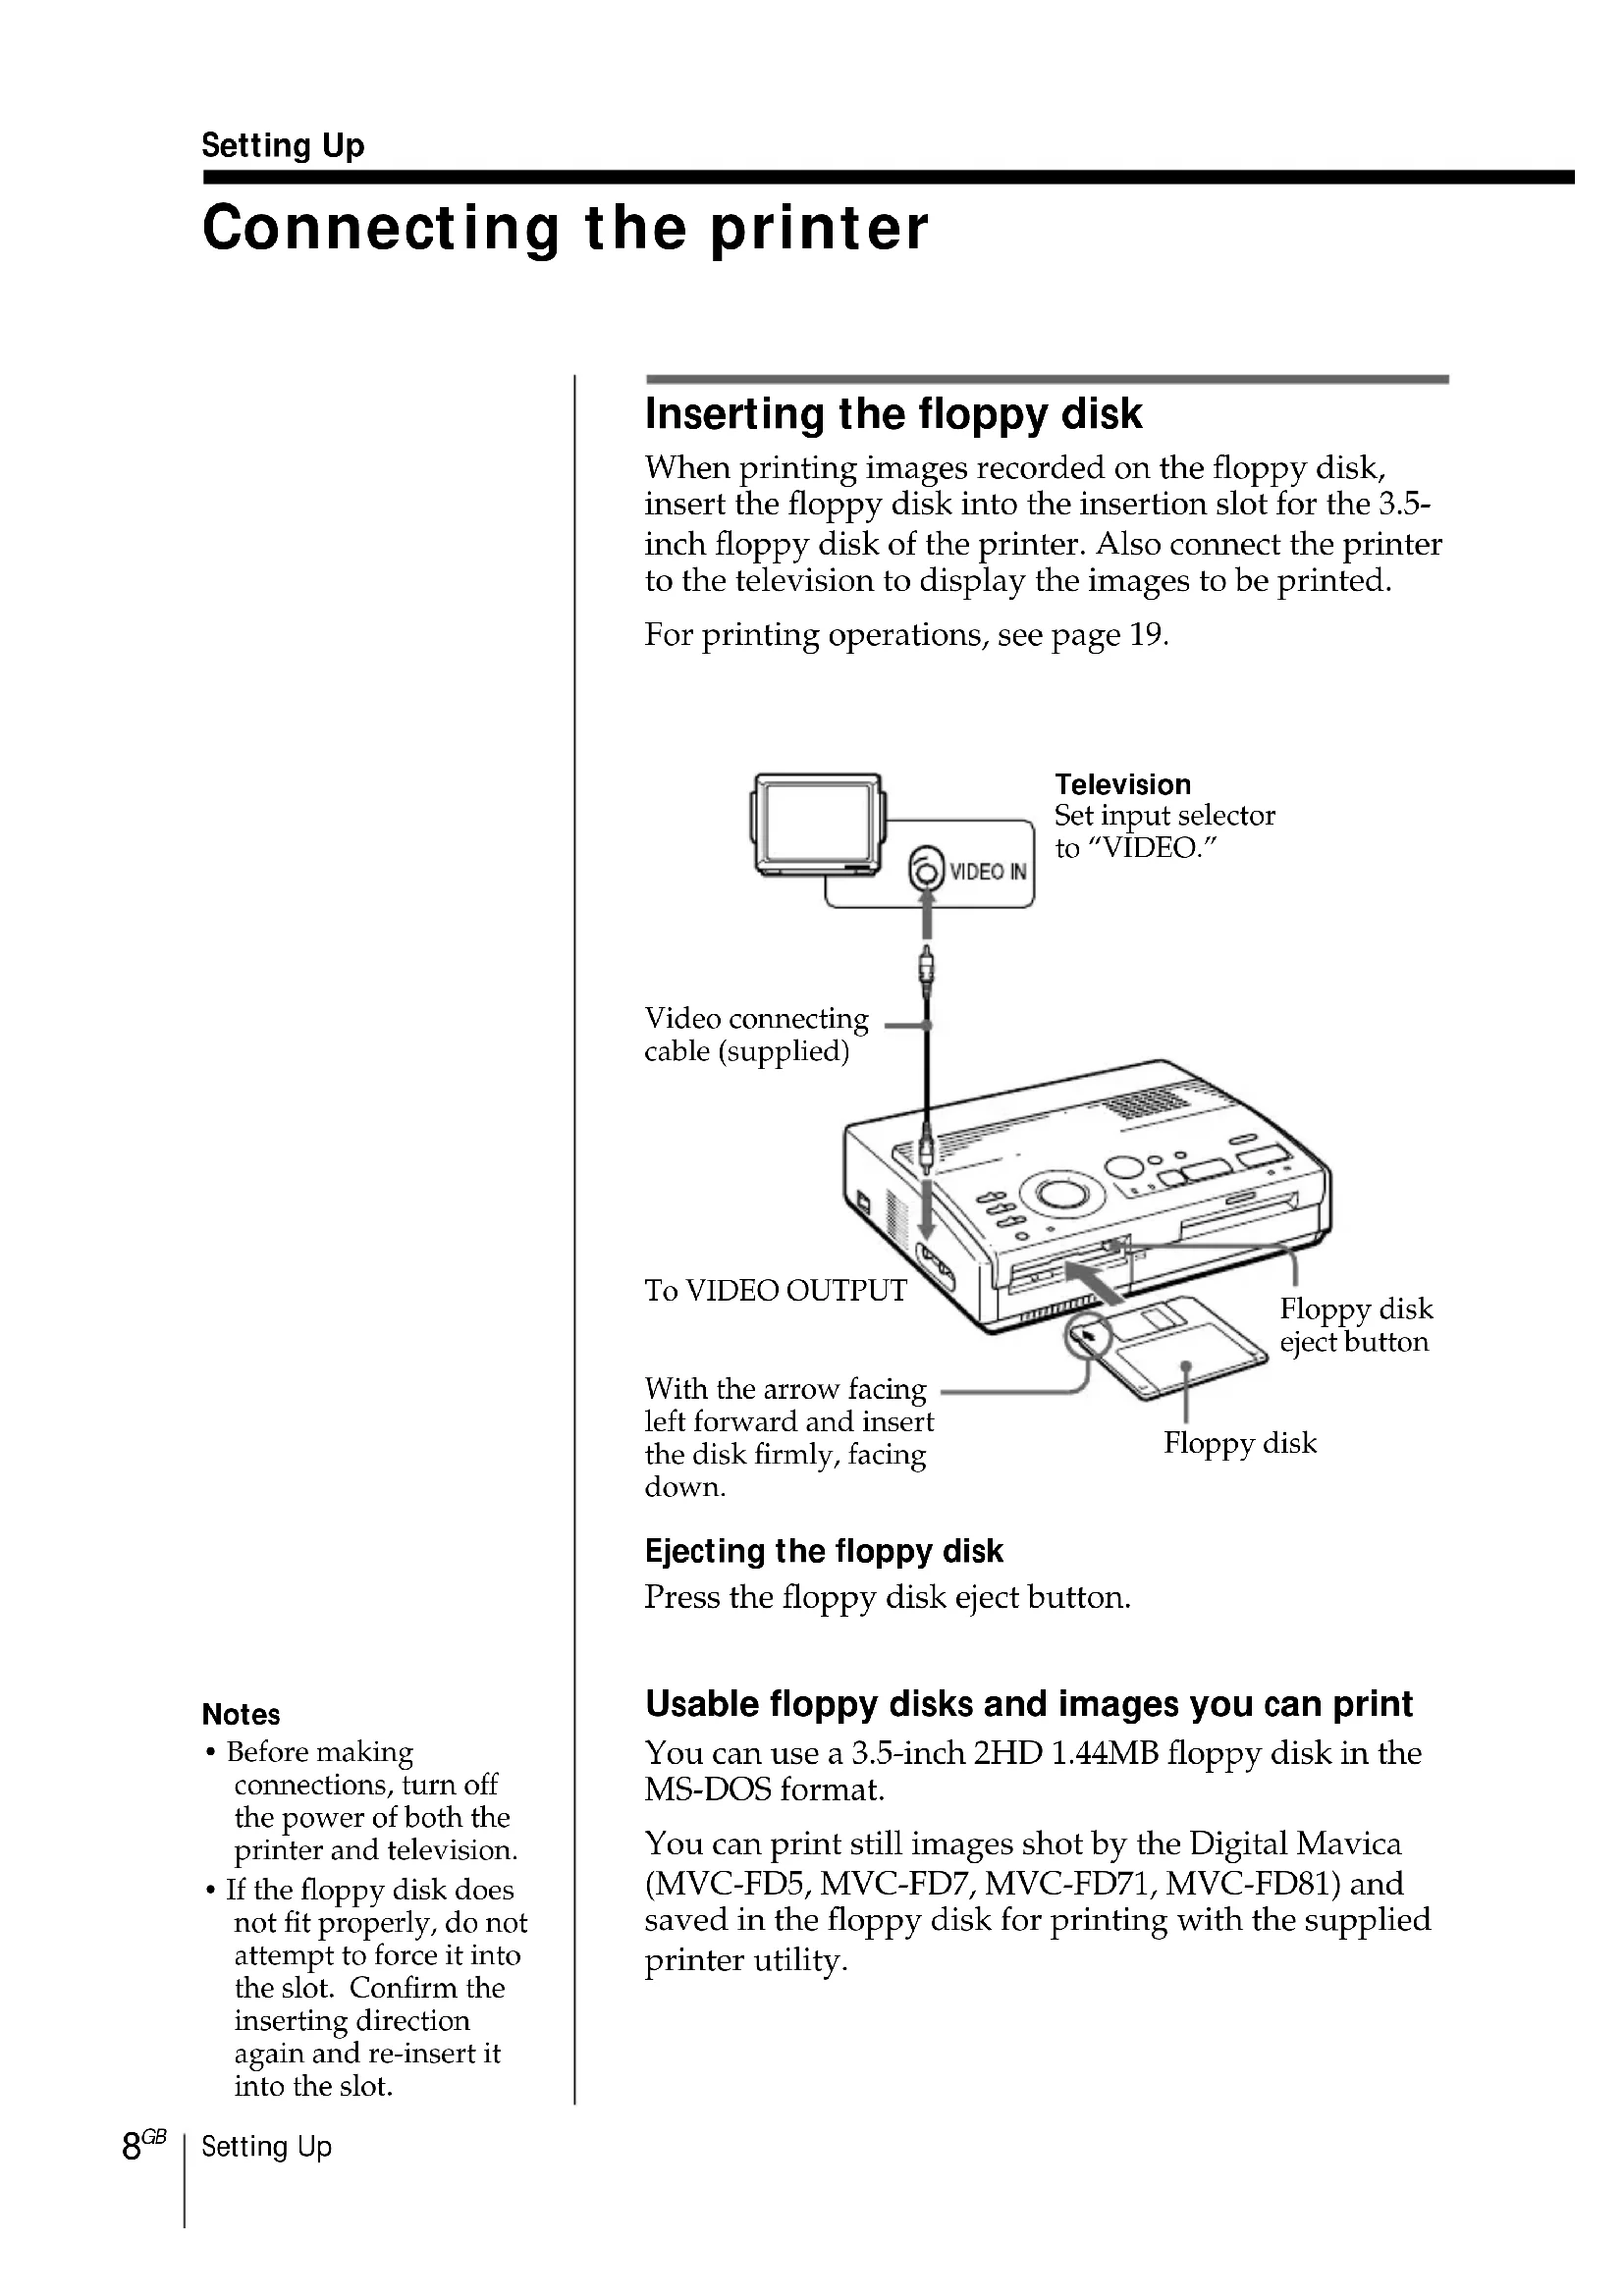
Connecting the printer
Inserting the floppy disk
When printing images recorded on the floppy disk, insert the floppy disk into the insertion slot for the 3.5-inch floppy disk of the printer. Also connect the printer to the television to display the images to be printed.
For printing operations, see page 19.
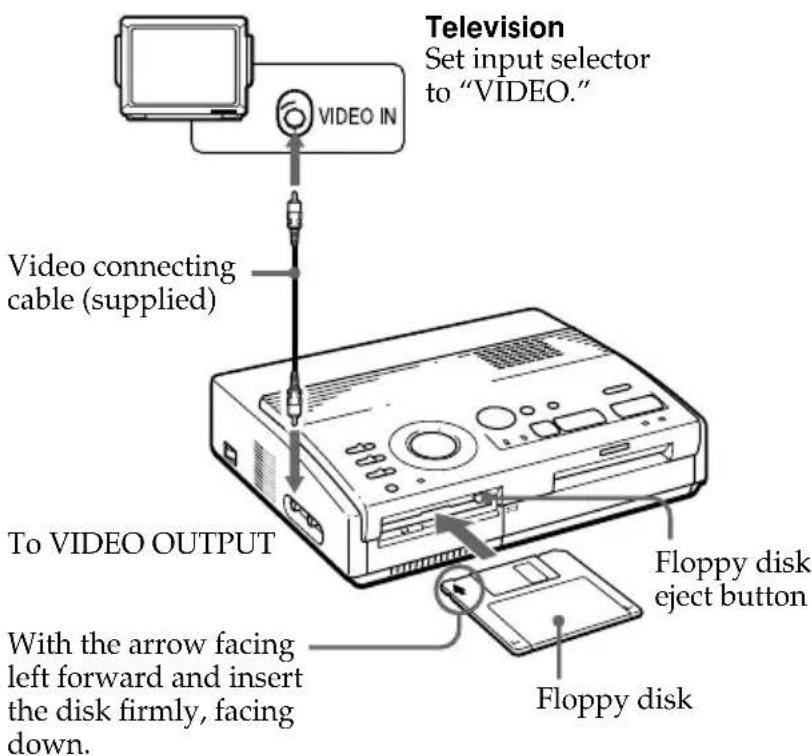
Ejecting the floppy disk
Press the floppy disk eject button.
Usable floppy disks and images you can print
You can use a 3.5-inch 2HD 1.44MB floppy disk in the MS-DOS format.
You can print still images shot by the Digital Mavica (MVC-FD5, MVC-FD7, MVC-FD71, MVC-FD81) and saved in the floppy disk for printing with the supplied printer utility.
Notes
Before making connections, turn off the power of both the printer and television.
- If the floppy disk does not fit properly, do not attempt to force it into the slot. Confirm the inserting direction again and re-insert it into the slot.
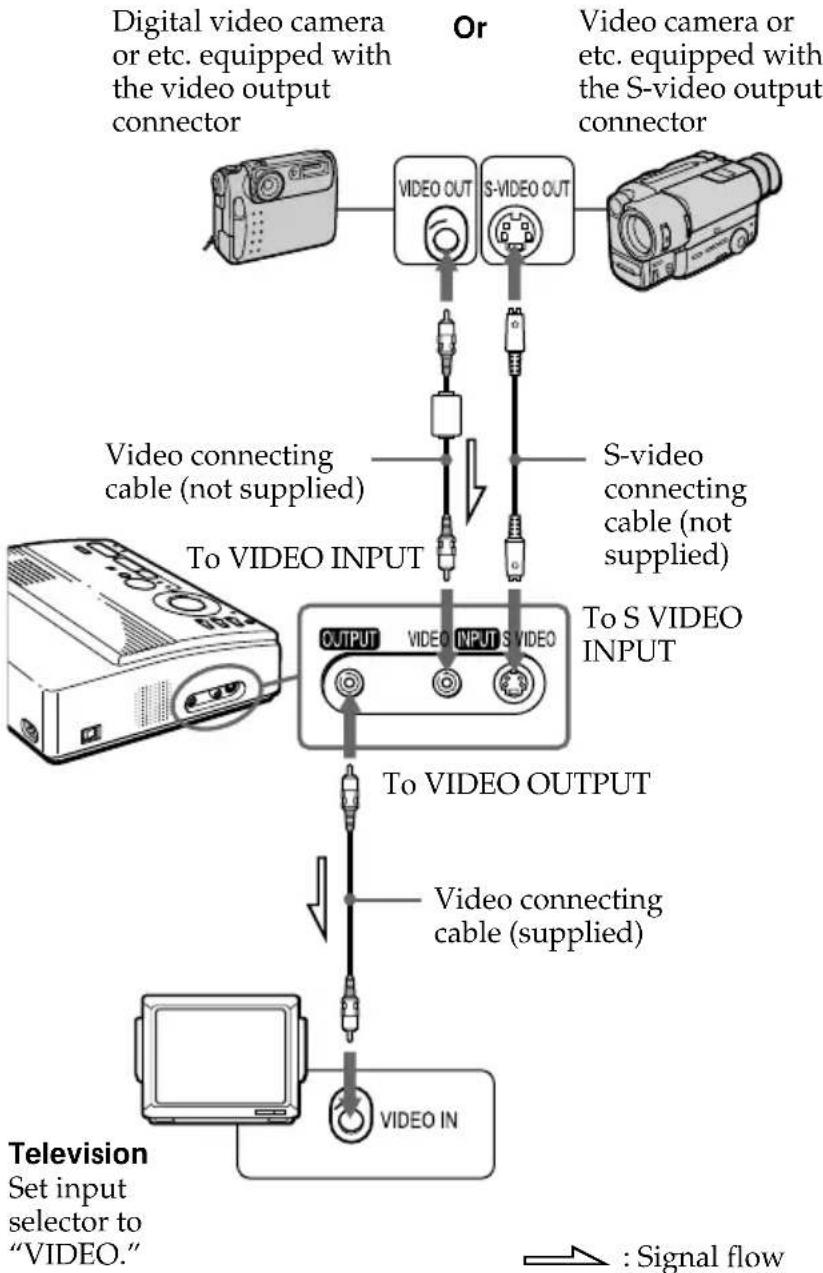
Connecting to the video equipment
When printing images from the video equipment such as a VCR or camcorder, use the supplied video connecting cable to connect the video equipment and the printer. Also connect the printer to the television to display the images to be printed.
For printing operations, see page 22.
If the video equipment has the S-video output connector
Connect it to the SVIDEO INPUT connector of the printer using the optional S-video connecting cable so that you can get better picture quality. In this case, you do not need to connect the video connector.
When both the SVIDEO INPUT andVIDEO INPUT connectors of the printer are connected
The input signals from the SVIDEO INPUT connector are automatically selected.
Notes
Before making connections, turn off the power of the printer, the video equipment and television.
See also to the instruction manuals for the video equipment.
Connecting the printer (continued)
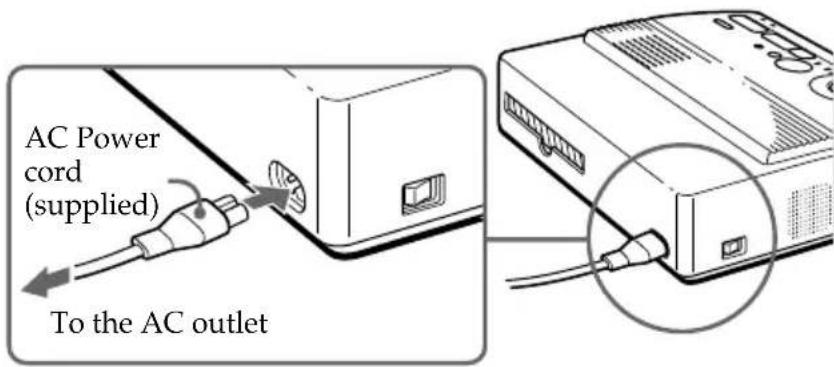
Connecting the AC power cord
After you make connections, connect the supplied AC power cord to the AC power connector of the printer and then to the AC outlet.
Adjusting the clock
You can save the time when the images are captured from the video equipment by adjusting the clock of the printer. Once you adjust the clock, the clock is maintained with the battery even if you turn off the power.
1 Turn on the power of the printer. The POWER indicator lights up.
2 Press and hold CLOCK SET, then press . The clock setting display appears on the television.
3 Press / to set the month (for the FVP-1) or date (for the FVP-1E).
Pressing increases the number. Pressing decreases the number.
Adjusting the clock (continued)
4 Press
The cursor moves to the next item.
10 01 1998 0:00AM
5 Repeat steps 3 and 4 to set all items: month, date, year, hour and minute (for the FVP-1) or date, month, year, hour and minute (for the FVP-1E).
If you want to set the previous item, press
10 01 1998 10 35 AM
6 Press CLOCK SET.
The clock setting display disappears.
Displaying the clock
When the INPUT indicator is on, press CLOCK SET to display the current time on the center of the screen. To turn off the time display, press CLOCK SET again.
10 01 1998 10:35AM
Using optional supplies (print packs)
You need an optional print pack with VP mark. The pack contains print paper and ink ribbon cartridge for printing. See page 46 for details on the print papers.
The following types of print packs are available:
| Print Model Print paper Print cartridge |
| Standard VPM-P50STA Standard type for 50 prints |
| Sticker VPM-P50WSA 1-cut Sticker for 50 printsAdhesive-label sheet |
| VPM-P50S16A 16-cut Sticker for 50 printsAdhesive-label sheet |
Note
Use the set of the print paper and ink ribbon cartridge supplied together in the same carton. If you use them in different combination, proper printing results may not be obtained, or paper jam or other trouble may occur.
Loading the print cartridge
Caution
Never put your hand into the cartridge compartment. The thermal head reaches high temperatures, especially after repeated printing.

Notes
- If the print cartridge is not loaded when you turn on the printer, the warning sound beeps and the ribbon error indicator lights up.
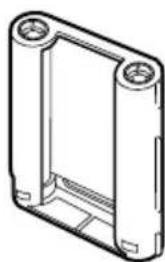
- When installing the ink ribbon cartridge, stand it as illustrated so that dust will not get on the ink ribbon.
- Do not touch the ink ribbon or place the print cartridge in a dusty location. Fingerprints or dust on the ink ribbon may result in imperfect printing.
Insert the print cartridge into the printer.
Use only the print cartridge supplied with the print paper packed in the same carton.
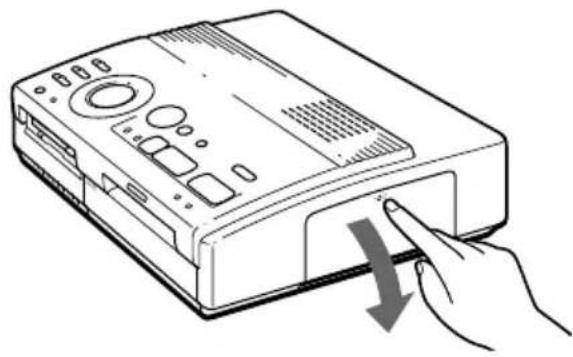
1 Press PUSH to open the cartridge compartment lid.
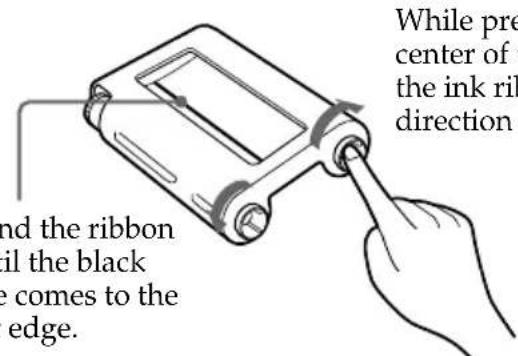
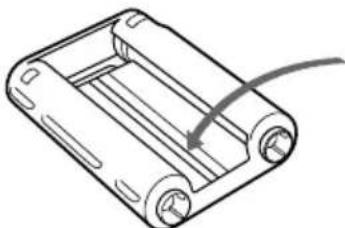
2 Wind up the ink ribbon to remove the slack.
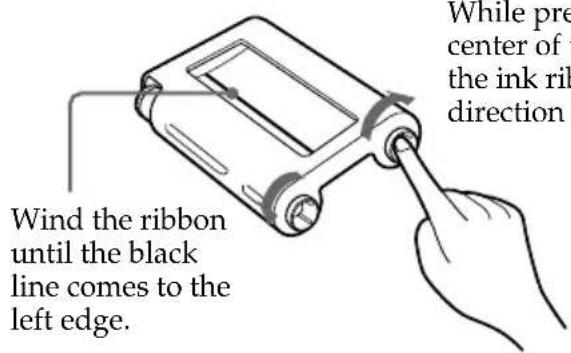
While pressing the center of the reel, wind the ink ribbon in the direction of the arrow.
3 Insert the print cartridge firmly until it clicks into place and close the cartridge compartment lid.

If the print cartridge does not click into place
Remove the print cartridge, and then re-insert it.
To replace the print cartridge
If the ribbon indicator flashes and the inserted paper emerges after you insert the paper and the paper is automatically loaded, remove the print paper and replace the print cartridge.
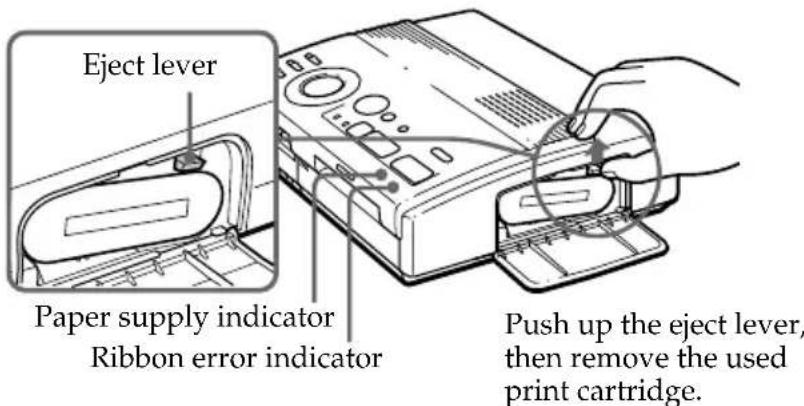
Open the cartridge compartment lid and push up the eject lever. Remove the used print cartridge and replace it with a new one.
To load the half-used ink ribbon cartridge
If ink ribbon should tear
Repair the ribbon with transparent tape. There should be no problem with using the remaining portion of the ribbon. Before loading the ink ribbon cartridge into the printer, turn the reel until the transparent tape can no longer be seen.
Repair with transparent tape.
Notes on storing the print cartridge
- Avoid placing the cartridge in a location subject to:
- high temperatures
- high humidity
- excessive dust
- direct sunlight
- When you are going to store a partially-used cartridge for an extended period of time, store it in its original bag.
Inserting the print paper
Notes
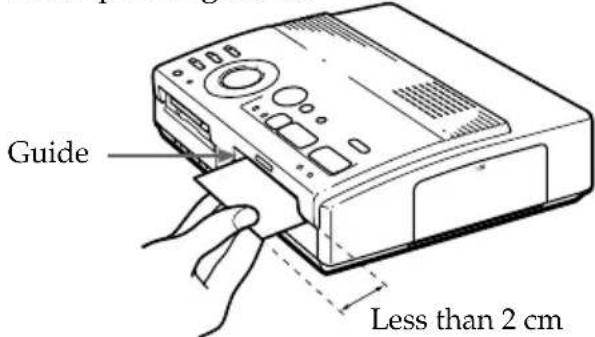
- Insert the print paper straight along the guide to the left of the paper port. If the paper is positioned to the right or slanted, the printing area may get out of position.
The paper may not be loaded automatically if you do not insert the paper firmly. - You cannot type on the printing surface before printing. If you want to write greetings or draw on the printing surface after printing, use an oil ink pen.
- When handling the print paper, do not touch the printing surface (shiny side where nothing is printed).
- Do not place the print paper in a dusty location. Fingerprints or dust on the printing surface may result in imperfect printing.
- Do not use the sticker papers which have been peeled off.
Use the print paper recommended for this printer only. - Do not fold or bend the print paper.
Insert the print paper sheet by sheet. This section explains how to insert the standard type print paper. Use the print paper designated for this printer only.
1 Turn on the power of the printer. The POWER indicator lights up.
2 Follow printing procedures. For details, see pages 19 to 3
3 Insert the print paper straight with its blank printing surface facing up, along the guide to the left of the paper port.
Insert the paper until less than 2cm (approx. 0.8 inches) remains. The paper is automatically loaded when printing starts.
When you use the optional automatic feeder VPF-A1
You can automatically print images up to 25 sheets.
To attach the automatic feeder, press PUSH of the automatic feeder insertion port cover on the front panel of the printer.
When you close the cover, press PUSH until it locks.
Notes on storing the print paper
- Avoid placing the print paper in a location subject to:
- high temperatures
- high humidity
- excessive dust
- direct sunlight
- When you are going to store the partially-used print paper for an extended period of time, store it in its original bag.
Printing an image recorded on the floppy disk
You can select an image recorded on the floppy disk and print it in full-size (standard print).
Preparations
1 Turn on the printer and television and set the input selector of the television to "VIDEO."
The POWER indicator lights up.
2 Set INPUT SELECT to "FD."
3 Insert the floppy disk on which you record images into the floppy disk insertion slot. (page 8)
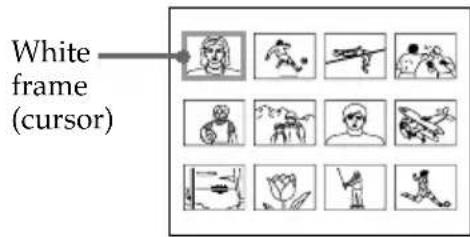
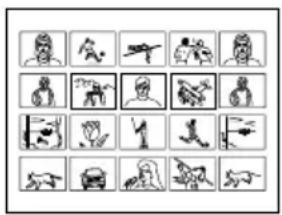
While the printer is accessing the floppy disk, the access indicator flashes. When the printer ends reading images, recorded images are displayed as thumbnails.
Notes
- Avoid getting liquids on the floppy disk or using floppy disks in areas subject to high humidity. Otherwise, data may be rendered unreadable.
- When the access indicator is lit, do not eject the floppy disk. Otherwise, the disk may crash.
Make sure PRESET SELECT is set to "OFF."
Scrolling the pages
When multiple pages exist, you can change the pages back and forth. To display the next page (when appears at the bottom-right), move the white frame to the bottom line of the image list and press . To display to the previous page (when appears at the top-right), move the white frame to the top line and press . The access lamp flashes and pages switches.
Cancelling the selection
Move the white frame to the image you want to cancel the selection and press ENTER. The blue frame disappears and the selection is canceled.
Selecting multiple images
Repeat steps 2 and 3 until you select all images you want to print.
Displaying the image in full-size
Move the white frame to the desired image, then press CAPTURE in step 3.
The selected full-size image appears in the center of the screen.
To display the next or previous full-size image, press (next image) or (previous image).
If you want to re-select the image, press PICTURE to return to the image list then repeat steps 2 and 3.
Note
The displayed full-size image may not correspond with the actual print in details.
Printing
1 Set print mode dial to "standard").
2 Press the arrow ( / / / ) buttons to move the white frame (cursor) to the image you want to print.
Move the white frame up () , down () , rightward () , or leftward () .
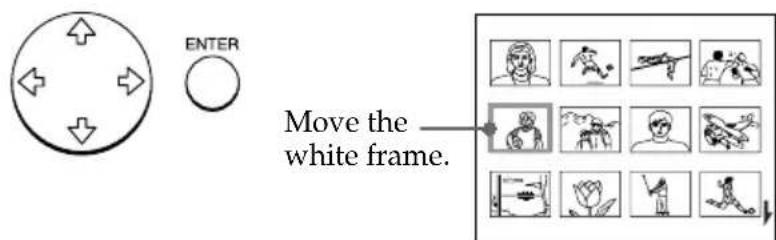
3 Press ENTER.
The blue frame appears inside the white frame and the selected image is specified to be printed.

Printing an image recorded on the floppy disk (continued)
Notes
An image which is damaged or has some trouble does not appear in the image list.
- If there are no images stored in the floppy disk, "NO FILE" appears on the display.
If you press PRINT while displaying the actual print image, only the displayed image is printed.
- If you press PRINT while displaying the thumbnail list, all images with the blue frame are printed.
While printing, never move or turn off the printer; the print cartridge or paper may become stuck. If this happens, turn the printer off and on, and resume printing from the beginning.
-
Do not insert another sheet of print paper until you remove the printed sheet.
-
During printing, the print paper is partially ejected from the paper outlet several times. Never pull out the paper forcibly.
-
Avoid storing the paper with the printed faces contacting each other or contacting with rubber or plastic products including vinyl chloride or plasticizer for an extended period of time; the ink may transfer on to them.
If the print paper is not loaded
The print indicator and the paper supply indicator flash.
Insert the print paper.
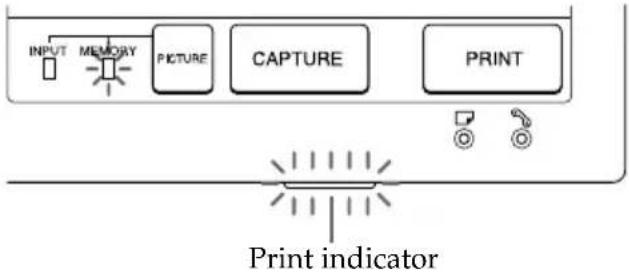
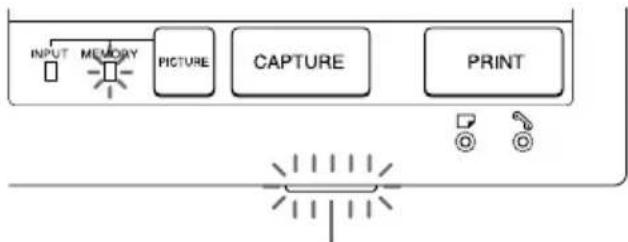
4 Press PRINT.
The print indicator flashes and the print paper is automatically loaded. The paper supply indicator flashes while loading the print paper.
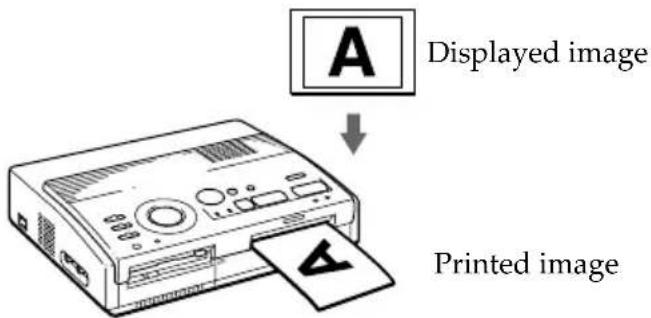
Printing direction
The image displayed on the digital camera is printed in the direction as shown below.
5 Remove the print from the printer.
When printing ends, the print paper automatically emerges from the print outlet.
The print indicator turns out.
Printing the same image again
Press PRINT.
With the optional Automatic Feeder VPF-A1, you can print the same image continuously up to 25 sheets.
Printing other images
Press PICTURE so that the thumbnail screen appears, then perform steps 1 to 5.
Printing multiple images continuously
You can print multiple images continuously up to 25 sheets using the optional Automatic Feeder VPF-A1.
Printing an image from the video equipment
You can capture the input image from the video equipment connected to the VIDEO INPUT connector of the printer and print it in full-size (standard print).
Standard print
CLEAR ALL
POWERindicator
PICTURE
Preparations
1 Turn on the printer and television and set the input selector of the television to "VIDEO."
The POWER indicator turns on.
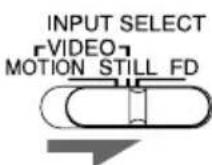
2 Set INPUT SELECT to "VIDEO MOTION" or "VIDEO STILL."
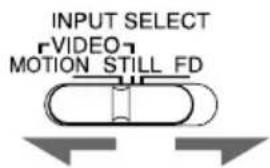
To Selector position
Print the motion picture VIDEO MOTION while compensating for the image blur
Print the still image VIDEO STILL
Printing an image from the video equipment (continued)
Printing
1 Set print mode dial to "standard").
2 Start playback on the video equipment.
While the INPUT indicator lights up, the playback picture appears on the screen (input picture).
For details on playing back on the video equipment, refer to the instruction manual of your equipment.
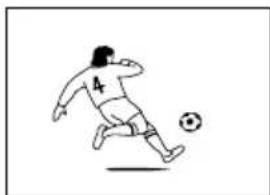
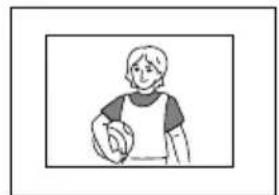
Input image
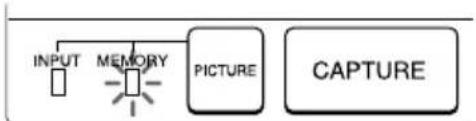
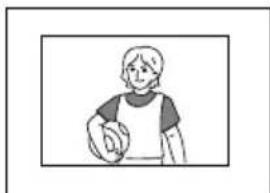
3 Press CAPTURE when the picture you want to print appears on the screen.
The selected full-size image appears in the center of the screen, and the MEMORY indicator lights up.
Print image
Blur compensation
When you set INPUT SELECT to "VIDEO MOTION," the selected image appears on the screen and the horizontal red line moves from the top to the bottom on the left half of screen, then moves from the top to the bottom on the right half of screen. In this sequence, if there is motion blur on the image, the printer automatically compensates for the image (blur compensation). When the blur compensation ends, the screen darkens once and the print image appears in the screen.
Re-selecting the image
Press PICTURE. The playback picture appears on the screen. If you press CLEAR ALL, the printer is reset to stand by mode. Perform printing procedures from the beginning.
Notes
While printing, never move or turn off the printer; the print cartridge or paper may become stuck. If this happens, turn the printer off and on, and resume printing from the beginning.
- Do not insert another sheet of print paper until you remove the printed sheet.
During printing, the print paper is partially ejected from the paper outlet several times. Never pull out the paper forcibly.
- It is not recommended to select an image while pausing the video equipment because the picture quality will be lost.
- Avoid storing the paper with the printed faces contacting each other or contacting with rubber or plastic products including vinyl chloride or plasticizer for an extended period of time; the ink may transfer on to them.
If the print paper is not loaded
The print indicator and the paper supply indicator flash.
Insert the print paper.
4 Press PRINT.
The print indicator flashes and the print paper is automatically loaded. The paper supply indicator flashes while loading the print paper.
Print indicator
Printing direction
The image displayed on the digital camera is printed in the direction as shown below.

5 Remove the print from the printer.
When printing ends, the print paper automatically emerges from the print outlet.
The print indicator turns out.
Printing the same image again
Make sure that the desired image is displayed on the screen, then press PRINT.
With the optional Automatic Feeder VPF-A1, you can print the same image continuously up to 25 sheets.
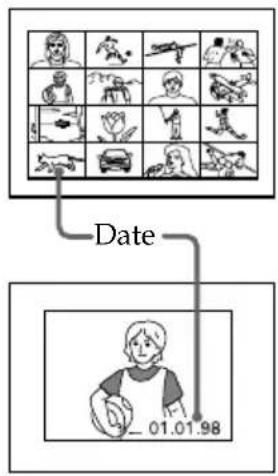
Printing the date
When printing the image in the floppy disk, you can print the date shot with the Digital Mavica.
Before you begin
1 Turn on the printer and television and set the input selector of the television to "VIDEO."
2 Set INPUT SELECT to "FD."
3 Set PRESET SELECT to "OFF."
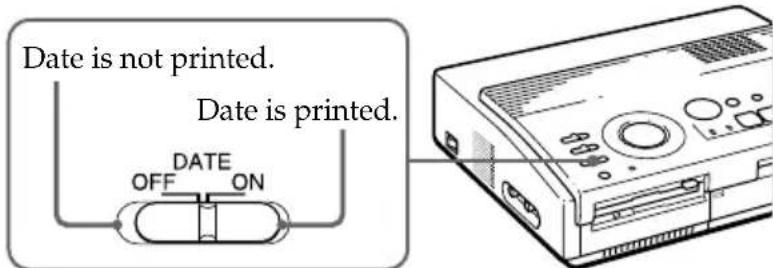
1 Set DATE to "ON."
2 Select the desired print using the print mode dial.
You can select standard printing (page 19, 22), split printing (page 26 to 29), index printing (page 30) or index printing (page 32).
Note
You cannot print the date in following cases.
- when you print the image from the video equipment
- when you print the image with your PC using the supplied Printer Utility
3 Select the image for printing.
① Insert the floppy disk into the floppy disk slot.
② Press the arrow buttons to move the white frame to the image you want to print, then press ENTER.
4 Press PRINT.
The selected image is printed with the date.
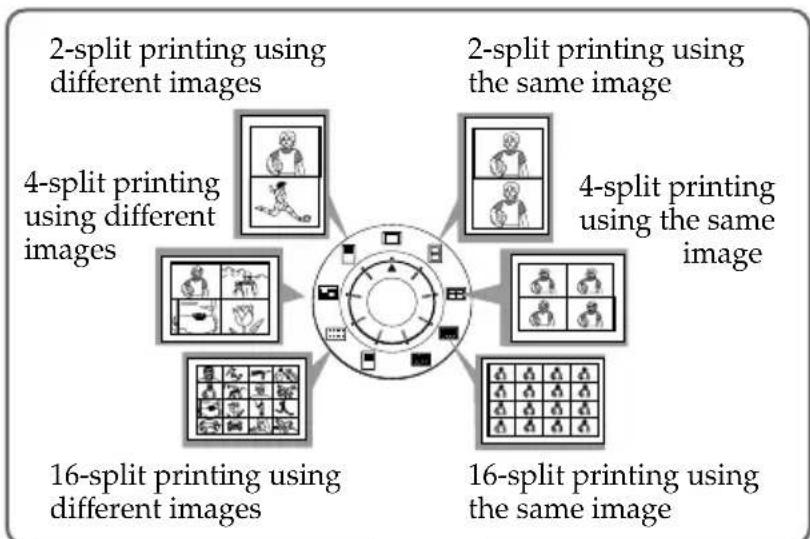
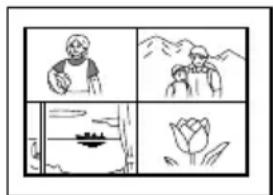
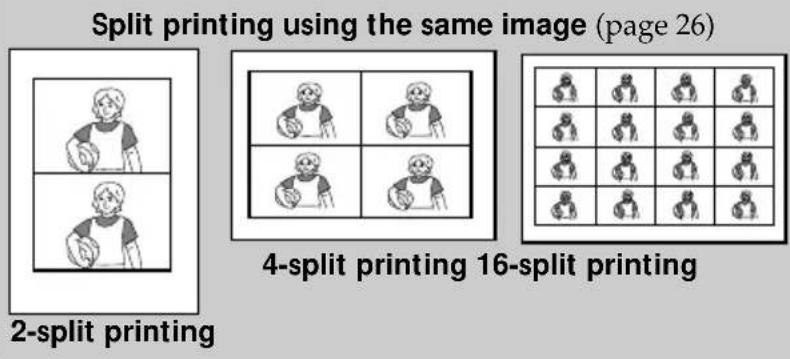
Making split prints
Printing images from the floppy disk
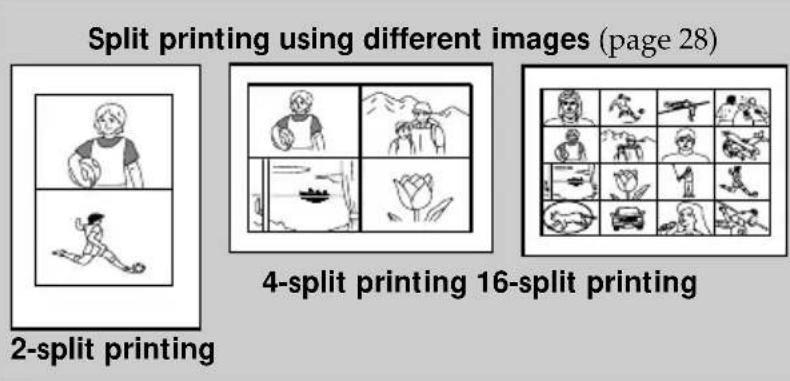
You can make prints divided into multiples of 1 / 2 -, 1 / 4 - or 1 / 16 -size pictures. You can select the same image, or different images for the split print.
Before you begin
1 Turn on the printer and television and set the input selector of the television to "VIDEO."
2 Set INPUT SELECT to "FD."
3 Set PRESET SELECT to "OFF."
4 Insert the floppy disk into the floppy disk slot.
1 Select the type of split using the print mode dial. You can select 2-split, 4-split, 16-split planes of the same image or different images.
2 Select the image.
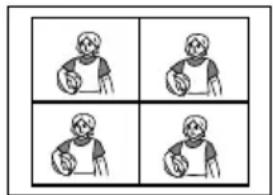
- When selecting the same image for all the split planes:
① Press arrow button to move the white frame to the image you want to print, then press ENTER. (The blue frame appears inside the white frame.)
Printing the date
You can print the date when the image was saved by setting DATE to "ON."
Re-selecting the image Move the white frame to the image you want to cancel the selection for and press ENTER. The blue frame disappears and the selection is canceled.
If you want to re-select the image after displaying the actual print image, press PICTURE to return to the thumbnail screen, then repeat step 2.
Re-selecting the type of the split
Press PICTURE so that the thumbnail screen appears. Re-select the split type using the print mode dial. You can use the selected images, or change the selection.
Canceling the operation
Press CLEAR ALL. The selected image is removed and the printer returns to stand by mode.
Perform printing procedures from the beginning.
Note
If you press PRINT when the actual print image is displayed, only the displayed image is printed.
② If you want to make other same image prints, repeat step ①
- When selecting the different images for each split plane:
① Press the arrow button to move the white frame to the image you want to print, then press ENTER. (The blue frame appears inside the white frame.)
② Repeat step ① to select images for the split planes in the desired order.
The pictures are placed from the upper left to the lower right on the sheet in order of the selection, not in order of the image list.
You can also select an image from the different pages.
If you select more images than the number of the split planes, the images are automatically placed on the next print.
To check the actual print image
Press CAPTURE.
The actual print image with the white frame (for the same image split printing) or the blue frame (for the different images split printing) appears in the center of the screen.
To display multiple split prints, press or .
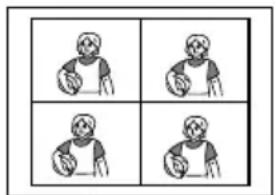
When you select 4-split printing using a same image
When you select 4-split printing using different images
Making split prints (continued)
3 Press PRINT.
The print indicator flashes while printing, and the selected image is printed.
Printing images from the video equipment
You can make prints divided into multiples of 1 / 2 , 1 / 4 , or 1 / 16 -size pictures. You can also select the same image, or different images for the split print.
Before you begin
1 Turn on the printer and television and set the input selector of the television to "VIDEO."
2 Set INPUT SELECT to "VIDEO MOTION" or "VIDEO STILL."
3 Set PRESET SELECT to "OFF."
1 Select the type of split using the print mode dial.
You can select 2-split, 4-split, 16-split planes of the same image or different images.
When you select "VIDEO MOTION"
When you set INPUT SELECT to "VIDEO MOTION," the selected image is blur-compensated in step ②.
Re-selecting the image
Press CLEAR ALL. The selected image is removed and the printer returns to stand by mode. Perform printing procedures from the beginning. You can also press CAPTURE again while the MEMORY indicator is flashing to reselect the image. When you set to split printing with the same images, you can also press PICTURE to display the input picture, then reselect a new image.
2 Select the image.
- When selecting the same image for all the split planes:
① Turn on the video equipment and start playback.
② Press CAPTURE when the picture you want to print appears on the screen.
The memory image is displayed in the split planes selected in the step 1.
When you select 4-split printing
- When selecting the different images for each split plane:
① Turn on the video equipment and start playback.
② Press CAPTURE when the picture you want to print appears on the screen.
The memory image is displayed in the first plane of the split planes selected in the step 1.
③ Press PICTURE so that the input picture appears in the screen.
④ Repeat steps ② to ③ until you select images for all split planes.
The selected pictures are allocated as follows: upper left upper right lower left lower right.

When you select 4-split printing
3 Press PRINT.
The print indicator flashes while printing, and the selected image is printed.
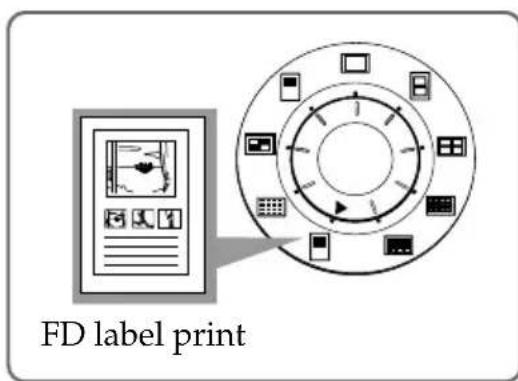
Making a label for a floppy disk
You can make a label for a floppy disk by using the sticker-type print paper.
The selected image is printed as large picture on one label, and 3 thumbnail images with lines are printed on the other label. The total number of images is printed at the bottom left of the label.
Before you begin
1 Turn on the printer and television and set the input selector of the television to "VIDEO."
2 Set INPUT SELECT to "FD."
3 Set PRESET SELECT to "OFF."
1 Select "D label print") using the print modal dial.
2 Select the image for printing.
① Insert the floppy disk into the floppy disk slot.
② Press the arrow buttons to move the white frame to the image you want to print, then press ENTER.
The selected image is placed on the upper half of the print and the leftmost of the thumbnail on the lower half.
When printing the input image from the video equipment
You cannot make a label for a floppy disk.
Printing the date
You can print the date when the image was saved by setting DATE to "ON."
③ Repeat step ② to select images for the other 2 thumbnails.
④ Press CAPTURE if you want to check the actual print image.
To display multiple print images, press or .

3 Insert the sticker type paper into the printer, then press PRINT.
The print indicator flashes while printing, and the label for the floppy disk is printed.
You can use each part of the label for the floppy disk. Cut the paper so it fits the label side.
Cancelling the selection
Move the white frame to the image you want to cancel the selection and press ENTER. The blue frame disappears and the selection is canceled. To remove the all selected images, press CLEAR ALL.
Perform printing procedures from the beginning.
Note
You cannot type on the printing surface before printing. If you want to write greetings or draw on the printing surface after printing, use an oil ink pen.
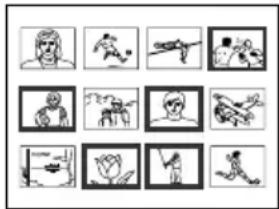
Making an index list of images
You can make an index list of images saved in a floppy disk. When you want to search for the recorded image, you can find the desired images immediately with this index list.
Before you begin
1 Turn on the printer and television and set the input selector of the television to "VIDEO."
2 Set INPUT SELECT to "FD."
3 Set PRESET SELECT to "OFF."
1 Select "ex print") using the print mode dial.
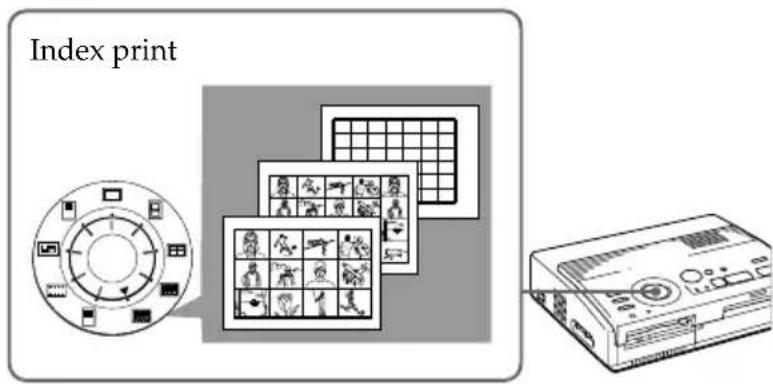
2 Insert the floppy disk into the floppy disk slot.
All the images recorded in the floppy disk are displayed in a thumbnail list.
If there are multiple pages, press or to display the next or previous page.
About date printing
The date when the image was saved is printed regardless of the DATE setting. However, the date does not appear on the displayed image.
To display the actual print image
Press CAPTURE.
All the images recorded in the floppy disk are displayed as the thumbnail images.
3 Press PRINT.
The print indicator flashes while printing, and the index list of the recorded images on the floppy disk is printed.
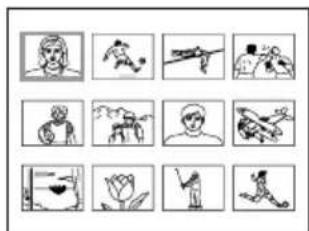
The size of each image depends on the number of the images.
- When the number of images is 1 to 12
The images are made into the size of 12 thumbnails. Each thumbnail has the corresponding image number.
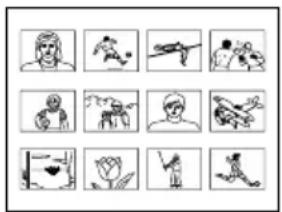
- When the number of images is 13 to 20
The images are made into the size of 20 thumbnails. Each thumbnail has the corresponding image number.
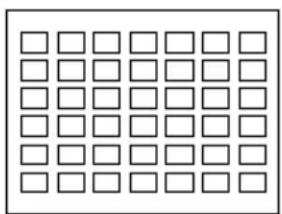
- When the number of images is over 21
The images are made into the size of 42 thumbnails. Each thumbnail has the corresponding image number.
Notes
- If the number of images is less than that of split planes, planes without images remain blank.
- If the number of image is over 43, the image number 43 or more is not printed.
Printing images specified with the Printer Utility
You can print images specified as protected images with the Digital Mavica or images specified with the Printer Utility all at once.
Before you begin
1 Turn on the printer and television and set the input selector of the television to "VIDEO."
2 Set INPUT SELECT to "FD."
1 Set PRESET SELECT to "MAVICA" or "PC."
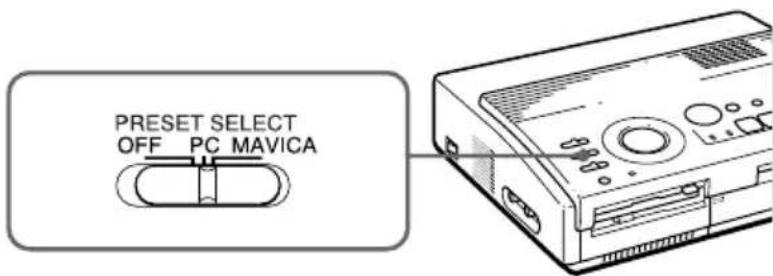
To Selector position
Print images protected by MAVICA the Digital Mavica
Print images specified with PC the printer utility
Notes
- If you set PRESET SELECT to "OFF," the images specified with the Digital Mavica or the printer utility do not appear as the selected image. In this case, perform the normal printing procedures.
- In this print mode, you can make only the standard print regardless of the position of the print mode dial.
Displaying the print image
Press CAPTURE. The first print image appears in the center of the screen. To display the next or previous print image, press (next image) or (previous image).
Notes
If you press PRINT while displaying the actual print image, only the displayed image is printed.
- If you press PRINT while displaying the thumbnail list, all images specified to be printed are printed.
2 Insert the floppy disk into the floppy disk slot.
- When printing images protected by the Digital Mavica
The image protected by the Digital Mavica is displayed in the thumbnail list.
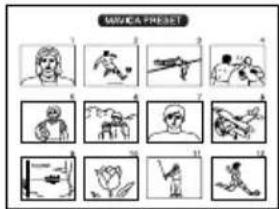
- When printing images specified by the printer utility
The image specified by the printer utility is displayed in the thumbnail list.
3 Press PRINT.
The print indicator flashes while printing, and the protected images or specified images are printed in the order of the image number.
Recording the video picture as a still image
You can record the playback picture from the video equipment as a still image onto the floppy disk.
You can view the image with the Digital Mavica, process the image with the printer utility on your PC, or save the image as a general image file.
Before you begin
1 Turn on the printer and television and set the input selector of the television to "VIDEO."
2 Set INPUT SELECT to "VIDEO MOTION" or "VIDEO STILL."
1 Set print mode dial to "standard).
2 Select the image to be recorded.
For details of operating procedures, refer to the pages for the corresponding printing mode.
① Turn on and start playback on the video equipment.
② Press CAPTURE when the picture you want to record appears on the screen.
3 Insert the floppy disk into the floppy disk slot. Insert a floppy disk formatted in the MS-DOS format. Check that the write protect switch on the disk is set to the write enable position.
Re-selecting the image
Press PICTURE. The playback picture appears on the screen. Follow step 2.
If you press CLEAR ALL, the printer is reset to stand by mode.
Perform printing procedures from the beginning.
4 Press SAVE.
The access indicator of the floppy disk drive lights up, and the displayed image is recorded onto the floppy disk.
About file name of the recorded image
The image is recorded with the file name "MVC-###f.jpg." The number "########" is sequentially allocated following the largest file number (same as the image number) recorded in the floppy disk.
If an error message appears
| Error message Meaning |
| DISK ERROR The inserted floppy disk is not formatted.Insert a disk in the MS-DOS format. |
| DISK FULL There is not enough space to record the image replacing the floppy disk with new one. |
| DISK PROTECT The write protect tab on the inserted floppy disk is set to write protect position. Set it to the write enable position and then record the image. |
Precautions
On safety
- Operate the printer on 110 to 120VAC (for the FVP-1) or 220 to 240VAC (for the FVP-1E), 50/60Hz only.
- Be careful not to set or drop any heavy objects on the power cord, or to damage the power cord in any way. Never operate this printer with a damaged power cord.
- Should any solid object or liquid fall into the cabinet, unplug the printer and have it checked by qualified personnel before operating it any further.
- Never disassemble the printer.
- To disconnect the power cord, pull it out by the plug. Never pull the power cord itself.
- When the printer is not going to be used for an extended period of time, disconnect the power cord from the wall outlet.
- Do not handle the printer roughly.
- To reduce the risk of electrical shock, always unplug the printer from electrical outlet before cleaning and servicing the printer.
On installation
- Avoid placing the unit in a location subject to:
-vibration
high humidity
excessive dust
direct sunlight
extremely high or low temperatures
- Do not use electrical equipment near the unit. The unit will not work properly in electromagnetic fields.
-
The unit is designed to operate horizontally. Never attempt to operate the printer in a tilted position. If the unit was placed on its side or with its top panel facing down, make sure to remove the paper tray and check that the print papers are set properly before starting operation.
-
Do not place heavy objects on the printer.
- Leave enough room around the printer so that the ventilation holes are not blocked. Blocking these holes may cause internal heat build-up.
On moisture condensation
If the printer is brought directly from a cold location to warm location or placed in an extremely warm or humid room, moisture may condense inside the unit. In such cases the printer will probably not work properly and may even develop a fault if you persist in using it. If moisture condensation occurs, turn off the power and do not use the printer for at least one hour.
On transport
When you transport the printer, remove the print cartridge from the printer and put the unit in the original box with the protective packaging.
If you no longer have the original box and packing parts, use the substitutive packing material so that it will not be damaged while transporting.
On cleaning
Clean the cabinet, panel and controls with a soft dry cloth, or a soft cloth lightly moistened with a mild detergent solution. Do not use any type of solvent, such as alcohol or benzine, which may damage the finish.
Precautions (continued)
On floppy disks
To protect data recorded on floppy disk, note the following:
- Avoid storing floppy disks near magnets or magnetic fields such as those of speakers and televisions, permanent erasure of disk data may result.
- Avoid storing floppy disks in areas subject to direct sunlight or sources of high temperature, such as heating device. Floppy disk warping of damage may result, rendering the disk useless.
- Avoid contact with the disk's surface by opening the disk shutter plate. If the disk's surface becomes blemished, data may be rendered unreadable.
- Avoid getting liquids on the floppy disk or using floppy disks in areas subject to high humidity. Otherwise, data may be rendered unreadable.
- Be sure to use the floppy disk case to ensure protection of important data.
- Use only a 2HD type disk head cleaner when cleaning the disk drive.
- Even when you use a 3.5 inch 2HD floppy disk, image data may not be recorded and/or displayed depending on the using environment. In this case, use the other brand disks.
Back up recommendation
To avoid the potential risk of data loss, always copy (back up) data to the other floppy disk.
On print paper
Use the set of the print paper and print cartridge supplied together in the same carton. If you use them in different combination, proper printing results may not be obtained, or paper jam or other trouble may occur.
Troubleshooting
If you run into any problems using the printer, use the following table to troubleshoot the problem.
If the problem persists, consult your Sony dealer.
When you use the printer with the printer utility, see also the User's Guide for Printer Utility.
Cannot operate the printer after the power switch is turned on.
Connect the AC power cord to an AC outlet securely (page 10).
The television displays no images.
Set the input selector of the television to "VIDEO."
Turn on the printer and connected devices including the television and the video equipment.
Connect the printer to the television and video equipment (page 9).
Insert a floppy disk which is formatted in the MS-DOS format properly. Check that images are recorded on the inserted floppy disk.
Start playback on the video equipment.
Set INPUT SELECT to appropriate position.
Error message appears on the TV screen.
Refer to "If an error message appears" on page 42.
Cannot remove the print cartridge.
Turn the printer off then on. After the motor sound stops, try to remove the cartridge (page 15).
Printing takes longer than usual.
If the printing indicator is flashing, see "If the indicators are on" on page 43.
Troubleshooting (continued)
Cannot print.
Insert the print paper (page 16).
Try printing again after removing the print paper if the print paper has emerged from the paper outlet at the rear.
See "If the indicators are on" on the next page.
Insert the print paper if you use the optional automatic feeder (page 17).
Insert the print cartridge (page 14).
Use the proper set of the print cartridge and print paper (page 13).
The beeps sound.
Check that you operate with the correct procedures.
See "If the indicators are on" on the next page.
If an error message appears
NO DISK
The floppy disk is not inserted. Insert the floppy disk into the floppy disk slot.
DISK ERROR
The inserted floppy disk is not formatted, or there is something wrong with the disk. Format the floppy disk in the MS-DOS format (512 byte·18 sector) using the Digital Mavica or your PC.
DISK PROTECT
The write protect tab on the inserted floppy disk is set to the write protect position. Set it to the write enable position and then record the image.
DISK FULL
There is not enough space to record the image. Delete unnecessary images, or use a new floppy disk.
NOFILE
There is no image recorded on the disk. Insert the disk on which images are recorded.
There is no image specified with the Digital Mavica or the Printer Utility (when PRESET SELECT is set to "MAVICA" or "PC").
FILE ERROR
The selected image is broken.
If the indicators are on
If you cannot print, check the indicators on the front panel.
The ribbon error indicator lights.
The print cartridge is not loaded. Insert the print cartridge (page 14).
The print cartridge has run out. Change the print cartridge (page 15). The printer will start printing automatically.
Both the ribbon error and paper supply indicators flash.
The combination of the print paper and print cartridge is not proper. Use the print paper for the print cartridge you are using (page 13).
When you use the optional automatic feeder, remove it the from the printer, then insert the print paper and reinstall the automatic feeder.
Note
The POWER indicator always lights up while the printer is turned on.
Troubleshooting (continued)
The paper supply indicator and printing indicators light up.
No paper is inserted. Insert the print paper (page 16).
When you use the optional automatic feeder, remove it the from the printer, then insert the print paper and reinstall the automatic feeder.
The MEMORY indicator flashes.
The printer is processing the data for storing to the internal memory. It takes some time to operate again.
The ribbon error, paper supply and printing indicators flash.
Print paper is jammed. See "If the print paper is jammed" below.
All indicators flash.
An error has occurred. Turn off the printer, then turn on again.
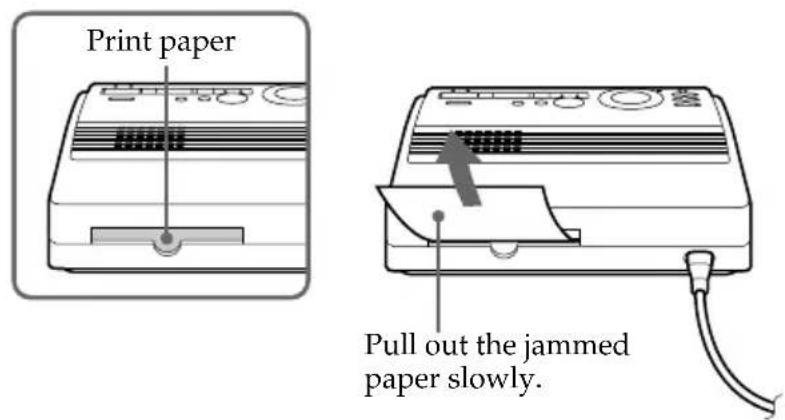
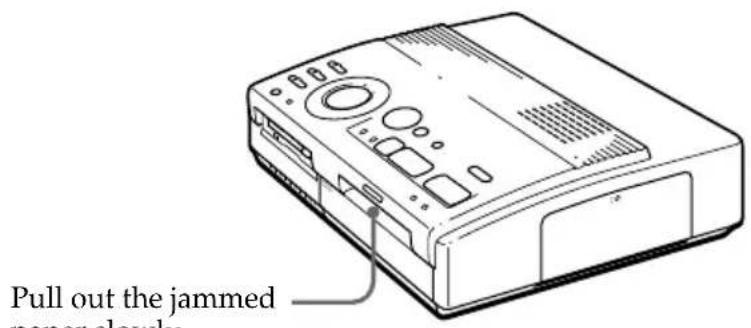
If the print paper is jammed
If the print paper is jammed, the ribbon error, paper supply and printing indicators flash and printing stops. Turn off the power and remove the jammed paper.
Remove the jammed paper from the paper outlet on the rear panel.
Remove the jammed paper from the automatic feeder.
Notes
- When you print from the video equipment, printing may not resume automatically even after you have removed the jammed paper. In this case, turn the power off and on. Then, try printing from the video equipment after capturing the desired image again.
- If you cannot remove the jammed paper, contact your Sony dealer.
Optional supplies (print packs)
You need an optional set of print paper and ink ribbon cartridge with the VP mark for printing.
Make sure to use the following set.
VPM-P50STA (Standard papers)
One print cartridge for printing up to 50 sheets and two set of 25 sheets of standard paper
VPM-P50WSA (Adhesive-label sheets for sticker)
One print cartridge for printing up to 50 sheets and two set of 25 adhesive-label sheets with one sticker per sheet
VPM-P50S16A (16-cut adhesive-label sheets for sticker)
One print cartridge for printing up to 50 sheets and 50 cut adhesive-label sheets
About number of print
Each print pack contains print paper and print cartridge.
If you try printing with the already printed paper, the print paper is left over, because the each print cartridge allows you to make print in the same number of print papers contained in the print pack.
Specifications
Printing system
Sublimation dye transfer printing (Yellow/Magenta/Cyan 3 pass)
Effective pixels
1,376 (H) x 1,024 (V) dot
Printing size
114 (H) × 85 (V) mm (maximum)
(4^1 / 2× 3^3 / 8 inches)
Gradations
256 levels (8 bits), per color (24 bits)
Approx. 16,770,000 colors
Printing time
Approx. 100 seconds per sheet
(excluding the time for data processing and data transferring from the video equipment or floppy disk)
Input/output connectors
VIDEO INPUT connector (phono jack x 1)
1 Vp-p, 75 ohms (unbalanced), sync negative
SVIDEO INPUT connector
(4-pin mini-DIN x 1)
Y: 1 Vp-p, 75 ohms (unbalanced), sync negative
C: 0.286 Vp-p (color burst),
75-ohms(unbalanced)
VIDEO OUTPUT connector
(phono jack x 1)
1 Vp-p, 75 ohms (unbalanced), sync negative
3.5" Floppy disk drive
Print cartridge
See page 45.
Print paper
100· 140mm (4× 5^5 / 8 inches)
See page 45.
Power requirements
110 - 120 V AC, 50/60 Hz, 0.6 A (for the FVP-1)
220 - 240 V AC (for the FVP-1E)
Power consumption
72W (printing)
13 W (stand by mode)
Operating temperature
5^ to 35^ (41 F to 95 F)
Dimensions
Approx. 301· 83· 246mm
(w/h/d, excluding protruding parts)
(12· 3^3 / 8· 9^7 / 8 inches)
Mass
Approx. 3kg (6 lb 10 oz)
Supplied accessories
See page 5.
Design and specifications are subject to change without notice.
Chart for various print mode
Standard printing (page 18,21)

Date printing (page 24)
Index
A
AC power connector 10
Adjusting the clock 11
Arrowbuttons (一 /一 /一 / 19
Automatic feeder VPF-A1 17
C
CAPTURE button 19,22
Chart for various print mode 48
CLEARALLbutton 22
Clock
adjusting the clock 11 displaying the clock 12
CLOCK SET button 11
Connecting printer 8
video equipment 9
AC power cord 10
Cover for the optional automatic feeder 17
D, E, F
DATE switch 24
Eject lever 15
ENTER button 19
Error messages 42
Features 4
Floppy disk inserting 8
Precautions 40
I, J, K, L, M, N, O
Identifying the parts 6
INPUTindicator 22,43
INPUT SELECT switch 18,24
MEMORY indicator 22, 43
Operation panel 7
Optional supplies 13
P
Paper inlet/outlet 16
Paper outlet 45
Paper supply indicator 43
PICTURE button 20, 22
POWERindicator 15
POWER switch 11
Precautions 38
PRESET SELECT switch 36
PRINT button 20,23
Print cartridge loading 14
Optional supplies 13, 46
Print indicator 20, 23, 43
Printmode dial 19,22, 26,28,30,32
Printpacks 13,46
Print paper inserting 16
Optional supplies 13, 46
Printing
an image recorded on the floppy disk 18
an image from the video equipment 21
the date 24
split prints 26
a label 30
an index list 32
images specified with the Printer Utility 34
R,S,T,U
Recording the video picture 36
Ribbon error indicator 43
SVIDEO INPUT connector 9
SAVE button 37
Specifications 47
Troubleshooting 41
Unpacking 5
V
VIDEO INPUT connector 9
VIDEO OUTPUT
connector 8,9
VPF-A1 17
Others
3.5-inch floppy disk eject button 8
3.5-inch floppy disk insertion slot 8
WARNING
Compartment à cassette
nk ribbon should tear


- Digital Color Printer
- 取叢説明書
- 警告
- Operating Instructions
- Mode d'emploi
- FVP-1/1E
- 安全のたてに
- D
- E
- F
- 1
- m = 311
- 七
- 于
- 卜
- 二
- 业
- 7
- A
- M
- X
- U
- ↓
- お問い合わせ用紙
- For Customers in the U.S.A.
- Owner's Record
- WARNING
- CAUTION
- Table of contents
- Getting Started
- Setting Up
- Printing
- Making Various Prints
- For Your Information
- Features
- Fine printing with 1.41 million pixels
- Direct printing of the image from the Digital Mavica
- Printing and saving images from the video equipment
- Various types of printing
- More types of various printing using supplied software
- Printing 25 sheets continuously
- Unpacking the printer
- Identifying the parts
- Operation Panel
- Indicators
- Connecting the printer
- Inserting the floppy disk
- Ejecting the floppy disk
- Usable floppy disks and images you can print
- Notes
- Connecting to the video equipment
- If the video equipment has the S-video output connector
- When both the SVIDEO INPUT andVIDEO INPUT connectors of the printer are connected
- Connecting the printer (continued)
- Connecting the AC power cord
- Adjusting the clock
- Adjusting the clock (continued)
- Displaying the clock
- Using optional supplies (print packs)
- Note
- Loading the print cartridge
- To replace the print cartridge
- To load the half-used ink ribbon cartridge
- If ink ribbon should tear
- Notes on storing the print cartridge
- Inserting the print paper
- When you use the optional automatic feeder VPF-A1
- Notes on storing the print paper
- Printing an image recorded on the floppy disk
- Preparations
- Scrolling the pages
- Cancelling the selection
- Selecting multiple images
- Displaying the image in full-size
- Printing an image recorded on the floppy disk (continued)
- If the print paper is not loaded
- Printing direction
- Printing the same image again
- Printing other images
- Printing multiple images continuously
- Printing an image from the video equipment
- To Selector position
- Printing an image from the video equipment (continued)
- Blur compensation
- Re-selecting the image
- Press PRINT.
- Remove the print from the printer.
- Printing the date
- Before you begin
- Making split prints
- Printing images from the floppy disk
- Select the image.
- Re-selecting the type of the split
- Canceling the operation
- To check the actual print image
- Making split prints (continued)
- Printing images from the video equipment
- When you select "VIDEO MOTION"
- Press PRINT.
- Making a label for a floppy disk
- When printing the input image from the video equipment
- Making an index list of images
- About date printing
- To display the actual print image
- Printing images specified with the Printer Utility
- Displaying the print image
- Recording the video picture as a still image
- Press SAVE.
- About file name of the recorded image
- If an error message appears
- Precautions
- On safety
- On installation
- On moisture condensation
- On transport
- On cleaning
- Precautions (continued)
- On floppy disks
- Back up recommendation
- On print paper
- Troubleshooting
- Cannot operate the printer after the power switch is turned on.
- The television displays no images.
- Error message appears on the TV screen.
- Cannot remove the print cartridge.
- Printing takes longer than usual.
- Troubleshooting (continued)
- Cannot print.
- The beeps sound.
- NO DISK
- DISK ERROR
- DISK PROTECT
- DISK FULL
- NOFILE
- FILE ERROR
- If the indicators are on
- The ribbon error indicator lights.
- Both the ribbon error and paper supply indicators flash.
- If the print paper is jammed
- Optional supplies (print packs)
- VPM-P50STA (Standard papers)
- VPM-P50WSA (Adhesive-label sheets for sticker)
- VPM-P50S16A (16-cut adhesive-label sheets for sticker)
- About number of print
- Specifications
- Chart for various print mode
- Index
- C
- D, E, F
- P
- R,S,T,U
- V
- Others
- nk ribbon should tear
Brand : SONY
Model : FVP1
Category : Printer