
Tornado 2108 HW - Tractor STIGA - Free user manual and instructions
Find the device manual for free Tornado 2108 HW STIGA in PDF.

| Product type | Ride-on lawn tractor |
| Brand | Stiga |
| Model | Tornado 2108 HW |
| Length | Variable depending on configuration (with/without bag) |
| Width | Variable depending on configuration (with/without side deflector) |
| Height | Not specified in the manual |
| Weight | Variable depending on equipment (see rating plate) |
| Engine | 4-stroke, petrol |
| Transmission | Hydrostatic |
| Cutting width | 108 cm (depending on series SD 98/108) |
| Cutting height | 3 to 8 cm (7 positions) |
| Fuel tank capacity | Not specified (see rating plate) |
| Front tyre pressure | See technical data table |
| Rear tyre pressure | See technical data table |
| Cutting system | Rotary blades with side or rear discharge depending on version |
| Mowing mode | Collection, ground discharge, mulching (optional kit) |
| Safety | Safety devices: engine cut-off if operator absent, blade brake, discharge protection |
| Battery | 12 V, to be charged before first use and after inactivity |
| Maintenance | Oil change, blade cleaning, check of fastenings every 25 hours |
| Compatible accessories | Trailer, spreader, snow blade, collection broom, protective cover |
| Intended use | Private individuals, amateur use, lawn mowing |
Frequently Asked Questions - Tornado 2108 HW STIGA
User questions about Tornado 2108 HW STIGA
0 question about this device. Answer the ones you know or ask your own.
Ask a new question about this device
Download the instructions for your Tractor in PDF format for free! Find your manual Tornado 2108 HW - STIGA and take your electronic device back in hand. On this page are published all the documents necessary for the use of your device. Tornado 2108 HW by STIGA.
USER MANUAL Tornado 2108 HW STIGA
MP 84 Series
MP 98 Series
SD 98 Series
SD 108 Series

EN Ride-on lawnmower with seated operator - OPERATOR'S MANUAL
WARNING: read thoroughly the Instruction booklet before using the machine.
[7]Pumpetryk for fordak
[8]Pumpetryk for bagdaek
[9] Vægt (*)
[10] Minimumsradius af/DD klippet graes
[11] Klippehoge
[12] Klippebrede
[42.A1, 42.A2] “Mulching
[42.C] Zugvorrichtung
[42.D] Abdeckung
[4] Electrical system
[5] Front tyres
[6] Rear tyres
[7] Front tyre pressure
[8] Rear tyre pressure
[9] Mass (*)
[10] Minimum radius of uncut grass
[11] Cutting height
[12] Cutting width
[13] Mechanical transmission Forward speed (approximate) at 3000min^-1
[14] Hydrostatic transmission Forward speed (approximate) at 3000min^-1
[15] Speed limit with snow chains (if available)
[16] Dimensions
[17] Length
[18] Length with grass catcher (length without grass catcher)
[19] Width
[20] Width with side discharge chute (Width without side discharge chute)
[21] Height
[22] Cutting means code
[23] Fuel tank capacity
[24] Admissible load on towing device (maximum vertical weight)
[25] Admissible load for towing device (maximum towing weight)
[26] Maximum admissible tilt
[27] Acoustic pressure level
[28] Measurement uncertainty
[29] Measured acoustic power level
[30] Guaranteed acoustic power level
[31] Operator position vibration level
[32] Steering wheel vibration level
[33] Table for correct accessory combinations
[33.A] Rear accessories
[33.B] Front accessories
[42] Accessories available on request
[42.A1, 42.A2] "Mulching" kit
[42.B] Maintenance battery charger
[42.C] Towing kit
[42.D] Cloth cover
[42.E] Rear discharge guard kit (only for MP series)
[42.F] Snow chains (18")
[42.G] Mud / Snow wheels (18")
[42.H]Trailer
[42.1] Sprinkler
[42.J] Lawn roller
[42.K] Snow shovel
[42.L] Leaf and grass catcher (only for SD series)
- Please refer to the data indicated on the machine's identification plate for the exact figure.
[1] ES - DATOS TECNICOS
[2] Potencia nominal (*)
[42.K] Quitanieves de cucilla
[1] FI-TEKNISET TIEDOT
[2] Nimellisteho (*)
[42.C] Kit remorquage
[42.D] Housse de protection
[42.E] Kit protectur d'éjection arrière (seule
[33.A] Accessoires awhile
[26] Maks. tillatt helling
[27] Lydtrykkniva
[28] Maleusikkerhet
[29] Malt lydeffektniva
[30] Garanter lydefeftkniva
[42.A1, 42.A2] Mulching-sett
[42.B] Batterilader
[10] MInHIMaJIbHbI paJnyc HeCKoUeHHOH TpaBbI
[11] BbICota cKaaUNBaEMo TpaBbl
[12] WupnHa cKaunBaHn
[13] MexaHuecka TpaHCmncn - Chopocb nepeDbNKeHH (opHeHTnpOBOuHa) np3000 MnH
[14] Гадоростандахая Трасмнccn -Скорoctь поедвдени (opentinpoBOvHa) npn 3000 mH-1
[15] PpeJeI cKOpocTn C ceIaMn npOTINBOCKOJIbKeHEnC IIN PpeDyCMOTpeHO 3TO DIOONIHITeJIbHoe OobopyDOBaHne)
[16]「a6apntbl
[17]Динна
[26]ДOnyuctMbI MaKcHMaJIbHbI HaKIOH
[27] ypoBHeH 3ByKOBOr DaBHeHnA
[28] NorpewHOCTb n3MepeHH
[29]ИЗмepeHHbI yPoBeHb 3ByKOBo MOnHOCHTN
[30] TapaHTnpyEmbI ypOBeHb 3ByKOBO MOUHOCTN
[31] YpOBeHb Bn6paunHa MeCTe BoDITeJIa
[32] YpOBeHb Bn6paun Ha pyne
[33] Ta6nIca npabunbHorO coUeTaHn npHaJNeJXHOCTe- HabeChbIX opyDIn
[33.A] 3aHnHe HabeChbIe OpynIa
[33.B]ФpoHTaIbHbIeHaBeChbIeOpyIa
[42] npnHaJneKHOCTN-HaBeCHbIe OpydIn no 3aKa3y
[42.A1, 42.A2] Komnlekt dЯ MylbvyroBaHnY
[42.B] noДернИВaIOUe 3apIdHoe yCTpOINCTBO
[42.C] PpniueHoe yctpoiCtBO [42.D] 3aunThbIyexoI
[42.E] Komnnekt 3aunTb1 3aHero BbIbpoca (ToIbKO dIra cepnn MP)
[42.l] Pa36paacbIBaTeIb
[42.J] BaIok dIy TpaBbl
[42.K] UHeKopoToPbHbI CHeroOoHcTHTeJIb
[42.L] C6opuNK TpaBbI NlcTbeB (ToIbKO dIa cepHn SD)
- Tochoe 3haeHne CM. NaIDEHTNΦIKAUHOHHom JpJIbke MaUNHbI
[1] SK-TECHNICKÉ PARAMETRE
[2] Menovity vykon (^*)
[3] Otáčky za minútu (*)
[4] Elektroinstalacia
[42.K] Snehová radlca
[42.L] Zberac lista a travy (vylucne pre sériu SD)
[32] Vibrationsniva pa ratten
[42.A1, 42.A2] Sats for "mulching"
[42.B] Batteriladdare for utjaminingsladdning
[42.C] Sats for bogsering
[42.D] Presenning
[42.G] Hjul for lera/snö
[42.H] Spridarek
[42.I] Slap
[42.J] Vals for gräs
[42.K] Snorjare med blad
6. USO DELLA MACCHINA
15.1 KIT PER MULCHING
6.5 PRACOVNI CINNOST
6.5.1 Pojezd dopredu a presuny
Béhempresun:
7.7 FIXACNI MATICE A SROUBY
1b. Kun for kofangere at type "II"
For at skifte position:
- skru skruen (fig.17.B) Ios og tag den ud
- saet hjulet (fig.17.A) med afstandsstykket (fig.17.C) i hullet svarende til den onskede afstand
- stram skruen (fig.17.B) i bund i mootrikken (fig.17.D).
b. kun modeller med opsamling bagpa
For at skifte position:
- skru møtrikken (fig.18.B) af og fjern stiften (Fig.18.C).
- anbring hjulet (fig. 18.A) i den ønskede position
- genmontér stiften (Fig.18.C) og sorg for at stiftens hovede (Fig.18.C) er vendt indad mod maskinen
- stram møtrikken (fig.18.B) helt.
7.5 RENGØRING
15.1 KIT TIL "MULTICLIP"
15.3 KIT TIL TRAKNING
Til traekning af en lille anhaenger (fig. 43.C).
15.4 PRESENNING
15.5 KIT HINTERER AUSWURFSCHUTZ
- GENERAL INFORMATION 2
2.SAFETY REGULATIONS. 2 - GETTING TO KNOW THE MACHINE....4
3.1 Description of the machine and planned use 4
3.2 Safety signs 5
3.3 Identification label 6
3.4 Main components 6
- ASSEMBLY 6
4.1 Assembly components.. 6
4.2 Steering wheel assembly 7
4.3 Seat assembly 7
4.4 Mounting and connecting the battery.... 7
4.5 Mounting the rear bumper.. 7
4.6 Side discharge chute assembly (for models with side discharge only) 7
4.7 Mounting the cutting-means assembly side reinforcements (for side discharge models only, if foreseen). 8
4.8 Rear plate assembly and completion (for rear collection models only) 8
5.CONTROLS. 8
5.1 Key ignition switch 8
5.2 Throttle control 8
5.3 Parking brake lever.. 9
5.4 Clutch / brake pedal (mechanical drive) 9
5.5 Speed change lever (mechanical drive) 9
5.6 Brake pedal (hydrostatic drive) 9
5.7 Drive pedal (hydrostatic drive) 9
5.8 Hydrostatic transmission disengagement lever (hydrostatic transmission) 10
5.9 Cutting means engage and disengage functions 10
5.10 Reverse gear cutting consent button... 10
5.11 Cutting height adjuster lever 10
5.12 Acoustic alarm indicator light and device (for rear collection models only) 10
5.13 Grass catcher tipping lever (if foreseen, for rear collection models only) 10
- USING THE MACHINE 10
6.1 Preparation 10
6.2 Safety checks.. 11
6.3 Using on slopes 12
6.4 Startup 12
6.5 Operation 13
6.6 Stop 14
6.7 After operation 15
- ROUTINE MAINTENANCE 15
7.1 General information.. 15
7.2 Refuelling / emptying the fuel tank.... 15
7.3 Check, top up, draining of engine oil ... 16
7.4 Anti-chipping wheels 16
7.5 Cleaning 17
7.6 Battery 17
7.7 Nuts and bolts 18
- EXTRAORDINARY MAINTENANCE 18
8.1 Safety recommendations 18
8.2 Cutting-means assembly / cutting means 18
8.3 Replacing of front / rear wheels 18
8.4 Electronic circuit board. 19
8.5 Replacing a fuse 19
8.6 Replacing bulbs 20
8.7 Rear axle 20
- STORING THE MACHINE 20
10.HANDLING AND TRANSPORTATION 20 - ASSISTANCE AND REPAIRS 20
12.WARRANTY COVERAGE 21 - MAINTENANCE TABLE 21
14.PROBLEMIDENTIFICATION 22
15.ATTACHMENTS 25
15.1 "Mulching" kit 25
15.2 Maintenance battery charger 25
15.3 Towing kit 25
15.4Canvas cover 25
15.5 Rear discharge guard kit 25
15.6 18" Snow chains 25
15.7 18" Mud / snow wheels 25
15.8 Trailer 25
15.9 Sprinkler 25
15.10 Grass roller 25
15.11 Snowblade 25
15.12 Leaf and grass collector 25
1. GENERAL INFORMATION
1.1 HOW TO READ THE MANUAL
Some paragraphs in the manual contain important information regarding safety and operation and are emphasized in this manner:
NOTE or IMPORTANT these give details or further information on what has already been said, and aim to prevent damage to the machine.
The symbol highlights danger. Noncompliance with the warning could lead to personal and/or third party injury and or damage.
The paragraphs highlighted in a square with grey spots indicate the optional characteristics not on all models documented in this manual. Check if the characteristic is on this model.
Whenever reference is made to a position on the machine "front", "back", "left" or "right" hand side, this refers to the operator's working position.
1.2 REFERENCES
1.2.1 Figures
The figures in these instructions for use are numbered 1, 2, 3, etc.
Components shown in the figures are marked A, B, C, etc.
A reference to component C in figure 2 is written: "See fig. 2.C" or simply "(Fig. 2.C)".
The figures are given as a guide only. The actual parts may vary from those shown.
1.2.2 Titles
The manual is divided into chapters and paragraphs. The title of paragraph "2.1 Training" is a sub-title of "2. Safety regulations". References to titles or paragraphs are marked with the abbreviation chap. or par. and the relevant number. Example: "chap. 2" or "par. 2.1"
2. SAFETY REGULATIONS
2.1 TRAINING
Become acquainted with the controls and the proper use of the machine. Learn
how to stop the engine quickly. Failure to follow the warnings and instructions may result in fire and/or serious injury.
- Never allow children or persons unfamiliar with these instructions to use the machine. Local regulations may restrict the age of the operator.
- Never use the machine if the user is tired or unwell, or has taken medicine, drugs, alcohol or any substances which may slow his reflexes and compromise his judgement.
- Do not allow children or other passengers to ride on the machine.
- Bear in mind that the operator or user is responsible for accidents or unexpected events occurring to other people or the property. It is the user's responsibility to assess the potential risk of the area where work is to be carried out, and to take all the necessary precautions to ensure his own safety and that of others, particularly on slopes or rough, slippery and unstable ground.
- If the machine is sold or lent to others, make sure that the operator looks over the user instructions contained in this manual.
2.2 PREPARATION
Personal Protective Equipment (PPE)
- Always wear suitable work attire, hard-wearing safety footwear with non-slip soles and long trousers. Do not operate the machine when barefoot or wearing open sandals. Wear hearing protection devices.
- Never wear scarves, shirts, necklaces, bracelets, clothing with flowing parts, laces or ties or any hanging or flapping accessory that could catch in the machine or in any objects or materials in the work area.
- Tie your hair back if it is long.
Work area/Machine
- Thoroughly inspect the entire work area and remove anything that could be thrown by the machine or damage the cutting means/rotating units (stones, branches, iron wire, bones, etc.).
Internal combustion engines: fuel
DANGER! The fuel is highly flammable.
- Keep the fuel in approved containers, in a safe place, away from any naked lights or heat sources.
- Keep the containers and storage area free of grass cuttings, leaves, or excessive grease.
-
Keep the containers out of the reach of children.
-
Do not smoke when filling up with fuel or when handling the fuel.
- Use a funnel to top up with fuel only in the open air.
- Do not inhale fuel fumes.
- Never remove the tank cap or add fuel while the engine is running or when the engine is hot.
- Open the fuel tank slowly to allow the pressure inside to decrease gradually.
- Do not approach the tank opening with a naked flame to check its contents.
- If you have spilled some fuel, do not attempt to start the engine but move the machine away from the area of spillage and avoid creating any source of ignition until the fuel has evaporated and fuel vapours have dissipated.
- Immediately clean up all traces of fuel spilt on the machine or on the ground.
- Replace caps of all fuel tanks and containers securely.
- Never start the machine in the same place in which you refilled it with fuel; the engine must be started in an area at least 3 metres from where you refuelled.
- If fuel is spilt on clothing, change clothing before starting the engine.
2.3 DURING OPERATION
Work Area
- Do not operate the engine in a confined space where dangerous carbon monoxide fumes can develop. All starting operations have to be effected in an open or well ventilated area. Always remember that exhaust gases are toxic!
- When starting up the machine, do not direct the silencer and therefore the exhaust fumes towards flammable materials.
- Do not use the machine in environments at risk of explosion, in the presence of flammable liquids, gas or powder. Electrical contacts and mechanical friction can generate sparks that can ignite the powder or vapours.
- Work only in daylight or with good artificial light in good visibility conditions.
- Keep persons, children and animals away from the working area. Instruct another adult to supervise any children in the vicinity.
- Avoid working with wet grass, in the rain and when there is a risk of a thunderstorm, especially lightening
- Pay careful attention to uneven ground (hills, dips), slopes, hidden hazards and obstacles than could limit visibility.
-
Be very careful near ravines, ditches or embankments. The machine could overturn if a wheel slides over the edge or if the earth gives way.
-
Pay attention on sloping ground which requires particular care to prevent overturning or loss of control of the machine. The main reasons for loss of control are:
-
Insufficient wheel grip
- Excessive speed
- Inadequate braking
- Type of machine unsuitable for its task
Lack of awareness of the effect of ground conditions, especially slopes - Incorrect use as a towing machine.
Behaviour
- When working behind the wheel, do not become distracted and maintain the required level of concentration.
Exercise caution when reversing or moving backwards. Look behind you to make sure there are no obstacles before and during operations in reverse gear. -
Use care when pulling loads or using heavy equipment:
-
Use approved drawbar hitch points only when towing;
- Do not turn sharply. Take care when reversing;
-
Use counterweight(s) or wheel weights whenever advised in the instructions manual.
-
Pay attention when using the grass catcher and attachments that can alter the stability of the machine, especially on slopes.
Always keep hands and feet away from the cutting means, when starting and when using the machine. - Attention: the cutting means will continue to rotate for a few seconds after disengagement or after you have switched off the engine.
- Pay attention to cutting-means assemblies with more than one cutting means, as a rotating cutting means can trigger the rotation of the others,
- Keep away from the discharge opening.
- Do not touch the engine parts which heat up during use. Burns hazard.
- To avoid the risk of fire, do not leave the machine standing in high grass with the engine running.
If something breaks or an accident occurs during work, turn off the engine immediately and move the machine away to prevent further damage; if an accident occurs with injuries or third parties are injured, carry out the first aid measures most suitable for the situation immediately and contact the medical authorities for any necessary health care. Carefully remove any debris which could cause damage or injury to persons or animals if ignored.
Use limitations
- Never operate the machine with guards damaged, missing or incorrectly assembled (grass catcher, side discharge guards rear discharge guards)
- Don't use the machine if the attachments/ tools are not installed in their seats.
- Never disengage, deactivate, remove or tamper with the safety systems/ microswitches installed.
- Do not strain the machine too much and do not use a small machine for heavy-duty work. If you use the right machine, you will reduce the risk of hazards and improve the quality of your work.
- The machine has not been approved for use on public roads. It must be used (as indicated by the highway code) in private areas closed to traffic.
Ensure regular maintenance and correct storage to maintain machine safety and high performance levels.
Maintenance
- Never use the machine with worn or damaged parts. Faulty or worn-out parts must always be replaced and never repaired.
- To reduce the risk of fire, regularly check the machine for oil and/or fuel leaks.
- Be careful during adjustment of the machine to prevent entrapment of the fingers between moving parts of the cutting means and fixed parts of the machine.
The noise and vibration levels shown in these instructions are the maximum levels for use of the machine. The use of an unbalanced cutting element, the excessive speed of movement, or the absence of maintenance have a significant influence on noise emissions and vibrations. Consequently, it is necessary to take preventive steps to eliminate possible damage due to high levels of noise and stress from vibration. Maintain the machine well, wear ear protection devices, and take breaks while working.
Storage
- Do not store the machine with fuel in the tank in an area where fuel vapours could reach a naked light, a spark or a strong heat source.
- To reduce fire risks, do not leave containers with debris inside a room.
2.5 ENVIRONMENTAL PROTECTION
Safeguarding the environment must be a relevant and priority aspect of machine use, of benefit to the community and the environment we live in.
- Avoid being a disturbance to the neighbourhood. Use this machine at reasonable times of the day only (not early morning or late evening when the noise could cause disturbance).
- Adhere strictly to the local regulations governing the disposal of packaging, oil, fuel, filters, damaged parts or any other element which may have an impact on the environment; this waste should not be disposed of along with standard household waste, but must be disposed of separately and sent to special waste disposal facilities for handling and recycling.
- Scrupulously comply with local regulations for the disposal of waste materials
- When the machine is withdrawn from service, do not dump it in the environment, but take it to a waste disposal facility in accordance with the local regulations in force.
3. GETTING TO KNOW THE MACHINE
3.1 DESCRIPTION OF THE MACHINE AND PLANNED USE
This machine is a ride-on lawn mower with seated operator.
The machine is equipped with an engine which drives a cutting unit protected by a casing, as well as a transmission unit that moves the machine. This machine is fitted with rear traction.
The rear axle can also be fitted with:
- mechanical drive with 5 forward gears and 1 reverse gear.
hydrostatic drive with infinite ("Hydro") forward and reverse gears.
The operator is able to operate the machine and use the main controls, always seated in the operator's position.
The safety devices installed on the machine will disengage the engine and cutting means in a couple of seconds (par. 6.2.2).
3.1.1 Intended use
This machine was designed and built to cut grass.
Generally speaking this machine can:
-
MP 84 / MP 98 Series can:
-
mow the grass and collect it in the grass catcher
- mow the grass and discharge it on the ground from the rear section
- mow, chop and deposit the grass on the ground (mulching effect).
- SD 98/108 Series can:
- mow the grass and discharge it from the side
- mow, chop and deposit the grass on the ground (mulching effect).
The use of special attachments provided for by the Manufacturer as original equipment or which may be purchased separately, allows this work to be done in various operating modes, illustrated in this manual or the instructions that accompany the single attachments. Likewise, the intended use can be extended to include other functions by applying supplementary attachments (if provided for by the Manufacturer), abiding by the restrictions and conditions indicated in the instructions accompanying the attachment.
3.1.2 Improper use
- Any other usage not in keeping with the afore-mentioned ones may be hazardous and harm persons and/or damage things. Examples of improper use may include, but are not limited to: - allowing children, animals or other passengers to ride on the machine as they could fall off and injure themselves or compromise safe driving by the operator; - towing or pushing loads without the use of the specified attachment for towing; - using the machine for riding over unstable, slippery, icy, stony, rough, marshy ground or puddles that do not allow the consistency of the ground to be assessed; - using the cutting means on surfaces other than grass; - using of the machine for leaf or debris collection.
IMPORTANT Improper use of the machine will invalidate the warranty, relieve the Manufacturer from all liabilities, and the user will consequently be liable for all and any damage or injury to himself or others.
3.1.3 User types
This machine is intended for use by consumers, i.e. non-professional operators. The machine is intended for "DIY" use only.
IMPORTANT The machine must be used by one operator.
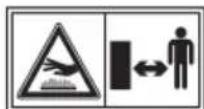
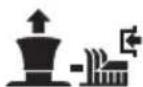
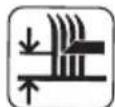
3.2 SAFETY SIGNS
The machine has various symbols on it (fig. 2). They are used to remind the operator of the behaviour to follow to use it with the necessary attention and caution. Meaning of symbols:
Warning: Read the instructions before operating the machine.
Warning: Disconnect the key and read the instructions before carrying out any maintenance or repair work.
Danger! Ejected objects: Do not operate without either the rear discharge guard or the grass catcher being in place. (for models with rear collection only)
Danger! Ejected objects: do not operate without side discharge chute in place. (for models with side discharge only)
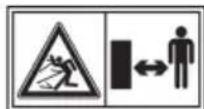
Danger! Ejected objects: Keep bystanders at a safe distance
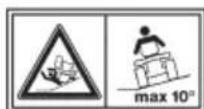
Danger! Machine rollover: Do not use this machine on slopes greater then 10^
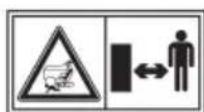
Danger! Dismemberment:
Make sure that children stay clear of the machine all the time when engine is running.
Cutting hazard. Cutting means in motion. Do not put hands or feet near or under the opening of the cutting means housing.

Warning! Keep away from hot surfaces.
When using the towing kit, do not exceed the recommended loads stated on the label and follow the safety instructions.
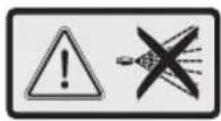
Warning! Never use pressure lances to wash the transmission system.
IMPORTANT Any damaged or illegible decals must be replaced. Order replacement decals from an authorised assistance centre.
3.3 IDENTIFICATION LABEL
The identification label holds the following data (fig. 1):
- Acoustic power level
- CE Conformity marking
- Year of manufacture
- Operating engine power and speed
- Machine model
- Type of machine
- Serial number
- Weight in kg
- Name and address of Manufacturer
- Type of transmission
- Article code
Write the identification data of the machine in the specific space on the label on the back of the cover page.
IMPORTANT Quote the information on the product identification label whenever you contact an authorized service workshop.
IMPORTANT The example of the Declaration of Conformity is provided on the last pages of the manual.
3.4 MAIN COMPONENTS
The machine is composed of a series of main components that have the following functions (fig.1):
A. Cutting-means assembly: this is the assembly comprising the casing that houses the rotating cutting means, and the cutting means.
B. Cutting means: these are what cut the grass; the fins at the ends help convey the cut grass towards the discharge chute.
C. Side discharge chute: a safety device to prevent objects drawn up by the cutting means from being hurled by the machine (for side discharge models only).
D. Discharge chute: this is the part connecting the cutting-means assembly to the grass catcher (for models with rear collector only).
E. Grass catcher: as well as collecting the grass cuttings, this is also a safety element that stops any objects drawn up by the cutting devices from being hurled away from the machine (for rear collection models only).
F. Rear discharge guard (available upon request): this can be fitted in place of the grass catcher and prevents objects from being drawn up by the cutting means and hurled away from the machine. (for rear collection models only).
G. Driving seat: this is where the machine operator sits. It has a sensor connected to safety devices for detecting the presence of the operator.
H. Battery: provides the energy for starting the engine. Its specifications and regulations for use are described in a specific manual.
I. Engine: this moves the cutting means and drives the wheels. Its specifications and regulations for use are described in a specific manual.
J. Front bumper: this protects the front section of the machine.
K. Steering wheel: turns the front wheels.
4. ASSEMBLY
The safety regulations to follow are described in chap. 2. Strictly comply with these instructions to avoid serious risks or hazards.
For storage and transport purposes, some components of the machine are not installed in the factory and have to be assembled after unpacking. Follow the instructions below.
Unpacking and completing the assembly should be done on a flat and stable surface, with enough space for machine handling and its packaging, always making use of suitable equipment. Do not use the machine until all the indications provided in the "ASSEMBLY" section have been carried out.
4.1 ASSEMBLY COMPONENTS
The packaging holds the components needed for assembly as listed in the table below:
| Description | |
| 1 | Steering wheel |
| 2 | Dashboard cover and steering wheel assembly parts |
| 3 | Driving seat |
| 4 | Battery |
| 5 Front bumpers |
| 6 Ant-chipping wheels |
| 7 Grass catcher with relative assembly screws and instructions (for models with rear collection only) |
| 8 Lower part of the rear plate, the grass catcher brackets and attachments necessary for completing and assembly (for rear collection models only) |
| 9 Side discharge chute (for models with side discharge only) |
| 10 Cutting-means assembly side reinforcements (for side discharge models only, if foreseen). |
| 11 Envelope containing: - the instruction manuals and documents - driving seat assembly screws - side discharge chute assembly fittings (for models with side discharge only) - the connection screws for the battery cables - 2 starter keys - 1 spare 10 A fuse |
4.1.1 Unpacking
- Cautiously open the packaging, paying attention not to lose components.
- Consult the documentation in the box, including these instructions.
- Remove all the unassembled parts from the box.
- Remove the machine from the packaging taking the following precautions: - move the cutting-means assembly to its maximum height (par. 5.10) to protect it against damage when the machine is lifted off the base pallet; - Lift the machine off the base pallet.
For hydrostatic drive models, move the rear drive release lever to the locked position (par. 5.13).
4.2 STEERING WHEEL ASSEMBLY
- Put the machine on a flat surface and straighten the front wheels.
- Mount the hub (fig. 3.A) on the shaft (fig. 3.B), making sure that the plug (fig. 3.C) is correctly fitted into the hub seat.
- Fit the dashboard cover (fig. 3.D) clicking the seven fasteners into place.
- Fit the steering wheel (fig. 3.E) onto the hub (fig. 3.A) with the spokes directed towards the seat.
5a. For type "I" steering wheel only - Fit the spacer (fig. 3.F) and fasten the
steering wheel in place using the screws supplied (fig. 3.G) in the indicated order.
5b. For type "II" steering wheel only - Fasten the steering wheel in place using the screws (fig. 3.F, 3.G) supplied, in the indicated order.
6. Fit the steering wheel cover (fig. 3.H) by clicking the fasteners into place.
4.3 SEAT ASSEMBLY
Fit the seat (fig. 4.A) onto the plate (fig. 4.B) using the screws (fig. 4.C).
4.4 MOUNTING AND CONNECTING THE BATTERY
The battery (fig. 5.A) is housed under the seat and secured by a spring (fig. 5.B).
- First connect the red wire (fig. 5.C) to the positive pole (+) and then the black wire (fig. 5.D) to the negative pole (-) , using the screws supplied as shown.
- Apply silicone grease to the terminals and check that the protective cap for the red wire (fig. 5.E) is in place.
IMPORTANT Always fully charge the battery according to the instructions in the battery booklet.
IMPORTANT To prevent the safety device in the electronic circuit board from cutting in, never start the engine until the battery is fully charged!
4.5 MOUNTING THE REAR BUMPER
1a. For type "I" bumpers only - Mount the front bumper (fig. 6A) on the bottom of the frame (fig. 6.B) using the four screws (fig. 6.C).
1b. For type "II" bumpers only
- Fit the two brackets (fig. 6.A) and (fig. 6.B) to the bottom of the frame (fig. 6.C) following the direction of assembly indicated in the figure: R = right; L = left.
- fully tighten the screws (fig. 6.D).
- Attach the front bumper (fig. 6.E) to the brackets (fig. 6.A) and (fig. 6.B) using the screws (fig. 6.F) and nuts (fig. 6.G).
4.6 SIDE DISCHARGE CHUTE ASSEMBLY (FOR MODELS WITH SIDE DISCHARGE ONLY)
-
From the inside of the side discharge chute (fig. 7.A), fit the spring (fig. 7.B) by inserting the terminal (fig. 7.B.1) into the hole and turning it so that both the spring (fig. 7.B) and the terminal (fig. 7.B.2) are securely positioned in their seatings.
-
Position the side discharge chute (fig. 7.A) in line with the cutting-means assembly brackets (fig. 7.C). Using a screwdriver, turn the second terminal (fig. 7.B.2) of the spring (fig. 7.B) to bring it outside the side discharge chute.
- Fit the pin (fig. 7.D) in the holes on the brackets (fig. 7.C) and on the side discharge chute, so that it passes through the coils of the spring (fig. 7.B) and the drilled end comes out of the inner most bracket.
- Insert the cotter pin (fig. 7.E) in the pin (fig. 7.D) hole (fig. D.1) and rotate the pin until it is possible to bend the two ends (fig. 7.E.1) of the cotter pin, (with the aid of a pair of pliers), so it cannot slide out and cause the pin to fall out (fig. 7.D).
Check that the spring works correctly and keep the side discharge chute securely lowered. Make sure that the pin is fitted properly to prevent it from falling out accidentally.
IMPORTANT For models with optional side unloading: make sure that the side unloading guard (Fig. 13.A) is lowered and locked by the safety lever (Fig. 13.B).
IMPORTANT Before disassembling or servicing the deflector, always push the safety lever (Fig. 14.B) and lift the side unloading guard (Fig. 14.A) to allow disassembly.
NOTE To remove the deflector, perform assembly steps in reverse order.
4.7 MOUNTING THE CUTTING-MEANS ASSEMBLY SIDE REINFORCEMENTS (FOR SIDE DISCHARGE MODELS ONLY, IF FORESEEN).
Complete the mounting of the cutting-means assembly by fitting the side reinforcements on the cutting-means assembly profile using the screws supplied (fig. 8)
4.8 REAR PLATE ASSEMBLY AND COMPLETION (FOR REAR COLLECTION MODELS ONLY)
-
Assemble the two lower brackets (fig. 9.A) and (fig. 9.B), following the assembly direction as shown in the illustration, and fasten them with the screws (fig.9.C) and nuts (fig. 9.D), tightening them completely.
-
Remove the two screws (fig. 9.H), which will be used later.
- Assemble the lower part (fig. 9.E) of the rear plate and fasten it to the lower brackets with the screws (fig. 9.F) and bolts (fig. 9.G), without tightening them completely.
- Finish fastening the lower part (fig. 9.E) of the rear plate, completely tightening the two central screws (fig. 9.H) that you previously removed and the four upper screws (fig. 9.I)
- Fully tighten the two bottom nuts (fig. 9.G).
- Insert the lever (fig. 9.J) of the "grass catcher full" indicator into its seat (fig. 9.K) and push it down until you hear a click.
- Assemble the two grass catcher brackets (fig. 9.L) and (fig. 9.M), following the assembly direction as shown in the illustration, and fasten them with the screws (fig. 9.N) and snap washers (fig. 9.O), tightening them firmly.
5. CONTROLS
5.1 KEY IGNITION SWITCH
The key turns the machine and headlamps (if fitted) On and Off.
It has four different positions (fig. 10.A):

- Stop position. The machine turns off immediately.

- Headlights On position (if fitted); After turning the engine on, turn the lights on by turning the key to this position. To switch them off, turn the key to On.

- On position. All services are enabled..

- Start position. Switch on the starter motor to start the machine. If you release the key on start it will automatically return to On.
5.2 THROTTLE CONTROL
Regulates the engine's r.p.m.
There are two types of throttle control according to the engine type:
A. Type "I" with separate Choke command (Fig. 10.E + Fig. 10.E.1)
B. Type "II" (Fig. 10.E)
The positions indicated correspond to:

- Choke Command - Cold start. Used to turn on the engine when cold. The «CHOKE» position enriches the mixture so it must only be used for the time necessary for cold starts.

- Maximum engine speed. To be used always when starting the machine, while it is On and during grass cutting operations.

- Minimum engine speed. Used when the machine is sufficiently warm during stationary periods of operation.
NOTE When moving from one area to another, put the lever in a position between «tortoise» and «hare».
This lever stops the machine from moving when it has been parked.
This lever has two positions (fig. 10.D), corresponding to:

- Brake disengaged. Press the pedal to disengage the parking brake (fig. 10.1). The lever returns to the brake disengaged position.

- Brake engaged. Press the pedal all the way down to engage the parking brake (fig. 10.1) and shift the lever to brake engaged position. When you take your foot off the pedal it will be blocked in the lowered position.
5.4 CLUTCH / BRAKE PEDAL (MECHANICAL DRIVE)
This pedal has a double function (fig. 10.1):

- during the first part of its travel it acts as a clutch, engaging and disengaging drive to the wheels.
- in the second part it works the brake on the rear wheels.
IMPORTANT Do not keep the pedal half way between clutch engagement or disengagement, as this can cause overheating and damage the transmission belt.
NOTE When the machine is in movement, keep your foot off the pedal.
5.5 SPEED CHANGE LEVER (MECHANICAL DRIVE)
This lever has seven positions (fig. 10.K):
1
- 5 forward gears Gear must only be engaged when the machine has stopped.
3
4
5
N
- Neutral «N»
R
- Reverse «R» Reverse must only be engaged when the machine has stopped.
To change gear, press the pedal halfway down (Fig. 10.1) and move the lever according to the indications on the label.
5.6 BRAKE PEDAL (HYDROSTATIC DRIVE)

This pedal works the brake on the rear wheels (fig. 10.1)
5.7 DRIVE PEDAL (HYDROSTATIC DRIVE)
This pedal engages drive in the wheels and controls the machine's forward and reverse speed (fig. 10.J):
- Forward drive gear. To insert the forward drive gear, press the front pedal with the tip of your foot. Increasing the pressure on the pedal progressively increases the speed of the machine.
-
Reverse gear. Reverse gear is engaged by pressing the rear pedal with your heel. Reverse must only be engaged when the machine has stopped.
-
Neutral position. The pedal automatically goes into neutral position when released.
NOTE If the drive pedal is used, whether forwards or for reverse, when the parking brake (fig. 10.D) is engaged, the engine stops.
5.8 HYDROSTATIC TRANSMISSION DISENGAGEMENT LEVER (HYDROSTATIC TRANSMISSION)
This lever has two positions, as shown on the plate (fig. 10.L):

- Drive engaged : for all uses, when moving and during cutting.
- Drive disengaged : this makes it much easier to move the machine by hand, with the engine turned off.
IMPORTANT To avoid damaging the transmission unit, this operation must be carried out only when the engine has stopped with the pedal (fig. 10.J) at neutral position.
5.9 CUTTING MEANS ENGAGE AND DISENGAGE FUNCTIONS
The mushroom switch allows you to engage the cutting means using an electromagnetic clutch (fig. 10.B):
- Cutting means engaged. Mushroom switch pulled

-
Cutting means disengaged. Mushroom switch engaged.
-
On disengaging the cutting means, a brake is simultaneously activated which stops their rotation within a few seconds.
NOTE If you engage the cutting means without taking the necessary safety precautions, the engine shuts down and cannot be restarted (see par. 6.2.2)
5.10 REVERSE GEAR CUTTING CONSENT BUTTON

By pressing and holding this button (fig. 10.F), it is possible to switch to reverse gear with the cutting means engaged without causing the engine to stop.
5.11 CUTTING HEIGHT ADJUSTER LEVER
Use this lever to raise and lower the cutting-means assembly to one of the 7 different cutting heights (fig. 10.G).

The seven positions for this lever, shown as 1 to 7 on the label, correspond to various cutting heights between 3 and 8cm

To go from one position to another, move the lever sideways and put it back in one of the stop notches.
5.12 ACOUSTIC ALARM INDICATOR LIGHT AND DEVICE (FOR REAR COLLECTION MODELS ONLY)
This light (fig. 10.C) comes on when the key (fig. 10.A) is in the "ON" position and stays on while the machine is running.
- When it flashes, it means that it is not ready to be started (see par. 6.2.2).
- The sound warning signals that the grass catcher is full (see par. 6.5.5).
5.13 GRASS CATCHER TIPPING LEVER (IF FORESEEN, FOR REAR COLLECTION MODELS ONLY)
This pull-out lever tips and empties the grass catcher. This means less work for the operator (fig. 10.H).
6. USING THE MACHINE
The safety regulations to follow are described in chap. 2. Strictly comply with these instructions to avoid serious risks or hazards.
6.1 PREPARATION
Before starting to mow, it is necessary to carry out several checks and operations to ensure you can work efficiently and in maximum safety.
6.1.1 Filling with oil and fuel
IMPORTANT The machine is supplied without engine oil or fuel.
Before using the machine check for fuel and the oil level (par. 7.2, par. 7.3). For refuelling and oil top-up methods and precautionsent follow the instructions given in (par. 7.2, par. 7.3) and in the engine handbook.
6.1.2 Seat adjustment
To change the seat position, loosen the four fixing bolts (fig. 11.A) and slide it along the slots. Once you have found the right position, tighten the four screws (fig. 11.A) thoroughly.
6.1.3 Tyre pressure
Having the right tyre pressure is the main condition for ensuring that the cutting-means assembly is horizontal and mows evenly.
- Unscrew the valve caps
- Connect a compressed air line with a gauge to the valves (fig. 12)
- Adjust the pressure according to the values indicated in the "Technical Data" chart.
6.1.4 Preparing the machine before starting work
NOTE This machine can be used to mow lawns in a number of different ways; before starting work, prepare the machine based on how the lawn is to be mowed.
a. Prepare the machine for side cutting and discharge of the grass onto the floor (for models with side discharge only)
- Always make sure that the spring inside the deflector (Fig. 13.A) and the safety lever (Fig. 13.B, 14.B) operate correctly, holding it firmly in the lowered position.
b. Preparation for grass cutting and collection in the grass catcher (for rear collection models only)
- Fasten the grass catcher (fig. 15.A) onto the supports (fig. 15.B) and centre it up
with the rear plate. Centring is ensured by using the right bracket as lateral support.
- Make sure that the lower pipe of the grass catcher opening is attached to the pawl (fig. 15.C).
c. Prepare the machine for rear cutting and discharge of the grass onto the floor (for models with rear collection only)
- If you decide to work without the grass catcher, a rear discharge guard kit (fig. 16; chap. 15.5) is available upon request. This has to be attached to the rear plate as indicated in the instructions.
d. Preparation for mowing and mulching of grass
- If you decide to mow the grass, mulching it and leaving it on the grass, a "mulching" kit is available upon request (chap.
15.1). This has to be attached to the rear plate as indicated in the instructions.
6.1.5 Positioning the anti-scalp wheels
The anti-chipping wheels are used to reduce the risk of tearing up sections of lawn, which can occur when the edge of the cutting-means assembly drags over irregular ground.
Position the wheels as indicated (par. 7.4).
6.2 SAFETY CHECKS
Run the following safety checks and check that the results correspond to those outlined on the tables.

Always carry out the safety checks before use.
6.2.1 General safety check
| Object Result | |
| Battery No damage to the c | asing,cover or terminals |
| Rear discharge guard,grass catcher | Good condition. No damage. Properly installed. |
| Side discharge guard, suction grid | Good condition. No damage. Properly installed. |
| Fuel lines and connections. | No leaks. |
| Electrical cables. All insulation | ion intact.No mechanical damage. |
| Oil lines No leaks. | No damage. |
| Drive the machine forwards and backwards, shift to neutral / release the drive pedal (par. 5.5; par. 5.7) | The machine slows down and stops |
| Press the brake pedal (par. 5.4; par. 5.6) | The machine stops |
| Test driving No abnormal vibrations. No abnormal sound | |
| Safety devices Proceed as indicated in par. 6.2.2 | |
6.2.2 Control of safety devices
The safety devices work in two ways:
A. they prevent the engine from starting if all the safety requirements have not been met;
B. by stopping the engine if even just one of the safety requirements is lacking.
| Action Result | |
| 1. gear in “neutral”;2. cutting means disengaged;3. operator seated. | The engine starts |
| the operator leaves his seat The engine stops | |
| the grass catcher is lifted or the rear discharge guard removed without disengaging the cutting means (for rear collection models only) | The engine stops |
| the parking brake is engaged without disengaging the cutting means | The engine stops |
| the speed change is activated or the drive pedal with the parking brake engaged | The engine stops |
| the reverse gear is engaged with the cutting means engaged, without pressing the consent button (par. 5.9) | The engine stops |
If any of the results fails to match the indications provided in the tables, do not use the machine! Contact a service centre to have it checked and repaired if necessary.
IMPORTANT Always bear in mind that the safety devices prevent the engine from starting if safety requirements have not been met. In these cases, once the start consent has been reinstated, the ignition key (fig. 10.A) must first be turned back to Of before the engine can be restarted.
6.3 USING ON SLOPES
Comply with the limits indicated in the "Technical Data" Tables ad in "fig. 19" regardless of the mowing direction.
Remember there is no such thing as a "safe" slope. Driving on grass slopes requires particular care. To prevent overturning or loss of control over the machine:
- Never mow across the face of the slope. Lawns on a slope have to be mowed moving up and down and never across them. When changing direction, take great care that the wheels facing the slope do not hit any obstacles (such as stones, branches, roots, etc.) that may cause the machine to slide sideways, tip over or make you lose control.
- Do not stop or start suddenly when going up or downhill;
- Shift to drive gear very gently paying particular attention to prevent the machine from tipping up.
- Reduce speed:
- before changing direction and during tight turns
- before facing a slope, particularly downhill
- Never switch to reverse gear to decrease speed when going downhill: this could cause loss of control of the machine, especially on slippery ground.
-
Always engage the parking brake before leaving the machine at a standstill and unattended.
-
For models with mechanical drive only Never ride the machine on slopes in neutral or with the clutch out! Always shift into a low gear before leaving the machine at a standstill and unattended.
- For models with hydrostatic drive only: Drive down slopes with your foot off the drive pedal to use the braking effect of the hydrostatic transmission when the transmission is not engaged.
6.4 STARTUP
- Open the fuel tap (fig. 20.A) (if provided).
- Sit in the operator's position.
- Put the drive into neutral («N») (par. 5.5; par. 5.7).
- Disengage the cutting means (par. 5.8).
- Engage the parking brake (par. 5.3).
- Shift the throttle control to maximum "hare" speed position (par. 5.2).
-
If cold starting: engage the choke (par. 5.2 / par. 5.2.1)
-
Insert the ignition key and turn to On to make electrical contact, then turn it to Start to start the engine.
- Release the ignition key once the engine has started.
- If cold starting: as soon as the engine ticks over regularly:
10a. Disengage the choke (par. 5.2 type "II"), shift the throttle control to maximum "hare" speed position.
10b. Disengage the choke (par. 5.2, type "I").
NOTE Using the choke when the engine is already warm can foul the spark plugs and cause the engine to run erratically.
- When the engine has started, shift the throttle control to the minimum «tortoise» speed position.
NOTE If there are engine starting problems, do not insist as you can risk running the battery flat and flooding the engine. Turn the key to the Off position, wait for a few seconds and then repeat the operation. If the malfunction persists, refer to the engine manual and chapter «14» in this manual.
6.5 OPERATION
6.5.1 Forward gear and riding without mowing
When moving the machine:
disengage the cutting means (par. 5.8);
- bring the cutting-means assembly to the highest position (position 7 );
- shift the throttle control to a point midway between the «tortoise» and «hare» speed positions.
-
For models with mechanical drive only:
-
Press the pedal all the way down (par. 5.4) and shift the gear lever to 1st gear (par. 5.5).
- Hold the pedal down (fig. 10.1) then disengage the parking brake (par. 5.3).
- Slowly release the pedal which will turn from «brake» to «clutch» mode, thus operating the rear wheels (par. 5.4).
The pedal has to be released gradually, as a sudden engagement may cause the vehicle to tip over and the driver to lose control.
-
Gradually reach the desired speed using the throttle and gear lever. To change gear, press the clutch halfway down (par. 5.4; par. 5.5).
IMPORTANT Gear must be engaged when the machine has stopped. -
For models with hydrostatic drive only:
-
Disengage the parking brake and release the brake pedal (par. 5.6).
- Press the drive pedal (par. 5.7) in the "forward drive" direction and reach the required speed by gradually increasing pressure on the pedal and working the throttle.
Drive can only be engaged following the procedure illustrated (par. 5.7 to prevent sudden engagement which may cause the vehicle to tip over and the driver to lose control, especially on slopes.
6.5.2 Braking
First reduce the machine's speed by reducing the engine's r.p.m., and then press the brake pedal (par. 5.4; par. 5.6) to slow down the machine until it stops.
For models with hydrostatic drive only:
The machine already slows down considerably by just releasing the drive pedal (par. 5.7)
6.5.3 Reverse gear
IMPORTANT Reverse must be engaged when the machine has stopped.
For models with mechanical drive only:
- Press the pedal (par. 5.4) until the machine comes to a stop;
- Shift the gear lever to "R" reverse (par. 5.5).
- Gradually release the pedal to engage the clutch and then begin moving in reverse.
For models with hydrostatic drive only:
- Press the pedal (par. 5.6) until the machine comes to a stop;
- start reversing by pressing the drive pedal in the "R" direction (par. 5.7).
6.5.4 Grass cutting
To operate with the machine proceed as described below:
- shift the throttle to the maximum speed position ("hare"); this position is always used when using the machine;
- bring the cutting-means assembly to the highest position;
- engage the cutting means (par. 5.8) only on grass lawns; avoid engaging them on stony ground or when the grass is very high;
- regulate the forward speed and the cutting height (par. 5.10) considering the conditions of the lawn (the height, density and dampness of the grass).
- start moving forwards on the grass very slowly and with utmost caution, as already described;
IMPORTANT To proceed in reverse gear with the cutting means engaged, it is necessary to press and hold the consent button (par. 5.9) so as not to cause the engine to stop.
Lower the speed whenever you note a drop in engine speed, since a forward speed that is too fast compared to the amount of grass being cut will never mow the grass well.
Disengage the cutting means and move the cutting-means assembly to the highest position:
- When moving between work areas
- When driving on grass free surfaces
- Every time it is necessary to overcome an obstacle.
6.5.5 Suggestions for maintaining a nice lawn
- To keep a lawn green and soft with a good appearance, it should be cut regularly. A lawn can be composed of different types of grass. If the lawn is cut frequently, grass and roots grow more vigorously, forming
a solid grassy bed. If the lawn is cut is less frequently, higher grass and weeds start growing (clover and daisies, etc.).
2. It is always better to cut the grass when dry.
3. The cutting means must be in good condition and well sharpened so that the grass is cut straight without a ragged edge that leads to yellowing at the ends.
4. The engine must run at full speed, both to ensure a sharp cut of the grass and to get the necessary thrust to push the cuttings through the collector channel.
5. The frequency of mowing should be in relation to the rate of growth of the grass, which should not be left to grow too much between one cut and the next.
6. During hot and dry periods, the grass should be cut a little higher to prevent the ground from drying out.
7. The best height of the grass on a well-kept lawn is approx. 4-5 cm. and with one mowing, you do not need to remove more than a third of the total height. If the grass is very tall, it should be cut twice in a twenty-four hour period. The first time with the cutting means at maximum cutting height, possibly reducing the cutting width and the second cut at the height desired (fig. 21).
8. The appearance of the lawn will improve if you alternate the cutting in both directions (fig. 22).
9. If the discharge chute tends to get blocked with grass, you should reduce the forward speed as it may be too high for the condition of the grass. If the problem persists, the probable causes are either badly sharpened cutting means or deformed fins.
10. Be very careful when mowing near bushes or kerbs as these could distort the horizontal position of the cutting-means assembly and damage its edge as well as the cutting means.
6.5.6 Emptying the grass catcher (for rear collection models only)
NOTE The emptying of the grass catcher can only be done with the cutting means disengaged, otherwise the engine stops.
- Do not let the grass catcher become too full as this may block the collection channel.
-
When the grass catcher is full you will hear a warning sound:
-
disengage the cutting means (par. 5.8) and the audible signal will stop
- shift the throttle control to minimum "tortoise" speed position (par.
-
stop moving forward and switch to neutral (par. 5.5; par. 5.7);
-
engage the parking brake;
- stop the engine;
- pull out the lever (fig. 23.A - if fitted) or grasp the rear handle (fig. 23.A1) and tip up the grass catcher to empty it;
- close up the grass catcher so that it hooks onto the pawl (fig. 23.B).
6.5.7 Cleaning the discharge chute (for rear collection models only)
- Cutting very tall or wet grass, particularly at excessively high speed, can clog up the discharge chute. If it clogs, follow the instructions provided in chap. 7.42.
6.5.8 Mowing completed
When mowing has been completed:
- disengage the cutting means;
- decrease the engine's r.p.m.
- drive back with the cutting-means assembly in its highest position:
6.6 STOP
To stop the machine:
- shift the throttle lever to minimum "tortoise" speed position
To avoid backfire, leave the throttle in the minimum "tortoise" speed position for 20 seconds before switching off the engine.
- switch off the engine by turning the ignition key to Off;
- with the engine turned off, close the fuel tap (fig. 24.A) (if provided).
- remove the key from the ignition
IMPORTANT To keep the battery charged, do not leave the ignition key in the «on» or «headlights on» position when the engine is not running.
The engine may be very warm immediately after it is shut off. Do not touch the exhaust or adjacent parts. This can cause burn injuries.
6.7 AFTER OPERATION
- Allow the engine to cool before storing in an enclosed space.
- Clean (par. 7.4).
- Lower the cutting-means assembly, shift to neutral, engage the parking brake, turn off the engine and remove the
ignition key (checking that all moving parts are completely stationary): whenever the machine is left unattended, the operator dismounts from the driving seat, or parks the machine;
7. ROUTINE MAINTENANCE
7.1 GENERAL INFORMATION
The safety regulations to follow are described in chap. 2. Strictly comply with these instructions to avoid serious risks or hazards.
Before conducting any inspections, cleaning or maintenance/adjustment interventions on the machine:
disengage the cutting means;
- shift into neutral;
- engage the parking brake;
stop the engine;
- remove the key, (never leave the keys in the ignition or within reach of children or unauthorised persons);
make sure that all moving parts have come to a complete stop;
- read the relevant instructions;
- Use suitable clothing, protective gloves and goggles
- The frequency and types of maintenance are summarised in the "Maintenance Table". The table will help you maintain your machine's safety and performance. It lists the main maintenance tasks and how often they need to be performed. Carry out the relevant task as soon as it is scheduled to be performed.
- The use of non-genuine and/or incorrectly assembled spare parts and attachments could adversely affect machine operation and safety. The manufacturer shall decline all liability in the event of injuries or damages caused by such parts.
- Genuine spare parts are supplied by authorized assistance workshops and dealers.
7.2 REFUELLING / EMPTYING THE FUEL TANK
NOTE The type of fuel to use is given in the engine manual.
IMPORTANT The machine is delivered to the client without fuel. Follow all the instructions in the engine manual.
7.2.1 Refuelling
To refuel:
- Unscrew the tank closure cap and remove it (fig. 25).
- Insert the funnel (fig. 25).
- Refuel being careful not to completely fill the tank.
- Remove the funnel.
- Close the fuel cap securely after refuelling and clean away any spills.
IMPORTANT Do not drip petrol onto the plastic parts to avoid ruining them.
In the event of accidental leaks, rinse immediately with water. The warranty does not cover for damage to plastic parts of the bodywork or the engine caused by petrol.
7.2.2 Emptying the fuel tank
NOTE Fuel is perishable and should not remain in the tank for more than 30 days. Empty the fuel tank before storing the machine for long periods of time (chap. 9).
Allow the engine to cool before emptying the fuel tank.
- Place the machine on a flat surface, in the open air.
- Place a suitable container under the drain tube (fig. 27.A).
- Disconnect the tube (fig. 27.A) installed on the fuel filter inlet (fig. 27.B).
- Open the fuel tap (if provided)
- Collect the fuel in a suitable container.
- Reconnect the tube (fig. 27.A) making sure you position the clamp properly (fig. 27.C).
- Close the fuel tap (if provided).
The next time the machine is used, check that there are no fuel leaks from the tubes, fuel stopcock or carburettor.
7.3 CHECK, TOP UP, DRAINING OF ENGINE OIL
NOTE The type of oil to use is given in the engine manual.
IMPORTANT The machine is delivered to the client without engine oil.
IMPORTANT Follow all the instructions in the engine manual.
7.3.1 Check/top-up
Always check the oil level before use.
- Check the oil level: according to the instructions in the engine manual, this must be between the MIN and MAX marks on the dipstick (fig. 26).
Do not overfill as this could cause the engine to overheat. If the oil level exceeds the "MAX" mark, drain until the correct level is achieved.
7.3.2 Draining
The oil may be very hot if removed just after the engine has been switched off. Consequently allow the engine to cool down for a few minutes before proceeding to drain off the oil.
Replace the engine oil according to the frequency indicated in the engine instruction manual.
Proceed as follows:
-
Type "I":
-
Place the machine on a flat surface.
- Place a suitable container under the extension tube (fig. 28.A).
- Hold the extension tube (fig. 28.A) firmly in place and unscrew the drain plug (fig. 28.B).
- Collect the oil in a suitable vessel.
- Replace the drain plug (fig. 28.B) making sure that the gasket is in the right position (fig. 28.C).
- Fully tighten holding the extension tube firmly in place (fig. 28.A).
-
Clean up any spills.
-
Type "II":
-
Unscrew the topping up cap (fig. 28.A).
- Fit the tube (fig. 28.B) onto the syringe (fig. 28.C) and insert it as far as possible into the hole.
-
Using the syringe (fig. 28.C), suck up all the engine oil, bearing in mind that you need to repeat this operation a few times before all the oil is removed.
-
Type "III":
-
Place the machine on a flat surface.
- Place a suitable container under the extension tube (fig. 28.A).
- Press the cotter (fig. 28.B)
- Release the extension tube from the support by moving it downwards;
-
Bend the extension tube and drain the oil into a suitable container.
-
Refit the extension tube (fig. 28.A) on the support (fig. 28.C) before topping up the oil. 7. Clean up any spills.
IMPORTANT Hand the spent oil over to a disposal facility in accordance with local provisions.
7.4 ANTI-CHIPPING WHEELS
The different heights of the wheels allow you to maintain a safe distance "H" between the cutting-means assembly and the ground (fig. 17.A, fig. 18.A). Adjust the position of the anti-chipping wheels according to how irregular the ground is.
This should always be performed on both wheels, positioning them at the same height WITH THE ENGINE OFF AND CUTTING MEANS DISENGAGED.
a. for models with side discharge only To change the position:
- unscrew and remove the screw (fig. 17.B)
- reposition the wheel (fig. 17.A) with the spacer (fig. 17.C) inside the hole at the desired distance
- fully tighten the screw (fig.17.B) onto the nut (fig. 17.D).
b. for models with rear collection only To change the position:
- unscrew the nut (fig. 18.B) and extract the pin (fig.18.C).
- reposition the wheel (fig. 18.A) in the desired position
- reassemble the pin (fig. 18.C), making sure the pin (fig. 18.C) head is facing toward the inside of the machine
- then tighten the nut completely (fig. 18.B).
7.5 CLEANING
Clean thoroughly following the instructions below every time it is used.
7.5.1 Cleaning the machine
- Clean the outside of the machine washing the plastic parts of the bodywork with a damp sponge using water and detergent, taking care not to wet the engine, the electrical parts or the electronic circuit board located under the dashboard.
- To reduce fire hazards, keep the engine, silencer, battery compartment and petrol storage area free of grass, leaves, or excessive grease.
IMPORTANT Never use hose-nozzles or harsh detergents for cleaning the body and engine!
IMPORTANT Do not wash the transmission system when it is hot. Never use pressure lances to wash the transmission system.
7.5.2 Cleaning the discharge chute (for rear collection models only)
If the discharge chute is clogged:
- remove the grass catcher or the rear discharge guard;
- remove the grass cuttings; you can reach them from the channel discharge opening.
7.5.3 Cleaning the grass catcher (for rear collection models only)
- Empty the grass catcher
- Shake it to remove grass cuttings and soil residue
- Replace the grass catcher and clean the interior of the cutting-means assembly (par. 7.4.4-a), now remove the grass catcher, empty and rinse it, then place it where it can dry quickly.
7.5.4 Cleaning the cuttingmeans assembly
Clean the cutting-means assembly thoroughly to remove any grass remains or debris.
Keep people or animals away from the surrounding area when cleaning the cutting-means assembly.
a. Cleaning the interiors
When washing the inside of the cuttingmeans assembly and the discharge chute, the machine must be on firm ground with:
- the grass catcher or the rear discharge guard mounted in place (for rear collection models only)
- the side discharge chute mounted (for models with side discharge only);
the operator seated;
- the cutting-means assembly in position «1»;
- the engine running
- the transmission in neutral
- the cutting means engaged
-
Connect a water hose to each of the pipe fittings (fig. 29.A; fig. 30.A) one at a time and run water through each one for a few minutes, with the cutting means moving.
-
follow the instructions in the battery manual;
IMPORTANT In order not to compromise the efficiency of the electromagnetic clutch: - do not let the clutch come into contact with oil; - do not spray pressurised water directly on the clutch unit; - do not clean the clutch with petrol.
b. Cleaning the exterior
Do not let debris and dried grass accumulate in the upper part of the cutting-means assembly in order to maintain maximum machine efficiency and safety levels.
To clean the upper part of the cutting-means assembly:
- lower the cutting-means assembly completely (position 1
- blow a jet of compressed air through the right and left guard openings (fig. 29; fig. 30).
7.6 BATTERY
To ensure long life to the battery it is essential to keep it carefully maintained. The machine battery must always be charged:
- before using the machine for the first time after purchase;
- before leaving the machine disused for a long period (over 30 days) (par. 9);
- before starting up the machine after a prolonged period of inactivity.
Carefully read and observe the battery recharging instructions in the booklet provided with the battery. Failure in following the procedure or in charging the battery could permanently damage the battery elements. A flat battery must be recharged as soon as possible.
IMPORTANT Recharging must be done using a battery charger at constant voltage. Other recharging systems can irreversibly damage the battery.
- The machine comes with a connector (fig. 31.A) for recharging; this is connected to the corresponding connector for the special maintenance battery-charger supplied (if included) or available on request (par. 15.2).
IMPORTANT This connector must only be used for connection to the maintenance battery-charger indicated by the Manufacturer. For its use: - follow the instructions given in the relative instructions manual;
7.7 NUTS AND BOLTS
- Keep all nuts, bolts and screws tight to be sure the equipment is in safe working condition.
8. EXTRAORDINARY MAINTENANCE
8.1 SAFETY RECOMMENDATIONS
You must go to a specialized Service Centre or contact your Dealer if the following are malfunctioning: -the brake -the cutting means engage and disengage functions -switching the drive to forward or reverse gears.
8.2 CUTTING-MEANS ASSEMBLY / CUTTING MEANS
8.2.1 Aligning the cutting-means assembly
The cutting-means assembly should be properly adjusted to obtain an evenly mown lawn (fig. 32). If mowing is uneven, check the tyre pressure (par. 6.1.3). If this is not sufficient to achieve an even cut, please contact your Dealer to adjust the alignment of the cutting-means assembly.
8.2.2 Cutting means
A badly sharpened cutting means pulls at the grass and causes the lawn to turn yellow.
All work on the cutting means (disassembly, sharpening, balancing, repairing, reassembly and/or replacing) are demanding jobs that require special skills as well as special tools. For safety reasons, these jobs are best carried out at a Specialised Centre.
Make sure damaged, misshapen or worn cutting means are replaced as a whole unit, together with its own screws in place to preserve balance.
IMPORTANT Cutting means should be replaced in pairs, especially when there are marked differences in wear.
IMPORTANT Always use original cutting means bearing the code indicated in the "Technical Data".
Given product evolution, the cutting means listed in the "Technical Data" table may be replaced in time with others having similar interchangeable and operating safety features.
8.3 REPLACING OF FRONT / REAR WHEELS
8.3.1 Preparation
IMPORTANT Use a suitable lifting device, for example a scissor jack.
Before changing the wheels it is necessary to complete some preliminary operations:
- Remove all attachments.
- Position the machine on a solid and even surface that guarantees stability of the machine.
- Engage the parking brake;
- Stop the engine;
- Remove the key from the ignition;
- Position the jack in the lifting position near the wheel to be changed (par. 8.3.2; par. 8.3.3).
- Check that the jack is perfectly perpendicular to the ground.
8.3.2 Choice and positioning of the jack on the rear wheels
Position some wooden wedges (fig. 33.A) to the wheel base (fig. 33.B) to the side of the wheel to be changed (fig. 33.C).
For models with rear collection:
The maximum possible jack height when closed is 110mm (fig. 33).
- Position the jack under the rear plate (fig. 34.A) at 180mm from the side edge.
For side discharge models:
The maximum possible jack height when closed is 110mm (fig. 35).
- Position the jack under the rear axle, in the point indicated in the diagram (fig. 36.A).
NOTE In this position the jack allows you to only raise the wheel to be changed.
8.3.3 Choice and positioning of the jack on the front wheels
- Position some wooden wedges (fig. 37.A) to the wheel base (fig. 37.B) behind the wheel to be changed (fig. 37.C).
- The maximum possible jack height when closed is 110mm
- Position a square 10 × 10 cm wooden wedge (fig. 38.B) on the jack (fig. 38.A).
NOTE The wooden wedge prevents damage to the front axle.
- Raise the jack so that the wedge rests against the chassis and structural parts (fig. 38.C).
NOTE During this phase use your hand to keep the wedge balanced correctly on the jack.
NOTE In this position the jack allows you to raise the entire front axle.
8.3.4 Changing the wheel
IMPORTANT Make certain the machine remains still and stable during the lifting process. If you notice anything out of the ordinary, lower the jack immediately, check and resolve any problems and lift the machine again.
- Remove the cover (fig. 39.A).
- Raise it enough to extract the wheel easily.
- Using a screwdriver, remove the snap ring (fig. 39.B) and the shoulder washer (fig. 39.C).
- Remove the wheel to be changed.
- Coat the axle (fig. 39.D) with grease.
- Mount the spare wheel.
- Carefully replace the shoulder washer and snap ring.
IMPORTANT Check that the two rear wheels are the same height (fig. 40.A) and that the difference between the external diameters of the two wheels (fig. 40.B) is no greater than 8 - 10mm . On the contrary, to avoid uneven mowing, the cutting-means assembly must be aligned by an authorised service centre.
8.3.5 Repairing or changing tyres
The tyres are "Tubeless" and so all punctures must be repaired by a tyre repairer following the procedures required for this kind of tyre.
8.4 ELECTRONIC CIRCUIT BOARD
The electronic circuit board is a component fitted below the dashboard which manages all machine safety devices.
8.4.1 Electronic circuit board protection device (for rear collection models only)
- The electronic circuit board is located below the dashboard and fitted with a self-setting protection which breaks the circuit if there is a fault or short circuit on the electrical system (chap. 14).
8.4.2 Electronic circuit board protection fuse (for side discharge models only)
- The electronic circuit board is located below the dashboard and fitted with a fuse which breaks the circuit if there is a fault or short circuit on the electrical system (chap. 14).
8.5 REPLACING A FUSE
The machine is fitted with fuses (fig. 41.A) with different capacities and functions. Specifically:
- 10 A fuse = protects the main and power circuits of the electronic circuit board. When it blows, the machine stops and the dashboard light switches off (for rear discharge models only (par. 5.11)
-25 A fuse = protects the battery recharge circuit. When it blows, the battery gradually runs down and the machine will have problems starting.
The fuse capacity is indicated on the fuse.
IMPORTANT A blown fuse must always be replaced by one of the same type and ampere rating, and never with one of another rating.
If you are unable to understand why it has blown, contact Your Dealer.
8.6 REPLACING BULBS
8.6.1 Type "I" - Incandescent light bulbs
- The bulbs (18W) have a bayonet fitting and are installed in the bulb holder which can be taken out by turning it anti-clockwise with pliers (fig. 42).
8.6.2 Type "II" - LED light bulbs
- Loosen the lock nut (fig. 42.A) and remove the connector (fig.42.B). Remove the LED illuminator (fig. 42.C), secured by screws (fig. 42.D).
8.7 REAR AXLE
- This is a sealed single unit that does not require maintenance. It is permanently lubricated and its lubricant does not need changing or topping up.
9. STORING THE MACHINE
When you intend to put your machine away for more than 30 days:
-
Wait for the engine to cool
-
Disconnect the battery cables and store it in a cool and dry place.
-
Empty the fuel tank (par. 7.2.2) and follow all the instructions in the engine manual.
-
Clean the machine thoroughly.
-
Check the machine for any damage. If necessary, contact the authorised assistance centre.
-
Store the machine:
with the cutting-means assembly lowered
-in a dry place
- protected from inclement weather
and covered with a sheet where possible (par. 15.4)
-
in a place where children cannot get to it
-
making sure that keys or tools used for maintenance are removed.
Before starting to use the machine again:
-
check that there are no fuel leaks from the tubes, fuel stopcock or carburettor.
-
prepare the machine as described in chapter "6. Using the machine".
10. HANDLING AND TRANSPORTATION
- When handling the machine, always: - disengage the cutting means; - bring the cutting-means assembly to the highest position; - stop the engine;
- When transporting the machine on a vehicle or trailer, always: - use an access ramp of suitable strength, width and length; - load the machine with the engine switched off, with the key removed from the ignition, without a driver and push by an adequate number of people; - close the fuel tap (if provided); - lower the cutting-means assembly; - engage the parking brake; - position it so that it can not cause a hazard for anybody; - fasten firmly to the means of transp ropes or chains to prevent it from tipping over causing damage and fuel leaks.
11. ASSISTANCE AND REPAIRS
This manual provides all the necessary information to run the machine and for correct basic maintenance operations which can be performed by the user. Any regulations and maintenance operations not described herein must be carried out by your Dealer or Authorized Service Centre, which have the necessary knowledge and equipment to ensure that the work is carried out correctly, maintaining the correct degree of safety and the original operating conditions of the machine. Any operations performed in unauthorized centres or by unqualified persons will totally invalidate the Warranty and all obligations and responsibilities of the Manufacturer.
-
Only authorized service workshops can carry out guaranteed repairs and maintenance.
-
The authorized service workshops only use genuine spare parts. Genuine spare parts and attachments have been designed specifically for machines.
- Non-original parts and attachments are not approved; use of non-original spare parts and attachments will jeopardize the safety of the machine and relieve the Manufacturer from all obligations or liabilities.
- It is advisable to send your machine once a year to an authorized service workshop for servicing, assistance and safety device inspection.
12. WARRANTY COVERAGE
The warranty covers all material and manufacturing defects. The user must follow all the instructions provided in the accompanying documentation. The warranty does not cover damages caused by:
- Failure to become familiar with the documentation accompanying the machine.
- Carelessness.
- Incorrect or prohibited use or assembly.
- Use of non-genuine spare parts.
- Use of attachments not supplied or approved by the manufacturer.
The warranty does not cover: - Normal wear and tear of consumables, such as drive belts, headlights, wheels, blades, safety bolts and wires.
Normal wear and tear. - Engines. Engines are covered by the warranty provided by the relative manufacturer in compliance with the specified terms and conditions.
The purchaser is protected by his own national legislation. The purchaser's rights envisaged by the national laws in his own country are not in any way restricted by this warranty.
13. MAINTENANCE TABLE
The boxes at the side are for you to mark the date or number of working hours at which the intervention was made.
| Operation Frequency | (hours) | Completed (Date or Hours) Notes | |||||
| MACHINE | |||||||
| Safety checks/check controls | Before each use | par. 6.2 | |||||
| Tyre pressure check | Before each use | par. 6.1.3 | |||||
| Assembly/Checking of outlet guards | Before each use | par. 6.1.4 | |||||
| General cleaning and inspection | After each use | par. 7.4 | |||||
| Checking for any damage to the machine. If necessary, contact the authorised assistance centre. | After each use | - | |||||
| Battery power reserve | Before storage | par. 7.5 | |||||
| Complete bolt and screw check | 25 | ||||||
| Cutting means positioning and sharpening check | 25 *** | ||||||
| Transmission belt check | 25 *** | ||||||
| Cutting means control belt check | 25 *** | ||||||
| Brake regulation and check | 25 *** | ||||||
| Drive regulation and check | 25 *** | ||||||
| Cutting means gear and brake check | 25 *** | ||||||
| General lubrication | 25 **** | ||||||
| Replacing cutting means | 100 *** | ||||||
| Replacing the transmission belt | - ** / *** | ||||||
| Replacing the cutting means control belt | - ** / *** | ||||||
| ENGINE | |||||||
| Checking/topping up fuel level Before | each use | par 7.2 | |||||
| Check/top-up engine oil Before | each use | par 7.3 | |||||
| Replacement of the engine oil ... * | |||||||
| Air filter cleaning and check ... * | |||||||
| Air filter replacement ... * | |||||||
| Fuel filter check ... * | |||||||
| Fuel filter replacement | ... * | ||||||
| Spark plug points cleaning and check | ... * | ||||||
| Replace the spark plug | ... * | ||||||
- See the engine manual for the full list and frequency
** At the first signs of any malfunction, contact your Dealer immediately
*** The operation must be carried out by your Dealer or a specialized Service Centre
*** General lubrication of all joints should also be carried out whenever
the machine is to be left unused for a long period.
14. PROBLEM IDENTIFICATION
| PROBLEM | PROBABLE CAUSE | REMEDY |
| 1. With the key turned to «ON», the light stays off (for rear collection models only) | The safety device of the electronic circuit board has cut in due to: | Turn the ignition key to «STOP» position and look for the cause of the problem: |
| badly connected battery check the connections (par. 4.4) | ||
| battery terminals crossed check the connections (par. 4.4). | ||
| flat battery recharge the battery (par. 7.5) | ||
| fuse blown replace fuse (10 A) (par. 8.5) | ||
| wet circuit board dry using luke warm air | ||
| 2. With the key turned to «START» the light flashes and the starter motor does not run (for rear collection models only) | starting conditions have not been met check that all starting conditions are met (par. 6.2.2) | |
| 3. With the key turned to «START» the light is on but the starter motor does not run (for rear collection models only) | insufficiently charged battery recharge the battery (par. 7.5) | |
| malfunction on the starter relay contact your Dealer | ||
If problems persist after having performed the above operations, contact your dealer.
| PROBLEM PROB | ABLE CAUSE REMEDY | |
| 4. With the key turned to “START” the starter motor does not run (for side discharge models only) | Turn the ignition key to “STOP” position and look for the cause of the problem: | |
| starting conditions have not been met check that all starting conditions are met (par. 6.2.2) | ||
| badly connected battery check the connections (par. 4.4) | ||
| battery terminals crossed check the connections (par. 4.4) | ||
| flat battery recharge the battery (par. 7.5) | ||
| fuse blown replace fuse (10 A) (par. 8.5). | ||
| wet circuit board dry using luke warm air | ||
| malfunction on the starter relay contact your Dealer | ||
| 5. With the key on “START” the starter motor runs but the engine does not start | insufficiently charged battery recharge the battery (par. 7.5) | |
| faulty fuel supply check the level in the tank (par. 7.2.1) | ||
| open the fuel stopcock (if foreseen) (par. 6.4) | ||
| check the fuel filter | ||
| faulty ignition check that spark plug cap is securely fitted | ||
| check that the electrodes are clean and have the correct gap | ||
| 6. Starting is difficult or the engine runs erratically | carburation problems clean or replace the air filter | |
| empty the fuel tank and refill with fresh fuel | ||
| check and replace the fuel filter if necessary | ||
| 7. Weak engine performance during cutting | forward speed too high in relation to cutting height | reduce the forward speed and/or raise the cutting height (par. 6.5.4) |
| 8. The engine shuts down whilst working | the safety devices have cut in | check that all starting conditions are met (par. 6.2.2) |
| blown fuse due to a short circuit or electrical system faults (for side discharge models only) | The cause of the fault should be ascertained and dealt with to avoid reactivating the protection device | |
| Replace the fuse (10 A) (par. 8.5). Contact your Dealer if such interruptions continue | ||
| 9. The engine stops whilst operating and the indicator light switches off (for rear collection models only) | The safety device of the electronic circuit board has cut in due to: | Turn the ignition key to “STOP”, wait for a couple of seconds to allow the circuit to reset automatically and: |
| battery terminals crossed | check the connections (par. 4.4) | |
| faults in the battery charging regulator | check the battery connections (par. 4.4) | |
| check the battery is fitted | ||
| short circuit | contact your Dealer | |
| 10. The cutting means do not engage or do not stop promptly when they are disengaged | problems with engagement mechanism | contact your Dealer |
If problems persist after having performed the above operations, contact your dealer.
| PROBLEM PROBABLE CAUSE REMEDY | ||
| 11. Uneven mowing and insufficient collection (for rear collection models only) | cutting-means assembly is not parallel to the ground | check the tyre pressure (par. 6.1.3) |
| reinstate the alignment of the cutting-means assembly in relation to the ground (par. 8.2.1) | ||
| inefficient cutting means | contact your Dealer | |
| forward speed too high compared to height of grass | reduce the forward speed and/or raise the cutting-means assembly (par. 6.5.4) | |
| wait for the grass to dry | ||
| collector channel is blocked | remove the grass catcher and empty the discharge chute (par. 7.4.2) | |
| 12. Uneven mowing for side (discharge models only) | cutting-means assembly is not parallel to the ground | check the tyre pressure (par. 6.1.3) |
| reinstate the alignment of the cutting-means assembly in relation to the ground (par. 8.2.1) | ||
| inefficient cutting means | contact your Dealer | |
| 13. Unusual vibrations while working | cutting-means assembly is full of grass | clean the cutting-means assembly (par. 7.4.4) |
| the cutting means are unbalanced or loose | contact your Dealer | |
| loose bolts and screws | check and tighten all the engine and frame bolts | |
| 14. Uncertain or ineffective braking | the brake is not adjusted correctly | contact your Dealer |
| 15. Erratic forward movement, poor drive when going uphill or if the machine has a tendency to rear up | problems with the belt or the engagement device | contact your Dealer |
| 16. With the engine running, the machine does not move when the drive pedal is pressed (hydrostatic transmission models) | release lever in the gear disengagement position | return it to the gear engaged position (par. 5.13) |
| 17. The machine starts to vibrate abnormally and/ or has hit an object | damaged or loose parts | stop the machine and remove the ignition key |
| inspect for damage | ||
| check for and tighten any loose parts | ||
| have all checks, repair work and replacements carried out by a specialized Centre only. | ||
If problems persist after having performed the above operations, contact your dealer.
15. ATTACHMENTS
15.1 "MULCHING"KIT
It finely chops the grass cuttings and leaves them on the lawn (fig. 43.A1; fig 43.A2).
15.2 MAINTENANCE BATTERY CHARGER
This keeps the battery in good working order when the machine is in storage, guaranteeing an optimum level of charge and longer battery life (fig. 43.B).
15.3 TOWING KIT
To tow a small trailer (fig. 43.C).
15.4 CANVAS COVER
Protects the machine from dust when not in use (fig. 43.D)
15.5 REAR DISCHARGE GUARD KIT
Used instead of the grass catcher when the cuttings are not collected (fig.43.E). (For rear discharge models only).
15.6 18" SNOW CHAINS
These improve front wheel adherence on snow-covered sections of road and allow the snow shovel equipment to be used (fig. 43.F).
15.7 18" MUD / SNOW WHEELS
These improve drive performance on snow and mud.
15.8 TRAILER
For transporting tools and other objects within the allowed load limits (fig. 43.H).
15.9 SPRINKLER
To sprinkle salt or fertilisers (fig. 43.1).
15.10 GRASS ROLLER
To make the soil compact after seeding or to flatten the grass (fig. 43.J).
15.11 SNOW BLADE
Shovels and accumulates removed snow to the side (fig. 43.K).
15.12 LEAF AND GRASS COLLECTOR
For the collection of leaves and grass on lawn surfaces (fig. 43.L).
INDICE
- INFORMACION GENERAL 2
- NORMAS DE SEGURIDAD 2
- CONOCER LA MAQUINA 5
15.1 KIT PARA "MULCHING"
8.1 RECOMMANDATIONS POUR LA SÉCURITÉ
8.5 REMPLACEMENT D'UN FUSIBLE
10. MANUTENTION ET TRANSPORT
2.5 BESCHERMING VAN DE OMGEVING
B. Type "II" (Afb. 10.E)
7.2.2 Lediging reservoir
OPMERKING
7.7 MOEREN EN SCHROEVEN VOOR BEVESTIGING
8.6.1 Type "I" - Gloeilampen
15.1 KIT VOOR "MULCHING"
2.4 VEDLIKEHOLD OG LAGRING
5.10 KNAPP FOR KLIPPING I REVERS
8. EKSTRAORDIN/AERT VEDLIKEHOLD
8.1 SIKKERHETSFORSKRIFTER
8.6.1 Type "I" - Glodelamper
- Lyspaerene (18 W) har bajonettsokkel og kan tas ut ved a vri den mot klokken med en tang (fig. 42).
8.6.2 Type "II" - LED-paerer
- Løsne ringen (fig. 42.A) og ta ut koblingsstykket (fig. 42.B). Demonter LED-lampen (fig. 42.C) som er festet med skruene (fig. 42.D).
8.7 BAKAKSLING
15.5 SETT MED VERN FOR UTKAST BAK
2.2 CZYNNOSCI WSTEPNE
6.1 CZYNNOSCI WSTEPNE
A这其中 is a very good idea to consider the possibility of using this method.
15.1 KIT PARA "MULCHING"
Tritura bemina relva cortada e a deixa no relativado (fig. 43.A1; fig. 43.A2).
5.CPECTBAYNPABLHEN1 10
5.1 KIIOUeBOI nepeKIIIOuTaTeIb 10
5.2 Pbyar ynpaBHeHn npoccelem 10
5.3 PyIar cTOnHOuHOro TOpMo3a 10
5.4 PendaJIb cIeJIeHnI / TopMo3 (MexaHnuecka TpaHCmncn) 10
5.5 Pbyar ynpaBlenna nepeKJIoueHnem CKOpocTN (MexaHuecka TpaHcMnccn) 10
5.6 PendaTb TopMo3a (rHdpocTaTnuecka TaPacmncnna) 11
5.7 PedaIb npB0da (rInpocTaTnuecka TpaHcMnccn) 11
5.8 Pbyar pa36loKnpoBkn rnpocTaTnuecko TpaHcMnccn (rnpocTaTnuecka TpaHcMnccn).....11
5.9 BkIIOUeHnE n BbIKIOUeHne peKuX npncnoc6JIeHn.. 11
5.10 KhoHnKa pa3peWeHHaCKaWbAHNa Ha 3aDHeM XoOy 12
5.11 Pbyar perylinpoBKN BbICOTbl cKaunBaemOn TpaBbl... 12
5.12 INHdNkTOpHaJaMnOuKa n 3ByKOBaCnHnHa3aunr (ToJIbKO dIy MoJeIe C3aDnM c6Opom) 12
5.13 Pbyar onpOKnDbIbAHnKoHTeHepa dJa c6opa TpaBbl (ecIn OH npEydcmOTpeh, ToJIbKO dJa MoJeIeN C 3aHnM c6opOM)
- 3KcIyATAUHA MAHHB1 12
6.1 PnroTOBHTeJIbHbIe Oepaun 12
6.2 PpOBepKn 6e3oNaChocTn 13
6.3ИспользованеHaHaKIOHbIX yuactkax 14
6.4 3anyck 15
6.5 Onncahne pa6oTbI 15
6.6 OctaHOB. 17
6.7 Pocne pa6oTb1 18
7.ПАHOBOETEXHINCHECKOE OBCJYKINBAHNE 18
7.1 Ooue cBeHnra 18
7.2 3anpaBka TOnnIBOM / onopOJHeHne TOnnHBHO 6aKa 18
7.3 IpoBepKa yPOBHa, 3a npabKa, cIINB MOTOPHO RAMa 19
7.4 Kolecnki, 3aunuaoune ra3oh ot pa3pbioB. 20
7.5 Ouchka. 20
7.6 Batapea 21
7.7 KpeeneKhble raHn BNHTbl 21
8.BHEOUEPEDHOETXHNUECHOE OBCJYKINBAHNE 21
8.1 PeKOMeHdaUzIy IJy oBeCneUeHHaBWe 6e3OpaCHocTn. 21
8.2 PeKyuyn y3eJ / peKyuynepnncnocoblenna 22
8.3 3aMeHa nepeDnHex / 3aDnHex KOlec .22
8.4 Θлкгонняплata 23
8.5 3aMeHa npedoxpaHnTeIa 23
8.6 3aMeHa IaMn.. 24
8.7 3aHnraocb.. 24
9.XPAHEHNE 24
- INPEEMELIeHHe N TPAHCIOPTNPOBKA..24
11.CEPBHCHEOOBCLYKINBAHNEIPEMOHT 24 - YCJIOBNAI IAPAHTIN 25
- TÁBЛицA TEXHnueCkOTo ОБслУЖИBAHЯ 25
- BbIaBHeHne HEnoJAdOK. 27
15.ДОПОЛHINTELBHOEOBOPUOBAHNE.....29 15.1KOMNJIeKTДЯМУЛьчИРОВАн..29
15.2 PoiepKnBaIOoee 3apAnHoe ycTpoiCTBO
15.3 PnueHoe yctpOcTBO... 29
15.4 TkaHeBbI yexoI 29
15.5 HomnneKT 3aunTb 3aHero Bb6poca ...29
15.6 Lenn npToHBOckOJIbKeHHa 18" 29
15.7 Holeca dIpy3n / chera 18" 29
15.8 Pnueen 30
15.9 Pa36paCbIbTeJIb 30
15.10 CaIOBbI KaTOK 30
15.11 ⅢheKopoToPbI CHeroOoUcNtTeJIb.30
15.12 C6opuK TpaBbI JnCTbeB.... 30
1. OBUNIE CBEDEHNA
1.1 HAH CJIeIyET YHTATb 3TO PYKOBOdCTBO
B TeKCTe 3TOrO pyKOBOdCTBa OTDeJIbHbIe a63aUbI, CoDEpJkaUne OCO6eHNO BaJHKHyU INΦOpMaUH O TexHnKe 6e3OnacHOCTn INI pINuINax pa6OTbI yCTpOJCTBa, BbIDJeHbI CJIeDyUoUm 6pa3OM:
PnMeyAHNE BAXHO
COpEHHyTOHHeNn Hn CcblKnHa
ApIpyuO paHee yNoMaHyTuO nHΦOpMauno
TnpeDToBpaUeHn NOJOMKn
MaunbHnHaHeceHn yuep6a.
3HaBaBaeT Ha onaHocTb. Hec6IIOHeHne DaHHoro IpeDynpexKdeHn MoKeT npIBeCTN B NOJyehnIO HaHeceHIO TpaBM N/IINa HaHeCEHNO yep6a.
NyHtbl, obpaMeHHbIe cepoN yNHKTnPHoH pAMKo, coepKaT ONcaHne OOnHOHaJIbHbIX XapaKTepnCTnK, He npCcyuX BCem MOeJAM, PpeCTaBLeHHbIM B DaHHOM pyKOBoODCTBe. IpoBepbTe, eCTb Li DaHHa XapaKTepnCTnKa B BaWeM MoDeJI.
Bce 603haeHnna "peepHn", "3aHn", "npabb" n "IeBb" yka3bBAIOTCr OTHOCHTeNbHO pa6oery noLoJxHnna onepaTopa.
1.2 OBO3HAUEHN
1.2.1 PncyHnn
PncyHKn B daHHOM pyKOBoODCTBe
no 3KcNpyaTuN npOHymepoBaHbI
1,2,3 n TaK daJe.
KomnoHeNTbl, pokaHaHbIe Ha pncyHkax,
603NaueHb6yKbAmn A,B,C n TaK daJe.
CcbInka Ha KomNoHEnT C Ha pncyHke 2
OcyuEcTBJAreTc npn NMOU Hpa3bl:
"CM.pnc.2.C" nn npocTo "(pnc.2.C)".
N36paKeHnHa pncyHKax YBIAOTc
Pn6n3ntelhBIMn.PaeNbIe DeTaJIi
MOrTy OTnNuATbcr O NT36paKeHHbIX.
1.2.2 Ha3BaHnI rIaB
DaHHepyKOBODCTBO NOdpa3DeJIeTcH Ha IaBbI INyHKTbI. NyHKT NOD HA3BaHnEM "2.1 O6yehne" ABJETcN NOyHKTOM IaBbI "2. IpaBnla 6e3oNaChOCTn". CcbIKn Ha IaBbI IN yNHtBi 0603HaauOTcCOKpaueHem Tl.
HIN NYNKT IN COOTBETCTBYIOUIM HOMEPOM.
Pnpmep:"rn.2" HIN "nyHKT 2.1"
2. ПAPВИЛА БЕЗПАСНСТN
2.1 OByeHne
O3HaHOMbTecb c opraHamn ynpaBHeHHn HaJIeHaaHm NCNoIb3OBaHHem MaunHbI. HayHTecb 6bICTpo OCTaHaBnBaTb dBHrAteJb. Heco6JIoJeHne Mep npedocTopoHoctH n peHomeHdaaM MoHeT npHBecTH N noKaPam H/IIN cepBe3HbIM TpaBMam.
- HnB Koem Cnyae He pa3pewaIte NOJb3OBaTbcra MaunHOJ DeTAM NIN LIncaM, HeIOCTaTOUHO XOpOio 3HaKOMbIM C npabNlAmn O6paueHnC Hei. MeCTHOe 3aHOHOaTeJIbCTBO MOKeT yCTaHaBJIbBaTb MNHMaJIbHbI BO3pAcT NOJb3OBaTeJIa.
- HnKOrda He nCnoJb3yIte MaunHy, ecIn noJb3OBaTeJIb yCTaJI, IIOXo Ce6a YvBCTByeT nn HaxOJNTcRA NOB03DeIcTBnEM JeKapCTB, HApKOTnKOB, aIKORoJIa NNBeUeCTB, CHNJaOuX CKOpOCTb peΦJIeKCoB IN yPOBEHb BHNMaHnI.
He nepeBo3nTe Ha MaunHe DeTeHnn Dpyrnx naccaKnpoB.
-ПOMHHTe,чTOОнepaTOpИлпОЛьЗВаTeJIb HecET OTBETCTBEHHOCTb 3a HeCuaCTHbIe CnyuAn IIN yUepe6,HaHeceHbIy DpyrIM LIncAm IIN INx IMuYeCTBy. IOnb3OBATeJIb HecET OTBETCTBeHHOCTb 3a OueHky NoteHuaJIbHbIX PnCKOB Ha yUacTKe,Ha KOTOpOM OH pa6OtaeT,КpOME TOrO,OH DOJKeH PrnHrTb BCE Mepbl NpeDIOCTOPoXHOCTN, YTObI OBeCneYtB CBOIO 6e3ONaCHOCTb N 6e3ONaCHOCTb OKpyJkaIOuNX,BOCo6EHHOCTn Ha CHLOHAX,HEPOBHBIX,CHOLb3KHX IIN HeyCTOuNVbIX NOBepxHOCTx. - EcIn Bbl HaMepeHbI nepeDaTb nIN OdoJHKITb MaunHy dpyrIm IucaM, yOCTOBepbTEcb, YTO OHN O3HaKOMnJIncb C yKa3aHnMa N O KcPnyaTaunn, H3IOJKeHHbIMN B HaCToAeM pyKOBoIDCTBe.
2.2 IOIIGOTOBNTIELHbIE ONEPAUIN
CpeDCTBa HndnBnDyaJbHOb 3aunTbI (CN3)
HaedeHbTe NOxOJaIyO OJeKdy, npouHyop a60uyo 6ybHa HeckoJIb3aIeJ noDoWe n dInnHbIe 6pOKn. He 3anyckaTMe MaunHy 6ocnOM nB OTKpbITbIX caHaJnx. HaedeHbTe HayuHNKn dJa3aUnTIb OPraHOB cLyxa.
He hadeBaTe wapbI, xaIaTbI, KOJIbe, 6paCteTbI, pa3BeBaIOUyOcR OeJMy, a TaKHe OeJMy CO UHypKaMn IraIcTyKn, a TaKHe JIObIe BnCryHne NInu ShIpOKHe akCeCCyApbl, KOTOpBle MOrY T3acTpRb B MaINHe NIn B npEdmTaX N MaTePnaJax, HaxOJaUxNcxHa pa6OyEm MeCTe.
-Должнblmобразмco6epeTeДИHHHbIe BOLOcbl.
Pa6ouy yuactok / Maunha
BHHMaTeIbHO OCMOTpHrE pa6OuH yAcTOK u6ePHTe BCE, YTO MOKeT 6bITb Bbl6poWeHO MaunHoN, IINoBpeDHTb peKyuUee npncnOco6JeHne/ BpaAioUeCe oprAHbI(KamHn, BETKn, pOBOLKy, KocTN T.D.).
BnraTeIN BHytpenHero cropaHnTOnnIbO

ONACHOCTb! TOnJIHBOJeRKO BOCJIaMeHReTcR.
XpaHnTe TOnJIbBO B CneuHaIbHbIX KaHnCTpax,OMOJIoRIpOBaHHbIX IJa DaHHoIeJIiB6e3ONaChOM MeCTe,BdJIINOT HcTOUHNKOB TeIIa N OTKpbITOrO PJIaMeHI.
OuHuaTe KaHnCTpbI H MeCTO XpaHEnH6eH3nHa OTOCTaTKOB TpaBbl, JNCTbeB IN3JIuKOB CMa3KN.
He octabnIte KaHnCTpbI B npedeJax DoCraeMoCTn DeTei.
He Kypnte BO Bpem 3a npabkn nI IN DOJIIBKn TOnJIINBa, a TaKHe BOO6ue npn O6paueHH C TOnJIINBOM.
3aIbAaIe TOnJIINBO Yepe3 BOpOHky, TOJbKO NOI OTKpbITbIM He6OM.
-Избerte Вдьханя napOB TOnnlaBa.
He doabajnTe TOnnBO n He cHmAJTe npo6ky 6aka, KOrda DnrgateIb pa6otaet nn KOrda OH ropayn.
- MedlenHHO OTKpoIte npo6ky 6aKa, YTO6bl NOCTeHNO C6pocNTb BHyTpeHHee daBHeHne;
He npn6lnkaTe nlaamK 3anpaBOCHOMy OTBepCTNU6baKa, YTO6bl npOBepNTb erO codepxHMOe.
B CJIyuae pa3IbA TOJIbA He 3aynckaiTe DnIraTeIb, y6epHTe MaunHy C MeCTa pa3JIbA ToJIbA I npIMNTe Mepbl NO ppeDynpexDeHIO BO3rOpAHJ DO TEX Nop, nOHa TOnJIbBO He NCnapITcN erO napbl He pacceIoTcR.
- HemeIeHNo y6epnte Bce cIebli TOnnBa, KOTOpoe npOJIINIOcb Ha MaunHy nn Ha 3emIo.
Bcerda Bo3BpaaJte Ha MeCTO nIIOTHo 3aKpyuHbAte Ipo6Kn 6aKa H KaHnCTpbIC TOJIINBOM.
He 3anyckaIte MaunHy B MeCTe 3anpaBKn; 3anyck DnHraTeJr Heo6XoDIMO
OCyUeCTBJIrTb Ha pacCTOHH He MeHee, Yem 3 MeTp aOT MecTa 3aPpABK TOnJIINBOM.
- I36eraTe KOHTaKTa TOnJIbBa C OeJdoI n, B clyuae ee 3aqr3HeHnI, nepeOeHbTecb nepeI 3anyCKOM DnIraTeJI.
2.3 BO BPEMRAPOBTbl
Pa6ouy yuactok
He BnIouaHTe DnIraTeJIb 3aKpbITOM npocTpaHCTBe, rJe MOKeT CKONITbcr OanChbYrApHbYra3.3aynck DoJxhen npOn3BOAnTbCn Ha yInCe HINB XopoOIO npOBeTpNaemom MeCte. He 3a6bBaIte O TOM, YTO BbIXLOHNbIe Ra3bl DnIraTeJI TOKCNHbI.
Bo Bpem3aynyckMaunHbI He HaprabTte rnyuNTeIbN, CJeIOBATEJIbHO,BbIXIONHie Ra3bl Ha IerKOBocnAmHeHouUneecMaTePnaJIbI.
He nCnoJIb3yIte MaunHy BO B3pbIBOONaCHO
cpeJe,IO6JIn3OCTn OT rOpUChX HnIDKOCTe,
ra3a nnPiNbII. 3JeKtpnueCKne KOHTaKTbl
nnMexaHnueCKOE TpeHne MOryt
creHepnpoBaTb NCKpbl, KOTOpBle MOrYT
PnPBecTI K BO3rOpAHNo PbIIN nn NapOB.
Pa60TaTbToJbKO npn DHeBHom CBete nIIN npn XopoWem NCKyCCTBeHHOM OCEeHNN, BycIOBnx XopoWeBvIMOCTN.
Ha pa6ooyem yuactke He doJIHHO 6bITb B3pocIbIX IIODei, DeTei HKNBOTHbIX. Heo6xOJIMO, YTO6blpyrO B3pocIbIy eJIOBek CMOTpeI 3a DeTbMn.
- H36eraTe pa6oTbHa MOKpoi TpaBe, NOd DOxHem HIn ECIn 6JIn3HTcR rPo3a, OCO6eHHO ECIn BO3MOKHBIOJHN.
- O6paaTe oc6oe BHNMaHne Ha HepOBHOCTn NOyBbl (KoUKN, KaHaBbl), Ha yKIOH, Ha cKpbITbIe OAnCHOCTN n HaJIuHHe BO3MOXHBIX IppeTCTBNI, KOToPbIE MOrYr OOrpaHnHTb BNIMOCtB.
CobIoJaIe ocToPOHnOcTb,pa6oTa pAOM C o6pbIbAMN,KaHaBAMN 6bepeAMN BOIOeMOB.MaunHa MoKeT OnpOKnHyTbcR, ecn OndHO3 KOleC nepeedTe Ype3 nx Kpa nnecn KpaonOBaJIntcR.
Co6JIIOdaIte oCToPOKHOCTb Ha HAnIOHHbIX yuaCTkax, rde cIeMyET pa6oTaTb Oco6eHNO BHNMaTeIbHO BO N36EkaHne OnpOKnDbIBaHnN IIN NOTePN KOHTpOJn HAd MaunHo. HnKe nepeuNCJeHbI OCHOBHbI pUnHHbI NOTePN KOHTpOJn:
-HeocTaToHoe cenIeHne MeKdy KOlecamn NOBepxHOCTbIO
- CnHOM BbICOKa CKOPOCTb
-HeoctaToUHoeTopMOKeHne
MaHnHa He COOTBeTCTByeT UeJN NcNoJIb3OBAHnI
-He3HaHne, KaK pa3IInuHbIe NOBepxHOCTN BJIINrHT Ha NOBeDeHne MaunHbI
- HenpaBnIbHna 3KcNlyaTaun B KaueCTBe Traya.
IpaBnla nobedeHna BO BpeMa pa6oTbI
- Bo Bpem ynpaBHeH MaunHoN i pa6oTbI He OTBLeKaTbCn I DOJKNbIM O6pa3OM CkOHcEHTpnpObaTbCn Ha pa6oTe.
- BydTe octopoJHbI npn DbIXeHn 3aHnM XoDom HnHa3ad. Pn DbIXeHn 3aHnM XoDom CMOTpnte Ha3ad Do n BO BpeMr DbIXeHn, YTO6blY6eINTbcR B OTCyTCTBn INpeNATCTBn.
-ПрибукрOBKe rpy3OB nINn Ри nCNoIb3OBAHn TЯжELORO OBOpydoBaHn6 BybTe BHNMaTeIbHbI: -ДЯ креленя 6ykCupHbIX TЯг nCNoIb3yIte TOLbKO прдHa3HaueHHbI eДЯ 3TOrO MecTa; -He NOBopaUNBaIte pylb pe3ko. БydTe BHNMaTeIbHbI рNi MaHeBpax 3aДнIM XODOM; -YcTaHOBIne IpoTINBOBecbl nINn rpy3nKn Ha KOJIeCa, ecJN B pyKOBoDCTBe NO 3KcPlyaTuIN peKOMeHdYETc IN X nCNoIb3OBAHnE. - BybTe octopoHHbl, KOrda nCNoJIb3yeTcKoHTeHep dIa c6opa TpaBbl nnDOnOJIHnTeJIbHOe 6OpyDoBaHne, KOtOpoe MoKeT HApUHnTB yCTOuNBOCTbMaunHbl, B YAcTHOCTn, NOd yKIOHOm.
Bcerda depknte pykn n HOrn Ha pacctoHnn ot peKyuIero npncnoc6JeHHa KaB BO BpeMa 3anycha, TaK N BO BpeMa pa6tbl Ha MaunHe.
BHHMaHHe:peKyuN3JIeMeHT npoDoJHaet BpaaTbC8 B TeueHne HeCKOJIbKnX ceHyD NOcIe eRO BbIKIOUeHnI NIN NOcIe BbIKIOUeHnI DBNrATeJI. - Bydte ocTopoHHbI npn pa6oTe c peKyUHMN y3JaMn, BKNIOaIOUHMN 6OJIe oHOrOpexKyUero npncnocO6JIeHn, NocKoJbKy BpaueHne OHOro peKyuero npncnocO6JIeHn MoKeT BblBaTb BpaueHne dpyrnx.
BcerdaepKHTecbHa paccToHnOT OTBepCTN DJI BbIbPoca.
He npnkaTecb K qactm DBnraTeJI, KOtOpBie HArpeBaIOTc BO Bpempa60tbl. Pnck OKorOB. - TTo6bI He Co3dAbaTb PNCK BO3HNKHOBEHnnaNoJapa,He OCTaBnIe HEnoDBNkHyUOMaunHy C BKNIOueHHbIM DBNrAteJeMaHa yUCACTKe C BBICOKO TpaBOi.
Bcnyae noLOMOK nIaBAPN BO Bpemra60tbl He3ameINTeJIbHO BbIKHIOHTbDBnIATEJIb N y6paTb MaunHy, YTO6bl OHa HHehecla eue 6OJIbUIM yUep6; ecIn npOn3oWeJI HeCuaCTHbI ClyuA IN OpeaTOP IIN TpeTbINIua NOUYIN TpaBMbl, He3ameINTeJIbHO pInHATb MEPbl NO NOMOUn NocTpadaBWM,
HAn6OJIe NODXODJUeNBE KOHNKeTHoH CNTyaIuN,IObpaTHTbcBMeIuINHCKoe UypeKdEHNHe Ia Heo6xOIMOro LeueHn. TuaTeNbHO ydaIaIte MaTePnaI, KOTOpBI MOKeT HaHeCTNuYcep6 NIn TpaBMJI IIOJAM IN HKNBOTbIM,KOTOpbIE MOryTe Ero He 3aMeTNTb.
OrpaHnueHHB npMHeHH
- HnKOrJa He noJIb3OBAtbc MaunHOc NOBpeJdeHHbIMN,OTCyTCTBYUOMMnHnHe npABNbHO paCNoLOKeHHbIMN3aHTbIMn pncnoc6JeHHaMn (KoHTeHepIy c6opAp TaBbl,3aNTa 6OKOBORo BbIbPocA,3aNTa 3aHero BbIbPocA).
He nCnoJIb3yIte MaunHy,ecn IOnoJIHnTeJIbHoe O6OpUdoBAnHe/ HNCTpyMeHT He yCTaHOBJeHbI B npEynCMOTpeHHbIX MeCTax.
He OTHIOaHTe, He BbIKIOaHTe, He CHIMaTe H He pa3bnpaTe NMeIOUneCn 3aHTbIe yCTPOINCTBa/MKPOBbIKIOuataJI.
He noDBepraTe MaunHy ype3MepHbIN Harpy3kAm N He NCNoB3yIe MaJIeHbKyIO MaunHy Ia BBINOJIHeHNr TAnKeIOn pa60TbI;NCNoB3OBAHne NOxODJaEe MaunHbI CHnHaet pNCH N NOBbIwae TaueCTBO pa60TbI.
MaunHa He npedHa3HaueHa IJn HCNoIb3OBaHn Ha Doporax O6uero NOIb3OBaHn. Ee nCnoIb3OBaHne (coIaCHO npabnIam DopOHHoro DBNKeHn) pa3peSeHo TOIbKO Ha YacTHoTeppHTOpHn, OTDeJIeHHoOT DOpOHHoro DBNKeHn.
2.4 TEXHnueECKOE OBCJyHKBAHNE, XPAHEHNE
PeryIaRHOeTexHueeCKoe 06cLyKHBnHe N npaBnIbHOe XpaHEnHe YBIAOTc3aIOrom 6e3OpacHOCTMaUNHbI N NOdepKaHnE ee 3KcNlyaTaUIOHHbIX KaYeCTB.
TexHnuechoe 06cnyHbHaHe
- Hn B Koem Cnyae He nCnoB3OBAt b MaunHy C N3HOCNBWMNCr IIN IOBpeJDeHHbIMN Yactm. NOBpeJDeHHbIe N3HOCNBWneCe R DeTaJI N BcERda Heo6XoDMO 3aMeHrTb, OHn He NoDJIeKHaT peMOHTy.
-ДлпpeodTbpaueHnOnaChocTH BO3ropaHnpeyIrpHo ydoCTOBepaNTecb B OTCyTCTBnYTeeK Macna n/IIIN TOJIINA.
BoBpemHaJaKnMaunHbI Heo6xOIMO pa60TaTb OyeHb BHMaTeJbHO BO n36eKaHne nonaHaHnnaJIbUeB B UeJb MeKdY DnKHyuMcpeKyuIm npncnocO6JeHEm HHeNoDnKhbIMy3JaMaunHbI.
3HaueHn ypoBna Bn6paun, yKa3aHHbIe B HactoJsem pyKOBODCTBe, AJIOTcMaKCHMaJIbHbIM pa6OHNM
3HaueHnMaunHbI. HcnoJb3OBaHne
He6balaHcnpoBaHHoro peKyuapeo 3JeMeHTa,
CNIuHKOM BbICOKaYCKOCTb, OTCyTCTBNE
TexHnueckOrO 06cLyJKNBaHnry CyUeCTBeHHO
BnraOT Ha yPoBeHb Wyma N Bn6paQnIO.
CLeIDoBaTeJIbHO, Heo6xOdIMo PpInrTa
PPOfNlaKTtueckNe Mepbl Dnla YcTpAHeHn
BO3MOJHoro yUe6ba, BblBaHHoro BbICOKM
yPoBHeM Wyma N Bn6paQNoHHbIMn HaRpy3KaMn;
BblONHrTB 06cLyJKNBaHne MaunHbl,
HaDeBaTb IpOTNbOwumHbIe HayShnKn,
DeJaTb NepepbIBbl BO BpeMa pa60TbI.
XpahHeHne
He CtaBbTe MaunHy C TOnnBOM B 6aKe B NOMEuHne, Ie Hcnapenr ToonnBa MOryT BCTyNTb B KOHTaKT C PnAmEhem, NCKPOI INN HCTOHNKOM CNbHOro TeIIa.
-Дя CHINKEHNA pNcKa noKapa He OCTaBnTb KOHTeHepbIC OTXODAMN B NOMEeHNI.
2.5 OXPAHA OKPYHJAIOUCEI CPEDbI
OxpaHa OkpyKaIOUeI cpeBldoJHKHa
YBJIaTbCc cyueCTBeHHbIM N IepBOOuepeHbIM
acNEKTOM npn POJIb3OBaHm MaUNHOi,
BO 6JIaRo YELOBEueCKOrO O6ueCTBa H
OKpyKaIOUeI cpeBld,B KOTOpOI Mbl JINBEM.
- CtapaIteScb He 6ecnOKoHTb OkpyKaIOuX. HcnoJIb3yIe MaunHy TolbHO B pa3ymHoe Bpem (He paHO yTpOM n He No3dHO Beepom, KOrda Bbl MoKeTe NOMEwAtb OkpyKaIOuM).
- Ctporo co6bIoJaTe MeCTHbIe HOpMbI yTnIN3aUHN yNaKOBKN, MaceI, TOnJIbA bINbTPOB, NOBpeKJDeHHbIX YAcTeN INI NIObix 3JeMeHTOB CO 3HaUNTEJBHbIM BInrHHe Ha OKpyKaHOuO cPeDy; 3TN OTXoDbI He DOJIHHbI Bbl6paCbIBaTbcR C 6bITOBbIM MycOPOM, a CO6HpTaTbcR OTdEINbHO npePaBaTbcR B CneuaJIbHbIe CEHTpbI c6opa OTXoDOB, BblONJIHIOUe IN nepepa6OTHy.
CTporo co6IIOdaTb DeiCTByIOUne Ha MeCTHOM yPOBHe npaBnla NO BbIBO3y OTXODOB. - После завершени срoka сужбы Maшины He Bbl6pacbIBAHTe ee C 6bITOBbIM Mycopom, aобразнтecь B ueHTp c6opa OTXODOB B COOTBeTCTBnC DeiCTBYIOUIM MeCTHbIM 3aKHOHaTeJIbCTBOM.
3. O3HAKOMJIEHNCE C MAUNHOI
3.1 ONHCAHNE MAUHHbI IN PPEyCMOTPEHHOE PPIMHEHNE
DaHHa MaunHa AByIeTc CaMOxOHOra3OHOKoHc HdEhBem OepaTopa.
Maunha ochaeta Hbngatelem, KOtOpBn npBODNT B DeiCTBne peKyuue npncnocoblenhe,3aunueneHHoe Kopnycom,a TaKHe y3eTpaHcMnCCn, ObecneuBaOUsn nepemEeHne Maunhbl. 3Ta MaunHa ochaeta Ha 3aHm npBOOM. 3aHraocb MoKeT 6bItb ochaeta:
-MexaHueeCKoTpaHcMnCCneiC 5peepaamnpepdHeRoXoJa NODHO3aDHeRoXoJa.
-6ecctyneHuaToI rndpoctaTnuecko TpaHcMnCCnei IJIa DvNKeHHBnpeiHa3ad ("Hydro").
OnepaTop BeTeMaHnHy n ynpabIaeT ee OCHOBbIMn OprHaAMn ynpaBJIeHHN, BcERda CndHa MeCTe BODHTeJI.
PpeoXpaHnTeBhIe yCtpoiCTBa,yCTaHOBJeHbIe Ha MaUNHe BblIOuAOT DBNrAteIb N peHy-uee npncOco6JIeHne B TeUeHne HeCKOJbKnx ceHyd (nyHKT 6.2.2).
3.1.1 IpeymoTpeHHoe HcNoIb3ObaHne
TaMaHnHa pa3pa6OtaHa n 13rTOBJeHa dIa CtpnKn rA3OHa.
B obuxyepTx, daHHa MaunHa MOKeT:
-
MP 84 / MP 98 Series MoHKeT:
-
Kocntb TpaBy n CO6npaTb ee B KOHTeHep dIa C6opa TpaBbl
- KOCNTb TpaBy N BblpyKaTb ee Ha 3eMlIO H3 3aJHeY qactn
- Kocntb TpaBy, N3MeIbIaTb ee N yHlaIbIbAtb Ha Ra3OH (3ΦΦeKT "MyIbIuPObAHnA").
- SD 98/108 Series MOXeT:
- Kocntb TpaBy N BblpyKaTbe B CTopoHy
- Kocntb TpaBy, N3MeIbIaTb ee N yKlaIbIbAtb Ha Ra3OH (OΦΦeKT "MyIbIuPObAHnA").
IcnoIb3OBaHnne CneuHaIbHOro
DOnOJIHNTeJIbHOrO O6OpUdOBaHnR,
IpEysCMOTpeHHoro N3ROTOBHTeMe B KaueCTBe
OpINHaJIbHOJ OChAcTKn IIN npNo6peTaEMORO
OTeJIbHO, PO3BOJAreT BbINOJIHrTb 3Ty pa60Tu
Bpa3LIuHbIX PeKIMax, ONNCaHHbIX B
DaHHOM pyKOBOdCTBe INN B IHCTpyKUHX K
OTeJIbHbIM DOnOJIHNTeJIbHbIM YcTPOiCTBaM.
AHaIOrHuO, pPImeHeHne DOnOJIHtEJIbHOrO
O6OpyDoBaHnra (ecIn 3TO IpEysCMOTpeHo
n3rOToBHTeJIeM) MoKeT paCUnpNtB
IpeDyCMOTpeHHyIO OblaCTb npImeHEny
H Do6aHTb DOnoJHNTeJbHbIe FyHKUHN,
B COOTBetCTBn C OrpaHnueHnA Mn
UCOBnMn, N3LOXeHHbIMN B HnCTpyKuNX
DONoHnTeJbHOrO 06OpyDoBaHn.
3.1.2 HenpaBnIbHoe nCNoJIb3OBAHne
JIIO6oe dpyroe HcNoIb3ObaHHe, OTINuHOe OT BbIWeyNOMaHToRO,MOKeT CO3dA Tb ONaCHOCTb N npUHHITb yuepe6 IIOJAM N/nnn NmUeCTBy. BxOHTB NOHrTne HnPaBnIbHOro NCPOIb3OBAHnR (B KaueCTBe pPImepa, Ho He OrpaHnUHBaCb 3TUMn ClyuaMn):
- BO3NTb Ha MaunHe nIn B npuqepe Dpynx IIODei, DeTeH nn HKNBOThBIX, NOTOMy YTO OHN MOYr yNaCTb N NOJyHTb Cepbe3HbIe TpaBMbl, a TaKHe NOBnTb Ha 6e3ONaCHOCTb ynpaBJIeHn MaunHO;
-6yKcnpoBaTbHnToJkTaBrpy3bl 6e3 nCNoIb3OBAHnCneuaJIbHOro 06OpyIOBaHn, IpeDyCMOTpeHHoro DIA6yKcnpoBKn;
- INCNOJIb3OBAtB MaUHHy Ha HecTa6NJbHOM, CKOJIb3KOM, 3aJIeDeHeJOM, KAMEHNCTOM IIN HEPOBHOM rpyHTe, dIy npoxoDa NO LyJiAM NII 3a6OJIOueHHbIM MECTAm, HE N03BOJIAOUIM pON3BecTN OueHKy KOHCNCTeHcN rpyHTa;
- npBODNTb B DeIcTBnpeKyuuee npncnoc6leHne HaHeTpBaRHNCTbIX yuactkax;
- HcnoIb3OBAtB MaunHy IJRA C6opa JnctBeB INN OTXoIOB.
BAHHO HeaJIeJaee nCnoJb3OBaHne MaINHbI BJeCyET 3a CObOy UTpAty Cnblr rapaHTn H ChIMaet C N3ROTOBtEny BCIO OTBeTCTBeHHOCt, BO3laRaJ Ha NOpJb3OBaTeJr OTBeTCTBeHHOCt 3a N3dEppKn B Cclyae NOPu IMUeCTBa, NOlyeHn TpaBM IIn HaHeCEHn yUep6a TpeTbM INuam.
3.1.3 Tn noJb3ObaTeJIa
DaanhaMaunHa npedHa3NaueHa DnI shpoKoro Kpyra notpe6nteJe, DnHepoceccnoHaJIbHO rnpmeHenr. OHa npedHa3NaueHa DnI JIO6nteJbCKoro npimeHenr.
BAHHO MaHHoDJIKeH ynpabJIaTb TJIbHo OIN YeIOBeK.
3.2 3HAHNI B3ONACHOCTN
HaMaunHe HMeIOTcpa3nHbIE CnMBOJIbI (pnc.2).Onn npn3BaHbI HanOMnHaTb onepaTopy O Heo6xOAnMoCTN BHMaTeJbHOI n octopoxHHo 3KcnnyatauIN.
3haeHne cIMBOJIOB:
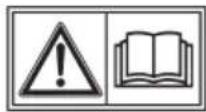
BHHMaHHe: Ipeed nCNoIb30BaHnEM MaunHbI npOHTaTe yKa3aHn.
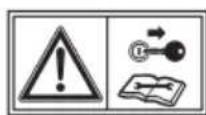
BHHMaHHe:PepeBbIIOJIHeHEm KaKnx-ⅡI6O OIepaun noTexO6cIyXnBaHNIO nIpeMOHTy N3BLeKeNTe KJIouN IpoUHTaTe yKa3aHnA.
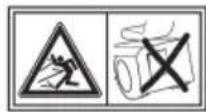
Onachocb! Bby6poc npedMetOB: HNKoIa He pa6oTaIte6e3 yCTaHOBJIeHHOJ 3aUHTbI3aHrero Bby6poca IIN KOHTeHepa dJa c6opa TpaBbl. (TOJIbKO DIA MOJeIeC 3a-HNM C6OpOM)
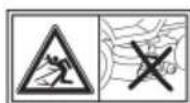
Onachocb! Bby6poc npedMetOB: HnKorda He pa6oTaHTe 6e3 yCTaHOBLeHHoro 60KOBOrO JHeI6oBa DnA Bbl6poca. (Tolbko dIra MoJeIeN C 60KOBoi pa3rpy3ko)
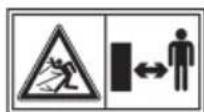
Onachoctb! BbIbpc npedMetOB: He donyckaTe haXoHdEHHN NOCTOPOHHX NIIUPADOM
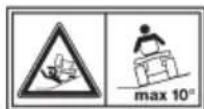
Onachoctb! OnpohnDbibaHne MaunHb: He nCnoJIb-3yIte MaunHy Ha yuactkax CykloHOM 6oJe 10
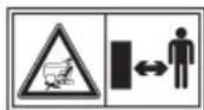
Onachoctb! YBeey: YeDNTecb, yTO nKa DnraTeB BkIouyeH, dETn HaxOaTcH aPacCToHHN OT MaunHbl
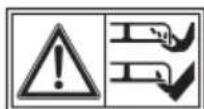
Onachoctb nope3OB. IOpBnKhIe peKyuIe npncnocO6JIeHn. He BCTabJIte pyKn Hn HOrn BHyTpB BbIeMkn DJIpeKyuIx npncnocO6JIeHn.
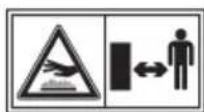
BHHMaHHe! CToIe Ha pacCTOaHHN OT rOpAUX NOBepx-HoCTeN
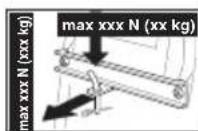
PnHcNoIb3OBAHN npi- ceHoro yCTpOiCTBa He npeBbIaIte orpaHnueHn no Harpy3Ke, yKa3aHHbIe Ha rapIbIke, nCo6JIoJaTe npaBnla 6e3OpacHOCTn
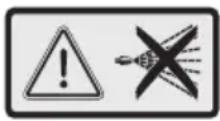
BHMHHe!Pn MoKe TpaHC-MNCCn HNKoTa He NcNoJIb-3yIte NCTOJeTb IJr NOpaH BODbl ND DaBHeHem.
BAHHO NOBpeHdEHHbIe HJI HeHTaEMbIe HaKNeiKn HJXJaOTcB 3aMeHe.3aKaHnTe HObIe HaKNeHN B aBTopN3OBAHHOM cepBnCHOM cHTpe.
3.3 NIDEHTNΦHKAUHOHHbI JAPbIK
Ha ndeHTnΦnKaunOHHom npIbIke yka3aHa cnedyuOua nHΦopMaun (pnc.1):
- YPOBEHb 3ByKOBO MOUHOCTN
2.3HaK COOTBeTCTBnA INPeKTnBE CE
3.ФОИЗROTOВЕNHЯ - MoUHocTb npa6Oua CHOpocTb DnHaTeJIa
- MoDJIb MaUNHbI
- TnMaHnHbI
- 3aBODCKoHOMep
- Bec B KΓ
- HanmeHOBaHne n aDpeC n3rOToBtTeJIa
- Tn TpaHcMnccnn:
- Kod n3deJn
BnHnTe ndeHTnΦnKaaOnHbIe daHbIe MaunHb I CneuaJIbHbIe NOJ Ha npJIbKe, NOMEeHHOM Ha o6paTHoCtOPOHe oBLOKn.
BAHXO YKa3bIaIe NdeHTnΦnKaUHOHbIe DaHHbIe, YKa3aHHbIe Ha NdeHTnΦnKaUHOHOM RaJIbIe, KaHbI pa3 npN ObaaueHN B aBTOpN3OBaHHbI cepBnCHbI ueHTp.
BAHHO O6pa3e4 deKnapaun COOTBeTCTBn HaxOHTcRa Ha NocJeDnX CTpaHua pyKOBODCTBa.
3.4 OCHOBHbIE KOMNOHEHTbl
Maunha coCToNT n3 cIeDyIOUnx OCHOHBIX COCTaBbIX yAcTeN, KOToPbIE BbINOJIHrIOT CLeDyOUIne fYHKuIN (pnc.1):
A. Pechyun y3eL: B 3OT y3eL BXOJRT KOpIyc, B KOTopbI 3aKJIIOUeHbl BpaIauIuIeCra peKyuIe npncnoc6JeHnI, n HeNOCpeDCTBeHHo peKyuIe npncnoc6JeHnI.
B. Pekyune npncnocoblenia:3to 3IeMeHTbl, npeHa3NaueHHbIe dIa KOseHn TpaBbl; pacnoLOXKeHHbIe Ha KOHcpepe6pa cnocO6CTByIO TnPaBLeHIO CHOSeHHoN TpaBbl B KaHaI Bbl6pOca.
C.BoHOBOH HeJIO6 IaY BbIbPOca:3TO 3aunTHoe yCTpoNCTBO, npedOTBpaauOooee
Bb6pocco6paHHbIXpeKyuIMN npncnocO6IeHnA MnpEaMeTOB Ha 6oIbwoepacCToHnE (TolbKO JnMa MoJeNe C 60koBo pa3rpy3kOJ).
D. KaHaJI BbIb6pOca: 3TO COeHINHTeJIbHbI INJIeMeHT MeJdy peKHyUIM y3JOM IN KOHTeHepOM dJa C6Opa TpaBbl(ToJIbKO dJa MoDeJIeN c3aDHm C6OpOM)
E. HonteHep dIa c6opa TpaBbI: KpOMe c6opa cKoUeHHoTpaBbl OH BbIIOJIHReT TaKHe npEdoxpaHHTeJIbHyIO fYHKuIO, NocKoJIbKy npEdOTbPaUaAeT BbIbPoc C6opaHbIX peKHyUIMn pRcNOC6JIeHnAMn npEdMeTOB Ha 6OJIbUoe pacCTOAHne (ToJbKO dIa MoJeIeC 3aDnHM c6opOM)
F. 3aunta 3adHero Bb6poca (no Tpe6oBaHHO): yCTaHaBnBaetcBMeTO KOHTeHepa dIra C6opa TpaBbl, PpeDToBpaAaET Bb6poc C6paHHbIXpeKyuIMN pncnOC6JIeHNMaIPpeDMeTOB Ha 60JIbWoE pacCToHHe.(TolbKO dIy MoJeIe C 3aHmC6OpOM)
G. CndeHbe BOUNTEJIa: 3TO pa6ooye MeCTO ONEpaTopa, OHO OCHASeHO DaTCHKOM, PACNO3HaUoIIM eRO npCcyTCTBHe, KOToPbI Heo6xOdIm dJa pa6oTbI PpeOxApaHHTeJIbHbIX yCTPOIcTB.
H.Бatape:ObecneuBaETJaleKtpO3HeprIIO 1nla3anychaDbngate;ee xapaHTepnCTnN n npabNla3Kcnnyataun OINCAHbBOTdJIbHOMpyKOBODCTBE.
I. DnraTeB: oecneuBaet KaK DnHexHene peKyuux npncnocO6JeHn, TaK n npBOd KOlec; eO xapaKTepnCTnKn n npaBnla 3KcNJaTaTuOnn OONcaHbI B OTdeJIbHOM pyKOBoDCTBe.
J. NpeHn6amnp: oBecneuBaet 3aunTy nepeHne yacTn MaunHbI.
K. Pylb: ynpablaet nobopoTOM nepednIX KOLEC.
4. MOHTAH
I npabnla 6e3oNaChOCTn npBedeHb I RII.2.Ctporo co6JIOdaIte yHa3aHHa BO n36eHaHne cepbe3HbIX pNCHOB n OnaCHOCTn.
B CBa3n Co ChlaAnipoBaHneM n TpaHcnpTnpOBKo HeKOToPbIe COCTaBHbIe YactN MaunHbI He Co6pauOTcR HEnocpeDCTBeHHo Ha 3aBoE, IN HeO6xOJMo CO6paTb NocIe ydaJIeHn ynaKOBouHOro MaTePnAJa, COrJaCHO CJeDuOuIM yKa3aHnM.
PacnaKOBHa n 3aBepWeHne MOHTaHa DOJIHHbI BblIOJHrTbcra Ha TBepDoN IOBHOn NOBepXHOCTn, rde DOCTaTOUHO MeCTa dIe nepemeueHn MaunHbI H ee yNaHOBN,
Heo6xOJMo Bcerga NOb3OBA Tbbcra COOTBeTCTByIOUzHMn HNcTpymeHTaMn. Ipeed NcNoB3OBaHneMaunHbI Heo6xOJMo BbINOJHnTb BCE yHa3aHna, H3IoKeHHbE B pa3dJe "MOHTAH".
4.1 KOMNOHEHTbIДЛЯ MOHTAXKA
B ynaKOBKe HMeOTcKOMNoHENTbI dIa MoHTaHa, npNBeDeHHbE B CLeDyUoSe T a6nue:
| Опincане | |
| 1 Руь | БИЗКАПИБОРНООДПИТКАИ КOMПОЕNTБД ДЛУ UCTAHOВКIN рUrlA |
| 3 СиДЕНБЕ BODITIEL | Батaperя |
| 5 Передни Бампер | БИЗКИ, ЗAZUSSAJOUSHE ГАЗОН OT pa3рьIBOB |
| 7 | Кontейнэрс с Креленгны ВИNTAMN И ИСТРУКUIЕС (ТOLБК ДЛЯ МоDEЛЕС 3AZHIM C6OporM) |
| 8 НИЗ | ЧИЯЧASTB 3AZHEN ППАСТИНБI, ОПОБЛ COHTEINHERA И COOTBETCTBYЮUSNE ПрисNOPОБLEVENIA ДЛУ KOMПLEKTOBAHNIA И MOHTAZHA (ТOLБК ДЛЯ МОDEЛЕС 3AZ- ДHIM C6OporM) |
| 9 БOKOBОДGELO6 DЛЯ Bbl6PocA (TOLBKO ДЛЯ MОDEЛЕС C6OKOBОД pa3rpy3KOH) | |
| 10 БOKOBIE YCSINIBAJOUSNE ЗЛЕМENTБI ржунERO y3la (TOLBKO ДЛЯ МоDEЛЕС C6OKOBОД pa3rpy3KOH, eCII OHA ppeDyCMOTpeHa). | |
| 11 КИВERT, B KOTOPOM HAXODIТСА: - рУКОВODICTBA NO 3KCSNJIYATAUZHI N DOKUY- МЕNTAUZHA - HabOP BИNTOB ДЛЯ UCTaHOBKN CANDENBYA - OCHACTKA ДЛЯ UCTaHOBKN BOKOBOTO JVE- Лоба ДЛЯ Bbl6PocA (TOLBKO ДЛЯ MОDEЛЕС С bOKOBОД pa3rpy3KOH) - HabOP BИNTOB ДЛЯ PONKLIQUECHNIA ПО- ВODOB 6aTaperи - 2 KIIIOUa 3AZHINAGHIN - 1 ZAPACHОД ПЛавКIN пpeDoxpaHITeJIb Ha 10 A | |
4.1.1 PacnaHOBka
- BckpbBaIte ynaKOBky octopoJHNO BHIMATEJIbHO, YTObI He NOTepaTb KOMNoHEtbl.
- O3HaKOMbTecb C DOkymeHTaMn, Jekhaunm B Kopo6Ke, B TOM YncJe, C DaHHbIM pyKOBOdCTBOM.
3.ИЗВЛЕКИТЕ ИЗ KОРБКИ BCE OTДeЛьНьИЕ KOMПОНЕТbl.
4.ИЗВЛЕКНТЕ MaSHINHy n3 yNAKOBHn, CO6JIIOДА СLEДУЮПЕ МерБI ПЕДОCTOPOKHOCTN: -уCTaHOBHTe peKHyuŋ y3eJ B camOE Верхпee NOLOJOKeHne (nyHKT 5.10), ЧTOбI He NOВpeДИть erO ри с顺序e MaSHINHBi C 6a3OBOrO NOДоHa; -С顺序Tb MaSHINHy c 6a3OBOrO NOДоHa.
B MoDJIaX C rIaPocTaTHueCKoTpaHcMnCCneY yCTaHOBInTe pbUaPa36JIOKIpOBKn 3aADHe TpaHCmCCnB Pa36JIOKIpOBaHHoe nOLOKeHHe (nyHKT 5.13).
4.2 YCTAHOBHA PYJI
- PacnoJIOKeTe MaunHy Ha poBHOI NOBepXHocTn HbipOBHnTe nepeHNHe KOleCa.
- YctaHOBnTe BTyIky (pnc. 3.A) Ha BaI (pnc. 3.B), cTapaIcIb, yTO6bl WTNΦT (pnc. 3.C) 6bl npabInbHOB CCTaBJIeH B rHe3do BTyIkn.
- YcTaHOBInTe KpbIshky npN6OpHOrO uHTHa (pnc. 3.D), BcTaNb Do uJeUHa cEmb KpeJIeHn B COOTBeTCTByIOuNe rHe3da.
- YctaHOBnTe pyIb (pnc. 3.E) Ha BTyIky (pnc. 3.A), yTO6bl CnIcbl 6blnn NOBepHyTbIK cnIeHbIO.
5a.ToIbHO pnyTnna "I" - BcTaBbTe npocTabHy (pnc.3.F) n 3aKpeNITE pyJb BNHTAmn (pnc.3.G), BXoJaUmN B KOMJIeKTAuH,ByHa3aHHO INOCJeDoBaTeJbHOCTn.
5b.ToIbHOJpyNA "II" - 3aKpeNITepyJIb BnHTamn (pnc. 3.F, 3.G), BXOJaUIMNB KOMJIeKTAuHOBvKa3aHHoINOCJeDoBaTeJIbHOCTH. - YcTaHOBInTe KpbIshKy pyJn (pnc.3.H), BCTaBnB ee do ueJHka B COOTBETCTByUoue THe3do.
4.3 MOHTAX CnDEHbY
YcTaHOBnTe CnDeneHbe (pnc. 4.A) Ha nlaCTnHy (pnc. 4.B) npn nomouu BNHTOB (pnc. 4.C).
4.4 YCTAHOBHA N IODCOEDHHEHNE BATAPEN
BaTapea (pnc.5.A) pa3meueHa noD cndeHbem npndepKnBaetc npyKnHOJ (pnc.5.B).
1.Подсоeннite сачалкрасьн Ka6eь (pnc.5.C)КпоJOHnTeIbHOMy ПОИOCY (+),a 3aTeM YepHbI Ka6eь (pnc.5.D)K OTPицateIbHOMy NOIOCy (-) npn NOMOuN IOCTaBJIeMbIX BINTOB, KaN Oka3aHO.
2.CmaKbTe 3aKIMbI CnJIHKOHOBOM Cma3KoI aKHypaTHO yCTaHOBHTe B npaBnIbHOe nIOJKeHne 3aUNTHbI KOJINaOH KpaCHOrO Ka6Erl (pnc.5.E).
BAHHO Bcerda BbINOJIHnIe NOJHyIO 3apRky, CJeDyraYka3aHnM, N3IOKeHHbIM B pyKOBOCTBe 6atapeu.
BAHHO YTo6bI He IOnyCTnTb Cpa6aTbIBaHH 3aHTbI 3JeKTPoHHo IIaTbI, HN B KOem Cnyae He 3anyckaHte DnRaTeIb Do 3aBepWeHn NOH0 3apAKn!
5.2 PbyIaIynpABLeHnA DPOCEJIEM
PerynpyeT uNcNo o6OpOTOB dBVaTeJIaB 3aBncmocTN OT Tnna DvRaTeJIy cTpoiCTBO ynpaBHeHn dPoCCeJIem MoKeT 6bITb DByx TINOB:
A. Tn "I" c OTdJIbHbIM pbIyarom ynpaBHeHnBa 03dyuSHoH 3acLOHHoN (Pnc.10.E+Pnc.10.E.1)
B. Tn "II" (Pnc. 10.E)
Yka3aHHbIe noLoXeHnA
COOTBeTCTByIOT CNeDuOuEMy:

1.PbUar ynpablenra BO3dUH0n 3acJOnKo -XoJOnHbI 3anyck. HcnoJIb3yeTcIy 3aNycka xoJIoDHorO DBIrataTeJI. IIOJooKeHne "CHOKE" Bbl3bIbAeT 6oRaueHne cMeCN,ero Heo6xOdmo HCNoJIb3OBaTb TOLbKO CTpOrO Heo6xOdMbl nPOMeKHyTOK BpeMeHI.

peKOMeHdyeTcH He depKaTb HOry Ha neaII.
5.5 PbIyAR UYPABJEHNA PEPEKJIIOUeyHnEM CHOPOCTN (MEXAHUeCKA TPAHCMMCCN)
Y 3TOrO pbUra hMeETcA cEmb NOLOKeHn (pnc.10.K):

- Pntb nepeaay IyraBnHexnna Bnepe
BkIouHne nepeHn XoH Heo6XoHMo OcUseCTBJATb, KOrda MaunHa CTOUT Ha MeCTe.

-
HeɪtpaɪbHoe nɒlɔːkHeHne «N»
-
3aHnXoR «R» BkIoueHne 3aHero XoJa Heo6xOJHMo OcyuEcTBJrTb, KOrda MaunHa CTOnT Ha MeCTe.
TTo6bI nepeHIOUOTbC OdHOn
IepeDaHn Ha DpyTu, CJIeDyET HaxaTb
DO NIOBnHbXoJaNeaJIb (Pnc.10.l) n
IpeMeCTNtB pbHaR B COOTBeTCTBnC
Yka3aHnAMn, I3LOKeHHbIMn HaApblke.
5.9 BKNIOUOHEH N BbIKJIIOUOHEHPEKNUX INPCNOCOBHEN
Pn6OBnHaKHOHkaNo3BOJraT NOHIOUHTb peKyuIe npncnOcOBeHnN OocpeDCTBOM 3JIeKtpomarHnTHoro cuenHeHn (pnc.10.B):
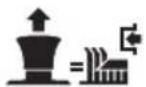
- PechyunepnncnocobneHn BKHIOUeHbI. rpi6OBnHa H KHOHka OTKaTa.
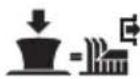
-
Pechyuime npncnoc6leHn OTHIOUeHbI. rpi6OBuHa KhoNka HaKaTa.
-
OndHOBpeMeHNO C OTKJIIOUeHnEM peKyuux npncnocO6JeHn BHKIOyaeTcR TopMO3, KOtOpbI 3a HeCKoJIbKO CeKHyD OCTaHaBnBaet BpaueHne.
PIMMEAHNE Ecnn npn BkIOueHn peKyuNX npncno6eHn He CO6IouaOTcN ppeyCMOTpeHHbI MepbI 6e3ONaChocT, DnRaTeJIb BbIKIOuaeTcN HnHe 3anyckaetc (cm. NyHrT 6.2.2)
5.10 HHONHA PA3PEUHEN CHAUNBAHNA HA 3ADHEM XOy

Pn ydepaHn KhoNk (pnc. 10.F) B haKaTOM COCTOHN MOHO BbINOJHrTB DBNKeHne 3aHnM XoDc M PNOKJIIOeHHbIMn peKyuImn Pnncnoc6JeHnMa, He Bbl3BaB OCTaHOBA DBrTaTeJI.
5.11 Pbyar PEYUNPOBKN BbICOTbl CHAUNBAEMOITPABBI
3TUMpbIyAROMMOHNOIOHNMaTbN ONyCHaTBpeKyuUy3eJ,KOTOpBIMoXHO yCTaHaBnBaTb Ha7pa3InuHbIXypOBHei BbICOTblcAunBaEMOITpabbl(pnc.10.G).

Cemb noLOXeHn 3TORo pbIyara
O6O3HaueHbI Ha Ta6JIuYKe OT
<1>do <7>,N COOTBETCTBYOT
CTOJIbKIM JHe 3HaueHnM BbICOTbl
CHaUNBaEMOn TpaBbI OT 3 Do 8 cm.
Ipeboda pbyara n3 OHO rno nooKeHnB pyroe Tpe6yeTcH NOTAHyTB pbiar B CTOpOHy n yCTaHOBNb eRo Ha OHy n3 yCTaHOBOHbIX MeTOK.
5.12 INHINKATOPHAR JAMIOUHA N 3BYHOBAI CNHAAJN3AUJRA (TOJIbHOДЯ MODEJIEN C 3ADHIM C6OPOM)
- HndnKaTOPHaJaMNoUHa (pnc. 10.C) 3aropaeTcH, KOrda KIOu (pnc.
10.A) haxoNTcB noLoKeHHN XODn npoJnaeT Bcerda ropeTB BO Bpempa6Obl.
EcnH OHa Muraet,TO 3TO O3haaet, TTO He CO6JIIODeHbI yCIOBnI, N03BOJIOUHe OcyuieCTBHTb 3aNyCK DBNrAteTl (CM. nyHKT 6.2.2).
3ByKOBO CNHnONOBeuaT O TOM, YTO KOHTeHep dIa c6opa TpaBbI NOHNbI (CM. NyHKT 6.5.5).
5.13 PbIyAR OINPOHnIbIBAHNHOHTEINHEPA IJIa CbOPA TPABbl(ECJH OH INPEyCMOTPEH,TOJIbHO IJIa MoDEJIeNC 3ADHM CbOPOM)
3TOPTbIur,IN3BLeKaEmbI IN3 CNEUaJIbHO rHe3da,IO3BOJAreT ONPOKHyTB N ONOPOKHHTb KOHTeHep DnlaC6opa TpaBbl,ymeHbua ycnJne, npilaraemoe onepatopom (pnc.10.H).
6. 3KcπIyATAUmaHbI
IpaBnla 6e3oNaChOCTn npBedeHb I B rI.2.Ctporo co6IIOaIte yHa3aHNA BO n36eHaHne cepBe3HbIX pNCHOB n OnaCHOCTn.
6.1 NOdrotOBHTbHbIE ONEPAcN
Ipeed hauaIom pa6oTbI Heo6xOdHMO BblnoHNHT HeCKoJIbKO npOBepOK n Oepaun, YTO6bI oEecneuTb 3ΦΦeKTHBHyIO pa6O TY BycIOBnX MaHCmMaJIbHOJ 6e3OpacHOCTN.
6.1.1 3anpaBHa Maclon N 6eH3nHOM
BAKHHO Pn NOCTBHe B MaunHe OTCyTCTBYOT MOTOPHoe MacNo N TOONIBO.
Ipeed 3KcnpyaatauHmAsnHb npOBepbTe Haunue TOpInBa n yPOBeHb MOTOPHO macla (nyhKT 7.2, nyhKT 7.3). IopraDOK mepbl ppeoCTOpOxHocTH npn 3aNPaBKe MaunHb entTOJINBOM n 3aJIbke Macla co6IIOdaIte npeDnscAHn, n3IoXeHHbIe B (nyhKT 7.2, nyhKT 7.3) n B pyKOBoDCTBe NO 3KcnpyaatauHdBNrAteTEn.
6.1.2 PerylnpoBHa cnDHeBb
YTO6bI N3MeHnTb NOLOXKeHne CnDeHb, Heo6xOaIMO Ocna6nTb YeTbipe KpeNEXHBIX BnHTa (pnc. 11.A) n nepemecntNb CnDeHbe
BdoIb OOnOpHbIX HnPaBIAUOxIx. NocIe TOrO, KaK 6yDet HaIDeHO HyXHoe NOLOKeHne, 3aTaNHTe Do KOHca Yetbipe BnHTa (pnc. 11.A).
6.1.3Давлиецьшнанx
-BcIyae,ecnBbIXOTHTepa6oTaTb6e3 KOHTeHepaIraC6opatpaBBi,MOxHO 3aKa3aTb3aunTy3aHrO BbI6poca (Pnc.16;rr.15.5),KOTOPaJdoJIHHa6bITb
yCTaHOBJIeHa Ha 3aHIOI NlaCTnHy, KaK yKa3aHO B COOTBeTCTByIOUe INHCTpyKuIN.
6.2 IPOBEPKN BE3ONACHOCTN
BbInolHnTe cJeDyUOuIne npOBepKn 6e3oNaChOCTn uYIOCTOBepbTecb, YTO pe3yJbTaTbI npOBepOK COOTBeTCTByIOT DaHHbIM, pINBEdeHHbIM B Ta6JInce.
IpeHdyeem npnctyntb K pa6ote, Bcerda npOBepaHTe 6e3onacHOCTb MaunHbl.
6.2.1 Ośuza npoBepka 6e3onachocTH
ToIbko dIy MoJeIeN C rIaPoCTaTHueCHO TpaHcMnCCneH:
- Hαχmnte Ha πeДаь (nyHKT 5.6), YTOбы Maшинha OCTaHOВиlaçь;
- NaCHNte DvHKeHne Ha3aI, HaKaB neJaIb npVBoDa B HappaBLeHn 3aHrero XoJa (nyHKT 5.7).
6.5.4 ChauWBaHne TpaBbl
Дя npabnblHoi 3KcnnyatauMaunHbI BbINOHNHTe CneDyUOuNe DeiCTBnR:
1.yctaHOBnte pbiur ynpabIeHnA DPOCCeIeM B NOLOXHeHne MaKcIMMaIbHOrOpexKIma("3aU");3TO NOLOXeHne DOJHKHO HcNOJIb3OBAtbcr BCerda BO BpeMpa60TbHa MaUnHe;
2. yctaHOBHTe peKyuyn y3en Ha MaKcMaJIbHyU BbICOTy;
3. BKNIOHTe peKHyUne npncnOc6JIeHn (nyHKT 5.8) TOLbKO Ha ra3OHe, n36eRaIte Hx BKNIOUeHnHa rpaBnHOM rpyHTe HIn HA OUYb BBICOKO TpaBe;
4. OTperyIpyTe CkOpocTb DnHKeHn I BbICOTy cKaunBaemOn TpaBbl (nyHKT 5.10) COJIaCHO COCTOHNIO Ra3OHa (BbICOTa, NlOTHOCTb IN BLaXHOCTb TpaBbl);
5. Naatb nocteeneHoe npoDbnKeHne NO 3apocwemy TpaBOn yuactky, CO6JIIOaI OOC6yIO OCTOpXHHOCTb, KaYke 6blNo yka3aHO Bbiie;
BAHHO TTO TO6bI BbINHOHTb
DnKHeHne 3aHnM XoDM C BkIIOeHHbIMn peKyuHM npncNOCO6JeHNrMa, Heo6XoHMo HaKaTb N He OTNyCKaTb KHOKNy pa3peWeHn KOWeHn Pn DnBxKeHn Ha3aI (nyKT 5.9) BO n36eHaHne OCTaHOBA dBNrTaTeJI.
CkopoocTb Heo6xOJIMO yMeHbIaTb KaJdbi pa3, KOrda YyBCTByeTc CHNKeHHe O6OpOTOB DnIraTeJI. IMeIte B BVdy, UTo eCIn ChKOpOCTb IpeEdnHexHcNtIKOM BbICOKaH NO CpaBHeHHc KOJIueCTBOM TpaBbl, KOTopyIO Heo6xOJIMO CKOCHTb, To KaueCTBO ChaUNBaHHa HNKOrda He 6yDet yDoBLeTBOpITeJbHbIM.
BbIIOUaTepeKyuNe npncnocO6JIeHn H yCTaHaBnBaItepeKyuN y3eI Bcamoe BbICOKOE NOJKeHHe:
-BoBpemnepemeeHnOToHOpa6oey30hblKdpuro
-Припегесецни уастков 6e3ТраВы
- Ppi npeoOJelenn npenTCTBni.
6.5.5 CoBebI IO NO IODepeHHIO ra30Ha B XOpOWeM COCTOHN
- TTo6bI NOdepKHNBaTb XOPOwN BHeuHn BnD r30Ha, YTO6bI OH 6bl 3eJeHbI N MArKn, erO Heo6xOAnMo peYyIaRpHo CTrpUb. Ha ra3oHe MoTy paCTn pa3InuHbIe BnDbI TpaBbl. Ppr yAcTOM KoWeHn 6bICTpee pactET TpaBA C 60JIbWM KOJInueCTBOM KopHei, O6pa3yIOUaA nnOThbl TpaBraHOI NOKPoB; ecJIH JHe, HAO6OpOT, KoWeHne Ipon3BOdHTcH He TaK YAcTo, 60JIbWee
pacnpoctpaehne nojyuaet BbICOKaI INKAR TpaBA (KLeBep, pOMaWKN T.D.).
- Bcerda npednoTneBHeN Kocntb TpaBy, KOrDa ra3OH cyXoN.
- Pekyue npncnoc6leHnI dolKhbl 6bItb ceIbIMN I XopoOo 3aToOeHHbIMN, TTo6bI cKaunBaHne npoxoJIo npaBnIbHO N3-3a HepOBHOro Cpe3a He NoKeJIteJIb 6bl KOHcI TpaBBI.
4.ДВИгаTeЛь Heo6xOДМо HcNoJIb3OBaTb B MaKcHMaJIbHOM peXmme O6OpOTob, KaKДЯTORO,чTO6bl O6ecneHTb ПpaBnIbHOe ChaShuBaHne,Tak И ДЯTORO,чTO6bl CKOWeHHyIO TpaBy CdoCTaTOUHOn CInLOH HApPaBHTb HApyJy Upe3 BbIb6pOCHOn KaHaJI.
5.ПернODиHOCtB CTpNxKn DoJIxHa COOTBeTCTBOBaTb POCTy TpaBbl, He DoIpyCha CInuKOM CInbHO BbIpactaHn TpaBbl MEJdy ODNHM ChaINBaHnEM n DpyrIM. - B tenloe n cyxoe Bpem roda peKOMeHdyetcnaOpdeprHnBaTb HEMHO 60Jee BbICOKyTOpaBy, YTO6bl yMeHbWHTb BbICbIXaHne NOYBl.
- ONTIMaJIbHaBbICota TpaBbI yXoJHHO ra3OHa COCTaBJIaNET 4-5 CM, pRn OdHOM cAunBaHHHe He CJIeDyET Cpe3aTb 6oJIee ODHOn TpEtN OT ObSei BbICOTb. EcIn TpaBa OueHb BbICOKa, cKaUnBaHne JyUWe OCyUeCTBnTb B DBA npIEMa C INTEpBaJOM B OAn H DeH; pRn NepBOI CTpnKHe peKyuIe npNCIO6JIeHnI DOJIxHbI 6bITb Ha MaKcImaJIbHOB BbICOTE I JeJIaTeJIbHO yMeHbIHTb WIPINH YNOLOCBI ChAunBaEMOn TpaBbI, a pRn BTOpO - peKyuIe npNCIO6JIeHnI CJIeDyET YCTaHOBtB Ha JeJaembl yPoBeH (pnc.21).
- BHeuHn BnI ra3OHa 6yTe IyUwe, ecIn cKaunBaHne OcyueCTBnreTcNOpepMeHHo B DByx HnpaBLeHnx (pnc.22).
- EcIn Bb6pOCHo KaHaI 3acopReTc TaBoi, LyuWe CnH3NTb ChOpocTb PPOBnHexeHn, NocKOBky OHa MOKeT 6bTb CInuKOM 60JIbWo OTHOCHTeJbHO COCTOHNr Ra3OHa; ecIn npo6Iema He peuNlacb, ee npuHOn MoYr 6bITb IIOxo 3aToueHHbepeKyuIne npncnoc6JeHn HIN DeOpMnPoBaHHb npoHnlpe6ep.
- BydTe OcO6eHNO BHNMaTeJbHbI npn cKaUHbAHN B6JI3N KcTApHKnOB n Hn3Knx 6OpDIOpHbIX KaMHei, KOtOpbIe MOryT HApuHTb NapaJIeJIbHOCTb I NOBpeINrKpaI peKyuIero y3la n peKyuIne npncnocO6JeHnra.
6.5.6 OnopOHHeHne KOHTeHepa dIra c6opa TpaBbI (TolbHO dIy MoJeIe C 3aADHM c6opOM)
PIMMEUAHNE Pn onopokHeHH
KoHTeHepa dIra C6opa TpaBbI peHyuNe npncnOcObeHna DOJIHHbI 6bITb OTHIOUChEhbl; B npOTNBOM Clyuae DBrIgAteJIb OCTaHOBUTCra.
He donyckaTe nepenolHene KOnTeHepa dIa c6opa TpaBbI, UTO6bln36eKaTb 3acopEnBaIb6pOCHoro KaHaJa.
3ByKOBoN CnHaJ ONOBeUaET O HAnOJIHeHIN KOHTeHepa DnA c6opa TpaBbI:
1.OTKJIIOHTbpeKyuIe npncnOc6JIeHn (nyHKT 5.8) nCnHaI npepBeTc;
2.yCTaHOBHTb pbIur ynpabJIeHnA DPOCCeJIeM B NOLOKeHne XOIOCTOrO XoJa "UpepeNaXa";
3. npeKpaTnTb npoDbNHexHne n yCTaHOBnTb pbIur B HeITpAlbHoe noLoXHeHne (nyHKT 5.5; nyHKT 5.7);
4.BKIOUHTB CTOHOUHbI TOPMO3;
5.BbIKHIOUHTb DBNfTeIb;
6. n3BJIeKHTe pbUar (pnc. 23.A - ecIn OH npEyCMOTpeH) INN BO3bMNTecb 3a 3aNDIO pyuKy (pnc. 23.A1) N OTKNHBTe KOHTeINHeP, YTO6bl erO ONOPOXHnTb;
7.3aKpOte KOHTeHep, YTO6bI OH 6bl npKpeIen H K CTOpHoi 3aueJIke (pnc.23.B).
6.5.7 OuHCTHa BbIbpoCHOro KaHaJa (ToJIbHO dIa MoJeIeN c 3aIHM c6Opom)
- CkaunBaHne ouHb BbICOKOH nIN BlaJHKHO TpaBbI npn CInuHOM BbICOKOH CHOpOCTN npoDbNKeHHa MOKeT npNBecTH K 3acopeHHIO Bb6pOCHOrO KaHaJa. B clyuae 3acopeHHa CJeDyIte npedncaHHaM rI.7.4.2.
6.5.8 3aBepueHne KooeHHN
Ioche3aBepweHnckaunBaHHN:
- OTKIIOHTe peKHyUne npncnocObeHnra;
- CHN3bTe YINcIO O6OpOTOB DBNrAteJIa
- IN BepHnTeCb Ha3aI, NOHReB peKyuIy3eI B MaKcHMaJIbHO BbICOKOE NIOJXHeHne.
6.6 OCTAHOB
Дя OCTaHOBa MaunHbI:
1.yctaHOBtbpUarynpaBHeHnI DPOCEJIEM B NOLOKeHnE XOJocTOro XoJa "YepeNaXa"
4To6bI n36eHaTb o6paTHoro ydapa, nepeD OCTaHOBHO dBURAteJI np6JH3NTeJIbHO Ha 20 cekyHd yCTaHOBHTe
pbIar ynpaBHeHnA DpOcSeHem B NOJHOHeHne XoNocToRo XoJa «YepeNaXa».
- BbIKJIIOHTb DnIRaTeJIb, NOBepHyB KJIou B NIOJKeHHe OCTaHOBA;
- npBbIKIIOeHHOM DnIRaTeJIe 3aKpbITb KpaH NOdau TOnJIiBa (pnc. 24.A) (ecIn OH npeDycmOTpeH);
- 13BJIeKHTe KIOU
BAHHO YTO6bI COxpaHnTb 3apJd 6aTapeu, He OCTabJIaIe KIOUy B NIOJOKeHN XoJa IIN BKIOUeHnI ap, eCIN DBNrAteJIb HE BKIOUeH.
Cpa3y nocle BbIKIIOUeHn
BbIraTeIb MoKet 6bITb OueHb rOpAHM.
He npHaCaIteCb K rIyUnTeJIo
H npHeraIoUm K Hemy YacTAm.
CyueCTByeOnaCHOctb OXORA.
6.7 NOCJIPEPABOTbl
1.ДаTe ocTbIb DBHraTeJIIO nepeI nepemeueHem MaunHbI BJIIOoe NOMEeHne.
2.Повецпесческг(nyнт7.4).
3. OnyckaTe peKuyn y3eI,
yCTaHaBnBaIe TpaHcMnCCnO B
HeITpAlbHoe NIOJKeHne N BkJIouaTe
CToAHOCHbI TOPMO3, BbIKIOUaTe
DbIRaTeIb N3BJIeKaIte KJIIOU 3aJNIGAHHa
(ydOCTOBepbTEcB, YTO BCE NOdBnKhbIe
y3JIb IIOHOCTBIO OCTaHOBNLNCb):
- KaKdbI pa3, KOrDa MaunHa OCTaETc
6e3 npncmOTpa, ppeJe Yem NOKHyTb
BOINTEJIbCKOE MecTo n PpeJDe
Yem npnpapKOBAt b MaunHy;
7. ПЛАHOBOE TEXHNUCHECKOE OБСЛУЖИBAHNE
7.1 OBUNIE CBEDEHNA
IpaBnla 6e3oNaChOCTn npBedeHb B rI.2.Ctporo co6JIOdaIte yHa3aHHa BO n36eHaHHe cepbe3HbIX pNCHOB IN ONaCHOCTN.
Ipeed IIO6oI npOBepHO, OunchHO, TexHnueChm 06cnyHbAHHeM/ perynpoBHO MaunHbl:
- OTKJIIOUHTe peKHyuee npncno6JeHne;
- yctaHOBHTe TpaHCMnCCnO B HeITpaJIbHOe NOJIOHeHne;
-
BHJIIOHTE CTOHOHbI TopMO3;
BbIKIOHTe ABnraTeIb; -
N3BNEHNTe KIIIOU (HINKOrda He OCTaBnIte KIIIOU BCTaBHeHHbIM, IIN6O B MecTe, DOCTyNHom dJa DeTeu INN dJa dpYrNX INu4, He CNOCo6HbIX ynpabnTb MaunHoN);
- ydOCTOBepbTecb, 4TO BCE NOdBnHbIe y3JIbI NOJHOCTbIO OCTaHOBNHcB;
-
npouHTaIte COOTBeTCTByIOuOeepyKOBoDcTBo;
HaedeNbTe noxOaJyU OeHdy, pa6oynepaTHN 3aunThbIe OHN -
PepnoDnHocTb n OINcAHne ONEpaCNI TexHnueCKOrO 06ClyJKNBaHNr npNBedeHbI B"Ta6JInce TexHnueCKOrO 06ClyJKNBaHNr". UeJIbIO 3ToI Ta6JIncuBЯBJIeTcR NOMOyBam NOdEPKHBaTB 3ΦΦeKTTHBHOCTb N6e3OnaChOCtB BaWeM MaUNHbI. B HeYka3aHbI OCHOBHbIE ONEpaCNI TexHnueCKOrO 06ClyJKNBaHNr MaUNHbI N PepNoDnHocTb, npEdyCMOTpeHHaIra KaKdoN I3 HIX.BbINOJIHnYe yKa3aHHbIe DeiCTBnR noNCteUeHN INepBOrO n3 yKa3aHHbIX cPOKOB.
- IcnoIb3OBAHHe HeOpnHaJIbHbIX n/IIHn HEnpaBnIbHO yCTaHOBJIeHHbIX 3aNaChbIX qacteN dONoIHNTeJIbHO O6OpyIOBaHnM oKTe OTpuCaTeJIbHO cKa3aTbcr Ha pa6Ote N 6e3OnaCHOCTH MaunHbl. N3roTOBtJIb He Hecet OTBeTCTBeHHocTn 3a yUep6, HeCchaTHe BcLyHn IIN TpaBMbl, Bbl3BaHHbIe DaHHbIMN 3dJeLNAHm.
OpHnHaJIbHbIe 3aIuaCTN MOxHO npNo6peTn B cepBnCHOM cEHTpe NIn y aBTOpn3OBAHHbIX dNcTpN6bIOTOPOB.
7.2 3APABKA TOJIINBOM /ONOPOXHEHNE TOJIINBHORO BAHA
Ipeed onopOHHeHEm TOnJIHBHOro 6aKa DaIte ABHraTeJIO OCTbITb.
- PacnoJoxHte MaunHy Ha POBHOI NOBepxHOCTN IOD OTKpbITbIM He6OM.
- PacnoJIOHNTE eMKOCTb IJIa c6opa nOД Tpy6KoI (pnc. 27.A).
- OToCoeHnHTe Tpy6ky (pnc. 27.A) pacnoIooKeHHyU Ha BXOde 6eH3oΦnJIbTpTa (pnc. 27.B).
- OTKpoIe KpaH noJaU TOnJIbA (ecIn OH npEduCMOTpeH)
- Co6epnTe TOnJIHBO B NOxOJaUyIO EMKoCTb.
- Choba noCDcoeHNHTe Tpy6ky (pnc. 27.A), cIeJ3a npabNlBHOCTbIO yCTaHOBNXOMyTNHa (pnc. 27.C).
- 3aKpoTe KpaH noJaU TOnJIbA (ecn OH npEdyCMOTpeH).
Ipn Bo306HOBLeHnn pa6oTbI yOCTOBepbTeCb, YTO Ha Tpy6hax, KpaHe Hap6IOpaTope HeYteeH 6eH3nHa.
7.3 IPOBEPHA YPOBHR, 3ANPABHA, CJINB MOTOPHORO MACLA
ПРИМЕЧАНЕ ТиMaCla,КOTOpoe Heo6xOДHMo IcNoIb3OBaTb,yHa3aH B pyKOBODCTBe NO 3KcNpyaTuIN DnBraTeJIA.
BAxHO MaunHa noCTabIaTeTcA NOb3OBaTeJIIO 6e3 MOTOPHOro Macna.
BAHHO CJeIyIte BcEM yKa3aHnM, N3IOJKeHHbIM BpyKOBODCTBe I0 3KcNJIyatauIN DBrIaTeJI.
TTo6bln3MeHHTbNoLOXHeHHe:
- OTBnHTNTb IN CHaTb BNHT (pnc.17.B)
- yCTaHOBHTb KOleCNko (pnc.17.A) c npocTaBKO (pnc.17.C) B OTBepCTne, COOTBeTCTByUoue Tpe6yEmoB BbICOTe
- 3aTaNHyTb Do yNopa BnHT (pnc.17.B)
B raiKe (pnc.17.D).
b. TOnbHO IaI MaOpeJe C 3aHm C6OpOM
YTo6bI N3MeHHTb NOLOXHeHHe:
- OTBnHTnTb raiKy (pnc.18.B) n 3BLeCy cTepeKeHb (pnc.18.C).
- yctaHOBt b KOleCnHO (pnc. 18.A) B Tpe6yEmoe nolOKeHne
- BHOBb yCTaHOBnTb CTepeKeHb (Pnc.18.C), YTO6bl erO roJIOBka (pnc.18.C) 6bla 06paueHa K BHyTpEHHe Yactn MaunHbl
- 3aTMyTb do ynpa raKy (pnc.18.B).
7.5 OYHCTHA
IocJe KaJIOrO HcNoJIb3OBaHnIy IcHTte MaunHy cOrnaCHO pINBeDEHHbIM HnKe yKa3aHnM.
7.5.1 OuHCTHa MaunHHbI
OuHCTHe MaunHy ChapyHn, npOMbIB nlaactMacCOBble Yactn Ky3OBA r6KoI, CMOeHHo BOIO N MOIOUM CpeCTBOM, DeiCTBya OueHb OCTOpOHNO, TTO6bl He 3AMOHTb DBNrataJIb, Detaln 3JeKTPOOBopyObaHn I 3JeKTPOHNy PnATy, yCTaHOBJIeHNy IO npNp6OpHO JocKoI.
-ДляпpeodTbpaueHЯOnaCHOCTH BO3rOpaHЯ OUnCTnTe DBNrTaTeJIb, rIyWnteJIb,OTcEK 6aTapen OT OCTaTKOB TpaBbl,INCTbeB INI N3JIMKOB Cma3KN.
BAHHO Pn MoKe H3Oba n DBnraTeHa HkOrda He NcNoIb3yIte INCToJeTbI IaNIOaU BObI NOd DaBHeHem aRpeCCNBbIe HndKocTn!
BAHHO He MoIe TpaHCMnCCnIO, KOrDa OHa Iopraa. Pn MOKe TpaHCMnCCn HnKOrda He NcNoB3yUte NCTOnTeblI JnOdau BVbI NOd DaBHeHem.
7.5.2 OuHCTHa BbI6pOCHOro KaHana (ToJIbHO dIa MoJeIeN c 3aIHM c6OpOM)
B cnyuae 3acopeHn BbI6pOCHOrKaHaHa Heo6xoDIMO:
- CHaTb KOHTeHep IJIa C6opa TpaBblIIN 3aunTy 3aHrero BbIbPoca;
- ydaJIINb cKONNBWUOc TpaBv, pa6oTa co CTOpOHbI BbIXoHOrO OTBepCTnKaHaJa.
7.5.3 OuHCTHa KOHTeHepa dIa c6opa TpaBbI (TOJIbHO dIa MoJeIeC 3aADHM c6opOM)
- OnopokHHTe KOHTeHep dIa c6opa TpaBbl
- BCTPAXHHTe erO, YTO6bI OUHCTNTb OT OCTaTKOB TpaBbI N 3eMIn
- ChOBA yCTaHOBHTe KOHTeHep IN BbINOJIHNTe npOMbIBKy BHyTpEHHEn YAcTn peKyuIero y3la (nyHKT 7.4.4-a), NocLe KOtOpoi DEMoHTnpUyTe, ONopoKHTe KOHTeHep, PpOMoITe IN POLOKHTe eRO B MecTo, rDe OH CMOXET 6bICTpo BBICOXHYtB.
7.5.4 OuHCTHa peKHyIeRo y3Ja
TuaTeIbHo OunuauTe peKyuyn y3eI dIyUdaJIeHnBCEX OCTaTKOB TpaBblnn 3acoXweJ 3emn.
Bo Bpem Ounchn peHyuzero y3na pa6oTaHTe Ha pacCTOHHN OTIIOe H HNBOTbIX.
a. OuchTka BHyTpEHHe Yactn PpombBHy BHyTpEHHe Yactn
pejyueero y3na N BbIbpochoRo KaHaIa Heo6xOIMO OCyUeCTBnTb Ha TBePdoI NOBepxHOCTN B CNeDyUOuNX YCLOBnX:
-KoHTeHep dIa c6opa TpaBbI IIN 3aUNTa 3aHero BbIbPoca DOJIHHbI 6bITb yCTaHOBJeHbI (TOJIbKO dIa MoJeIe C 3aADHM C6OpOM);
-60KOBoH JeIbOd Ia BbIbPoca DoJIHeH 6bITb yCTaHOBJeH (TOJbKO dIa MoIeJIeC 60KOBo pa3rpy3KoH);
-onepaTOp DOnJKeH CnDcTeB;
-yCTaHOBntepeKyuuHy3eIN B NOLOKeHHe «1»;
-ДВИralteIbdoJIkeHpa6OtaTb
- TpaHcMnCCnI DOnJXHa 6bItB HeITpApbHom NIOJOKeHN
-pexyune npncno6neHn DOJIHHbI 6bITb BKNIOUeHbI
IopcoeHnHrTe no oupeepn Tpy6ky nOaun BoDbl K CneuHaBbIM WTyuepaM (pnc.29.A;pnc.30.A),no3BOJINB BoDe TeYb TBteHHe HeCKoJIbKnx MmHT Yepe3 KaJdbn HnX,POKa peKyuNe npncnocO6JeHna HaxoJATcB DBNKeHHN.
BAHHO HTObI He CTaBnTb IOd yrpo3y IcnpabHOCTb 3JIeKTpOMarHnTHOro CcENJIeHnA:
-36eeraTe nonaHaHna Macna B CcenIeHne;
-He HappaBnAte CtpyIO BODI NOBbICOKIM DaBJIeHnEM HeNOCpeDCTBEHHHO Ha y3eI CuenHeHn;
-He YIcHtTe CzepnneHne 6eH3nHOM.
b. OuHCTHa HapyHHoH Yactn
B ueJx noAepHahn ONTMaIbHoro ypoBH 3oΦeHTNBHOCTn 6e3OanCHOCTn MaunHb He06XoHMo, YTO6bHa BepXHeyactn peHuZero y3Ja He cAnNBAHNCb 3acOXuHne HOMHN 3emn n TpaBbl.
Дя OчNTн Верхнй чаTN peKуцero y3la:
- NOIHOCTbIO ONyCTHTe peKyuyn y3eJ (noIooKeHne «1»);
- npodynte ctpyei Ckataoro Bo3dyxa chepe3 OTBepCTnB npaBOM H IeBOM 3aunTHbIX npncnoc6leHnx (pnc.29; pnc.30).
7.6 BATAPER
Upe3BbHauHOBaXHO BbINOJHrTb TuaTeIbHOE Texo6cLyKHBaHne 6aTapeu, YTO6bl
0e6cneHTb en DolnCpOK ClyK6bl.
BaTaapeIO BaWeMaINHbHeO6xOdIMO
083aTeJIbHO 3apKaTaB BCJeDyUOnx CnyaJx:
- Npeed nCNoJIb3OBAHnEM MaunHbIB NepBbI pa3 nocle ee NOKynK;
- Npeed KaKdbIM dInTeIbHbIM npocToem MaunHbI (6oJee 30 dHei) (nyHKT 9);
- nepeB BBODOM B 3KcNlyaTaunIO nocne dIInTeJbHOro npOCToR.
IpoHTaHTe HBNMaTeJbHO CJeDyHTe IpoUeDype 3apAKn, OINcaHHO B pyKOBODCTBe, npIIaRaemOM K 6aTapee. B clyae, ecIn IpoUeDpya He co6JIoHaetc r nn 6aTapeIO He 3apJXaOT, ee 3JeMeHTbl MOrY TOnLyuHTb HeO6paTumblie NOBpeJKeHn. Pa3pKaHeHHyIO 6aTapeIO Heo6xOdmo 3apAINTb KaK MoXHo Ckopee.
BAHHO 3apny Heo6xOIMO
OCyUeCTBnTb Pn NOMOu yCTpOcTBa C NOCToHHbIM HApRJaKeHHeM. Dpyrne CnCTembl 3apdKn MOrTy HaHeCTN 6aTaapee Heo6paTumbIe NoBpeJdeHnI.
Maunha cna6keha coeHHntelm (pnc. 31.A) n3apn, KOtOpbH Heo6xmo IOcOeHNHTb K COOTBETCTBYUeMy coeHNHTELIO CneuaIbHO rnoepKINBAUeTO 3apdHoro yCTpoiCTBa, BXODaero B KOMNLeKTaunio (ecnn npedycMOTeHO) nIN NOCTaJIReMOrO no Tpe6oBaHIO (nykT 15.2).
BAHHO 3TOT COeHNHTeJIb HEO6XoDIMO
NcnoJb3OBAtB NcHIOHTeJIbHO IJIa
IocoeINHeHn IooepKHBaIOUeRO
3apHOrO yCTPOIcTBA, PpeyCMOTpeHHORo
N3rTOBHTeIeM. Ppr erO NcNoJb3OBAHN:
- CLEIOBAb yKa3aHnA M,
N3LOXeHHbIM B COOTBETCTBYUOJIeH
NHCTpyKUIN NO 3KcIyatauIN;
CNEIOBAtbYk3aHnM,IN3IOKeHHbIM B pyKOBODCTBE NO 3KcNlyatauIn 6atapeu.
7.7 KPEENHbIE IAHN BNHTbl
- Cnéinte 3a Tem, qTo6bI rαiKN N BnHTbI 6blN 3aTaryTbI,ДЯ yBepenHOctN B TOM, qTO MaunHa Bcerda 6e3onacha npn pa6Ote.
8. BHEOUEPEДHOE TEXHnueECHOE
OBCJYKINBAHNE
8.1 PEHOMEHAUINIJIY OBECEPUEHENBAWEI BE3OPIACHOCTN
Heo6xOJIMO HeMeJLeHNO
6paTntbCn DnCTpN6bIOTpy HnB
CneuaJIH3nPOBaHHbI CepBnCHbI ceHTp,
ecn6byyT BbIBJeHbI c60n B pa6ote:
-TopMO3a,
-BKIOUeHn I BblIOUeHn
peHyux npncno6JeHn,
-BKIOUeHn IpNbOda B dBHHeHn
BnpeD nHa 3aHem XoY.
8.2 PEHXUH N U3EJI /PEHXUHNE IPNCSNOCOBJEHNIA
8.2.1 BbIpaBnBaHne noLoHeHnpeKyuIero y3la
Для paBHomepHоCTPNKn ra3OHa Heo6xOdmo, yTO6bl peJyuyn y3eJ 6bl xopoWo OTpeRyIInpoBaH (pnc.32). B clyuae HepaBHomepHoi CTpnKn npOBepbTe daBJIeHne B shINhax (nyHKT 6.3.1). EcIn 3TOTO HeoOCTaTOUHO dJI IOJUyeHn paBHomepHoi CTpnKn, CBJKNTEcB C BaWIM DnCTpn6bIOTOpOM dJI R BbIOJIHeHn BBipaBHBaHnpeJyueO y3Ja.
8.2.2 Pechyune npncnoc6leHnA
IIOxo 3aToeHoe peKyuuee npncnoc6JeHne BbInpaet TpaBy n npNBOiNT K NOKeJIteHIO ra30Ha.
Bce BbINOJIHReMbIe Ha peHyux npncnoc6leHnx Oepaunu (dEmoHTaK, 3aToHa, 6aHaHCnPOBHa, pEmOHT, MOHTaH H/Inn 3ameHa) ABJIOCTCLOXHHbIMN IN Tpe6yOT CneuaJIbHbIX HAbbIOB, NOMMO NCNoIb3OBAHNA COOTBETCTBYIOUcero HHCTpyMeHTa; B cIax 6e3OnaCHOCTN, OH dOLHHbI BCERda BbINOJIHrTbcB CneuaJIH3npOBaHHOM cepBnCHOM ceHTpe.
3aMeHnTe NOBpeHdeHHbIe, HcHpNBJIeHHbIe NIIu N3HOWeHHbIe peHyUne npncNOC6JIeHNr I BNHTbI BcEM 6JIOHOM dIra coXpaHeHH 6aJIaHCnPOBHN.
BAHHO Lelnc06pa3No npOn3BODntb 3aMeHy peKyuux npncnocobEnu B nape,OCo6eHNO BClyuec cyueCTBeHHbIX pa3IInuB CTepeHn H3HOca.
BAHHO Bcerda nCnoB3yIte opnHaJIbHbIe peKUzne npncNoC6JIeHn, HMeIOUne KoD, yKa3aHHbI B TabInce "TexNueckne XapaKTepNCtIKN".
yHTbBa pa3BnTne rammbl npOdyKcHn,
peKyuIe npncnoc6JIeHnA
yKa3aHHbIe B Ta6JIuCe "TexHueCKeXapaKTepnCTNk",MOrYT CO BpEmHeM 6bITb 3aMeHeHb IpyrIMN,C aHaIOnHybIMN XapaKTepnCTnKaMn B3aHMo3aMeHReMOCTn
N 6e30NaChOCTN B pa6Ote.
8.3 3AMEHA NEPEДнHx/3AДнHx KOJIeC
8.3.1 NpOToTOBnTeIbHbIe onepaun
BAHHO NcnoJb3yIte noJxOJauee NOJbEMHoe yCTpOJCTBO,HaPnMep, DOMKpaT-naHTorpaΦ.
IpeE3aMeHON KOIEC BbINOJIHInTe CLeDyUOUIne OepauuN:
- CHIMITE BCE DOJONHITeIbHoe o6OpydoBaHne.
- PacnoJIOKeHTe MaunHy Ha TBepDoH n POBHOI NOBepXHOCTn, YTO6bI OHa 6blA B yCTOuHBOM NIOJOHeHN.
- BkIIOUHTe CTOHOHbI TopMo3;
BbIKIOUHTe DBNraTeIb; - N3BLeKHTe KJIIOU;
- YctahOBHTe DOMKpaT B TOUKe NODbemaPraDM C 3aMeHReMbIM KOLeCOM (nyHKT 8.3.2; nyHKT 8.3.3).
- PpOBepbTe, yTO DOMKpaT B ToUHOCTN nepnEnHknyIpeH 3eMJIe.
8.3.2 BbI6Op n ycTaHOBHa dOMHpata Ha 3aHHe KOleca
PacnoJHnTe DepeBHHbIe KInHbIa (pnc.33.A) y ochOBaHNHa KOleca (pnc. 33.B),KOTOpoe pacnoJHOc6Oky OT 3aMeHReMoTo KOleca (pnc.33.C).
Длma moDEnei c 3aHnM c6opom:
MaKcImaJIbHaB BO3MOxHHa BbICota cNoXeHHOro DoMkpata 110 MM. (pnc. 33).
- YctaHOBNTe DOMKpat NOd 3aDHeN PnlaCTHNOI (pnc. 34.A), Ha paCCToHHN 180 MM OT KpaJ.
Длma moTeJIe C 6OKOBOn pa3rpy3HOn:
MaKcHmAlbHaB O3MOxHaB BbICota cIoxHeHHoro DOMkpaTa 110 MM. (pnc. 35).
- PacnoJIOJHnTe DOMKpaT NOI 3aIDHe OcbIO, B TOUKe, yKa3aHHoH Na pncyHke (pnc. 36.A).
ПРИМЕЧАНЕ Домкрат,
YCTaHOBJIeHHbI, KaK ONHcAHO B DaHHOM NyHKTe, N03BOJAEr TOpHrTb TOJIbKO To KOJIeCO, KOTOpOE Tpe6yET 3aMeHbl.
8.3.3 BbI6Op n ycTaHOBHa dOmKpTaHa nepeDnHe KOleca
- PacnoJIOKHTe DepeBHHbIe KINHbIy (pnc. 37.A) y ochOBaHNs KoIeCa (pnc. 37.B), KOtOpoe pacnoJIOKeHO c3aDi O T 3aMeHReMo rO KoIeCa (pnc. 37.C).
- MaKcHMaJIbHaB BO3MOxHbA BbICOTa CLOKeHHOrO DomKpaTa 110 MM.
3.Полжнerte HaДOMKpaT (pnc.38.A) KBaIpaTHyIO DepeBHHyIO npoklaKy (pnc. 38.B)cceehnem OKoIo 10x10cm.
ПРИМЕЧАНЕ Дереваяная
PpOKlaIka N03BOLJeT N36eKaTb NOBpeKdEHHa nepeDHeN OCN.
4.ПонHMnTeДOMKpaT,YTO6bl npOKlaJaHa ynpaIacb B paMy nB qactN KOHcTpkyuNn (pnc.38.C).
PIMMEUHHe Ha 3OM 3Tane pyKoI npIepKnBaIe Te pOKlaHy B paBHOBeCN Ha IOMkpaTe.
ПРИМЕЧАНЕ YСТаHOBЛЕньI TAHIM OБраЗOMДOMКрAT NO3BOJЯET ПОДHAЯТВ BCIOперДHIOO OCB.
8.3.4 3aMeHa KOleca
BAHHO IpoBepbTe, yTO BO BpemnnoIbema Maunha OCTaetc B yCTOuHBOM HEnoDbHHOM NoIOKeHN. EcnB bI 3aMeHTe, yTO yTO-TO nDeT He TaK, HEmeJHeHNO ONyCTHTe DOMkpaT, IpoBepbTe N UcTaPahNTe BO3MOHHbIe np6JIeMbI, a 3aTEM CHOBA NOHNMITE DOMkpaT.
- CHIMInTe KpbIiKhY (pnc. 39.A).
2.ПоднмITE MaшиHy,нackольк Tpe6уETcA,TO6bI 6ecnpenTCTBeHNO N3BLey KoIeCo.
3.Пипомои OTBергн ИЗВЛЕКИТе элactичhoe кolypo (pnc.39.B)и shaib6bybyptnka (pnc.39.C); - CHIMITE KOLECO, NOJENHauee 3ameHe.
- HaheCNTe ha ocb (pnc. 39.D) KOHcNCTeHTHyO Cma3Ky.
- YcTaHOBnTe 3aNaCHOe KOleco.
- BHOBb aHHypaTHO yCTaHOBNTe ⅢaH6y 6byTnKa n 3JIaCTnHoe KoIb4o.
BAHHO IpoBepbTe, yTo 3aHnne KoIeCa OAnHaKOBoB BbICOTbI (pnc. 40.A) n pa3Hnca HApXhBIX dNaMeTpO BdYx KoIeC (pnc. 40.B) He npEbblaaet 8-10 MM. B npOTnbHom clyuae
Heo6xOIMO OTpeRyIINPOBaTb COOCHOCTb peKyuNX npncnOCOJIeHm B C6ope B aBTopu3OBaHHOM cepBnCHOM ueHTpe, a TO CTpnKHa TpaBb IOnyUHTcHepOBHOH.
8.3.5 PeMoHT Hn 3aMeHa uH
NcnoIb3yIOCTeBeCKaMEpHbIeMHbI«Tubeless》,
No3TOMy 3aMeHy HINpeMOHT B Cnyuae
PpOKoJa 5HHbI HeO6XODmO OCUUecTBnTb
B CNEuaJI3nPOBaHOM 5HNHOHTaKe,
COrlaCHO pOueDype, PpeDyCMOTpeHHoH
dIra 3TOr TnPa aBTOnOKpbIweK.
8.4 3JIeHTPOHHA IJIATA
3JIeKTPoHHa nIaTa - 3TO yCTpOYCTBO,
pacnoJIOXeHHoe NOd npnbOpHoi
DOCHOI, KOTOpOE ynpabJIaET BCEMN
PpeOxpaHTeBbIMn yCTpOYCTBaMm MaunHbl.
8.4.1 3aunthoe yctpoicTBO nlaTbi (ToIbKO JIA MOeJIeN c 3aHmC6opom)
- ΘлкгоннларазpacnoLOKeHa NOДпрборндоскОиСанбkeHa cAmOBocctaHaBnBaIOUeICr 3aunTOI, KOTOPa pa3MbIkae TcENbВ Clyuae c6oEB 3ЛжггТpo6OpdyObaHn(rI.14).
8.4.2 Плавский п体现在ддя 3auntblпаТы(ToIbHOnДЯ Mоделсб6OBOBpa3rpy3HOb)
- Θлкгонная паразсполжewsnoяnpиборнoidockои chabkeha плавКIMпpeoxpanHTeJEM, KOTOpBpa3MbkaetцьВсCityae c60eB 3JIeKТpoobopydOBaHHNИнКОртКOrO 3AmbIkaHnR (rI.14).
8.5 3AMEHA PPEdoXPAHnteJIa
B MaunHe NmEeTc HecKoJIbKO
PpeOxpanTeIe (pnc.41.A)
pa3HOro HOMHaJa,IX Ha3HaueHne I
XapaKTepnCTnK yKa3aHbI HnKe: -PpeOxpanTeIb HOMHaJom 10 A= NCNoJIb3yeTc dJIa3uNTbl rlaBHbIX N CInOBbIX cenei 3JeKTPoHNoH O
IIaTbI,ero cpa6aTBiBaHne npINBOiT K OCTaHOBKe MaunHbI N,TOlbKO B MOeJIax C 3aHIMC6OpOM,TaKHe K NOIHOMy BbIKIOUeHHIO INdIKaTopa Ha np6OpHoD oCKe (nyHKT5.11) -PpeOxpanTeIb HOMHaJom 25 A = nCnoJIb3yeTc dJIa 3aUHTbl
ZeHH 3apJdKn,ero cpa6aTBiBaHne
npoBlaeTc B ycINlBAUoSeiCs
pa3pIke 6aTapeN, KOTOPaI npuBOiNT K TpyDIOCTyM npn 3anyCe.
HomHaJI npedoxpaHnteYka3aH
Ha camom npedoxpahnte.
BAHHO NperopeBwun npedoxpaHntb Heo6xOIMO Bcerda 3aMeHrTa HnpeoxpaHTb TaKOrO He Tna U C TaKIM He HOMHaIOM, HN B KOem Cnyae HeJIb3AaMeHrTb erO Ha npedoxpaHTb C dpyrHM HOMHaIOM.
B clyae, ecn He ydaetc yctpaHntb npuHy cpa6aTbIBAHNA,CBAKHTecb CO CBOIM INCTPN6bIOTOPOM.
8.6 3AMEHA JAMN
8.6.1 Tn "I" -JamnbHaKaHbAHHa
JaMnbl (18BT) BCTaBJIANTcB WtBIOBOe CoeINHeHne NaTPOHa, KOTOpbIM MOHNO CHrTb, NOBOPaUNBaE rO pOTNb YacOBoN CTpeJKN Prn NOMOUs KLeUeIe (pnc. 42)
8.6.2 Tn "II" - CBeToaNoHbIe JAmnbI
OTBnHTTE npHmHyo wa6y (pnc. 42.A) n CHIMTe coeHNHTeIb (pnc. 42.B).CHIMTe cBeToHOndHyIO NOcBeTky (pnc. 42.C), npHKpeNHeHHyIO BnHTaMn (pnc. 42.D).
8.7 3AДнЯ Oсь
- Oha YBJIeTc3aKpbITbIM Hepa3bEmHbIM 6IIOKOM Hr Tpe6yET TexHnueckOro 06CnyKINBaHn; OHa 3anpaBLeHa HepacXoYEmOm Cma3Ko, KOTOpU HET Heo6xOJMoCTn MeHrTb NIN NOnONHrTb.
9. XPAHEHNE
B cnyae, ecnn Maunna 6yTeXpAHNTbca 60lee 30 dHei, Heo6xOaMo:
- DaTb DnraTeIIO OCTbITb.
- OToCoEiHHTb npoB0da 6aTapeH xpaHnTbe B npoxlaHOM H cyXOM MeCTe.
- OnopokHHb 6aK OT TOnnBa (nyHKT 7.2.2) N CLEIOBaT b yKa3aHnM, INIOKeHHbIM B pyKOBOcCTBe NO 3KcNlyaTaun DnIraTeJr.
- TuaTeIbHO NOUHCTNTb MaunHy.
- Поберпь,чTo MaшинHa He Имeel Повржден.Есл Heo6xOДМо, СвжИТecь с abTOpN3OBaHHbIM СерВИСHBIM ZeHTpOM.
- XpaHnTe MaunHy: -COnyueHHbIMpeKyuIm y3JOM
-BCYXOM NOMEUeHIN
-3aunueHHOMOTIPOHOBO3dEICTBNA
-NO BO3MOKHOCTN,HaKpOHTe
MaunHy Hexlom (nyHKT 15.4)
-BHE DOcraeMOCTn DeTei.
-ydOCTOBepebTecb,TO Bbl y6paHn KIOUHN INHCTpyMeHNT,NCNoJIb30BaBUnEeCA DIA O6cIyKINBaHHa.
B MOMENT BO3O6HOBJIeHnRApa6ToHa MaunHe:
- ydoctOBepbTecb,HToHa Tpy6kax, KpaHe n Kap6IpaTope Het yTeueK 6eH3nHa
- NOIROTOBbTe MaunHy, KaK ONHcHo B rIabe "6. HcNoJIb3OBAHHe MaunHbI".
10. ПЕPEМELSEHNE TPAHCNOPTNPOBKA
- Pn nepemeHnMaunHbI Heo6xOaHMo: -OTKIOHTb peKyuee npncnoc6JeHne; -yCTaHOBnTb peKyuyn y3en Ha MaKcImaJIbHyIO BbICOTy; -BbIKIOHTb DBNrataTeJb;
- PnnepeBO3Ke MaunHbHa aBTOTpaHCnOpTe nn npucene Heo6xOIMO:
-NOIb3OBaTbcra CneuaJIbHbIMNIIaTΦOpMaMn C COOTBeTCTByIOueiIpy30NOJbEMHOCTbIO,UINHOH N DINOHO;
-NOpy3NTb MaunHy C BbIKIOueHHbIM DnIraTeIeM, 6e3 KIOUca 3aKINrAHHN, KOtOpBn Heo6XoDnMo N3BLeuB N3 COOTBetCTByIOUeRO THe3Da, 6e3 BOdntela INCKLIQUHTeJIbHO TOJKAHNEM, pPnBLeKaAR COOTBetCTByIOUee KOJInYeCTBO IIODei;
-3aKpbItb KpaH NpOaUH TOnJIbA (ecn OH npEydcmOTpeH);
- onyctntb peKyuuiy3eI;
-BKJIIOUHTbCTOARHOHbI TOPMO3;
- pacnoLOXHTb ee TaKIM 06pa3OM, UTO6bl OHa HN Dn KOrO He npedCTaBnla OnaCHOCTN;
- npouHNo npnKpeNtB ee K TpaHCnpTHOMy CpeDCTBy TpocAMN HIN CEYAMN DnToro, YTO6bI N36eKaTb ONPOKNDbIBaHHN, KOTOpOE MOKeT Bbl3BaTb NOBpeJHDeHHN I yTeHy TOJIINBa.
11. CEPBNUCHOE OBCJLYKINBAHNE H PEMOHT
B 3TOM pyKOBOCTBe n3LOKeHb BCE yKa3aHHa, Heo6XODHMbIe dIyUnpaBLeHHa MaHHoN I dJI npABnIbHO r BblOJIHeHH a OCHOBhBX ONepaunTexHueCKOro 06cJyKHBaHH, KOTope DoJIKeH BblOJIHrTB nIb3OBATeNb. JIyBblONHeHH BCex DeiCTBn I ne pereYlnpOBKe H o6cJyKHBaHHIO,
He OINcaHHbIX B 3TOM pyKOBOdCTBe,
O6paauTeCb K BaWemy DnCTpn6bIOTopy
HIn B CneuaJIuN3HPOBaHHbI CepBnCHbI
UeHTp, paCNoJaRaUoUm NODrTOBLeHHbIM
NepcoHaJOM NOBOpyDobAHnEM,
Heo6XoDNMbIMn DnI PpaBnJIbHOro
BbINOJIHEnra pa6Otbl, NOdEprKaHnRA
YPOBnR 6e3OaNCHOCTH N BOCCTaHOBLeHnRA
NepBOHaJaNbHOr COCTOAnrMaunHbI.
Onepaun, BbINOJIHEnHbIe B HeNOxOJaux DnI
3TORO CTpykTypax HIn HEKBaJIuΦnCIPoBAHHbIMN
JIouMbM, pINbOaRT K aHNyLIpuOBaHIO BCEX
BIVoB rapaHTnN n CHImaIoT C n3rTOBNTeJIa
BCIO OTBETCTBeHHOCTb N O6ra3aTeJIbCTBa.
ToIbKO aBTOpN3OBAHHbIe cepBnCHbIe ceHTpbIMoYr BbINOLHrTb rapaHTnHbI peMOHT n O6cLyKnBaHne.
- ABTOPH3OBAHHbIe cepBnCHbIe cHTpbI HcNoJIb3yIOrTOJbKOOpHnHaJIbHbIe 3aIacHbIe YactN.OpHnHaJIbHbIe 3aIacHbIe YactN I DOONJIHITeJIbHOE 6OpYdOBaHHe 6bln CneuaJIbHO pa3pa6OtaHbI DmMaunH DaHHoro Tnna.
- IcnoJb3OBaHne HeOpunHaJIbHbIX 3anachbIX qacteN dOJOnHInTeJIbHoro O6OpydoBaHnHe yTBepKJeHO N3rTOBInTeJIem; IcNoJb3OBaHne HeOpunHaJIbHbIX 3anachbIX qacteN dOJOnHInTeJIbHoro O6OpydoBaHn CHINKaET yPoBeHb 6e3ONaCHOCTn MaINHbl, a TaKHe ChIMaET C n3rTOBInTeJI BCE 063aTeJIbCTBa n OTBETCTBEHHOCtB.
- PeKOMeHdyETcRa3B rOd OTBO3nTb MaunHy B aBTOpN3OBaHHbI cepBnCHbI cHTp DIA O6ClyKnBaHnY, yXoDa I npOBepHn HcnpaBHocTH npedoxpaHnteJbHbIX yCTpoiCTB.
12. YCJIOBNAI IAPAHTN
IapaHTnIOKpbIBaET BCE DeΦeKTbIMaTePnaIOB Hn3rTOBLeHn. POnb3OBaTeJIb DOJIKeH 6yJET CKpyNJe3HO CNeIDOBaTB BcEM yKa3aHnM, H3LOXHeHHbIM B pNIOXKeHHoJ DOKyMeHTaCn. IpaANTn He nOKpbIBaET yUep6, Bbl3BaHHbI:
HeOCTaTOHbIM O3HaKOMJIeHNEM C coPBOODTeJbHOJ DOkUMeHTaUNe.
- HeBHHMaTeIbHOCTbIO.
- HenpaBnIbHbIMN IIN Hepa3peeHHbIMN 3KcIyatauNei MOHTaXOM.
- IcnoJb3ObaHnem HeOpnHaJIbHbIX 3aIyacteN.
- IcnoJb3ObaHnem DOIOJIHNTeJIbHbIX npncnoc6JeHn, He NOCTaJIeHHbIX nIi He yTBePKeHHbIX IV3rOToBnTeJIeM.
TapaHTnTaKHe He pacnpocTpahReTcHa:
- ECTECTBENHbI IN3HOC TaKHX paCXoDhbIX MaTePnaIOB, KaK npINBOdHbIe pemHn,Φapbl, KOJecA, HOxN, IpeDOxpaHnteJIbHbIe 6OJTbI INpOBOda.
- ECTECTBEHHbI IN3HOC.
-Двигаели.Ha hnxpacnpoctpaняOTcra paHTHn n3rOToBnteIeN DBuRaTeIeN C COOTBeTCTByUOzIMN yCIOBnAMN.
IpaBa nOKyNaTeJIaUuIaEe
3aKoHOdaTeJIbCTBO ero cTpaHbI. HAcToIaJraPaHTn HnKaK He OrpaHnHuBaET
IpaB nOKyNaTeJI, ppeDyCMOTpeHHbIX
3aKoHAMn ero cTpaHbI.
13. TÁBÍNÇA TEXHNUECKOFO OBCJLYKINBAHNY
B noIra c6Oky Bbl MoKeTe 3aHeCTn DaTy N KOJIueCTBO YacOB pa6oTbI, nocLe KOTOpbIX 6blN BblNOJIHeHbI 3TN Opeaun.
Ecnn nocJe BbIIOJIHeHn OINcAHhBx Bblwe DeIcTBn HEnoJaKn He Icye3In, CBJKNTECb C BaUNM dNCTpN6bIOTOpOM.
| HENOLADHA BOZ3 MOHNAI PRNUHNA YCTPAHEHNE | |
| 6. 3aTPUdHHeHoe ВКЛЮЧЕНUE Или HepaBbHOMePbHAp pa6To DAblrAteHЯ | проблелы в karбюрatope оочить и ОпорожнIHb 6ak и 3aJIITb CBeHnB 6eH3IN |
| прOBERNTb I B Clyuae Heo6xOJIMocTb ЗаменТь 6eH3InHOBbI ΦILTp | |
| 7. ChINJHHeHne ФФФeKTHIBNOCTH ДВИrAteHЯ BO BpEma СашИВaHЯ | СлишКOM 6olbuaCh SCOPoCTb ДВИнЖЕHЯ OTHOCITIELBO БblcOTb CsaWbAHnA |
| 8. ДВИrAteHь ВыкLIOчaTeCЯ BO ВpEma pa60TbI | сра6aTbIbAHne PrédoxpanHTeJIbHbIX уctroiCTb |
| ПлавКи PrédoxpanHTeJIpeperopel ИЗ-ЗАКорOTKOrO 3amblaKANHЯ Или сбоя | |
| ЗлEVTKpoOboOpDyOBaHry (TOlbH OДЯ Mоdelen c 6okoboi Pa3rgy3kn) | |
| 9. ДВИrAteHь ВыкLIOчaTeCЯ BO ВpEma pa60TbI, И ИndNKaTOpHЯ IamNoUka ВыкLIOчaTeCЯ (TOlbH OДЯ ДмМоDEeI c Задимс c6obom) | Сра6aTbIbAHne 3aUHtI b 3JeKTPoHNo ПлaTb ITO cleDyUOzIM PrinuHnAm: |
| Ис co6JIouDeHa ПОJOrhOCTb ВыlBOdOB 6batapei | |
| СбОВ I Pa6Ote PeryIaTOPa Зардк b6aTapei | |
| КорOTHoe 3aMbIaHne O6paTITeCb K Ba | |
| 10. РжУше ПрисnoCoblenue He ВКЛIOчaOTcЯ Или He OCTaHabIbBaIOTcR MTHOBeHNo Iprn Ix ВынLIOчeHЯ | Н ecIspaRbHOCSTb C nCtTeMe ВКЛIOчeHЯ CseIplEHn |
| 11. HecapBbHomerpHoe СашИВaHime I HekayeeCTBeHnhI c6Op TpArbI (TOlbH O ДЯ MоDEeI c Задимс c6obom) | ржушиу y3eI He paclnoLoHey параJIeJIbHO OTHOCITIELBO 3eMLI |
| Из eФeKTHIBOCTb ржуши присnoCobleni | |
| СлишКOM 6olbuaCh SCOPoCTb ДВИнЖeHЯ OTHOCITIELBO | |
| ВыlCOtI b CsaWbAeMoY TpArbI | |
| Засоренье kaHala ChIb TkoHTEHepДI | |
| 12. HecapBbHomerpHoe СашИВaHime (TOlbH O ДЯ MоDEeI c бOKOBOW pa3rgy3kn) | ржушиу y3eI He paclnoLoHey параJIeJIbHO OTHOCITIELBO 3eMLI |
| Из eФeKTHIBOCTb ржуши присnoCobleni | |
| 13.ЧeЗМернЯ ВИбрацnia BO ВpEma pa60TbI | ржушиу y3eI 3aOJIaHne TraboI npOch |
| ржушиу prcisnoCoblenia Ие c6balanCupOBaHb Ilin nx КреллeHne Oclal6IeNo | |
| ОCLAbeHbIeKpeIeHnI prOBePHTb I | |
Ecnn nocne BbINOpHeHNAcHbIX BblIe DeNCTBn HEnoJaKn He Ncye3nn, CBKHTecb C BaIIM dNCTpN6bIOTOPOM.
| HEPONJADHA BO3MOJHNA PUNUHNA YCTPAHEHNE | ||
| 14. Hectabibhoe ил He3ΦΦeKTHBHOE TOPMOJHHe | TOPMO3 He OTpeYIpOBaH nPapINbHo | образнТecь к Baшему диспбюТору |
| 15. Движение рыВКам, HeDcOStaTOCha TЯг prinbOda Na noDbeme, т endeHця СкolyжениMaшинь ВБokobоД занOC | Пробlems c peMHem ил uSTpoIcTBOM BkLIOUeHnA | образнТecь к Baшему диспбюТору |
| 16. Пri вклоченHom ДВИrTe№, наЖIMма Ha peДаль prinbOda, maшина He ДВИraTeСя (Mоделi с ГнростаТческо ТранCMnCCnei) | рьчаг pa36IoKHyOBKN B noLOJOeHm pa36IoKHyOBaHNo TpaHCMnCCn | yCTaHOBITE erO B noLOJOeHm e BkLIOUeHNo ТранCMnCCn (nyHKT 5.13) |
| 17. Машина Начиait anOMaJIbHo ВИбрИрВаТь i/ илу удAPIлась o noCTOPOHNДPreDMeT | ЧASTI MaSHInbI NOBpeJXDeHbI ил OCSa6JIeHbI | ОCTaHOBITE MaSHInHy i N3BLeKHTe КЛЮЧ ЗАнURAнIA |
| ВыRbITE NaJIчINE BO3MOJxHbIX ПОВpeJXDeHni | ||
| ПрobervTe, HeT Лоocla6JIeHbIX ЧаTei N 3aTЯнITE iX | ||
| ОБразнТecь B спесиаJIиЗИрOBaHьI серВИСНБИ ЗЕТР ДЛЯ ВБIOЛHЕHЯ ПрobervOK, ЗameHbI n peMOHTa | ||
EcnI nocJe BbInOJIHeHn OINcAHhIx BblSe DeIcTBn HEnoJaKn He Icye3JI, CBKHTecB C BaUNM INCTpN6bIOTOpOM.
15.ДОПОЛНITEЛьhoeOBOPYIOBAHNE
15.1 HOMPJIeKTДЯ MYJbYHPOBAHIN
ToHko n3MeIbUaET cKoUeHHyU TpaBy N OCTabIaIe ee Ha ra3OHe (pnc. 43.A1; pnc. 43.A2).
15.2 NOДДЕРЖИBAIOUJIEE 3APДHOE YCTPOICTBO
No3BOJAEI NOIDepKINBaTb 6aTapeB B COCTOHN IOTOBHOCTN B nepNOdbI npocTo, oEcneuBAra ONTMaJIbHbI yPOBeH 3apAnn 6oJe nnTeNbHbI cPOK CnyK6bl 6aTapei (pnc.43.B).
15.3 INPUNHOE YCTPOINCTBO
Дябкювн Heбьшоу npicena (pnc. 43.C).
15.4 THAHEBbIy YEXOJI
3aunuaet MaunHy OT nbIn, KOrda OHa He nCnoB3yeTcra (pnc. 43.D)
15.5 KOMNJIeHT 3AunTbI 3ADHErO BbIEPOCA
IpeHa3NaueH dIy IcNoIb3OBAHHBMeCTO KOHTeINHe p6op TaPbbl,ecn c6Op TpaBbI He Tpe6yeTcR (pnc. 43.E). (ToJIbHO dIy MoJeIeN C 3aAHNm C6OpOM).
15.6 1EINI POTNBOCKOJIbXEHNA 18"
YnyuataoT cueenlneHne 3aHnX KOleC rpyHTOM Ha 3aChHeKeHHbIX yHaCTkax N I03BOJIoT NCIOJIb3OBAtB CHEEOOuNCTHTeJIbHOe 6obopyoBaHne (pnc.43.F).
15.7 HOJEAДЛЯГР3N/CHEGA 18"
Unyuiaot TЯROBbIe XapaKTepnCTNKn Ha Chery NHa rpa3n.
15.8 PnCEN
2.5 OCHRANA ZIVOTNEHO PROSTREDA
B.Druh "II" (obr. 10.E)
6.5 PRACOVNA CINNOST
6.5.1 Pohyb smerom doprodu a presuny
Pochas presunu:
7.7 FIXACNE SKRUTKY A MATICE
- Zachovajte stav skrutiek a matić dotiahnuty, aby ste mohli byt stale isti bezpečnou Činnostou stroja.
8. MIMORIADNA UDRZBA
8.1 ODPORUCANIA NA ZAISTENIE BEZPECNOSTI
8.6.2 Druh "II" - LED ziarovsky
- Odskrutkujte kruhovú maticu (obr. 41.A) a odložte konektor (obr. 42.B). Odmontujte osvet'ovac's LED (obr. 42.C), pripevný skrutkami (obr. 42.D).
8.7 ZADNÁ NAPRAVA
15.1 SATS FÖR "MULCHING"
15.7 HJUL FÖR LERA/SNÖ 18"
EN · The content and images in this User Manual were produced expressly for ST. S.p.A. and are protected by copyright - any unauthorised reproduction or modification to the document, either partially or in full, is prohibited.