
STRIXR9390XDC38GD5GAMING - Graphic card ASUS - Free user manual and instructions
Find the device manual for free STRIXR9390XDC38GD5GAMING ASUS in PDF.

| Product type | Graphics card |
| Brand | ASUS |
| Model | STRIXR9390XDC38GD5GAMING |
| Graphics processor | AMD Radeon R9 390X |
| Video memory | 8 GB GDDR5 |
| Interface | PCI Express 3.0 x16 |
| Maximum resolution | 4096 x 2160 pixels |
| Connectors | 1x DVI-D, 1x HDMI, 3x DisplayPort |
| Recommended power supply | 750 W |
| Power connectors | 1x 8-pin + 1x 6-pin |
| Dimensions (L x W x H) | 30.5 x 14.5 x 4.5 cm |
| Weight | Approximately 1.2 kg |
| Cooling | ASUS DirectCU III |
| Software features | ASUS GPU Tweak, ASUS Streaming |
| Warranty | 3 years (depending on retailer) |
| Maintenance and cleaning | Regular dusting with compressed air. Avoid moisture and extreme temperatures. |
| Safety | Disconnect power before handling. Do not open the cooling enclosure. |
| Spare parts and repairability | No spare parts. Repairs only by an ASUS authorized service center. |
| General information | Instructions available for download at asus.com. Technical support via the website. |
Frequently Asked Questions - STRIXR9390XDC38GD5GAMING ASUS
User questions about STRIXR9390XDC38GD5GAMING ASUS
0 question about this device. Answer the ones you know or ask your own.
Ask a new question about this device
Download the instructions for your Graphic card in PDF format for free! Find your manual STRIXR9390XDC38GD5GAMING - ASUS and take your electronic device back in hand. On this page are published all the documents necessary for the use of your device. STRIXR9390XDC38GD5GAMING by ASUS.
USER MANUAL STRIXR9390XDC38GD5GAMING ASUS
Drivers and Utilities
Installation Guide
Index
English. 1
繁體中文 22
简体中文 42
Čestina 62
Nederlands 82
Francais 102
Deutsch 122
Elambdaviká 142
Italiano 162
日本語 183
日 203
Polski 223
Portugues 243
Espanol 263
yKpaHcbKa. 283
Hrvatski 303
E9733
Third Edition
September 2014
Copyright © 2014 ASUSTeK Computer Inc. All Rights Reserved.
No part of this manual, including the products and software described in it, may be reproduced, transmitted, transcribed, stored in a retrieval system, or translated into any language in any form or by any means, except documentation kept by the purchaser for backup purposes, without the express written permission of ASUSTeK Computer Inc. ("ASUS").
Product warranty or service will not be extended if: (1) the product is repaired, modified or altered, unless such repair, modification of alteration is authorized in writing by ASUS; or (2) the serial number of the product is defaced or missing.
ASUS PROVIDES THIS MANUAL "AS IS" WITHOUT WARRANTY OF ANY KIND, EITHER EXPRESS OR IMPLIED, INCLUDING BUT NOT LIMITED TO THE IMPLIED WARRANTYES OR CONDITIONS OF MERCHANTABILITY OR FITNESS FOR A PARTICULAR PURPOSE. IN NO EVENT SHALL ASUS, ITS DIRECTORS, OFFICERS, EMPLOYEES OR AGENTS BE LIABLE FOR ANY INDIRECT, SPECIAL, INCIDENTAL, OR CONSEQUENTIAL DAMAGES (INCLUDING DAMAGES FOR LOSS OF PROFITS, LOSS OF BUSINESS, LOSS OF USE OR DATA, INTERRUPTION OF BUSINESS AND THE LIKE), EVEN IF ASUS HAS BEEN ADVISED OF THE POSSIBILITY OF SUCH DAMAGES ARISING FROM ANY DEFECT OR ERROR IN THIS MANUAL OR PRODUCT.
SPECIFICATIONS AND INFORMATION CONTAINED IN THIS MANUAL ARE FURNISHED FOR INFORMATIONAL USE ONLY, AND ARE SUBJECT TO CHANGE AT ANY TIME WITHOUT NOTICE, AND SHOULD NOT BE CONSTRUED AS A COMMITMENT BY ASUS. ASUS ASSUMES NO RESPONSIBILITY OR LIABILITY FOR ANY ERRORS OR INACCURACIES THAT MAY APPEAR IN THIS MANUAL, INCLUDING THE PRODUCTS AND SOFTWARE DESCRIBED IN IT.
Products and corporate names appearing in this manual may or may not be registered trademarks or copyrights of their respective companies, and are used only for identification or explanation and to the owners' benefit, without intent to infringe.
Contents
Notices. 4
Safety information 5
About this guide 6
- Support CD information 7
- VGA drivers 8
2.1 Installing the VGA driver 8
2.2 Uninstalling the VGA driver 9
- ASUS GPU Tweak utility 10
3.1 Installing ASUS GPU Tweak 10
3.2 Uninstalling ASUS GPU Tweak 11
- ASUSAPRP 12
4.1 Installing ASUS APRP 12
4.2 Uninstalling ASUS APRP 13
- ASUS Streaming 14
5.1 Installing ASUS Streaming 14
5.2 Uninstalling ASUS Streaming 15
- Other information 16
6.1Browse the Support CD 16
6.2 Contact Information 16
6.3 Viewing the Read Me file 17
Appendix: Basic troubleshooting 18
Notices
Federal Communications Commission Statement
This device complies with Part 15 of the FCC Rules. Operation is subject to the following two conditions:
- This device may not cause harmful interference
- This device must accept any interference received including interference that may cause undesired operation.
This equipment has been tested and found to comply with the limits for a Class B digital device, pursuant to Part 15 of the FCC Rules. These limits are designed to provide reasonable protection against harmful interference in a residential installation. This equipment generates, uses, and can radiate radio frequency energy and, if not installed and used in accordance with manufacturer's instructions, may cause harmful interference to radio communications. However, there is no guarantee that interference will not occur in a particular installation. If this equipment does cause harmful interference to radio or television reception, which can be determined by turning the equipment off and on, the user is encouraged to try to correct the interference by one or more of the following measures:
- Reorient or relocate the receiving antenna.
- Increase the distance between the equipment and receiver.
- Connect the equipment to an outlet on a circuit different from that to which the receiver is connected.
- Consult the dealer or an experienced radio/TV technician for help.

The use of shielded cables for connection of the monitor to the graphics card is required to assure compliance with FCC regulations. Changes or modifications to this unit not expressly approved by the party responsible for compliance could void the user's authority to operate this equipment.
Canadian Department of Communication Statement
This digital apparatus does not exceed the Class B limits for radio noise emissions from digital apparatus set out in the Radio Interference Regulations of the Canadian Department of Communications.
This class B digital apparatus complies with Canadian ICES-003.
REACH
Complying with the REACH (Registration, Evaluation, Authorisation, and Restriction of Chemicals) regulatory framework, we published the chemical substances in our products at ASUS REACH website at http://green.asus.com/ english/REACH.htm.
Macrovision Corporation Product Notice
This product incorporates copyright protection technology that is protected by method claims of certain U.S. patents and other intellectual property rights owned by Macrovision Corporation and other rights owners. Use of this copyright protection technology must be authorized by Macrovision Corporation, and is intended for home and other limited viewing uses only, unless otherwise authorized by Macrovision Corporation. Reverse engineering or disassembly is prohibited.
Safety information
Electrical safety
- When adding or removing devices to or from the system, ensure that the power cables for the devices are unplugged before the signal cables are connected. If possible, disconnect all power cables from the existing system before you add a device.
- Make sure that your power supply is set to the correct voltage in your area. If you are not sure about the voltage of the electrical outlet you are using, contact your local power company.
- If the power supply is broken, do not try to fix it by yourself. Contact a qualified service technician or your retailer.
Operation safety
- Before installing devices on your motherboard, carefully read all the manuals that came with the package.
- Before using the product, make sure all cables are correctly connected and the power cables are not damaged. If you detect any damage, contact your dealer immediately.
- To avoid short circuits, keep paper clips, screws, and staples away from connectors, slots, sockets and circuitry.
- Avoid dust, humidity, and extreme temperature. Do not place the product in any area where it may be exposed to moisture.
- Place the product on a stable surface.
- If you encounter technical problems with the product, contact a qualified service technician or your retailer.
About this guide
Conventions used in this guide
To make sure that you perform certain tasks properly, take note of the following symbols used throughout this manual.

WARNING: Information to prevent injury to yourself when completing a task.

CAUTION: Information to prevent damage to the components when completing a task.
IMPORTANT: Information that you MUST follow to complete a task.

NOTE: Useful tips and additional information for completing a task.
Where to find more information
Refer to the following sources for additional information and for product and software updates.
1. ASUS Websites
The ASUS websites worldwide provide updated information on ASUS hardware and software products. The ASUS websites are listed in the ASUS Contact Information on the inside front cover of this installation guide.
2. Optional Documentation
Your product package may include optional documentation, such as warranty flyers, that may have been added by your dealer. These documents are not part of the standard package.
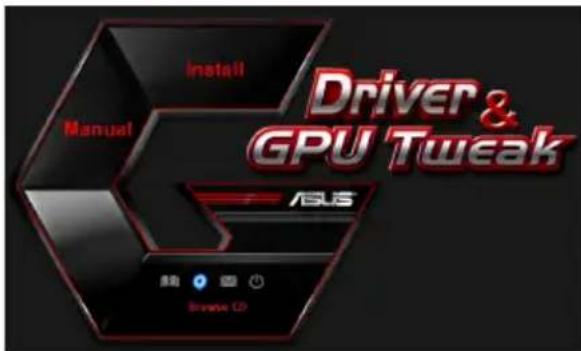
1. Support CD information
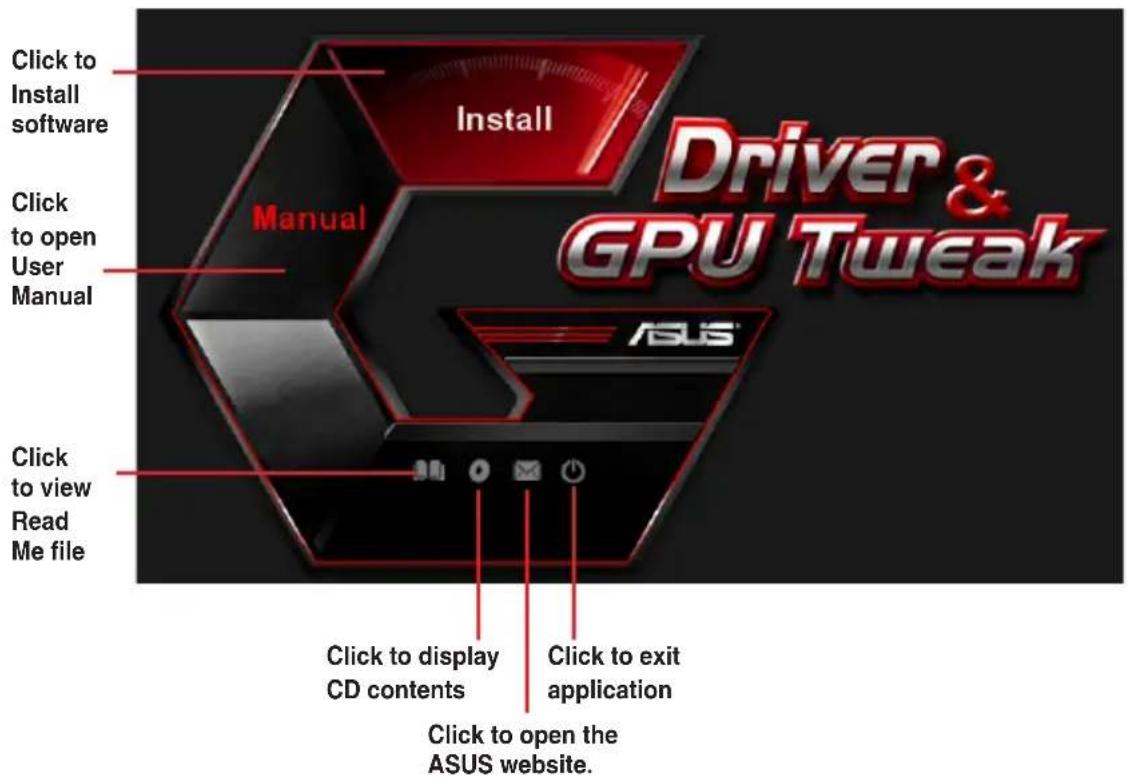
The support CD contains the drivers and utilities for your VGA card. Click the icons on the support CD's main menu to install software, obtain ASUS contact information, browse CD contents, or view the Read Me file.

- The screens in this manual are for reference only and may not exactly match what you see on your screen.
- The device driver and utility in the support CD apply only to specific ASUS VGA card models.
- You may need administrator rights to install the drivers and utilities. See your Windows® 8.1 / 8 / 7 / Vista documentation for details.
- The contents of the support CD are subject to change at any time without notice. Visit the ASUS website at www.asus.com for updates.
Insert the CD into your computer's optical drive. If Autorun is enabled, the Main Menu launches automatically.

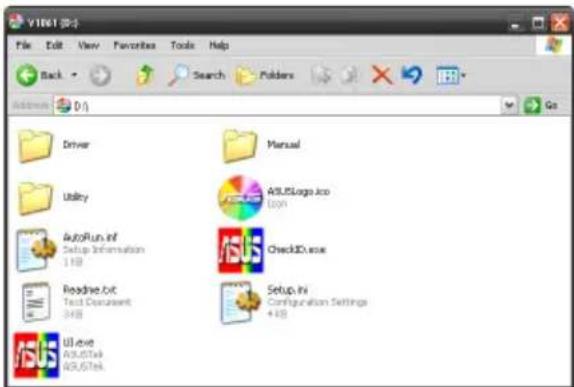
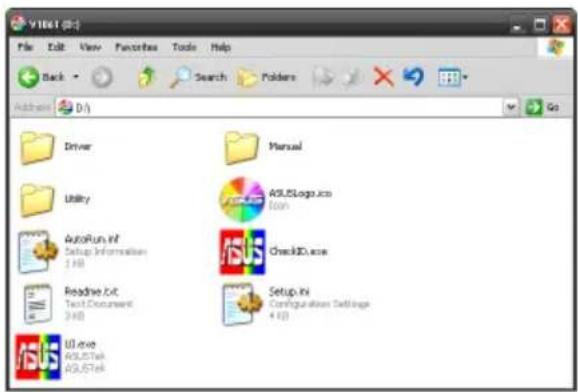
If Autorun is NOT enabled on your computer, browse the contents of the support CD to locate the file UI.exe. Double-click the UI.exe to run the support CD installation program.
2. VGA drivers
The VGA driver is the software program that makes the device work with your operating system. After physically installing your graphics card, use any of the recommended methods in this section to install, update, or remove the VGA driver.

If you are replacing an old graphics card with a new ASUS graphics card, uninstall the old display driver from your system.
2.1 Installing the VGA driver
2.1.1 Installing the VGA Drivers in Windows Vista and Windows® 8.1 / 8 / 7 (32/64 bit)
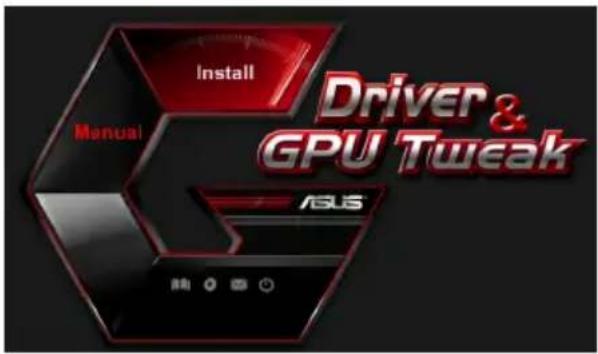
To install the VGA driver in Windows® 8.1 / 8 / 7 / Vista:
-
Insert the support CD into your optical drive.
-
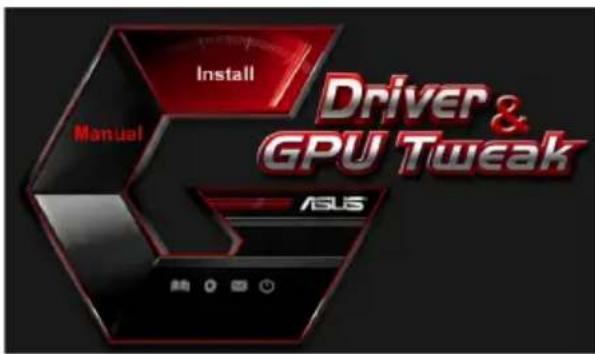
If Autorun is enabled, the main menu appears automatically. If Autorun is disabled, run UI.exe from the root directory of your support CD.
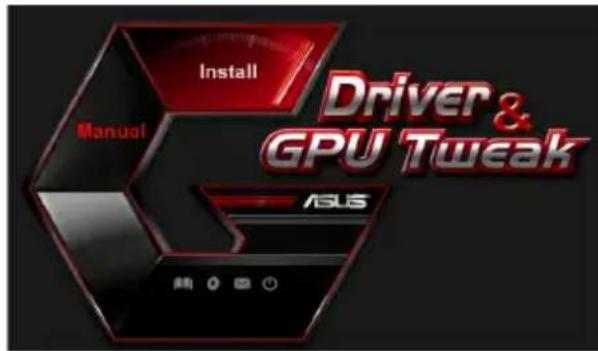
-
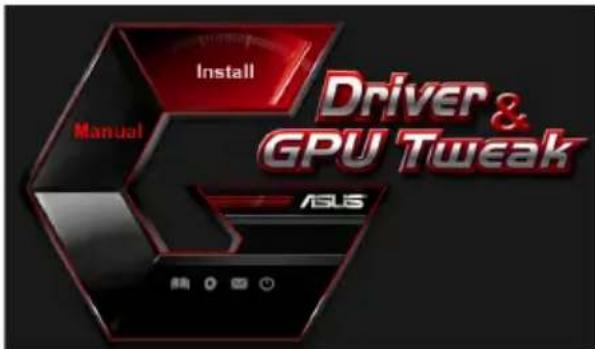
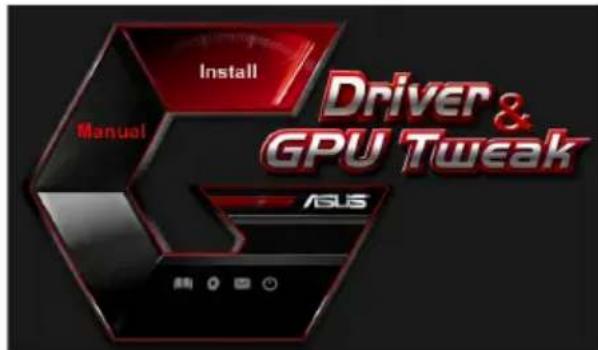
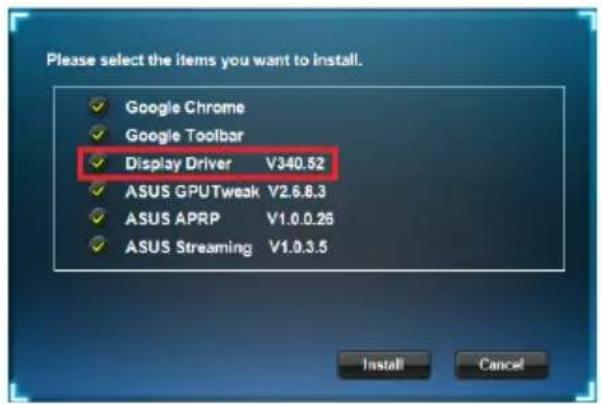
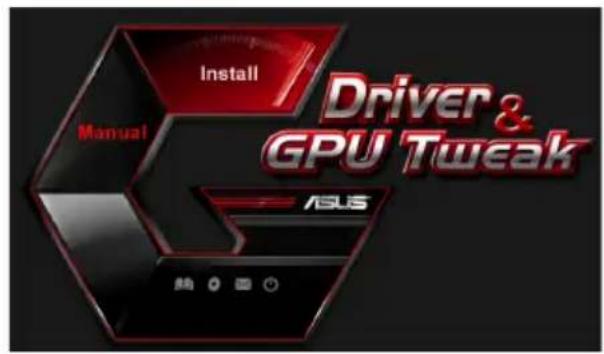
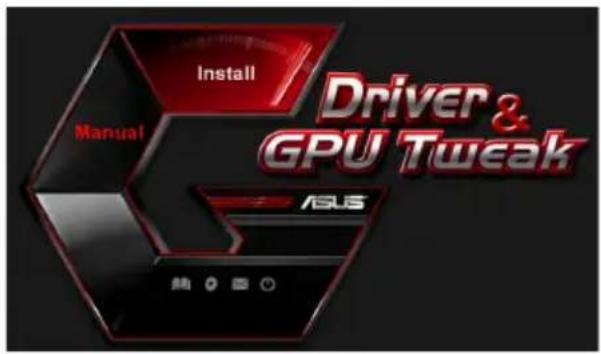
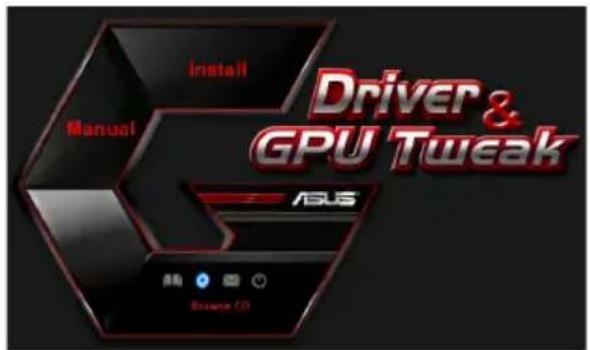
From the main menu, click Install.
-
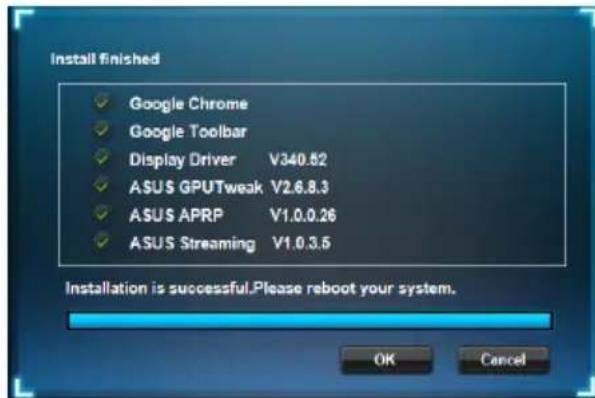
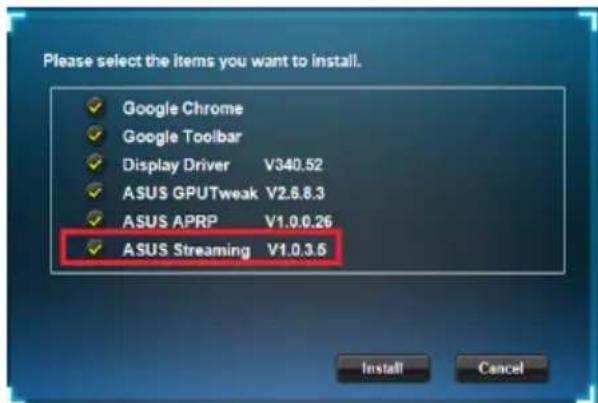
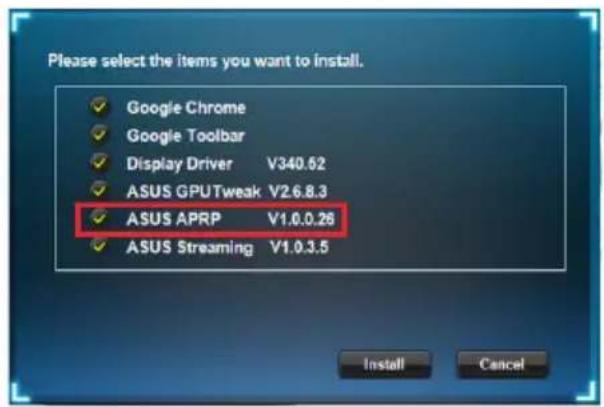
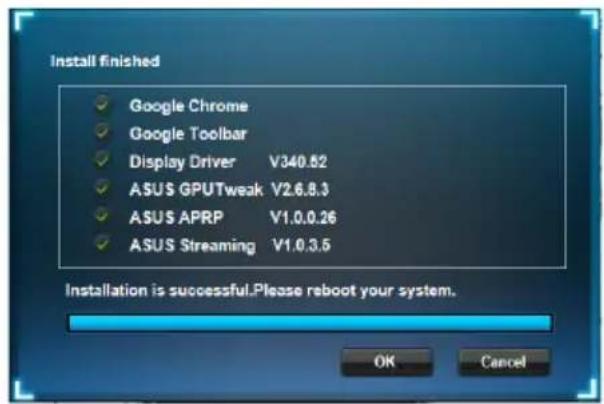
Select Display Driver and click the Install button.
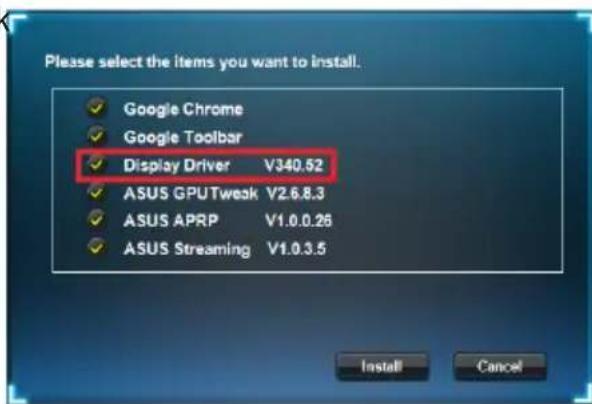
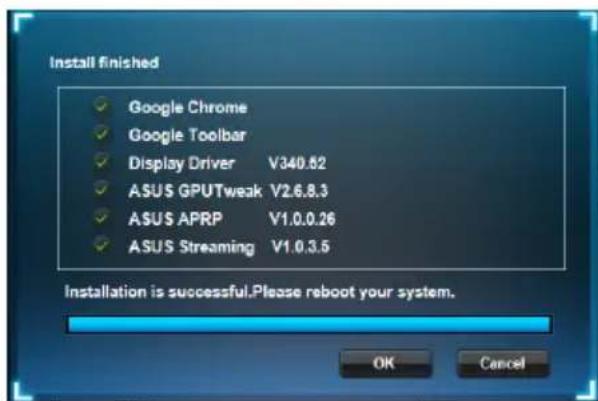
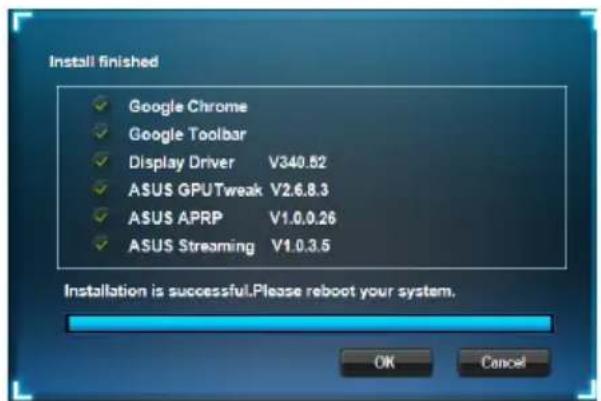
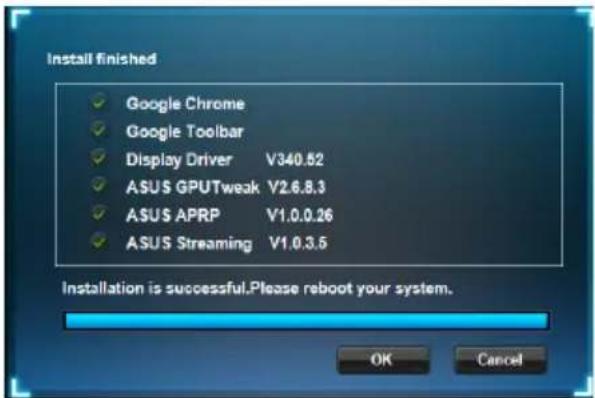
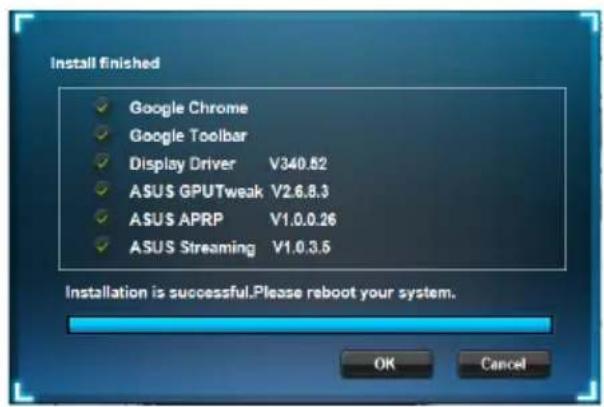
- Once installation is complete, click OK to reboot the system.
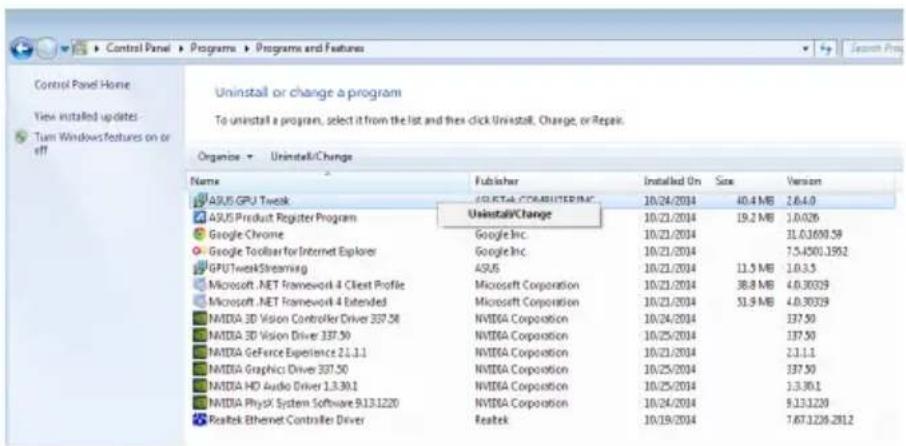
2.2 Uninstalling the VGA driver
2.2.1 Uninstalling VGA drivers in Windows 8.1/8/7/Vista
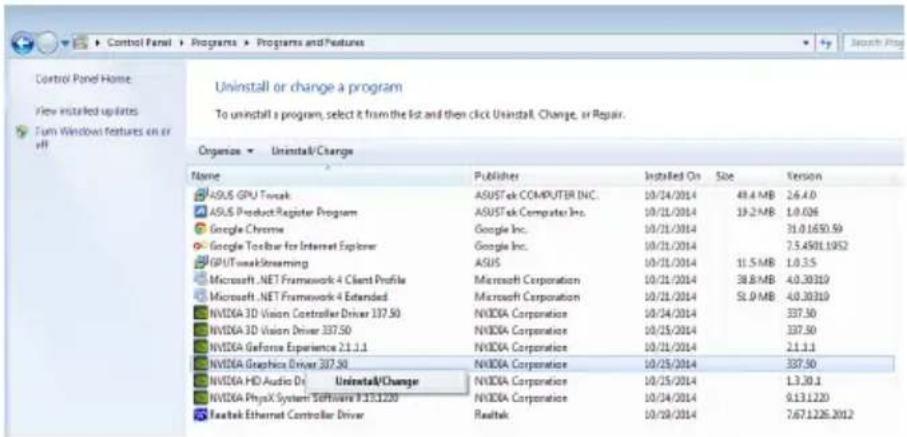
To remove the VGA driver in Windows® 8.1 / 8 / 7 / Vista:
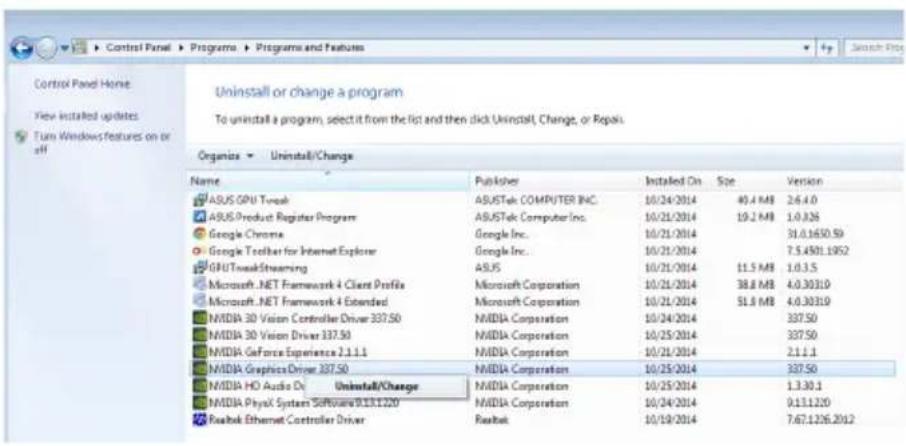
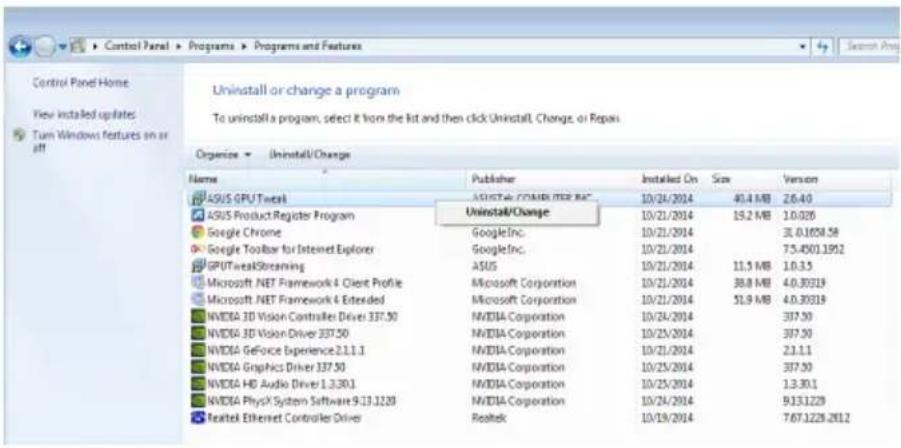
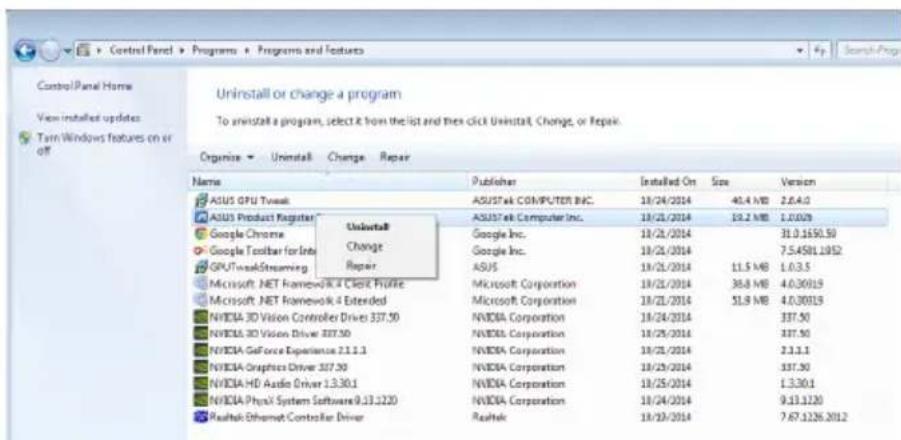
- Click Start > Control Panel > Programs > Programs and Features, select graphics driver. Click Uninstall.
3. ASUS GPU Tweak utility
ASUS GPU Tweak utility allows you to monitor and optimize the settings of your ASUS Graphics card.
3.1 Installing ASUS GPU Tweak
3.1.1 Installing ASUS GPU Tweak in Windows Vista and Windows 8.1 / 8 / 7 (32/64 bit)
To install ASUS GPU Tweak:
- Insert the support CD into your optical drive.
- If Autorun is enabled, the main menu appears automatically. If Autorun is disabled, run UI.exe from the root directory of your support CD.
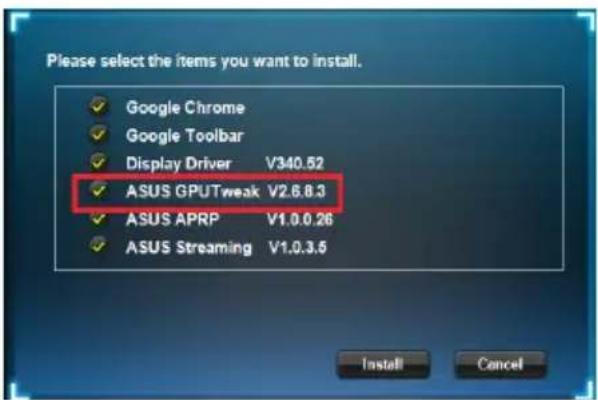
- From the main menu, click Install. Select ASUS GPU Tweak and click the Install button.

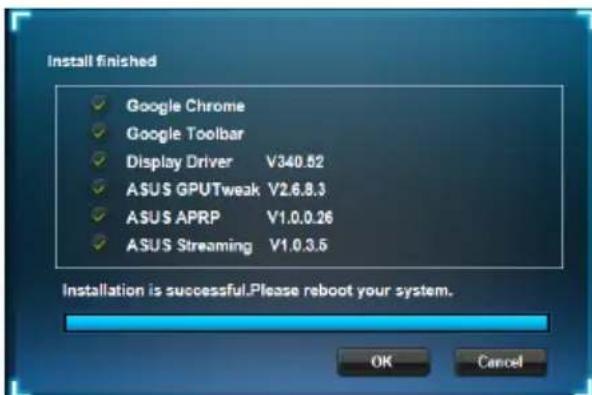
- Once installation is complete, click OK.
3.2 Uninstalling ASUS GPU Tweak
3.2.1 Removing ASUS GPU Tweak in Windows 8.1/8/7/Vista
To remove ASUS GPU Tweak in Windows® 8.1 / 8 / 7 / Vista:
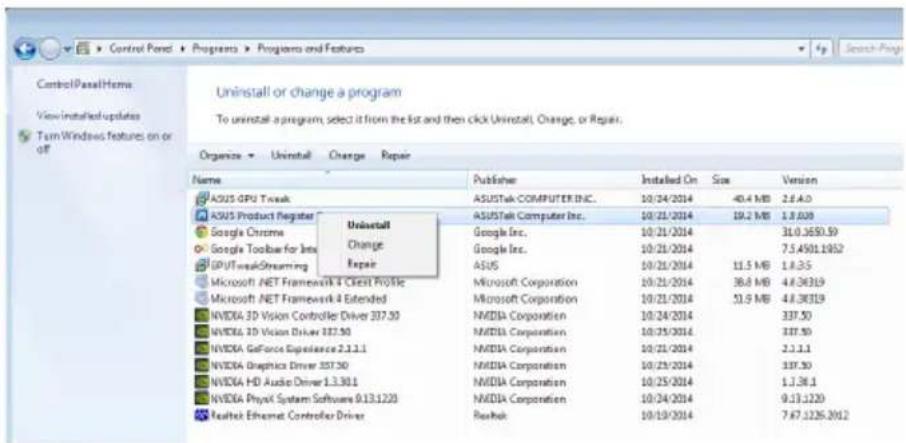
- Click Start > Control Panel > Programs > Programs and Features, select ASUS GPU Tweak. Click Uninstall.
4. ASUS APRP
4.1 Installing ASUS APRP
4.1.1 Installing ASUS APRP in Windows /8/7 (32/64 bit)
Vista and Windows 8.1
To install ASUS APRP:
- Insert the support CD into your optical drive.
- If Autorun is enabled, the main menu appears automatically. If Autorun is disabled, run UI.exe from the root directory of your support CD.
- From the main menu, click Install.
Select ASUS GPU Tweak and click the Install button.
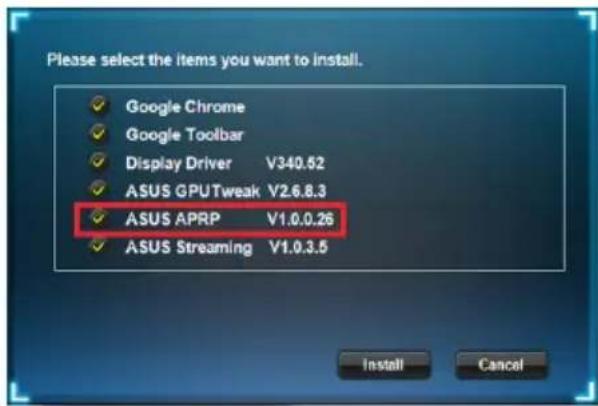
- Once installation is complete, click OK.
4.2 Uninstalling ASUS APRP
4.2.1 Removing ASUS APRP in Windows 8.1/8/7/Vista
To remove ASUS APRP in Windows® 8.1 / 8 / 7 / Vista:
- Click Start > Control Panel > Programs > Programs and Features, select ASUS APRP. Click Uninstall.
5. ASUS Streaming
5.1 Installing ASUS Streaming
5.1.1 Installing ASUS Streaming in Windows Windows® 8.1 / 8 / 7 (32/64 bit)
Vista and
To install ASUS Streaming:
- Insert the support CD into your optical drive.
- If Autorun is enabled, the main menu appears automatically. If Autorun is disabled, run UI.exe from the root directory of your support CD.
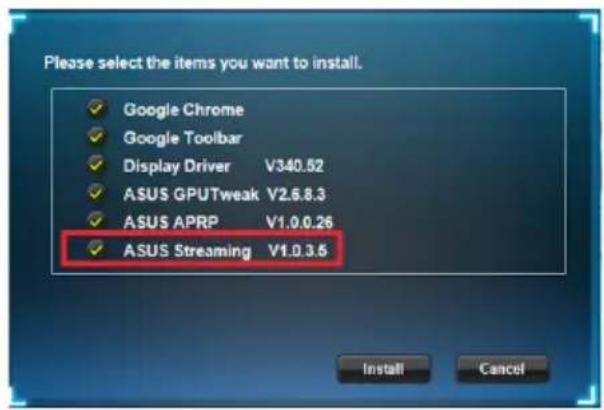
- From the main menu, click Install.
Select ASUS GPU Tweak and click the Install button.
- Once installation is complete, click OK.

5.2 Uninstalling ASUS Streaming
5.2.1 Removing ASUS Streaming in Windows 8.1/8/7/Vista
To remove ASUS Streaming in Windows® 8.1 / 8 / 7 / Vista:
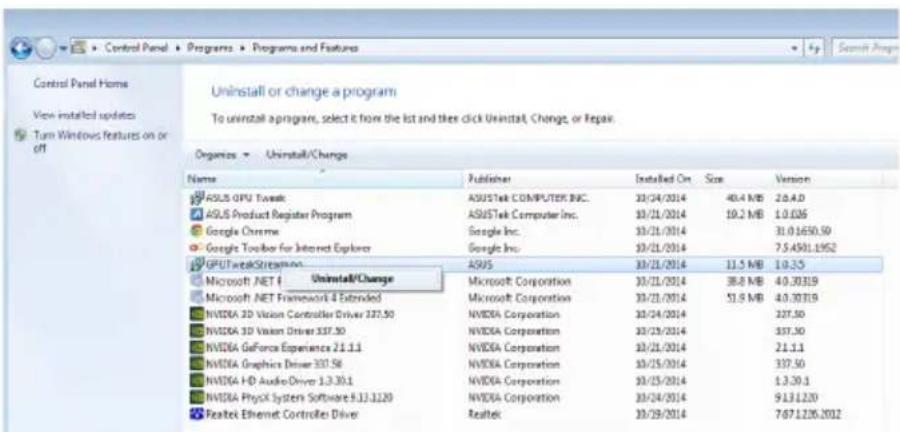
- Click Start > Control Panel > Programs > Programs and Features, select GPU Tweak Streaming. Click Uninstall.
6. Other information
6.1 Browse the Support CD
To browse the support CD:
- Insert the support CD into your optical drive.
- If Autorun is enabled, the main menu appears automatically. If Autorun is disabled, run UI.exe from the root directory of your support CD.
- From the main menu, click Browse CD to view the contents of the CD.
6.2 Contact Information
- Insert the support CD into your optical drive.
- If Autorun is enabled, the main menu appears automatically.
If Autorun is disabled, run UI.exe from the root directory of your support CD.
- From the main menu, click Contact Us to open the ASUS website for additional information.
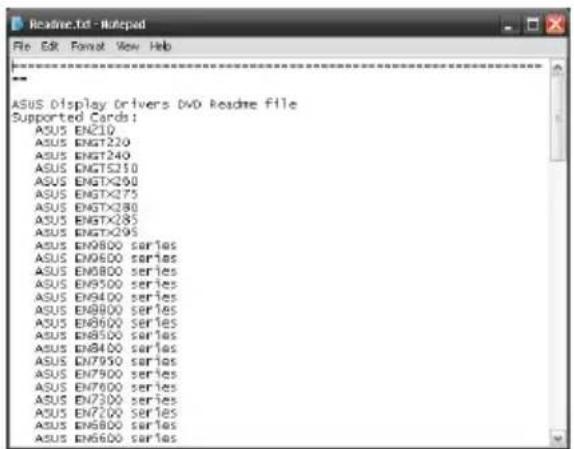
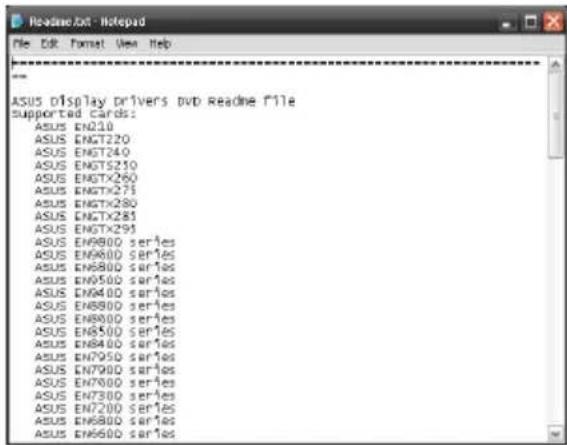
6.3 Viewing the Read Me file
To view theREADME file:
- Insert the support CD into your optical drive.
- If Autorun is enabled, the main menu appears automatically. If Autorun is disabled, run UI.exe from the root directory of your support CD.

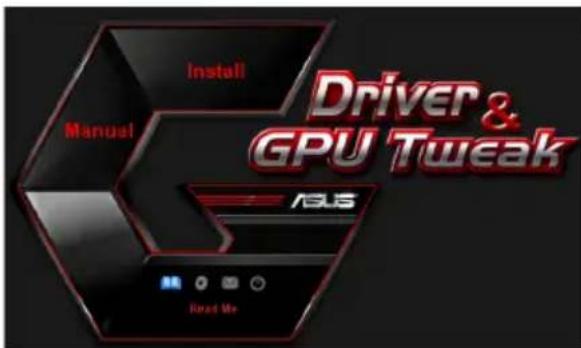
- From the main menu, click Read Me to display the Readme text file.
Appendix: Basic troubleshooting
If you encounter any of the following scenarios after installing your graphics card, try performing one of the possible solutions before calling for technical support.
| Problem No display after the card is installed | |
| Cause Your card might not be properly installed. Solution Make sure that the card is not tilted or skewed on the slot. | |
| Cause Your monitor might not be properly connected. Solution Make sure that the signal cable is properly connected to your monitor and graphics card. | |
| Cause Your graphics card is not supported by your motherboard. Solution Check the technical documentation that came with your motherboard and check the required specifications for your graphics card (e.g. AGP voltage requirement). | |
| Cause The graphics card's auxiliary power is not connected. Solution Make sure that the auxiliary power cables are properly connected with the power supply unit. | |
| Cause Insufficient power supply. Solution Make sure that your power supply unit can provide the minimum power requirement to your system. | |
| Cause Incorrect motherboard hardware system settings (e.g. system control panel connections). Solutions • Make sure that the system control panel cables are connected properly (e.g. power switch, reset). • Make sure that your CPU, CPU fan and/or memory DIMMs are in good working condition and are connected properly. | |
| Problem Wrong color balance | |
| Cause Your card might not be properly installed. Solution Make sure that the card is not tilted or skewed on the slot. | |
| Cause Your video controls might not be properly set. Solution • Manually configure your video controls to your desired settings. • Configure your graphics card display resolution in Dis-play properties. | |
| Cause There may be unsupported graphics card drivers installed in your system. Conflicts may occur with graphics card drivers from different vendors. Solution • Remove any unused graphics card drivers installed on your system. • Install the graphics card driver from the support CD that came with your graphics card package. | |
| Cause The graphics card's auxiliary power is not connected. Solution Make sure that the auxiliary power cables are properly connected to the power supply unit. | |
| Cause If your monitor comes with BNC connectors, the port con-nections may be incorrect. Solution Make sure that all BNC connectors are connected properly to its corresponding port. | |
| Cause Your monitor software settings might be incorrect. Solution Configure your monitor to supported display settings. | |
| Cause Your monitor might not be properly connected. Solution Make sure that the signal cable is properly connected to your monitor and graphics card. | |
| Problem The screen image is garbled | |
| Cause Your monitor cannot support the selected display setting. Solution Make sure that your monitor can support your desired display setting. Refer to the technical documentation that came with your monitor. | |
| Cause Your graphics card cannot support the desired system setting. Solution Make sure that your graphics card can support your desired display setting. See the specifications table that came with this graphics card package. | |
| Cause Some graphics driver files might be corrupt. Solution Remove your current graphics drivers and reinstall the graphics drivers from the support CD. | |
| Cause Poor heat dissipation inside the chassis. Solution Make sure that the chassis fan, CPU, and heatsink with fan, and/or the graphics card GPU fan are working properly. | |
| Cause GPU or VGA memory overclocked beyond optimal working conditions. Solutions Restore default frequency settings of GPU and VGA memory. |

Other problems that you might encounter can be related to other parts or accessories (e.g., motherboard, power supply unit, LCD/CRT) of your system.
ASUS
顯示卡
驅動程式與公用程式
安装指南
T9733
第三版
2014年9月發行
版權所有·不得翻印©2014華碩電腦
This product incorporates copyright protection technology that is protected by method claims of certain U.S. patents and other intellectual property rights owned by Macrovision Corporation and other rights owners. Use of this copyright protection technology must be authorized by Macrovision Corporation, and is intended for home and other limited viewing uses only, unless otherwise authorized by Macrovision Corporation. Reverse engineering or disassembly is prohibited.
Copyright © 2014 ASUSTeK Computer, Inc.
Dichiarazione FCC (Federal Communications Commission)
Copyright © 2014 ASUSTeK COMPUTER INC. All Rights Reserved.
Federal Communications Commission Statement (原文)
This device complies with Part 15 of the FCC Rules. Operation is subject to the following two conditions:
- This device may not cause harmful interference, and
- This device must accept any interference received including interference that may cause undesired operation.
This equipment has been tested and found to comply with the limits for a Class B digital device, pursuant to Part 15 of the FCC Rules. These limits are designed to provide reasonable protection against harmful interference in a residential installation. This equipment generates, uses and can radiate radio frequency energy and, if not installed and used in accordance with manufacturer's instructions, may cause harmful interference to radio communications. However, there is no guarantee that interference will not occur in a particular installation. If this equipment does cause harmful interference to radio or television reception, which can be determined by turning the equipment off and on, the user is encouraged to try to correct the interference by one or more of the following measures:
- Reorient or relocate the receiving antenna.
- Increase the separation between the equipment and receiver.
- Connect the equipment to an outlet on a circuit different from that to which the receiver is connected.
- Consult the dealer or an experienced radio/TV technician for help.

The use of shielded cables for connection of the monitor to the graphics card is required to assure compliance with FCC regulations. Changes or modifications to this unit not expressly approved by the party responsible for compliance could void the user's authority to operate this equipment.
Canadian Department of Communication Statement (原文)
This digital apparatus does not exceed the Class B limits for radio noise emissions from digital apparatus set out in the Radio Interference Regulations of the Canadian Department of Communications.
This class B digital apparatus complies with Canadian ICES-003.
REACH (原文)
Complying with the REACH (Registration, Evaluation, Authorisation, and Restriction of Chemicals) regulatory framework, we published the chemical substances in our products at ASUS REACH website at http://green.asus.com/ english/REACH.htm.
Macrovision Corporation Product Notice (原文)
This product incorporates copyright protection technology that is protected by method claims of certain U.S. patents and other intellectual property rights owned by Macrovision Corporation and other rights owners. Use of this copyright protection technology must be authorized by Macrovision Corporation, and is intended for home and other limited viewing uses only, unless otherwise authorized by Macrovision Corporation. Reverse engineering or disassembly is prohibited.
安全上のご注意
電気の取り挃い
This man has a lot of experience.
Copyright © 2014 ASUSTeK Computer Inc. All Rights Reserved.
Copyright © 2014 ASUSTeK Computer Inc. All Rights Reserved.
No part of this manual, including the products and software described in it, may be reproduced, transmitted, transcribed, stored in a retrieval system, or translated into any language in any form or by any means, except documentation kept by the purchaser for backup purposes, without the express written permission of ASUSTeK Computer Inc. ("ASUS").
Product warranty or service will not be extended if: (1) the product is repaired, modified or altered, unless such repair, modification of alteration is authorized in writing by ASUS; or (2) the serial number of the product is defaced or missing.
ASUS PROVIDES THIS MANUAL "AS IS" WITHOUT WARRANTY OF ANY KIND, EITHER EXPRESS OR IMPLIED, INCLUDING BUT NOT LIMITED TO THE IMPLIED WARRANTYES OR CONDITIONS OF MERCHANTABILITY OR FITNESS FOR A PARTICULAR PURPOSE. IN NO EVENT SHALL ASUS, ITS DIRECTORS, OFFICERS, EMPLOYEES OR AGENTS BE LIABLE FOR ANY INDIRECT, SPECIAL, INCIDENTAL, OR CONSEQUENTIAL DAMAGES (INCLUDING DAMAGES FOR LOSS OF PROFITS, LOSS OF BUSINESS, LOSS OF USE OR DATA, INTERRUsION OF BUSINESS AND THE LIKE), EVEN IF ASUS HAS BEEN ADVISED OF THE POSSIBILITY OF SUCH DAMAGES ARISING FROM ANY DEFECT OR ERROR IN THIS MANUAL OR PRODUCT.
SPECIFICATIONS AND INFORMATION CONTAINED IN THIS MANUAL ARE FURNISHED FOR INFORMATIONAL USE ONLY, AND ARE SUBJECT TO CHANGE AT ANY TIME WITHOUT NOTICE, AND SHOULD NOT BE CONTRUED AS A COMMITMENT BY ASUS. ASUS ASSUMES NO RESPONSIBILITY OR LIABILITY FOR ANY ERRORS OR INACCURACIES THAT MAY APPEAR IN THIS MANUAL, INCLUDING THE PRODUCTS AND SOFTWARE DESCRIBED IN IT.
Products and corporate names appearing in this manual may or may not be registered trademarks or copyrights of their respective companies, and are used only for identification or explanation and to the owners' benefit, without intent to infringe.
Contents
Adnotacja 225
Bezpieczestewo 226
O tym Informatorze 227
1. Be6-caiTH KOMnHaHII ASUS.
Be6-caHTN KOMIIaIII ASUS IO BCbOMy cBiTOBi 3a6e3IeuyIOb OIOBJIeHy iHΦopMaIIO IIIOI aIIapATHX Ta IIOpOrpaMHNX IIOyKTIB ASUS.
JaKIO aBTOMaTHHn 3aIyck He HaaHTOBaHH, 3aIyctiTb paJI Setup.exe 3 KOpHeBOrO KaTaIory IOnOMIXHO KOMNaKT-INCKY.
- Y roJIOBHO My MCHHO HAHTHCHITb Ha Drivers (JaaiBepn).
- Bn6epiB Display Driver (IpaIbep BiEoKapTu) i HaTnCHITb Ha KHOJIi Install (InctaJIIOBAtu).
- Koliin iHctaJIaIi3aBepuHTbcra, HATnCHITb Ha OK,IO6 Ipe3aBaHTaKHTn cHCTeMy.
2.2 DeiHcTaJaIaIpaIbepa VGA
2.2.1 DeiHcTaJaIaIpaIbepa VGA y Windows 8.1/8/7/Vista
IIo6 BndaJIHTn dpaBep VGA n Windows 8.1/8/7/Vista:
- HaTnchItb Ha Start (Ctapt) > Control Panel (KoHTpoJIbHa naneIb) > Programs (IIporpamn) > Programs and Features (IIporpamn ta 3ac06n), Bn6epiTB nyHKT, kNn Bn 6aKaCTe BnJaIHTn. BnKOHaBnH, HATncHITb Ha Uninstall (JciHcTaJIIOBaTH).
3. 3actocy Hok ASUS GPU Tweak
3acocyHOK ASUS GPU Tweak hadae moKJIbictb BiIcTeKyBaTH i OITHMIOBvBATn Iapametprn rpaqiHoi KapTH ASUS.
- Y roJIOBHOmy McHHO HaTNCiTB Ha Install (IhctaJIHObaTH).
Bn6epiTb ASUS GPU Tweak i HaTNCiTb Ha KHOII Install (HcTaJIIOBaTH).
- Koli n iHctajia 3aBepnlaac, HATNCITb Na OK.
3.2 DeiHcTaJaIaIaIg ASUS GPU Tweak
3.2.1 BuaJIeHnAsUS GPU Tweaky Windows 8.1/8/7/Vista
IIO6 BnDaJIHTN ASUS GPU Tweaky Windows8.1/8/7/Vista:
- Hatncitb Ha Start (Iyck) > Control Panel (KoHTpoJIbHa IaHeJIb) > Programs (IIporpamH) > Programs and Features (IIporpamH ta 3ac06H), Bn6epiTb ASUS GPU Tweak. Hatncitb Ha Uninstall (JeinctaIOBAtH).
4. ASUS APRP
4.1 IInctaJIaIciA ASUSAPRP
4.1.1 IuctaiausASUSAPRPyWindows Vista/Windows8.1/8/7 (32/646it)
IIO6 iHCTaJIIOBaTH ASUSAPRP:
- BcTaBTe CD IIITpHMKn lo OINTHNOI INCKOBOy.
2.Як immoakTHBOBAHO aBTO3aIyck, TIOOBHe MeHIO 3'ABHTbcra ABTOMATHNO.
JIKIO aBTO3aIyck BHMKHeHO, 3aIycITb UI.exe 3 KopeHeBOr MeHIO Ha CD IIITpHMKn.
- Y FOJIOBHOMy MCHHO HAHTHCHITb Ha Install (IhctaJIHOBaTH).
Bn6epiAsUSAPRPiHaTncHItb HaKHOIIInstall(IhctaJIOBaTH).
- Koln iHctajua 3aBepuHaac, HATNCiTB Ha OK.
4.2 DeiHcTaJIaIciA ASUSAPRP
4.2.1 BuaJIeHnAsUSAPRPyWindows 8.1/8/7/Vista
IIo6 BndaJIHTN ASUS APRPy Windows 8.1/8/7/Vista:
- Hatncihb Ha Start (Ilyck) > Control Panel (KoHTpoJIbHa IaHeJIb) > Programs (IIporpaH) > Programs and Features (IIporpaM Ta 3acobH), BNoepiB ASUS APRP. Hatncihb Ha Uninstall (JeinctaIOBaTH).
5. ASUS Streaming
5.1 Inctajus ASUS Streaming
5.1.1 Inceta ASUS Streaming y Windows Vista/Windows 8.1/8/7(32/646ir)
IIO6 iHCTaJIHOBAtN ASUS Streaming:
- BcTaBTe CD IIITpHMKn lo OINTHNOI INCKOBOy.
- A K I I O a K T H B O B A H O a B T O 3 a N Y C K, T O J I O B H C M C H O 3' J B H T b C R a B T O M a T H U H O.
KIO aBTO3aIyck BHMKHeHO, 3aIyctITb UI.exe 3 KopeHeBOro MeHIO Ha CD IIITpHMKn.
- Y roIOBHOmy McHHO HAHTCHiTB Ha Install (IhctaJIHObaTH).
Bn6epiTb ASUS Streaming i HaTncHITb Ha KHOII Install (IhctaJIIOBaTH).
- Koln i nctajia 3aBepuuiacn, HATNCiTB Ha OK.
5.2 DeiHcTaJaIaIg ASUS Streaming
5.2.1 BuaJIeHnAsUS Streaming y Windows 8.1/8/7/Vista
IIO6 BnJaJIHTN ASUS Streaming y Windows® 8.1 / 8 / 7 / Vista:
- Hatncihb Ha Start (Iyck) > Control Panel (KoHTpoJIbHa IaHeJIb) > Programs (IIporpamH) > Programs and Features (IIporpamH ta 3ac06H), Bn6epiTb ASUS Streaming. Hatncihb Ha Uninstall (JeinhctaIOBATH).

JaKIO aBTOMaTHHn 3aIyck He HaJIaHTOBaHH, 3aIyCTiTb faiSetup.exe 3 KopeHeBOrO KaTajory IOIIOMIXHO KOMIIaKT-ITCKY.
- Y FOIOBHOmy MeHIO HAHTCHiTB Ha Browse CD (IpeperJHyTH CD), IIo6 IpeperJHyTH 3MiCT CD.
6.2 KoHTaKTHa iHΦopMaui
- BcTABTe KOMIIaKT-ⅡNCK IIITPhMKN IO OITTHHORO INCKOBODY.
2.ЯкшоakTHBOBaHO aBTO 3aIyck,abTOMaTHUHO 3'YBJIeTBcE kpaH iHCTaJIaII III dpaibepa ASUS VGA.
aKIO aBTOMaTHUHn 3aIyck He HaJIaHTOBaHH, 3aIyctITb faiJ Setup.exe 3 KopeHeBOrO KaTajORY IOnOMIXHO KOMIIaKT-HNCKY.
- Y roIOBHOmy MeHIO HaTHcHITb Ha Contact Us (3BepHyTcHs IIO hac), IIo6 IpeHTn IO Be6-caIry ASUS i Ii3HaTHc6iJIbIe.
6.3 O3haHOMnI paJI
IIO6 IpeerJHyTH O3HaHOMHJ ai:
- BcTaBTe KOMIIaKT-ДИСК IIITpHMKN IO OINTHNO IINCKOBOJY.
- KaHIO aKTHBOBaHO aBTO 3aIyck, aBTOMaTHUHO 3'ABJIaCTbc8 eKpaH iHcTajnii dpaiBepa ASUS VGA.
KIO aBTOMaTHUHH 3aIyck He HaJIaITOBaHH, 3aIyctItb paJI Setup.exe 3 KopeHeBOrO KaTAlIgry IOIIOMIXHO KOMIIaKT-DHcKy.
- Y T O J I O B H O M Y M E H H O H A T N C H I T b H a Read Me (UHTaT).
Ha ekpahi 3'YBHTbcTaKe BIKHO.
Додатук. Виравлесь осовнх несправност
KIO IIICJI BCTAHOBJIeHHI rpaHIO aHaITepa BNHNKAOTb 6yNb-RAI 3 HabeJeHNX IIpo6JIem, cIpO6yIte IpeE THM, k BHKJINKaTH TexHiCy HITpHMky, BHKOHATN ODNY 3 MOJKJINBX onepaui.
Copyright © 2014 ASUSTeK Computer Inc. All Rights Reserved.
No part of this manual, including the products and software described in it, may be reproduced, transmitted, transcribed, stored in a retrieval system, or translated into any language in any form or by any means, except documentation kept by the purchaser for backup purposes, without the express written permission of ASUSTeK Computer Inc. ("ASUS").
Product warranty or service will not be extended if: (1) the product is repaired, modified or altered, unless such repair, modification of alteration is authorized in writing by ASUS; or (2) the serial number of the product is defaced or missing.
ASUS PROVIDES THIS MANUAL "AS IS" WITHOUT WARRANTY OF ANY KIND, EITHER EXPRESS OR IMPLIED, INCLUDING BUT NOT LIMITED TO THE IMPLIED WARRANTYORIES OR CONDITIONS OF MERCHANTABILITY OR FITNESS FOR A PARTICULAR PURPOSE. IN NO EVENT SHALL ASUS, ITS DIRECTORS, OFFICERS, EMPLOYEES OR AGENTS BE LIABLE FOR ANY INDIRECT, SPECIAL, INCIDENTAL, OR CONSEQUENTIAL DAMAGES (INCLUDING DAMAGES FOR LOSS OF PROFITS, LOSS OF BUSINESS, LOSS OF USE OR DATA, INTERRUsION OF BUSINESS AND THE LIKE), EVEN IF ASUS HAS BEEN ADVISED OF THE POSSIBILITY OF SUCH DAMAGES ARISING FROM ANY DEFECT OR ERROR IN THIS MANUAL OR PRODUCT.
SPECIFICATIONS AND INFORMATION CONTAINED IN THIS MANUAL ARE FURNISHED FOR INFORMATIONAL USE ONLY, AND ARE SUBJECT TO CHANGE AT ANY TIME WITHOUT NOTICE, AND SHOULD NOT BE CONTRUED AS A COMMITMENT BY ASUS. ASUS ASSUMES NO RESPONSIBILITY OR LIABILITY FOR ANY ERRORS OR INACCURACIES THAT MAY APPEAR IN THIS MANUAL, INCLUDING THE PRODUCTS AND SOFTWARE DESCRIBED IN IT.
Products and corporate names appearing in this manual may or may not be registered trademarks or copyrights of their respective companies, and are used only for identification or explanation and to the owners' benefit, without intent to infringe.
Sadržaji


- Drivers and Utilities
- Index
- Copyright © 2014 ASUSTeK Computer Inc. All Rights Reserved.
- Contents
- Notices
- Federal Communications Commission Statement
- Canadian Department of Communication Statement
- REACH
- Macrovision Corporation Product Notice
- Safety information
- Electrical safety
- Operation safety
- About this guide
- Conventions used in this guide
- Where to find more information
- ASUS Websites
- Optional Documentation
- Support CD information
- VGA drivers
- Installing the VGA driver
- Installing the VGA Drivers in Windows Vista and Windows® 8.1 / 8 / 7 (32/64 bit)
- Uninstalling the VGA driver
- Uninstalling VGA drivers in Windows 8.1/8/7/Vista
- ASUS GPU Tweak utility
- Installing ASUS GPU Tweak
- Installing ASUS GPU Tweak in Windows Vista and Windows 8.1 / 8 / 7 (32/64 bit)
- Uninstalling ASUS GPU Tweak
- Removing ASUS GPU Tweak in Windows 8.1/8/7/Vista
- ASUS APRP
- Installing ASUS APRP
- Installing ASUS APRP in Windows /8/7 (32/64 bit)
- Uninstalling ASUS APRP
- Removing ASUS APRP in Windows 8.1/8/7/Vista
- ASUS Streaming
- Installing ASUS Streaming
- Installing ASUS Streaming in Windows Windows® 8.1 / 8 / 7 (32/64 bit)
- Uninstalling ASUS Streaming
- Removing ASUS Streaming in Windows 8.1/8/7/Vista
- Other information
- Browse the Support CD
- Contact Information
- Viewing the Read Me file
- Appendix: Basic troubleshooting
- ASUS
- 顯示卡
- 驅動程式與公用程式
- 版權所有·不得翻印©2014華碩電腦
- Dichiarazione FCC (Federal Communications Commission)
- Federal Communications Commission Statement (原文)
- Canadian Department of Communication Statement (原文)
- REACH (原文)
- Macrovision Corporation Product Notice (原文)
- 安全上のご注意
- 電気の取り挃い
- This man has a lot of experience.
- Be6-caiTH KOMnHaHII ASUS.
- DeiHcTaJaIaIpaIbepa VGA
- DeiHcTaJaIaIpaIbepa VGA y Windows 8.1/8/7/Vista
- 3actocy Hok ASUS GPU Tweak
- DeiHcTaJaIaIaIg ASUS GPU Tweak
- BuaJIeHnAsUS GPU Tweaky Windows 8.1/8/7/Vista
- IInctaJIaIciA ASUSAPRP
- IuctaiausASUSAPRPyWindows Vista/Windows8.1/8/7 (32/646it)
- DeiHcTaJIaIciA ASUSAPRP
- BuaJIeHnAsUSAPRPyWindows 8.1/8/7/Vista
- Inctajus ASUS Streaming
- Inceta ASUS Streaming y Windows Vista/Windows 8.1/8/7(32/646ir)
- DeiHcTaJaIaIg ASUS Streaming
- BuaJIeHnAsUS Streaming y Windows 8.1/8/7/Vista
- KoHTaKTHa iHΦopMaui
- O3haHOMnI paJI
- Додатук. Виравлесь осовнх несправност
- Sadržaji
Brand : ASUS
Model : STRIXR9390XDC38GD5GAMING
Category : Graphic card