
FX1075 - Food Processor BLACK & DECKER - Free user manual and instructions
Find the device manual for free FX1075 BLACK & DECKER in PDF.
| Product Type | Multi-function Food Processor |
| Brand | Black & Decker |
| Model | FX1075 |
| Power | 1000 W |
| Voltage | 220-240 V |
| Frequency | 50/60 Hz |
| Bowl Capacity | 1.5 L |
| Blender Jug Capacity | 1.75 L |
| Double Insulation | Yes |
| Safety Lock | Yes |
| Thermal Protection | Yes |
| Number of Speeds | 2 + Pulse |
| Main Functions | Chopping, slicing, grating, shredding, kneading, emulsifying, blending, grinding |
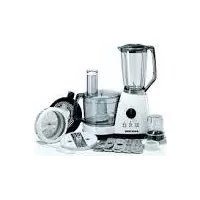
| Included Accessories | Bowl, blender jug, double chopping blade, thick slicing disc, thin slicing disc, coarse shredding disc, fine shredding disc, grating disc, kneading blade, emulsifying disc, grinder, pusher |
| Cleaning of Removable Parts | Dishwasher safe (except bowl, blender jug and grinder bowl) |
| Warranty | 24 months |
| Country of Origin | Not specified in the manual |
Frequently Asked Questions - FX1075 BLACK & DECKER
User questions about FX1075 BLACK & DECKER
0 question about this device. Answer the ones you know or ask your own.
Ask a new question about this device
Download the instructions for your Food Processor in PDF format for free! Find your manual FX1075 - BLACK & DECKER and take your electronic device back in hand. On this page are published all the documents necessary for the use of your device. FX1075 by BLACK & DECKER.
USER MANUAL FX1075 BLACK & DECKER
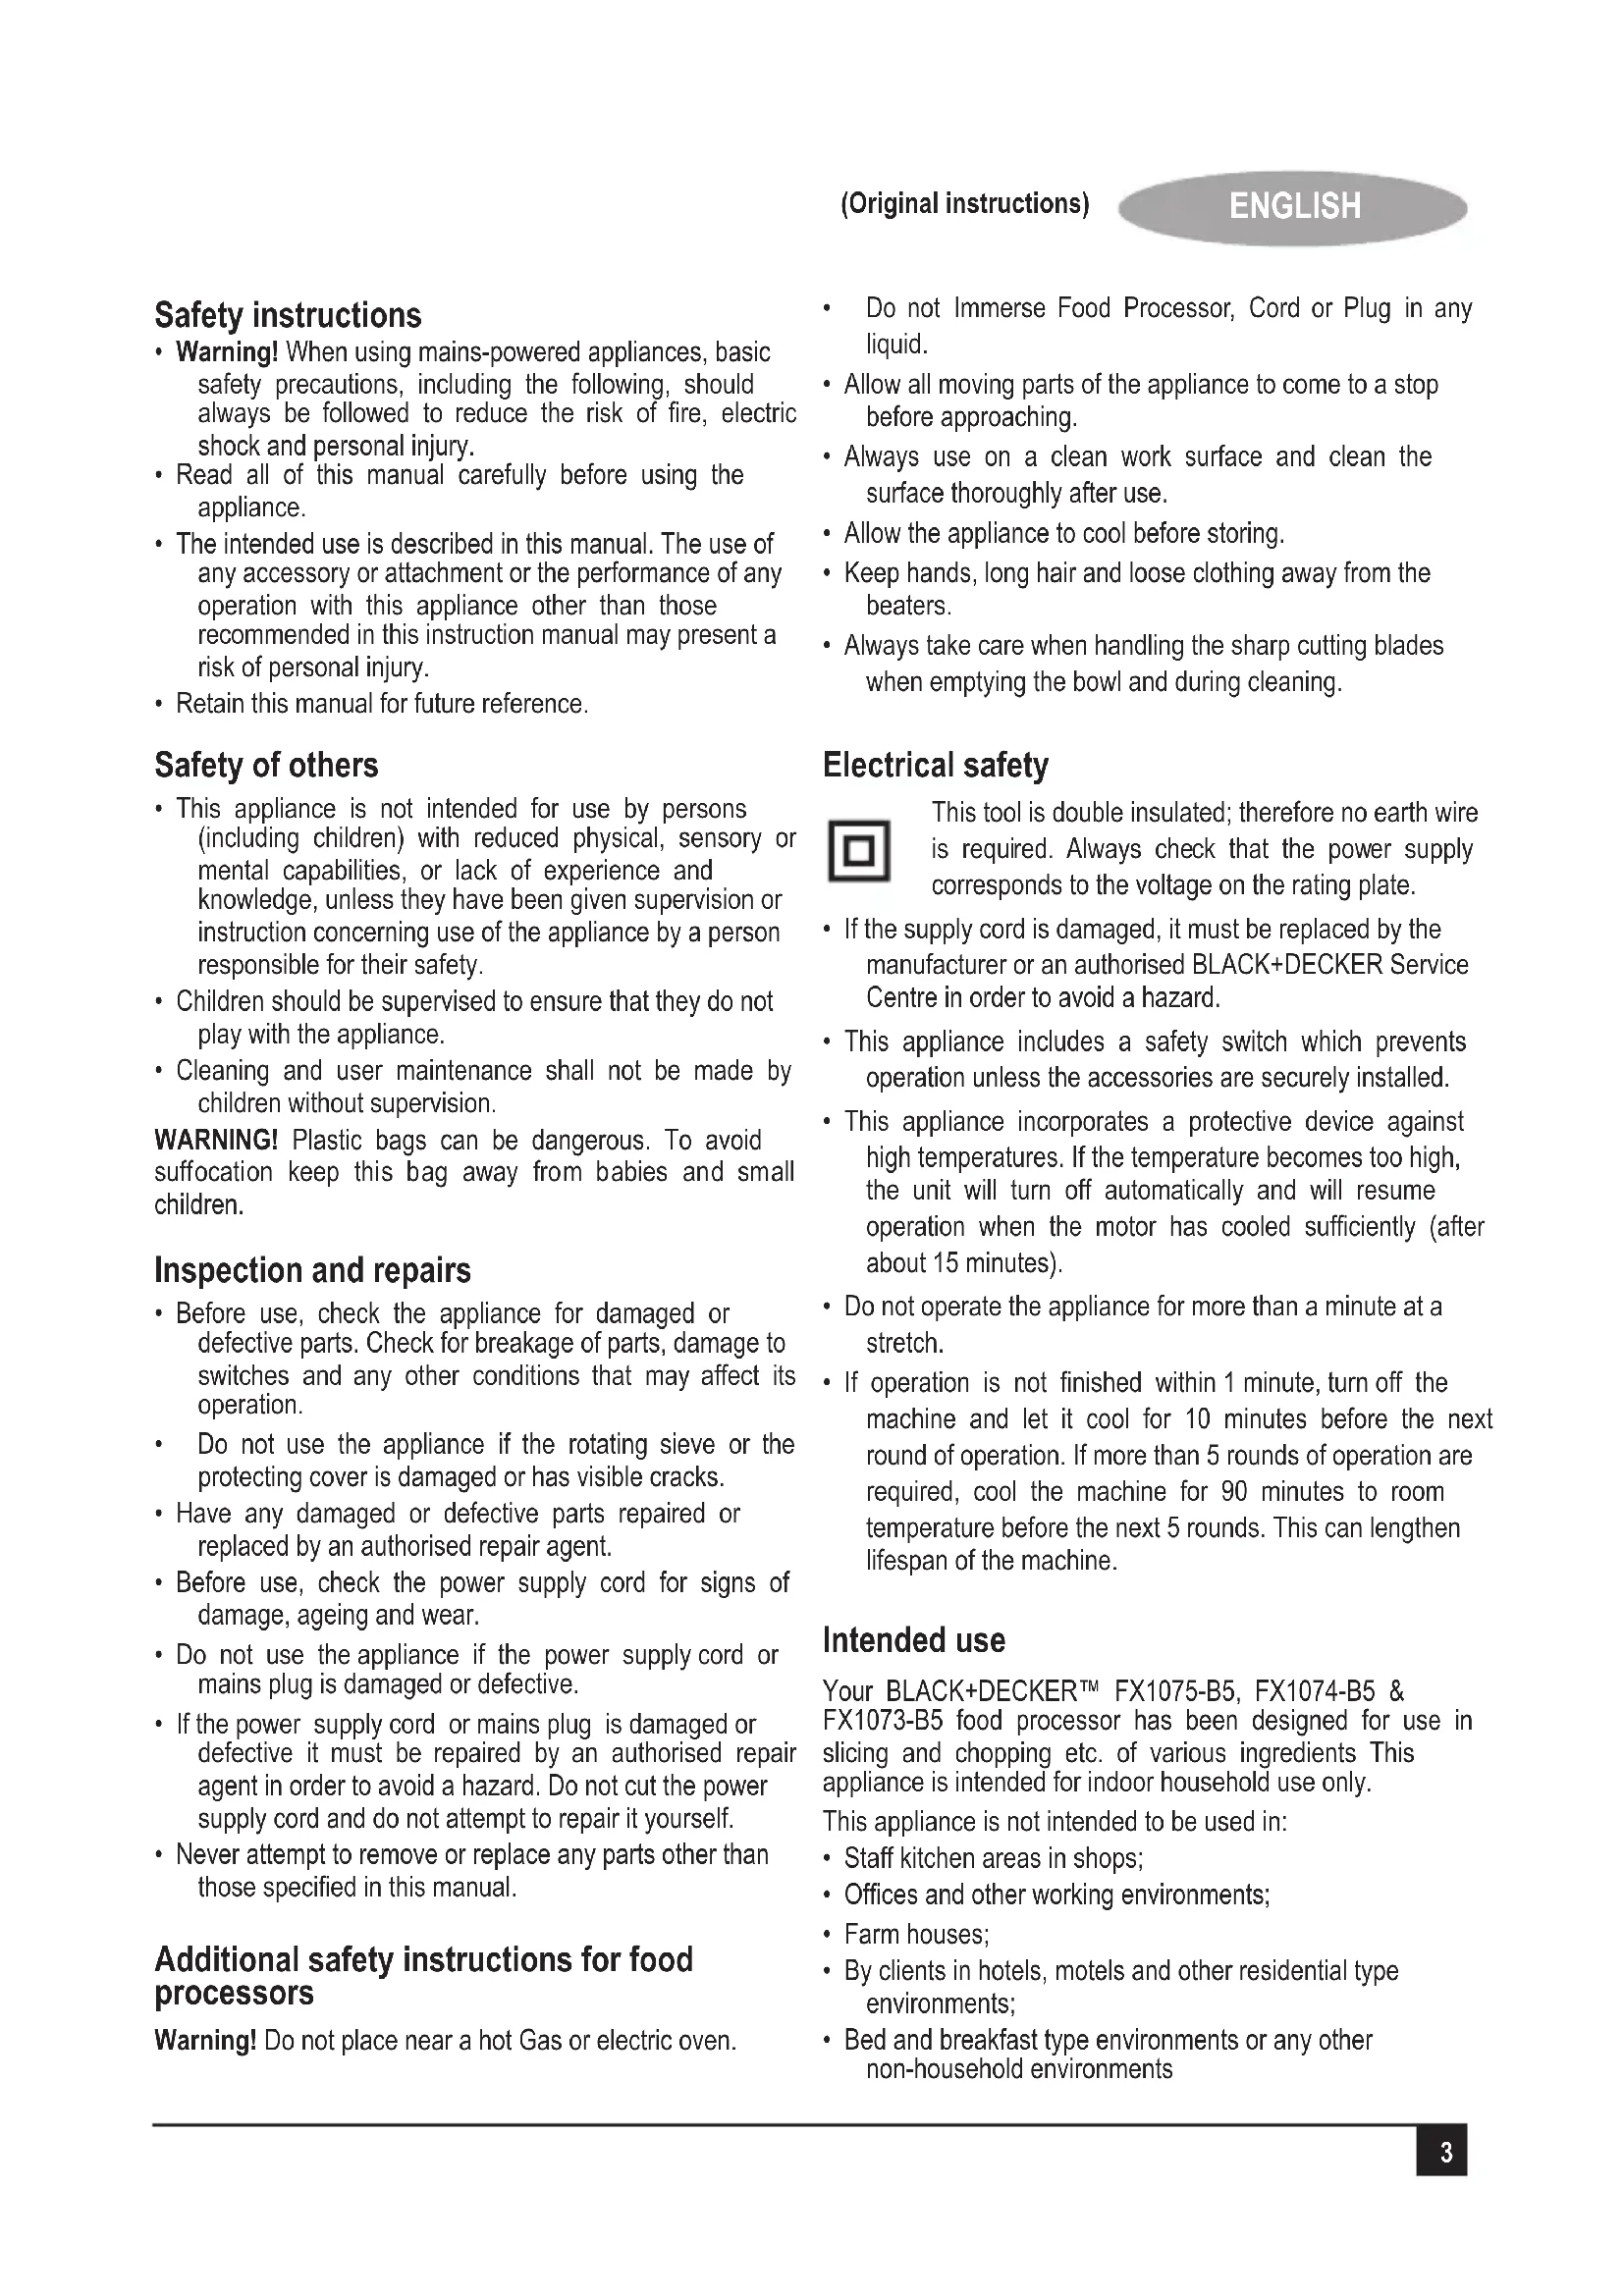
- Warning! When using mains-powered appliances, basic safety precautions, including the following, should always be followed to reduce the risk of fire, electric shock and personal injury.
- Read all of this manual carefully before using the appliance.
- The intended use is described in this manual. The use of any accessory or attachment or the performance of any operation with this appliance other than those recommended in this instruction manual may present a risk of personal injury.
- Retain this manual for future reference.
Safety of others
- This appliance is not intended for use by persons (including children) with reduced physical, sensory or mental capabilities, or lack of experience and knowledge, unless they have been given supervision or instruction concerning use of the appliance by a person responsible for their safety.
- Children should be supervised to ensure that they do not play with the appliance.
- Cleaning and user maintenance shall not be made by children without supervision.
WARNING! Plastic bags can be dangerous. To avoid suffocation keep this bag away from babies and small children.
Inspection and repairs
- Before use, check the appliance for damaged or defective parts. Check for breakage of parts, damage to switches and any other conditions that may affect its operation.
- Do not use the appliance if the rotating sieve or the protecting cover is damaged or has visible cracks.
- Have any damaged or defective parts repaired or replaced by an authorised repair agent.
- Before use, check the power supply cord for signs of damage, ageing and wear.
- Do not use the appliance if the power supply cord or mains plug is damaged or defective.
- If the power supply cord or mains plug is damaged or defective it must be repaired by an authorised repair agent in order to avoid a hazard. Do not cut the power supply cord and do not attempt to repair it yourself.
- Never attempt to remove or replace any parts other than those specified in this manual.
Additional safety instructions for food processors
Warning! Do not place near a hot Gas or electric oven.
- Do not Immerse Food Processor, Cord or Plug in any liquid.
- Allow all moving parts of the appliance to come to a stop before approaching.
- Always use on a clean work surface and clean the surface thoroughly after use.
- Allow the appliance to cool before storing.
- Keep hands, long hair and loose clothing away from the beaters.
- Always take care when handling the sharp cutting blades when emptying the bowl and during cleaning.
Electrical safety

This tool is double insulated; therefore no earth wire is required. Always check that the power supply corresponds to the voltage on the rating plate.
- If the supply cord is damaged, it must be replaced by the manufacturer or an authorised BLACK+DECKER Service Centre in order to avoid a hazard.
- This appliance includes a safety switch which prevents operation unless the accessories are securely installed.
- This appliance incorporates a protective device against high temperatures. If the temperature becomes too high, the unit will turn off automatically and will resume operation when the motor has cooled sufficiently (after about 15 minutes).
- Do not operate the appliance for more than a minute at a stretch.
- If operation is not finished within 1 minute, turn off the machine and let it cool for 10 minutes before the next round of operation. If more than 5 rounds of operation are required, cool the machine for 90 minutes to room temperature before the next 5 rounds. This can lengthen lifespan of the machine.
Intended use
Your BLACK+DECKER™ FX1075-B5, FX1074-B5 & FX1073-B5 food processor has been designed for use in slicing and chopping etc. of various ingredients This appliance is intended for indoor household use only.
This appliance is not intended to be used in:
Staff kitchen areas in shops;
- Offices and other working environments;
- Farm houses;
- By clients in hotels, motels and other residential type environments;
- Bed and breakfast type environments or any other non-household environments
In order to avoid a hazard due to inadvertent resetting of the thermal cut-out, this appliance must not be supplied through an external switching device, such as a timer, or connected to a circuit that is regularly switched on and off by the utility
Using your appliance
Always take care when using the appliance.
- Misuse could cause injury.
- Do not use the appliance outdoors.
- Do not operate the appliance if your hands are wet. Do not operate the appliance if you are barefoot.
- Guide the power supply cord neatly so it does not hang over the edge of a work top and cannot be caught accidentally or tripped over.
- Be careful if hot liquid is poured into the food processor or blender as it can be ejected out of the appliance due to a sudden steaming.
- Keep loose clothing, hair, etc. away from moving parts.
- Never pull the power supply cord to disconnect the plug from the socket. Keep the power supply cord away from heat, oil and sharp edges.
- If the power supply cord is damaged during use, disconnect the appliance from the power supply immediately. Do not touch the power supply cord before disconnecting from the power supply.
- Switch off the appliance and disconnect from the supply before changing accessories or approaching parts that move in use
- Disconnect the appliance from the power supply when not in use and before changing accessories, cleaning, etc.
- Do not immerse the appliance, cord set or plug in water or any other liquids.
Note: Do not run the appliance for more than 2 minutes, and wait for one minute or wait until the unit is cooled to room temperature before performing next operation cycle.
After use
- Switch off, remove the plug from the socket and let the appliance cool down before leaving it unattended and before changing, cleaning or inspecting any parts of the appliance.
- When not in use, the appliance should be stored in a dry place. Children should not have access to stored appliances.
Features
- Fine slicing disc (FX1075-B5 and FX1074-B5)
- Medium slicing disc
-
Grating disc (FX1075-B5 and FX1074-B5)
-
Fine shredding disc
- Coarse shredding disc (FX1075-B5)
- Disc holder
- Emulsifying disc
- Kneading blade
- Protective cover for chopping blade
- Chopping blade (2 blade for FX1075-B5 and 1 blade for FX1074-B5 and FX1073-B5)
- Pusher
- Feeding chute
- Food processor bowl cover
- Measuring cup
- Blender jar cover
16.Blender jar - Drive shaft
- Food processor bowl
- Safety lock
- Control knob
- Grinderr (FX1075-B5)
- Motor unit
Before first use
Thoroughly clean the parts that come into contact with food before you use the appliance for the first time.
(see chapter 'Cleaning and maintenance').
Using the appliance
General
The appliance is equipped with a built-in safety lock that prevents it from functioning if the blender jar or food processor bowl and its lid are not assembled properly.
Food processor
- Put the bowl on the motor unit (22) and turn it clockwise to fix it
Note: The bowl is assembled correctly when the handle is directly above the closed lock symbol.
- Put the drive shaft with the desired accessory in the bowl (chopping blade, kneading accessory, emulsifying disc or the disc holder with one of the discs). See the appropriate section below.
- When you use the chopping blade or the kneading disc, put the ingredients to be processed in the bowl.
Note: Do not fill the bowl beyond the MAX indication
4. Put the lid on the bowl. Turn the lid clockwise to fix it ('click')
Note: Make sure the projection on the lid locks into the slot of the bowl handle
- When you use the disc holder with one of the discs, add the ingredients through the feeding chute and push them down with the pusher
- Select the speed setting that corresponds with the accessory you choose. See the appropriate section below.
- When you have finished processing, turn the speed selector to 0.
| Accessory Preferred speed | setting |
| Shredding, slicing & grating 1 discs | |
| Kneading blade 1 | |
| Emulsifying disc 1 | |
| Blender | 2 & Pulse |
| Chopper | 2 & Pulse |
| Grinder | 2 |
Feeding tube and pusher
- Use the feeding chute to add liquid and/or solid ingredients.
- Use the pusher to push solid ingredients down the feeding chute.
Tip : You can also use the pusher to close the feeding chute. This prevents ingredients from escaping through the feeding chute.
Chopping blade
You can use the chopping blade to chop, mix, blend or puree ingredients.
- Remove the protective cover from the blade. The cutting edges are very sharp. Do not touch them.
- Put the drive shaft in the bowl.
- Put the chopping blade on the drive shaft in the bowl
- Put the ingredients in the bowl. Pre-cut large pieces of food into pieces of approx. 3 × 3 × 3cm
Note: Always put the drive shaft with the chopping blade in the bowl before you add the ingredients
- Put the lid on the bowl. Turn the lid clockwise to fix it ('click').
Note: Make sure the projection on the lid locks into the slot of the bowl handle. - Put the pusher in the feeding chute.
- Select the speed that corresponds with the accessory.
- When you have finished processing, turn the speed selector to 0 and unplug the appliance.
Tips
-
When you chop onions, turn the speed selector to P (pulse position) a few times to prevent the onions from becoming too finely chopped.
-
Do not let the appliance run too long when you chop (hard) cheese or chocolate. Otherwise these ingredients become too hot, start to melt and turn lumpy.
- Do not use the chopping blade to chop very hard ingredients like coffee beans, turmeric, nutmeg and ice cubes, as this may cause the blade to get blunt.
- If food sticks to the blade or to the wall of the bowl, switch off the appliance and un plug it. Then use a spatula to remove the food from the blade or from the wall of the bowl.
Kneading blade
You can use the kneading blade to knead yeast dough for bread and pizzas.
- Put the drive shaft in the bowl.
- Put the kneading blade on the drive shaft.
Note: Always put the drive shaft with the kneading blade in the bowl before you add the ingredients.
- Put the ingredients in the bowl.
- Put the lid on the bowl. Turn the lid clockwise to fix it ('click').
Note: Make sure the projection on the lid locks into the slot of the bowl handle.
- Put the pusher in the feeding chute.
- Select the speed that corresponds with the accessory.
- When you have finished processing, turn the speed selector to 0 and unplug the appliance.
Slicing, shredding and grating discs
Never process hard ingredients like ice cubes with the discs. The cutting edges of the discs are very sharp. Do not touch them
- Put the drive shaft in the bowl.
- Place the shredding, slicing or grating disc in the disc holder
- Place the opening of the disc over the shaft of the disc holder.
- Push the opening of the disc over the projection on the disc holder.
- Press the disc onto the disc holder unit it locks in the position with a click
- Place the disc holder with disc on the drive shaft.
- Put the lid on the bowl. Turn the lid clockwise to fix it ('click').
Note: Make sure the projection on the lid locks into the slot of the bowl handle.
5. Put the ingredients in the feeding chute.
- Pre-cut large ingredients in to chunks that fit in the feeding chute.
- Fill the feeding chute evenly for the best results.
- When you have to process a large amount of ingredients, process small batches and empty the bowl between batches.
- Select the speed that corresponds the accessory.
- Press the pusher lightly onto the ingredients in the feeding chute.
- When you have finished processing, turn the speed selector to 0 and unplug the appliance.
Tips
- When you shred or grate soft ingredients, use a low speed to prevent the ingredients from turning into puree.
- Do not let the appliance run too long when you grate (hard) cheese. If you do the cheese becomes too hot, starts to melt and turns lumpy.
- Do not use the discs to process chocolate. Only use the chopping blade for this purpose.
Emulsifying disc
You can use the emulsifying disc to whip cream and to whisk eggs, egg whites, instant pudding, mayonnaise and sponge cake mixtures.
- Put the drive shaft in the bowl.
- Place the emulsifying disc on the drive shaft.
- Put the ingredients in the bowl.
- Put the lid on the bowl. Turn the lid clockwise to fix it ('click')
- Put the pusher in the feeding chute.
- Select the speed that corresponds the accessory
- When you have finished processing, turn the speed selector to 0 and unplug the appliance
Tips
- Do not use the emulsifying disc to prepare cake mixtures with butter or margarine or to knead dough. Use the kneading blade for these jobs.
- Make sure the bowl and the emulsifying disc are dry and free from grease when you whisk egg whites. Make sure the egg whites are at room temperature
Blender
The blender is intended for:
- Blending fluids, e.g. dairy products, sauces, fruit juices, soups, mixed drinks, shakes.
- Mixing soft ingredients, e.g. pancake batter or mayonnaise.
Pureeing cooked ingredients, e.g.for making baby food.
1. Place the blender jar on the motor unit and turn it clockwise to fix it. There are four possible positions to fix the blender onto the motor unit.
Do not exert too much pressure on the handle of the blender jar.
2. Put the ingredients in the blender jar. Never fill the blender jar with ingredients hotter than 80^ .
To avoid spillage, never fill the jar above the maximum level indication, particularly not when you blend hot liquids.
- Place the lid on the blender jar and turn it clockwise to fix it.
- Select the speed that corresponds the accessory.
Never open the lid to put your hand or any object in the jar while the blender is running
Always let the appliance cool down to room temperature after you have processed two batches.
5. When you have finished processing, turn the speed selector to 0 and unplug the appliance.
Tips
- While the appliance is running, you can put liquid or solid ingredients in the blender jar through the opening in the lid.
- The longer you let the appliance run, the finer the blending result will be.
- Pre-cut solid ingredients into smaller pieces before you put them in the blender jar. If you want to prepare a large quantity, process small baths of ingredients instead of a large quantity at once.
- To crush ice cubes, put the cubes in the jar close the lid and turn the speed selector to P (pulse position)
- Some ingredients, e.g. fruits, are easier to blend if you add some liquid e.g. lemon juice.
- When you blend soup, use cooked ingredients.
- If you are not satisfied with the results, let the appliance run briefly a number of times by turning the speed selector to P (pulse position).
You can also try to get a better result by stirring the ingredients with a spatula (not while the blender is running), or by pouring out some of the contents in order to process a smaller amount.
- When you process a liquid that is hot or tends to foam (e.g.milk), do not put more than 500ml in the blender jar to avoid spillage.
- If food sticks to the wall of the blender jar, switch off the appliance and unplug it. Then use a spatula to remove the food from the wall.
Grinder
- Put the food into the grinder cup.
- Place the transparent cover onto the grinder cup and lock it.
- Place the grinder on the main body of the food processor
- Make sure it is locked by turning it to the lock direction.
- Set the speed to your desire to start the device.
Note: Dry grinds such as black pepper, coffee beans, etc. are ground at a rate of not more than the MAX marking (on the grinder cup) at a time.
Cleaning and maintenance
Warning! Before performing any maintenance:
- Switch off and disconnect from the mains supply.
- Wait for the appliance to completely cool down.
- If necessary scrape excess food particles from the tools.
Warning! The motor base must not be immersed in water or other liquid.
- Wipe over the outside surface of the base with a damp cloth and polish with a soft dry cloth.
- Wipe any excess food particles from the power cord.
- Immerse the processing bowl, bowl cover, pusher, blade holder, cutting blades, chopper, kneading blade, emulsifying disc, citrus juicing head and plate and blender assembly in warm soapy water for complete cleaning. Then rinse under running water and wipe dry.
Dishwasher Safe
All removable parts are dishwasher safe excluding food processing bowl, blender jar and grinder mill.
Quick-cleaning the food processor bowl and blender jar
- Pour lukewarm water (not more than 0.5 litres) and some washing-up liquid into the food processor bowl or blender jar.
- Place the lid on the food processor bowl or blender jar and turn it clockwise to fix it.
- Select the speed setting that corresponds with the accessory.
- Let the appliance run until the food processor bowl or blender jar is clean or for 30 seconds.
- Detach the blender jar or food processor bowl and rinse it with clean water.
Storage
You can wind the cord around the bottom of the appliance.
Troubleshooting
| PROBLEM | SOLUTION |
| When I turn the speed selector to a speed or to P (pulse position) the appliance does not operate. | Make sure the food processor bowl and its lid or the blender jar are assembled correctly ('click'). Make sure that the drive shaft has been inserted properly if you are using any accessory with the food processor bowl. If you use the blender jar, make sure it is locked in one of its four locking positions, Keep the lid fixed to avoid spillage. If you use the food processor, make sure that the bowl handle is directly above the closed lock symbol. The bowl lid is correctly assembled when the projection is locked in to the slot of the bowl handle. If all parts are assembled correctly, the appliance starts to operate when you select a speed with the speed selector or press the pulse button. |
| The emulsifying disc or kneading blade does not turn, | Make sure the emulsidfying disc or kneading blade is assembled properly onto the drive shaft. Also make sure the food processor bowl and the lid are assembled properly ('click') |
Mains plug replacement
If a new mains plug needs to be fitted:
- Safely dispose of the old plug.
- Connect the brown lead to the live terminal in the new plug.
- Connect the blue lead to the neutral terminal.
- If the product is class I (earthed), connect the green/yellow lead to the earth terminal
Note! If your product is class II double insulated (only 2 wires in the cord set), no connection is to be made to the earth terminal.
Follow the fitting instructions supplied with good quality plugs. Any replacement fuse must be of the same rating as the original fuse supplied with the product.
Warning! The above section on mains plug replacement is for authorized service centre persons.
Protecting the environment

Separate collection. This product must not be disposed of with normal household waste.
Should you find one day that your BLACK+DECKER product needs replacement, or if it is of no further use to you, do not dispose of it with other household waste. Make this product available for separate collection.
- BLACK+DECKER provides a facility for recycling BLACK+DECKER products once they have reached the end of their working life. This service is provided free of charge. To take advantage of this service please return your product to any authorised repair agent who will collect them on our behalf.
- You can check the location of your nearest authorised repair agent by contacting your local BLACK+DECKER office at the address indicated in this manual. Alternatively, a list of authorized BLACK+DECKER repair agents and full details of our after-sales service and contact are available on the Internet at: www.2helpU.com.
Technical data
| FX1075-B5, FX1074-B5 & FX1073-B5 | |
| Voltage 220-240V | |
| Frequency 50/60 Hz | |
| Power 1000W | |
| Attachments FX1075-B5 | FX1074-B | FX1073-B | |
| 1.5 Ltr Food Processor Bowl | ✓✓ | ✓ | |
| 1.75 Ltr Blender Jar | ✓ | ||
| Chopping blade Double | Single | $ingle | |
| Coarse slicing disc | ✓ | ✓ | ✓ |
| Fine slicing disc | ✓ | ✓ | X |
| Coarse shredding disc | ✓ | X | X |
| Fine shredding disc | ✓ | ✓ | ✓ |
| Grating disc | ✓ | ✓ | X |
| Kneading blade | ✓ | ✓ | ✓ |
| Whisking disc | ✓ | ✓ | ✓ |
| Grinder | ✓ | X | X |
Warranty
BLACK+DECKER is confident of the quality of its products and offers an outstanding warranty.
This warranty statement is in addition to and in no way prejudices your statutory rights.
If a BLACK+DECKER product becomes defective due to faulty materials, workmanship or lack of conformity, within 24 months from the date of purchase, BLACK+DECKER warranty to replace defective parts, repair products subjected to fair wear and tear or replace such products to ensure minimum inconvenience to the customer unless:
The product has been used for trade, professional or hire purposes;
The product has been subjected to misuse or neglect;
The product has sustained damage through foreign objects, substances or accidents;
Repairs have been attempted by persons other than authorised repair agents or BLACK+DECKER service staff.
To claim on the warranty, you will need to submit proof of purchase to the seller or an authorised repair agent. You can check the location of your nearest authorised repair agent by contacting your local BLACK+DECKER office at the address indicated in this manual.
Alternatively, a list of authorised BLACK+DECKER repair agents and full details of our after-sales service and contacts are available on the Internet at: www.2helpU.com.
Black and Decker (Overseas) GmbH
PO Box 17164, Dubai, United Arab Emirates
Jalll jjll jjjll Jgill dll Jg
J/21 1 (Lz)1
JSSIJI JSSS) jssj 2 1s
J 1
a a a a a a a a a a a a a a a a a a a a a a a a a
aall 203rall 1501 rall aaii jiele Juaill
jSg jgsy Jlls Jluiu Laiu Laiu
loosooool
aill aas
co 201111111111111111
aJull aJjll 2olal


Jolal JgLul 11w
a + b = 1
1
j0000000000000000000000000000
LgoljUlc
l_g : y = 1
BLACK+DECKER 111111111111111111111111111111111111
BLACK+DECKER
BLACK+DECKER
a
jll jao jai aol jalil
l'olai jlgall
aljll aill alil jll plalll ljj bll jol
Jlglg gIg IALLg dall aalee jae jae jae
aebaaolaloojolaoeabaaedell jllbawwew
aL aocLi Jua
aIbll JcJoo aellal plabll oJoo oJoo
a2 < a ≤ a1
a jolol jolol golalg lclg pabll jss sccs
m = 311
aillll 1slll iiee, lllll llll
jsslls
Joo: 2olll, Jloll Jle, aagyall zgboll oill
- J a,b/ p,a,b
aai 1
bll aiiil iaioo e i j j j j j j j j j j j j j j j j j j j j j j j j j j j j j j j j j j
eog aedie 1
bylil
151b0 bXlll eG yXy.bXylll eG yS aIgSall g
80° jc lgsu ujui Lulg
1
a a a a a a a a a a a a a a a a a a
0 1 a e 1234567890123456789012345678901234567890123456789012345678901234567890123456789012345678901234567890123456789
a = b
#
j 1
a b c d e f g h i j k l m n o p q r s t
.5
.6
Jolal 0ll a c jlll 1 7
lg =
a
aaljaiuuiuiei 1ylo Jia aio Lgso llo jao
Lgaii 1. iaiill sdd jolr 11
.1
Jolal 1gac gag wajg aia
Jolal Jolal bannn ggs jess
iLs 1
zabobcogoljdo
aLlwl wJle cIg sUbiill ggs Ubiil 4
.
aegll jaoia gai ball bc bawll
.5
1000000000000000000000000000000000000000
i
111 111 111 111 111 111 111 111
cuii jiuie all jia 4a5 i jai Liie
e 1
all wll 6
2.111111111111111111111111111111111111111111
a a a a a a a a a a a a a a a a a a a a
aiee eae 1 aee
cbai 3j
j 1 j 1 j 1 j 1 j 1 j 1 j 1 j 1 j 1 j 1 j 1 j 1 j 1 j 1 j 1 j 1 j 1 j 1 j 1 j 1 j 1 j 1 j 1 j 1 j 1 j 1 j 1 j 1 j 1 j 1 j 1 j 1 j 1 j 1 j
LiSoll
y. 1
Lgwal
.2
eLgll gjy jglgac glc sbaill aai 3
alglb pabll aljla dll gol.
x3x3x3 2
jglg jghdai jao gao
LgSall
aocolil 1blll 5.
"aaaab" 4auiui aclll
eagll jiao zao gai liy buill glbe bawll j ai: a
.6
all co wolll 7
0 8
j
#
()P
Lill Logjao Jaiy
j(all)jzllgabii sic algbjial Jla jglal y
g iu w gaii liu o
iLscio 14,11
Joo 1000
1 1
.5jai11 ai 1i
J 1
jolabll 2jly j a bmo a eao p jsiw pi .dslg jglall
.alegljzle jgai
jai
i j 1
.1
.aleglg jyjgjjgge jzall s
jglgll jzalljzsscojgdlgac lai g:alx
即 12 ≤ a1 < 12 ,又 a1 > 0
.aleglslgolglslgall
wlaolai sll bail gui jia .eall gai llal
(“aibib”)iuiuiicu
eagll 2aie ggl baillebawll jsl atx
Jai.19
Sall 20
(FX1075-B5)2.21
22
jJg
yo jjglall lJolSll plall wss JyI Jnl Jel (il all ydiill
j4.11 p.s2
jbl.01i jill gll lall co wliii gll acgwl ldlc! 6
0 1 a c j wll jdo yj g jy j j j j j j j j j j j j j j j j j j j j j j j j j j j j j j
Laiolll jia jiall jao jc alalg jall jia jia jai
j 1000000000000000000000000000000000000000000000000000000000000
y 1 y
1
jglgll jLo n no sll lal gjlg jlg 1sui i.
gai jil jil jil jil jil jil jil jil jil jil jil jil jil jil
12 12
yilaill
(FX1075-B5 and FX1074-B5)
aBssusu 2
(FX1075-B5 and FX1074-B5)
pclll jjss 4
(FX1075-B5) j.5
Joll 6
3.7
j211s.8
cubilljaiuolalboc.9
cbsil a j.10
JF1075-B5 (FX1074-B5 and FX1073-B5
11
a.11 12
plabll jiaao aleg oibc.13
zjlao wS.14
Lx11111111.15
bLi11Lc.16
j 17
plabllnss 18.18
aui jai gjai ljj jia jia jia jai
B
g jie g sall aal l jia 10 Jaleill alil jai all g
slll joln no aolll

y 111111111111111111111111111111
g iall j no dlljwal y 11111111111 111 111 111 111 111 111 111 111 111 111 111 111 11
Jia Jiaiuill iio aieolg yalao cIieo jlglll lai Jaiu. .JIoLi Liolal
.
jglalg gusagabgsybsa jall 1
jglalg yaslae 15
aegj 1g aag jao jai jgl jai
Jusu gds aagul yLs agall aalll iI 1
10 5 5 5 5 5 5 5 5 5 5 5 5 5 5 5 5 5 5 5 5 5 5
jll jy 1
auiy jao
jLJBLCK+DECKER
FX1075-B5.FX1074-B5&FX1073-B5
all jll Log a 1 all
i#j#
Jaliall jllallbblio
(5) 12 all ball
:J
Lol yI jLoIg sryaall gLiall gJuiell Jxll
oi jaii jai iaii jaii jaii jaii jaii
a
j 1
aill j 10j 10i 10i 10i 10i 10i 10i 10i 10i
p0000
jlll pae jlaal Jleb2a
aai jn nn aaiiall 1 1 1 1 1 1 1 1 1 1 1 1
111 111 111 111 111 111 111 111 111 111 111 111 111 111 111 111 1
x
gaii jia jie aui jia jia jia jia jia
jai jia jia jia jia jia jia jia jia jia jia jia jia
.
123 1
p1234567890
Names & Addresses for BLACK+DECKER Service Concessionaries
| COUNTRY NAME ADDRESS TELEPHONE NO. EMAIL | |||
| BAHRAIN | Alfouz Services Co. WLL | P.O. Box 26562, Tubli, Manama | (00973) 17783562 / 17879987 |
| BAHRAIN | Kewalram & Sons Co. WLL | P.O. Box 84, Manama, Kingdom of Bahrain | (00973) 17213110 17210617 |
| EGYPT | Anasia Egypt for Trading S.A.E. (Mentre trade) | P.O. Box 2443, 9, Mostafa Refaat Street, Sheraton Heliopolis 11361, Cairo | (00202) 22684159 Hotline19311 |
| JORDAN | Mega Hardware - (Sami Bashiti & Partners Co.) | 93 King Abdullah II St., P.O. Box 3005 AMMAN 11953 | (009626) 5349098 |
| KSA | Fawaz Ebrahim Al Zayani Trading Est. | P.O. Box 76026, Al Raka : 31952 | (009663) 8140914 |
| KSA (U-MARK) and Ghunaim Market | United Trading & Marketing Co; Military city road – Near City max | #15, Khamis Mushait 62411, Abha, Military city street – Near City max | (00966) 172500378 |
| KSA (U-MARK) | United Trading & Marketing Co; Al Saud Street - Near Nawan Hotel | #116, Prince Fahad Ibn Ibrahim | (00966) 11473-3258 |
| KSA (U-MARK) | United Trading & Marketing Co; 52371 Al Hamr Road near Jaryat | Ash Shiqah, Al Hamr, Buraydah | (00966) 16-3694969 |
| KSA (U-MARK) | United Trading & Marketing Co; King Abdulaziz St, Al Aziziyah Dammam 32424 near Dat AS | (00966) 138179319 138172654 | servicedammam@u-mark.net |
| KSA (U-MARK) | United Trading & Marketing Co; Jeddah 23331 Falastin Road Near | (00966) 126612552 | servicejeddah@u-mark.net |
| KSA New Jeddah National Hospital | New Jeddah North Africa Trading Street 11, Bangladesh | #356, Al Talah Medina 42322 | (00966) 148423339 |
| KUAWAIT | Al Omar Technical Co. | P.O. Box 4062, Safat 13041, Kuwait | (00965) 24848595 / 24840039 |
| LEBANON Building, Beirut | Aces Service Centre (Est. F.A.Ketaneh SA) | P.O. Box 90-102, Nahr El Mot, Seaside Highway, Pharaon | nissrine.haji@aces.com.lb nassim.aziz@aces.com.lb |
| LIBYA Benghazi, Libya (P.O. Box 18182 Salmany) | Homeworld Co. Libya (P.O. Box 18182 Salmany) | Senidal St. Amr Ibn Elaas Road, ext. 103 | (0021861) 9094183 |
| LIBYA (El Ghoul Brothers) | North Africa Trading Street 11, Benghazi | P.O. Box 348, 7 October | (00218061) 3383994 |
| LIBYA (El Ghoul Brothers) | North Africa Trading (El Ghoul Brothers) | AlBarniq Dewalt Center, Mokhazin-elsukar St. ElFallah, Tripoli | (00218021) 3606430 |
| MAURITIUS | The Brandhouse Ltd. | Rogers Industrial Park 1, Riche Terre, Mauritius | nagte.ly@gmail.com nagle.dpt@gmail.com |
| OMAN | Oman Marketing & Service Co. (Omasco) | P.O. Box 2734,Behind Honda Showroom,Wattayah,Oman | npservice@omasco.com.om ashok.balan@omasco.com.om |
| OMAN | Oman Marketing & Service Co. (Omasco) | Al Ohi, Sohar,Oman | sooraj.neeran@omasco.com.om |
| OMAN | Oman Marketing & Service Co. (Omasco) | Sanaya, Salalah,Oman | rajagopal.pr@omasco.com.om |
| PAKISTAN Plaza Behind Gul Plaza Marston Road,KARACHI | Ammar Service & Spares Office No 6068 6th Floor Central | (009221) 32775252 | babji93@yahoo.com |
| QATAR | Al Mufah Service Centre | Al Wakrah Road, P.O. Box 875, Doha,Qatar | service@almufah.com almufah@almufah.com |
| TUNISIA Societe Tunisienne De Maintenance(STM) 2013 BEN AROUS, TUNISIA. Zone INDUSTRIELLE BEN AROUS. | Zone INDUSTRIELLE BEN AROUS. | (0021679) 389687 | importa@stqu.com |
| UAE Light House Electrical | P.O. Box 120, Abu Dhabi | (009712) 6726131 | dewalt_lhe@hotmail.com |
| UAE Light House Electrical | P.O. Box 120, Abu Dhabi | (009712) 5548315 | dewalt_lhe@hotmail.com |
| UAE BLACK+DECKER (Overseas) GmbH | P.O. Box 5420, Dubai | (009714) 8127400 / 8127406 | service.mea@sbdinc.com |
| UAE Zillion Equipment and Trading LLC | P.O. Box 10584, Ras Al Khaimah Trimix Redymix Sanaiaya, Al Ain | (009717) 2277095 | zillionrak@gmail.com |
| YEMEN Middle East Trading Co. (METCO) | 5th Flr.Hayel Saeed Anam Bldg. Al-Mugamma St. Taiz, Yemen | (009674) 213455 | metco@metcotreading.com sami@metcotreading.com |
| YEMEN Middle East Trading Co. (METCO) | Mualla Dakka, Aden Sami@metcotreading.com | (009672) 222670 | metco@metcotreading.com |
| YEMEN Middle East Trading Co. (METCO) | Hayel st.,Sana'a, Yemen Sami@metcotreading.com | (009671) 204201 | metco@metcotreading.com |
WARRANTY REGISTRATION CARD
YOUR NAME/ VOTRE NOM
YOUR ADDRESS/VOTRE ADRESSE/
DATE OF PURCHASE/JOUR D'ACHAT
DEALER'S NAME & ADDRESS/ NOM ET ADRESSE DU VENTEUR/


- Safety of others
- Inspection and repairs
- Additional safety instructions for food processors
- Electrical safety
- Intended use
- Using your appliance
- After use
- Features
- Before first use
- Using the appliance
- General
- Food processor
- Feeding tube and pusher
- Chopping blade
- Tips
- Kneading blade
- Slicing, shredding and grating discs
- Emulsifying disc
- Blender
- Grinder
- Cleaning and maintenance
- Dishwasher Safe
- Quick-cleaning the food processor bowl and blender jar
- Storage
- Troubleshooting
- Mains plug replacement
- Protecting the environment
- Technical data
- Warranty
- aill aas
- l_g : y = 1
- #
- jai
- slll joln no aolll
- auiy jao
- x
- WARRANTY REGISTRATION CARD
Brand : BLACK & DECKER
Model : FX1075
Category : Food Processor