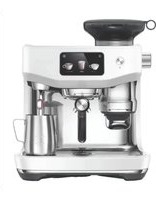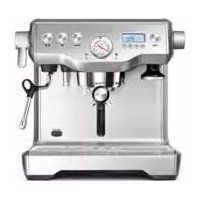
the Dual Boiler BES920XL - Coffee machine BREVILLE - Free user manual and instructions
Find the device manual for free the Dual Boiler BES920XL BREVILLE in PDF.


User questions about the Dual Boiler BES920XL BREVILLE
0 question about this device. Answer the ones you know or ask your own.
Ask a new question about this device
Download the instructions for your Coffee machine in PDF format for free! Find your manual the Dual Boiler BES920XL - BREVILLE and take your electronic device back in hand. On this page are published all the documents necessary for the use of your device. the Dual Boiler BES920XL by BREVILLE.
USER MANUAL the Dual Boiler BES920XL BREVILLE
Breville Consumer Support
USA
Mail:Breville USA
19400 S. Western Ave
Torrance CA
90501-1119
Phone: 1-866-273-8455
1-866-BREVILLE
Web: brevilleusupport.com
Canada
Mail: Breville Canada
Brev. is a registered Inderm of Brev. P.y. Ltd ABN 98000092928
Copyright: Breville Pty. Ltd. 2013
Due to continue product improvement, the products illustrated/photographed
in his book may vary slightly from the usual product.
Model BES920XL Issue-C13
Breville
the Dual Boiler
Instruction Book - Manual instructions
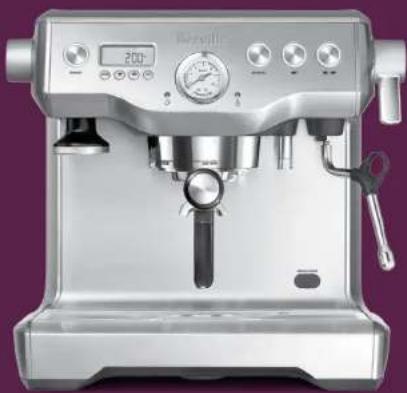
Suits all BES92OXL models
ConGRAtULAAtIonS
On the purchase of your Breville product
Register online for product support and exclusive offers.*
USA Consumers: www.brevilleusa.com
Canadian Consumers: www.breville.ca
*Registering is not a substitute for proof of purchase when submitting a Warranty Claim.
ContEntS
4 Breville recommends safety first
7 Know your Breville product
11 Operating your Breville product
27 Coffee making tips & preparation
32 Care & cleaning
39 Troubleshooting
46 Coffees to try
At Breville we are very safety conscious. We design and manufacture consumer products with the safety of you, our valued customer, foremost in mind. In addition we ask that you exercise a degree of care when using any electrical appliance and adhere to the following precautions.
IMPoRtAnt SAfEGUARDs

When using electrical appliances, basic safety precautions should always be followed, including the following:
for ALL ELECTRICAL APPLIANCES
- Carefully read all instructions before operating and save for future reference.
- Do not touch hot surfaces. Use handles or knobs as advised in this instruction book.
To protect against fire, electric shock and injury to persons do not immerse the power cord, plug, or appliance itself in water or other liquids. - Close supervision is necessary when any appliance is used by or near children.
- If the appliance is to be: -left unattended
-cleaned
-moved
- assembled; or
- stored
Always switch off the appliance by pressing the POWER button to off and unplug from the power outlet.
Always allow the appliance to cool before cleaning, moving or storing.
It is recommended to regularly inspect the appliance and power cord. Do not use the appliance if there is damage to the power cord or plug, or after the appliance malfunctions or has been damaged in any way. Immediately stop use and call Breville Consumer Support.
The use of accessory attachments not recommended by Breville may result in fire, electric shock or injury to persons.
- Do not let the power cord hang over the edge of a table or counter-top, or touch hot surfaces.
- Do not place the appliance near the edge of a table or counter-top. Ensure the surface is level, clean and free of water and other substances.
- Do not place the appliance on or near a hot gas or electric burner. Do not place it in, or allow it to come in contact with a heated oven.
BREvILLE RECoMMEnds SAFEt y fRtBREvILLE RECoMMEnds SAFEt y fRt
This appliance is recommended for household use only. Do not use this appliance for anything other than its intended use. Do not use outdoors. Do not use in moving vehicles or boats.
Do not attempt to open or service the espresso machine.
- For any maintenance other than cleaning, call Breville Consumer Support or visit a Breville Authorized Servicer.
SPECIFIC InStRUCTIonS foR BES920XL
- It is recommended to plug the expresso machine into a properly grounded and dedicated circuit, separate from other electrical appliances.
Use only cold water in the water tank. Do not use any other liquids. Do not use highly filtered, demineralized or distilled water as this may affect the taste of the coffee and how the espresso machine operates. - Ensure the portafilter is firmly inserted and secured into the group head before starting an extraction. Never remove the portafilter during the extraction process.
- Caution must be used during descaling as hot steam may be released. Before descaling, turn off the machine, allow to cool for at least 1 hour and ensure the drip tray is empty and fully inserted. For instructions, refer to 'Descale (dESc)', page 35.
ShoRt CoRd InStRUcTIonS
Your Breville appliance is fitted with a short power cord to reduce personal injury or property damage resulting from pulling, tripping or becoming entangled with a longer cord. Longer detachable power cords or extension cords are available and may be used if care is exercised. If an extension cord is used, (1) the marked electrical rating of the cord set or extension cord should be at least as great as the electrical rating of the appliance, (2) the cord should be arranged so that it will not drape over the counter-top or table where it can be pulled on by children or tripped over unintentionally and (3) the extension cord must include a 3-prong grounding plug.
BREVILLE RECoMMEnd SAfEtY fIrSt
BREVILLE ASSIST PLUG
Your Breville appliance comes with a unique Assist Plug, conveniently designed with a finger hole to ease removal from the power outlet.
CSADuty CYCLEMARKInG:
The Canadian Standards Authority requires any appliances capable of drawing over 1500W to be marked with a 'duty cycle' in minutes. For the BES920XL, this 'duty cycle' represents the maximum time for which the appliance will draw over 1500W during any 2 hour period of use. It does not indicate the appliance is unsafe for continuous use or is required to be switched off at certain intervals during normal use.
CALifoRnIA PROPoSItIon 65:
(Applicable to California residents only).
This product contains chemicals known to the State of California to cause cancer, birth defects or other reproductive harm.
SAvE thESE InStRUCTIonS
knoW
your Breville product
FEATURES OF YOUR BREVILLE PRODUCT
TRIPLE HEAT SYSTEM
Dual Stainless Steel Boilers
Dedicated espresso and steam boilers for simultaneous milk texturing and espresso extraction at the optimum temperature.
Actively Heated Group Head
Commercial 58mm group head with embedded element for optimal thermal stability during extraction.
PRECISION CONTROL
Electronic PID Temperature Control
Electronic temperature control delivers precise water temperature for optimum espresso flavor. Programmable.
Regulated Extraction Pressure
Over pressure valve (CPV) limits maximum pressure for optimal espresso flavor.
Low Pressure Pre-Infusion
Gradually increases water pressure to gently expand grinds for an even extraction. Programmable.
Dual Pumps
Dedicated espresso and steam boiler pumps help maintain constant pressure throughout extraction.
Programmable Shot Temperature
Adjust water temperature to achieve optimal
espresso flavor depending on coffee origin and degree of roast.
ADDITIONAL FEATURES
Backlit LCD
Displays current settings and simplifies programming functions.
High Volume Instant Steam
Dedicated 32 Boz (950ml) steam boiler delivers instant and continuous steam.
Commercial Steam Wand
Stainless steel 360^ swivel-action steam wand with 3 hole tip for a silker texture.
Instant Hot Water
Dedicated hot water outlet for maiding Americanos and pre beating cups.
58mm Full Stainless Steel Portafilter
Helps to promote a more even extraction and is easier to clean.
Shot Clock
Displays duration of the espresso shot being extracted.
Auto Start
Switches machine on at a specified time.
The Razor™ Dose Trimming Tool
Patented twist blade trims down the puck to the right level for precision dosing and a consistent extraction.
KNOW YOUR BREVILLE PRODUCT

C. POWER button
A. Top-fill 84 fl.oz (2.5L) removable water tank With integrated water filter and b level indicator.
B. Hot water dial
Rotate to start and stop the flow of hot water from the hot water outlet.
D. Backlit LCD Displays current settings and simplifies programming functions.
E. MENU button Use in conjunction with the LCD to set the programmable functions.
F. Espresso pressure gauge Monitor extraction pressure.
G. Integrated & removable 58mm tamper
H. Heated 58mm group head with embedded element
1. 58mm full stainless steel portafilter
J. Heated cup warming tray
K.1 CUP,2 CUP and MANUAL buttons With preset shot durations, manual override or reprogrammable durations/volumes.
L. Steam lever
For instant and continuous steam.
M. Dedicated hot water outlet
Delivers hot water for Americanos and pre-heating cups.
N. 360^ swivel action steam wand
With 3 hole tip for a silkier texture.
C. Descale access point
F. Tool storage tray
Houcass accessories when not in use.
Q. Drop down swivel foot
Lifts the machine upwards for easy
maneuverability.
R. Removable drip tray
With Empty Me! indicator.
knoW yoUR BREvILLE PRodUCT
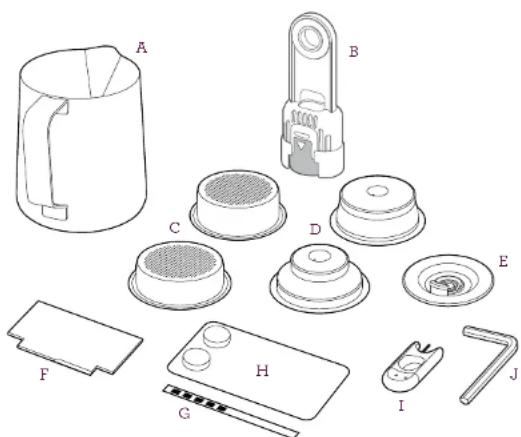
ACCEssOries
A. Stainless steel milk jug
B. Water filter holder with filter
C. 1 CUP & 2 CUP single wall filter baskets
D. 1 CUP & 2 CUP dual wall filter baskets
E. Cleaning disc
F. The Razor precision dose trimming tool
G. Water hardness test strip
H. Espresso cleaning tablets
1. Cleaning tool for steam wand tip
J. Allen key
oPERAtInG
your Breville product
OPERATING YOUR BREVILLE PRODUCT
BEFORE FIRST USE
Machine Preparation
Remove and discard all labels and packaging materials attached to your espresso machine. Ensure you have removed all parts and accessories before discarding the packaging.
Remove the water tank located at the back of the machine by pulling down the water tank handle. Remove the plastic bag containing the water filter and water filter holder. Clean parts and accessories (water tank, portafilter, filter baskets, jug) using warm water and a gentle dish washing liquid. Rinse well then dry thoroughly.
TIP
To easily maneuver your machine, use the drop down swivel foot located under the drip tray. When turned to UNLOCK, the swivel foot drops down and lifts the machine upwards, making it easier to access the removable water tank or reposition the machine to another location.
INSTALLING THE WATER FILTER
- Remove the water filter and water filter holder from the plastic bag.
Soak the filter in a cup of water for 5 minutes then rinse under cold running water. - Wash the filter holder with cold water, taking specific care to rinse the stainless steel mesh.

Soak filter for 5 minutes Rinse filter & mesh
- Insert the filter into the two parts of the filter holder.
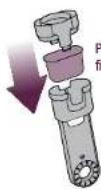
Place filter Into filter holder
To install the assembled filter holder into the water tank, align the base of the filter holder with the adapter inside the water tank. Push down to lock into place.
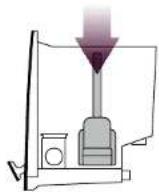
- Fill the water tank with cold water before sliding back into position at the back of the machine and looking into place.
NOTE
DO NOT use highly filtered, demineralized or distilled water in this machine. This may affect the taste of the coffee and how the machine operates.
NOTE
To purchase water filters, visit www.breville.com or call Breville Consumer Support.
OPERATING YOUR BREVILLE PRODUCT
FIRSTUSE
- Ensure tank is filled with cold water. You can do this by either opening the top-fill water tank lid (push to open), or by removing the water tank at the back of the machine.
- Check STEAM LEVER and HOT WATER dial are in the CLOSED position.
- Press POWER button to turn machine on.
- The LCD will display 'Hrd3', prompting you to set the water hardness level. Programming this will determine the regularity of the 'NEW FILTER' alert which indicates when the water filter in the water tank needs to be replaced.
Setting Water Hardness
Remove the supplied water hardness test strip from the wrapper.
- Dip the test strip into a sample of the water you have filled the tank with. Wait for one minute. The water hardness setting is indicated by the number of red squares displayed on the test strip. 3 red squares indicates a water hardness setting of 3.
Press UP or DOWN arrow to the required setting from 'Hrd1' (softest water) to 'Hrd5' (hardest water). Press MENU button to set. Machine will beep to confirm selection.
NOTE
If there is no selection within 5 minutes, the machine will default to setting 'Hrd3'.
- A pumping/vibrating sound will be heard indicating empty boilers are being filled with water for the first time. The LCD will display the current boiler temperature as it heats up.
- After approximately 10 minutes, the machine will reach the default operating temperature (200°F/93°C) and all 4 buttons will illuminate. The machine is now in STANDBY mode, ready for the next step, 'Flushing The Machine'.
200

POWER

MANUAL


NOTE
You will not be able to select the 1 CUP or 2 CUP functions; access the cleaning cycle in the menu options; or activate the steam wand until the machine has reached operating temperature (STANDBY mode). The machine will beep 3 times if one of these functions is selected.
OPERATING YOUR BREVILLE PRODUCT
Flushing The Machine
When the machine has reached STANDBY mode:
- Press 2 CUP button to run water through the group head for 30 seconds.
- Rotate HOT WATER dial to the OPEN position to run water through the hot water outlet. After 30 seconds, rotate HOT WATER dial to the CLOSED position.
- Lift STEAM LEVER to the OPEN position to release steam through the steam wand. After 30 seconds, lower the STEAM LEVER to the CLOSED position.
- Repeat steps 1-3 twice.
- Re-fill water tank and empty drip tray, if required.
POWER SAVE MODE
The machine will enter POWER SAVE mode after remaining idle for 1 hour and turn off completely if not used for a continuous 4 hour period.
Pressing any button during POWER SAVE (except POWER), or operating the STEAM LEVER or HOT WATER dial will cause the machine to heat-up to operating temperature.
Pressing the POWER button during POWER SAVE will turn the machine off.
LCD INTERFACE
Display modes
3 modes can be displayed on the LCD screen: Shot Temperature, Shot Clock or Clock. Press UP or DOWN arrow to change the display mode.
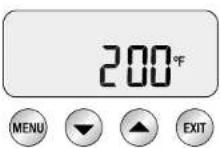
1. Shot Temp
Displays selected extraction temperature. The default is 200^ (93^) but can be changed from 190^ - 205^ (86^ - 96^) See Extraction Temperature, page 18.
2. Shot Clock
Displays duration of expense extraction in seconds. See 'Extraction Guide', page 31.
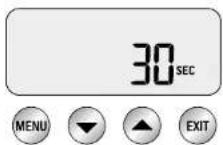
Shot clock will be displayed during an extraction and 10 seconds after the extraction before returning to the default shot temperature display mode.
OPERATING YOUR BREVILLE PRODUCT
3. Clock
Displays current time. The default is 12:00AM if the time has not been set. See 'Set Clock', page 18.
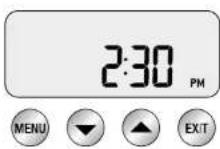
If selected, the clock will display for 10 seconds before returning to the default shot temperature display mode.
GENERAL OPERATION
The 1 CUP & 2 CUP buttons use duration to control espress volume. The duration times are preset, but can be reprogrammed (refer to 'Reprogramming Shot Duration', page 18). Alternatively, access the Advanced Features if you wish to use volumetric controls instead of duration to determine espresso volume (refer to 'Volumetric Control (vOL)'. page 23).
1CUP BUTTON
Press L CUP button once to extract a single shot of espress at the preset duration (30 seconds). The extraction will start using the low pressure pre-infusion.
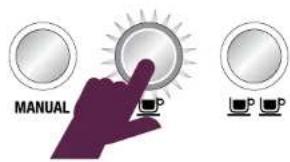
The machine will stop after 30 seconds and return to STANDBY mode.
TIP
To by-pass low pressure pre-infusion and deliver water to the group head at full pump pressure, press and hold the 1 CUP button. Release button when the desired amount of espresso has been extracted. This function can be used when purging the group head.
2 CUP BUTTON
Press 2 CUP button once to extract a double shot of espresso at the preset duration (30 seconds). The extraction will start using the low pressure pre-infusion.

MANUAL
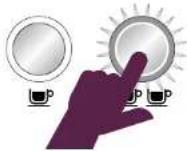
The machine will stop after 30 seconds and return to STANDBY mode.
TIP
To by-pass low pressure pre-infusion and deliver water to the group head at full pump pressure, press and hold the 2 CUP button. Release button when the desired amount of espresso has been extracted. This function can be used when purging the group head.
oPERAtInG yoUR BREvILLE PRodUCT
MANUALBUtton
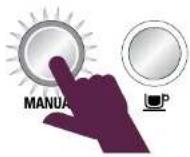
The MANUAL button allows you to control the espressoduration/volume to suit your preference. Press MANUAL button once to start the espresso extraction. The extraction will start using the low pressure pre-infusion. Press MANUAL button again to stop extraction.

tIP
To manually control the low pressure pre-infusion duration, press and hold the MANUAL button. When the required pre-infusion duration is met, release button to begin full pump pressure. Press MANUAL button again to stop extraction.
StEAM
For instant steam, move STEAM LEVER to OPEN position. The STEAM LED will illuminate.
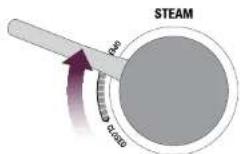
To turn steam off, move STEAM LEVER to CLOSED position. The machine will return to STANDBY mode.

CAUTION: BURN HAZARD
Pressurized steam can still be released, even after machine has been switched off. Children must always be supervised.
oPERAtInG yoUR BREvILLE PRodUCT
hot WAtER
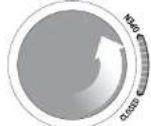
For instant hot water, rotate the HOT WATER dial to OPEN position. The HOT WATER LED will illuminate.
HOT WATER
To turn hot water off, rotate the HOT WATER dial to CLOSED position. The machine will return to STANDBY mode.
notE
You cannot run hot water and extract.
espresso at the same time.
notE
Hot water will cease to dispense after approx. 30 seconds. Depending on the size of your cup, you may need to close, then re-open the HOT WATER dial. See 'HOT WATER LED flashing', page 23.
PROGRAMMABLEfUnCtIonS
To enter program mode, press the MENU button. Continue to press MENU button until the desired function is flashing on the LCD.
Program mode allows you to program:
Shot Volume
Shot Temperature
Auto Start
Clean Cycle
SetClock
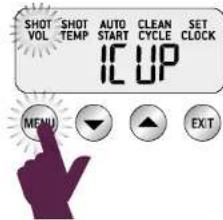
To exit program mode, press EXIT button.
notE
The MENU button is disabled during an extraction or when dispensing hot water.
oPERAtInG yoUR BREvILLE PRodUCT
REPRoGRAMInG Shot dURAtion
The 1 CUP and 2 CUP buttons use duration to control espressor volume. Reprogram the preset 30 second duration to your preference.
Press MENU button until 'SHOT VOI', flashes and either '1 CUP' or '2 CUP' is displayed, depending on the button you'd like to reprogram.
Without the portafiler in place, press the button you'd like to reprogram (either 1 CUP or 2 CUP button) to start water flow from the group head. Using the shot clock on the LCD, press the 1 CUP or 2 CUP button once the required duration has been reached.
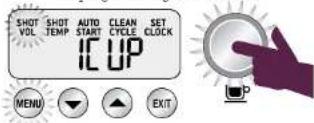
Reprogramming 1CUP button
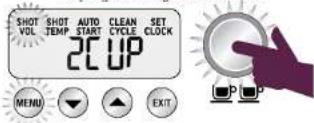
Reprogramming 2 CUP button
The machine will beep. Press the EXIT button to set the new duration.
REProGRAMInG Shot voLUME
The 1 CUP and 2 CUP buttons use duration to control espressor volume. Access the Advanced Features if you wish to use volumetric controls instead of duration to determine espressor volume (refer to 'Volumetric Control (vOL), page 23). Then follow these instructions:
Press MENU button until 'SHOT VOL' flashes and either '1 CUP' or '2 CUP' is displayed, depending on the button you'd like to reprogram.
Dose & tamp the portafilter with ground coffee. Insert the portafilter into the group head. Press the button you'd like to reprogram (either 1 CUP or 2 CUP button) to start expresso extraction. Press the 1 CUP or 2 CUP button once the desired volume of expresso has been extracted. The machine will beep. Press the EXIT button to set the new volume.
OPERAtInG yoUR BREvILLE PRodUCT
EXtRAClontEMPERAtURE
Press MENU button until 'SHOT TEMP' flashes. The LCD will display the current shot temperature.
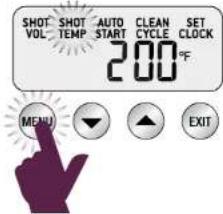
Press UP or DOWN arrow to adjust the temperature. The default is set at 200^ (93°C) but can be changed from 180°F - 205°F (86°C - 96°C).
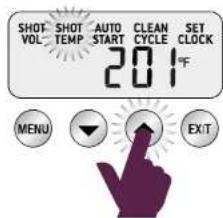
The optimum temperature will depend on the origin of the coffee beans, their freshness and degree of roast.
We recommend a temperature range between 184^ - 203^ (90^ - 95^) for optimal flavor.
The new temperature will be displayed on the LCD. Press this EXIT button to set.
SEt CLock
Setting the clock is optional. Press MENU button until SET CLOCK flashes. The default is 12.00AM if time has not been set.
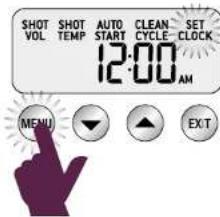
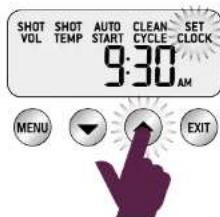
Press UP or DOWN arrow to adjust the time. For faster scrolling, press and hold the UP or DOWN arrow. Press the EXIT button to set.
OPERATING YOUR BREVILLE PRODUCT
AUTO START
Auto Start is optional. It allows you to program the specific time when the machine will automatically turn on. By programming your machine, you will not have to wait for it to pre-heat. We recommend programming the machine to start 15 minutes before you plan to use it.
Press MENU button until AUTO START flashes and the current Auto Start setting (ON or OFF) is displayed on the LCD.
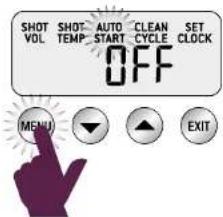
Press UP or DOWN arrow to act the AUTO START TO ON or OFF.
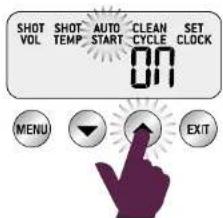
If OFF is selected, press the EXIT button to set.
If ON is selected, press the MENU button. Press UP or DOWN arrow to the desired Auto Start time. For faster scrolling, press and hold the UP or DOWN arrow.
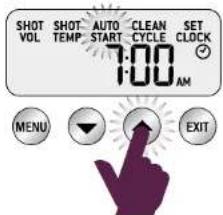
Press the EXIT button to set. A small clock icon will be displayed on the LCD when the Auto Start function has been programmed.
CLEANING CYCLE
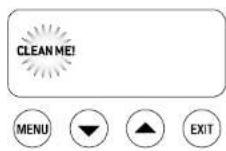
The cleaning cycle cleans the shower screen and back flushes the group head. Select this feature when the LCD displays 'CLEAN ME! Refer to 'Cleaning Cycle', page 33.
OPERATING YOUR BREVILLE PRODUCT
ADVANCED FEATURES
These features should only be accessed by experienced users.
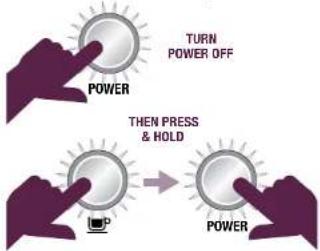
To access Advanced Features, with the machine turned off, press and hold the 1 CUP button, then also press the POWER button. Press the UP arrow to the desired feature then press MENU button to access feature settings.
Press the EXIT button at any time to exit.
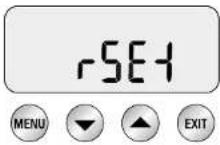
Reset Default Settings (rSEt)
Use this function to reset all programmable values back to the default settings. The machine has the following default settings:
- Temperature - 200°F (93°C)
2.Pre-Infusion-Duration Pd07
3.Pre-Infusion-Power PP60 - Steam temperature - 275°T (135°C)
- Machine Audio - LO
6.AutoOff-ON
7.Auto Start-Off - Temperature Unit - Fahrenheit
- Water Hardness-Hrd3
- Shot Duration - 30 secs
While 'rSET' is displayed on the LCD, press the MENU button to reset all settings to factory defaults. Machine will beep to confirm selection.
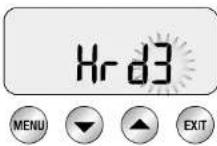
'Hrd's'll flash on screen. Machine is row in Water Hardness mode. Determine water hardness with the supplied water hardness test strip. Refer to 'Setting Water Hardness', page 13. Press UP or DOWN arrow to the required setting from 'Hrdl' (softest water) to 'Hrd's' (hardest water). Press MENU button to set. Machine will beep to confirm selection.
Setting water hardness will determine the regularity of the NEW FILTER' alert which indicates when the water filter in the water tank needs to be replaced.
Descale (dESc)
Select this feature to access the step by step descale procedure on the LCD. Refer to page 35 for the accompanying instructions.
OPERATING YOUR BREVILLE PRODUCT
Temperature Unit - ^ C / ^ (SEt)
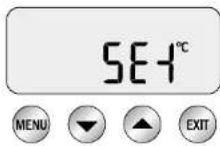
Set units to metric or imperial. While 'SET' is displayed on the LCD, press MENU button. Press UP or DOWN arrow to the desired unit. Press MENU button to set. Machine will beep to confirm selection.
Steam Temperature (StEA)
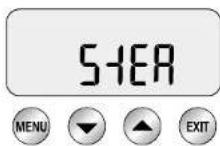
Adjust the steam boiler temperature, which in turn controls steam pressure. Lower steam temperature to texture smaller volumes of milk or to have more control. Increase steam temperature to texture larger volumes of milk.
While 'S:EA' is displayed on the LCD, press MENU button. Press UP or DOWN arrow to the desired temperature. Press MENU button to set. Machine will beep to confirm selection.
Disable AUTO OFF (A OF)
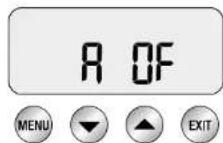
Use this function to disable the Auto Off feature. While 'A OF' is displayed on the LCD, press MENU button. Press UP or DOWN arrow to select off or on. Press MENU button to set. Machine will beep to confirm selection.
Machine Audio (Snd)
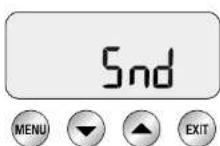
Adjust the audible alerts. While 'Snd' is displayed on the LCD, press MENU button. Press UP or DOWN arrow to off (OFF), low (LO) or high (HI). Press MENU button to act. Depending on the selected setting, the machine may beep to confirm selection.
OPERATING YOUR BREVILLE PRODUCT
Volumetric Control (vOL)

Select between volume based (FLO) or time based (SEC) method for espresso dose measurement. While 'vOL' is displayed on the LCD, press MENU button. Press UP or DOWN arrow to the desired method. Press MENU button to set. Machine will beep to confirm selection.
PRE-INFUSION PROGRAMMING
With the machine on and in STANDBY mode, press UP and DOWN arrow together to enter Pre-Infusion Programming mode. Press MENU button to move between Pre-Infusion Duration (Pd) and Pre-Infusion Power (PP).
Pre-Infusion Duration (Pd)
The LCD will display the current Pre-Infusion Duration.
Press UP or DOWN arrow to vary time.
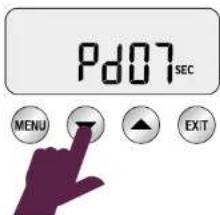
We recommend a range between 5-15 secs as being optimum. Press MENU button to access Pre-Infusion Power, or press EXIT button to set.
Pre-Infusion Power (PP)
The LCD will display current Pre-Infusion Power.
Press UP or DOWN arrow to vary power.
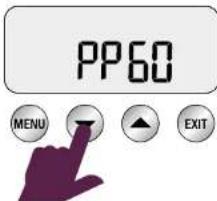
We recommend a range between 50-65 as being optimum. Press EXIT button to set.
ALERTS
STEAM LEVER beeps during heat-up
The machine will beep 3 times and not reach operating temperature (STANDBY mode) if the STEAM LEVER is in the OPEN position. Move the STEAM LEVER to the CLOSED position.
HOT WATER LED flashing during heat-up
The machine will not reach operating temperature (STANDBY mode) if the HOT WATER dial is in the OPEN position. The HOT WATER LED will flash. Move the HOT WATER dial to the CLOSED position.
HOT WATER LED flashing
To ensure water is dispersed at the correct temperature, hot water will cease to dispense after approx. 30 seconds and the HOT WATER LED will flash. Move the HOT WATER dial to the CLOSED position
OPERATING YOUR BREVILLE PRODUCT
Fill Tank
The machine will detect a low water level. The LCD will display 'FILL TANK'.
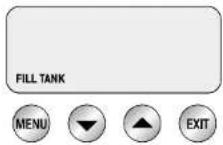
Fill tank with cold fresh water. The machine will not be able to make coffee or hot water while the tank is empty.
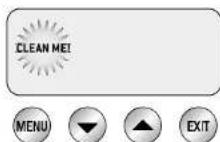
Clean Me!
Indicates when 200 extractions have been carried out since the last clearing cycle.
The cleaning cycle cleans the shower screen and back-flushes the group head. For information on how to clean the machine, refer to 'Cleaning Cycle', page 33.
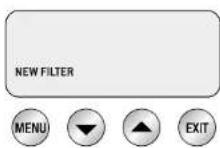
New Filter
Indicates when the water filter in the water tank needs to be replaced. For information on changing the filter, refer to 'Installing Water Filters', page 33.
The regularity of this alert is determined by the water hardness setting (Hrd1-Hrd5) selected. For information, refer to 'Setting Water Hardness', page 13.
Temperature flashing
Indicates when the machine is heating up or if the temperature drops excessively during use.
Service
To ensure a long life of optimal, brewing and steaming performance, it is important the machine is serviced by Breville or an Authorized Servicer when the 'SERVICE' prompt scrolls across the LCD screen.
The SERVICE' prompt will appear after 6,000 cycles - approximately 4-5 years of regular use in a domestic environment. The frequency of this prompt will depend on your frequency of use.
Contact Breville Consumer Support for advice.
OPERATING YOUR BREVILLE PRODUCT
TRANSPORTING AND STORING
We recommend draining both boilers completely before transporting the machine or storing for an extended period of time. This procedure is also intended as an anti freeze measure in the event the machine is exposed to extreme cold temperatures.
CAUTION
Never open DESCALE ACCESS valves while machine is still hot. Always turn off the machine and allow to cool for at least 1 hour prior to starting descale process.
CAUTION
During descale process, water may flow through group head and the drip tray will fill with water.
Step 1 - Preparation
a) Ensure the machine is off and has cooled for at least 1 hour.
b) Empty water tank, remove water filter then replace and lock water tank back into position.
c) Ensure drip tray is empty and fully inserted into position.
Step 2 - Empty Boilers
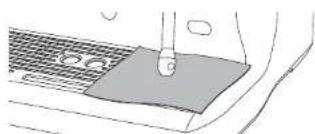
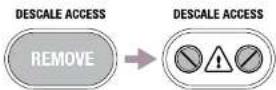
a) Remove the grey silicone cover on the lower front panel marked DESCALCE ACCESS. Place a cloth over the drip tray to stop steam escaping.
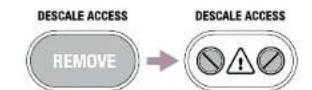
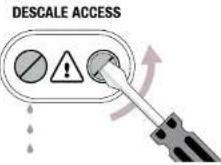
b) Use a flat-head screwdriver to rotate the right screw counter-clockwise until the valve is fully open. As the valve opens, steam may be released.
CAUTION HOT WATER & STEAM
oPERAtInG yoUR BREvILLE PRodUCT
c) Next, repeat the process on the left screw. As the valve is opened, water may begin flowing into the drip tray.
d) Allow valves to remain open until no more water or steam escapes.
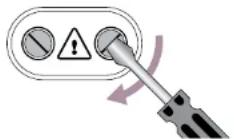
c) Close both valves by rotating screws clockwise until seated. Do not overtighten screws to avoid damaging the valves. Replace the grey silicone cover over the valves.
DESCALE ACCESS
f) Empty drip tray and reinsert into position. Use caution as the drip tray may be hot due to the water and steam from the boilers.
CoffEE MAkInG tIPS & PREPARAtIon
COFFEE MAKING TIPS & PREPARATION
PRE-HEATING
Heating your cup or glass
A warm cup will help maintain the coffee's optimal temperature. Pre-heat your cup by rinsing with hot water from the hot water outlet and place on the cup warming tray.
Heating the portafilter and filter basket
A cold portafilter and filter basket can reduce the extraction temperature enough to significantly affect the quality of your expresso. Always ensure the portafilter and filter basket are pre-heated with hot water from the hot water outlet before initial use.
NOTE
Always wipe the portafilter and filter basket dry before dosing with ground coffee as moisture can encourage 'channeling' where water by-passes the ground coffee during extraction.
SELECTING FILTER BASKET
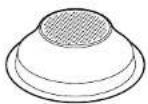
Single Wall Filter Baskets
Use Single Wall filter baskets if grinding fresh whole coffee beans.
Single Wall filter baskets allow you to experiment with grind and close to create a more balanced espresso.
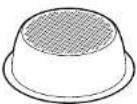
1CUP2CUP
Dual Wall Filter Baskets
Use Dual Wall filter baskets if using pre-ground coffee.
Dual Wall filter baskets regulate the pressure and help to optimize the extraction regardless of the grind, dose or freshness.
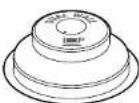
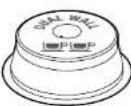
1CUP2CUP
NOTE
Regardless of whether you use Single Wall or Dual Wall filter baskets, use the 1 CUP basket when brewing a single cup and the 2 CUP basket when brewing two cups or a stronger single cup or mug.
THE GRIND
If grinding coffee beans, the grind size should be fine but not too fine. The grind size will affect the rate at which the water flows through the ground coffee in the filter basket and the taste of the expresso.
If the grind is too fine (looks like powder and feels like flour when rubbed between fingers), the water will not flow through the coffee even when under pressure. The resulting espresso will be OVER-EXTRACTED, dark in color and bitter in flavor.
If the grind is too coarse the water will flow through the ground coffee in the filter basket too quickly. The resultingpresso will be UNDER-EXTRACTED and lacking in color and flavor.
COFFEE MAKING TIPS & PREPARATION
DOSE AND TAMPING
Wipe filter basket with a dry cloth.
If using Single Wall filter baskets, grind just enough coffee to fill the filter basket. You may need to experiment with how long the grinder needs to run to achieve the correct dose.
- Tap the portafilter several times to distribute the coffee evenly in the filter basket.
Tamp down firmly (using approx. 30-40 lbs or 15-20 kg of pressure). The amount of pressure is not as important as consistent pressure every time.
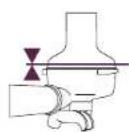
As a guide to dose, the top edge of the metal cap on the tamper should be level with the top of the filter basket after the coffee has been tamped.
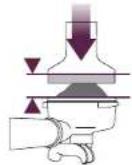
TRIMMING THE DOSE
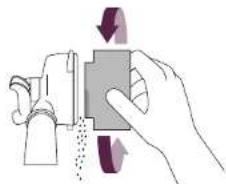
The Razor precision dose trimming tool allows you to trim the puck to the right level for a consistent extraction.

Insert the Razor" dose trimming tool into the filter basket until the shoulders of the tool rest on the rim of the basket. The blade of the dose trimming tool should penetrate the surface of the tamped coffee.
Rotate the Razer'to dose trimming tool back and forth while holding the portalfilter on an angle over a knock box to trim off excess coffee grinds. Your filter basket is now closed with the correct amount of coffee.
- Wipe excess coffee from the rim of the filter basket to ensure a proper seal is achieved in the group head.
TIP
If the extraction is too fast, make the grind finer & repeat above steps. If the extraction is too slow, make the grind coarser and repeat above steps.
PURGING THE GROUP HEAD
Before placing the portal filter into the group head, run a short flow of water through the group head by pressing and holding the 1 CUP button. Allow water to flow for 5 seconds, then release the 1 CUP button to stop the flow of water. This will purge any ground coffee residue from the group head and stabilize the temperature prior to extraction.
CoffEE MAkInG tIPS & PREPARAtIon
InSERtInG thE PoRtAflLtER
Place the portafilter underneath the group head so the handle is aligned with the INSERT position. Insert the portafilter into the group head and rotate to the right until the handle is securely locked in place. Rotating past the center will not damage the silicone seal.
EXtRACtInG ESPRESSo
- Place pre-warmed cup(s) beneath the portal filter and press the MANUAL, 1 CUP or 2 CUP button.
As a guide, the espresso will start to flow after 9-14 seconds (this includes pre-infusion time) and should be the consistency of dripping honey.
If the espresso starts to flow before 9 seconds you have either under dosed the filter basket and/or the grind is too coarse. This is an UNDER-EXTRACTED shot.
If the expresso starts to drip or flow after 14 seconds, then you have either over dosed the filter basket and/or the grind is too fine. This is an OVER-EXTRACTED shot.
A great espresso is about achieving the perfect balance between sweetness, acidity and bitterness.
The flavor of your coffee will depend on many factors, such as the type of coffee beans, degree of roast, freshness, coarseness or fineness of the grind, dose of ground coffee, and tamping pressure.
Experiment by adjusting these factors just one at a time to achieve the taste of your preference.
tEXtURInG MILk
Always start with fresh cold milk.
Fill the jug just below the "V" at the bottom of the spout.
Position the steam tip above the drip tray and lift the STEAM LEVER to purge the steam wand of any condensed water.
Insert the steam tip 14 - 3% (1-2cm) below the surface of the milk, close to the right hand side of the jug at the 3 o'clock position.
Move the STEAM LEVER to the OPEN position.
- Keep the tip just under the surface of the milk until the milk is spinning clockwise, producing a vortex (whirlpool effect).
With the milk spinning, slowly lower the jug. This will bring the steam tip to the surface of the milk & start to introduce air into the milk. You may have to gently break the surface of the milk with the tip to get the milk spinning fast enough.
- Keep the tip at or slightly below the surface, continuing to maintain the vortex. Texture the milk until sufficient volume is obtained.
- Lift the handle of the jug to lower the tip beneath the surface, but keep the vortex of milk spinning. The milk is at the correct temperature (140 - 150°C for 60 - 65°C) when the jug is hot to touch.
- Move the STEAM LEVER to the CLOSED position BEFORE taking the tip out of the milk.
- Set the jug to one side. Wipe the wand & tip with a damp cloth. Position the steam tip above the drip tray and lift the steam lever to purge out any residual milk.
- Tap the jug on the bench to collapse any bubbles.
- Swirl the jug to "polish" and re-integrate the texture.
Pour milk directly into the espresso.
The key is to work quickly, before the milk begins to separate.
CoffEE MAkInG tIPS & PREPARAtIon
hIntS & tIPS
Fresh, quality coffee beans will give you the best possible extraction.
We recommend quality 100% Arabica beans with a Roasted On' date stamped on the bag, not a Best Before' or Use By' date.
Coffee beans are best consumed between 5-20 days after the Roasted On' date. Ideally only grind directly before the extraction to maximize flavor.
- Buy coffee beans in small batches to reduce the storage time.
- Store coffee beans in a cool, dark and dry container. Vacuum seal if possible.
EXtRACtIon GUIdE
| GRIND | GRIND DUSE | TAMP | SHOT TIME | |
| OVER EXTRACTED | TOO FINE | TOO MUCH | TOO HEAVY | OVER 40 SEC |
| BITTER • ASTRINGENT | USE RAZOR TO TRIM | |||
| OPTIMUM | OPTIMUM 25-35 SE | 30-40hrs(15-20Rg) | ||
| UNDEREXTRACTED | TOO COARSE | TOO LITTLE | TOO LIGHT | |
| UNDERDEVELOPED • SOUR | USE RAZOR TO TRIM |
CARE & CLEANInG
CARE & CLEANInG
CLEAnInG CyCLE
CLEAN MEI will be displayed on the LCD to indicate when a cleaning cycle is required (approx. 200 shots).
Insert the 1CUP filter basket into the portalfilter, followed by the supplied cleaning disc, followed by 1 cleaning tablet.
Lock the portafilter into the group head, ensuring it is rotated to the right until the handle is securely locked in place.
- Ensure the water tank is filled with cold water and empty the drip tray.
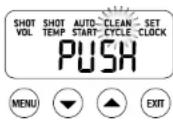
Press MENU button until CLEAN CYCLE' flashes and PUSH' is displayed on the LCD.
InStALLInG WAtER FILTERS
- Discard the used water filter. Soak a new filter in a cup of water for 5 minutes, then rinse under cold running water.
- Wash the water filter holder with cold water, taking specific care to rinse the stainless steel mesh.
- Insert the new water filter into the two parts of the water filter holder.
To install the assembled water filter holder into the water tank, align the base of the water filter holder with the adapter inside the water tank. Push down to lock into place. - Slide the water tank back into position at the back of the machine and lock into place.
notE
To purchase additional water filters, visit www.breville.com or call Breville Consumer Support.
CARE & CLEANING
CLEANING THE STEAM WAND
- Immediately after texturing milk, wipe the steam wand with a damp cloth and purge by lifting the STEAM LEVER for a few seconds.
If any of the holes in the tip of the steam wand become blocked, ensure the STEAM LEVER is in the CLOSED position and clean using the pin on the end of the provided cleaning tool. - If steam wand remains blocked, remove the tip using the integrated spanner in the cleaning tool and soak in hot water. Screw tip back onto the steam wand using the integrated spanner in the cleaning tool.
CLEANING THE FILTER BASKETS AND PORTAFILTER
The filter baskets and portalfilter should be rinsed under hot water directly after use to remove all residual coffee oils.
If the holes in the filter baskets become blocked, dissolve a cleaning tablet in hot water and soak filter basket and portal filter in solution for approx. 20 minutes. Rinse thoroughly.
The group head interior and shower screen should be wiped with a damp cloth to remove any ground coffee particles.
Periodically purge the machine with hot water to rinse cut any residual coffee. Place an empty filter basket into the portalafter. To by-pass low pressure pre-infusion and deliver water to the group head at full pump pressure, press and hold the 2 CUP button. Release button after 20 seconds.
CLEAR WATER BACKFLUSH
After each coffee making session we recommend doing a clear water backflush before you turn off the machine. Insert the cleaning disc into the filter basket then insert the portalflter into the group head. Press the 2 CUP button and allow pressure to build for 20secs, then press to stop & release pressure. Repeat this 5 times to purge any fine coffee grounds and residual coffee oils from the brew water paths.
The drip tray should be removed, emptied and cleaned after each use or when the drip tray indicator is showing Empty Mel Remove grill from the drip tray. Wash both in warm soapy water. The Empty Mel indicator can also be removed from the drip tray.
The storage tray can be removed and cleaned with a soft, damp cloth (do not use abrasive cleansers, pads or cloths which can scratch the surface).
CLEANING THE OUTER HOUSING & CUP WARMING TRAY
The outer housing and cup warming tray can be cleaned with a soft, damp cloth. Polish with a soft, dry cloth. Do not use abrasive cleansers, pads or cloths which can scratch the surface.
NOTE
Do not clean any of the parts or accessories in the dishwasher.
CARE & CLEANING
DESCALE(dESc)
Use this function to access the step by step descale procedure on the LCD.
CAUTION
Never open DESCALE ACCESS valves while machine is still hot. Always turn off the machine and allow to cool for at least 1 hour prior to starting descale process.
CAUTION
During descale process, water may flow through group head and the drip tray will fill with water.
Step 1 - Prepare for Descale
a) Ensure drip tray is empty and fully inserted into position.
b) Ensure the machine is off and has cooled for at least 1 hour. With the machine off, press and hold the 1 CUP button, then also press the POWER button to access Advanced Features.
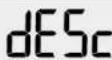
Press UP arrow until 'dESC' is displayed on the LCD. Press MENU button to select. The LCD will display 'PUSH' and the MANUAL button will illuminate.
Step 2 - Empty Boilers
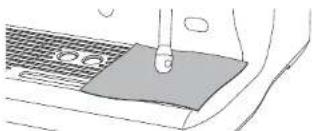
a) Remove the grey silicone cover on the lower front panel marked DESCALE ACCESS. Place a cloth over the drip tray to stop steam escaping.
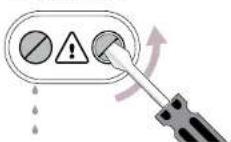
b) Use a fat-head screwdriver to rotate the right screw counter-clockwise until the valve is fully open. As the valve opens, steam may be released.
CAUTION HOT WATER & STEAM
DESCALE ACCESS
c) Next, repeat the process on the left screw. As the valve is opened, water may begin flowing into the drip tray.
d) Allow valves to remain open until no more water or steam escapes.
CARE & CLEANING
e) Close both valves by rotating screws clockwise until seated. Do not overtighten screws to avoid damaging the valves.
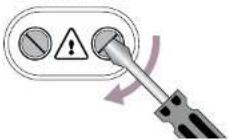
DESCALE ACCESS
Empty drip tray and reinsert into position. Use caution as the drip tray may be hot due to the water and steam from the boilers.
g) Empty water tank, remove water filter.
h) Empty descale solution into water tank, then top with cold water to MAX line, or as per manufacturer's instructions. Replace and lock water tank back into position at the back of the machine.
i) Press MANUAL button to proceed to the next step.
NOTE
If boilers are not empty, the machine will beep 3 times and 'VALv' will be displayed on the LCD.
Step 3-Begin Descale
a) 20 minute timer will begin. Machine will fill boilers with descale solution and heat to temperature. During this time, water may flow through the group head. Wait for countdown timer to finish. This allows solution to dissolve scale build up.
20
b) The LCD will display 'PUSH' when the timer has finished.
Step 4 - Empty Descale Solution
a) Empty water tank then rinse and fill with clean water to the MAX line. Replace and lock water tank back into position at the back of the machine.
NOTE
If water tank has not been removed then replaced or is empty, water tank LED will flash 5 times, the machine will beep 3 times and 'FILL TANK' will be displayed on the LCD.
b) Place a cloth over the drip tray to stop steam escaping.
c) Use a flat-head screwdriver to rotate the right screw counter-clockwise until the valve is fully open. As the valve opens, steam may be released.
CAUTION
HOT WATER & STEAM
CARE & CLEANING
d) Next, repeat the process on the left screw. As the valve is opened, water may begin flowing into the drip tray.
e) Allow valves to remain open until no more water or steam escapes.
f Close both valves by rotating screws clock-wise until seated. Do not overtighten screws to avoid damaging the valves.
g Empty drip tray and reinsert into position.Use caution as the drip tray may be hot due to the water and steam from the boilers.
h) Press MANUAL button to proceed to next step.
Step 5-Fill Boilers
a) 5 minute timer will begin. During this time, water may flow through the group head. Wait for countdown timer to finish. This allows any remaining solution to be removed from the system.
5
b) The LCD will display 'PUSH' when the timer has finished.
Step 6-Flush Boilers
a) Empty and rinse water tank. Assemble new water filter into tank.
b) Fill water tank with cold water to MAX line. Replace and lock water tank back into position at the back of the machine.
c) Ensure strip tray is empty and fully inserted into position.
d) Place a cloth over the drip tray to stop steam escaping.
c) Use a flat-head screwdriver to rotate the right screw counter-clockwise until the valve is fully open. As the valve opens, steam may be released.

CAUTION
HOT WATER & STEAM
f) Next, repeat the process on the left screw. As the valve is opened, water may begin flowing into the drip tray.
g) Allow valves to remain open until no more water or steam escapes.
h) Close both valves by rotating screws clockwise until seated. Do not overtighten screws to avoid damaging the valves. Replace the grey silicone cover over the valves.
i) Empty drip tray and reinsert into position. Use caution as the drip tray may be hot due to the water and steam from the boilers.
Press MANUAL button to complete descale procedure. Machine will heat up and is ready to use once operating temperature (STANDBY mode) is reached.
CARE & CLEANING
USING THE ALLEN KEY
Over time, the silicone seal surrounding the shower screen will need to be replaced to ensure optimum brewing performance.
- Press the POWER button to turn the machine off and unplug the cord from the power outlet.
- Carefully remove the rear water tank and drip tray, taking particular care if they are full.
- Using a skewer or similar, clean the center of the screw of any residual coffee.
- Insert the shorter end of the Allen Key into the center of the screw. Turn counter-clockwise to loosen the screw.
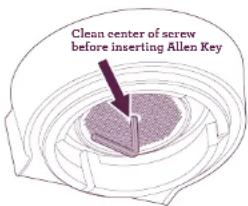
-
Once loosened, carefully remove and retain the screw, stainless steel shower screen and black dispersion plate. Make note of the side of the shower screen and dispersion plate that are facing downwards. This will make re-assembly easier. Wash the shower screen and dispersion plate in warm soapy water, then dry thoroughly.
-
Remove the silicone seal with your fingers or a pair of long-nose pliers. Insert the new seal, flat side first, so the ribbed side is facing you.
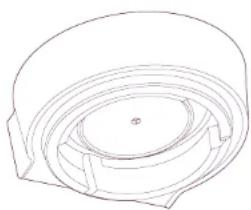
-
Re insert the dispersion plate, then the shower screen, then the screw. With your fingers, turn the screw clockwise for 2-3 revolutions then insert the Allen Key to tighten until the screw is flush with the shower screen. Do not overtighten screw.
-
Re-insert the drip tray and rear water tank.
Contact Breville Consumer Support or visit www.breville.com for replacement silicone scales or for advice.
TROUBLESHOOTING
TROUBLESHOOTING
| PROBLEM POSSIBLE CAUSES WHAT TO DO | ||
| The HOT WATER LED flashes when the machine is turned on | HOT WATER dial is OPEN. | Turn the HOT WATER dial to the CLOSED position. |
| Machine beeps when turned on | STEAM LEVER is OPEN or has been activated before the machine has reached operating temperature. | Move the STEAM LEVER to the CLOSED position. |
| Water does not flow from the group head | Machine has not reached operating temperature. | Allow time for the machine to reach operating temperature. The POWER button will stop flashing when machine is ready. |
| Water tank is empty. Fill tank. | ||
| Water tank is not fully inserted and locked into position. | Push water tank in fully and lock latch closed. | |
| FILL TANK on LCD, but water tank is full | Water tank is not fully inserted and locked into position. | Push water tank in fully and lock latch closed. |
| No steam or hot water | Machine is not turned on. | Ensure the machine is plugged in and the POWER button is on. |
| No hot water · Water tank is empty. Fill water tank. | ||
| No steam · Steam wand is blocked. Use the pin on the end of the provided cleaning tool. If steam wand remains blocked, remove the tip using the integrated spanner in the cleaning tool and soak in hot water. Screw tip back onto the steam wand using the integrated spanner in the cleaning tool. | ||
TROUBLESHOOTING
| PROBLEM POSSIBLE CAUSES WHAT TO DO | |
| The machine is on but ceases to operate | |
| Steam pouring out of group head | |
| Espresso only drips from the portafilter spouts, restricted flow | . Coffee is ground too finely. Use slightly coarser grind. |
| . Too much coffee in the filter basket. Lower dose of coffee by tamping then using the Razor™ dose trimming tool to trim off excess coffee. | |
| . Coffee tamped too firmly. Tamp between 30-40lbs or 15-20kg of pressure. | |
| . The filter basket may be blocked. Use the fine pin on the provided cleaning tool to clear the outlet hole(s) on the under side of the filter basket. If it continues to be blocked, dissolve a cleaning tablet in hot water and soak filter basket and portafilter in the solution for approx. 20 minutes. Rinse thoroughly. |
TROUBLESHOOTING
| PROBLEM POSSIBLE CAUSES WHAT TO DO | ||
| Espresso runs out too quickly and/or Pressure gauge not reaching 9 bar | The coffee is ground too coarse. | Use slightly finer grind. |
| Not enough coffee in the filter basket. | Increase dose of coffee. Tamp then use the Razor™ dose trimming tool to trim off excess coffee. | |
| Coffee not tamped firmly enough. | Tamp between 30-40lbs or 15-20kg of pressure. | |
| If the above suggestions do not help, check the machine. Place an EMPTY Dual Wall filter basket into the portalfilter (either 1 CUP or 2 CUP). Press the MANUAL button. If the pressure gauge reads over 5 bar, the machine is working correctly. Try re-pulling a shot, with coffee, using the 3 suggestions above (finer grind, increase dose, increase tamp). If the pressure gauge reads below 5 bar, call Breville Consumer Support. | ||
| Coffee beans are stale. U | freshly roasted coffee beans with a 'Roasted On' date and consume between 5-20 days after that date. | |
| Coffee not hot enough | Cups not pre-heated. | Rinse cups under hot water outlet and place on cup warming tray. |
| Milk not hot enough (if making a cappuccino or latte etc). | Heat milk until base of the jug becomes hot to touch. | |
| Extraction temperature is too low. | Increase extraction temperature. See 'Extraction Temperature', page 19. | |
TROUBLESHOOTING
| PROBLEM POSSIBLE CAUSES WHAT TO DO | ||
| No crema · Coffee beans are stale. Use freshly roasted coffee beans with a 'Roasted On' date and consume between 5-20 days after that date. | ||
| Using Single Wall filter baskets with pre-ground coffee. | Ensure you use Dual Wall filter baskets with pre-ground coffee. | |
| Espresso runs out around the edge of the portafilter and/or Portafilter comes out of the group head during an extraction | Portafilter not inserted in the group head correctly. | Ensure portafilter is rotated to the right until the handle is securely locked in place. Rotating past the center will not damage the silicone seal. |
| There are coffee grounds around the filter basket rim. | Clean excess coffee from the rim of the filter basket to ensure a proper seal in group head. | |
| Filter basket rim is wet or underside of portafilter lugs are wet. Wet surfaces reduce the friction required to hold the portafilter in place whilst under pressure during an extraction. | Always ensure filter basket and portafilter are dried thoroughly before filling with coffee, tamping and inserting into the group head. | |
| Too much coffee in the filter basket. | After tamping, trim the coffee dose using the Razor™ dose trimming tool. | |
| Unable to set Auto Start time | Clock not set or clock is set with incorrect time. | Check that the clock and Auto Start time have been programmed correctly. The LCD will display a clock icon when the Auto Start time is programmed. |
| E1, E2 or E3 error message on LCD | An error that cannot be reset by the user has occurred. | Call Breville Consumer Support. |
TROUBLESHOOTING
| PROBLEM POSSIBLE CAUSES WHAT TO DO | ||
| Coffee puck is sticking to the shower screen | This is normal and happens occasionally. The dry puck feature creates a slight vacuum on top of the coffee puck which will occasionally hold the puck against the shower screen instead of leaving it in the filter basket. | |
| Pumps continue to operate / Steam is very wet & spotty / Hot water outlet leaks | Using highly filtered, de-mineralized or distilled water which is affecting how the machine is designed to function. | We recommend using cold, filtered water. We do not recommend using water with no/low mineral content such as de-mineralized or distilled water. If the problem persists, contact Breville Consumer Support. |
| Too much coffee extracted | Coffee is ground too coarsely.Shot duration/volume needs to be reprogrammed. | Adjust the grind size slightly finer. Tamp then use the Razor™ dose trimming tool to trim off excess coffee.Reprogram the shot duration/volume.Refer to 'Reprogramming Shot Duration & Volume', page 18. |
TROUBLESHOOTING
| PROBLEM POSSIBLE CAUSES WHAT TO DO | ||
| Not enough coffee extracted | ·Coffee is ground too finely. ·Shot duration/volume needs to be reprogrammed. | ·Adjust the grind size slightly coarser. Tamp then use the Razor™ dose trimming tool to trim off excess coffee. ·Reprogram the shot duration/volume. Refer to 'Reprogramming Shot Duration & Volume', page 18. |
| Amount of coffee extracted has changed, but all settings are the same | ·As coffee beans age, the extraction rate changes and can affect the shot volume. | ·Adjust the grind size slightly finer. Tamp then use the Razor™ dose trimming tool to trim off excess coffee. ·Reprogram the shot duration/volume. Refer to 'Reprogramming Shot Duration & Volume', page 18. ·Use freshly roasted coffee beans with a 'Roasted On' date and consume between 5-20 days after that date. |
CoffEES to tRy
CoffEEs to tRy
CAPPUCCIno
A single shot of espresso with textured milk and garnished with drinking chocolate.
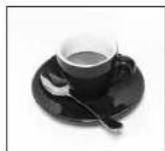
ESPRESSO
Interse and aromatic, it is also known as short black and is served in a small cup or glass.
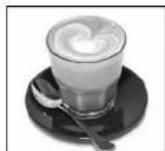
LAtte
A latre consists of a single espresso with textured milk and approximately 10mm of foam.
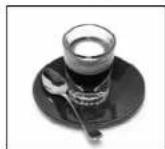
MACChIAto
Traditionally served short, the macchiato is also poured as an Americano with a dash of milk or a dollop of textured milk.
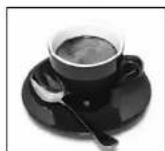
AMERICAno
A shot of espresso (single or double) with hot water. Also known as a long black.
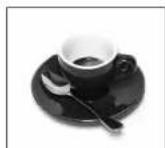
RISTREtto
A ristretto is an extremely short espcse of approximately 15ml, distinguished by its intense flavor and aftertaste.