ACS09K01 - Air Conditioning Fuave - Free user manual and instructions
Find the device manual for free ACS09K01 Fuave in PDF.

Download the instructions for your Air Conditioning in PDF format for free! Find your manual ACS09K01 - Fuave and take your electronic device back in hand. On this page are published all the documents necessary for the use of your device. ACS09K01 by Fuave.
USER MANUAL ACS09K01 Fuave
Input Cooling 1000W Heating ---- Rated current Cooling 6.22A Heating ---- Rated input Cooling 1280W Heating ---- Resistance class IPX0 Demension(mm) 703x355x345 mm Sound pressure lever (hi/low) 51,9dB(A)/ 46,9dB(A) Sound power lever 63dB(A) Type Fuave ACS09K0132 SAFETY WARNINGS Read all safety instructions and other instructions. Non-compliance with all the instructions can result in injuries or material damage. General safety warnings
- This appliance is suitable only for household use.
- Install the appliance according to the installation instructions. Incorrect installation can cause water leakage, electric shocks, re or damage to your possessions.
- Use only the accessories delivered with the appliance and the specic tools for installation.
- Make sure that at all times (also during transport) the entire appliance stands upright. If nevertheless, the entire appliance has been lying horizontally (partly), wait 2 hours before you use it. This is the time span needed by the compressor to do its job correctly.
- Make sure that the appliance stands on an even, horizontal and rm surface.
- When operating the appliance, make sure that it has at least 50 cm of free space on all sides.33
- Make sure that the plug and socket are visible and accessible at all times.
- Do not place any objects on the appliance.
- Do not leave an operating appliance unsupervised, also not for a few seconds!
- Do not use the appliance near fuels, lightly ammable materials or materials that could easily explode (keep a distance of minimum 1 metre). Furthermore, do not use paint, cleaning sprays, insect repellent sprays, etc. on or near the appliance; this can warp the plastic or damage the electric parts.
- Do not touch the appliance with wet or moist hands. Do not use the appliance when standing barefoot.
- Do not use the appliance: - near a source of re; - near splattering oil; - in direct sunlight; - near splattering water; - in a bathroom or near a swimming pool.
- The appliance has wheels for moving it easily. Do not place the appliance on a high pile carpet and do not roll it over objects that might cause it to topple over.
- Do not block the grids from incoming or outgoing airows: also not partially.
- Do not cover the appliance: this can cause a re!
- Do not stick ngers or objects, such as pens, etc. through the grids. Warn children in particular about this danger.
- Make sure that the fan is not blocked.
- Children, unauthorised persons and house pets must be supervised.
- This appliance is not a toy; therefore children must not play with it.34
- The appliance can be operated by children over the age of 8 and by people with physical, sensory or mental disabilities or who lack knowledge and experience, only if they are supervised or are given instructions on how to use it safely and if they understand the risks involved.
- Unsupervised children may not carry out cleaning and maintenance tasks.
- If you hear a strange sound, smell a strange odour or see smoke, take the plug out of the socket.
- If the appliance topples over during use, switch it off and take the plug out of the socket. Inspect the appliance meticulously to be certain that there is no damage.
- If you suspect damage, contact your supplier or a certied electrician.
- Do not operate the appliance if you notice damage to the appliance, electric cable, plug or cooling pipe or if it is functioning poorly, if it has fallen over or malfunctions in any way. Return the entire appliance to your supplier or a certied electrician for checking and/or repair. Always demand original parts.
- The appliance (including the electricity cable and plug) may be opened and/or repaired only by a person qualied to do so.
- When the water drainage points are not used, make sure that the top and bottom rubber sealing plugs are plugged in rmly in their place to prevent water damage and danger of suffocation. Electrical safety
- This appliance is suitable only for indoor use.
- Use only a plug mounted on the appliance by the manufacturer and no other means of connection!
- This appliance must be connected according to national wiring codes.
- Before use, check whether the socket that you want to use is earthed, shows no faults and whether the voltage on the socket matches the voltage shown on the type plate of the appliance. Damage caused by faulty voltage is not covered by the warranty!35
- If the appliance is not being used or if you are cleaning it or carrying out maintenance or if you want to move it, rst switch it off and then take out the plug from the socket. Always move and/or transport the appliance gently!
- In addition, when you start using the appliance, the following applies: First insert the plug into the socket, then switch the appliance to the ON position and only thereafter use the operating button!
- Do not use the appliance in a damp or wet environment, such as a bathroom or laundry area, not in the area of a bath, shower or swimming pool and do not splash water, oil or any other liquid on the appliance.
- Wind the appliance’s electric cable completely before you put the plug into the socket and make sure that the electric cable never comes in contact with any hot parts of the appliance or that it becomes hot in any other way. Never route the electric cable under a carpet, do not cover it with mats, runners, etc. and keep the cable away from walking paths. Make sure that the electric cable is not stepped on and that no furniture is placed on it. Do not route the electric cable along sharp corners and after use, do not wind it too tightly!
- Prevent the electric cable from coming in contact with oil, solvent and sharp objects. Check the electric cable and plug regularly for damage. Do not twist or bend the electric cable around the appliance; this can damage the insulation!
- Try as best as possible to avoid using extension cords. If this is unavoidable, then use a cord with sufcient capacity (minimum 3x1.5 mm²) and don’t put it close to walking paths!
- Connect the appliance only to a xed socket. Do not use a junction box / power strip, etc.
- Do not move the appliance by pulling the electric cable and hold the plug in your hand when you unplug it.
- Do not pull, warp or change the electric cable or submerge it under water. Pulling or incorrect use of the electric cable will damage the appliance and can result in an electric shock.36 Safety and refrigerant R290
- This appliance contains R290 refrigerant. R290 is a refrigerant that complies with European directives. Never puncture the cooling circuit; R290 is ammable (GWP 3)!
- For the dehumidifying process, never us any refrigerant other than what the manufacturer recommends.
- This appliance must be used and stored in a place that has no sources of ignition, such as an open replace or gas and electric appliances that are running.
- Do not puncture any of the components of the cooling circuit and do not set the appliance on re.
- If the appliance is installed, operated or stored in a non-ventilated room, then you must take measures for preventing re or explosion caused by leaking refrigerant. Make sure that there are no sources of ignition in the same area (such as re, stoves, electric appliances with sparks, burning cigarettes, etc.).
- The appliance must be stored in a way that prevents mechanical faults.
- Do not install, use or store this appliance in a space that is smaller than 9 m².
- R290 is odourless so you will not smell a leak!
- Persons working or interfering with cooling circuits must be in the possession of the appropriate certication, which is issued by a certied body and in which it is stated that the person in question is competent to handle cooling agents in compliance with a specic assessment recognised by associations in the sector.
- Do not use the appliance or switch it off immediately and remove the plug from the socket, if the electric cable, plug or the appliance itself is damaged, broken or malfunctions. The appliance, plug and/or cable must be repaired/replaced by an electrician or a similarly qualied person. Repairs by unqualied individuals are not covered by the warranty and could result in dangerous situations!37
- The repairs must be carried out based on the recommendations of the appliance’s manufacturer. Maintenance and repairs that require the assistance of other qualied personnel must be carried out under the supervision of someone who specialises in the use of inammable cooling agents.
- Dismantling and recycling of air conditioners must be carried out by a certied technician.
- Do not exceed the recommended maximum space for cooling.
- Do not place the appliance in the vicinity of a source of heat and do not expose it to direct sunlight.
- Close windows and doors and also keep curtains and blinds closed during the hottest hours of the day.
- Keep the air lter clean.
- Lower the temperature and ventilation settings when room has reached the desired conditions.38 Description
2. Indication light for remote control
3. Horizontal shutters (manual setting)
4. Vertical shutters (manual setting)
10. Connection point for water drainage hose for dehumidifying
13. Connection point for water drain hose for cooling
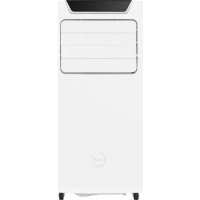
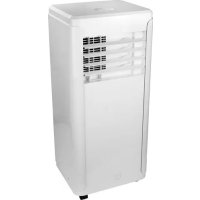
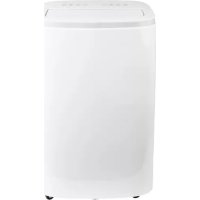
Front side Back side39 Installation The Fuave ACS09K01 is a portable air conditioner/humidier that can be moved from room to room.
- Remove the packaging material, keep it out of children’s reach and make sure that the appliance remains standing upright.
- Before use, check whether all the accessories are present and whether the appliance and the accessories do not show any damage. Do not start using a damaged appliance, but return it to your supplier!
- Place the appliance on a rm, even, dry and horizontal surface close to a socket and drainage possibility for warm air, for example, by a window that can be slightly opened. Make sure that the appliance has at least 50 cm free space on all sides and observe all the directions stated in the safety instructions.
- To dehumidify, connect a water drain hose to the connection point for the water drain hose (10). Lead this hose into a bucket or pit. The hose must not be routed upwards! Your appliance can now be used (see section on water drainage).
- To cool, you have to discharge the warm air to the outside.
- Avoid bends or curves in the drain hose. This causes a built-up of exhausted humid air, which can result in leakage, overheating or switching off the airco.
- Warning! Do not use your airco before you have followed all the installation instructions described above!
- Warning! Make sure that no water enters the interior of the appliance!
- Warning! The length of the drain pipe has been adapted specically to the technology of this airco. Do not replace or extend it using your own hose. This could have an adverse effect on the functioning of your airco. The hose can be extended, but the length should be as short as possible for optimal effect.
- Do remember to prevent break-in! After all, the window is open when using the portable air-conditioner.40 Before using your airco, check:
- Whether it is installed according to the regulations and safety instructions.
- Whether it shows no damage or faults.
- Whether the socket that you want to use has the same voltage as shown on the type plate of the appliance (220-240V / 50Hz).
- Whether there is no other appliance connected to the same socket. If the above is fully in order, then you can insert the plug into the socket. You can operate the airco via the control panel or the remote control. Werking Operating via the remote control41 ON /OFF button. This switches the airco on or off. With this you select a particular function: cooling, fanning or dehumidifying. Every time you press the button, you change the function; the light on the control panel shows which function is active. The fan is set automatically. With this, you set the desired room temperature in steps of 1°C (from 17°C to 30°C). The control system can show temperatures in °C and in °F. If the temperature is shown is °F, then press both + and – buttons at the same time for 3 seconds and the temperature will show °C again. The LED display shows the set temperature of the cooling function. The room temperature is shown at the dehumidifying and fanning functions. The LED display also shows the following error and safety codes. Error codes: E0 EEPROM error E1 Room temperature sensor error E2 Humidier temperature sensor error E3 Condenser temperature sensor error E4 Screen communication error EC Refrigerant leakage detection fault Safety codes: P1 Water reservoir is full: Connect the drain hose to the bottom water drainage point and let the collected water run off (also see the section on water drainage). If this safety code recurs, contact your supplier.42 Remark: When one of the aforementioned faults occurs, switch off the airco and check for possible obstacles. Restart the airco. If the fault persists, switch off the airco and take the plug out of the socket. Contact your supplier. Cooling: Press the Mode button until the function light ‘ Cool’ comes on, press the + and – buttons to set the desired room temperature (17°C – 30°C). Using the FAN SPEED button on the remote control, you can set the fan speed to HIGH or to LOW. Fanning: Press on the Mode button until the ‘Fan” function light comes on. Using the FAN SPEED button on the remote control, you can set the fan speed to HIGH or to LOW. The temperature cannot be set. Dehumidifying: Press on the Mode button until the ‘Dry” function light comes on. The fan speed and temperature cannot be set. The fan starts automatically on LOW speed (see the section on water drainage). Operating with the remote control
- Specications Type of remote control RG51B30/CE Type of battery 2x AAA 1.5 V Transmission distance 8 metres43
- General - Use the remote control within a distance of 8 metres from the airco. Direct it to the receiver. Reception will be conrmed by means of a beep. - Make sure that there are on obstacles, such as curtains, doors or alike, are standing in the way of the remote control. - Insert 2 AAA batteries into the remote control. - Do not use old and new batteries at the same time. - Remove the batteries from the remote control if the airco is not used for a long period. - Attention: When you remove the batteries, the remote control deletes all the programming. When you insert new batteries, you have to re-programme the remote control. - Keep the remote control away from liquids. - Protect the remote control against high temperatures and exposure to radiation. - Keep the remote control out of direct sunlight. - Keep the remote control away from other electric appliances.44
LED display remote control A. Mode indication B. Indicates remote control is switched on C. Temperature / Timer indication D. ON /OFF indication E. Fan indication F. Fan speed indication G. Time indication H. Lock indication46
- Using the buttons Auto operation
1. Press on the MODE button to
2. Press on TEMP or to set the
desired temperature.
3. Press on the ON/OFF button to
- In the Auto mode, the airco can logically select between cooling, fanning and dehumidifying by detecting the difference between the actual room temperature and the temperature set in the remote control.
- In Auto mode, you cannot select the fan speed; this occurs automatically.
- When the Auto mode is not comfortable, then manually select COOL, DRY or FAN.47 Cool and Fan operations
1. Press on the MODE button to
select the COOL or FAN function.
2. Press on TEMP or to set the
desired temperature.
3. Press on the FAN SPEED to
select the fan speed AUTO-HIGH-LOW.
4. Press on the ON/OFF button to
start. Remark: In the FAN function, the set temperature is not visible on the display of the remote control. Also the temperature cannot be regulated. Only steps 1, 3 and 4 can be executed.48 Dehumidifying operation
1. Press on the MODE button to
select the DRY function.
2. Press on TEMP or to set the
desired temperature.
3. Press on the ON/OFF button to
start. Remark: In the DRY function, you cannot select the fan speed; this occurs automatically. Timer operation Press the Timer ON button to set the automatic switch ON time; press the Timer OFF button to set the automatic switch OFF time.
1. Setting the time for automatic
switch ON. a. Press the TIMER ON button. The remote control shows TIMER ON, the signal ‘h’ is shown on the LCD display. Now it is ready for resetting the Auto- on time to start the operation. b. Press again on the TIMER ON button to set the desired Auto-on time. Every time you press the button, the time increases in steps of 30 minutes until 10 hours and henceforth in steps of 1 hour to 24 hours.49 c. After the TIMER ON is set, it takes half a second before the remote control transmits the signal to the air conditioner. After approximately 2 seconds, the ‘h’ signal disappears and the set temperature appears again on the LCD display. The timer function control light on the airco goes on.
2. Setting the time for automatic switch OFF.
a. Press the TIMER OFF button. The remote control shows TIMER OF, the signal ‘h’ is shown on the LCD display. Now it is ready for resetting the Auto-off time to start the operation. b. Press again on the TIMER OFF button to set the desired Auto-off time. Every time you press the button, the time increases in steps of 30 minutes until 10 hours and henceforth in steps of 1 hour to 24 hours. c. After the TIMER OFF is set, it takes half a second before the remote control transmits the signal to the air conditioner. After approximately 2 seconds, the ‘h’ signal disappears and the set temperature appears again on the LCD display. The timer function control light on the airco goes on. Important: setting the time in the Timer: 0.5, 1, 1.5, 2, 2.5, 3, 3.5, 4, 4.5, 5, 5.5, 6, 6.5, 7, 7.5, 8, 8.5, 9, 9.5, 10, 11, 12, 13, 14, 15, 16, 17, 18, 19, 20, 21, 22, 23 and 24.50 Examples: The airco must start operating in 6 hours. TIMER ON
1. Press the TIMER ON button, the
signal ‘h’ appears on the display.
3. Wait approximately 3 seconds
and the digital display will show the temperature again. The function is now activated. The airco must stop operating in 10 hours. TIMER OFF
1. Press the TIMER OFF button, the
signal ‘h’ appears on the display.
3. Wait approximately 3 seconds
and the digital display will show the temperature again. The function is now activated. 6.0h TIMER ON 10h TIMER OFF51 Stopping the airco 2 hours after setting and restarting it 10 hours after setting. TIMER OFF-TIMER ON (on-off-start)
to show ‘2.0h’ on the display.
5. Wait approximately 3 seconds and the
digital display will show the temperature again. The function is now activated. Starting the airco 2 hours after setting and stopping it 5 hours after setting. TIMER OFF-TIMER ON (on-off-stop)
to show ‘5.0h’ on the display.
5. Wait approximately 3 seconds and the
digital display will show the temperature again. The function is now activated. 10h
Sleep (Economy) operation The SLEEP function is used to reduce energy consumption while you sleep. After all, you don’t need the same temperature to feel comfortable. The SLEEP function can only be activated by the remote control. This function can only be used in the COOL and AUTO modes. Press on the SLEEP button when you go to sleep. After 30 minutes, the set temperature will decrease or increase by 1°C. And after another 30 minutes, it will decrease or increase again by 1°C. The appliance will maintain this newly set temperature for 7 hours and afterwards the airco will work according to the original programmed setting. LOCK button Use this button when you want to avoid that all the settings will accidentally change. A lock symbol will appear on the display when the button is pressed. If you press again, the LOCK function will be disabled. Other functions > Auto-restart If the airco switches off unexpectedly due to a power cut, then the previous setting automatically starts after the power is restored. > Adjusting the airow The airow can be automatically adjusted by setting the shutters manually to the desired position. Keep the shutters completely open during use. Do not place any heavy objects or something else on the shutters, this will damage the airco.53 > Power Management If during COOL, the room temperature is lower than the set temperature, the airco will automatically operate in energy-saving function after an interval. The compressor shuts down and the fan starts working on LOW. When the room temperature rises again above the set temperature, then the compressor and fan will start working normally and the energy-saving function will switch off. Remark: When you cool or dehumidify, always wait 3 minutes after switching ON or OFF before you switch the airco ON or OFF again. The compressor needs this time to recover. Water drainage
1. During dehumidifying
During dehumidifying, additional water is extracted from the air. Therefore, remove the drain plug, connect a drain hose to the water drain connection (10) during the dehumidifying process and route this hose to a lower positioned water drain. Make sure that the hose is attached rmly and does not leak. Direct the hose to the drain and make sure that it does not bend, which would stop the ow of water. Once you nish using the hose, then put the drain plug and knob back to prevent leakage. continuous drain hose remove the drain plug54 During this process, water is extracted from the air. This largely evaporates, but any excess water accumulates at the bottom water reservoir. When the water reservoir is full, the airco will beep 8 times and the display will show P1. The motor and the compressor will stop working, but not the fan. Switch off the airco and remove the plug from the socket. Move the airco to a drain location and empty the water reservoir by removing the drain plug and connecting a hose. Make sure that as soon as the water reservoir is empty, the drain plug is securely re-inserted to prevent leakage. The symbol P1 disappears. If the error recurs, contact your supplier.
2. During the COOL process
remove the drain plug continous drain hose bottom drain plug55 The Fuave portable airco is equipped with overheating protection, which switches off the airco when it overheats. When this happens, you must remove the plug from the socket and let the appliance cool down for at least 30 minutes. Eliminate the cause of the overheating: Was the appliance covered or partly covered? Does it stand too close to a wall or another obstacle, resulting in insufcient air sucked in or blown out? Afterwards, you can use your appliance again in the usual manner, but rst keep on eye on it for the rst 30 minutes to see whether no problems recur. If the appliance shows deviations or it overheats again without any explainable reasons, then contact your supplier or a certied electrician for checking and/or repairing. Safety Attention! Before you clean the airco or carry out any maintenance tasks, you must always switch off the airco and remove the plug from the socket! To keep the airco in good condition, regular cleaning is a must! Cleaning the housing case Use a soft, moist cloth to wipe the case. Never spray it and make sure that no water penetrates the interior of the appliance! Never use aggressive cleaning agents, benzene, detergents, cloths impregnated with chemicals or other cleaning solutions. This could damage the case. Dry the appliance afterwards with a soft cloth. Cleaning and maintenance Cleaning the air lter Clean the air lter every two weeks; an airco with a dirty air lter does not operate well. The air lter is located at the rear of the airco and can easily be removed. Use a vacuum cleaner or tap lightly on the air lter to remove loose dust and dirt. Afterwards, rinse clean the air lter in lukewarm water (not higher than 40 °C.) and perhaps use a mild and neutral cleaning agent. Let the air lter dry completely in the shade before remounting it. Watch out! Never operate the airco without the air lter!56 End-of-season cleaning If the appliance is stored for a long period, you must take the following measures!
- Completely remove the condense water. Let the airco fan run for 12 hours so that the airco is totally dry on the inside.
- Switch off the airco and remove the plug from the socket.
- Clean the air lter and return it to its place or replace the air lter.
- Rotate the drain hose of the appliance to prevent damage.
- Remove the batteries from the remote control.
- If possible, pack the airco in its original packaging or in a plastic bag and store it in a dry spot. Do not place any heavy objects on the appliance. air lter remove the air lter57 The appliance does not start when I press the ON/OFF button
- Is the plug inserted into the socket?
- Is the residual-current circuit breaker switched on? No power cut?
- Is the water reservoir full (P1)? Then empty it out.
- The room temperature is lower than the set temperature; adjust the set temperature The appliance does not seem to cool well
- Measure the temperature of the air blown out. This should be around 10° cooler than the room temperature.
- Is there direct sunlight? Close the curtains.
- Are there windows or doors open? Close these.
- Are there too many people in the room? They produce heat!
- Is the room too big?
- Is there something in the room that produces heat (or too much heat)? Switch it off or remove it.
- Is the lter dusty or covered with dirt? Clean the lter.
- Is the air inlet or outlet (the hose) blocked? Make sure the airow is unobstructed. The appliance makes noise
- Is the surface on which the appliance rests rm, even and horizontal?