
T8141 - Washing machine BALAY - Free user manual and instructions
Find the device manual for free T8141 BALAY in PDF.
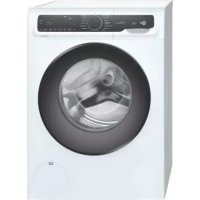
| Product type | Washing machine |
| Brand | Balay |
| Model | T8141 |
| Width | 60 cm |
| Wash capacity (heavy-duty laundry) | 4.5 kg |
| Wash capacity (delicate laundry) | 2.0 kg |
| Wash capacity (wool and fine fabrics) | 1.5 kg |
| Water pressure | 0.5 to 10 bar |
| Wash programs | Cotton, synthetics, wool, pre-wash, rinse, fabric softener, drain |
| Options | Delicate, eco, stop tank full, cold wash, reduced spin |
| Loading type | Front-loading |
| Cleaning drain filter | Every 2 months (depending on use) |
| Cleaning detergent dispenser | Periodically |
| Cleaning water inlet filters | Every 2 to 3 months |
| Electrical safety | Connection to grounded outlet mandatory |
| Door opening | Stop the machine and wait 2 minutes |
Frequently Asked Questions - T8141 BALAY
User questions about T8141 BALAY
0 question about this device. Answer the ones you know or ask your own.
Ask a new question about this device
Download the instructions for your Washing machine in PDF format for free! Find your manual T8141 - BALAY and take your electronic device back in hand. On this page are published all the documents necessary for the use of your device. T8141 by BALAY.
USER MANUAL T8141 BALAY
INSTRUCTIONS FOR THE INSTALLATION, USE AND MAINTENANCE AUTOMATIC WASHING MACHINES
INSTRUCCIONES DE INSTALLACION, USO Y CONSERVACION
Paginas 3,4,5,15,18
Fig. páginas 16, 17
Page 9, 10, 11, 15, 19
Fig. page 16, 17
INSTRUCTIONS FOR THE INSTALLATION, USE AND MAINTENANCE
Page 12, 13, 14, 15, 19
Fig. page 16, 17
Open illustrated front and back coverflaps when reading instructions.
Our contribution towards a cleaner environment - we use recycled paper.

1. DESCRIPTICN FUNCIONAL
- Dispenser for detergents and additives.
- Operation keys and start-stop.
- Functional pilot.
- Temperature selector (s.m.).
- Program selector.
- Removable lid for embedding.
- Drainage tube (posterior part), Figs. 2-5-6.
- Characteristics plaque, Figs. 1-4.
-
Loading door opening latch, Fig. 8.
-
Drainage filter, Fig. 12.
- Leveling legs, Fig. 7.
- Decorative door (s.m.).
- Decorative socle and height regulator (s.m.).
- Loosen and remove the 3 anchorage screws (A) (Fig. 3).
- To recuperate the rubber B separators that have fallen on the floor, tilt the machine (Fig. 3).
- Put together the protection plug C, that you will find in the documentation bag (Fig. 4).
ATTENTION: To forestall damages during the transport of the washing machines, block the ascendate kit.
3. INSTALLATION
WATER INSTALLATION
Mount in the water connection the filter (Fig. 5) which we provide with the washing machine (documentation bag).
The water pressure will be between: Max. 10 bar - Min. 0,5 bar.
For new installations (before connecting the machine) let some water out to clean the conductors.
ATTENTION: To prevent possible damages caused by leachages of water, close the tape when the program has finished and imperatively in case of prolonged absence.
The tube which empties the water, should connect to a drainage duct a diameter larger, existing a looseness between both and which height should be between. Min. 60 cm. and Max. 70 cm. (Fig. 6).
Do not seal the tube which empties the water the drainage duct.
ELECTRICAL INSTALLATION
Make the following checks before connecting the machine:
The indicated voltage in the characteristic plaque coincides with that of the address.
Dispose of a socket base, with a take of mass adequate to plug into the machine, and is according to the maximum power (indicated in the characteristic plaque).
This machine has a radio electric suppressor interruptor in accordance with the directives 76/889 and 87/308 of the C.E.E.
AS A MEASURE OF SAFETY AND IN ACCORDANCE WITH THE NORMS IN VIGOR, THE WASHING MACHINE SHOULD BE CONNECTED TO A GOOD TAKE OF EARTH.
LEVELING
For the machine to function perfectly, it's necessary to have it filtered and leveled properly.
To obtain this, rotate the four regulable legs, situated in the front and back part of the washing machine, fitting them with a check nut (Fig. 7).
FUNCTIONING
The program list (pag. 19), indicates the perfect positioning of the elements of command to carry out the corresponding program for each type of clothes.
IMPORTANT: With small items, it's better to wash them in a small mesh bag.
Introduce the items one by one in the machine.
Place the laundry loosely and unfolded in the drum, mixing large and small items as much as possible.
Remove from pockets, items which could have been forgotten.
For a better result of wash, we recommend you load the machine with a maximum of:
—Resistant clothes 4,5 kg.
—Delicate and sintetic clothes. 2,0 kg.
Woolen and fine textures 1,5 kg.
CONTROL ELEMENTS
Program selector
It's the factor that establishes the order of operations to carry out in a wash program.
The letter or number should be situated corresponding to the program selected, coinciding with the index of the programmer.
It should always rotate like the hands on a clock (towards the right).
Temperature selector (s.m.)
With this command, you can select the temperature of the wash ending up with an uncountable number of programs.
Button functions.
See page 15.
STARTING THE MACHINE
Clothes load
To open the loading door slowly move the door sniper without letting go, tum it towards yourself and open (Fig. 8).
—Introduce clothes in the washing machine depending on the type of fabric.
—Close the door by pressing it until it closes properly.
Detergent dosage
Because of economical and functional reasons (to prevent the possibility of excess foam, especially in soft water) add the right amount of detergent depending on the amount of clothes, dirtyness and the manufactures opinion on the detergent container
The maximum amount of detergent suggested in the programme list (pag. 19) is based on to rely on a complete laundry load and a very hard water.
DISPENSER SIGNALING (Fig. 19)
| I | Prewash | d | Bleach |
| E | Wash | Softeners |
-Add the right amount of detergent and additives in the compartments indicated, without adding more than the MAX. nivel indicated.
Program selection
Select the program chosen, rotating the control like in Fig. 10 (right). This control should always be rotated before starting the W.M.
Select the most adequate temperature for the type of clothes about to be washed (see list of programmes).
Pulse the chosen option.
Pulse the start-stop botton to start the washing machine (Fig. 11).
If you wish to stop the machine at any moment or when the wash is over, pulse the start-stop botton, and wait aprox. 2 min.
MAINTENANCE
Cleaning the machine
Use normal household cleaning agents that are free of solvents and that are nonscratching.
For safety reasons, the machine should never be sprayed with a jet of water.
Drainage Pipe (Fig. 12).
Its function is to protect if from possible attachments in the motor pump, collecting fogotten objects, for example, coins, bottoms, keys, etc.
For its normal use, we recommend checking the machine every 2 months, and to do it, follow the instruction:
—Disconnect to washing machine.
—Close the water tap.
Put under the filter a recipient that will collect te water which may have been left behind.
—Eliminate from the motor drainage chamber the remains os shreds or other objects stored there.
—Replace pump cover. Please make sure that the cover sits firmly and fightly in place.
Detergent-additives dispenser
Regularly, clean the remains of the detergent stored in the different parts to the dispenser.
To clean the dispenser, pull the dispenser outwards.
Once this is done, proceed to clean with a brush and water. Do not forget to clean the part left in the washing machine and dry with a cloth the water that may have fallen on the chassis of the machine.
Water tube entry
You will find them on each extreme of the entry pipe.
It is convenient to clean it every 2 or 3 months or when you observe that the water entry is slow. To do this, extract the filter from the inside of the mouth where the tube screws in (the back of the machine).
The other filter, is found when you unscrew the other extreme of the tube which joins to the water outlet. They could be cleaned under a spurt of water, inverting its position to the water flow. If the obstruction persists, a small brush may help (Fig. 13).
SMALL FAILURE
All washing machines have been revised before leaving the factory. Nevertheless, if you observe some abnormality in its functioning, before you call a service engineer, use the following hints to see whether you can remedy the fault yourself. Even guarantee repairs can cost money sometimes (see conditions of warranty).
- Check to see if there is an electrical flow.
- Check if the loading door is closed.
- Check that the water tap is open.
- Check if wather entry filters are not obstructed.
- If the washing machine does not empty properly, check:
The emptying tube is nor bent.
the control FLOT" (stop when the water is in the tub) is not actioned.
-the drainage filter has no objects or an excess of threads.
If these things have all been checked, and the washing machine does not work, do not hesitate in calling us and giving us the following details: the product number (E-Nr) and serial number (FD) of the machine.
That you will find on the characteristic plaque.
E-Nr.
FD
TECHNICAL CHARACTERISTICS
Width 60 cm.
Depth 53/50 cm. (s.m.)
Height 85cm.
Aprox. weight 72/80 kg. (s.m.)
Dried clothes capacity depending on the
Tension net
Fuse
Water presion 0,5÷10 bar
DESCRIPCION FUNCIONALIDAD TECLAS-FUNCAO DAS TECLAS UTILISATION DES TOUCHES-BU TTON FUNCTIONS

Tecla MARCHA-PARO
Press ON/OFF button: The machine is switched on and the power indicator lamp is lit.

Tecla DELICADO
Button pressed: The washing rhythmist reduced for delicate fabrics.

Tecla FRIO
Button pressed: Programs run without heating the water.

Button pressed: The laundry is not spun.
Water is pumped out.
For delicate fabrics.

Tecla MEDIA CARGA
Press this button: If you only want to wash half a load or less.
Do not press this button: For curtains and for wool.

Tecla FLOT-ANTIARRUGAS
Button pressed: The laundry remains in the remaining rinse water.
You may end the program, depressing this button.
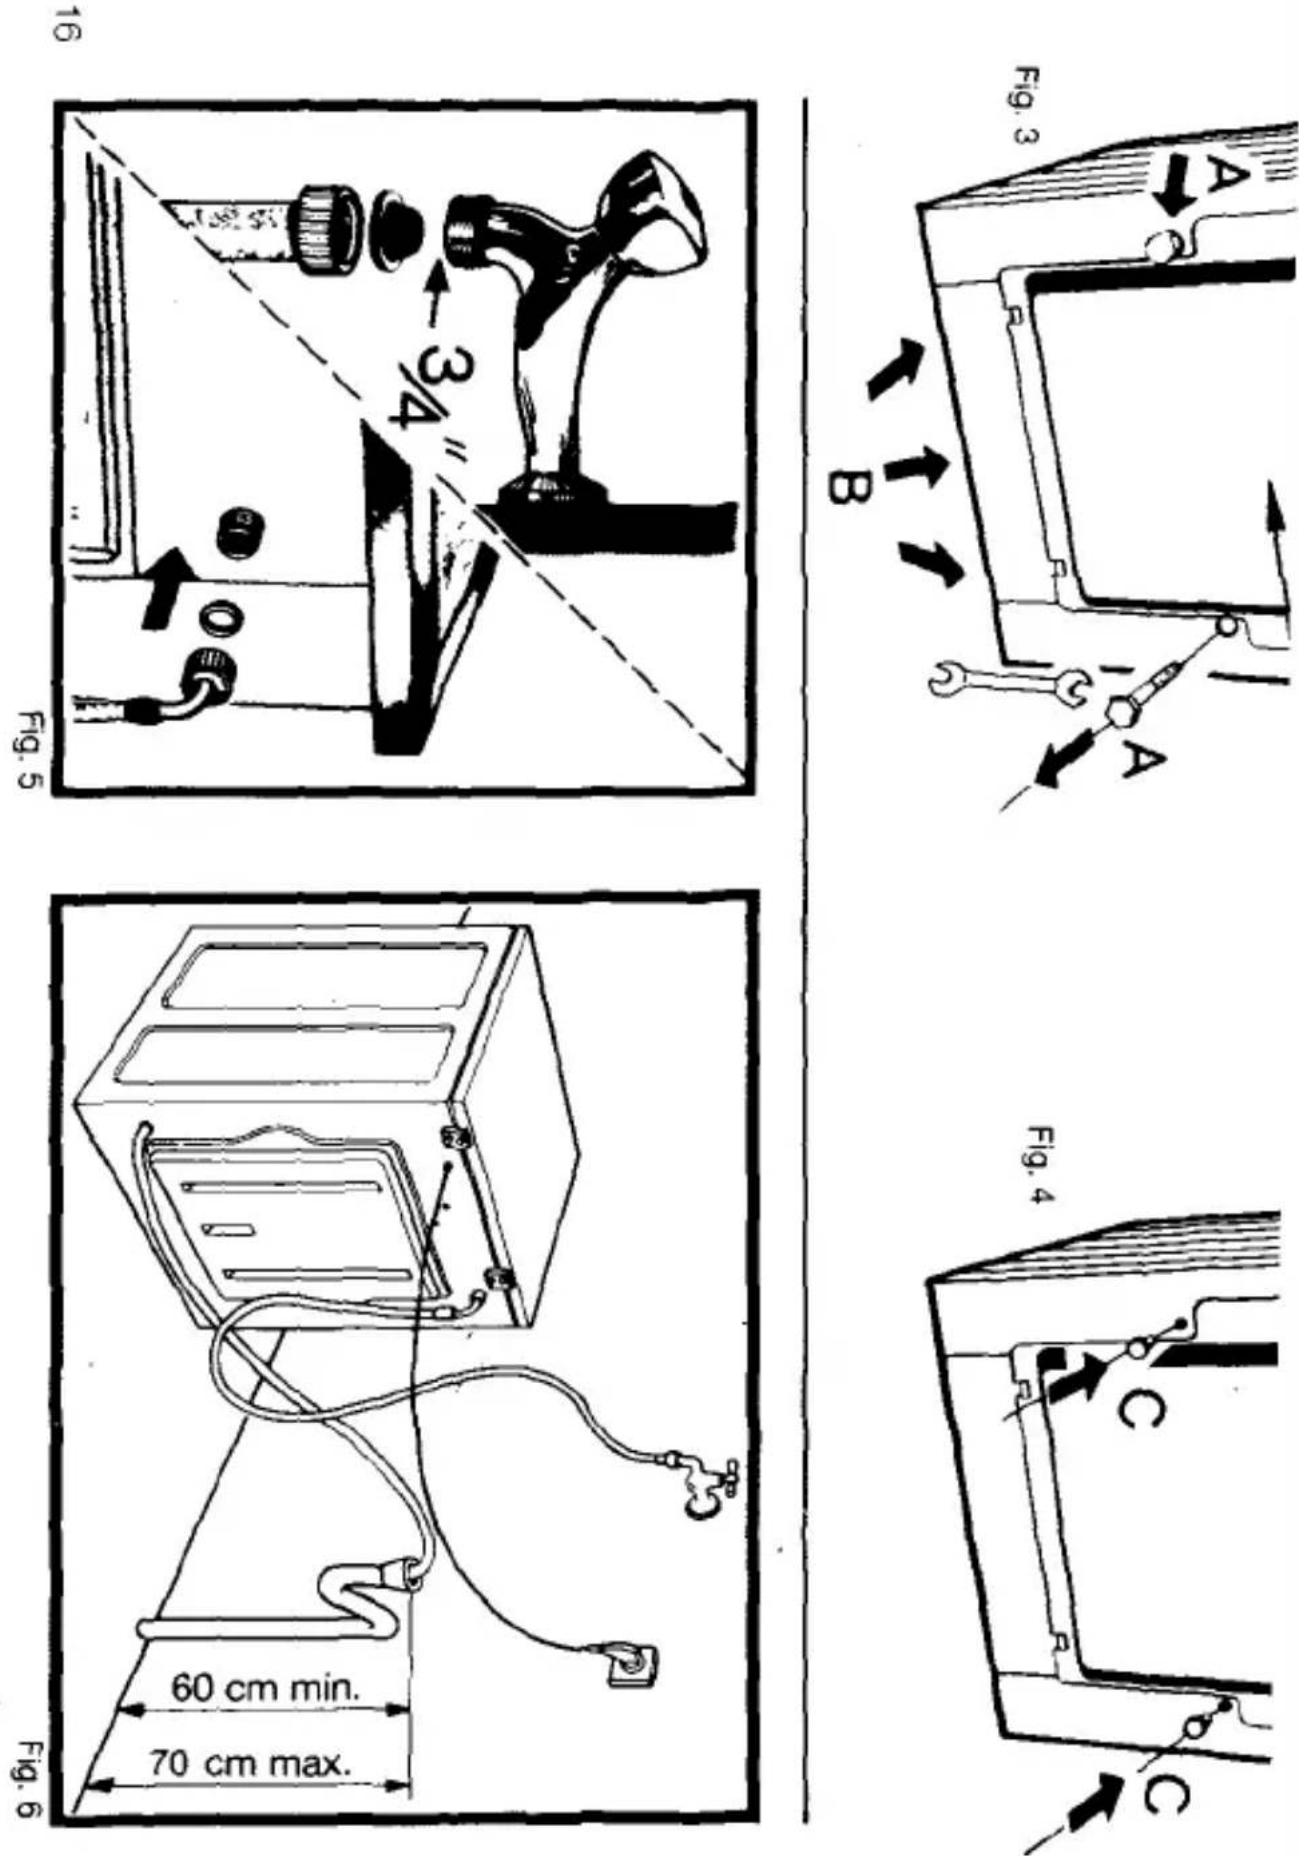
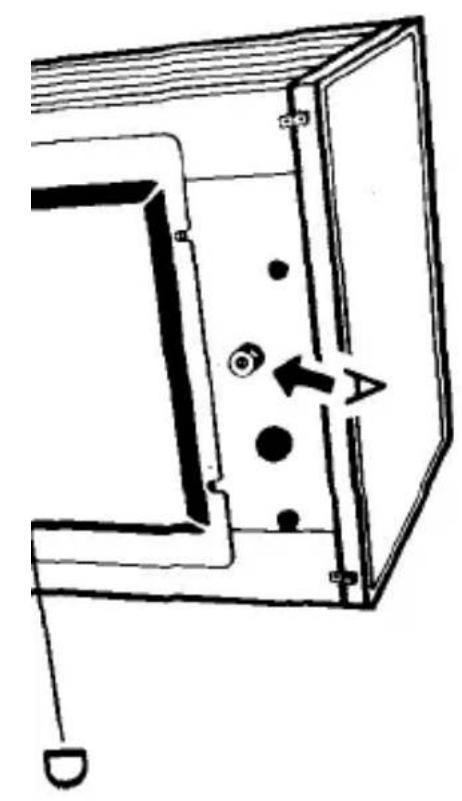
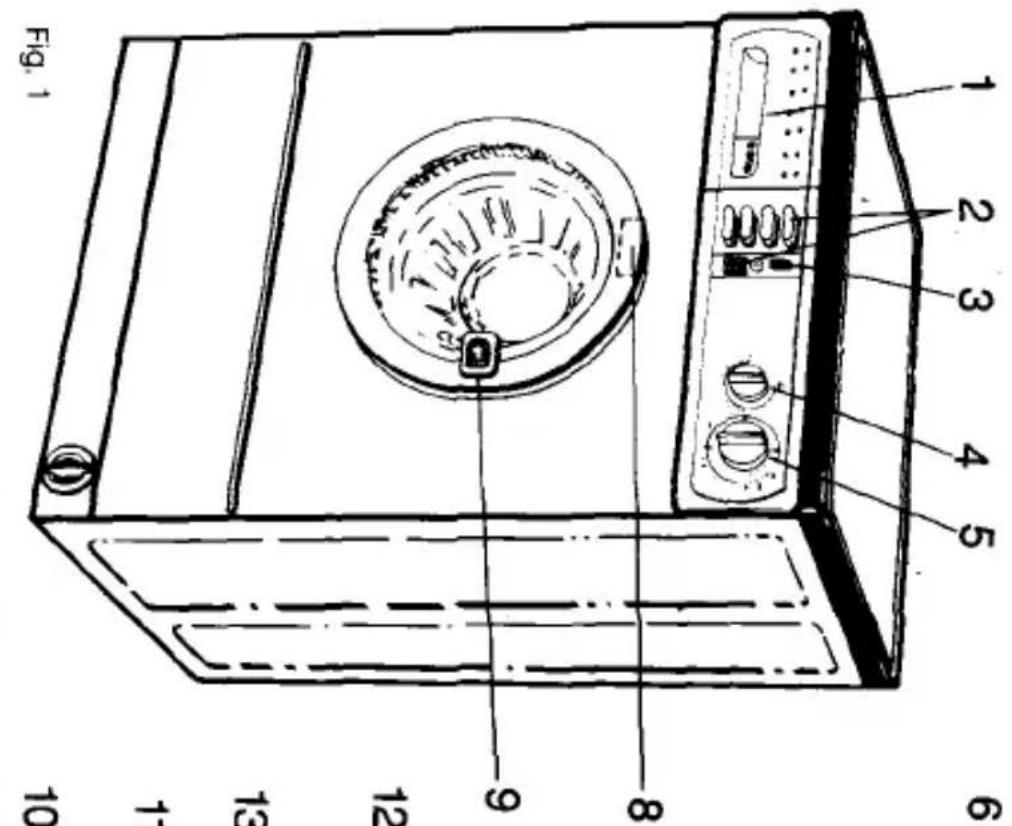
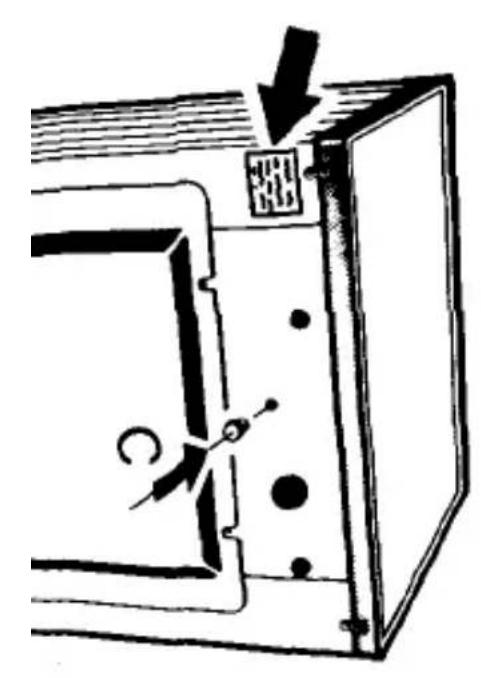
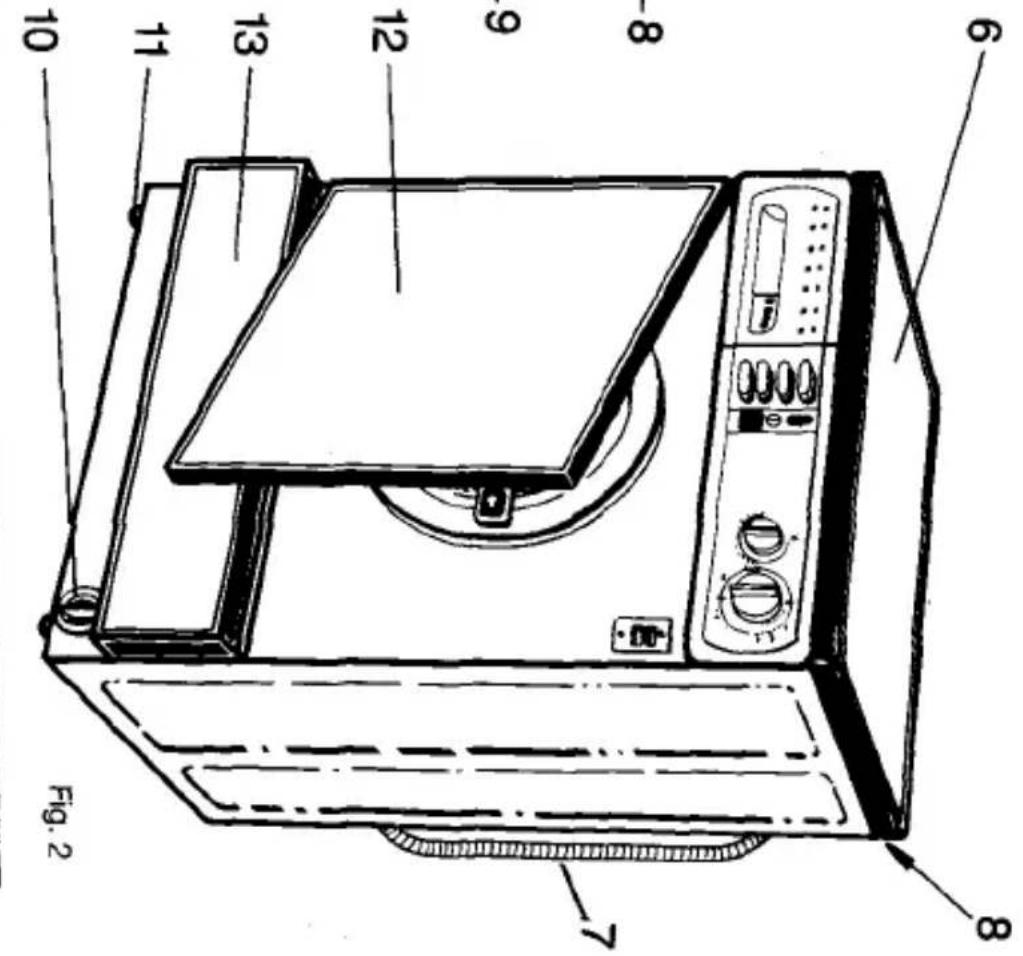
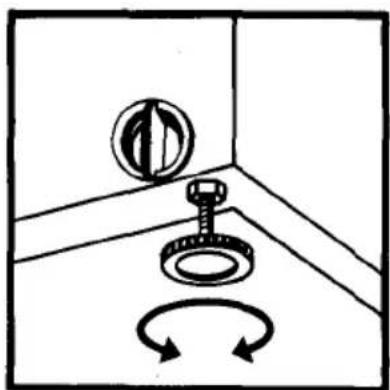
Fig. 7
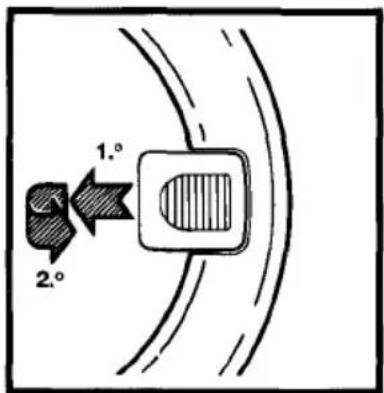
Fig. 8
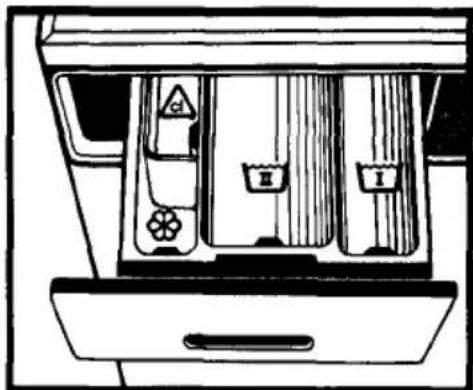
Fig.9
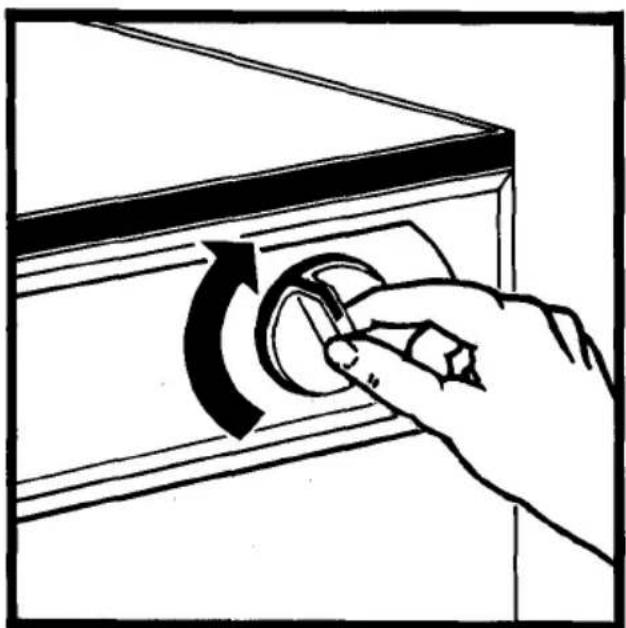
Fig. 10
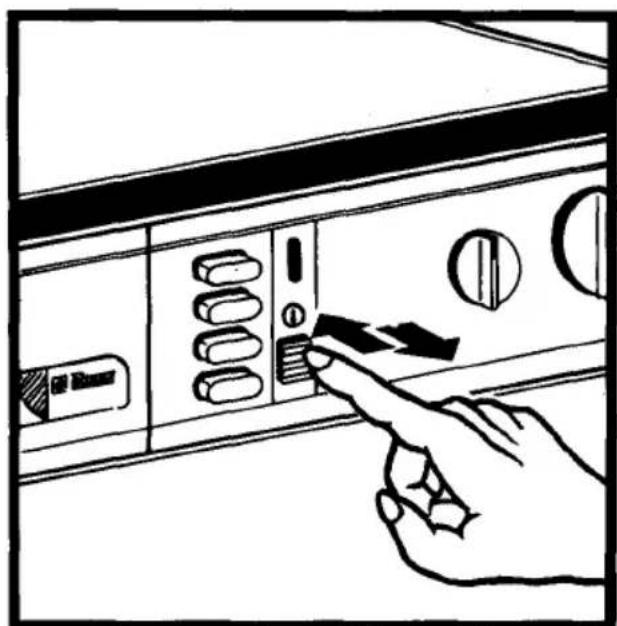
Fig. 11
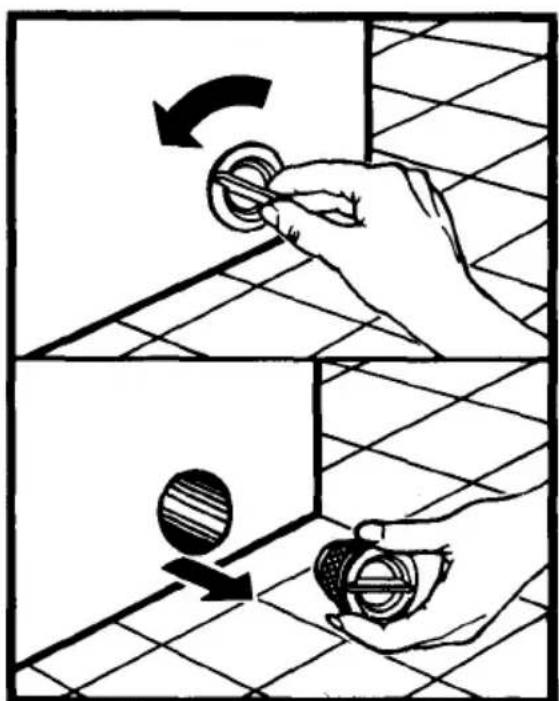
Fig. 12
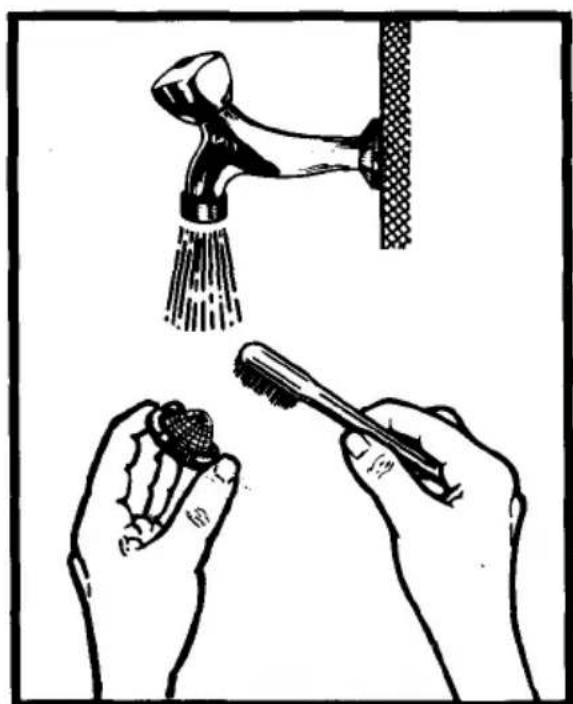
Fig. 13
Plaque programmes . List of programmes
ATTENTION: In programmes Wool and Synthetic, the machine stops with the full of water (WASH AND WEAR - ). In order to finish your programme, you may use the programme or turn one step in the timer knob according to the nature of your.
Condieones de Garantia

- INSTRUCCIONES DE INSTALLACION, USO Y CONSERVACION
- INSTRUCTIONS FOR THE INSTALLATION, USE AND MAINTENANCE
- DESCRIPTICN FUNCIONAL
- INSTALLATION
- WATER INSTALLATION
- ATTENTION: To prevent possible damages caused by leachages of water, close the tape when the program has finished and imperatively in case of prolonged absence.
- ELECTRICAL INSTALLATION
- LEVELING
- FUNCTIONING
- Remove from pockets, items which could have been forgotten.
- CONTROL ELEMENTS
- Program selector
- Temperature selector (s.m.)
- Button functions.
- STARTING THE MACHINE
- Clothes load
- Detergent dosage
- Program selection
- MAINTENANCE
- Cleaning the machine
- Drainage Pipe (Fig. 12).
- —Disconnect to washing machine.
- —Close the water tap.
- Detergent-additives dispenser
- Water tube entry
- SMALL FAILURE
- TECHNICAL CHARACTERISTICS
- DESCRIPCION FUNCIONALIDAD TECLAS-FUNCAO DAS TECLAS UTILISATION DES TOUCHES-BU TTON FUNCTIONS
- Tecla MARCHA-PARO
- Tecla DELICADO
- Tecla FRIO
- Tecla MEDIA CARGA
- Tecla FLOT-ANTIARRUGAS
- Condieones de Garantia
Brand : BALAY
Model : T8141
Category : Washing machine