CTAR 87432 IN - Cooker BAUKNECHT - Free user manual and instructions
Find the device manual for free CTAR 87432 IN BAUKNECHT in PDF.
User questions about CTAR 87432 IN BAUKNECHT
0 question about this device. Answer the ones you know or ask your own.
Ask a new question about this device
Download the instructions for your Cooker in PDF format for free! Find your manual CTAR 87432 IN - BAUKNECHT and take your electronic device back in hand. On this page are published all the documents necessary for the use of your device. CTAR 87432 IN by BAUKNECHT.
USER MANUAL CTAR 87432 IN BAUKNECHT
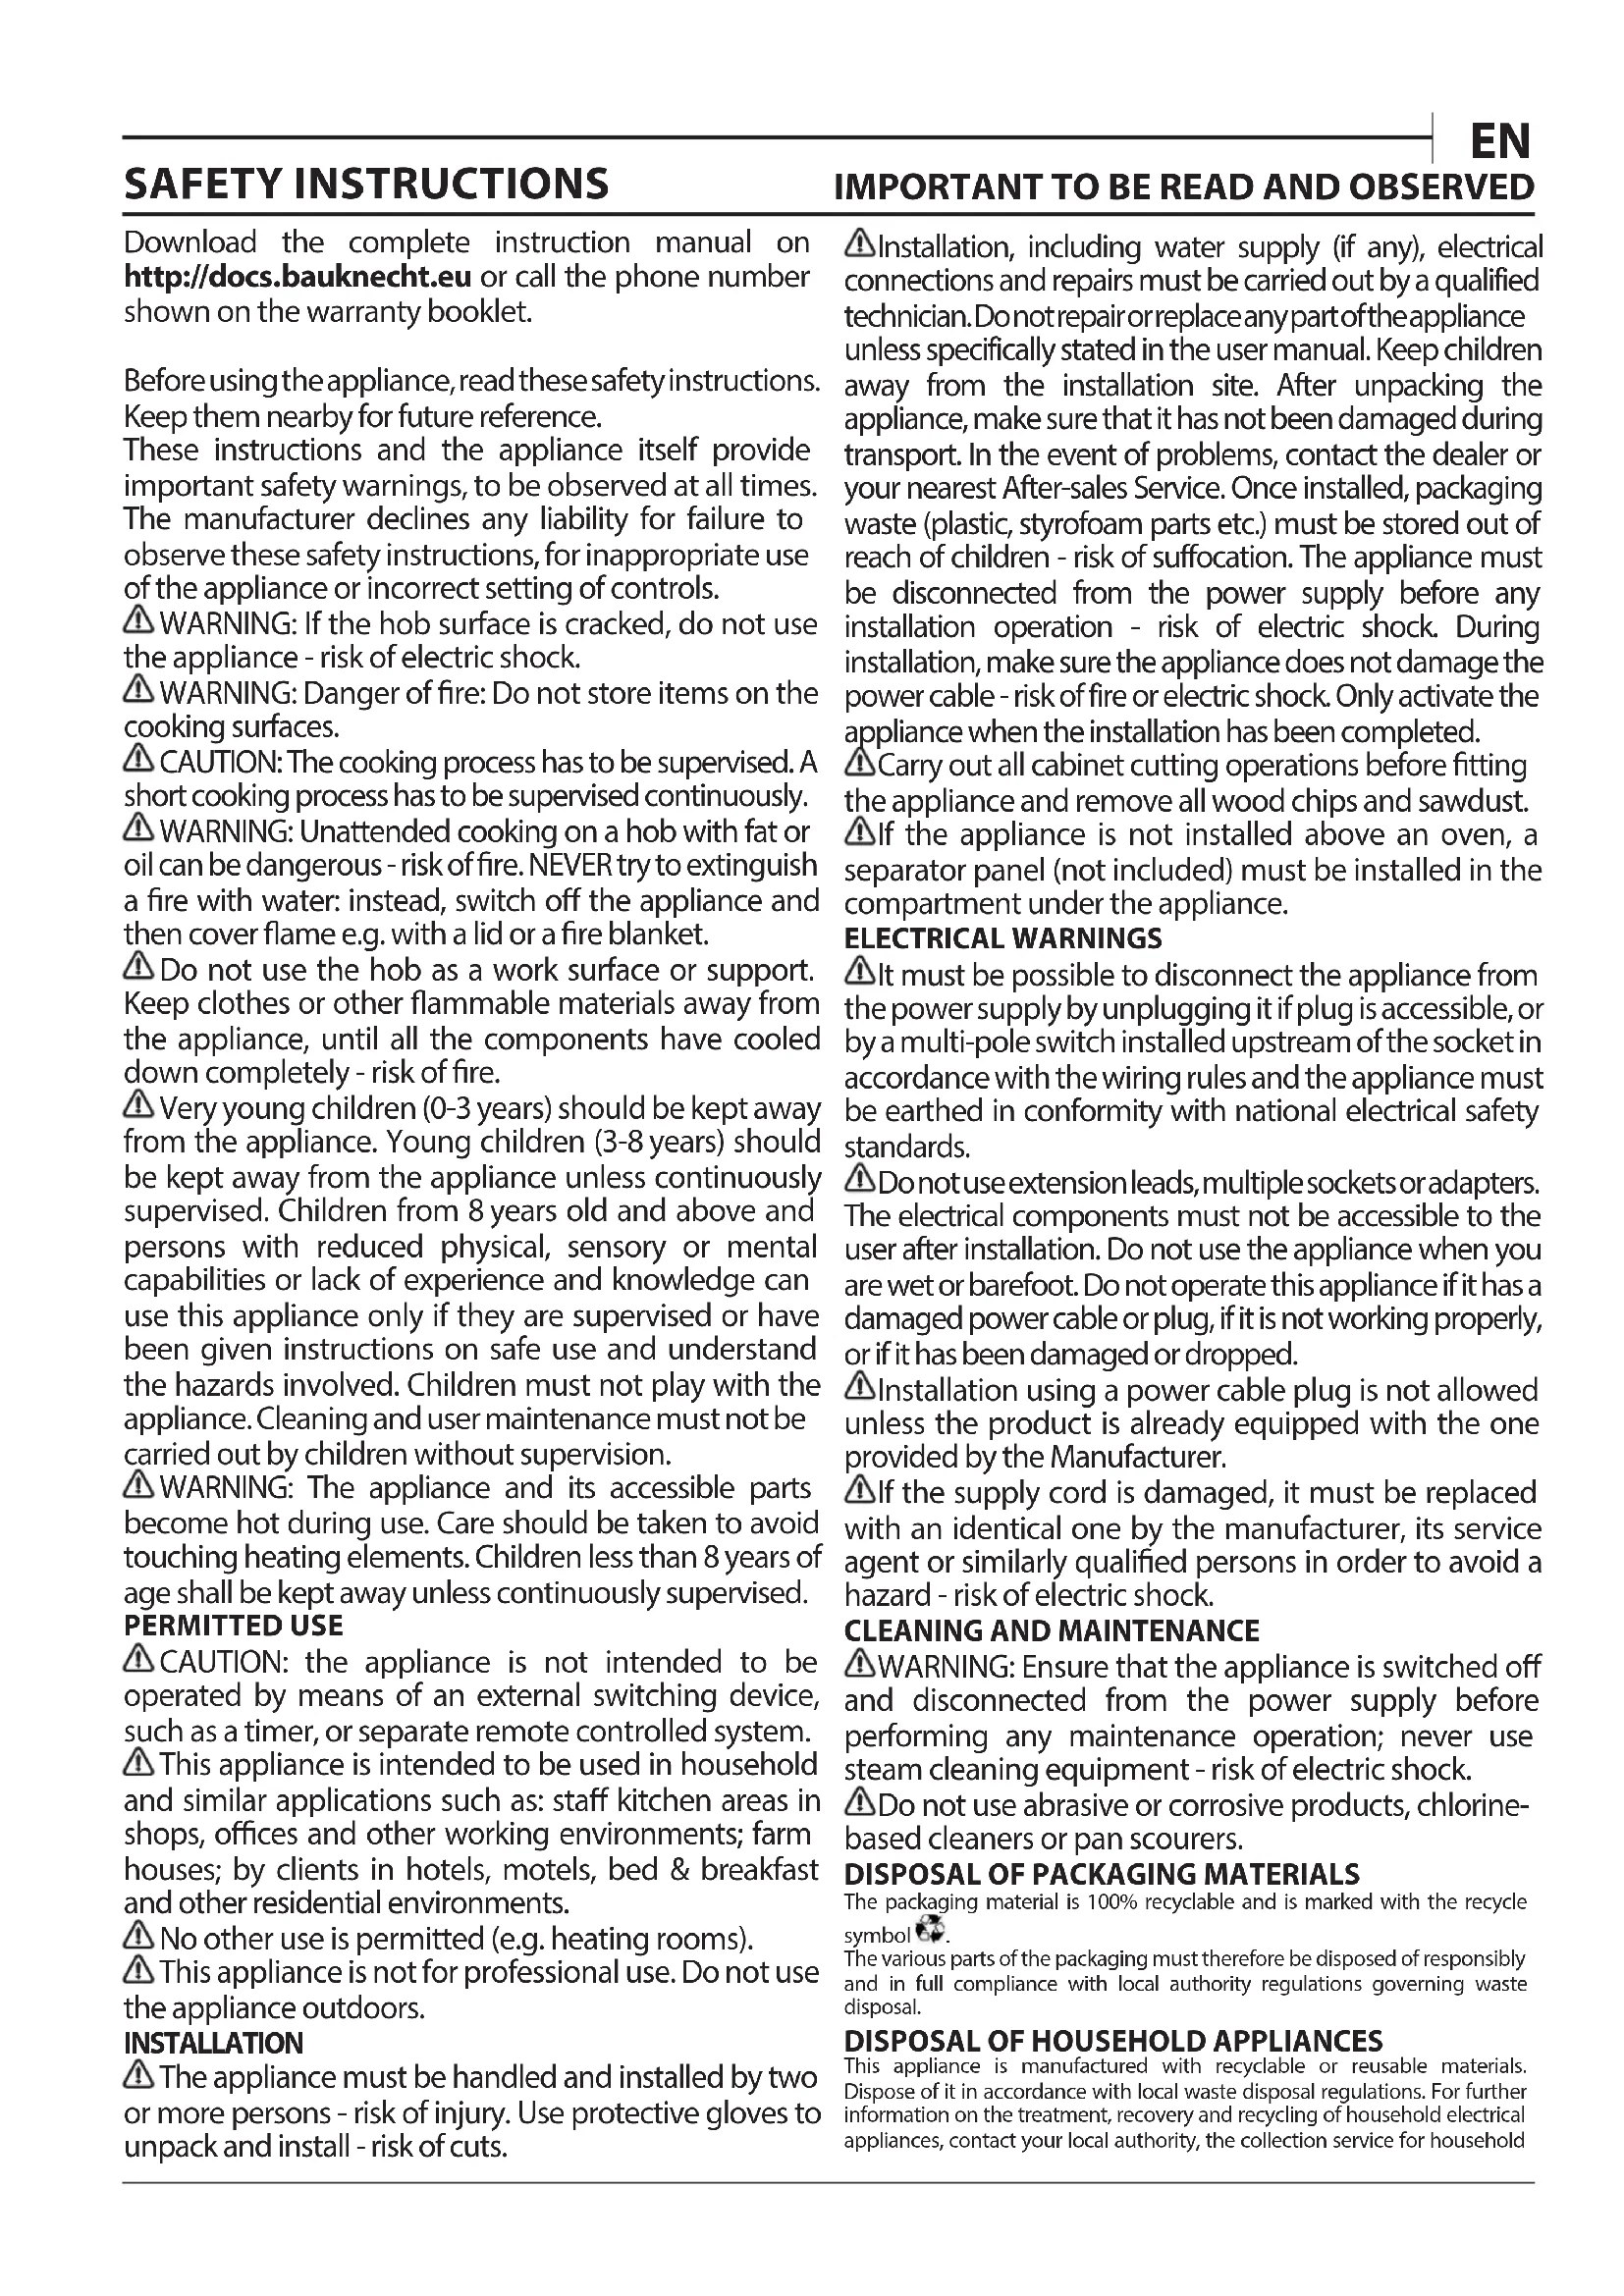
Before using the appliance, read these safety instructions. Keep them nearby for future reference.
These instructions and the appliance itself provide important safety warnings, to be observed at all times. The manufacturer declines any liability for failure to observe these safety instructions, for inappropriate use of the appliance or incorrect setting of controls.
WARNING: If the hob surface is cracked, do not use the appliance - risk of electric shock.
WARNING: Danger of fire: Do not store items on the cooking surfaces.
CAUTION: The cooking process has to be supervised. A short cooking process has to be supervised continuously.
WARNING: Unattended cooking on a hob with fat or oil can be dangerous - risk of fire. NEVER try to extinguish a fire with water: instead, switch off the appliance and then cover flame e.q. with a lid or a fire blanket.
Do not use the hob as a work surface or support. Keep clothes or other flammable materials away from the appliance, until all the components have cooled down completely - risk of fire.
Very young children (0-3 years) should be kept away from the appliance. Young children (3-8 years) should be kept away from the appliance unless continuously supervised. Children from 8 years old and above and persons with reduced physical, sensory or mental capabilities or lack of experience and knowledge can use this appliance only if they are supervised or have been given instructions on safe use and understand the hazards involved. Children must not play with the appliance. Cleaning and user maintenance must not be carried out by children without supervision.
WARNING: The appliance and its accessible parts become hot during use. Care should be taken to avoid touching heating elements. Children less than 8 years of age shall be kept away unless continuously supervised. PERMITTED USE
CAUTION: the appliance is not intended to be operated by means of an external switching device, such as a timer, or separate remote controlled system.
This appliance is intended to be used in household and similar applications such as: staff kitchen areas in shops, offices and other working environments; farm houses; by clients in hotels, motels, bed & breakfast and other residential environments.
No other use is permitted (e.g. heating rooms).
This appliance is not for professional use. Do not use the appliance outdoors.
INSTALLATION
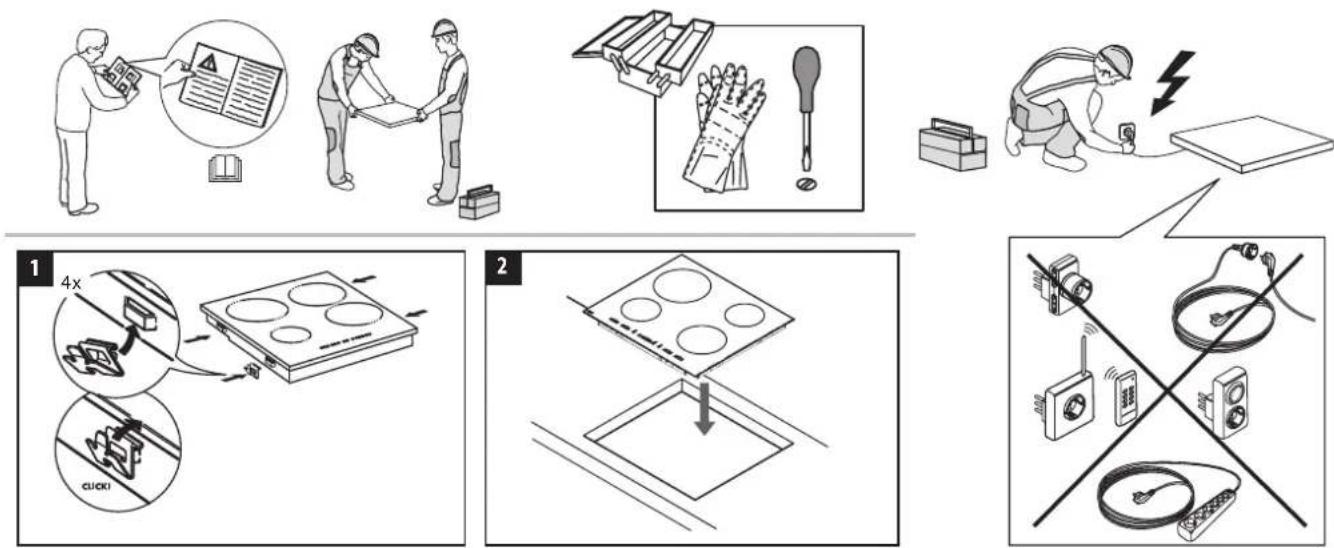
The appliance must be handled and installed by two or more persons - risk of injury. Use protective gloves to unpack and install - risk of cuts.
Installation, including water supply (if any), electrical connections and repairs must be carried out by a qualified technician. Do not repair or replace any part of the appliance unless specifically stated in the user manual. Keep children away from the installation site. After unpacking the appliance, make sure that it has not been damaged during transport. In the event of problems, contact the dealer or your nearest After-sales Service. Once installed, packaging waste (plastic, styrofoam parts etc.) must be stored out of reach of children - risk of suffocation. The appliance must be disconnected from the power supply before any installation operation - risk of electric shock. During installation, make sure the appliance does not damage the power cable - risk of fire or electric shock. Only activate the appliance when the installation has been completed.
Carry out all cabinet cutting operations before fitting the appliance and remove all wood chips and sawdust.
If the appliance is not installed above an oven, a separator panel (not included) must be installed in the compartment under the appliance.
ELECTRICALWARNINGS
It must be possible to disconnect the appliance from the power supply by unplugging it if plug is accessible, or by a multi-pole switch installed upstream of the socket in accordance with the wiring rules and the appliance must be earthed in conformity with national electrical safety standards.
Do not use extension leads, multiple sockets or adapters. The electrical components must not be accessible to the user after installation. Do not use the appliance when you are wet or barefoot. Do not operate this appliance if it has a damaged power cable or plug, if it is not working properly, or if it has been damaged or dropped.
Installation using a power cable plug is not allowed unless the product is already equipped with the one provided by the Manufacturer.
If the supply cord is damaged, it must be replaced with an identical one by the manufacturer, its service agent or similarly qualified persons in order to avoid a hazard - risk of electric shock.
CLEANING AND MAINTENANCE
WARNING: Ensure that the appliance is switched off and disconnected from the power supply before performing any maintenance operation; never use steam cleaning equipment - risk of electric shock.
Do not use abrasive or corrosive products, chlorine-based cleaners or pan scourers.
DISPOSAL OF PACKAGING MATERIALS
The packaging material is 100% recyclable and is marked with the recycle symbol.
The various parts of the packaging must therefore be disposed of responsibly and in full compliance with local authority regulations governing waste disposal.
DISPOSAL OF HOUSEHOLD APPLIANCES
This appliance is manufactured with recyclable or reusable materials. Dispos of it in accordance with local waste disposal regulations. For further information on the treatment, recovery and recycling of household electrical appliances, contact your local authority, the collection service for household
waste or the store where you purchased the appliance. This appliance is marked in compliance with European Directive 2012/19/EU, Waste Electrical and Electronic Equipment (WEEE) and with the Waste Electrical and Electronic Equipment regulations 2013 (as amended).
By ensuring this product is disposed of correctly, you will help prevent negative consequences for the environment and human health.
The symbol 品 on the product or on the accompanying documentation indicates that it should not be treated as domestic waste but must be taken to an appropriate collection center for the recycling of electrical and electronic equipment.
ENERGY SAVING TIPS
Make the most of your hot plate's residual heat by switching it off a few minutes before you finish cooking.
The base of your pot or pan should cover the hot plate completely; a container that is smaller than the hot plate will cause energy to be wasted.
Cover your pots and pans with tight-fitting lids while cooking and use as little water as possible. Cooking with the lid off will greatly increase energy consumption.
Use only flat-bottomed pots and pans.
DECLARATION OF CONFORMITY
This appliance meets Ecodesign requirements of European Regulation 66/2014 and The Ecodesign for Energy-Related Products and Energy Information (Amendment) (EU Exit) Regulations 2019 in compliance with the European standard EN 60350-2.
INSTALLATION
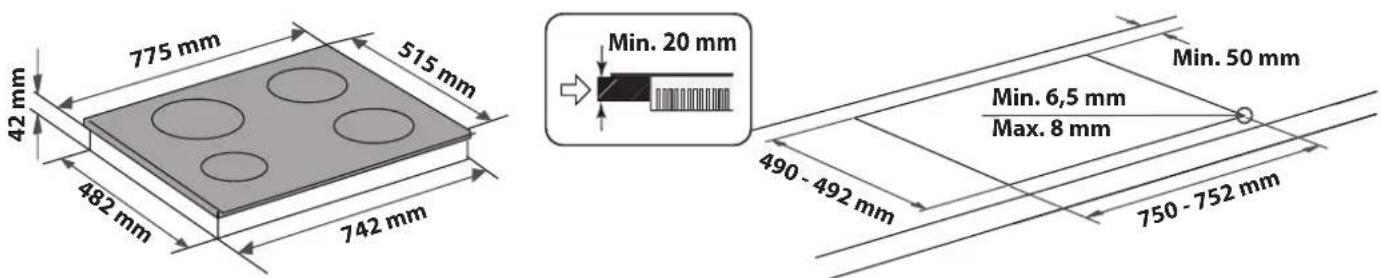
- The cooktop must be set into a worktop at least 20mm deep.
- There must be nothing between the cooktop and the oven (cross rails, brackets, etc.).
- Make sure the power cord is long enough to allow convenient installation.
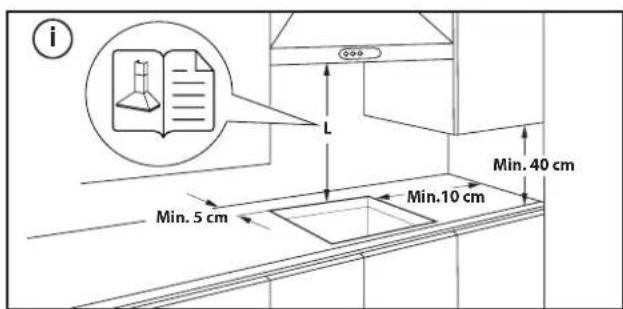
- The distance between the lower face of the glass ceramic hob and the cupboard or separating panel must be at least 20~mm .
- For built-in dimensions and installation see the picture in this paragraph.
A minimum distance must be maintained between the hob and the hood above it. Please refer to the user manual of the hood for more informations.
Apply the supplied gasket to the cooktop (unless it has already been fitted), after having cleaned its surface. - Do not install the cooktop near a dishwasher or washing machine, so that the electronic circuits do not come into contact with steam or moisture, which could damage them.
If an oven (from our range of ovens) is installed beneath the cooktop, make sure that it is equipped with a cooling system. If the temperature of the electronic circuits exceeds the maximum permitted temperature, the cooktop will switch off automatically; in this case, wait for a few minutes until the internal temperature of the electronic circuits reaches a tolerable level, at which point it will be possible to switch the hob on again.
PLACING THE HOB
After the electrical connection (see the chapter "Electrical connection"). Position each fixing clips on the dedicated slots on the lateral sides of the hob as shown in the picture. Then push the hob inside the cut out and check that the glass is flat and parallel to the worktop. The fixing clips are designed for every type of worktop material (wood, marble, etc).
DIMENSIONS AND DISTANCES TO BE MAINTAINED
REMOVING THE HOB:
To remove the hob, first, disconnect it from the electric supply. It is strongly recommended to free the underneath part from the oven, drawer, separator, or other. It allows the technician to access the lower part of the hob to unfasten the four clips with a screwdriver, lift the hob and remove it, avoiding any worktop damage.
Electrical connection must be made before connecting the appliance to the electricity supply.
The power cord is not included in the package - remember to prepare your own power cord.
Installation must be carried out by qualified personnel who know the current safety and installation regulations. Specifically, installation must be carried out in compliance with the regulations of the local electricity supply company.
Make sure the voltage specified on the data plate located on the bottom of the appliance is the same as that of the home.
Regulations require that the appliance be earthed: use conductors (including the earth conductor) of the appropriate size only.
CONNECTION TO THE TERMINAL BLOCK
For the electrical connection, use an H05RR-F or H05V2V2-F cable as specified in the table below.
| SUPPLY VOLTAGE | CONDUCTORS AMOUNT x SIZE |
| 220-240V ~ + 1/2 | 3 x 4 mm² |
| 230-240V ~ + 1/2 | 3 x 4 mm² (Australia only) |
| 220-240V 3~+ 1/2 | 4 x 1,5 mm² |
| 380-415V 3N~+ 1/2 | 5 x 1,5 mm² |
| 380-425V 2N~+ 1/2 | 4 x 1,5 mm² |
The appliance must be connected to the electricity supply by means of an all-pole disconnect switch with minimum contact gap of 3 mm.
ATTENlON: the power supply cable must be long enough to allow the cooktop to be removed from the worktop and must be positioned so as to avoid damage or overheating caused by contact with the base.
NOTE: the yellow/green earth wire must be connected to the terminal with the symbol 12 and must be longer than the other wires.
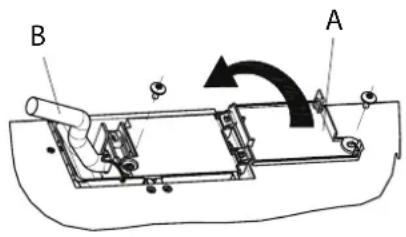
- Remove approx. 70 mm of the cable sheath from the power supply cable (B).
- Strip approx. 10mm of sheath from the wires. Then insert the power supply cable into the cable clamp and connect the wires to the terminal block as indicated in the connection diagram placed close to the terminal block itself.
- Secure the power supply cable (B) by means of the cable clamp.
- Close the terminal board with the cover (A) securing it with the screw provided.
After the electrical connection, fit the hob from the top and hook it to the support springs, according to the illustration.

THANK YOU FOR BUYING A WHIRLPOOL PRODUCT In order to receive a more complete assistance, please register your product on www.bauknecht.eu/register.

Before using the appliance carefully read the Safety Instruction.
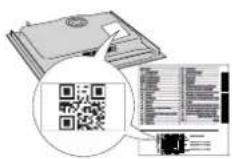
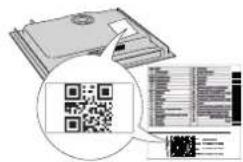
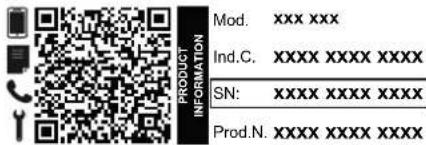
PLEASE SCAN THE QR CODE ON YOUR APPLIANCE IN ORDER TO REACH MORE INFORMATION
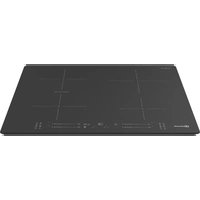
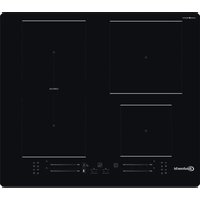
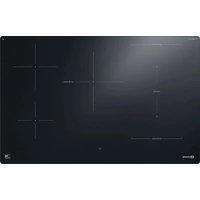
PRODUCT DESCRIPTION
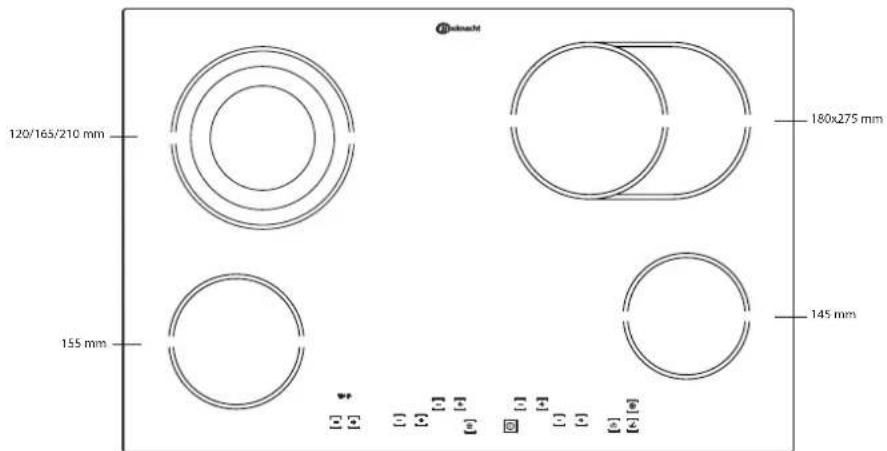
CONTROL PANEL

FIRST TIME USE
After connecting the hob to the electrical power supply, the control panel is locked. To unlock the control panel, touch the controls for 2 seconds.
The control panel lock indicator switches off and the hob can be used. Read the "Control panel lock" paragraph for more details.
DAILYUSE
SWITCHING THE HOB ON/OFF
To switch the hob on, touch the control until the cooking zone displays light up. To switch off, touch the same control until the displays switch off. All the cooking zones are deactivated.
If within 30 seconds of switching on, no function is selected, the hob switches off automatically.
SWITCHING ON AND ADJUSTING COOKING ZONES
Power indicator display
Selected cooking zone indication
(the dot blinks when there is a Timer active on that zone)
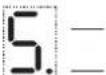
Place the pot on the cooking zone, switching the hob on, activate the required cooking zone by touching the corresponding "−" or "+" controls: "5" will appear on the display. With "−" and "+" controls it is possible to select the required power level, from min. 0 to max. 9.
To switch off the cooking zone, touch the control "--" and "+" simultaneously and keep pressing until cooking zone is off or select the level "0" with the control "-".
The cooking zone switches off and, if still hot, the letter "H" appears on the zone display.

CONTROL PANEL LOCK
This function locks the controls to prevent accidental activation of the hob.
To activate the control panel lock, touch 控 control; an acoustic signal sounds and a luminous indicator appears on the display. The control panel is locked except for the switching off function.
To deactivate the control panel lock, repeat the activation procedure.
The presence of water, liquid spilled from pots or any objects resting on the controls can accidentally activate or deactivate the control panel lock.
TIMER
The timer can be used to set the cooking time for a maximum of 99 minutes (1 hour and 39 minutes) for all the cooking zones.
Select the cooking zone to be used, touch the timer "--" or "+" controls; an acoustic signal indicates the function activation. The display shows "00". The Timer value can be decreased and increased by keeping the finger on the
controls ^ + ^ or - - " . After the Timer value selection, the display continue to blink for 10 seconds before the countdown starts.
When the set time has elapsed, an acoustic signal sounds and the cooking zone switches off automatically.
To deactivate the timer, select the cooking zone, touch the Timer controls " - and "+" simultaneously and keep pressing until the function is deactivated.
IMPORTANT:
- The dot blinking next to the power level display shows that the Timer function is active on that zone.
The Timer is available for all the zones but one at a time.
SPECIAL FUNCTION
| BUTTON FUNCTION NAME | VISUAL INDICATION | DESCRIPTION |
| Dual/Triple zone | - - S. + | The control activates the double or triple zone(if available). After positioning the pot/accessory on the chosen cooking zone, switch on the hob and select the cooking zone. Select the power level and touch the control one time to activate the dual zone or two times to activate the triple zone. To deactivate the function, simply touch the same button. LEDs above the controls are switched on only when the function is active for the selected zone. |
| Boiling | Display shows: | This function sets the zone maximum power (for example to quickly bring water to the boil). After positioning the pot/accessory on the chosen cooking zone, switch on the hob, select the cooking zone and touch the boiling controls. After 6 minutes of usage of this function, the appliance automatically sets the zone to level 9. To deactivate the function simply touch the same control or lower the power level with “-”. It is possible to use this function in combination with dual/triple zone function. |
| Melting | Display shows: | This function sets a power level that is suitable for slowly melting delicate products without compromising their sensory quality (chocolate, butter, etc.). After positioning the pot/accessory on the chosen cooking zone, switch on the hob, select the cooking zone and touch the melting control. To deactivate the function, simply press the same button or touch “-” and “+” simultaneously to switch off the zone. It is possible to use this function in combination with dual/triple zone function. |
The hob is also equipped with the "auto shut off" function that switch off the cooking zone if no power level modification is done after a specific time frame depending on the power setting itself. In the table there is the time duration of each power level.
| POWER LEVEL AUTO SHUT OFF TIME | |
| 0 30 seconds | |
| 1 10 hours | |
| 2 5 hours | |
| 3 5 hours | |
| 4 4 hours | |
| 5 3 hours | |
| 6 2 hours | |
| 7 2 hours | |
| 8 2 hours | |
| 9 1 hour | |
RESIDUAL HEAT INDICATOR
If the display shows "H", the cooking zone is still hot. If the residual heat indicator of a given cooking zone is lit, that zone can be used, for example, to keep a dish warm or to melt butter.
When the cooking zone cools down, the display goes off.
IMPORTANT: To avoid a permanent damage the hob:
- do not use pots with bottoms that are not flat;
- do not use metal pots with enamelled bottom;
- do not place hot pots/pans over the control panel.
COOKING TABLE
| POWER LEVEL TYPE OF | COOKING | LEVEL USE (indicating cooking experience and habits) | |
| Maximum power | Boiling [P on display] | Boiling | Ideal for rapidly increasing the temperature of food to fast boiling in the case of water or rapidly heating cooking liquids. |
| 9-8 Searing | Ideal for browning, starting to cook, frying | frying frozen products, fast boiling. | |
| High power | 8-7 Browning | maintain boiling – grilling | Ideal for browning, maintaining a high boil, cooking and grilling (short duration, 5-10 minutes). |
| 7-6 | Frying – cooking – grilling | Ideal for maintaining a low boil, cooking and grilling (medium duration, 10-20 minutes), preheating and frying. | |
| Medium power | 6-5 | Gentle frying | Ideal for frying eggs, and omelets. |
| 5-4 | Cooking – simmering – stewing | Ideal for prolonged cooking (rice, sauces, roasts, fish) with liquids (e.g. water, wine, broth, milk), creaming pasta. | |
| 4-3 | Thickening – creaming pasta | ||
| Low power | 2-1 | Defrosting – keeping food hot – creaming risottos | Ideal for defrosting small products and keeping just-cooked food hot (e.g. sauces, soups, minestrone). |
| Ideal for keeping just-cooked food hot, creaming risottos and keeping serving dishes warm. | |||
| Minimum power | Melting [R on display] | Melting Ideal for gently | melting chocolate or butter. |
| Zero | 0 | - | Hob in stand-by or off mode (possible end of cooking residual heat, indicated by an “H”). |
CLEANING AND MAINTENANCE
Disconnect the appliance from the power supply.
- Do not use steam cleaning equipment.
- Do not use abrasive sponges or scouring pads as they may damage the glass.
- After each use, clean the hob (when it is cool) to remove any deposits and stains from food residue.
Sugar or foods with high sugar content can damage the hob and must be immediately removed.
Salt, sugar and sand could scratch the glass surface.
- Use a soft cloth, absorbent kitchen paper or a specific hob cleaner (follow the Manufacturer's instructions).
- Spills of liquid in the cooking zones can cause the pots to move or vibrate.
After cleaning the hob, dry thoroughly.
TROUBLESHOOTING
If the hob will not operate correctly, before calling the After-Sales Service, refer to the Troubleshooting Guide to determine the problem.
- Read and follow the instructions given in the section "Daily use".
-
Consult the table below for instructions.
-
Check that the electricity supply has not been shut off.
- Dry the hob thoroughly after cleaning it.
If after the above checks the fault still occurs, get in touch with the nearest After Sales Service.
| FAILURE DESCRIPTION POSSIBLE CA | USES MEASURE | |
| The hob does not switch on. | Missing power supply. Check that power supply is on. | |
| Wrong connection of the main cable. | Call a qualified technician to check the cable connection. | |
| Hob failure. Call after sales service. | ||
| The hob switch on but "F" alternately to one of "0, A, C, E, t, H, J, U, 3, 4, 5, 6, r" symbol is shown on the displays. | Hob failure. | Restart the hob (disconnect and reconnect to the power supply), if the problem persists call after sales service. |
| Heater does not heat up but the display is on. Hob failure. Call after sales service. | ||
| The hob plays 3 acoustic signals and then shut off. | One or more buttons are continuously pressed for more than 3 seconds. | Remove any object or liquid that is placed over the control panel. |
| Not possible to switch the hob off. | Hob failure. | Disconnect the hob from power supply and call After sales service. |
| The heater is not continuously on, it switches on and off cyclically even if on the display the power lever does not change. | Normal functioning of the hob. | The on/off cycle allows the power regulation of the heater and is completely normal. In some cases a thermal protection could switch off the heater for some time to avoid the glass damage. Examples of such cases are: cooking long time at high power level, usage of pots smaller than the heating element, pot bottoms not flat. |
| The hob switch on but "F" alternately to one of "c, t, E" is shown on the displays. | Control panel overheating or damaged temperature sensor. | Wait until control panel temperature cool down. The hob will automatically switch on when the temperature drops below operating limit. If not, call after sales service. |
| The hob switching off automatically. Liquid presence on the displays. | HMI. Dry the HMI and turn the hob back on. | |
AFTER-SALES SERVICE
To receive a more complete assistance, please register your product on www.bauknecht.eu/register.
BEFORE CALLING THE AFTER-SALES SERVICE:
- See if you can solve the problem by yourself with the help of the TROUBLESHOOTING suggestions.
- Switch the appliance off and back on again to see if the fault persists.
IF AFTER THE ABOVE CHECKS THE FAULT STILL OCCURS, GET IN TOUCH WITH THE NEAREST AFTER-SALES SERVICE.
To receive assistance, call the number shown on the warranty booklet or follow the website's instructions on www.bauknecht.eu.
When contacting our Client After sales service, always specify:
- a brief description of the fault;
- the type and exact model of the appliance;
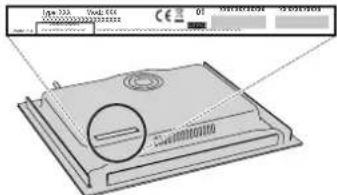
- the serial number (number after the word SN on the rating plate located under the appliance). The serial number is also indicated in the documentation;
- your full address;
- your telephone number.
If any repairs are required, please contact an authorized after-sales service (to guarantee that original spare parts will be used and repairs carried out correctly).
Policies, standard documentation and additional product information can be found by:
- Using QR code in your appliance;
Visiting our website docs.bauknecht.eu; - Alternatively, contact our After-sales Service (See phone number in the warranty booklet). When contacting our After-sales Service, please state the codes provided on your product's identification plate.