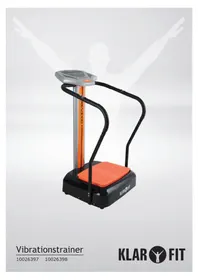
Goodvibe 10026397 - Vibratory plate Klarfit - Free user manual and instructions
Find the device manual for free Goodvibe 10026397 Klarfit in PDF.
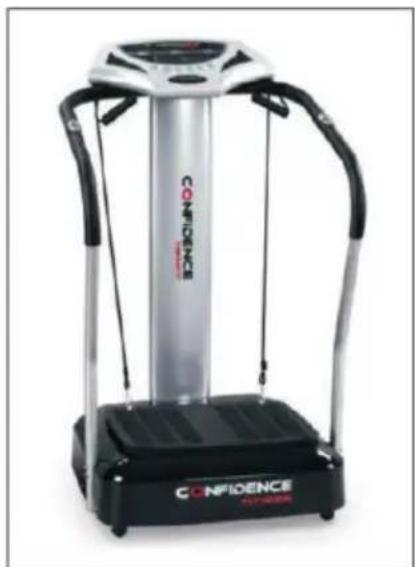
| Product Type | Vibration Plate |
| Brand | Klarfit |
| Model | Goodvibe 10026397 |
| Power Supply | 220-240 V ~ 50 Hz |
| Maximum User Weight | 120 kg |
| Training Programs | Manual (HL), 3 automatic (P1-P3), normal mode (88), fat test |
| Display | Screen with duration, speed, program selection |
| Duration per Program | 10 minutes |
| Speed Settings | Increase/Decrease speed buttons (disabled in automatic mode) |
| Certification | EN957, household use |
| Intended Use | Personal training, non-therapeutic |
| Maintenance | Check screws and fastenings before each use, clean with a damp cloth |
| Safety | Stop immediately in case of pain, dizziness, or unusual noise |
| Operating Conditions | Dry and level surface, appropriate clothing |
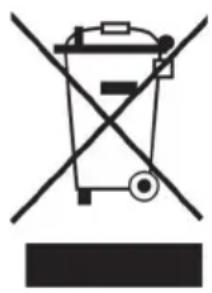
| Recycling | WEEE compliant, do not dispose with household waste |
Frequently Asked Questions - Goodvibe 10026397 Klarfit
User questions about Goodvibe 10026397 Klarfit
0 question about this device. Answer the ones you know or ask your own.
Ask a new question about this device
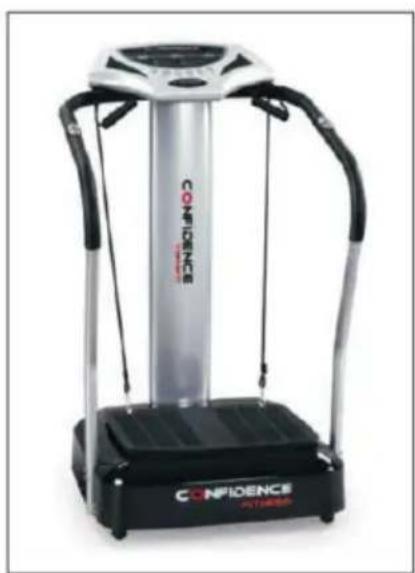
Download the instructions for your Vibratory plate in PDF format for free! Find your manual Goodvibe 10026397 - Klarfit and take your electronic device back in hand. On this page are published all the documents necessary for the use of your device. Goodvibe 10026397 by Klarfit.
USER MANUAL Goodvibe 10026397 Klarfit
natural_image
Exterior view of a KLAR FIT exercise stand with orange base and black handle (no text or symbols on the device itself)natural_image
Close-up of four metallic threaded fasteners (no text or markings visible)natural_image
Four identical circular ring shapes arranged in a 2x2 grid (no text or symbols)natural_image
Six identical black screw fasteners arranged in two rows (no text or symbols visible)natural_image
Six black rubber washers arranged in a grid on a light background (no text or symbols visible)natural_image
Close-up of a metal nail on a plain surface (no text or symbols visible)natural_image
Four identical metallic screw fasteners arranged in a 2x2 grid (no text or symbols visible)natural_image
Metal L-shaped metal bracket with no visible text or markingsnatural_image
Exterior view of a modern office building (no signage)P1

natural_image
Person holding a spray can with a tool, no visible text or symbolsP2

natural_image
Close-up of hands holding a tool near a surface, no visible text or symbolsP3

natural_image
Close-up of a metallic tool interacting with a surface, showing a droplet on the surface (no text or symbols visible)P4
natural_image
Close-up of a hand using a sewing machine to adjust or install a component (no visible text or symbols)P 5
natural_image
Close-up of a hand holding a white object with a pen, next to a car (no visible text or symbols)P6
natural_image
Close-up of a hand pouring liquid into a container labeled 'MAX' (no other text or symbols visible)P 7
natural_image
Close-up of a hand holding a pen near a curved object (no visible text or symbols)P8
natural_image
Close-up of hands using a tool to tie wires on a cylindrical object (no visible text or symbols)P 9
natural_image
Close-up of hands installing or adjusting a pipe with wires (no visible text or symbols)P10
natural_image
Close-up of hands using a tool to adjust or install a cylindrical object (no visible text or symbols)P 11
natural_image
Close-up of a white cylindrical object resting on a metallic base, possibly a mechanical or electronic component (no visible text or symbols)P 12
natural_image
Close-up of hands installing or adjusting a component on a curved surface (no visible text or symbols)P 13

natural_image
Exterior view of a self-service exercise device with black base and silver top (no visible text or symbols)Trainingsvorschläge
natural_image
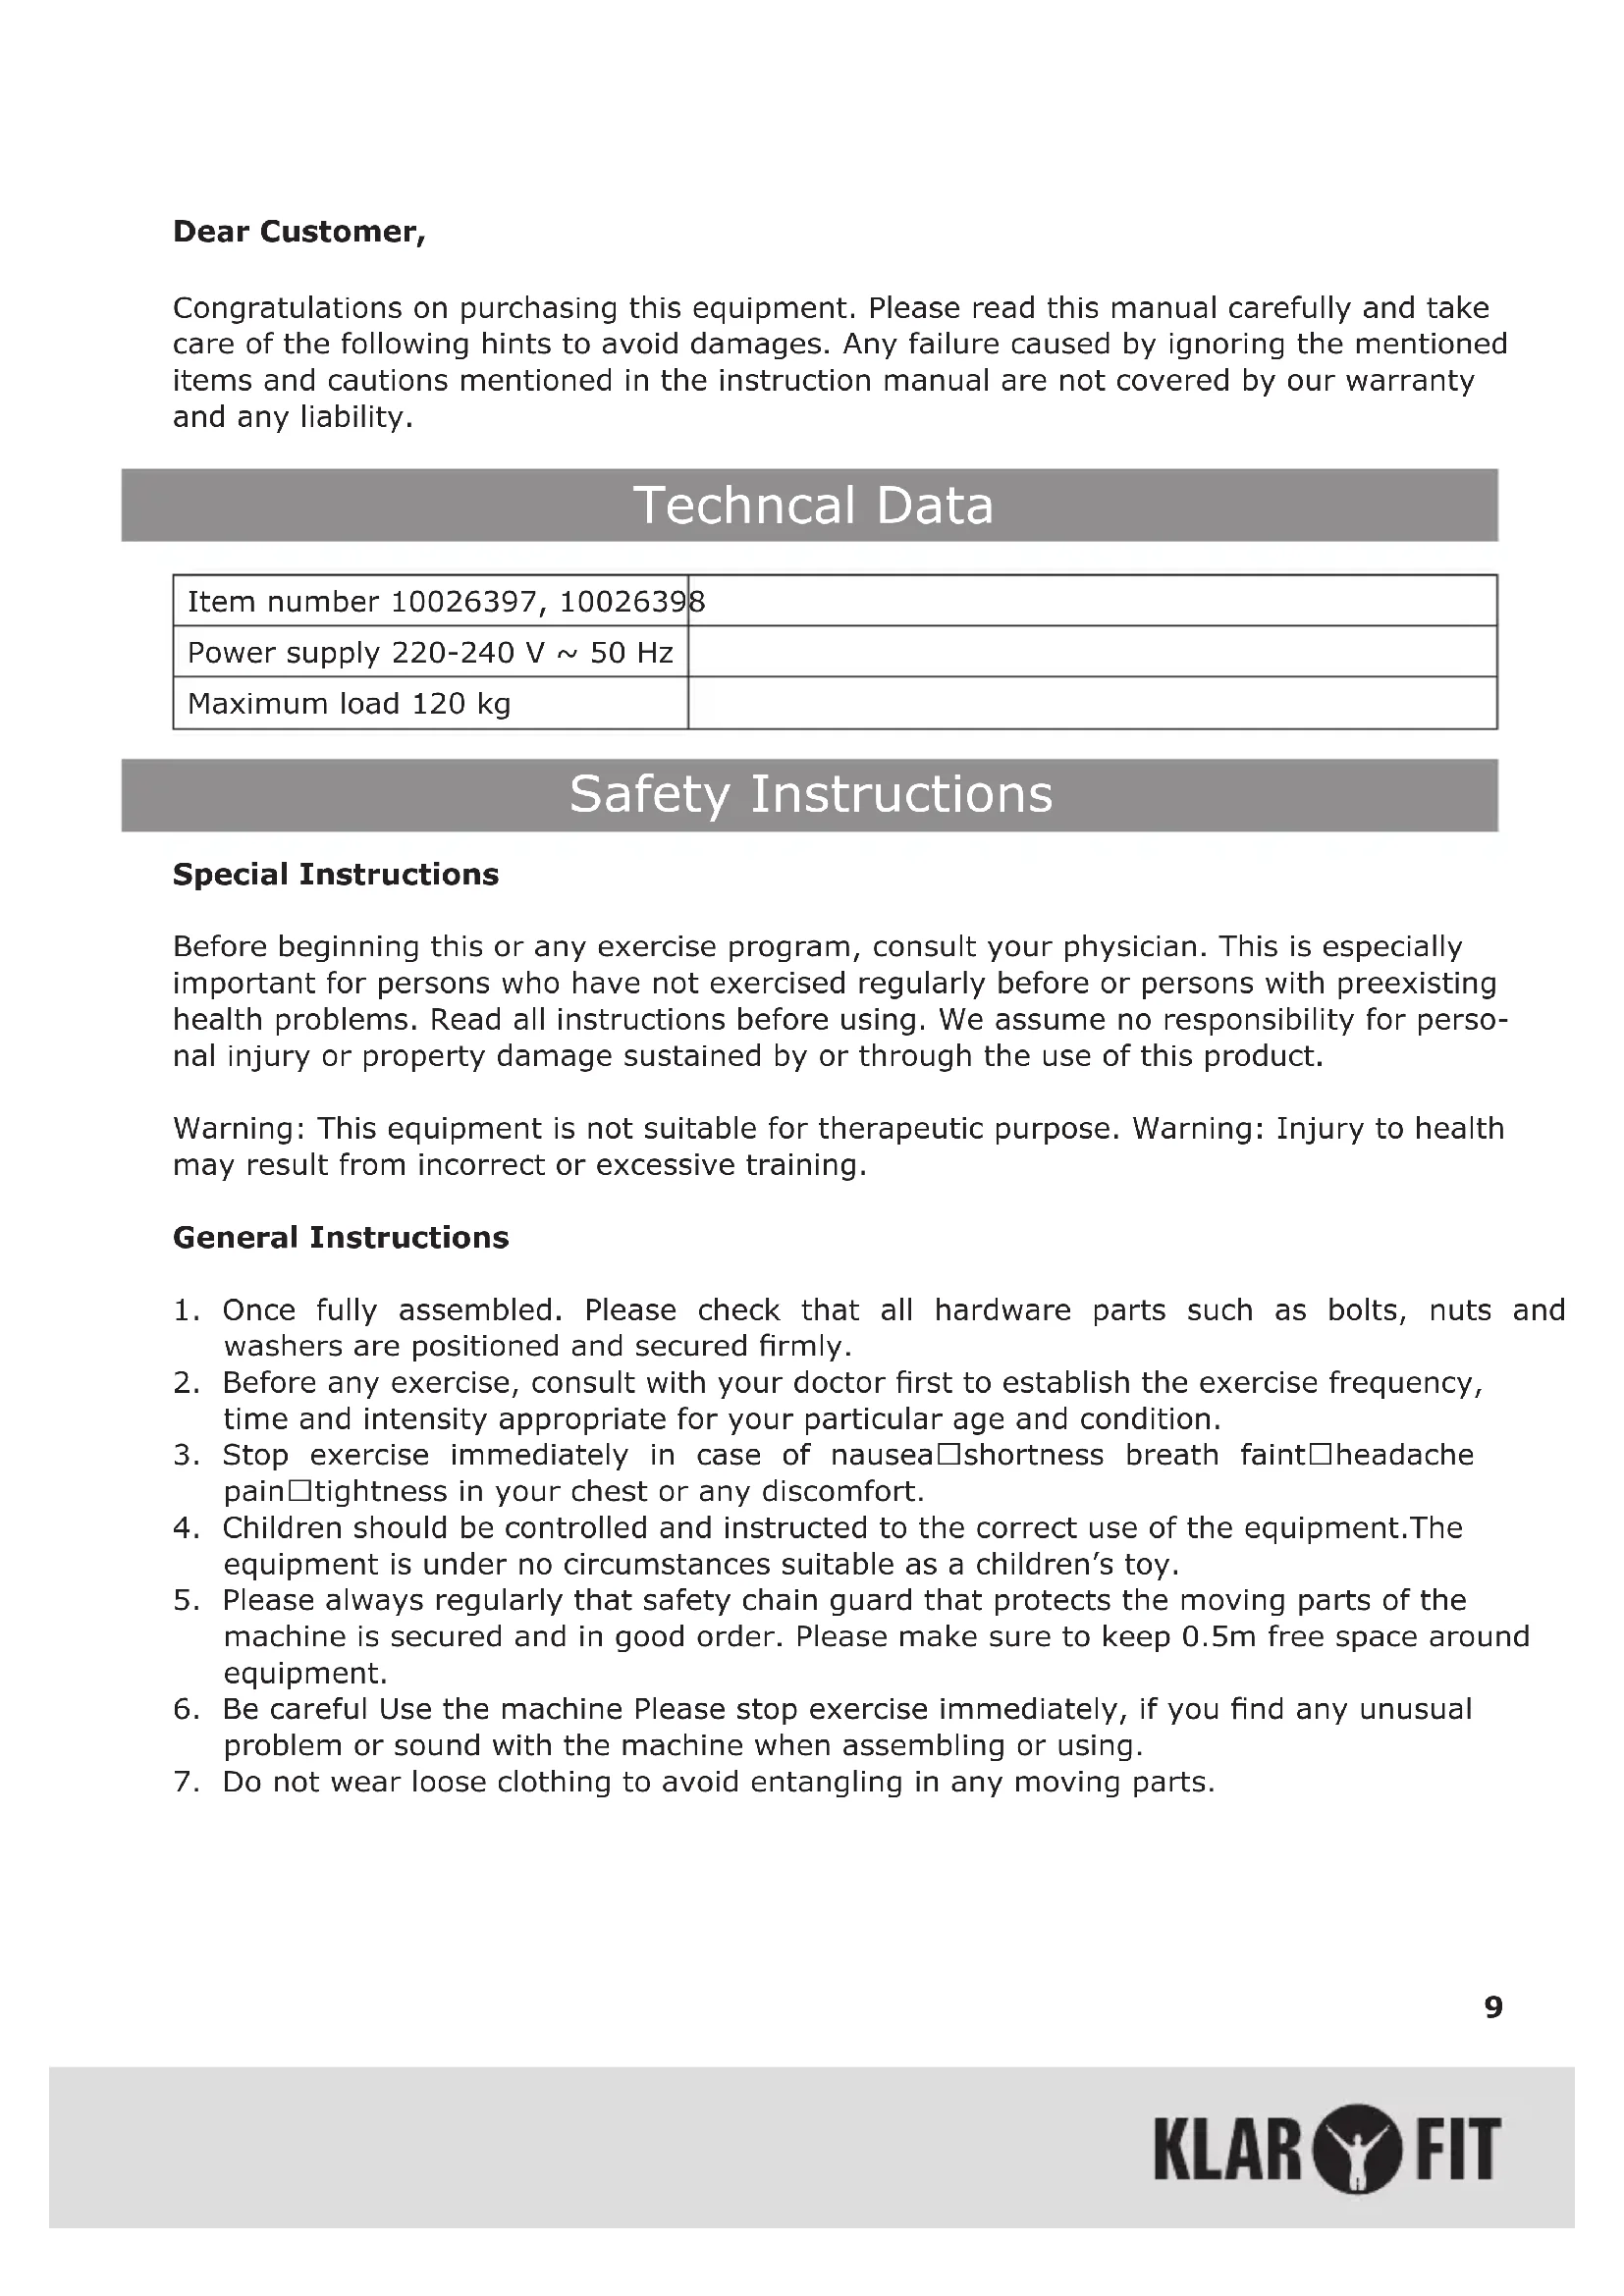
Symbol of a trash bin crossed with a diagonal line, no text or numbers presentCongratulations on purchasing this equipment. Please read this manual carefully and take care of the following hints to avoid damages. Any failure caused by ignoring the mentioned items and cautions mentioned in the instruction manual are not covered by our warranty and any liability.
Technical Data
| Item number 10026397, 10026398 | |
| Power supply 220-240 V ~ 50 Hz | |
| Maximum load 120 kg |
Safety Instructions
Special Instructions
Before beginning this or any exercise program, consult your physician. This is especially important for persons who have not exercised regularly before or persons with preexisting health problems. Read all instructions before using. We assume no responsibility for personal injury or property damage sustained by or through the use of this product.
Warning: This equipment is not suitable for therapeutic purpose. Warning: Injury to health may result from incorrect or excessive training.
General Instructions
- Once fully assembled. Please check that all hardware parts such as bolts, nuts and washers are positioned and secured firmly.
- Before any exercise, consult with your doctor first to establish the exercise frequency, time and intensity appropriate for your particular age and condition.
- Stop exercise immediately in case of nausea □shortness breath faint □headache pain □tightness in your chest or any discomfort.
- Children should be controlled and instructed to the correct use of the equipment. The equipment is under no circumstances suitable as a children's toy.
- Please always regularly that safety chain guard that protects the moving parts of the machine is secured and in good order. Please make sure to keep 0.5m free space around equipment.
- Be careful Use the machine Please stop exercise immediately, if you find any unusual problem or sound with the machine when assembling or using.
-
Do not wear loose clothing to avoid entangling in any moving parts.
-
This machine is only for indoor or family. Users' body maximum weight is 100kg. Person whose body weight exceeds this limit should not use this machine.
- Be more careful in order to avoid unnecessary hurt when moving this machine.
- Unsupervised children should be kept away from the equipment.
- Equipment shall be installed on a stable base and properly levelled
- Parents and others in charge of children should be aware of their responsibility because the natural play instruct and the fondness of experimenting of children can lead to situation and behavior for which the training equipment is not intended.
- Class H & C, for home used only
- WARNING: injuries to health may result from incorrect or excessive training.
Display
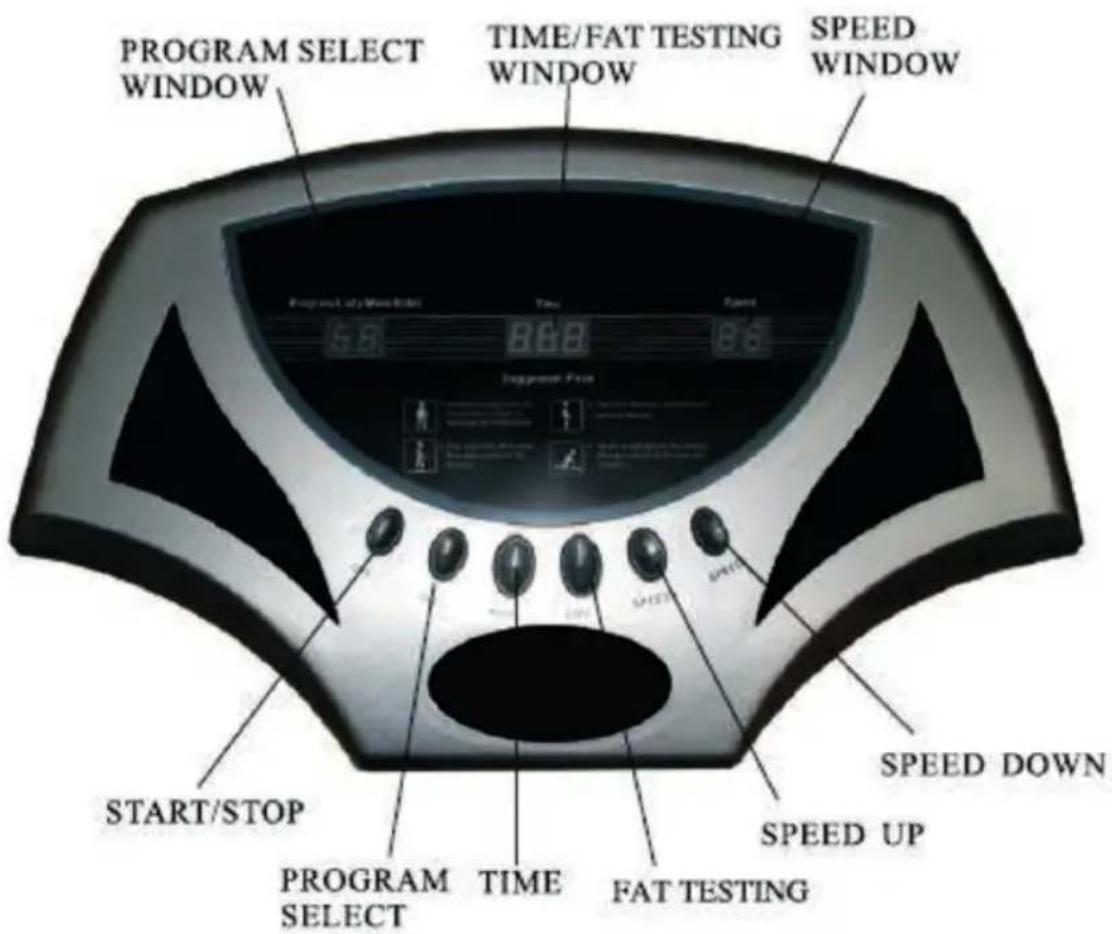
text_image
PROGRAM SELECT WINDOW TIME/FAT TESTING WINDOW SPEED WINDOW Program Only Mean Rate Time Fast Dependent Force START/STOP PROGRAM SELECT TIME FAT TESTING SPEED UP SPEED DOWNOperation
- Power on, the PROGRAM SELECT window shows "HL"; TIME window shows "O10", which means timing for 10 minutes; SPEED window shows "00".
- In any status, press the TIME key to change the show of time in the middle displayer window.
- In the standby status, press the START/STOP key, the machine is in working status, press this key again, the machine come to the standby status again.
- In any standby or working status, press the PROGRAM SELECT key to choose the working program. They are manual mode "HL", automatic program "P 1", automatic program "P2", automatic program "P3", fat testing program "1" and nominal program "88". Timing for every Program: 10 minutes. On the automatic program, the SPEED key is inactive.
Fat testing mode:
In the standby mode, through the AUTO key to enter the fat testing mode („1“), time window to show sex, male 1, female 2, through the speed plus / minus keys to select gender; and then through the TIME key to enter the age of choice: 010-»120, then height selected by the TIME key to enter the (M): 0.10---2.50, then weight selection by the TIME key to enter the (KG):010---150, then press the TIME key to enter the fat testing results show.
Automatic Program Working Mode:
| P1 | Slowly increase your body's heart rate and vibration resistance. Every 1 minutes, the speed change from Start to 10-25-40»55-70-85-70-55-40-25 , Keep cyclic motion. |
| P2 | Keep your heart rate in the fat burning zone. Every 1 minutes, the speed change from Start to 15-30-45-60-75-20-35-50—65 -80, Keep accelerated motion. |
| P3 | Fartlek training for advanced athletes.Every 1 minutes, the speed changes to 20-50-20-50-90-60-90-60-30-20 Keep accelerated motion. |
Tools
Fartlek training for advanced athletes. Every 1 minute, the speed changes to 20-50-20-50-90-60-90-60-30-20 Keep accelerated motion.
natural_image
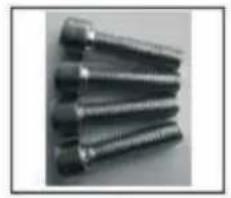
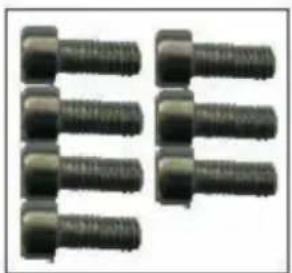
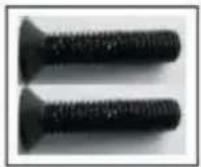
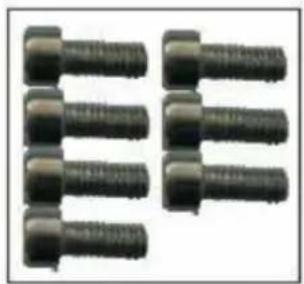
Close-up of four metallic threaded fasteners (no text or markings visible)Hexagon Screws: 8x30 4pcs
natural_image
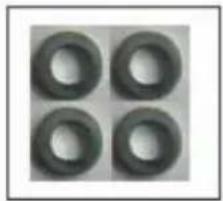
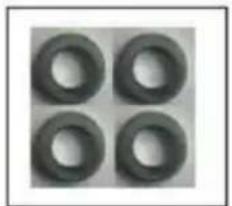
Four identical dark circular rings arranged in a 2x2 grid (no text or symbols)Washers: Φ8 4pcs
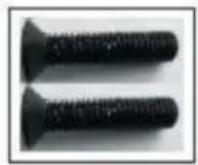
Big Screws: M8x40
natural_image
Six identical black screw fasteners arranged in two rows (no text or symbols visible)Middle Screws: M6x10 7pcs
natural_image
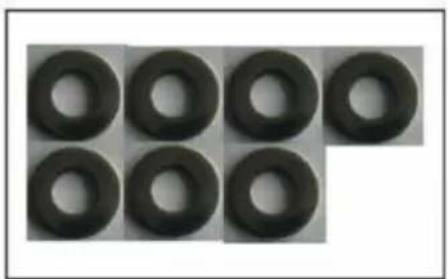
Six black circular ring shapes arranged in a 2x2 grid (no text or symbols)Washers: Φ6 7 pcs
natural_image
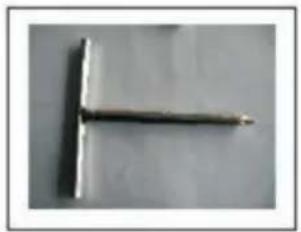
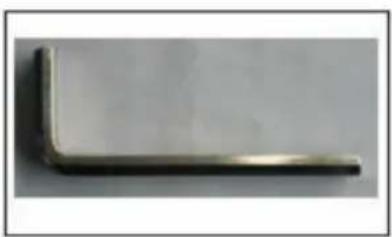
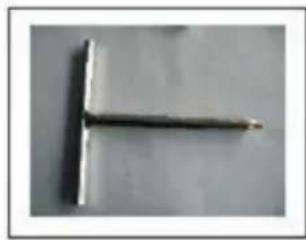
Close-up of a metal nail on a plain surface (no text or symbols visible)Hexagon Die Nu:#6
natural_image
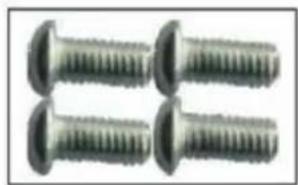
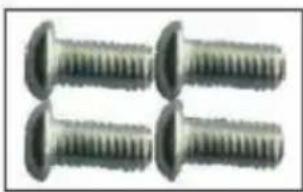
Four metallic screw fasteners arranged in a 2x2 grid (no text or symbols visible)Small Screws: 5X10 4pcs
natural_image
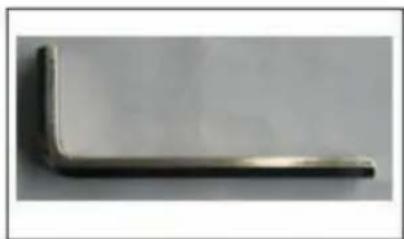
Metal L-shaped metal bracket with rounded edges (no text or symbols visible)exagon Die Nu:#5
Assembly

natural_image
Exterior view of a modern office building (no signage)P1
natural_image
Person holding a spray can with a tool, no visible text or symbolsP2

natural_image
Close-up of hands holding a tool near a surface, no visible text or symbolsP3
natural_image
Close-up of a hand holding a metallic object, possibly a tool or tool, with no visible text or symbols.P4
natural_image
Close-up of a hand using a sewing machine to adjust or install a component (no visible text or symbols)P 5
natural_image
Close-up of a hand holding a white plastic object with a pen, against a plain background (no text or symbols visible)P6
natural_image
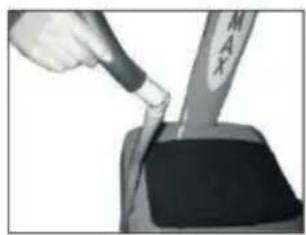
Hand pouring liquid into a container with a 'MAX' label (no other text or symbols visible)P 7
natural_image
Close-up of a hand holding a pen near a curved arm, with no visible text or symbolsP8
natural_image
Close-up of hands using a tool to tie wires around a metal object (no visible text or symbols)P 9
- Lay the main ur1it(PI) on an even surface
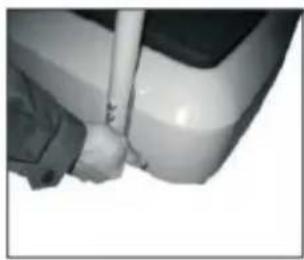
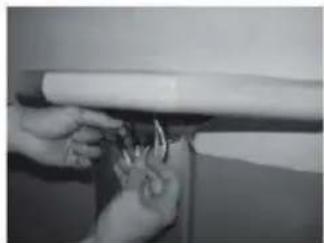
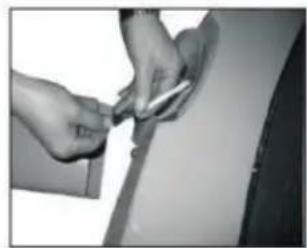
- Take wire (P2) pass it down the middle of the support tube. Please pay attention to have larger connector at the top. Please see the picture carefully (P2)
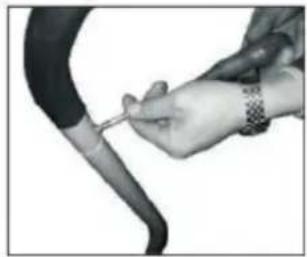
- When you assemble the main support tube, make sure the wires remain connected. Than, Connect the bottom connector of wire with the wire in the main unit. Please See the picture (P3) and make sure the wires remain connected.
-
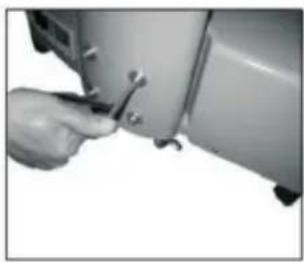
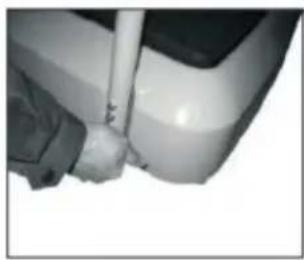
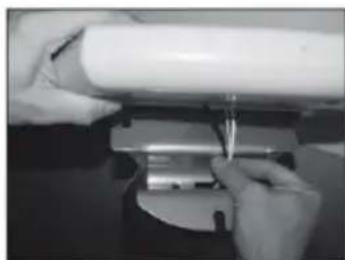
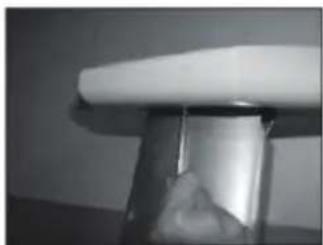
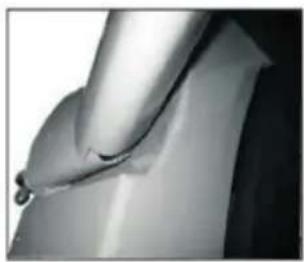
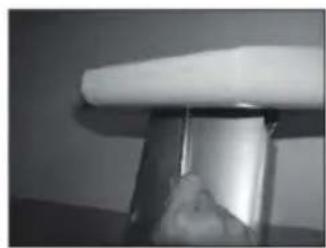
Now, slot the main support tube into the main unit, please see picture P4 Pay attention to use correct tools and screws: Hexagon screws 8x30 The picture P5 shows how the main support tube should look like when connected and assembled.
-
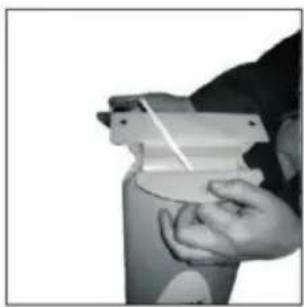
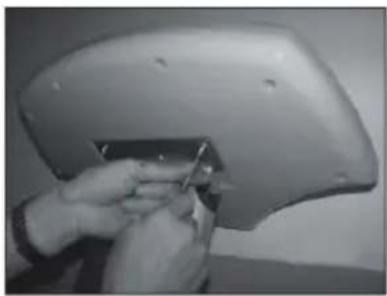
Take the 2 bottom support bars (P6) and place into the main unit. Please make sure the top of the bottom support bars are angled away from the main unit. Take the correct tool and use Middle screws: M6X10 and washers to secure the bottom support bars to the main unit. This should be done at the bottom of the main unit. See picture P6.
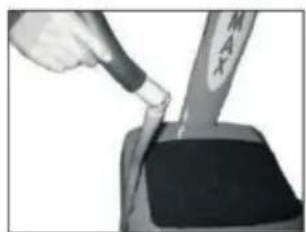
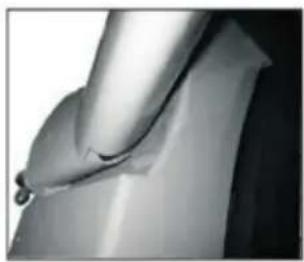
- Take the top support bars and place on top of the bottom support bars. Pay attention that the top bars fit into the main support tube. See picture P7
- Take the tool and use small screws: 5x10 to secure the top support bars to the bottom support bars. Please see Picture P8.
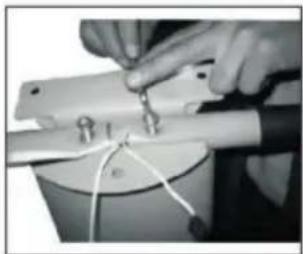
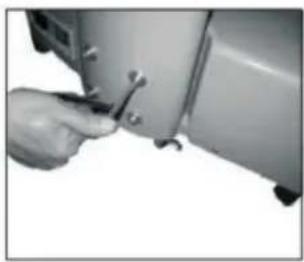
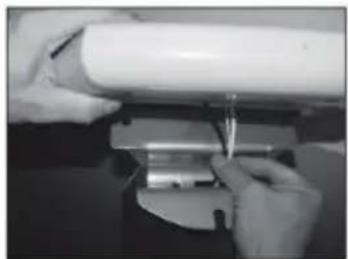
- Use the correct tool and take the big screws: M8x40 and secure the top support bars to the main support unit. Please see picture P9.
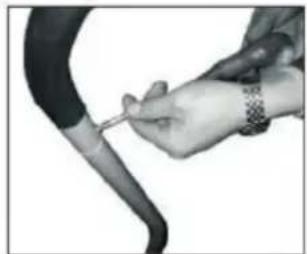
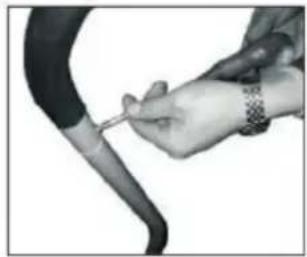
- Connect the wires of the control panel to the wires of the main support tube. Please see picture P10.
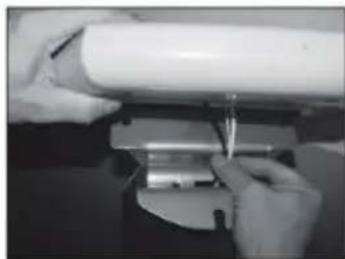
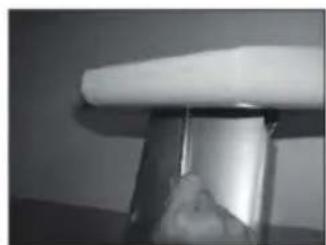
- Place the control panel onto the main support tube and feed the wires inside the main support. Please to picture P11.
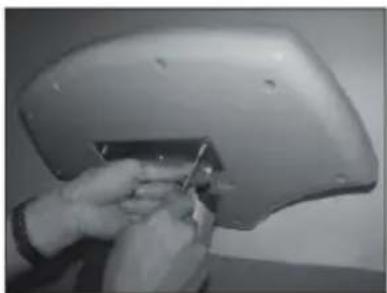
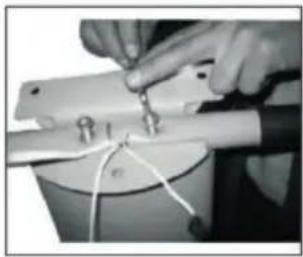
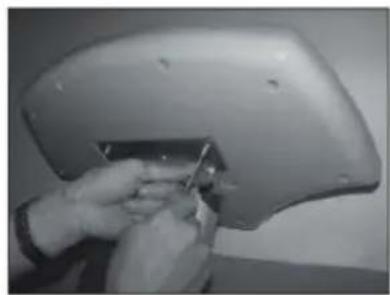
- Finally, using screws M6X10 at the bottom side of the control panel. Then, use tool to secure the control panel to the main support tube. Make sure to secure the front screw first, than screw on two sides.
natural_image
Close-up of hands installing or adjusting a metal component with a rolled paper or scroll (no visible text or symbols)P10
natural_image
Close-up of hands using a tool to adjust or install a cylindrical component (no visible text or symbols)P 11
natural_image
Close-up of a white cylindrical object with a flat top, possibly a mechanical or electronic component (no visible text or symbols)P 12
natural_image
Close-up of hands installing a small metal component into a white plastic panel (no text or symbols visible)P 13
natural_image
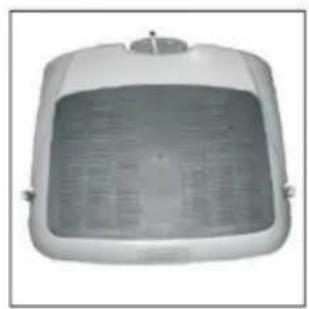
Exterior view of a self-service exercise stand with metallic frame and black base (no visible text or symbols)Excersice Description
There are many exercise that you can select for your workouts depending on the area of the Body you choose to exercise, your level of fi tness and your personal exercise objectives. However, We have selected a set of four core exercise (postures), which can be performed in manual mode. These four exercises are described in full as follows:
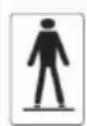
Standing Posture: Stand up straight with your feet hip Width apart. Hold the handle. Function: This will exercise the back, waist, buttocks, chest and abdomen.
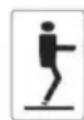
Knee Bend Posture: Stand on the foodboard, hold the handle. Bend your knees at 80 degrees, knees should not be bent over your toes. Function: This will exercise the buttocks and thighs.
Tiptoed Posture: Stand up straight and rise onto your tiptoes. Function: This will exercise the calves, buttocks and thighs.
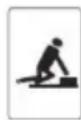
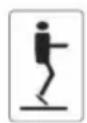
Runaway Posture: Place your hands either side of the footboard. Bend one the leg as if you were about to run and hold the position. Function: This will exercise the shoulder, back, arms and chest.
Hints on Disposal
natural_image
Symbol of a trash bin crossed with a diagonal line, no text or numbers presentAccording to the European waste regulation 2012/19/EU this symbol on the product or on its packaging indicates that this product may not be treated as household waste. Instead it should be taken to the appropriate collection point for the recycling of electrical and electronic equipment. By ensuring this product is disposed of correctly, you will help prevent potential negative consequences for the environment and human health, which could otherwise be caused by inappropriate waste handling of this product. For more detailed information about recycling of this product, please contact your local council or your household waste disposal service.
Declaration of Conformity
Producer: Chal-Tec GmbH, Wallstraße 16, 10179 Berlin, Germany.

This product is conform to the following European Directives:
2014/30/EU (EMC)
2014/35/EU (LVD)
2011/65/EU (RoHS)
EN957
Chère cliente, cher client,
natural_image
Close-up of four metallic threaded rods arranged diagonally (no text or markings visible)Vis Allen 8x30 / 4 pcs
natural_image
Four identical dark circular rings arranged in a 2x2 grid (no text or symbols)Rondelles ∅ 8 / 4 pcs
Grande vis M8x40
natural_image
Six black screw fasteners arranged in two rows (no text or symbols visible)natural_image
Six black circular washers arranged in a 2x2 grid on a light background (no text or symbols)Rondelles ∅ 6 / 7 pcs
natural_image
Close-up of a metallic T-shaped metal nail on a plain surface (no text or symbols visible)Clé Allen #6
natural_image
Four metallic screw fasteners arranged in a 2x2 grid (no text or symbols visible)Petites vis 5x10 / 4 pcs
natural_image
Metal L-shaped tool or bracket with a tapered end, isolated on white background (no text or symbols)Clé Allen #5
Assemblage
natural_image
Exterior view of a modern office building (no signage)P1

natural_image
Person holding a spray can with a tool, no visible text or symbolsP2
natural_image
Close-up of hands holding a tool near a surface, no visible text or symbolsP3
natural_image
Close-up of a metallic tool interacting with a surface, showing a droplet on the surface (no text or symbols visible)P4

natural_image
Close-up of a hand using a sewing machine to adjust or install a small mechanical component (no visible text or symbols)P 5

natural_image
Close-up of a hand holding a white object with a pen, next to a car (no visible text or symbols)P6

natural_image
Close-up of a hand pouring liquid into a container labeled 'MAX' (no other text or symbols visible)P 7
natural_image
Close-up of a hand holding a pen near a curved arm (no visible text or symbols)P8

natural_image
Close-up of hands using a tool to tie wires on a cylindrical object (no visible text or symbols)P 9
natural_image
Close-up of hands installing or adjusting a metal pipe with a hook (no visible text or symbols)P10
natural_image
Close-up of hands using a tool to adjust or install a cylindrical object (no visible text or symbols)P 11
natural_image
Close-up of a white cylindrical object resting on a metallic base, possibly a mechanical or electronic component (no visible text or symbols)P 12
natural_image
Close-up of hands installing or adjusting a component on a curved surface (no visible text or symbols)P 13