
Rupal 45+ - Backpack Vaude - Free user manual and instructions
Find the device manual for free Rupal 45+ Vaude in PDF.
| Product type | Mountain backpack |
| Brand | Vaude |
| Model | Rupal 45+ |
| Volume | 45 L (expandable with adjustable lid) |
| Weight | Approximately 1.6 kg (estimated) |
| Power supply | None (non-electric backpack) |
| Main features | F.L.A.S.H. NT system for adjusting shoulder strap length, adjustable and removable hip belt, height-adjustable lid, side zipper access, ice axe holder, gear loop, crampon pocket, side ski attachment, safety compartment for shovel/probe, snowboard attachment, snowshoe attachment, removable helmet holder |
| Care and cleaning | Clean by hand with a damp sponge and mild soap. Do not machine wash. Air dry in the shade. |
| Safety | Safety compartment with elastic bands for probe and shovel. Compression straps to stabilize the load. |
| Spare parts and repairability | Spare parts available via Vaude (straps, buckles, belt). Repairable by a specialized workshop. |
| General information | User manual available as PDF. Designed for hiking and mountaineering. |
Frequently Asked Questions - Rupal 45+ Vaude
User questions about Rupal 45+ Vaude
0 question about this device. Answer the ones you know or ask your own.
Ask a new question about this device
Download the instructions for your Backpack in PDF format for free! Find your manual Rupal 45+ - Vaude and take your electronic device back in hand. On this page are published all the documents necessary for the use of your device. Rupal 45+ by Vaude.
USER MANUAL Rupal 45+ Vaude
USER MANUAL/MOUNTAIN BACKPACKS
USER MANUAL
MOUNTAIN BACKPACKS
raude.com
DEUTSCH 1
ENGLISH. 11
FRANÇAIS 21
ITALIANO. 31
ESPANOL 41
中文. 52
INHALT
General Instructions. 11
How to pack your backpack correctly 11
Fit and Adjustment 13
Shoulder Harness Adjustment F.L.A.S.H. NT 14
Mountain BackpackFeatures 15
Hipbelt 15
Backpack Lid - Rope Attachment 16
Backpack Top Lid
Adjustable Top Lid Volume Extension 16
Main Compartment - Side Zip Access 16
Equipment & Co. - Ice Gear Attachment 17
Equipment & Co. - Gear Attachment 17
Equipment & Co. - Crampon Pocket 18
Equipment & Co. - Side Ski Attachment 18
Winter Features - Safety Pocket 18
Winter Features - Snowboard Attachment 19
Winter Features - Snowshoe Attachment 19
Winter Features-Helmet Holder 20
GENERAL INSTRUCTIONS
HOW TO PACK YOUR BACKPACK CORRECTLY
The rule of thumb is to make sure the loaded pack's center of gravity lies directly above your own. Heavy items should therefore be packed as close to your back as possible..


- Lid | Compartment: small; lightweight items of gear that need to be close at hand, e.g. mobile phones, GPS, compass.
- Main Compartment: Lighter items such as clothing
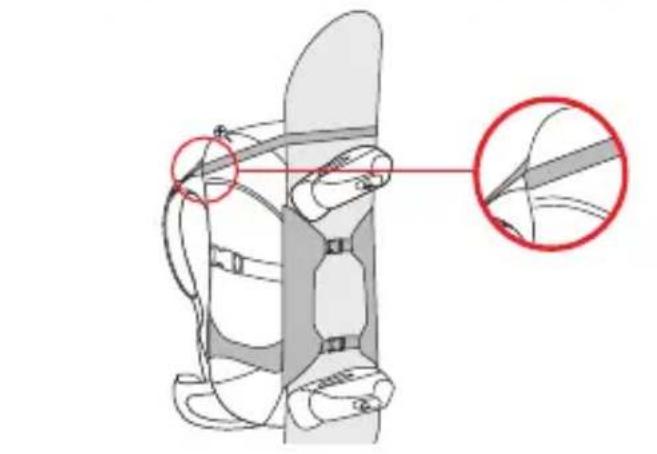
ENGLISH
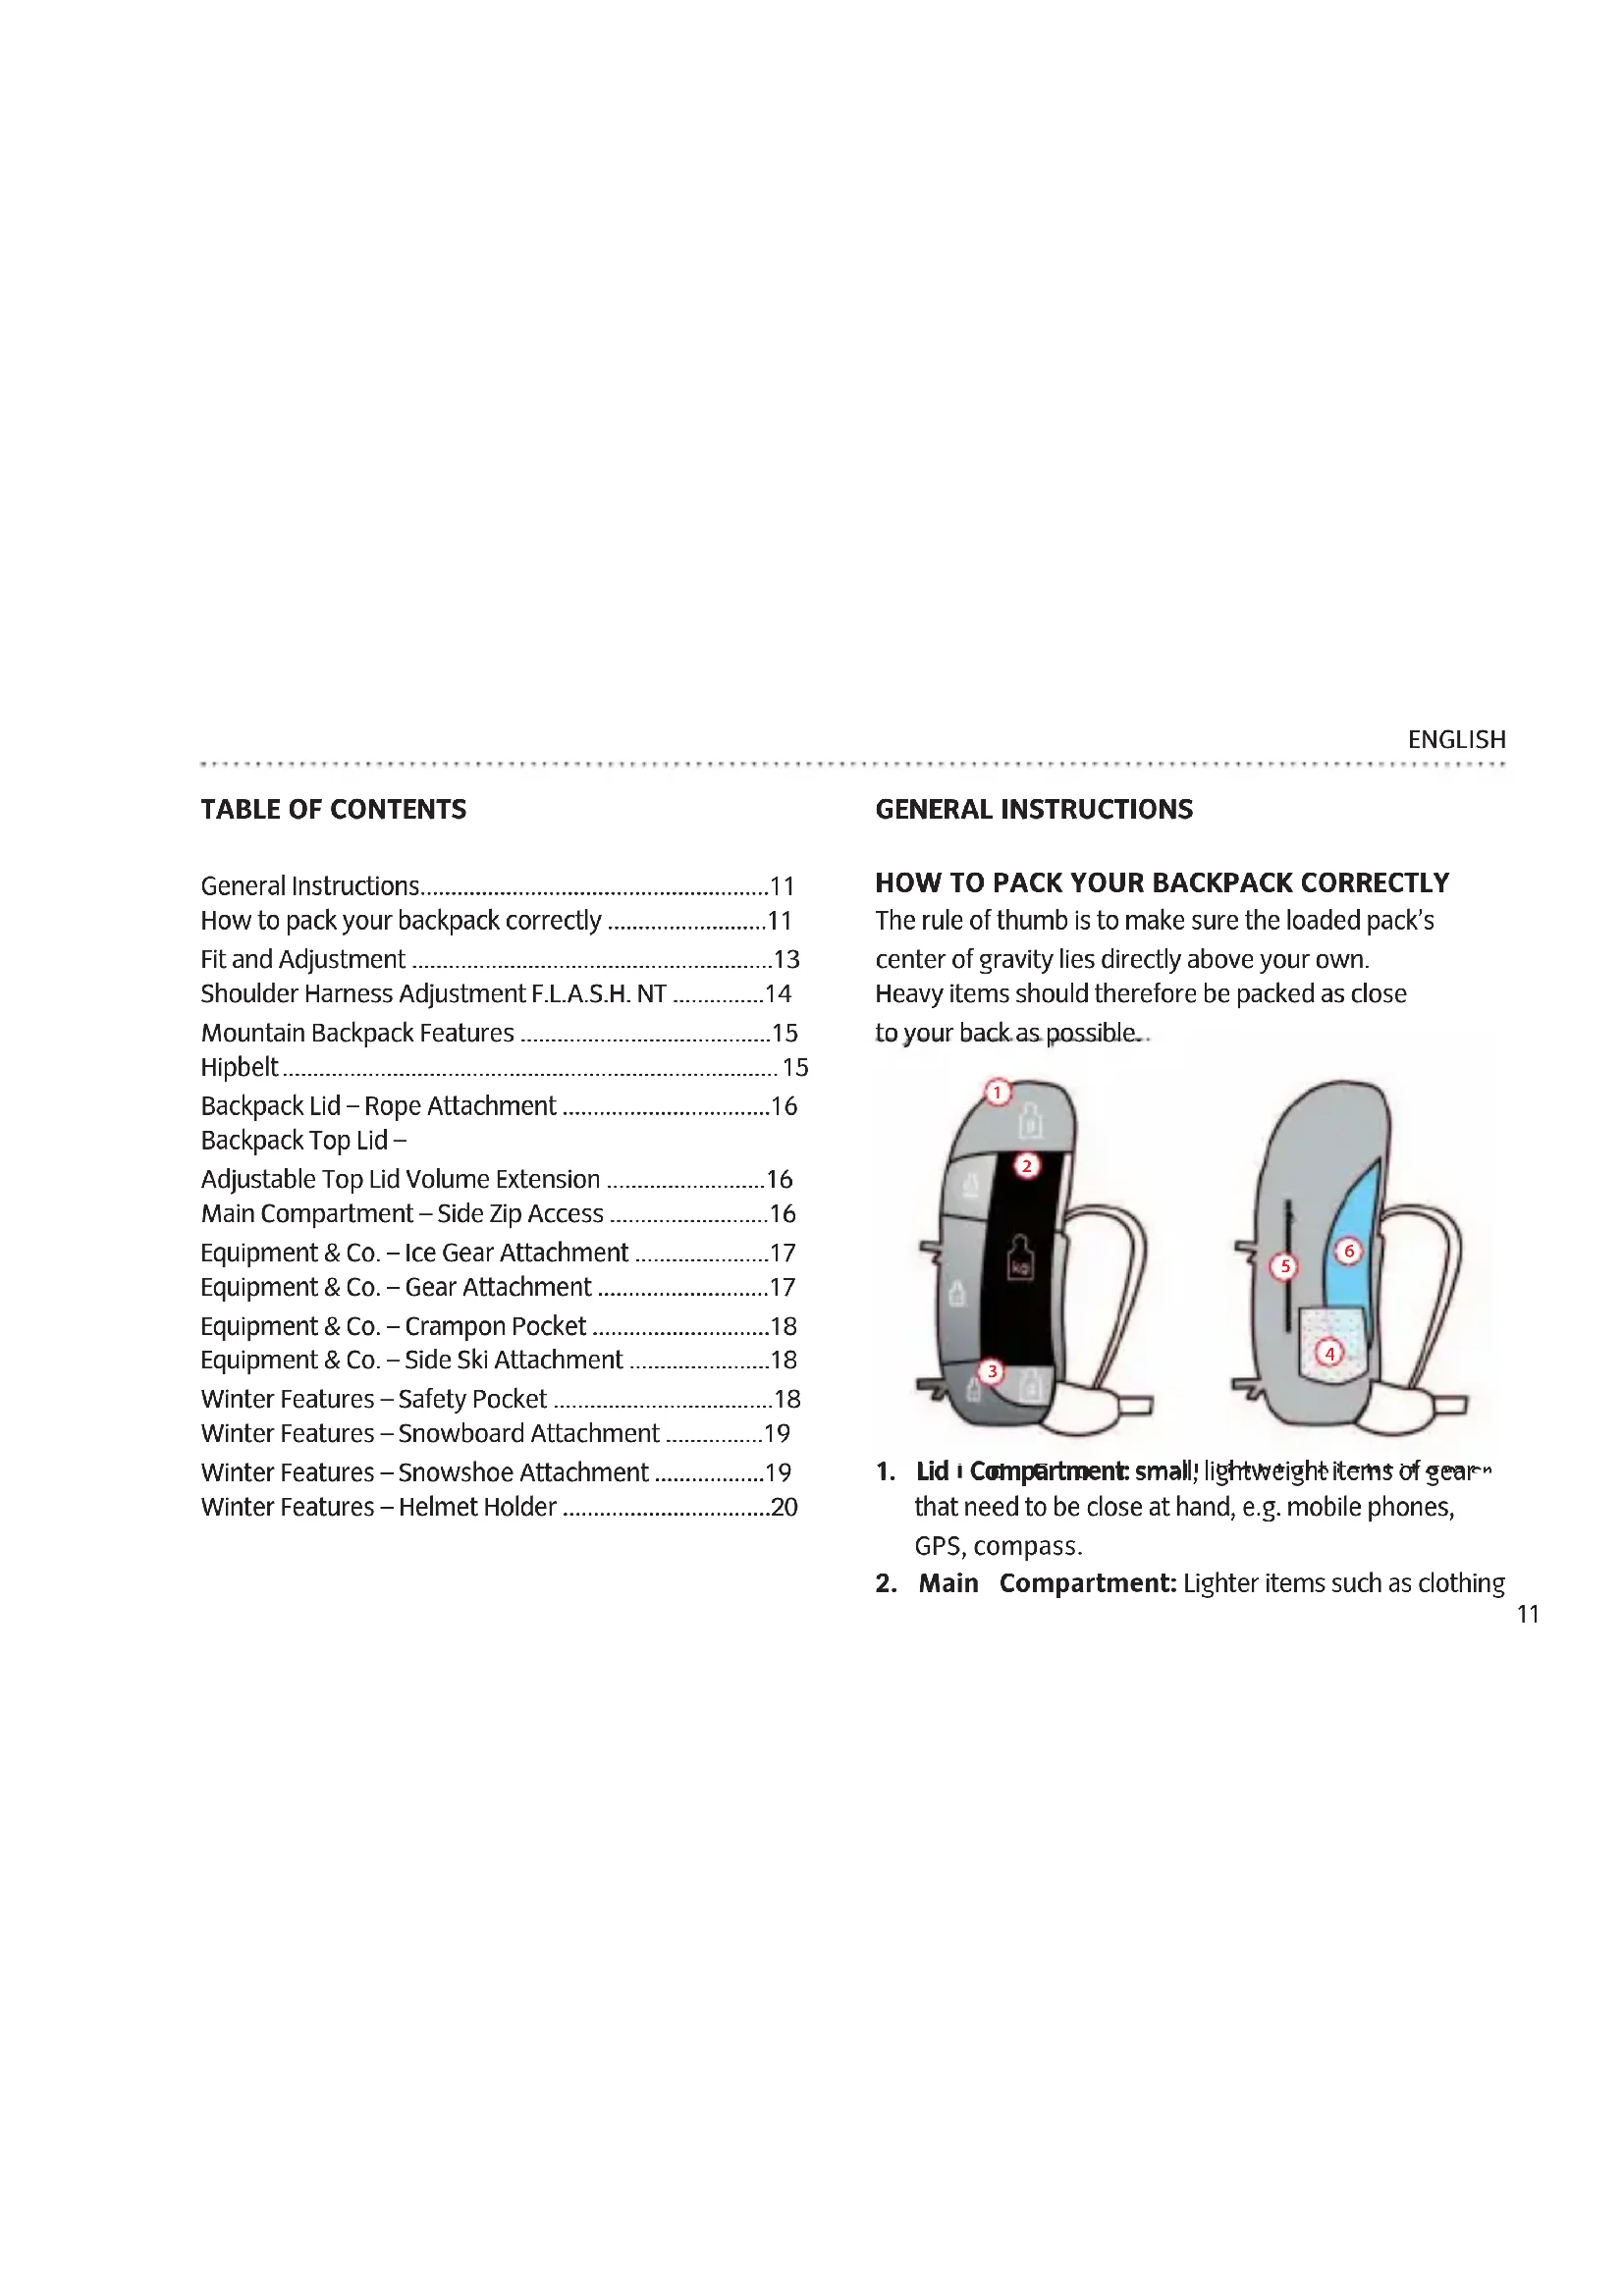
Hydration tube port with top lid closure
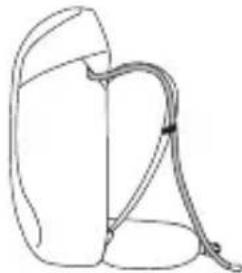
Hydration bladder attachment:velcro
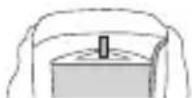
Hydration tube port with front zip closure
Hydration bladder attachment: hook
should be packed at the bottom, top and on the sides. Heavier items such as climbing equipment (carabiners, wedges, quickdraws), the tent, tinned food or water supplies should be packed in the middle, close in to your back.
-
Bottom Compartment: This is the best place to store lightweight, bulky items that would take up too much room in the main compartment (sleeping bag, dirty laundry bag).
-
Outer Pockets and Mesh Pockets: Room for smaller items (rain jacket, cap, tissues, gloves etc.). Each side should weigh about the same.
-
Map Pocket: Flat outer pocket for easy access to maps, climbing topos and hiking guides.
-
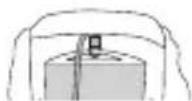
Hydration System: The pocket for the hydration bladder always lies close to your back so that it doesn't offset your center of gravity. The hydration tube port in backpacks with top lids is located underneath the top lid closure. In backpacks with front zip closures, the hydration tube port is found above the shoulder straps.
FIT AND ADJUSTMENT
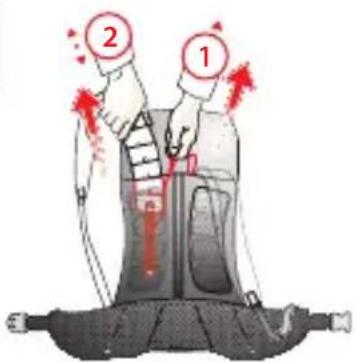
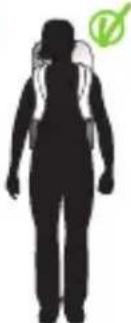
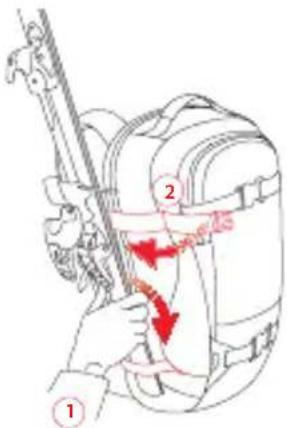
To adjust a loaded backpack, hoist it onto your back and proceed as follows:
- Fasten the shoulder straps and load adjustment straps (1 and 2) and tighten slightly. The buckles and load lifter straps should lie between your collarbone and the top of your shoulder (red arrow). The mid-point of the padded shoulder strap should be about at the top of your shoulders. If this is not the case, adjust the length of the shoulder strap accordingly.
- Raise your shoulders and fasten the hipbelt, then tighten it (3). The hipbelt should straddle your hipbones and carry about 80% of the pack's weight.
- Loosen the shoulder straps until the entire weight of the pack is resting on your hips. Then tighten the straps gently to stabilize the pack on your shoulders.
-
Pull the load-lifting straps tight. The shoulder straps will lift away from the shoulders slightly and take the weight off this area.
-
Last but not least, slide the sternum strap to a comfortable height (red arrow) and fasten it. Make sure when tightening the strap that the elastic is not overstretched as this may restrict breathing.

ENGLISH


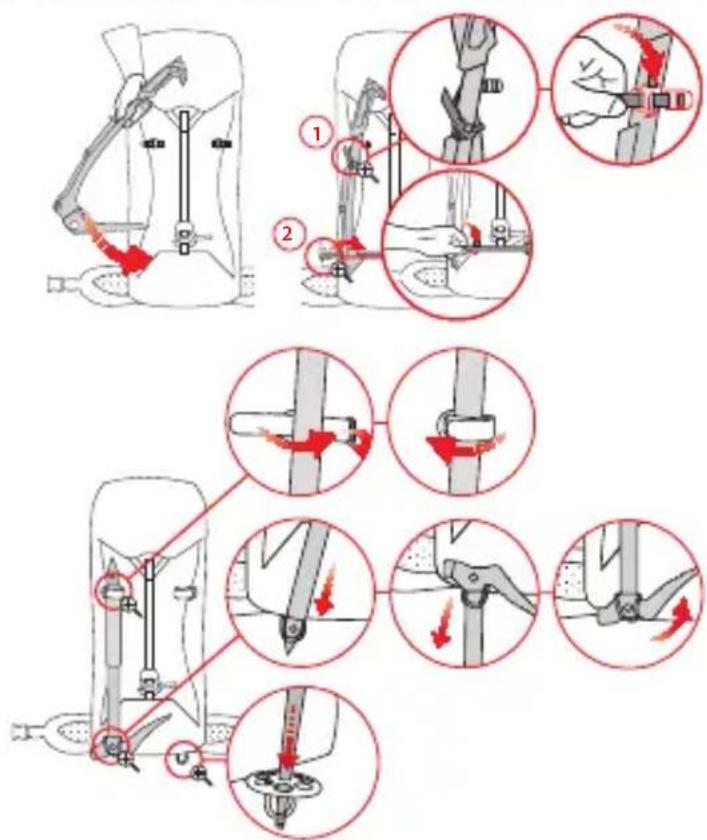
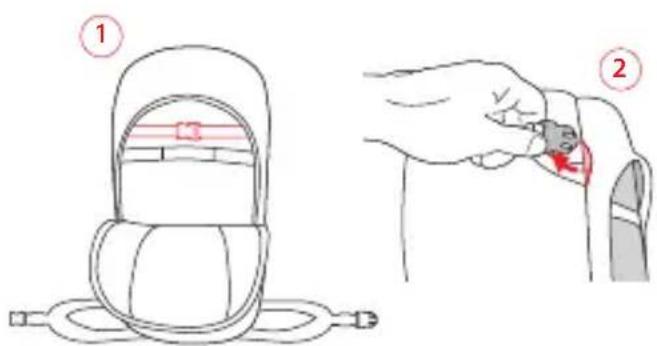
SHOULDER HARNESS ADJUSTMENT F.L.A.S.H. NT
Every person has an individual torso length and shape. With the help of F.L.A.S.H. NT shoulder harness adjustment, the backpack's suspension system can be optimally adjusted to suit your upper body proportions for custom-fitting carrying comfort.
ADJUSTMENT:
The F.L.A.S.H. NT system has two pull loops that allow you to precisely adjust the length of the shoulder straps quickly, continuously and comfortably for individual torso length comfort. A red pull loop at the point where the shoulder strap exits the pack releases the shoulder strap adjustment. The strap can then be pulled out or inserted as desired (2). To refasten the shoulder strap, release the red pull loop (1). Size indicators underneath the shoulder straps help determine the correct shoulder strap length.
Instructions for the precise adjustment of the suspension system can be found on our YouTube channel www.youtube.com/vaudesport
MOUNTAIN BACKPACK FEATURES
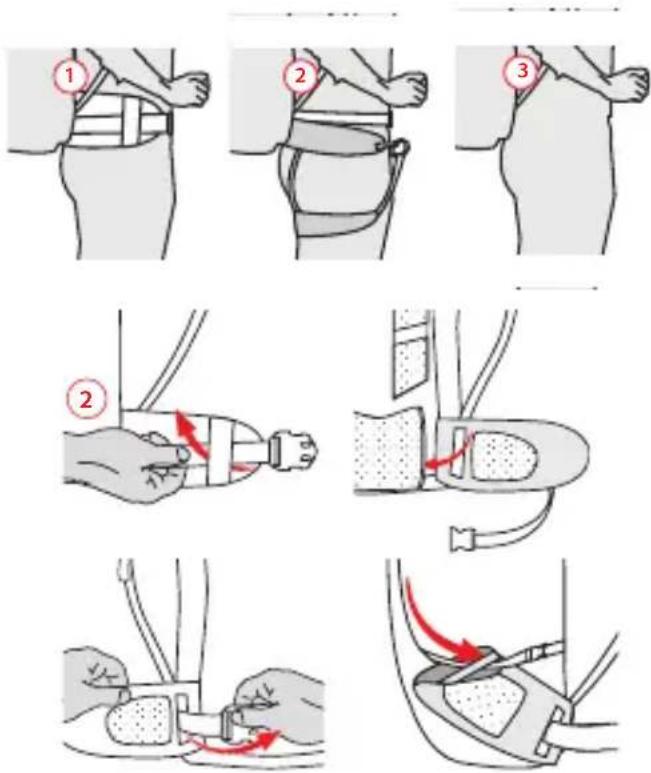
HIPBELT
The VAUDE Mountain Backpack hipbelt can be optimally adjusted for different activities:
- As a standard hipbelt with wide, comfortable hip wings.
- With the hip wings folded back, a webbing belt then secures the backpack. This is especially useful when wearing a harness (only available in the Anatomic Alpine suspension system). Pull the webbing belt out from behind the hip wings, fold the hip wings back or secure them with the lower compression strap.
- Without the hipbelt. The hipbelt can be completely detached. A velcro strap attachment secures the hipbelt within the storage pocket at the back of the pack. First lift the hipbelt and detach the Velcro closure, then pull the complete hipbelt out of its compartment.
ENGLISH
BACKPACK LID - ROPE ATTACHMENT
The rope attachment under the top lid prevents the rope from sliding out from under the lid, and provides more storage space inside the main compartment.
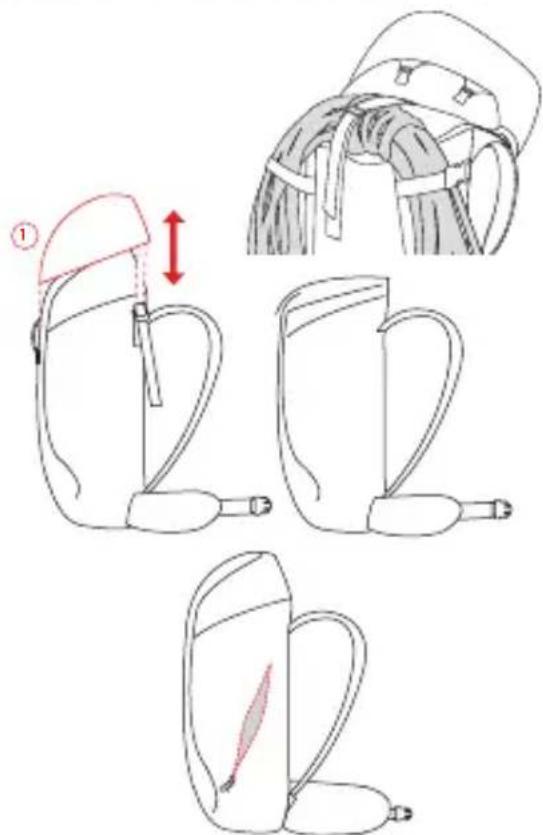
BACKPACK TOP LID - ADJUSTABLE TOP LID VOLUME EXTENSION
By loosening the lid straps, the backpack volume can be expanded by about 10 liters. The lid can also be completely removed when needed, such as for climbers who need more headroom. To remove the lid, unthread the load adjustment straps (1) and then detach the lid from the velcro attachment.
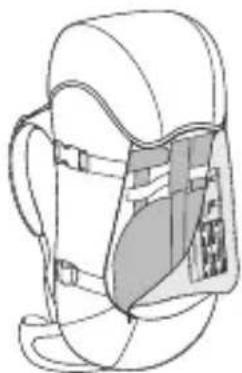
MAIN COMPARTMENT - SIDE ZIP ACCESS
Access to the main compartment is also possible through the side zip.
EQUIPMENT & CO. - ICE GEAR ATTACHMENT
Ice tool / ice axe attachment with practical holster for the axe. The tool is inserted into the pocket with the axe side first. The straps are then used to attach the shaft at the top and bottom.
EQUIPMENT & CO.-GEAR ATTACHMENT
Trekking poles are inserted from below into the loop at the bottom of the pack. The shaft is then attached at the top with either a velcro strap or webbing strap.
The shaft of the ice gear is inserted from the top through the loop and then flipped over. Attach the shaft on top with either the velcro strap or webbing strap.
ENGLISH
3
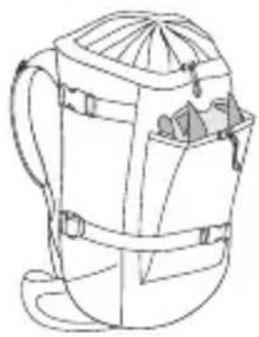
EQUIPMENT & CO. - CRAMPON POUCHET
Additional front pocket for safe storage of crampons or climbing skins.
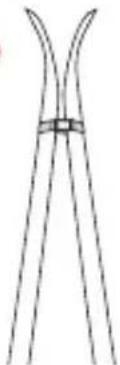
EQUIPMENT & CO. - SIDE SKI ATTACHMENT
Side Ski Attachment
Attach one ski to the left and one to the right side of the pack (1). With the bottom surface against the pack, slide each ski down into the respective lower loop until you reach the ski binding, then tighten the upper compression loop to fi x the ski fir mly (2).
Tip: Skis are most secure if they are tied together at the top. This prevents them from swinging back and forth. You can do this with an extra piece of cord or strap.
WINTER FEATURES - SAFETY POUCHET
Safety Pocket: Probe and shovel are safely stored and also quickly accessed at the front of the backpack. Inside the pocket, elastic drawcord attachment secures the shovel handle and probe to keep them from bumping around.
WINTER FEATURES - SNOWBOARD ATTACHMENT
Snowboard attachment straps Open the straps at the front of the pack and lay the snowboard, with the bottom side facing the pack, onto the backpack. Fasten the straps again and tighten until secure. The upper strap should be just under the binding to prevent the snowboard from sliding down.
Tip: For more legroom on ascents, we recommend using an additional webbing strap to pull the upper part of the snowboard slightly forward. Thread the strap through the load adjusters (1) above the shoulder straps, wrap it around the snowboard and then tighten it.
WINTER FEATURES - SNOWSHOE ATTACHMENT
In order to transport snowshoes, open the front pocket (1) and pull out the carrying straps through the side opening of the pocket (2). Close the front pocket again, lay the snowshoes (as depicted) against the backpack,
ENGLISH
thread the straps through the snowshoes and then fasten the buckle (3).
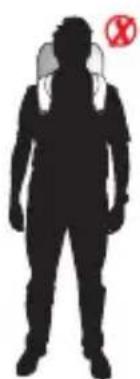
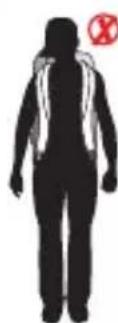
WINTER FEATURES - HELMET HOLDER
Winter backpacks have a detachable helmet holder. The main compartment remains easily accessible even with the helmet attached.
Hook the helmet holder into the grommets at the front or on the lid of the backpack. Slip the helmet underneath and then tighten the straps.
INHALT
Réglages de base 21
Compartment principal
Zaini Mountain-Features 35
Cinturone a vita 35
Compartmento principal -


- USER MANUAL
- MOUNTAIN BACKPACKS
- INHALT
- GENERAL INSTRUCTIONS
- HOW TO PACK YOUR BACKPACK CORRECTLY
- ENGLISH
- FIT AND ADJUSTMENT
- SHOULDER HARNESS ADJUSTMENT F.L.A.S.H. NT
- ADJUSTMENT:
- MOUNTAIN BACKPACK FEATURES
- HIPBELT
- BACKPACK LID - ROPE ATTACHMENT
- BACKPACK TOP LID - ADJUSTABLE TOP LID VOLUME EXTENSION
- MAIN COMPARTMENT - SIDE ZIP ACCESS
- EQUIPMENT & CO. - ICE GEAR ATTACHMENT
- EQUIPMENT & CO.-GEAR ATTACHMENT
- EQUIPMENT & CO. - CRAMPON POUCHET
- EQUIPMENT & CO. - SIDE SKI ATTACHMENT
- WINTER FEATURES - SAFETY POUCHET
- WINTER FEATURES - SNOWBOARD ATTACHMENT
- WINTER FEATURES - SNOWSHOE ATTACHMENT
- WINTER FEATURES - HELMET HOLDER
Brand : Vaude
Model : Rupal 45+
Category : Backpack