
Floris - High chair Lionelo - Free user manual and instructions
Find the device manual for free Floris Lionelo in PDF.
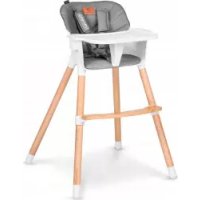
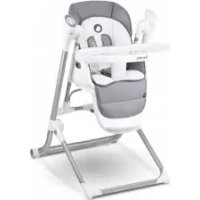
| Product type | Convertible high chair with integrated booster seat |
| Recommended age | 6 months to 3 years (high chair); 3 to 12 years (booster seat) |
| Maximum weight capacity | 15 kg (high chair); 40 kg (booster seat) |
| Safety standards | EN 14988:2017+A1:2020, EN 17191:2021 |
| Harness | 5-point harness with crotch strap |
| Tray | Removable, adjustable to 2 levels, dishwasher safe |
| Footrest | Adjustable to 4 levels |
| Main materials | Plastic, metal |
| Seat cleaning | Wipe with a damp cloth and mild detergent, do not use abrasive products |
| Cushion washing | Machine wash at 30°C, do not dry clean or iron |
| Assembly | Requires assembly with included Allen key |
| Spare parts | Contact the manufacturer at help@lionelo.com |
| Maintenance | Regularly check components, avoid prolonged exposure to sunlight |
| Usage precautions | Never leave the child unattended, always use the harness |
| Warranty | Detailed conditions available on the manufacturer's website |
| Manufacturer | BrandLine Group Sp. z o. o. |
Frequently Asked Questions - Floris Lionelo
User questions about Floris Lionelo
0 question about this device. Answer the ones you know or ask your own.
Ask a new question about this device
Download the instructions for your High chair in PDF format for free! Find your manual Floris - Lionelo and take your electronic device back in hand. On this page are published all the documents necessary for the use of your device. Floris by Lionelo.
USER MANUAL Floris Lionelo
natural_image
Line drawing of a lionelo chair with seat, legs, and side table (no text or symbols)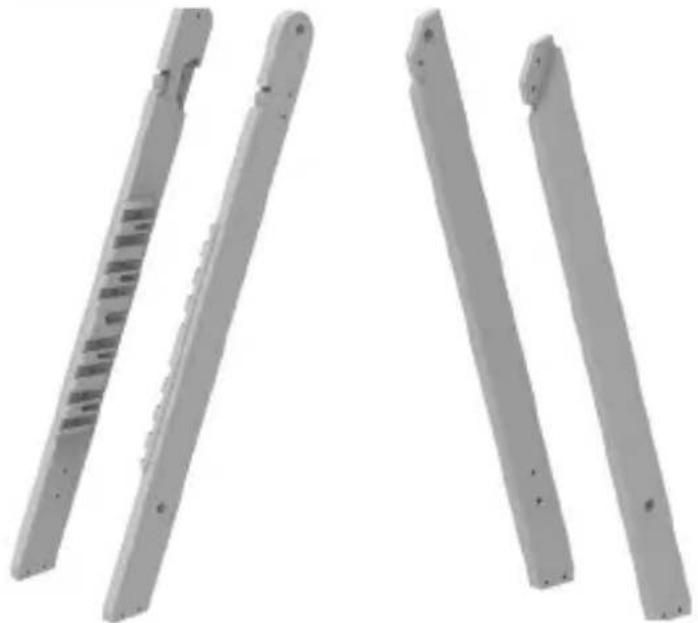
natural_image
Four metallic metal brackets with cutouts, shown from different angles (no text or symbols visible)A
natural_image
Two rectangular metallic components with mounting holes, shown in 3D rendering (no text or symbols)C
natural_image
3D rendered mechanical bracket component (no text or symbols visible)E
natural_image
Abstract gray gradient shape with a small white cutout in the center (no text or symbols)D
natural_image
Simple gray oval shape with two side cutouts and a horizontal line at the bottom (no text or symbols)F
natural_image
Plain gray oval shape with two small circular cutouts on the left side (no text or symbols)G
natural_image
Simple gray rounded rectangular shape with a small circular hole in the center (no text or symbols)H
IJK

natural_image
Two metallic metal stand holders with cutouts, shown from angle 0° (no text or symbols visible)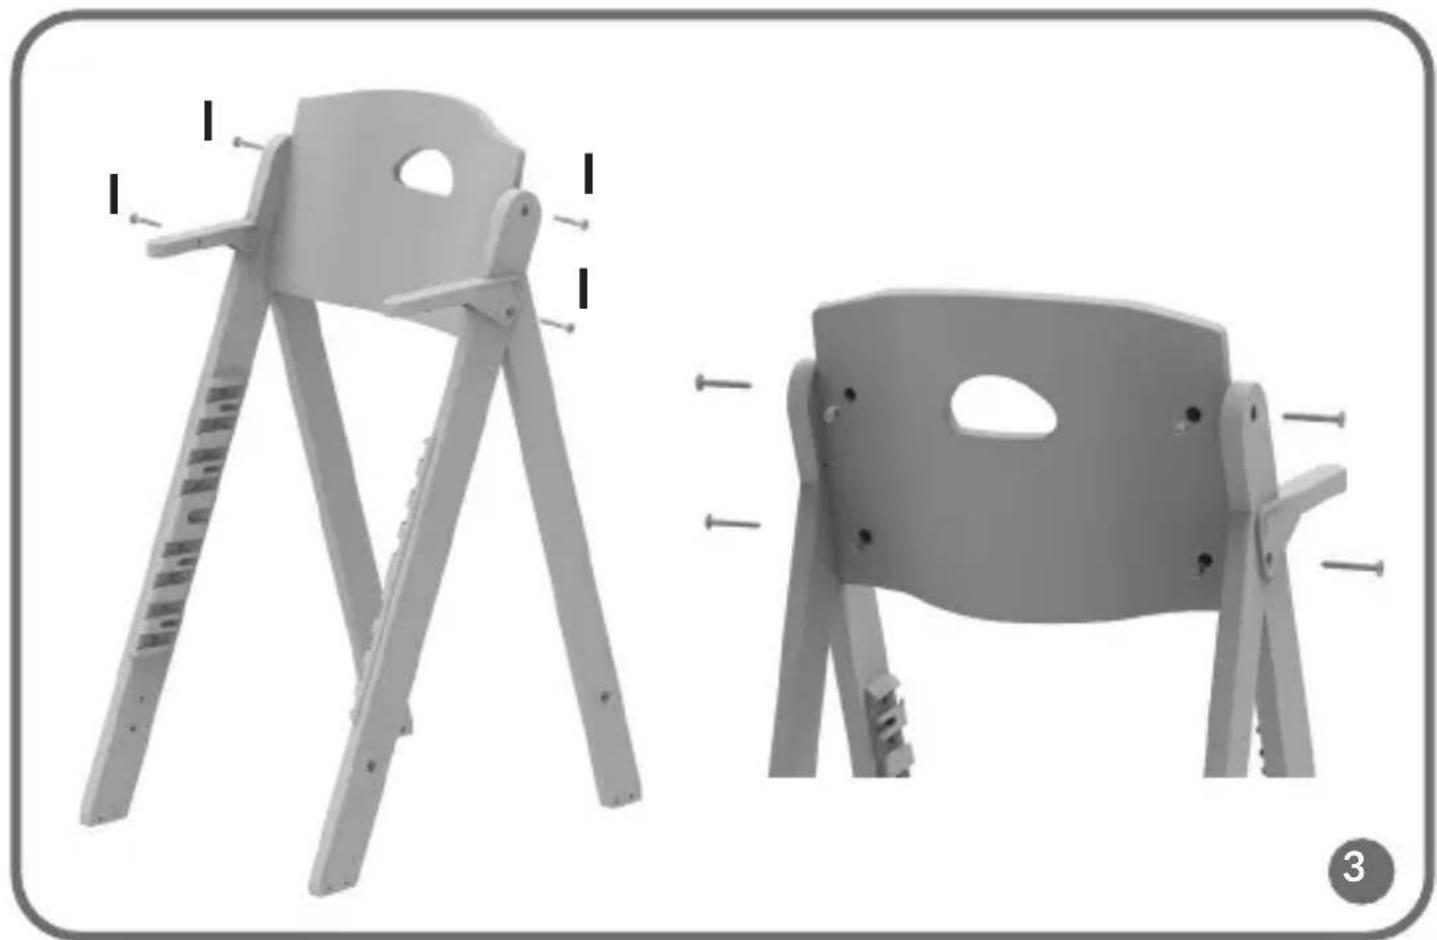
natural_image
Two views of a gray folding chair with metal hardware, shown from front and side angles (no text or symbols)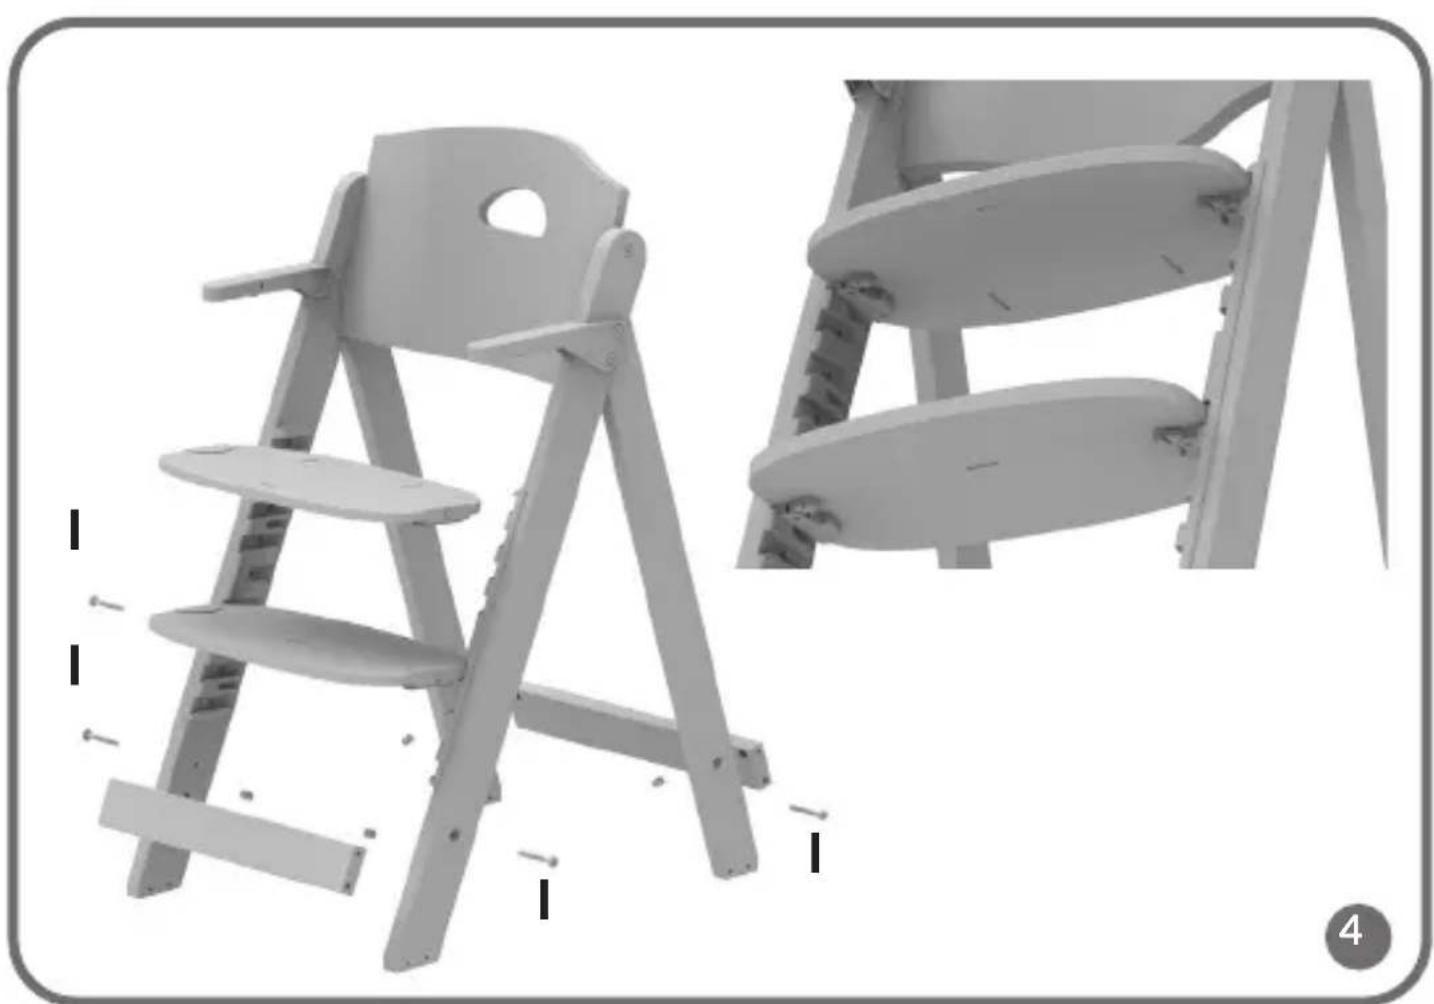
natural_image
Two views of a wooden chair with ladder and seat, shown from different angles (no text or symbols visible)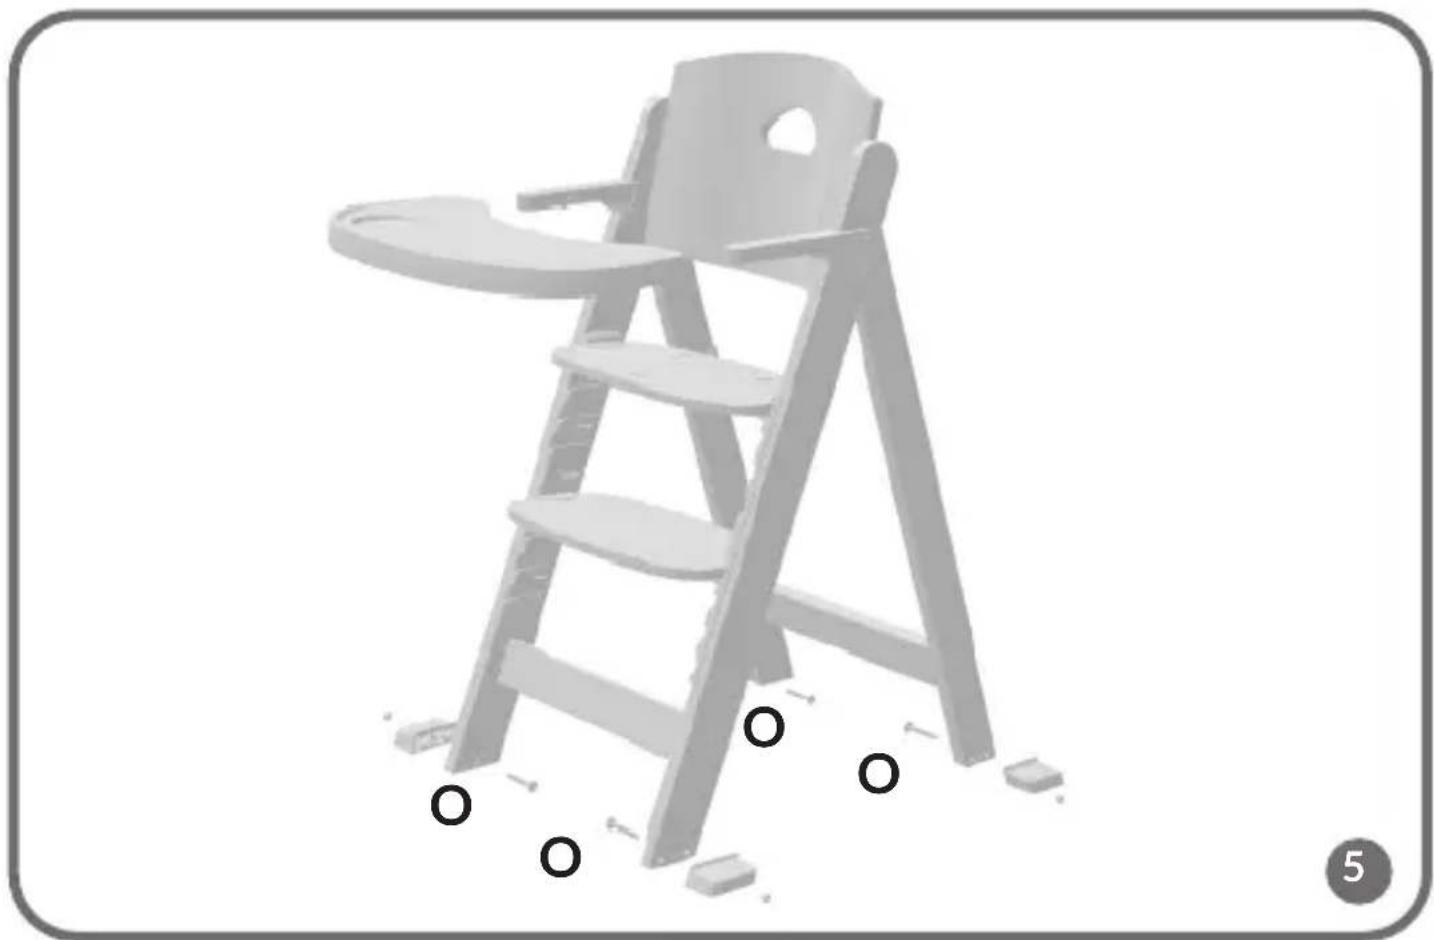
natural_image
3D model of a baby stool with ladder and seat, showing no text or symbols on the chair itself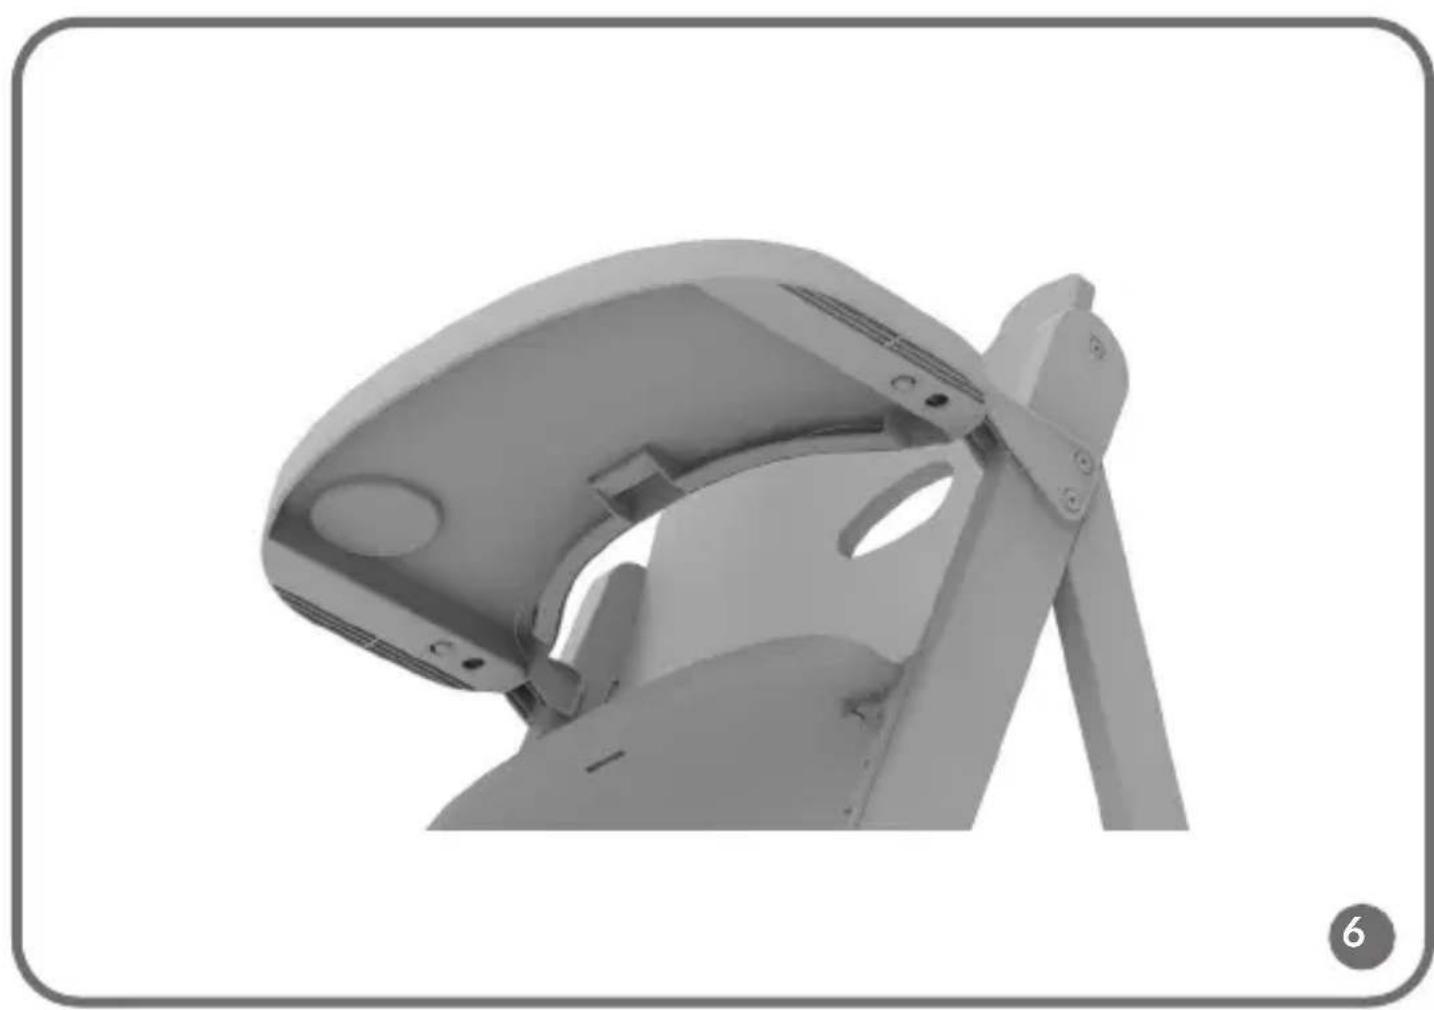
natural_image
3D rendered mechanical component with curved surfaces and mounting brackets (no visible text or symbols)
natural_image
Three-panel grayscale photo showing exterior wall-mounted electrical connectors and a close-up of the switch mechanism (no text or symbols visible)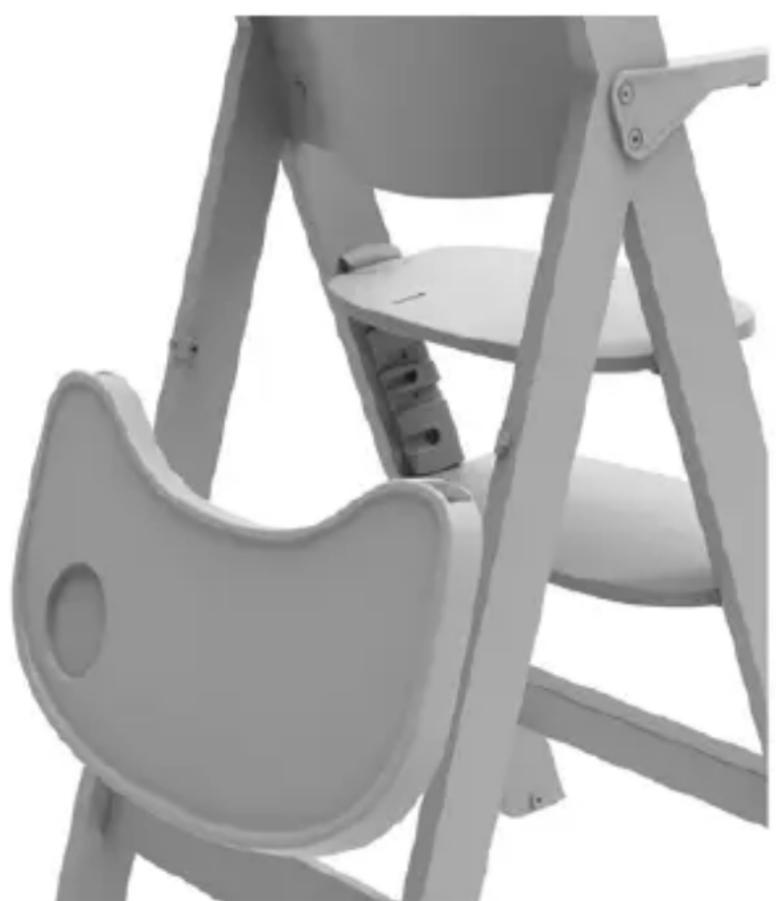
natural_image
3D rendered image of a baby chair with visible seat, legs, and side panel (no text or symbols)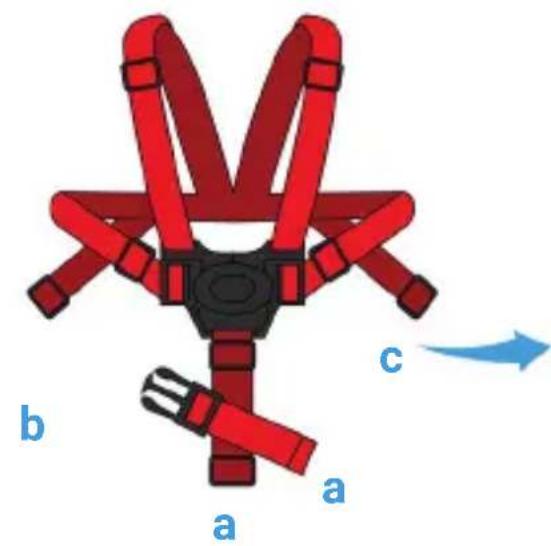
natural_image
Illustration of a child wearing a red safety harness and seatbelt, seated in a chair (no text or symbols)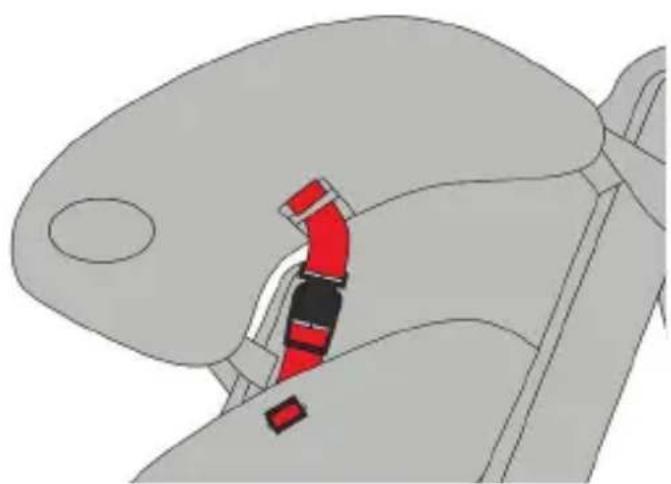
natural_image
Diagram of a car seatbelt mechanism showing red and black segments (no text or symbols)8

natural_image
Simple line drawing of a smiling baby face (no text or symbols)6 - 36 m
natural_image
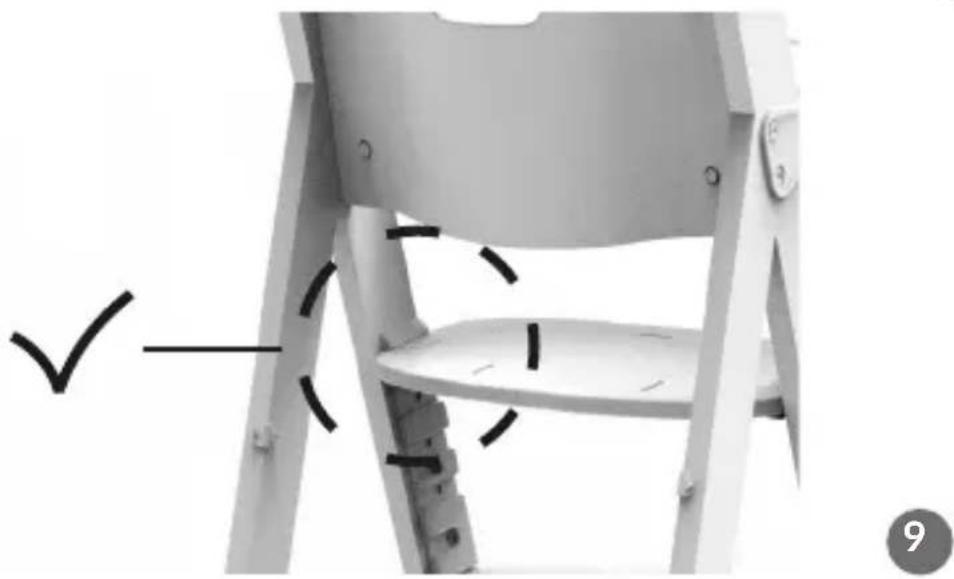
Close-up of a white chair with visible legs and seat, marked with a checkmark and number 9 (no text or symbols on the chair itself)9
Dear Customer!
In case of any questions or comments on the purchased product, please contact us:
help@lionelo.com
Producer:
BrandLine Group Sp. z o. o.
The product has been tested and complies with: EN 14988:2017+A1:2020, EN 17191:2021 standards.
Warnings for high chair:
IMPORTANT! READ CAREFULLY AND KEEP FOR FUTURE REFERENCE
WARNING
- Never leave the child unattended.
- Always use the restraint system.
- Falling hazard: Prevent your child from climbing on the product.
- Do not use the product unless all components are correctly fitted and adjusted.
- Be aware of the risk of open fire and other sources of strong heat in the vicinity of the product.
- Be aware of the risk of tilting when your child can push its feet against a table or any other structure.
- Do not use the product as long as your child cannot sit on its own.
- Do not use the product if any part is broken, torn or missing.
- Do not let your child get close when you assemble and disassemble this product.
- High chair functions – the product may be used by children aged 0,5-3 and whose weight does not exceed 15kg (fig. 9).
- Always use the crotch protection, the child must always be secured on the high chair, in any position. The tray does not provide safety to your child
while on chair.
- When the product is used as a high chair: use the highest position of the seat only.
Warnings for the child seat:
IMPORTANT! READ CAREFULLY AND KEEP FOR FUTURE REFERENCE
WARNING
- DO NOT place this product near a window as it can be used as a step by the child and cause the child to fall out of the window.
- Be aware of the risk of open fires and other sources of strong heat in the vicinity of the product.
- DO NOT place this product near a window where cords from blinds or curtains could strangle a child.
- The product may be used by children aged 3-12 and whose weight does not exceed 40 kg.
- All assembly fittings should always be tightened properly.
- Do not use the seating if any part is broken, torn or missing and use only spare parts approved by the manufacturer.
-
Restraint system shall be removed when the product is used as a seating.
-
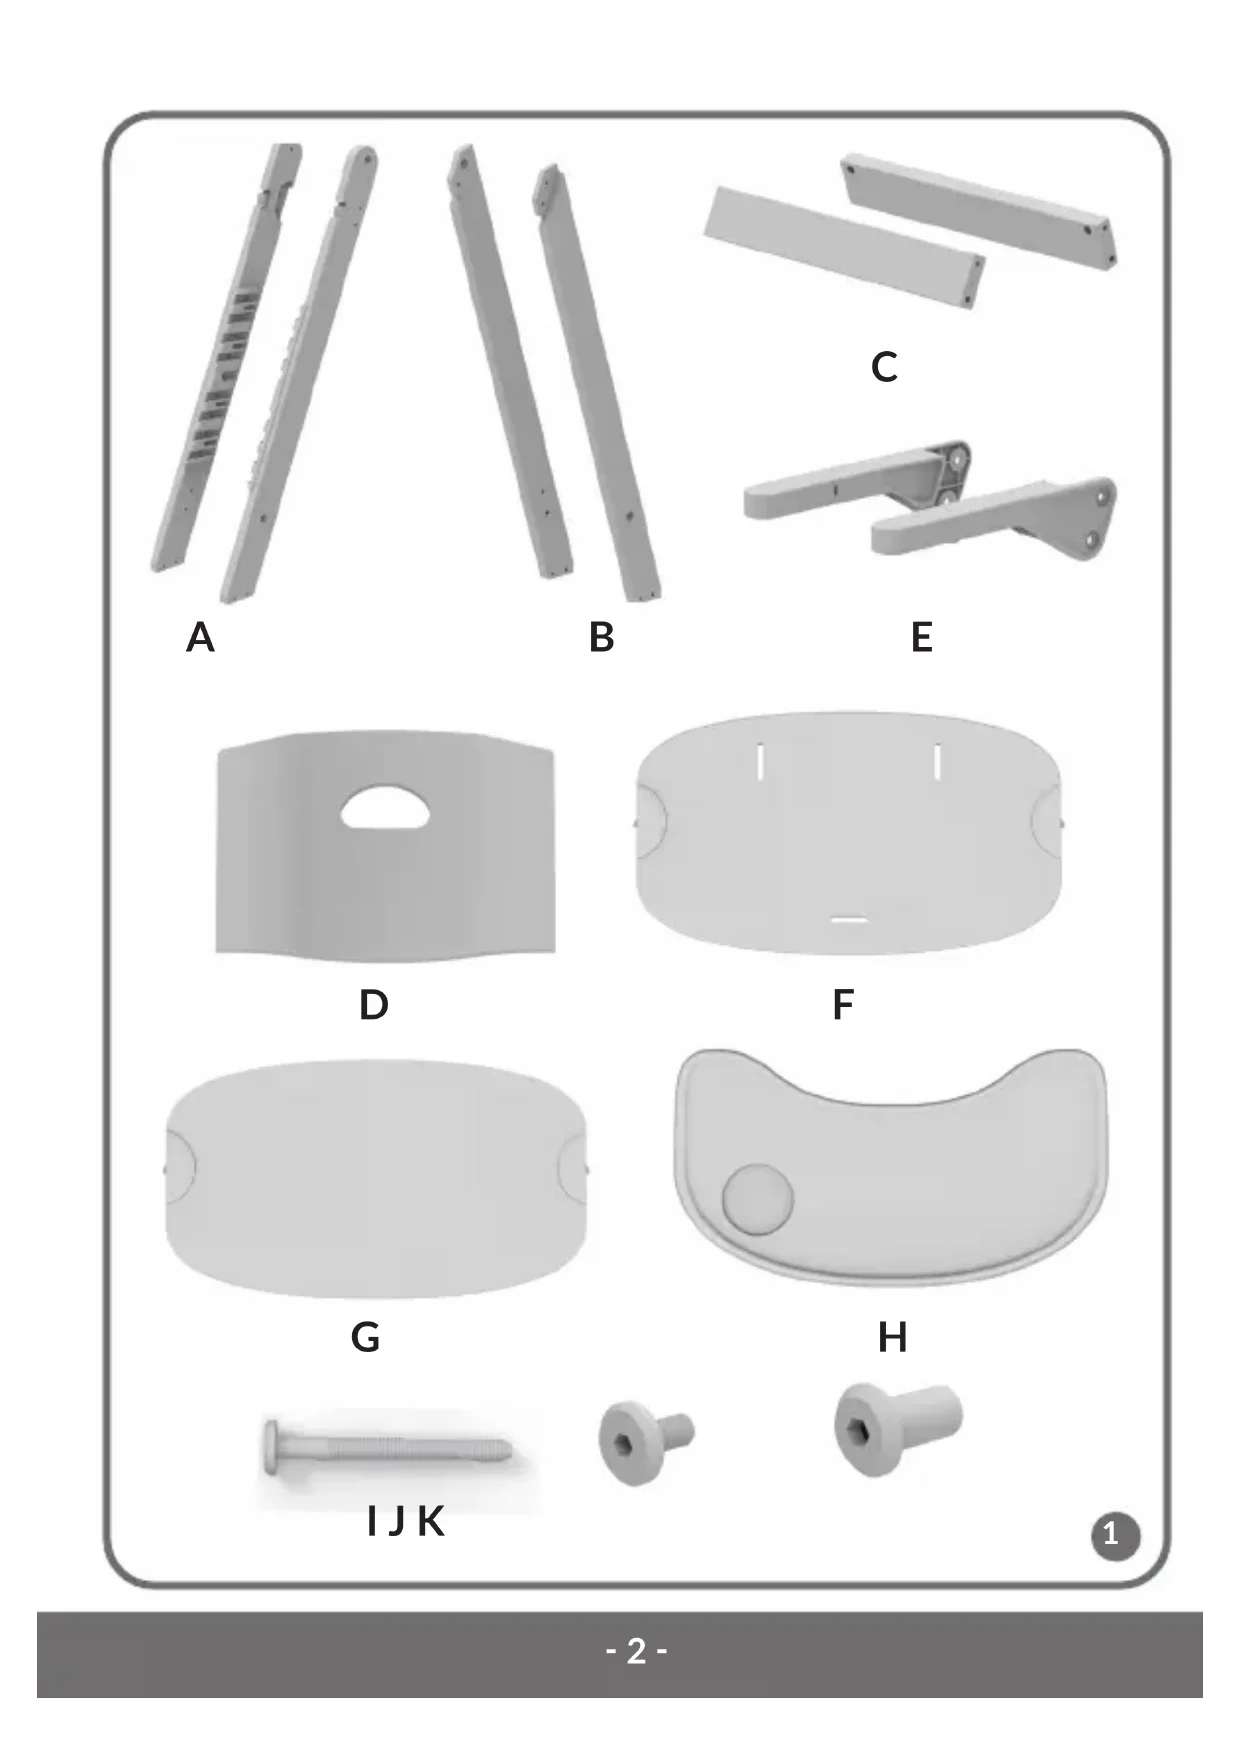
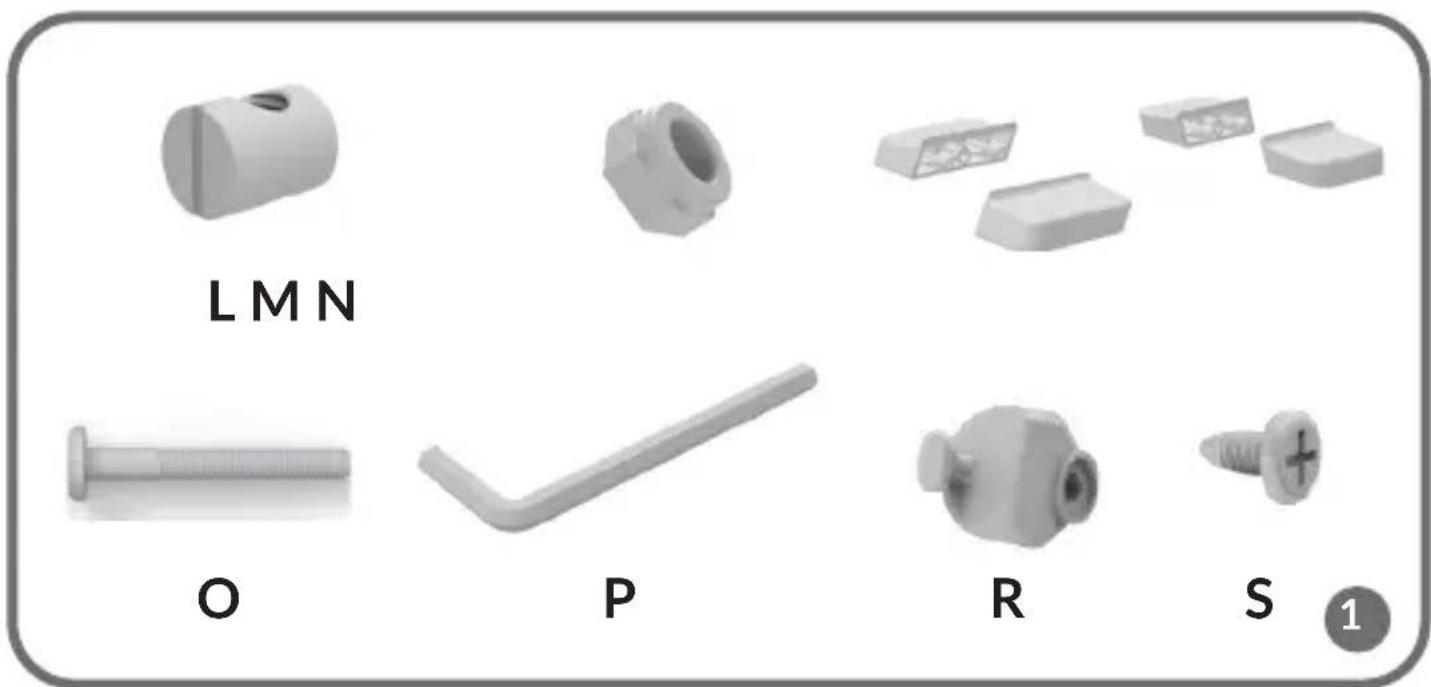
Description of product (see fig. 1):
A. Front legs (x2)
B. Rear legs (x2)
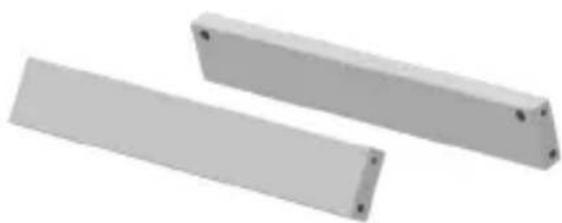
C. Brackets (x2)
D. Backrest
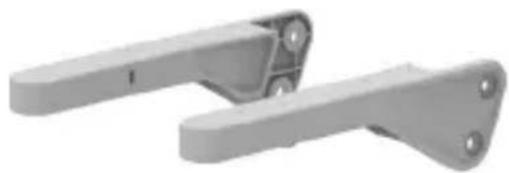
E. Elbow rests (x2) / tray guides
F. Seat
G. Footrest
H. Tray
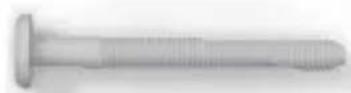
I. 60 mm screw (x8)
J. Short screw (x2)
K. Nut (x2)
L. Nut (x8)
M. Nut (x4)
N. Leg supports (x4)
O. 50 mm screw (x4)
P. Allen key
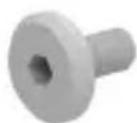
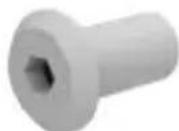
R. Tray hook
S. Tray hook screw
2. How to assemble
a) How to assemble legs and elbow rest (see fig. 2):
- Insert the nut (K) in the top hole on the internal side of the rear leg. Put the front leg and elbow rest against each other and then screw the short screw (J) with the Allen key. Do the same on the other side.
b) How to assemble backrest (see fig. 3):
- Position 4 nuts (L) with horizontal cut outwards and insert them in the holes at the back of the backrest.
• Tighten up long bolts (l) and nuts (L) in holes of front legs (A) with the Allen key
3. How to assemble brackets, seat and footrest (see fig. 4):
- Position the nuts (L) with the horizontal notch outwards and insert them into the holes in the brackets. Align the brackets (C), tighten the screws with the Allen key against the legs of the chair.
- Use the quick-fastening system to place the seat and footrest at the desired 4-level height.
- When the product is used as a high chair: use the highest position of the seat only.
4. How to assemble tray and legs support (see fig. 5):
- Adapt leg supports and tighten up long bolts (O) and nuts (M). NOTE: required to guarantee suitable stability.
- Press keys in the lower part on both sides of the tray and adjust to elbow rests. Choose 1 of 2 available tray adjustment levels (see fig. 6).
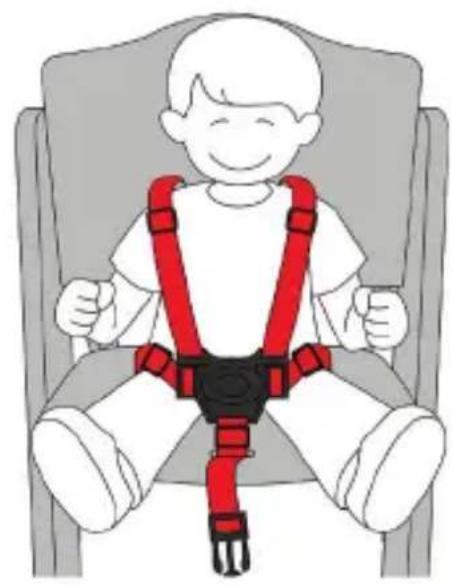
- Fasten 5-point safety belts and make sure the belts buckle works properly.
- Put the child in, adjust belts to the child and lock the buckle. For increased safety, fasten the crotch interlock by connecting the crotch belt to the tray.
- Install the tray hooks on the back legs of the chair using a screwdriver (see fig. 7).
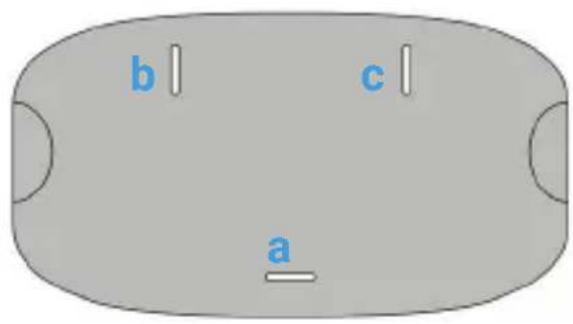
5. Safety belts assembly and disassembly (see: fig. 8):
- Put the shorter belt with the buckle into the slot in the seat.
- Put the safety harness into the remaining slots in the seat.
- Put the additional crotch belt into the slot in the seat.
-
Connect shoulder belts and lap belts.
-
Put the child in the seat and fasten the belts.
- Connect the crotch belt with the tray.
6. How to clean and store:
- Do not expose the chair to sunlight for a long time.
- If the set includes pillows must not be dry-cleaned or ironed. Machine wash at 30°C
- For cleaning, use soft cleaning agents.
- Frequently check the chair for damage and loose components.
- Wipe the seat with a wet cloth.
- Do not use abrasives.
- In case of any dirt on the tray, you can wash it in the dish washer.
- Stop using the chair if you have detected any damage.
- Protect against moisture.
The pictures are for reference only. The real design of products may differ from the pictures presented.
PL
Drogi Kliencie!
1. Description of product (see fig. 1):
Advarsler for barnestolen:
VIKTIG! LES N∅YE OG BEHOLD FOR FREMTIDIG BRUK
ADVARSEL
Detailed warranty conditions are available on the website:

- Dear Customer!
- Producer:
- Warnings for high chair:
- IMPORTANT! READ CAREFULLY AND KEEP FOR FUTURE REFERENCE
- WARNING
- Warnings for the child seat:
- How to assemble
- a) How to assemble legs and elbow rest (see fig. 2):
- b) How to assemble backrest (see fig. 3):
- How to assemble brackets, seat and footrest (see fig. 4):
- How to assemble tray and legs support (see fig. 5):
- Safety belts assembly and disassembly (see: fig. 8):
- How to clean and store:
- Drogi Kliencie!
- Description of product (see fig. 1):
- Advarsler for barnestolen:
- VIKTIG! LES N∅YE OG BEHOLD FOR FREMTIDIG BRUK
- ADVARSEL
Brand : Lionelo
Model : Floris
Category : High chair