
FLE05026X - Built-in oven CANDY - Free user manual and instructions
Find the device manual for free FLE05026X CANDY in PDF.
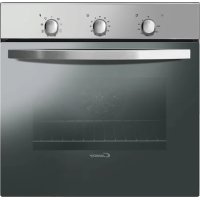


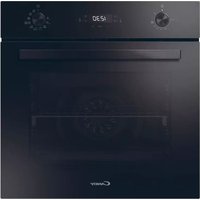
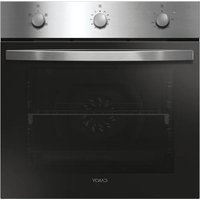
| Product type | Built-in oven |
| Brand | Candy |
| Model | FLE05026X |
| Dimensions (H x W x D) | 59.5 x 59.5 x 56 cm |
| Usable capacity | 70 litres |
| Net weight | 35 kg |
| Power supply | 220-240 V ~ 50/60 Hz |
| Total power | 3000 W |
| Cooking functions | Natural convection, forced air, grill, turbo grill, pizza, cook light, sprinter, soft cook, grill + rotisserie |
| Cleaning type | Aquactiva (steam), catalysis (optional) |
| Lighting | LED (U-See) |
| Timer | Audible timer and automatic cut-off |
| Child safety | Key lock |
| Door | Wide Door (large glass surface) |
| Included accessories | Simple grid, dish grid, drip tray, baking tray, pizza set (depending on model) |
| Maintenance | Clean with warm soapy water, non-abrasive sponge |
| Repairability | Spare parts available through approved service |
| Warranty | 2 years (parts and labor) |
| Standards | CE, compliance with European directives |
Frequently Asked Questions - FLE05026X CANDY
User questions about FLE05026X CANDY
0 question about this device. Answer the ones you know or ask your own.
Ask a new question about this device
Download the instructions for your Built-in oven in PDF format for free! Find your manual FLE05026X - CANDY and take your electronic device back in hand. On this page are published all the documents necessary for the use of your device. FLE05026X by CANDY.
USER MANUAL FLE05026X CANDY
WARNING: The appliance and its accessible parts become hot during use. Care should be taken to avoid touching heating elements.
- Children under 8 years of age must be kept away from the appliance unless they are continuously supervised.
- This appliance can be used by children aged from 8 years and above and persons with reduced physical, sensory or mental capabilities or lack of experience and knowledge if they have been given supervision or instruction concerning use of the appliance in a safe way and understand the hazards involved. Children must not play with the appliance.
- Cleaning and user maintenance shall not be made by children without supervision.
- During use the appliance becomes hot. Care should be taken to avoid touching heating elements inside the oven.
WARNING: Accessible parts may become hot during use. Young children must be kept away. - Do not use harsh abrasive cleaners or sharp metal scrapers to clean the oven door glass since they can scratch the surface, which may result in shattering of the glass. The oven must be switched off before removing the guard, after cleaning, the guard must be replaced in accordance with the instructions. - Only use the temperature probe recommended for this oven. - Do not use a steam cleaner for cleaning operations. - WARNING: Avoid possibility of electric shock - ensure the appliance is switched off before replacing the lamp. - The means for disconnection must be incorporated in the fixed wiring in accordance with the wiring rules. - The instructions state the type of cord to be used, taking into account the temperature of the rear surface of the appliance. - If the supply cord is damaged, it must be replaced by a special cord or assembly available from the manufacturer or its service agent. - CAUTION: In order to avoid a hazard due to inadvertent resetting of the thermal cutout, this appliance must not be supplied through an external switching device, such as a timer, or connected to a circuit that is regularly switched on and off by the utility. - CAUTION: Accessible parts may be hot when the grill is in use. Young children must be kept away. - Excess spillage must be removed before cleaning - During self-cleaning pyrolytic operation the surfaces may get hotter than usual and children MUST be kept away.
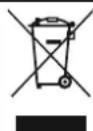
This appliance is marked according to the European directive 2012/19/EU on Waste Electrical and Electronic Equipment (WEEE). WEEE contains both polluting substances (which can cause negative consequences for the environment) and basic components (which can be re-used). It is important to have WEEE subjected to specific treatments, in order to remove and dispose properly all pollutants, and recover and recycle all materials. Individuals can play an important role in ensuring that WEEE does not become an environmental issue; it is essential to follow some basic rules:
WEEE shall not be treated as household waste.
WEEE shall be handed over to the relevant collection points managed by the municipality or by registered companies. In many countries, for large WEEE, home collection could be present. - When you buy a new appliance, the old one may be returned to the retailer who has to collect it free of charge on a one-to-one basis, as long as the equipment is of equivalent type and has the same functions as the supplied equipment.
1. GENERAL WARNINGS
Thank you for choosing one of our products. To get the most out of your oven we recommend that you:
- Read the notes in this manual carefully: they contain important instructions on how to install, use and service this oven safely.
- Keep this booklet in a safe place for easy, future reference.
All accessible parts are hot when the appliance is in operation, take care to not touch these elements.
When the oven is first switched on it may give out acrid smelling fumes. This is because the bonding agent for insulating panels around the oven has been heated up for the first time.
This is a completely normal, if it does occur you merely have to wait for the fumes to clear before putting the food into the oven.
An oven by its very nature becomes very hot. Especially the glass of the oven door.
1.1 DECLARATION OF COMPLIANCE
The parts of this appliance that may come into contact with foodstuffs comply with the provisions of EEC Directive 89/109.
Appliance complies with European Directives 73/23/EEC and 89/336/EEC, replaced by 2006/95/EC and 2004/108/EC, and subsequent
amendments.
When you have unpacked the oven, make sure that it has not been damaged in any way. If you have any doubts at all, do not use it: contact a professionally qualified person. Keep packing materials such as plastic bags, polystyrene, or nails out of the reach of children because they are dangerous for children.
1.2 SAFETY HINTS
- The oven must be used only for the purpose for which it was designed: it must only be used for cooking food. Any other use, e.g. as a form of heating, is an improper use of the oven and is therefore dangerous.
The manufacturers cannot be held responsible for any damage caused by improper, incorrect or unreasonable use. When using any electrical appliance you must follow a few basic rules.
- Do not pull on the power cable to remove the plug from the socket.
- Do not touch the oven with wet or damp hands or feet.
- Do not use the oven unless you are wearing something on your feet.
- It is not generally a good idea to use adapters, multiple sockets for several plugs and cable extensions.
- If the oven breaks down or develops a fault switch it off at the mains and do not touch it.
- If the cable is at all damaged it must be replaced promptly.
When replacing the cable, follow these instructions. Remove the power cable and replace it with one of the H05RRF, H05VV-F, H05V2V2-F type. The cable must be able to bear the electrical current required by the oven. Cable replacement must be carried out by properly qualified technicians. The earthing cable (yellow-green) must be 10 mm longer than the power cable.
Use only an approved service centre for repairs and ensure that only original parts are used. If the above instructions are not adhered to the manufacturers cannot guarantee the safety of the oven.
- Do not line the oven walls with aluminium foil or single-use protection available from stores. Aluminium foil or any other protection, in direct contact with the hot enamel, risks melting and deteriorating the enamel of the insides.
1.3 INSTALLATION
Installation is the customer's responsibility. The manufacturers have no obligation to carry this out. If the assistance of the manufacturer is required to rectify faults arising from incorrect installation, this assistance is not covered by the guarantee.
The installation instructions for professionally qualified personnel must be followed. Incorrect installation may cause harm or injury to people, animals or belongings. The manufacturer cannot be held responsible for such harm or injury.
1.4 FITTING THE OVEN INTO THE KITCHEN UNIT
Fit the oven into the space provided in the kitchen unit; it may be fitted underneath a work top or into an upright cupboard. Fix the oven in position by screwing into place, using the four fixing holes in the frame. (Fig. on last page).
To locate the fixing holes, open the oven door and look inside. To allow adequate ventilation, the measurements and distances indicated in the diagram on last page must be adhered to when fixing the oven.
Note: For ovens that are combined with a hob unit the instructions contained in the manual for the hob unit must be followed.
1.5 IMPORTANT
If the oven is to work properly, the kitchen housing must be suitable. The panels of the kitchen unit that are next to the oven must be made of a heat resistant material. Ensure that the glues of units made of veneered wood can withstand temperatures of at least 120°C. Plastics or glues that cannot withstand such temperatures will melt and deform the unit. Once the oven has been lodged inside the unit, the electrical parts must be completely insulated. This is a legal safety requirement. All guards must be firmly fixed into place so that it is impossible to remove them without using special tools.
Remove the back of the kitchen unit to ensure an adequate current of air circulates around the oven. The hob must have a rear gap of at least 45 mm.
1.6 CONNECTING TO THE POWER SUPPLY
Plug into the power supply. Ensure first that there is a third contact that acts as earthing for the oven. The oven must be properly earthed. If the model of oven is not fitted with a plug, fit a standard plug to the power cable. It must be able to bear the power supply indicated on the specifications plate. The earthing cable is yellow-green. The plug must be fitted by a properly qualified person. If the socket and the plug are incompatible, the socket must be changed by a properly qualified person. A properly qualified person must also ensure that the power cables can carry the current required to operate the oven.
An ON/OFF switch may also be connected to the power supply. The connections must take account of the current supplied and must comply with current legal requirements. The yellow-green earthing cable must not be governed by the ON/OFF switch. The socket or the ON/OFF switch used for connecting to the power supply must be easily accessible when the oven has been installed.
Important: During installation, position the power cable in such a way that it will not be subjected to temperatures of above 50°C at any point. The oven complies with safety standards set by the regulatory bodies. The oven is safe to use only if it has been adequately earthed in compliance with current legal requirements on wiring safety. You must ensure that the oven has been adequately earthed.
The manufacturers cannot be held responsible for any harm or injury to persons, animals or belongings caused by failure to properly earth the oven.
WARNING: the voltage and the supply frequency are shown on the rating plate (fig. on last page).
The cabling and wiring system must be able to bear the maximum electric power required by the oven. This is indicated on the specifications plate. If you are in any doubt at all, use the services of a professionally qualified person.
1.7 OVEN EQUIPMENT (according to the model)
It is necessary to do an initial cleaning of the equipment before the first use of each of them. Wash them with a sponge. Rinse and dry off.
The simple shelf can take moulds and dishes.
The tray holder shelf is especially good for grilling things. Use it with the drip tray.
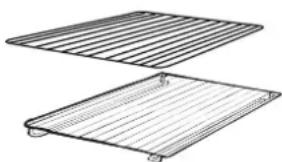
The special profile of the shelves means they stay horizontal even when pulled right out. There is no risk of a dish sliding or spilling.
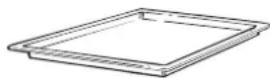
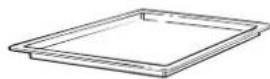
The drip tray catches the juices from grilled foods. It is only used with the Grill, Rotisserie, or Fan Assisted Grill; remove it from the oven for other cooking methods.
Never use the drip tray as a roasting tray as this creates smoke and fat will spatter your oven making it dirty.
The pizza set is designed for pizza cooking. In order to obtain the best results the set must be used together with Pizza function.
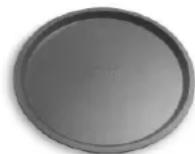
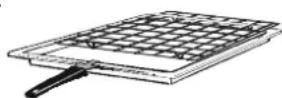
The tray holder
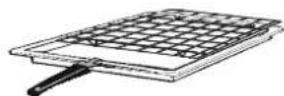
The tray holder shelf is ideal for grilling. Use it in conjunction with the drip tray. A handle is included to assist in moving both accessories safely. Do not leave the handle inside the oven.
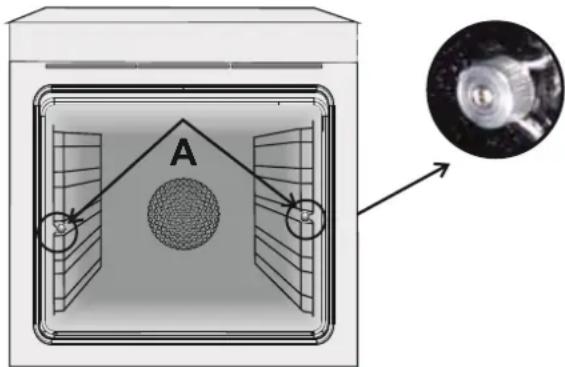
Removing and cleaning wire racks
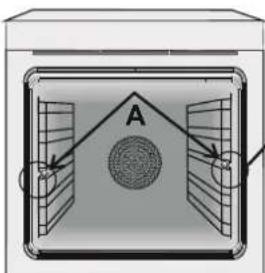
1- Remove the knurled nuts by turning them counterclockwise. 2- Remove the wire racks by pulling them towards yourself. 3- To clean the wire racks, either put them in the dishwasher or use a wet sponge, ensuring that they are dried afterwards. 4- After the cleaning process, install the wire racks in reverse order. 5- Replace the knurled nuts.
2.1 SHELF SAFETY SYSTEM
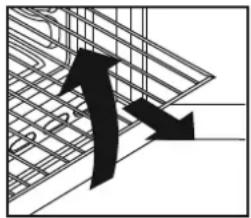
The oven features a new shelf safety system.
This allows you to pull out the oven shelves when inspecting the food without danger of food spillages or shelves falling accidentally out of the oven.
To remove the shelves, pull out and lift.
2.2 GRILLING
Grilling makes it possible to give food a rich brown colour quickly. For browning, we recommend that you insert the grill onto the fourth level, depending on the proportions of the food (see fig. page 7).
Almost all food can be cooked under the grill except for very lean game and meat rolls.
Meat and fish that are going to be grilled should first be lightly doused with oil.
2.3 The U·COOK MODELS
U-COOK Ovens have an electronic control of the fan speed, called and patented VARIOFAN. During cooking, this system automatically changes the speed of the fan (in multifunction mode) in order to optimize the air flow and the internal temperature in the cavity of the oven.

All Over the function.
This allows a management of the distribution of moisture and temperature. It reduces the loss of humidity by 50%, which guarantees the food remains tender and tastes better. This delicate cooking is recommended for the baking of bread and pastry.

It reduces the preheating time of ovens: only 8 minutes to reach 200 degrees Celsius.

It allows setting the level and intensity of grilling, with up to 50% more power compared to a traditional multifunction oven.
Some ovens are equipped with the new "WIDE DOOR" which has a larger window area, allowing better maintenance and improved thermal insulation.
2.4 Depending on the model

This is an illumination system that replaces the traditional light bulb. 14 LED lights are integrated within the door. These produce high-quality white illumination, enabling a clear view of the oven's interior without shadows on any of the shelves.
USE
Advantages:
In addition to providing excellent illumination inside the oven, this system lasts longer than the traditional light bulb, is easier to maintain, and most importantly, saves energy.
Optimum view - Long-lasting illumination - Very low energy consumption, -95% compared to traditional illumination. High
"Appliance with white light LED of Class 1M according to IEC 60825-1:1993 + A1:1997 + A2:2001 (equivalent to EN 60825-1:1994 + A1:2002 + A2:2001); the maximum emitted light power: 459nm < 150uW."
- A1: 2002 + A2: 2001); the maximum light power emitted. 459nm < 150uW.
Not observed directly with optical instruments.
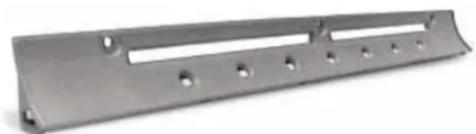
Special self-cleaning panels covered with a micro-porous coating are available as optional extras for all models. If fitted, the oven no longer needs to be cleaned by hand.
- Special self-cleaning panels covered in a micro-porous coating are available as optional extras for all models. If they are fitted, the oven no longer needs to be cleaned by hand.
Excessive splattering may nevertheless block the pores and therefore hinder self-cleaning. The self-cleaning capacity may be restored by switching on the empty oven to maximum for about 10-20 minutes. Do not use abrasive products, metal cleaning wads, sharp objects, rough cloths, or chemical products and detergents that may permanently damage the catalytic lining.
It is a good idea to use deep roasting trays to roast fatty foods such as joints of meat etc. and to put a tray underneath the grill to catch surplus fat. If the walls of the oven are so thickly coated in grease that the catalytic lining is no longer effective, remove surplus grease with a soft cloth or sponge soaked in hot water.
The lining must be porous for self-cleaning to be effective.
N.B.: All catalytic linings currently on the market have a working life of about 300 hours. They should therefore be replaced after about 300 hours.
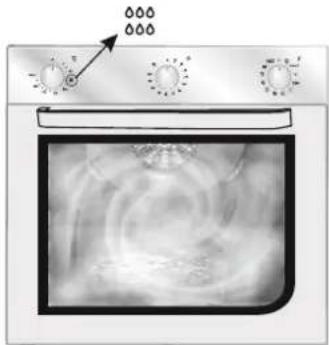
2.6 AQUACTIVA FUNCTION
The Aquactiva procedure uses steam to help remove remaining fat and food particles from the oven.
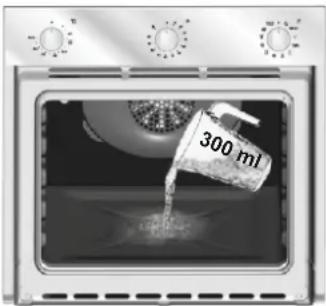
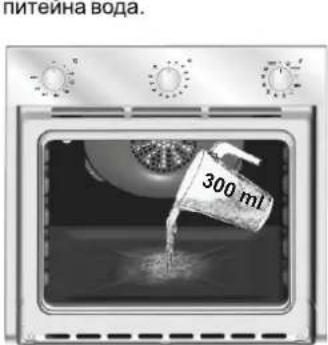
- Pour 300 ml of water into the Aquactiva container at the bottom of the oven.
- Set the oven function to Static ( ) or Bottom ( ) heater.
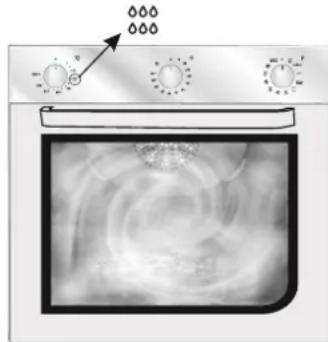
- Set the temperature to the Aquactiva icon.
- Allow the program to operate for 30 minutes.
- After 30 minutes, switch off the program and allow the oven to cool down.
- When the appliance is cool, clean the inner surfaces of the oven with a cloth.
Warning:
Make sure that the appliance is cool before you touch it. Care must be taken with all hot surfaces as there is a risk of burns. Use distilled or drinkable water.
2.7 CLEANING AND MAINTENANCE
Never use abrasive cleaners, wire wool, or sharp objects to clean the glass oven door.
Clean the stainless steel and enamelled surfaces with warm, soapy water or with suitable brand products. On no account use abrasive powders that may damage surfaces and ruin the oven's appearance. It is very important to clean the oven each time that it is used. Melted fat is deposited on the sides of the oven during cooking. The next time the oven is used this fat could cause unpleasant odours and might even jeopardise the success of the cooking. Use hot water and detergent to clean; rinse out thoroughly. To make this chore unnecessary all models can be lined with catalytic self-cleaning panels: these are supplied as an optional extra (see the section SELF-CLEANING OVEN WITH CATALYTIC LINING). Use detergents and abrasive metal pads like «brillo pads» for the stainless steel grills. The glass surfaces as the top, oven door and warming compartment door must be cleaned when they are cold. Damage that occurs to them because this rule was not adhered to are not covered by the guarantee. To replace the interior light: - switch off the mains power supply and unscrew bulb. Replace with an identical bulb that can withstand very high temperatures
2.8 SERVICE CENTRE
Before calling the Service Centre
If the oven is not working, we recommend that:
you check that the oven is properly plugged into the power supply.
If the cause of the fault cannot be detected:
disconnect the oven from the mains, do not touch the oven and call the after sales service.
Before calling the Service Centre remember to make a note of the serial number on the specifications plate (see fig. On last page).
The oven is supplied with a guarantee certificate that ensures that it will be repaired free of charge by the Service Centre
3. TIMER
3.1 USING THE MINUTE TIMER
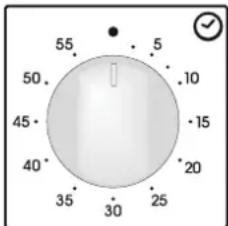
To set the cooking time, turn dial one complete revolution and then position the index to the required time. When the time has lapsed, the signal will ring for a few seconds.
3.2 USING THE END OF COOKING TIMER
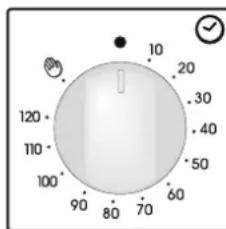
This control enables to set the desired cooking time (max. 120 min.) the oven will automatically switch off at the end of the set time.
The timer will count down from the set time, return to the O position, and switch off automatically.
For normal use of the oven, set the timer to the position.
To set the oven, ensure the timer is not on the O position.
3.3 SETTING THE CORRECT TIME
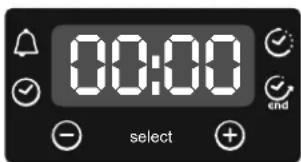
WARNING: the first operation to carry out after the oven has been installed or following the interruption of power supply (this is recognizable by the display pulsating and showing 1:00) is setting the correct time. This is achieved as follows.
- Push the central button 4 times.
Set time with the "-" button. Release all buttons.
ATTENTION: The oven will only operate providing the clock is set.
3.4 USE OF TOUCH CONTROL CLOCK PROGRAMMER
| FUNCTION | HOW TO ACTIVATE IT | HOW TO SWITCH ITOFF | WHAT IT DOES | WHAT IT IS FOR |
| KEY LOCK | ·Child Lock function is activated by touching Set (+) for a minimum of 5 seconds. From this moment on all other function are locked and the display will flash STOP and preset time intermittently. | ·Child Lock function is deactivated by touching touchpad Set (+) again for a minimum of 5 seconds. From this moment on all functions are selectable again. | ||
| MINUTE MINDER | ·Push the central button 1 times ·Press the buttons "+" " "+ to set the required time ·Release all the buttons | ·When the set time as elapsed an audible alarm is activated (this alarm will stop on its own, however it can be stopped immediately by pressing the button) SELECT. | ·Sounds an alarm at the end of the set time. ·During the process, the display shows the remaining time. | ·Allows to use the oven as alarm clock (could be activated either with operating the oven or with out operating the oven) |
| COOKING TIME | ·Push the central button 2 times ·Press the buttons "-" or "+" to set the lenght of cooking required ·Release all buttons ·Set the cooking function with the oven function selector | ·When the time is elapsed the oven will switch off automatically. Should you wish to stop cooking earlier either turn the function selector to 0, or set time to 0:00 (SELECT and "-" +" buttons) | ·It allows to preset the cooking time required for the recipe chosen. ·To check how long is left to run press the SELECT button 2 Times ·To alter/change the preset time press SELECT and "-" +" buttons. | ·Push any button to stop the signal. Push the central button to return to the clock function |
| END OF COOKING END | ·Push the central button 3 times ·Press the buttons "-" +" to set the time at which you wish the oven to switch off ·Release the buttons ·Set the cooking function with the oven function selector | ·At the time set, the oven will switch off. To switch off manually, turn the oven function selector to position O. | ·Enables you to set the end of cooking time ·To check the preset time push the central button 3 times ·To modify the preset time press buttons SELECT + "-" +" | ·This function is typically used with "cooking time" function. For example if the dish has to be cooked for 45 minutes and needs to be ready by 12:30, simply select the required function, set the cooking time to 45 minutes and the end of cooking time to 12:30. ·At the end of the cooking set time, the oven will switch off automatically and an audible alarm will ring. ·Cooking will start automatically at 11:45 (12:30 minus 45 mins) and will continue until the pre-set end-of-cooking-time, when the oven will switch itself off automatically. WARNING. If the END of cooking is selected without setting the length of cooking time, the oven will start cooking immediately and it will stop at the END of cooking time set. |
4. OPERATING INSTRUCTIONS
| Function dial | Temperature pre-set and setting. (Model with electronic programmer) (Type A) | Thermostat dial | Function |
| Turns on the oven lightThis will automatically activate the cooling fan (on fan cooled models only) | |||
| DefrostingWhen the dial is set to this position. The fan circulates air at room temperature around the, frozen food so that it defrosts in a few minutes without the protein content of the food being changed or altered. | |||
| Sprinter\(\overline{\mathbf{F}}\) | MAX | MAX | Super GrillThis function allows to set food crunchiness. The Super Grill function is characterized by a 50% power increase in comparison to the standard grill. |
| 22050÷240 | 50÷MAX | Natural convectionBottom and top oven elements are used. This is the traditional form of baking and roasting. It is ideal for roasting joints of meat and game, baking biscuits and apples and making the food nice and crunchy. | |
| 20050÷230 | 50÷MAX | Fan cookingBoth top and bottom heating elements are used with the fan circulating the air inside the oven.We recommend you use this method for poultry, pastries, fish and vegetables. Heat penetrates into the food better and both the cooking and preheating times are reduced. You can cook different foods at the same time with or without the same preparation in one or more positions.This cooking method gives even heat distribution and the smells are not mixed. Allow about ten minutes extra when cooking foods at the same time. | |
| 20050÷230 | - | Soft Cook (a)Soft Cook is the function for the confectionery and the bread. Thanks to its reduced fan speed, this function increases oven internal damp. The increased damp creates the ideal conditions of cooking for those foods that need to maintain an elastic consistence while they are cooking (ex. cakes, bread, biscuits) avoiding surface breakages. | |
| 16050÷220 | 50÷MAX | Fan plus lower elementThis function is ideal for delicate dishes (pies-souffle). | |
| Level 41÷4 | 50÷MAX | GRILL: use the grill with the door closed.The top heating element is used alone and you can adjust the temperature. Five minutes preheating is required to get the elements red-hot. Success is guaranteed for grills, kebabs and gratin dishes. White meats should be put at a distance from the grill; the cooking time is longer, but the meat will be tastier. You can put red meats and fish fillets on the shelf with the drip tray underneath. | |
| Supergrill\(\overline{\mathbf{F}}\) | Level 41÷4 | 50÷MAX | SUPER GRILL: the oven has two grill positionsGrill: 2200 W Grill SUPER: 3000 W |
| 190180÷200 | 50÷200 | FAN ASSISTED GRILL (a): use the turbo-grill with the door closed.The top heating element is used with the fan circulating the air inside the oven. Preheating is necessary for red meats but not for white meats. Ideal for cooking thick food items, whole pieces such as roast pork, poultry, etc. Place the food to be grilled directly on the shelf centrally, at the middle level. Slide the drip tray under the shelf to collect the juices. Make sure that the food is not too close to the grill. Turn the food over halfway through cooking. | |
| Level 41÷4 | 50÷200 | Grill/spit element.This is used for roasting on the spit. | |
| 220 | 50÷MAX | Function PizzaThis function with hot air circulated in the oven ensure perfect result for dishes such as pizza or focaccia. | |
| 190180÷200 | 50÷200 | The "COOK LIGHT" function allows you to cook in a healthier way, by reducing the amount of fat or oil required. Thanks to the use of the grill and fan combined with a pulsating cycle of air, it will retain the moisture content of the food, grilling the surface and using a shorter cooking time, without compromising on taste.It is particularly suitable for cooking meat, roasted vegetables and omelettes. The cycle of pulse air keeps the humidity inside the oven and the moisture content of the food, preserving the nutritional values and ensuring a rapid uniform cooking process.Try all your recipes and reduce the amount of dressing you usually use and experience the lightness of this new function! |
(a) on some models: function with "Vario Fan" is the exclusive system developed by Candy to optimize the cooking results, temperature management, and damp management. The Vario Fan system is a self-activating system that changes automatically fan speed when a fan function is chosen: the fan functions are the ones inside the outlined area on the control panel. Tested in accordance with the CENELEC EN 60350-1 * Tested in accordance with the CENELEC EN 60350-1 definition of energy class.
VEGETABLE MUFFINS
Ingredients:
200 g of courgettes
200 g of potatoes
- 200 g of sweet potatoes
- 1 red pepper
- yellow pepper
- 100 g of provolone cheese - 20 g of breadcrumbs
Cut the courgettes and peppers and dice the potatoes, boil for a few minutes on hob top. Cut and stir fry the other vegetables for 5 minutes in a pan with olive oil and paprika, salt and pepper.
Once the potatoes are boiled mash and add to the other vegetables and chopped provolone.
In the meantime, prepare a mixture of breadcrumbs and parmesan cheese, mix half of it into the vegetables.
Flour the muffin molds and fill to the brim, put the remaining of bread and cheese mixture on the top and add a little olive oil. Bake in the oven with the COOK
LIGHT function at 180 degrees for 15-20 minutes, until they are beautifully golden in colour.
Ingredients:
6 eggs, 10 courgette flowers - 1 boiled potato
- 1 slice of boiled pumpkin, 200 g of parmesan cheese
turmeric, 6 tablespoons of milk
- Cut and boil 1 potato. Cut the pumpkin into slices and place on a baking sheet, put into the oven at 160 degrees for approximately 20 minutes. Once cooked, mash with a fork.
Beat the eggs and add the boiled potato and the crushed pumpkin, milk, parmesan cheese, turmeric, salt and pepper.
Mix all the ingredients together and add the courgette flowers, ensure that they are cleaned and cut into small pieces.
Pour the mixture into the tin and bake with the COOK LIGHT function in the oven preheated at 180 for 20 minutes.
5. TABLES OF COOKING TIMES
The overall suggested cooking times set out below are intended as a rough guide only. They may in fact vary according to the quality, the freshness, the size and the thickness of the food cooked and of course cooking time is also partly a matter of taste. Let the food stand for a few minutes before serving because the ingredients continue cooking after they have been removed from the oven.
HANDY TIP: Lower the temperature so as to avoid the surface of the food becoming hard and dry.
Shelf position
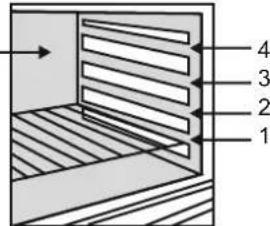
| Static electric oven | Electric fan oven | |||||||
| Food | Quantity | Shelf | Time of cooking in minutes | Oven temperature | Shelf | Time of cooking in minutes | Oven temperature | Remarks |
| · Pasta | ||||||||
| Lasagne | Kg 3,5 | 2 | 70 ÷ 75 | 220 | 2 | 60 ÷ 65 | 200 | Put the lasagne into an unheated oven |
| Cannelloni | Kg 1,8 | 2 | 50 ÷ 60 | 220 | 2 | 40 ÷ 50 | 200 | Put the cannelloni into an unheated oven |
| Oven baked pasta | Kg 2,5 | 2 | 55 ÷ 60 | 220 | 2 | 45 ÷ 50 | 200 | Put the oven baked pasta into an unheated oven |
| · Baking (not cakes) | ||||||||
| Bread | Kg 1 di pasta | 2 | 35 10 (pre-heating) | 200 | 2 | 30 ÷ 35 10 (pre-heating) | 180 | Form the dough into a loaf and make a cross with a knife on top of the dough leave the dough to rise for at least 2 hours. Grease the baking tin and put the dough in the middle of it. |
| Pizza | Kg 1 | 1 | 25 ÷ 35 | 190 | 1 | 20 ÷ 25 | 190 | Warm the oven for 15 minutes and place the pizzas on the greased baking tray. Garnish them with tomatoes, mozzarella, ham, oil, salt and origano. |
| Pastry (frozen) vol au vents | n° 24 | 1 | 30 ÷ 35 | 220 | 2 | 25 ÷ 30 | 200 | Place 24 vol au vents in the oven and bake. |
| Focaccia (n° 4) | gr. 200 of dough each | 2 | 25 ÷ 30 | 200 | 2 | 20 ÷ 25 | 180 | Warm the oven for 15 minutes, grease the baking tray, season the 4 focaccia with oil and salt and leave them to rise a room temperature for at least 2 hours before put ting them in the oven. |
| · Meat | ||||||||
| All meats can be roasted in shallow or deep roasting trays.It is advisable to cover the shallow trays to avoid splattering the sides of the oven with grease.The roasting times are the same whether the meat has been covered up or not. | ||||||||
| Whole joint of beef | Kg 1 | 3 | 70 ÷ 80 | 220 | 3 | 50 ÷ 60 | 200 | Put the meat into a deep Pyrex dish and season with salt and pepper; turn the meat half way through cooking. |
| Joint of deboned | Kg 1 | 2 | 100 ÷ 110 | 220 | 2 | 80 ÷ 90 | 200 | Cook the meat in a covered Pyrex dish with herbs, spice, oil and butter. |
| Joint of deboned veal | Kg 1,3 | 1 | 90 ÷ 110 | 220 | 2 | 90 ÷ 100 | 200 | Cook as indicated above |
| Joint of fillet of beef | Kg 1 | 2 | 80 ÷ 90 | 220 | 2 | 80 ÷ 90 | 200 | Cook as indicated above. |
- TABLES OF COOKING TIMES
| Static electric oven | Electric fan oven | |||||||
| Food | Quantity | Shelf | Time of cooking in minutes | Oven temperature | Shelf | Time of cooking in minutes | Oven temperature | Remarks |
| Rabbits and Poultry | ||||||||
| Guinea fowl | Kg 1-1,3 | 2 | 60 + 80 | 220 | 2 | 60 + 70 | 200 | Place the guinea fowl in a deep Pyrex or pottery dish with very little oil and season with herbs and spices. |
| Chicken | Kg 1,5-1,7 | 2 | 110 + 120 | 220 | 2 | 100 + 110 | 200 | Follow the procedure for cooking the guinea fowl. |
| Rabbit pieces | Kg 1-1,2 | 2 | 55 + 65 | 220 | 2 | 50 + 60 | 200 | Put all the pieces of the same size in the glazed tray. Season with herbs and spices. Turn the pieces as and when required. |
| Cakes | ||||||||
| Coconut cake baked in a tin | 1 | 55 | 180 | 1 | 50 | 160 | Use a tin that is 22 cm deep. Pre-heat for 10 mins. | |
| Sponge cake | 1 | 55 | 175 | 1 | 40 + 45 | 160 | Use a tin that is 22 cm deep. Pre-heat for 10 mins. | |
| Carrot cake baked in a tin | 1 | 65 | 180 | 1 | 50 + 60 | 160 | Use a tin that is 22 cm deep. Pre-heat for 10 mins. | |
| Apricot pie | 700 gr | 1 | 40 | 200 | 2 | 30 + 35 | 180 | Use a tin that is 22 cm deep. Pre-heat for 10 mins. |
| Vegetable | ||||||||
| Fennel | 800 gr | 1 | 70 + 80 | 220 | 1 | 60 + 70 | 200 | Cut the fennel into four pieces, add butter, salt and potatoes if required and place in a Pyrex face up. Cover the dish |
| Courgettes | 800 gr | 1 | 70 | 220 | 1 | 60 + 70 | 200 | Slice the courgettes, place in a Pyrex dish and add butter and salt. |
| Potatoes | 800 gr | 2 | 60 + 65 | 220 | 2 | 60 + 65 | 200 | Cut the potatoes into equal parts and place in a Pyrex dish. Season with salt, origano and rosemary. Cook in oil. |
| Carrots | 800 gr | 1 | 80 + 85 | 220 | 1 | 70 + 80 | 200 | Slice the carrots, place in a Pyrex dish and cook. |
| Grilling | ||||||||
| Place the food to be grilled underneath the infra-red grill. Warning: When the grill is on it takes on a bright red colour. Place the tray underneath the grill to collect juices and fat from the food being grilled. | ||||||||
| Squares of bread for toasting | 4 pieces | 4 | 5 (5 to heat up grill) | Grill Grill | 4 | 5 (10 to heat up grill) | Lay the bread on the grill tray. When one side of the bread has been toasted, turn over and toast the other side. Remember: keep the toast warm at the bottom of the oven until you are ready to serve it. | |
| Toasted sandwiches | 4 | 3 | 10 (10 to heat up grill) | Grill Grill | 3 | 5/8 (10 to heat up grill) | Lay the bread on the grill tray. When one side of the sandwich has been toasted, turn over and toast the other side. | |
| Sausages | n°6 / Kg 0,9 | 4 | 25/30 (5 to heat up grill) | Grill Grill | 4 | 15/20 (10 to heat up grill) | Cut the sausages in half and lay them face down on the grill. Half way through grilling turn them over. Every so often, check that they are being cooked equally all over. (If this is not happening, turn and reposition the ones being cooked either less or more than the others. | |
| Ribs of beef | n°4 / Kg 1,5 | 4 | 25 (5 to heat up grill) | Grill Grill | 4 | 15/20 (10 to heat up grill) | Make sure that the ribs of beef are exposed to the full effect on the main grill. | |
| Chicken legs | n°4 / Kg 1,5 | 3 | 50/60 (5 to heat up grill) | Grill Grill | 3 | 50/60 (10 to heat up grill) | Turn them over twice during grilling | |
| Fish | ||||||||
| Trout | 3 whole trout or / Kg 1 | 2 | 40 + 45 | 220 | 2 | 35 + 40 | 200 | Cover the trout with salt, oil and onions and cook in a Pyrex dish. |
| Salmon | 700 g 2,5 cm slice | 2 | 30 + 35 | 220 | 2 | 30 + 25 | 200 | Cook the salmon in an open Pyrex dish with salt, pepper and oil. |
| Sole | Kg 1 | 2 | 40 + 45 | 220 | 2 | 35 + 40 | 200 | Cook the sole with salt and a spoonful of oil. |
| Bream | 2 whole ones | 2 | 40 + 45 220 | 2 | 35 + 40 | 200 | Cook the bream in oil and salt in a covered dish. | |
| Fruit | ||||||||
| Whole apples | Kg 1 | 1 | 45 + 55 | 220 | 2 | 45 + 55 | 200 | Bake the fruit in an open Pyrex or earthen-ware dish. Leave it to cool inside the oven. |
| Pears | Kg 1 | 1 | 45 + 55 | 220 | 2 | 45 + 55 | 200 | Follow procedure above. |
| Peaches | Kg 1 | 1 | 45 + 55 | 220 | 2 | 45 + 55 | 200 | Follow procedure above. |
If these norms are not observed, the manufacturer bears no responsibility.
The oven complies with safety requirements, the standards provided for, and must be connected to a grounded outlet with a grounding conductor ensuring reliable grounding.
For electrical connection, it is necessary to install appropriate fuses and cables with sufficient cross-section for normal operation of the oven. Connection:
This oven is equipped with a power cord for connection only to electrical equipment with a voltage of 230 V - between phases or between phase and neutral.
Before connection, check:
- The voltage indicated on the electrical plate.
- The presence of an automatic circuit breaker.
The grounding conductor (yellow-green) of the oven must be connected to the grounding system of the house's electrical equipment. The reliability of the grounding system of the house's electrical equipment must be checked by a qualified electrician before electrical connection.
Note: Do not forget that the appliance may require technical maintenance, which must be performed by a service center. Therefore, it is necessary to ensure easy access to the appliance. Replacement of the power cord must be carried out by a service center employee or a qualified specialist. When replacing, follow the specified characteristics of the appliance. Protection class against electric shock.
1.6 Additional oven equipment
Before first use of additional equipment items, wash them using a sponge. Then dry them thoroughly with a cloth.
The simple grid is used for placing dishes during baking.
The grid with guides is used, in particular, for preparing grilled dishes, as it is attached to the guides for collecting fat released during cooking.
The special telescopic guides ensure the horizontal position of the grids when removing them from the oven, which prevents the dishes from tipping over.
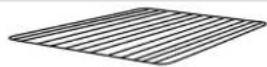
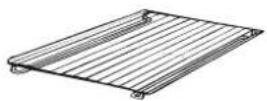
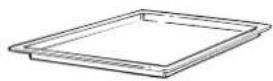
The tray is used to collect the juice released during cooking on the grill.
It is used only when cooking on the grill, on the spit, or on the grill with ventilation (depending on the model); when using other modes, it should be removed from the oven.
Do not use the juice collection tray as a baking tray, as this will create smoke and grease will deposit on the oven walls.
The skewers were designed for cooking on the spit. To get the best results, they must be used together with the "Spit" function.
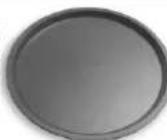
Grill grid. Ideal for cooking on the grill. Use together with the tray and juice collection. The set includes a handle, with which you can safely move these items. Do not leave the handle inside the oven.
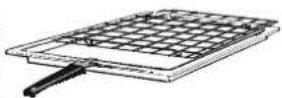
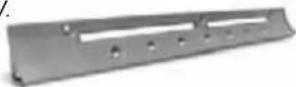
Cleaning accessory for the metal guides.
1- Unscrew the rotating screws, turning them counterclockwise. 2- Remove the metal guides by pulling them towards you. 3- Clean the metal guides with a sponge and dishwashing liquid, or in the dishwasher. Dry the metal guides after cleaning. 4- After cleaning, install the metal guides in the oven, repeating steps 1 and 2 in reverse order. 5- Tighten the screws.
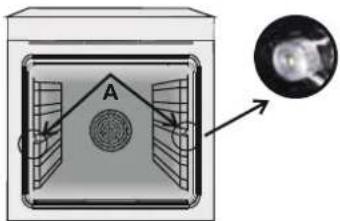
If the additional equipment items are not used, they should be removed from the oven.
2. USEFUL TIPS
2.1 SHELF SAFETY SYSTEM
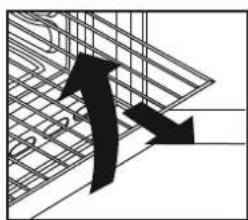
The oven is equipped with a shelf safety system. It allows you to pull out the shelves for checking the food without the risk of them slipping or accidentally falling out of the oven. To fully remove the shelf, lift it towards you and upwards.
2.2 COOKING ON THE GRILL
Using the grill, you can quickly cook a crispy crust. It is recommended to place the grid on the fourth level, depending on the size of the dish (see page 65). Practically any product can be cooked on the grill, except for very fatty or meaty dishes.
The meat should be greased with oil before cooking on the grill.
2.3 MODE COOK
The U-COOK ovens are equipped with an electronic convection speed control, patented under the name Vario Fan. During cooking, this system automatically changes the convection speed (multifunctional mode) to optimize the air flow and the internal temperature of the oven.
Soft
All U-COOK ovens are equipped with the Soft function. Thanks to this, it is possible to control the distribution of humidity and temperature. This reduces cooking time by 50%, which ensures tenderness and excellent taste of dishes. This is a delicate cooking method, recommended for baking bread and pastry products.
Sprinter
Reduces the preheating time of the oven: 200 degrees Celsius is reached in just 8 minutes.
Supergrill
Makes it possible to set the level of grilling intensity, up to 50% more power compared to traditional multifunctional ovens.
Some ovens are equipped with a new door design WIDE DOOR, with larger glass, which allows better access to the oven and ensures better thermal insulation.
2.4 Replacing the lighting in U-SEE models
This is a lighting system that replaces the usual lamp. 14 LEDs are built into the door. They illuminate with bright white light, which allows you to see the interior of the oven well without darkening at all levels.
Advantages:
The U.SEE system, in addition to excellent lighting, is characterized by a longer service life compared to a regular lamp, it is easier to maintain and it is more energy-efficient.
-Excellent visibility -Longevity -Low energy consumption, 95% less than a regular lamp -High quality
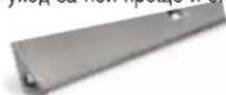
LED lighting complies with laser class 1M in accordance with IEC 60825-1:1993+A1:1997+A2:2001 (equivalent to EN 60825-1:1994+A1:2002+A2:2001); maximum emitted optical power 459nm < 150uW.
It is installed directly on the light source using optical instruments.
2.5 CATALYTIC SELF-CLEANING OVEN
Special panels, coated with enamel with a microporous structure, sold as additional equipment for all models, eliminate the need to clean the oven manually.
During the cooking process, grease deposited on the oven walls is converted into harmless substances through a catalytic oxidation process.
Grease splatters can clog the pores, thus hindering self-cleaning. This property of the protective panels can be restored by heating the empty oven for 10-20 minutes at maximum temperature. Do not use abrasive cleaners, metal scouring pads, sharp objects, harsh sponges, chemical substances, or cleaning agents that could irreparably damage the enamel. It is also recommended to use containers with high sides when cooking particularly fatty dishes (such as roasts) to prevent splattering. If, due to the nature of the contamination, the aforementioned measures prove insufficient, it is recommended to remove the grease with a soft cloth or sponge moistened with hot water. Regular cleaning is a prerequisite for ensuring the self-cleaning effect. N.B. Please note: all self-cleaning panels available on the market are designed for approximately 300 hours of oven operation. After this period, the panels should be replaced.
2.6 ACTIVATION FUNCTION
The Activation function uses steam to remove grease deposits and food residues left in the oven cavity after cooking. 1. Pour 300 ml of water into the special recess located on the bottom of the oven cavity. 2. Set the thermostat ( ) or lower (heat) 3. Set the temperature regulator to the activation mode 4. Leave the program on for 30 minutes. 5. After 30 minutes, turn off the program and let the oven cool down. 6. When the oven has cooled, clean the internal surfaces of the cooking cavity with a cloth or soft sponge. WARNING: Make sure the appliance is cool before touching it. Caution must be exercised with all hot surfaces, as there is a risk of burns. Use only distilled or demineralized water.
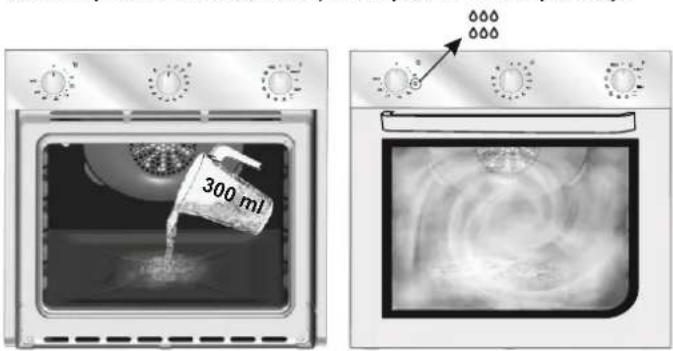
2.7 CARE AND CLEANING
- Before starting to clean the appliance, wait until it has cooled down. -Do not use abrasive cleaners, metal scouring pads, or sharp scrapers that could damage the enameled steel surface. Use cleaning agents based on soap. The oven is very important to wash after each use. During cooking, grease accumulates on the oven walls. If left unused, the oven may emit unpleasant odors and affect the quality of the dish. For oven cleaning, use a mild detergent, rinse thoroughly with clean water.
GLASS PARTS
Wipe the glass door with a damp cloth. If the surface remains too dirty, use a soft sponge with detergent. Rinse with clean water and wipe dry. Do not use abrasive agents or sharp objects. The door seal should be cleaned with a soft sponge and detergent.
ADDITIONAL EQUIPMENT
Clean with a sponge soaked in soapy solution, then rinse with clean water and wipe dry.
TRAY
After cooking, remove the tray from the oven. Pour its contents into a dish, wash it with hot water and mild detergent, then rinse with hot water and wipe dry. To remove burnt food residues, soak the tray in water with added detergent. The tray can be washed in a dishwasher or with special products available on the market. Never leave a dirty tray in the oven. OVEN LIGHTING
Before any cleaning or lamp replacement, unplug the oven. The lamp is protected by a cover made of materials resistant to high temperatures.
Lamp specifications:
230 V - 25 W - socket E 14 - temperature up to 300°C
If you need to replace the lamp, remove the protective glass cover, unscrew the lamp, replace it with a new one of the same type, and reinstall the protective glass cover.
2.8 MAINTENANCE AND SERVICE
Contact the service center.
If the oven does not work, we recommend you
- check that the plug is correctly inserted into the socket; if you cannot find the cause of the malfunction.
Turn off the appliance, do not attempt to repair it yourself, and contact an authorized service center. When contacting the authorized service center, you must provide the model name and serial number of the product, which you can find on the warranty certificate or on the rating plate. The product is covered by a warranty certificate, on the basis of which it will be repaired free of charge at the authorized service center within the warranty period.
The serial number consists of 16 digits. The first 8 digits are the model code. The next 4 digits are the production date (year, week). The last 4 digits are the factory number.
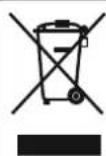
Disposal of waste electrical and electronic equipment (WEEE) in accordance with European Directive 2012/19/EC. Waste electrical and electronic equipment contains hazardous substances that can have a negative impact on the environment.
The main components are subject to reuse. It is important that waste electrical and electronic equipment is subjected to special treatment to remove and neutralize all hazardous substances, as well as to regenerate and reuse all materials.
What can make a significant contribution to preventing environmental problems caused by waste electrical and electronic equipment? For this, it is necessary to adhere to some basic rules:
Do not dispose of waste electrical and electronic equipment with household waste. - Waste electrical and electronic equipment should be handed over to collection points controlled by local authorities or registered companies. In many countries, for large quantities of waste electrical and electronic equipment, waste collection is carried out at home. - When purchasing a new appliance, the old appliance can be returned to the retail seller, which is obliged to accept it free of charge on the basis of mutual agreement, if the new appliance is of a similar type and the returned appliance has the same functions as the one being sold.
3. TIMER
3.1 USING THE TIMER
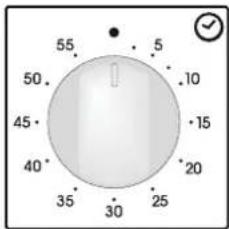
Set the cooking time using the knob with the required time, after the set period of time, a sound signal will sound for a few minutes.
3.2 USING THE TIMER FOR END OF COOKING TIME
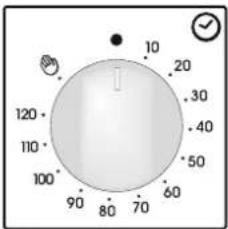
With this function, you can set the required cooking time (max. 120 min), after which the oven switches off automatically.
The timer counts down the set time and switches off automatically.
SAFETY INSTRUCTIONS
- WARNING: The appliance and its accessible parts become hot during use. Be careful not to touch them.
- Children under 8 years of age must not be allowed near the appliance without parental supervision. This appliance can be used by children over 8 years of age and by persons with reduced physical, sensory or mental capabilities, or lack of experience and knowledge, only if they have been given supervision or instruction concerning use of the appliance in a safe way and understand the hazards involved.
- The appliance must not be used by children without supervision. Cleaning and user maintenance shall not be made by children without supervision. WARNING: The appliance becomes hot during operation. Be careful not to touch the heating elements located inside the oven. WARNING: The accessible parts of the appliance become hot during operation. Do not allow children to touch them. Do not use abrasive cleaners or metal scrapers to clean the oven door glass, as they can scratch the surface, which may result in shattering of the glass.
- Before cleaning the oven, you must remove the grid and unplug the appliance. After cleaning, put the grid back as described in the instructions. Use only the temperature probe recommended by the manufacturer. Do not use steam cleaners for cleaning the appliance. WARNING: To avoid electric shock, before replacing the light bulb, make sure the appliance is unplugged from the power supply.
- The electrical connection of the appliance must be carried out using the appropriate devices according to the applicable safety regulations. The instructions must indicate the type of power cable. The temperature of the accessible surfaces of the appliance must be checked. In case of damage to the power cable, it must be replaced with a special power cable obtained from the manufacturer or its service center. ATTENTION: To avoid a hazard due to inadvertent resetting of the thermal cutout, the appliance must not be supplied through an external switching device, such as a timer, or connected to a circuit that is regularly switched on and off by the utility. ATTENTION: When in use, the accessible parts may become hot. Do not allow children to get close to the oven. - Before cleaning, remove the grid if there is one.
- After pyrolytic cleaning, the surfaces may become hotter than usual. Do not allow children to get close to the oven.
1. SAFETY INSTRUCTIONS
Thank you for choosing our product. To get the best performance from your oven, please read this manual carefully. We recommend that you keep this manual for installation and operation, so that you can refer to it in the future.
When the appliance is in operation, all accessible parts are hot. Be careful not to touch these elements.
The first time you use the oven, you may notice a slight odor. This is due to the protective coating on the heating elements. This is completely normal and there is no cause for concern. Run the oven empty and then let it cool down. After that, it is ready for normal use.
The oven becomes very hot during operation. Especially the glass on the oven door.
1.1 Declaration of Conformity

The parts of this appliance that may come into contact with food comply with the provisions of Directive 89/109/EEC.
This appliance complies with European Directives 73/23/EEC and 89/336/EEC, replaced by 2006/95/EC and 2004/108/EC, and their subsequent amendments.
Before using the appliance, make sure it has not been damaged during transport. If you notice any damage, do not use it: contact a qualified person. Keep the packaging materials (plastic bags, polystyrene, nails, etc.) out of the reach of children, as they are dangerous.
1.2 Safety instructions
The appliance must be used only for its intended purpose, i.e., only for cooking food. Any other use of the appliance, for example for heating the room, is forbidden.
- The manufacturer is not responsible for damages caused by improper use of the appliance. When using electrical appliances, you must always follow basic safety rules:
- Do not touch the appliance with wet hands or when standing on a wet floor.
- Do not touch the appliance with wet or damp hands or feet.
- Do not use the appliance if you are barefoot.
- The use of extension cords, multiple sockets, and cable extensions is not recommended.
- If the appliance is damaged or defective, disconnect it from the power supply and do not repair it yourself.
If the power cord is damaged, it must be replaced.
For cord replacement, follow the instructions. Remove the old cord and replace it with one of type H05RR-F, H05VV-F, or H05V2V2-F. The cord must be able to withstand the electrical load of the appliance. Cord replacement must be carried out by a qualified technician.
The grounding wire (yellow-green) must be 10 mm longer than the other wires. Use only an approved service center for repairs and make sure only original spare parts are used. If the above instructions are not followed, the manufacturer cannot guarantee the safety of the appliance.
Do not cover the appliance's vents with aluminum foil; this may cause overheating or damage to the appliance.
1.3 Installation
The manufacturer cannot be held responsible for damages caused by failure to perform this activity.
The installation instructions for professionally qualified personnel must be followed. Incorrect installation may cause damage to people, animals, or property. The manufacturer cannot be held responsible for these damages.
1.4 Installing the hob in the kitchen
Place the hob in the kitchen space. It can be installed above a worktop or in a cabinet. Fix the hob in place using the clips provided in the frame. (See figure on the last page). To mark the fixing holes, open the hob's doors and look inside to allow access for ventilation and measurements. The distances and measurements in the diagram on the last page must be followed.
Note: For hobs that are combined with ovens, the instructions in the oven manual must be followed.
1.5 Important
If you want the hob to work normally, the body of the kitchen must be resistant to heat. The kitchen block that is in the immediate vicinity of the appliance must be made of heat-resistant material. Be aware that any material may withstand temperatures up to 120°C; in the opposite case, it may deform and cause damage.
After the hob is installed, the electrical components must be insulated. This is a legal safety requirement. All connections must be properly fixed so that it is impossible to remove them without tools and special instruments.
The cooking surface must have a rear clearance of at least 45 mm for good cooling.
1.6 Connection to the power supply
Connect to the power supply. Make sure that the first and third contacts, which act as grounding for the hob, are properly connected. The hob must be correctly grounded. If the hob model is not equipped with a plug, install a standard plug on the power cable. It must be in accordance with the technical data table. Grounding with a yellow-green cable. The plug must be installed by a suitably qualified person. If the contact and the plug are incompatible,
the plug must be replaced by a suitably qualified
person. The correctly qualified person must also ensure that the power cable can withstand the current required for the hob's operation. The ON/OFF switch must be connected to the electrical mains. Before connecting, check the power consumption.
Important: During installation, position the power cable in such a way that it is not exposed to temperatures above 50°C. The hob complies with safety standards defined by regulatory bodies. The hob is safe to use only if it is installed in accordance with the current safety regulations. It must be ensured that the hob has been correctly grounded.
The manufacturer cannot be held responsible for damages to people, animals, or property caused by incorrect grounding of the hob.
The voltage and frequency of the power supply are shown in the table (see last page).
The appliance must be connected to a power supply that can provide the maximum electrical power required by the appliance. This is indicated in the technical data table.
If you have any doubts, contact a qualified electrician.
1.7 OVEN ACCESSORIES (DEPENDING ON MODEL)
Before using any of the accessories for the first time, it is necessary to perform an initial cleaning. Wash them with a sponge. Rinse and dry them.
The tray can be placed on the wire racks and the baking sheets.
It is particularly good for cooking meat. Use it together with the meat probe.
Special checks on the radio equipment will be carried out to ensure that there is no risk of interference when the appliance is used.
The tray is used for collecting juices from food cooked on the wire rack. It is used only with the grill, the wire rack, or the Fan Grill Assisted function; remove it if you use another program.
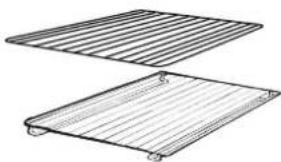
Never use the meat probe for collecting juices, as the meat probe and the juices may splash and cause burns.
For the best results from the meat probe, it must be used together with the "Meat" function.
Meat probe
It is ideal for cooking meat. Use it with the wire rack. A fork is also included for easier removal of the two elements.
DO NOT LEAVE THE FORK IN THE OVEN!!
Cleaning and maintenance of the metal racks
1- Turn the knob back to the closed position.
2- Pull the handle towards you and remove the lid.
3- To clean the appliance, place it in the dishwasher or wash it by hand, using a damp cloth.
4- During the cleaning process, do not immerse the handles in
water.
5- Turn the knob back.
2.1 Safety system for the handles
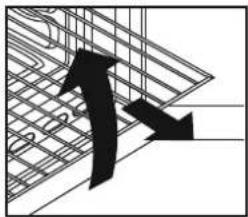
The appliance is equipped with a safety system for the handles. It allows you to lock the handles during cooking, ensuring safety from the hot handles. To lock the handles, press them down.
2.2
The handle allows you to quickly and easily lift the lid. To prevent burns, place the lid on the fourth hook, depending on the proportions of the food (see fig. on page 7).
All types of meat can be cooked in this way. Exception: very fatty meats. When cooking meat and fish, you must add oil and butter before placing them in the pan.
2.3 U-COOK models
The U-COOK oven has an electronic speed control for the fan, patented VARIOFAN. During cooking, this system automatically adjusts the fan speed (in multi-function mode) to optimize the air flow and the internal temperature of the oven.

U-COOK

All
This provides the possibility to control the distribution of moisture and temperature. The low-temperature baking function guarantees 50% humidity, leaving the bread soft and with a good taste, perfect for baking bread and pastries.

This is the minimum time for keeping the dishes warm, just for reaching 200 grams per liter.

It provides the possibility to determine the level and intensity of heating, with up to 50% less power compared to a traditional oven.
They are equipped with a new wide door that has a larger glass area, allowing for better visibility of the food during cooking.
2.4 Depending on the model

There is a lighting system that replaces the traditional handle. LED lights are integrated into the door frame. They provide bright lighting that allows you to see the inside of the oven clearly.
Advantages:
The system illuminates the oven interior with bright lighting, making it easier to see inside compared to traditional handles, and it is energy-efficient.
-Better lighting -LED lighting
Very low energy consumption, 95% lower than consumption
Device with LED light of class 1M according to IEC 60825-1:1993 + A1: 1997 + A2: 2001 (also harmonized with EN 60825-1
1994 + A1: 2002 + A2: 2001); maximum emitted light power λ459nm <150uW.
Do not look directly into the light.
2.5 Cooking time
For the recommended time for preparing different dishes, when using the oven, refer to the tables on pages 87, 88. Follow the instructions for normal use.
2.6 Catalytic converter
The catalytic converter is supplied as additional equipment for the grill. If it is installed, the grill must not be used without it.
Grease that accumulates on the catalytic converter during cooking is removed by the catalytic converter.
The recommended cleaning can block the catalytic converter and the subsequent self-cleaning cycle. The self-cleaning capability can be restored by running the grill at maximum temperature for about 10-20 minutes. Do not use abrasive products, sharp objects, sharp edges, or chemical products that could easily damage the catalytic converter.
When cooking fatty foods, it is advisable to use deeper trays and to place the tray for collecting grease.
IMPORTANT: Each catalytic converter has a working life of about 300 hours at the moment of delivery. Therefore, it must be replaced after about 300 hours.
2.7 AQUACTIVA function
The Aquactiva function uses steam to help remove grease and food residues from the grill.
1. Pour 300 ml of water into the Aquactiva container at the bottom of the grill. 2. Set the function to Static (bottom heating). 3. Set the temperature to Aquactiva icon. 4. Leave the program to run for 30 minutes. 5. After 30 minutes, stop the program and allow the grill to cool. 6. When the grill is cool, wipe the interior surfaces of the grill with a cloth.
Warning:
Make sure the grill is cool before touching it. Be careful with hot surfaces, as there is a risk of burns. Use distilled or filtered water.
2.8 Cleaning and maintenance
Clean the stainless steel and enameled surfaces of the grill with warm water and mild detergents. Never use abrasive powders that could damage the surface of the grill. It is very important to clean the grill after every use. Remove grease residues from the walls of the grill during cooking. Note that when the grill is used, grease may cause unpleasant odors or accelerate cooking. Use only water and cleaning agents; rinse thoroughly.
To perform this difficult task, some models can be equipped with catalytic self-cleaning panels: they are supplied as accessories (see section SELF-CLEANING CATALYTIC PANELS).
Use only mild cleaning agents, not abrasive products, on metal parts such as the burner and the grill rack.
The surface must be cleaned before installation. The warranty does not cover damage caused by incorrect installation or use of the appliance. The manufacturer is not responsible for any damage resulting from improper installation or use. The warranty does not cover the replacement of the light bulb, the filter, or the fuse. The replacement of the fuse must be done by a qualified technician.
2.9 Service Centre
Before contacting the Service Centre
If the appliance does not work, we recommend:
Check that the appliance is properly connected to the power supply.
If the fault cannot be determined:
Disconnect the appliance from the electrical mains, do not attempt to repair the appliance yourself, and contact a qualified service technician.
Before contacting the service center, do not forget to note the serial number on the rating plate (see the last page). The appliance is supplied with a warranty certificate, which guarantees that it will be repaired free of charge by the service center.
3. TIMER
3.1 Using the timer
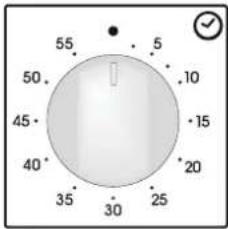
To set the cooking time, turn the knob fully clockwise, then set the pointer to the desired time. When the time has elapsed, a signal will sound for a few seconds.
3.2 Using the timer for a short cooking time
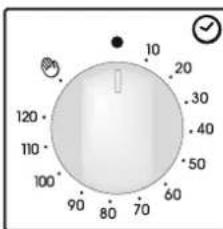
This control allows you to set the desired cooking time (max. 120 min.). The appliance will switch off automatically at the end of the set time.
The timer will count down the set time from the set position and switch off automatically.
For normal use of the appliance, set the timer to the off position.
The hood is installed, the timer is not in position O.
3.3 Setting the timer
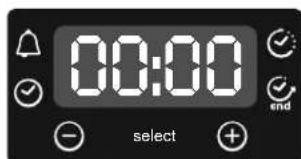
WARNING: The first operation to be performed after the hood has been installed or after the protection has been removed (this is recognized by the display) is to set the correct time. This is
achieved as follows:
Press the timer button
Set the time with the "+" button

-Release all buttons
WARNING: The hood will only work if the clock is set.
3.4 Using the electronic programmer
| Функция | Кakда akтувирамe | Кakда язклоочite | Кakbo прави | За кakBO ce n3нол3BA |
| Зakлочвае | •Функцията "Зakлочвае" сеakтувра差别а 3адыржпente6byton. Set (+) заим-mалко5cekyнд. OT този морентНатать BCИЧКДугТФункциma са зakлочни и на диспяши залочны за мига STOPи预先варително 3ададени Вразме наPreseckулkin. | •Функцията "Зakлочвае" сеakтувра差别а 3адыржпente6byton Set (+) заим-mалко5cekyнд. OT този морентНатать BCИCHKДугТФункциmaМогатда 6bdatи 3бibarNTSIBAPAHNOTHOBO. | ||
| Таймер | •Hathuschete zuentpalnna 6byton 1pbT•Hathuschete 6bytoni"-""+""3a за ibizbepeite Вразмe•OCBOБODeTe BCNUCKI 6bytoni | •Korato 3adadohoto Вразмenteche, се acikunpa 3bykOBCSINHAN (ta3n anapma сze等内容OT само сбссс, obache можедасспге He3ababho c hatackanhaHa 6byto) SELECT.Да сспге He3ababho c hatackanhaHa 6byto) SELECT. | •Аларма в края на Вразмeto•По Вразме на равота се поаЗВа оst. Вразмe | •Позволява ду Излошьагуфунота кATO apammenHuacobNHK (при ВКLOчЕниИзкLOчЕниФурна). |
| Вразме 3a rotbehene | •Hathuschete zuentpalnna 6byton 2pbTN•Hathuschete 6bytoni"-""ил"++"3a за ibizbepeiteПроблжителноCT•OCBOБODeTe BCNUCKI 6bytoni•Изберete Функция сбссelектopa | •При Изчане на Вразмeto Фурнatable се Изклоочи abTomatnycho.Aко Искате ду спгетerotberetno no-panho 3abbyptete celenktopа Ha 0, ллл за干嘛etebpe Вразмeto Ha 0:00 (SELECT n""+""6bytoni) | •Позволява вду Зададete Вразмeto 3a rotbehene 3a Ибраhanata pecenta.3a за поверпite OCTabaцuto Вразме habitschete SELECT 2 nbTN.3a prpopmaHa Ha 3adadehoto Вразме habitschete SELECT n""+""+""6bytoni. | •Hathuschete Нковуй 6byton 3a за спретe синILA.Hathuschete zuentpalnna 6byton 3a за сбурпесdoчанka. |
| Краз ha rotbeheto end | •Hathuschete zuentpalnna 6byton 3pbTN•Hathuschete 6bytoni"-""+""3a за ibizbepeite Вразмeto, в КокуSpecаефурнata, за сиЗКЛЮчI•OCBOБODeTe 6bytoni•Задаite Функцията 3a rotbehene c celektortopa 3a ibizbop | •В зададенOTO Вразмe,фурнatable се Изклоочи.3a за ИзклоочITEpbuchoФурнatura поставete celektortopa B no3ицяп O. | •ПозвOLява вду Zададete Края на Вразмeto 3a rotbehene.3a за поверпiteПробл�пелноЗадденOTO Вразмe HATINCHETe•Здэнтогун 3pbTN 3a поянна Habstpojknite SELECT + "-"+"+ | •Тази phункция obshknobovelo ceIzinon3Ba c phyнкцияТOTBVE".Hanprimimep, пояctmete Trябва дыбдide по只得увьВ по只得увьпудду 45 мИнTu n Trябва d e roToBo do 12:30 у相对较. •В края на Вразмeto 3a rotbehene 45 mИнTu n Края на Вразмeto 3a rotbehene do 12:30 у相对较. •В края на Вразмeto 3a rotbehene,фурнatable се Изклоочи abTomatnycho II 3bykOBa anapma сe 3bbHN.Tomeehemo ue se clammupa aemomamuhyo 11:45 (12:30 mUNyc 45 mUnyu) u ue prodbynx do npredырumsнгЗаддatenho epeme 3a краи на о��е ,koaramоФурнama ue se uzklouya aemomamuhyo.BHIMAHNE.Ako zaадete "края на rotbeheto"бezда задateneto краянчac,rotbeheto 3aznovalBevedhara. |
4. Operating instructions
| ΦeIeKTop Ha ФeYHKZH | Hастори на tempepaTуратa ( по моделс с eIeKToPoeH nporpamatop TYPE A) | Термocstat ceIeKTop | ФУнКЦИN | |
| Влночы осветлины no phунatable. Това size aktrimbра вавоматчно веHTиlaTopa 3a oxlanakdahe само рпз модели които го Имат( | ||||
| Размразьане Когатоизберete таши Фуншся веHTиlaTopa сц�кулірь вьзduха okono замраэенахха Таши чу размразьва за Няколков МИнтуб eczда се поремени сьстава на пotемп. Sprinter=MAX MAX MAX MAX MAX MAX MAX MAX MAX MAX MAX MAX MAX MAX MAX MAX MAX MAX MAX MAX MAX MAX MAX MAX MAX MAX MAX MAX MAX MAX MAX MAX MAX MAX MAX MAX MAX MAX MAX MAX MAX MAX MAX MAX MAX MAX MAX MAX MAX MAX MAX MAX MAX MAX MAX MAX MAX MAX MAX MAX MAX MAX MAX MAX MAX MAX MAX MAX MAX MAX MAX MAX MAX MAX MAX MAX MAX MAX MAX MAX MAX MAX MAX MAX MAX MAX MAX MAX MAX MAX MAX MAX MAX MAX MAX MAX MAX MAX MAX MAX MAX Max max max max max max max max max max max max max max max max max max max max max max max max max max max max max max max max max max max max max max max max max max max max max max max max max max max max max max max max max max max max max max max max max max max max max max max max max max max max max max max max max max max max max max max max max max max max max max max max max max max max max Max max max max max max max max max max max max max max max max max max max max max max max max max max max max max max max max max max max max max max max max max max max max max max max max max max max max max max max max max max max max max max max max max max max max max max max max max max max max max max max max max max max max max max max max max max max max max max max max max max max Max Max Max Max Max Max Max Max Max Max Max Max Max Max Max Max Max Max Max Max Max Max Max Max Max Max Max Max Max Max Max Max Max Max Max Max Max Max Max Max Max Max Max Max Max Max Max Max Max Max Max Max Max Max Max Max Max Max Max Max Max Max Max Max Max Max Max Max Max Max Max Max Max Max Max Max Max Max Max Max Max Max Max Max Max Max Max Max Max Max Max Max Max Max Max Max Max Max Max Max max max max max max max max max max max max max max max max max max max max max max max max max max max max max max max max max max max max max max max max max max max max max max max max max max max max max max max max max max max max max max max max max max max max max max max max max max max max max max max max max max max max max max max max max max max max max max max max max max max min max min min min min min min min min min min min min min min min min min min min min min min min min min min min min min min min min min min min min min min min min min min min min min min min min min min min min min min min min min min min min min min min min min min min min min min min min min min min min min min min min min min min min min min min min min min min min min min min min min min min min m * | ||||
| 220 50÷240 | 50÷MAX | Натуална кonsвекци Изгл�ьот се дolyи и raten harpebatelл. Стандарта Форma на лесен. Идагална за песене на месо, песене на бисьп. Рравлиха вальота вкуся Фот bene на веллалator Изгл�ьот се дolyи и raten harpebatelл. Заедно веHTилалatorа, които сц�кулірь вьзduха Бы tradeь вьзффурпasts. Росторддаба се за селичуши, рба и др. Точлалata на habлима вхраши по- добеши в вретима за петонлама и ratове на hamлалота можета. Можета на пет�гота разлелу в таллалота и петлелу в моримин храши有很大овөгөнн. Тозлmetддаба мблллдьдьдьдьдьдьдьдьдьдьдьдьдьдьдьдьдьдьдьдьдьдьдьдьдьдьдьдьдьдьдьдьдьдьдьдьдьдьдьдьдьдьдьдьдьдьдьдьдьдьдв КOTССТЕПЕОДОТСКОПОТ SCOKОТ STAN TELINATURA Фотүлгота олden harpebatel Идадлгота олdenхлгота олdenхлгота олdenхлгота олdenхлгота олdenхлгота олdenхлгота Идадлгота олdenхлгота олdenхлгота олdenхлгота олdenхлгота Идадлгота олdenхлгота олdenхлгота олdenхлгота Идадлгота олdenхлгота олdenхлгота олdenхлгота Идадлгота олdenхлгота олdenхлгота олdenхлгота Идадлгот�а олdenхлгота олdenхлgота олdenхлgота Идадлгота олdenхлgота олdenхлgота Идадлгота олdenхлgота олdenхлgота Идадлгота олdenхлgота Идадлгота олdenхлgота Идадлгота олdenхлgота Идадлгота олdenхлgота Идадлгота олdenхлgота Идадлгота олdenхлgота Идадлгота орлгота Идадлгота олdenхлgота Идадлгота олdenхлgота Идадлгота олdenхлgота Идадлгота олdenхлgота Идадлгота олdenхлgота Идадлгота олdenхлgота Осьени e ростору 180÷200 |
(a) For all models: The VARIOFAN function is an exclusive system developed by Candy to optimize the results of cooking. The VARIO FAN system is activated automatically and automatically changes the speed of the fan when a certain function is selected: the fan functions are in a limited control range.
Tested in accordance with CENELEC EN 50304.
** CENELEC EN 50304 testing used to define the energy class.
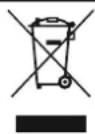
This appliance is marked in accordance with European Directive 2002/96/EC regarding waste electrical and electronic equipment (WEEE). By ensuring that this product is disposed of correctly, you will help prevent potential negative consequences for the environment and human health, which could otherwise be caused by inappropriate waste handling of this product.
The symbol on the product indicates that this product cannot be treated as household waste. Instead, it must be handed over to a designated collection point for recycling of electrical and electronic equipment. Disposal must be carried out in accordance with local regulations for waste disposal. For more detailed information about treatment, recovery, and recycling of this product, please contact your local city office, your waste disposal service, or the shop where you purchased the product.
Ingredients:
200g beef - 200g potatoes - 200g onion
1 bay leaf
1 teaspoon
100g sour cream
Preparation:
1 teaspoon of beef broth - 50g sour cream - 20g butter
Products:
- bun
10 slices of bacon, 1 boiled potato
-1 boiled egg
The manufacturer will not be responsible for any inaccuracy resulting from printing or transcript errors contained in this brochure. We reserve the right to carry out modifications to products as required, including the interests of consumption, without prejudice to the characteristics relating to safety or function.
The manufacturer will not be responsible for any inaccuracy resulting from printing or transcript errors contained in this brochure. We reserve the right to carry out modifications to products as required, including the interests of consumption, without prejudice to the characteristics relating to safety or function.
The manufacturer is not responsible for inaccuracies in the translation that may arise from the interpretation of these instructions. The manufacturer reserves the right to make changes to its products that it deems useful, without this affecting the characteristics related to the safety or the main functions of the device.
- GENERAL WARNINGS
- DECLARATION OF COMPLIANCE
- SAFETY HINTS
- INSTALLATION
- FITTING THE OVEN INTO THE KITCHEN UNIT
- IMPORTANT
- CONNECTING TO THE POWER SUPPLY
- OVEN EQUIPMENT (ACCORDING TO THE MODEL)
- THE TRAY HOLDER
- REMOVING AND CLEANING WIRE RACKS
- SHELF SAFETY SYSTEM
- GRILLING
- THE U·COOK MODELS
- DEPENDING ON THE MODEL
- USE
- ADVANTAGES
- SPECIAL SELF-CLEANING PANELS COVERED WITH A MICRO-POROUS COATING ARE AVAILABLE AS OPTIONAL EXTRAS FOR ALL MODELS. IF FITTED, THE OVEN NO LONGER NEEDS TO BE CLEANED BY HAND
- AQUACTIVA FUNCTION
- WARNING
- CLEANING AND MAINTENANCE
- SERVICE CENTRE
- TIMER
- USING THE MINUTE TIMER
- USING THE END OF COOKING TIMER
- SETTING THE CORRECT TIME
- USE OF TOUCH CONTROL CLOCK PROGRAMMER
- OPERATING INSTRUCTIONS
- VEGETABLE MUFFINS
- INGREDIENTS
- TABLES OF COOKING TIMES
- ADDITIONAL OVEN EQUIPMENT
- CLEANING ACCESSORY FOR THE METAL GUIDES
- USEFUL TIPS
- COOKING ON THE GRILL
- MODE COOK
- SOFT
- SPRINTER
- SUPERGRILL
- REPLACING THE LIGHTING IN U-SEE MODELS
- CATALYTIC SELF-CLEANING OVEN
- ACTIVATION FUNCTION
- CARE AND CLEANING
- GLASS PARTS
- ADDITIONAL EQUIPMENT
- TRAY
- MAINTENANCE AND SERVICE
- USING THE TIMER
- USING THE TIMER FOR END OF COOKING TIME
- SAFETY INSTRUCTIONS
- DECLARATION OF CONFORMITY
- INSTALLING THE HOB IN THE KITCHEN
- CONNECTION TO THE POWER SUPPLY
- OVEN ACCESSORIES (DEPENDING ON MODEL)
- CLEANING AND MAINTENANCE OF THE METAL RACKS
- SAFETY SYSTEM FOR THE HANDLES
- U-COOK MODELS
- U-COOK
- ALL
- COOKING TIME
- CATALYTIC CONVERTER
- USING THE TIMER FOR A SHORT COOKING TIME
- SETTING THE TIMER
- PRODUCTS
Brand : CANDY
Model : FLE05026X
Category : Built-in oven