WGD8120HW - Tumble drier WHIRLPOOL - Free user manual and instructions
Find the device manual for free WGD8120HW WHIRLPOOL in PDF.

User questions about WGD8120HW WHIRLPOOL
0 question about this device. Answer the ones you know or ask your own.
Ask a new question about this device
Download the instructions for your Tumble drier in PDF format for free! Find your manual WGD8120HW - WHIRLPOOL and take your electronic device back in hand. On this page are published all the documents necessary for the use of your device. WGD8120HW by WHIRLPOOL.
USER MANUAL WGD8120HW WHIRLPOOL
Failure to follow safety warnings exactly could result in serious injury, death, or property damage.
- Do not store or use gasoline or other flammable vapors and liquids in the vicinity of this or any other appliance.
- WHAT TO DO IF YOU SMELL GAS:
- Do not try to light any appliance.
- Do not touch any electrical switch; do not use any phone in your building.
- Clear the room, building, or area of all occupants.
- Immediately call your gas supplier from a neighbor's phone. Follow the gas supplier's instructions.
- If you cannot reach your gas supplier, call the fire department.
- Installation and service must be performed by a qualified installer, service agency, or the gas supplier.
WARNING: Gas leaks cannot always be detected by smell.
Gas suppliers recommend that you use a gas detector approved by UL or CSA.
For more information, contact your gas supplier.
If a gas leak is detected, follow the "What to do if you smell gas" instructions.
IMPORTANT SAFETY INSTRUCTIONS
WARNING: To reduce the risk of fire, electric shock, or injury to persons when using the dryer, follow basic precautions, including the following:
- Read all instructions before using the dryer.
■ Do not place items exposed to cooking oils in your dryer. Items contaminated with cooking oils may contribute to a chemical reaction that could cause a load to catch fire.
■ To reduce the risk of fire due to contaminated loads, the final part of a tumble dryer cycle occurs without heat (cool down period). Avoid stopping a tumble dryer before the end of the drying cycle unless all items are quickly removed and spread out so that the heat is dissipated. - Do not dry articles that have been previously cleaned in, washed in, soaked in, or spotted with gasoline, dry-cleaning solvents, or other flammable or explosive substances as they give off vapors that could ignite or explode.
■ Do not allow children to play on or in the dryer. Close supervision of children is necessary when the dryer is used near children.
■ Before the dryer is removed from service or discarded, remove the door to the drying compartment.
■ Do not reach into the dryer if the drum is moving.
■ Do not install or store the dryer where it will be exposed to the weather.
■ Do not tamper with controls.
■ Do not repair or replace any part of the dryer or attempt any servicing unless specifically recommended in this Use and Care Guide or in published user-repair instructions that you understand and have the skills to carry out.
■ Do not use fabric softeners or products to eliminate static unless recommended by the manufacturer of the fabric softener or product.
■ Do not use heat to dry articles containing foam rubber or similarly textured rubber-like materials.
■ Clean lint screen before or after each load.
- Keep area around the exhaust opening and adjacent surrounding areas free from the accumulation of lint, dust, and dirt.
■ The interior of the dryer and exhaust vent should be cleaned periodically by qualified service personnel.
■ See Installation Instructions for grounding instructions.
SAVE THESE INSTRUCTIONS
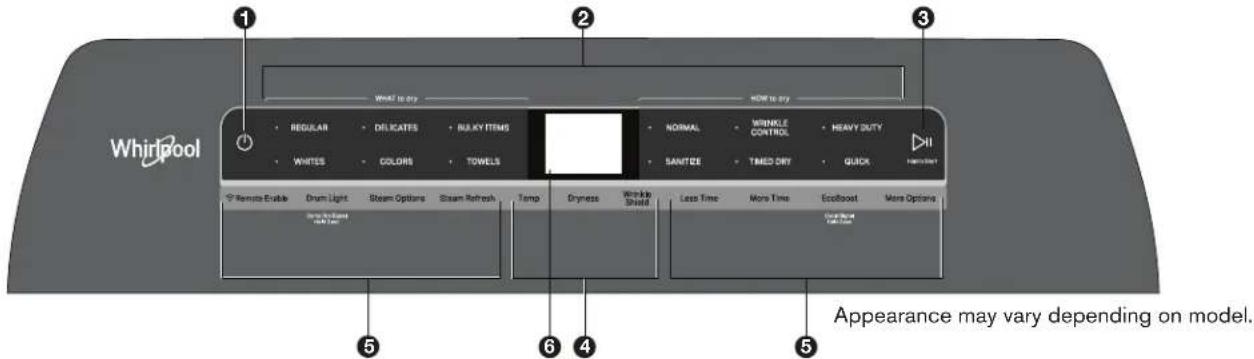
CONTROL PANEL AND FEATURES
text_image
Whirlpool 1 2 3 WHAT IS BY HOW IS BY REGULAR DELICATES BLACKY ITEMS NORMAL WRINKLE CONTROL HEAVY BUTT WHITES COLORS TOWELS SANITZE TMED DRY QUICK Remote Enable Drum Light Steam Options Steam Refresh Temp Dryness Wrinkle Shield Less Time More Time EcolBoost More Options Appearance may vary depending on model.1 POWER
Touch to turn on/off or to stop/cancel a cycle.
② WHAT TO DRY/HOW TO DRY
First select a cycle from the "What to Dry" and then select the "How to Dry" to get the best combination cycle available for the type of items you are going to dry. See "Cycle Guide" for cycle details.
3 START/PAUSE
Touch and hold; cycle will start after countdown.
Touch START/PAUSE during a cycle to pause it. Touch again to resume.
4 MODIFIERS (Not all cycles and options are available on all models.)
NOTE: Dryer remembers the last completed cycle and cycle settings. The next time you turn dryer on, it will be set to run the last cycle.
Temp
Touch to modify the cycle's available temperatures (Air Only, Low, Medium, Medium High, High). Follow garment label instructions for best results. Once a cycle has started, the temperature can be changed within the first 5-8 minutes.
Dryness
Touch to modify the cycle's available dryness levels on the sensor cycles (Less, Normal, More).
NOTE: Dryness is for use with Automatic Cycles only.
Wrinkle Shield™ Option
Touch to turn on/off and on with steam (select models). Wrinkle Shield™ option adds up to 150 minutes of periodic tumbling and heat to help reduce wrinkling. Wrinkle Shield™ option with steam will add a short steam cycle after 60 minutes to help smooth wrinkles.
5 CYCLE OPTIONS (Not all cycles and options are available on all models.)
Use to select available modifiers for your dryer.
Remote Enable
Touch each time you want to remotely control via the Whirlpool® app. Follow the instructions in the "GET THE WHIRLPOOL® APP AND GET CONNECTED" section below for more details.
NOTE: Once Remote Enable has been selected, certain interactions with the dryer will cause it to cancel Remote Enable. Example: Opening the door.
Damp Dry Signal
Touch DAMP DRY SIGNAL or touch and hold DRUM LIGHT (depending on the model) for at least 3 seconds to turn the Damp Dry Signal on or off. You will get a sound and display notification as "Items are damp. You can pause and reposition for best results".
Drum Light
Touch to turn the drum light on/off.
Steam Options
Touch to add Steam and/or Reduce Static to selected cycle. Steam option adds steam to the end of cycle to help smooth wrinkle. Reduce Static will automatically tumble, pause and introduce a small amount of moisture to the load to help reduce static.
Steam Refresh (steam models only)
This cycle is best for reducing wrinkles from dry items. Cycle time will increase, depending on number of items. This is an independent cycle that cannot be combined with any other cycle.
More Time/Less Time Timed Dry Adjust
Touch MORE TIME or LESS TIME with the Timed Dry/Quick Dry cycle to increase or decrease the length of the cycle time.
EcoBoost™ Option
The EcoBoost™ option will default on only for the Regular/Normal cycle and is only available on that cycle. This option allows you to increase your energy savings by using a slightly lower heat level. The EcoBoost™ option will increase drying times by approximately 40 minutes, which will be reflected on the LCD Display. If optimal time is desired, touch EcoBoost to turn off this option.
Cycle Signal
Use this option to turn the signal indicating the end of a drying cycle to Low, Medium, High, or Off.
NOTE: Press/hold Cycle Signal to select the volume.
More Options
Touch to select your "Favorite cycle" (Only available for models with WiFi capability).
Favorite cycle: You may create "custom" cycles in the app and store one frequently-used or favorite cycle on the machine.
6 LCD DISPLAY
When you select a cycle, its default settings will display and the Estimated Time Remaining (for Automatic Cycles) will vary depending on "What to Dry" and "How to Dry" selections, or actual time remaining for Timed Dry cycles (for Manual Cycles) will be displayed.
CYCLE PHASE LABELS
Sensing
Displays during Sensor cycles to indicate that the moisture sensor on the dryer is operating. It will not be displayed during Timed/Quick Dry cycles or options such as Wrinkle Shield™ option.
Drying
Dryer is in the main dry phase of the automatic cycle.
Steaming
Steam option selected and Steam phase running.
Cool Down
The dryer has finished drying with heat and is now tumbling the load without heat to cool it down.
Static Reduce
Reduce Static phase is running.
End
Display message will show "Drying is complete" and will time-out after 5 minutes. This will indicate that the selected cycle has ended and the load may be removed from the dryer. If Wrinkle Shield™ option has been selected, the dryer may continue to tumble the load, even if "End" is displayed.
Check Vent
The Check Vent alert is a feature available for Automatic cycles only. This alert will show the status of airflow through the dryer and the dryer vent system for the dryer's life. During the sensing phase at the beginning of the cycle if it detects a blocked vent or low pressure it will display "Check vent. Clean lint screen or vent for better performance."
REMEMBER: The dryer will continue to operate even when check vent notification is displayed, but poor airflow can impact dry times and overall performance.
Display message can be cleared by pressing any key with the exception of Power which will cancel the cycle.
GET THE WHIRLPOOL® APP AND GET CONNECTED

With your mobile device download the Whirlpool® app. You can get subscription and connectivity instructions, terms of use, and privacy policy at www.whirlpool.com/connect or in Canada www.whirlpool.ca/connect.
Once installed, launch the app and you will be guided through the steps to subscribe and create your user account to connect to your appliance. If you have any problems or questions, call Whirlpool ^® Connected Appliances at 1-866-333-4591.
(Only available for models with WiFi capability).
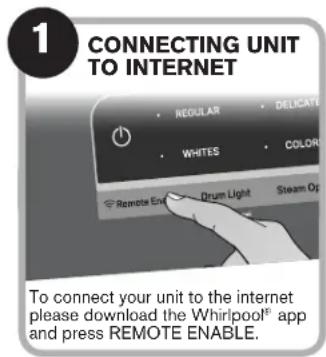
When unit is first powered on, it will prompt to select language before you see message to Download APP or press any other key to setup WiFi later.
text_image
1 CONNECTING UNIT TO INTERNET • REGULAR • DELICATE • WHITES • COLOR • Remote End • Drum Light • Steam Op To connect your unit to the internet please download the Whirlpool® app and press REMOTE ENABLE.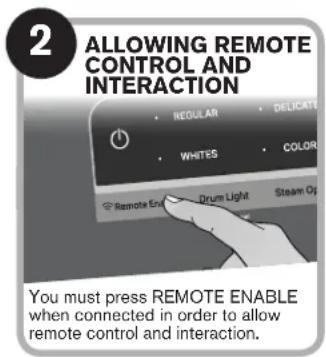
text_image
2 ALLOWING REMOTE CONTROL AND INTERACTION • REGULAR • DELICATE • WHITES • COLOR • Remote End • Drum Light • Steam Op You must press REMOTE ENABLE when connected in order to allow remote control and interaction.USING YOUR DRYER
WARNING

Fire Hazard
No washer can completely remove oil.
Do not dry anything that has ever had any type of oil on it (including cooking oils).
Items containing foam, rubber, or plastic must be dried on a clothesline or by using an Air Cycle.
Failure to follow these instructions can result in death or fire.
WARNING
Explosion Hazard
Keep flammable materials and vapors, such as gasoline, away from dryer.
Do not dry anything that has ever had anything flammable on it (even after washing).
Failure to follow these instructions can result in death, explosion, or fire.
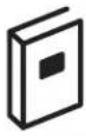
1 CLEAN LINT SCREEN

natural_image
Illustration of a boat hull viewed through a circular frame (no text or symbols)Clean the lint screen before each load. Also, clean the exhaust vent at least every 2 years.
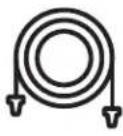
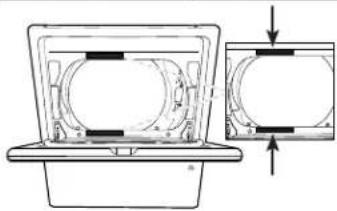
2 LOAD DRYER
natural_image
Anatomical illustration of internal organs or structures, possibly a liver, with no visible text or labels.3 PRESS POWER TO TURN ON THE DRYER
natural_image
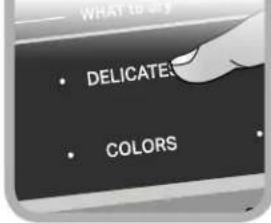
Power button icon on dark background (no text or symbols)4 SELECT WHAT TO DRY

text_image
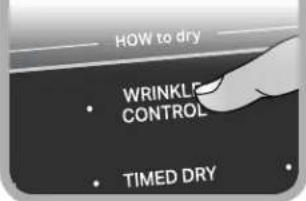
WHAT to dry • DELICATES • COLORS5 SELECT HOW TO DRY
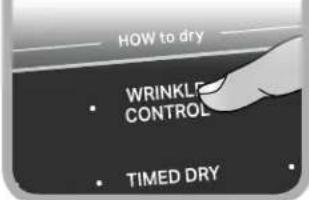
text_image
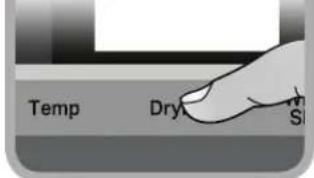
HOW to dry WRINKLE CONTROL TIMED DRY6 ADJUST CYCLE SETTINGS, IF DESIRED*
text_image
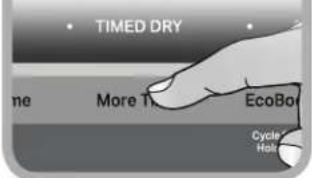
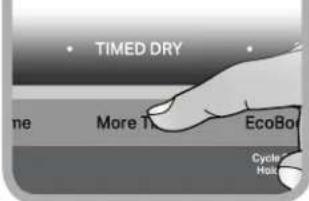
Temp Dry S7 SELECT ANY ADDITIONAL OPTIONS*
text_image
TIMED DRY More T EcoBo Cycle Hall8 TOUCH AND HOLD START/PAUSE TO BEGIN CYCLE

text_image
Hold to StartIf you accidentally select wrong language during digital un-boxing and/or you want to get back to Factory settings then perform Factory Reset.
FACTORY RESET
Press/hold both TEMP and Wrinkle Shield™ keys until display count-down has completed. Unit will power back on with "Select Language" display message.
*NOTE: See "Cycle Guide" for more information about cycles, settings, and options. Not all cycles, settings, and options are available with all models. Read all your Manuals for more information on your unit.
CYCLE GUIDE
Your dryer has a unique user interface to help you select the best cycle you need for your load. The "What to Dry" "How to Dry" layout guides you to the optimal cycle in two easy steps:
- First determine what items are in the load that you are trying to dry. Use that to guide your "What to Dry" selection.
- Then determine how you want the dryer to dry them by selecting the appropriate "How to Dry" selection. Modifiers are preset for the items being dried, but can be changed if desired.
To get the most energy savings and enhanced fabric care from your dryer, use the Automatic cycles. These cycles measure the drying air temperature and moisture levels to turn the dryer off once the load reaches the selected dryness level. Dryer performance and results may vary with service voltage less than rated voltage (Electric, 240 V; Gas, 120 V).
| For best fabric care, choose the cycle that best fits the load being dried.R - Recommended Cyclea - Alternate CycleBlank - Cycle is available but not optimal. | How do you want to dry? | ||||||
| "How to Dry" Cycle Selection | |||||||
| Normal Wr | nkle Control | Heavy Duty | Sanitize* | Timed Dry Quick | |||
| RegularAutomaticSensor Cyclestops whendryness levelis reached. | High Heatlonger cycleAutomaticSensor Cyclestops whendryness levelis reached. | Hot HighHeatUsed tokill 99.9%of threecommonbacteria. | Set amountof dry timeDryer runs forthe amount oftime selected. | Set amountof dry timeDryer runs forthe amount oftime selected. | |||
| What do youwant to dry? | "What to Dry"Cycle Selection | ||||||
| Baby Clothes | Regular | R | |||||
| Pajamas | R | ||||||
| Handkerchiefs | a | R | |||||
| T-Shirts | R | ||||||
| Sweatshirts | a | R | |||||
| Coats and Jackets | a | R | |||||
| Cotton Drapes | R | ||||||
| Machine Wash Curtains | R | ||||||
| Tablecloth | R | a | |||||
| Business Casual | R | ||||||
| No-Iron Fabrics | R | ||||||
| Bras | Delicates | a | R | NotAvailable | |||
| Fabric Shower Curtain | R | ||||||
| Lingerie | a | R | |||||
| Sheers | R | ||||||
| Undergarments | a | R | |||||
| Wool | R | ||||||
| Dress Shirts/Pants | a | R | |||||
| Blankets | Bulky Items | R | a | ||||
| Fabric Rugs | R | ||||||
| Heavy Drapes | R | a | |||||
| Jeans | a | R | |||||
| Comforters | R | a | |||||
| Pet Bedding | R | a | |||||
| Pillows - Fiber Fill | a | R | |||||
| Sheets | R | a | |||||
| Sleeping Bags | R | ||||||
| Stuffed Animals | R | ||||||
* Extended high-heat drying cycle intended to help sanitize items such as sheets and towels. This cycle is not recommended for all fabrics. For best results, this cycle should be run to completion to ensure sanitization and do not interrupt cycle.
For best fabric care, choose the cycle that best fits the load being dried.
R - Recommended Cycle
a - Alternate Cycle
Blank – Cycle is available but not optimal.
| How do you want to dry? | |||||
| "How to Dry" Cycle Selection | |||||
| Normal Wrinkle Control | Heavy Duty | Sanitize* | Timed Dry Quick | ||
| Regular Automatic Sensor Cycle stops when dryness level is reached. | High Heat longer cycleAutomatic Sensor Cycle stops when dryness level is reached. | Hot High Heat Used to kill 99.9% of three common bacteria. | Set amount of dry timeDryer runs for the amount of time selected. | Set amount of dry timeDryer runs for the amount of time selected. | |
| R | a | ||||
| R | a | ||||
| R | a | ||||
| R | a | ||||
| R | a | ||||
| a R a | |||||
| a R a | |||||
| R | |||||
| What do you want to dry? | “What to Dry” Cycle Selection | ||||||
| Cotton Undergarments | Whites | R | a | ||||
| White Napkins | R | a | |||||
| Athletic | Colors | R | a | ||||
| Performance Wear | R | a | |||||
| Colored Napkins | R | a | |||||
| Dish Cloths | Towels | a R a | |||||
| Towels | a R a | ||||||
| Non-Rubber Lined Rugs | R |
*Extended high-heat drying cycle intended to help sanitize items such as sheets and towels. This cycle is not recommended for all fabrics. For best results, this cycle should be run to completion to ensure sanitization and do not interrupt cycle.
Models 7120 & 8120
NOTE: These clothes dryer's Government energy certifications were based on the Regular + Normal Cycle, Maximum Drying Temperature Setting, Normal Dryness Level, EcoBoost™ On. The as - shipped defaults of EcoBoost™ On, Wrinkle Shield™ option off, Remote Enable off, were used.
Models 5100 & 6120
NOTE: These clothes dryer's Government energy certifications were based on the Regular + Timed Dry Cycle and Maximum Drying Temperature Setting. The as - shipped defaults of EcoBoost™ On, Wrinkle Shield™ option off, Remote Enable off, Normal Dryness level, were used.
DRYER ICONS
| Image | Description | Status |
| Remote Enable | On | |
| Off | ||
| Steam Refresh On | ||
| Steam On | ||
| Reduce Static On | ||
| Reduce Static & Steam | On |
| Image | Description | Status |
 | EcoBoost | On |
 | Off | |
 | Drum Light | On |
 | Off | |
 | WiFi Status Indicator *NOTE: When the WiFi is disconnected, the priority goes to the first, then as other options added, it goes to the least again. | Connected |
 | Disconnected | |
 | Smartgrid, Peak rates in effect | On |
 | Smart Delay | |
 | Smart Pause | |
 | Favorite Cycle | |
 | Download & Go Cycle |
| Image | Description | Status | |
 | Cycle Signal | Low | |
 | Medium | ||
 | High | ||
 | Off | ||
 | Damp Dry Signal | On | |
 | Off | ||
ASSISTANCE OR SERVICE AND ADDITIONAL INFORMATION
| For detailed installation instructions and maintenance information, winter storage and transportation, please see the INSTALLATION AND CARE INSTRUCTIONS MANUAL included with your machine.For detailed product dimensions, please see the DIMENSION GUIDE that can be found atwww.whirlpool.com/ownersor in Canadawww.whirlpool.ca/owners. | ||||||
| For information on any of the following items please visitwww.whirlpool.com/ownersor in Canadawww.whirlpool.ca/owners.This may save you the cost of a service call. | ||||||
| REGISTER PRODUCT | SCHEDULE SERVICE | HOW TO'S & FAQs | MANUALS & DOWNLOADS | ADD SERVICE PLAN | PARTS ACCESSORIES | |
 |  |  |  |  |  |  |
 | To speak with a customer service representative or if you have additional questions, call us toll free at1-866-698-2538or in Canada call1-800-688-2002.You can write with any questions or concerns at:Whirlpool Brand AppliancesCustomer eXperience Center533 Benson Road Benton Harbor, MI 49022-2692Please include a daytime phone number in your correspondence. | |||||
GUIDE DE RÉFÉRENCE RAPIDE SÉCHEUSE ÉLECTRIQUE/À GAZ WHIRLPOOL®

AVERTISSEMENT :
RISQUE D'INCENDIE OU D'EXPLOSION
Remote Enable (activation à distance)
natural_image
Close-up of a car's front wheel and dashboard (no visible text or symbols)natural_image
Illustration of a medical device with internal tissue and a central chamber (no text or symbols)3 APPUYER SUR LE BOUTON D'ALIMENTATION POUR METTRE LA SÉCHEUSE EN MARCHE

4 SÉLECTIONNER LE TYPE D'ARTICLES À SÉCHER
text_image
WHAT TO TRY • DELICATES • COLORS5 SÉLECTIONNER LA MÉTHODE DE SÉCHAGE
text_image
HOW to dry WRINKLE CONTROL TIMED DRY6 AJUSTER LES RÉGLAGES DE PROGRAMME SI DÉSIRÉ

text_image
Temp Dry SiSÉLECTIONNER TOUTE OPTION SUPPLÉMENTAIRE*
text_image
TIMED DRY More T. EcoBo Cycle Hold8 TOUCHER ET MAINTENIR ENFONCÉ LE BOUTON START/ PAUSE (MISE EN MARCHE/PAUSE) POUR DÉMARRER LE PROGRAMME