WMC10007AB - Microwave WHIRLPOOL - Free user manual and instructions
Find the device manual for free WMC10007AB WHIRLPOOL in PDF.


User questions about WMC10007AB WHIRLPOOL
0 question about this device. Answer the ones you know or ask your own.
Ask a new question about this device
Download the instructions for your Microwave in PDF format for free! Find your manual WMC10007AB - WHIRLPOOL and take your electronic device back in hand. On this page are published all the documents necessary for the use of your device. WMC10007AB by WHIRLPOOL.
USER MANUAL WMC10007AB WHIRLPOOL
This product is not intended for use above any heat source, such as a range or cooktop. See "Installation Requirements" section for further notes.
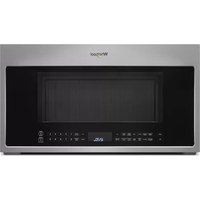
These installation instructions cover different models. The appearance of your particular model may differ slightly from the illustration in these installation instructions.
INSTRUCTIONS D'INSTALLATION FOUR À MICRO-ONDES SOUS PLACARD MURAL
Tools and Parts 2
Location Requirements. 2
Product Dimensions. 2
Electrical Requirements 3
INSTALLATION INSTRUCTIONS 3
PlaceCabinetTemplate 3
Mark and Drill Holes. 4
Install the Microwave Oven. 4
Complete Installation 5
SECURITE DU FOUR A MICRO-ONDES. 7
EXIGENCES D'INSTALLATION 7
Your safety and the safety of others are very important.
We have provided many important safety messages in this manual and on your appliance. Always read and obey all safety messages.

This is the safety alert symbol.
This symbol alerts you to potential hazards that can kill or hurt you and others.
All safety messages will follow the safety alert symbol and either the word "DANGER" or "WARNING."
These words mean:
ADANGER
You can be killed or seriously injured if you don't immediately follow instructions.
WARNING
You can be killed or seriously injured if you don't follow instructions.
All safety messages will tell you what the potential hazard is, tell you how to reduce the chance of injury, and tell you what can happen if the instructions are not followed.
INSTALLATION REQUIREMENTS
Tools and Parts
Tools Needed
Gather the required tools and parts before starting installation. Read and follow the instructions provided with any tools listed here.
Measuring tape
1/2" (13 mm) drill bit
Pencil
1/2" (13 mm) wood bit or metal hole cutter (if installing under a metal cabinet)
■ Masking tape
Covering or microwave oven carton
Scissors
No. 2 Phillips screwdriver
■ Drill
Parts Supplied (not shown to scale)
For information on reordering, see "Replacement Parts" section.
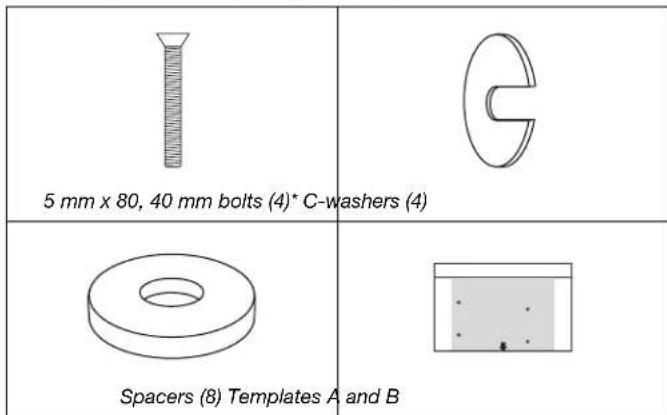
*Depending on cabinet shelf depth and/or cabinet trim overhang length, bolts longer than those provided (40 mm) may be required.
Location Requirements
NOTE: This microwave oven is intended for installation over a countertop. Do not install this microwave oven over any heat source, such as a range or cooktop.
Check the opening where the microwave oven will be installed. The location must provide:
Minimum cabinet depth of 12^ (30.5 cm).
Minimum cabinet lower shelf thickness of 3 / 16'' (5 mm).
Support for weight of at least 50 lbs (22.7 kg), in addition to the normal contents of the cabinet, as well as any items that might be hanging from the bottom of the cabinet.
Grounded electrical outlet inside upper cabinet. See "Electrical Requirements" section.
To allow for adequate ventilation, which is important for product performance, a clearance of at least 212 (6.4 cm) must exist between the microwave oven and a side wall (or cabinetry wall) on each side.
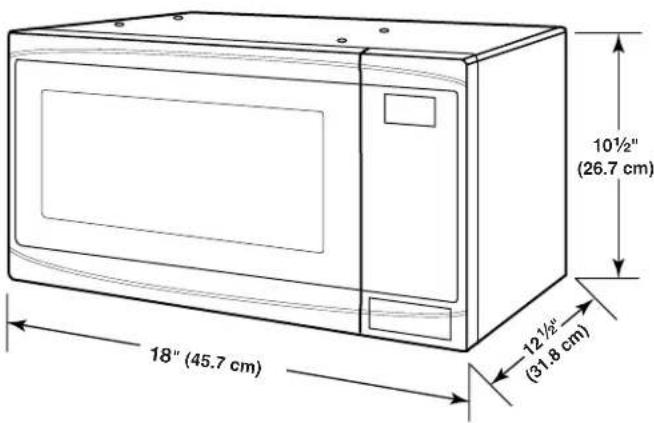
Product Dimensions
Electrical Requirements
WARNING
Electrical Shock Hazard
Plug into a grounded 3 prong outlet.
Do not remove ground prong.
Do not use an adapter.
Do not use an extension cord.
Failure to follow these instructions can result in death, fire, or electrical shock.
Observe all governing codes and ordinances.
Required:
A 120 volt, 60Hz AC only, 15- or 20-amp electrical supply with a fuse or circuit breaker.
Recommended:
A time-delay fuse or time-delay circuit breaker.
A separate circuit serving only this microwave oven.
GROUNDING INSTRUCTIONS
For all cord connected appliances:
The microwave oven must be grounded. In the event of an electrical short circuit, grounding reduces the risk of electric shock by providing an escape wire for the electric current. The microwave oven is equipped with a cord having a grounding wire with a grounding plug. The plug must be plugged into an outlet that is properly installed and grounded.
WARNING: Improper use of the grounding plug can result in a risk of electric shock. Consult a qualified electrician or serviceman if the grounding instructions are not completely understood, or if doubt exists as to whether the microwave oven is properly grounded.
Do not use an extension cord. If the power supply cord is too short, have a qualified electrician or serviceman install an outlet near the microwave oven.
SAVE THESE INSTRUCTIONS
INSTALLATION INSTRUCTIONS
Place Cabinet Template
The shadowed area of Template A represents the top of the microwave oven. Make sure it is centered in the space where the microwave oven will be installed.
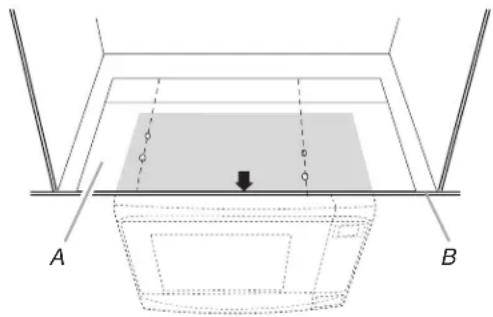
A. Template A
B. Cabinet front edge
Installation Under Cabinet without Partition
- If the cabinet does not have a partition, place the template (Template A) on the lower shelf of the cabinet, as shown in the illustration at the beginning of this section.
- Tape the template into place.
- Proceed to "Mark and Drill Holes" section.
Installation Under Cabinet with Partition
- If the cabinet has a partition, or if the microwave oven is being installed under adjoining cabinets, cut Template B from Template A.
- Cut Template A into two pieces to fit into each side of the partition.
- Align each piece of Template A so that it is flush with the front edge of the cabinet, as shown.
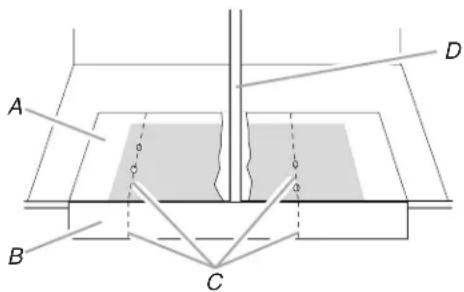
A. Template A (in 2 pieces)
B. Template B
C. Hole centerlines
D. Partition
- Align the Hole Centerlines of Template A with those of Template B, as shown.
- Tape the template pieces into place.
Mark and Drill Holes
- Mark the four hole centers through the template onto the lower shelf of the cabinet.
- Remove the template.
Following are the dimensions for the mounting holes on Template A:
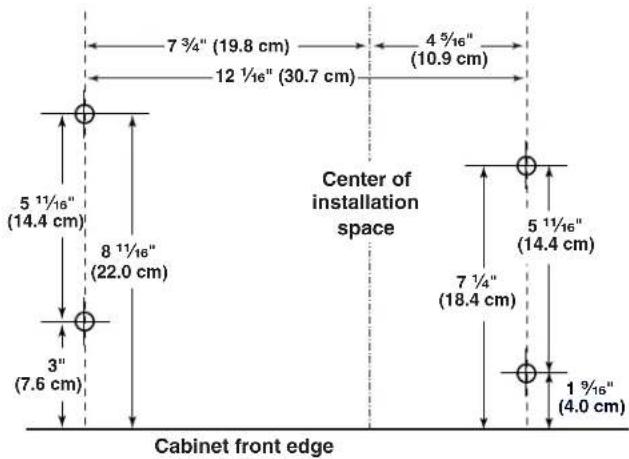
- Using 1 / 2'' drill, drill four holes through the centers marked in Step 1.
- Place the four C-washers near the holes inside the cabinet.
Install the Microwave Oven
- Remove the plugs from the four mounting holes on the top of the microwave oven. Save the plugs in case the microwave oven is used as a countertop unit in the future.
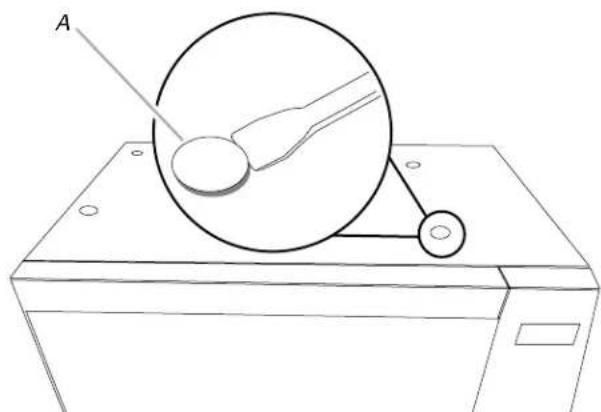
A. Plugs (4)
- Start the four bolts into the mounting holes. Turn each bolt three or four times.
- If the front edge of the cabinet is flush with the bottom of the cabinet (if there is no "lip" or trim overhang that extends below the cabinet bottom), proceed to Step 7.
- If the front edge of the cabinet has a "lip" or trim overhang that extends below the bottom of the cabinet, measure the length of the overhang. Spacers may need to be used on the back bolts.
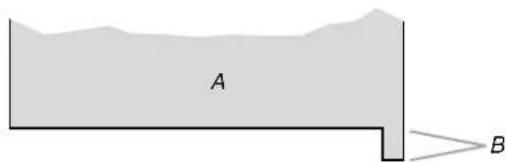
A. Cabinet
B. Trim overhang
- Determine the number of spacers needed for the back bolts.
| If the trim overhang is: | Use: |
| less than 1/2" (13 mm)1/2"-3/4" (13-19 mm)3/4"-1" (19-25 mm) | 0, 1 or 2 spacers2 or 3 spacers3 or 4 spacers |
- Place the appropriate number of spacers on the back bolts.
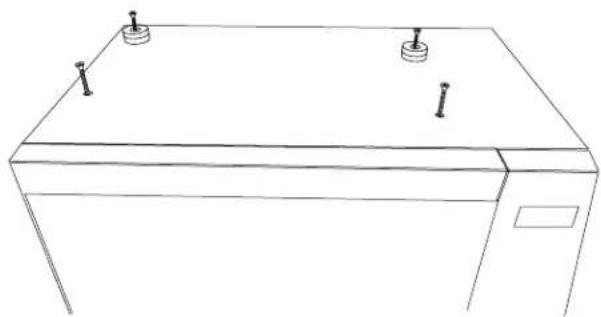
NOTE: Although the microwave oven can be installed by one person, we recommend having the aid of a second person for the next step.
7. Gently lift the microwave oven to the cabinet bottom, until the bolts emerge through the holes drilled into the lower shelf of the cabinet.
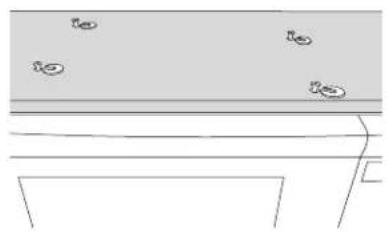
A. Bolts
B.C-washers
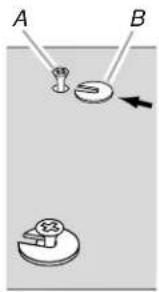
- Slide the slotted portion of each C-washer against each bolt. These washers will temporarily hold the microwave oven while installation is being completed.
- Gently and evenly, tighten each of the bolts, until the microwave oven is secure and level.
Properly installed, the microwave oven door will protrude in front of the front surface of the cabinet.
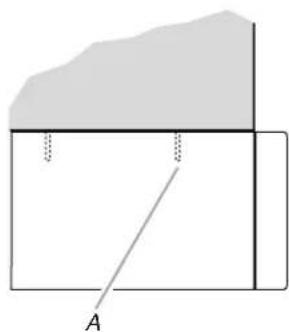
Cabinet without trim overhang
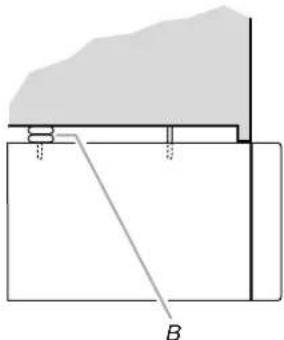
Cabinet with trim overhang
A. Bolts
B. Spacers
Complete Installation
AWARNING

Electrical Shock Hazard
Plug into a grounded 3 prong outlet.
Do not remove ground prong.
Do not use an adapter.
Do not use an extension cord.
Failure to follow these instructions can result in death, fire, or electrical shock.
- Plug microwave oven into grounded 3 prong outlet.
-
Check the operation of microwave oven by placing 1 cup (250~mL) of water on the turntable, and programming a cook time of 1 minute at 100% power.
-
If the microwave oven does not operate:
Check that a household fuse has not blown, or that a circuit breaker has not tripped. Replace the fuse or reset the circuit breaker. If the problem continues, call an electrician.
Check that the power supply cord is plugged into a grounded 3 prong outlet.
See the Use and Care Guide for troubleshooting information.
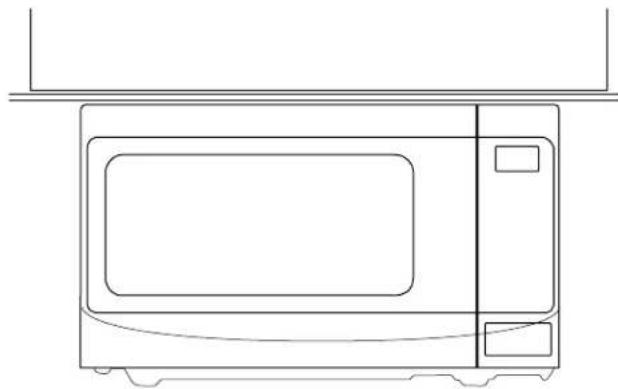
Installation is now complete.
Save Installation Instructions for future use.
Notes