MO1211SBC - Microwave Oven BLACK & DECKER - Free user manual and instructions
Find the device manual for free MO1211SBC BLACK & DECKER in PDF.
| Product Type | Microwave Oven |
| Brand | Black & Decker |
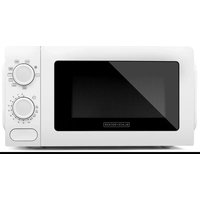
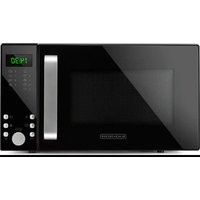
| Model | MO1211SBC |
| Power | 1100 W |
| Supply Voltage | 120 V ~ 60 Hz, 20 A |
| Capacity | Approximately 1.1 cu ft (not specified in manual, estimated) |
| Approximate dimensions (W x H x D) | 52 x 32 x 41 cm (20.5 x 12.5 x 16 in) |
| Approximate weight | 16 kg (35 lb) |
| Control type | Touch keys with digital display |
| Main functions | Cooking, quick defrost, defrost by weight, cook by weight, timer, clock, child lock, auto programs (popcorn, potato, pizza, beverage, frozen dinner, reheat) |
| Power levels | 10 levels (from 10% to 100%) |
| Turntable type | Removable glass turntable |
| Housing material | Painted steel (estimated) |
| Safety | Child safety lock, door lock system, grounding, tamper-resistant screws |
| Maintenance and cleaning | Clean exterior and door with mild soapy water; glass tray dishwasher safe; do not use abrasive cleaners |
| Spare parts | Glass turntable (part MO-002), turntable support (MO-001) |
| Repairability | No user-serviceable parts; contact qualified technician |
| Warranty | 2 years limited (USA and Canada) |
| Included accessories | Glass turntable, turntable support |
| Use | Household use only |
| Certifications | UL / CUL (presumed) |
Frequently Asked Questions - MO1211SBC BLACK & DECKER
User questions about MO1211SBC BLACK & DECKER
0 question about this device. Answer the ones you know or ask your own.
Ask a new question about this device
Download the instructions for your Microwave Oven in PDF format for free! Find your manual MO1211SBC - BLACK & DECKER and take your electronic device back in hand. On this page are published all the documents necessary for the use of your device. MO1211SBC by BLACK & DECKER.
USER MANUAL MO1211SBC BLACK & DECKER
Accessories/Parts (USA)
1-800-738-0245
For online customer service
and to register your product, go to
www.prodprotect.com/applica
Please Read and Save this Use and Care Book.
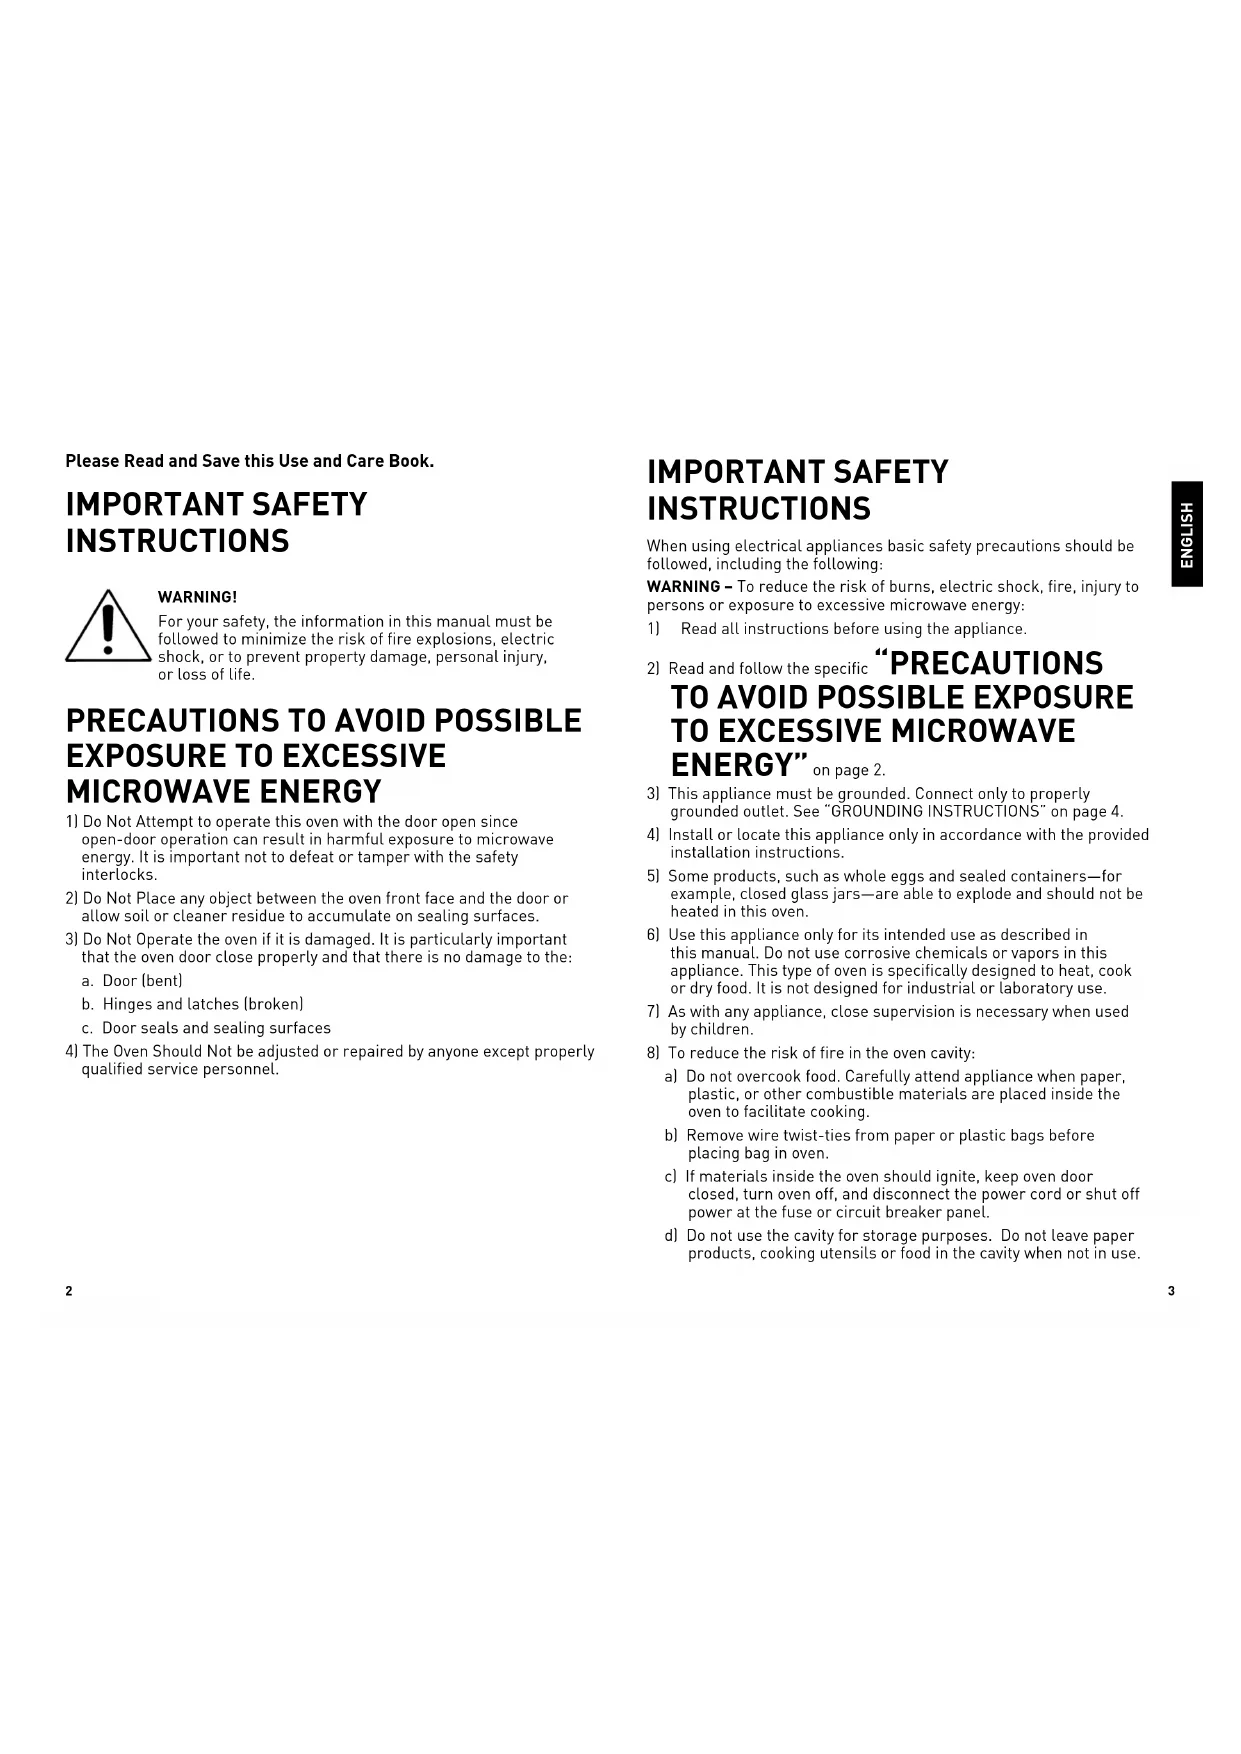
IMPORTANT SAFETY INSTRUCTIONS

WARNING!
For your safety, the information in this manual must be followed to minimize the risk of fire explosions, electric shock, or to prevent property damage, personal injury, or loss of life.
PRECAUTIONS TO AVOID POSSIBLE EXPOSURE TO EXCESSIVE MICROWAVE ENERGY
1) Do Not Attempt to operate this oven with the door open since open-door operation can result in harmful exposure to microwave energy. It is important not to defeat or tamper with the safety interlocks.
2) Do Not Place any object between the oven front face and the door or allow soil or cleaner residue to accumulate on sealing surfaces.
3) Do Not Operate the oven if it is damaged. It is particularly important that the oven door close properly and that there is no damage to the:
a. Door (bent)
b. Hinges and latches [broken]
c. Door seals and sealing surfaces
4) The Oven Should Not be adjusted or repaired by anyone except properly qualified service personnel.
IMPORTANT SAFETY INSTRUCTIONS
When using electrical appliances basic safety precautions should be followed, including the following:
WARNING - To reduce the risk of burns, electric shock, fire, injury to persons or exposure to excessive microwave energy:
1) Read all instructions before using the appliance.
2] Read and follow the specific "PRECAUTIONS TO AVOID POSSIBLE EXPOSURE TO EXCESSIVE MICROWAVE ENERGY" on page 2.
3) This appliance must be grounded. Connect only to properly grounded outlet. See "GROUNDING INSTRUCTIONS" on page 4.
4] Install or locate this appliance only in accordance with the provided installation instructions.
5) Some products, such as whole eggs and sealed containers—for example, closed glass jars—are able to explode and should not be heated in this oven.
6) Use this appliance only for its intended use as described in this manual. Do not use corrosive chemicals or vapors in this appliance. This type of oven is specifically designed to heat, cook or dry food. It is not designed for industrial or laboratory use.
7] As with any appliance, close supervision is necessary when used by children.
8] To reduce the risk of fire in the oven cavity:
a) Do not overcook food. Carefully attend appliance when paper, plastic, or other combustible materials are placed inside the oven to facilitate cooking.
b) Remove wire twist-ties from paper or plastic bags before placing bag in oven.
c] If materials inside the oven should ignite, keep oven door closed, turn oven off, and disconnect the power cord or shut off power at the fuse or circuit breaker panel.
d) Do not use the cavity for storage purposes. Do not leave paper products, cooking utensils or food in the cavity when not in use.
9) Liquids, such as water, coffee, or tea are able to be overheated beyond the boiling point without appearing to be boiling due to surface tension of the liquid. Visible bubbling or boiling when the container is removed from the microwave oven is not always present. THIS COULD RESULT IN VERY HOT LIQUIDS SUDDENLY BOILING OVER WHEN A SPOON OR OTHER UTENSILS IS INSERTED INTO THE LIQUID.
10) Do not cover or block any openings on the appliance.
11) Do not store or use this appliance outdoors. Do not use this product near water, for example, near a kitchen sink, in a wet basement, near a swimming pool, or similar locations.
12) Do not operate this appliance if it has a damage cord or plug, if it is not working properly or if it has been damaged or dropped.
13) Do not immerse cord or plug in water. Keep cord away from heated surface. Do not let cord hang over edge of table or counter.
14) Use only thermometers which are specifically designed for use in microwave ovens.
15) Do not operate any heating or cooking appliance.
16) Be certain the removable glass turntable and turntable support are in place when you operate the oven.
17) This appliance should be serviced only by qualified service personnel, contact nearest authorized service facility for examination, repair, or adjustment.
18) When cleaning surfaces of door and oven that comes together on closing the door, use only mild, nonabrasive soaps, or detergents applied with a sponge or soft cloth.
SAVE THESE INSTRUCTIONS.
This product is for household use only.
GROUNDING INSTRUCTIONS
As a safety feature, this product is equipped with a ground plug, which will only fit into a three-prong outlet. Do not attempt to defeat this safety feature. Improper connection of the grounding conductor may result in the risk of electric. Consult a qualified electrician if you are in doubt as to whether the outlet is properly grounded. This appliance must be grounded.
WARNING: Improper use of the grounding plug can result in a risk of electric shock.
Electrical Requirements
The electrical requirements are a 120 volt 60Hz , AC only, 20 amp. It is recommended that a separate circuit serving only the oven be provided. The oven is equipped with a 3-prong grounding plug. It must be plugged into a wall receptacle that is properly installed and grounded.
ELECTRICAL CORD
1) A short power-supply cord (or detachable power-supply cord) is to be provided to reduce the risk resulting from becoming entangled in or tripping over a longer cord.
2) Longer detachable power-supply cords or extension cords are available and may be used if care is exercised in their use.
3) If a long detachable power-supply cord or extension cord is used,
a.] The marked electrical rating of the detachable power-supply cord or extension cord should be at least as great as the electrical rating of the appliance,
b.) If the appliance is of the grounded type, the extension cord should be a grounding-type 3-wire cord, and
c.) The longer cord should be arranged so that it will not drape over the countertop or tabletop where it can be pulled on by children or tripped over.
NOT FOR COMMERCIAL USE.
How to Use
This product is for household use only.
GETTING STARTED
1) Remove all packaging materials from the inside of the microwave oven.
2) Please go to www.prodprotect.com/applica to register your warranty.
3) Check the oven for any damage, such as misaligned or bent door, damaged door seals and sealing surface, broken or loose door hinges and latches and dents inside the cavity or on the door. If there is any damage, do not operate the oven, but contact qualified service personnel.
4) This microwave oven must be placed on a flat, stable surface to hold its weight and the heaviest food likely to be cooked in the oven.
5) Do not place the microwave oven where heat, moisture or high humidity are generated, or near combustible materials.
6) For correct operation, the microwave oven must have sufficient airflow. Allow 20~cm of space above the oven, 10~cm at back and 5~cm at both sides. Do not cover or block any openings of the appliance. Do not remove feet on which oven stands.
7) Do not operate the microwave oven without the removable glass turntable, turntable support and motor shaft in their positions.
8) Make sure that the power supply cord is undamaged and does not run under the oven or over any hot or sharp surface.
9) The socket must be readily accessible so that it can be easily unplugged in an emergency.
10) Remove the removable glass turntable from oven.
11) Wash in sudsy water, rinse and dry with a cloth or paper towel.
12) Replace the removable glass turntable to the turntable support.
13) Plug unit into electrical outlet.
Radio or TV Interference
Should there be any interference caused by the microwave oven to your radio or TV, check that the microwave oven is on a different electrical circuit, relocate the radio or TV as far away from the oven as feasible or check position and signal of receiving antenna.
Helpful Information About Your Oven
Always read your manual carefully and save it for reference.
NEVER use the oven without the removable glass turntable and the turntable support, nor turn the turntable over so that a large dish could be placed in the oven. The turntable will turn both clockwise and counterclockwise.
ALWAYS have food in the oven when it is on to absorb the microwave energy.
Make sure all cookware used in your microwave oven is suitable for microwaving. Do not microwave empty containers. Do not permit children to use plastic cookware without complete supervision.
ABOUT FOOD
| FOOD DO DON'T | |
| Vegetables / Fruits / Eggs / Nuts / Seeds and Hot Dogs | ·Puncture eggs yolks before cooking to prevent "eruption". ·Puncture skins of potatoes, apples and hot dogs. |
| Popcorn • Only use | specially bagged microwave oven popcorn. |
| Baby Food • Transfer | baby food to a separate container and heat carefully. Always check temperature before serving. ·Remove nipples from bottles before heating. Shake thoroughly and always check temperature before feeding. |
| Tips • Stir foods such | as casseroles and vegetables while cooking to distribute heat evenly. ·Allow foods to stand at least 20 seconds after heating. ·Use deep bowl when cooking liquids or oatmeal, to prevent spillage and boil over. |
Product may vary slightly from what is illustrated.
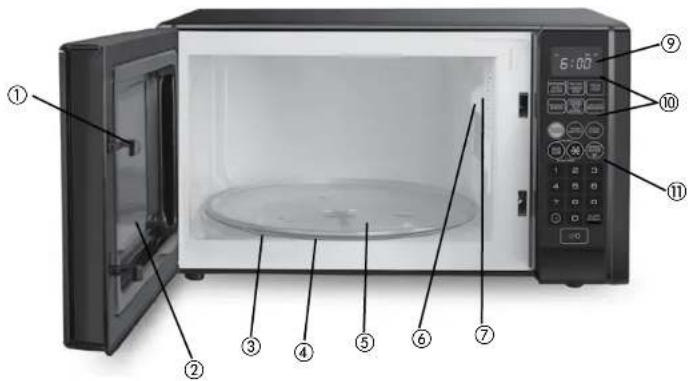
- Door Safety Lock System
- Oven Window
- Turntable Support (not shown) (Part# M0-001)
- Motor Shaft (not shown)
-
- Removable Glass Turntable (Part# M0-002)
- Light
- Ventilation Openings
- Wave Guide (Do Not Remove) (not shown)
- Time Display
- Quick Touch Pad
- Control Panel
Note: † indicates consumer replaceable/removable parts
CONTROL PANEL
Model MO1900BC 900W
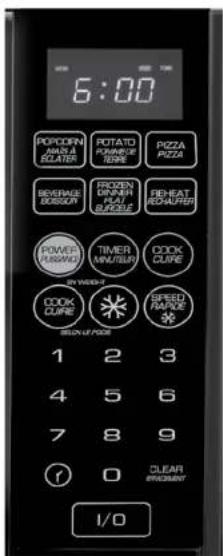
Model MO121SBC 1100W
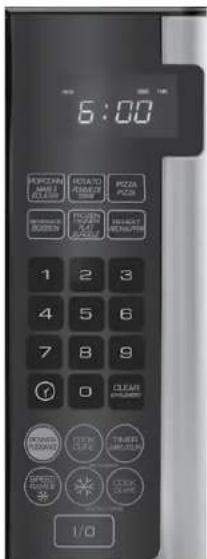
Display - Cooking time, power, indicators and present time are displayed. Quick Touch Pad - Instant setting to cook popcorn, potato, pizza, beverage, frozen dinner and reheat foods.
Power - Provides flexibility to microwaving cooking.
Cook - Automatically computes the power level and correct cooking times.
Timer - Timer functions independently, even while a cooking program is in process.
Clock - Set the current time.
Clear - Use to clear all previous settings.
Speed Defrost - Quick defrost function that alternates defrost and stand time to quickly defrost foods.
Defrost By Weight - Programmed defrosting based on the weight of the foods to be defrosted.
Cook By Weight - Programmed cooking based on weight of foods to be cooked.
Start/Stop-Touch to start or stop cooking.
Number Pad (0-9) - Touch to set time or level.
CAUTION: Never use metal bakeware or aluminum (pans or foil) inside the microwave oven.
TO SET THE CLOCK
1) Touch clock symbol.
2] Use the number pad to enter the correct time.
3) Touch clock pad again.
Note: When the microwave oven is first plugged in or when power resumes after a power interruption, the display will show Enter Clock Time. If you prefer to have the clock displayed, touch clear. If you wish to check the time while cooking is in progress, touch the Clock pad.
SETTING THE TIMER
1) Touch TIMER.
2) Enter amount of time by touching the number pad.
3) Touch START / STOP [I/O].
Note: Time countdown can be seen for 5 seconds before clock or cooking time is returned to display. Touch Timer and then touch Clear to cancel Timer during timing process.
SETTING A COOKING PROGRAM
One Stage Cooking
1) Use the number pad to set a cooking time. Set microwave for any time up to 99 minutes and 99 seconds.
2) Power Level is automatically set to Power Level 10 [1,0], but you may modify for more flexibility.
3) Touch COOK (select for lower power level).
4) Enter amount of time by touching the number pad.
5) Select Power Level (see chart below).
6) Touch START / STOP [I/O] to start cooking.
Note: Use single digits to set a cooking power level.
| Number Pad Coding Power | |
| 1,0 100% | |
| 9 90% | |
| 8 80% | |
| 7 70% | |
| 6 60% | |
| 5 50% | |
| 4 40% | |
| 3 30% | |
| 2 20% | |
| 1 10% | |
Below are some examples for using the different power levels:
| High [10] Fish / Bacon / Vegetables / Boiling Liquids |
| Med High [7] Meat / Poultry / Casseroles / Reheating |
| Med [5] Slow Cooking / Tender Cuts of Meat |
| Low [2 or 3] Simmering / Sauces |
| Warm [1] Softening Butter |
Two Stage Cooking
Some recipes require different stages of cooking at different temperatures.
1) Set Stage 1: follow steps 1 and 2 in "One Stage Cooking". Do Not Touch START / STOP (I/O).
2) Set Stage 2: Touch COOK then enter proper cooking time and (lower) Power Level (most 2-Stage recipes use lower power for second stage).
3) Touch START / STOP [I/O].
Note: Once cooking is completed, the microwave oven will beep and show "END" on the display. The beep will continue to sound every two minutes automatically until the door is opened or any pad is touched.
To ensure safe and efficient operation, please be certain to keep the inner door, door seal, hinges and latches clean and free from food residue.
SPEED DEFROST
1) Touch SPEED DEFROST.
2) Enter desired defrosting time by touching number pad. Digital timer sets minutes and seconds from left to right so a single digit can be set (5 for 5 seconds) or up to 4 digits (2405 for 24 minutes 5 seconds).
3) Touch START / STOP [I/O].
Note: Once cooking is completed, the microwave oven will beep and show "END" on the display. The beep will continue to sound every two minutes automatically until the door is opened or any pad is touched.
After setting SPEED DEFROST, oven can be programmed to automatically switch to one or two-stage cooking.
For SPEED DEFROST and One Stage cooking, follow steps above. Before touching START / STOP [I/O], touch COOK, enter time and power level. Then touch START / STOP [I/O].
For SPEED DEFROST and Two Stage cooking, follow steps above. Before touching START/STOP, enter Two Stage cooking programs.
For model M01900BC, during cooking, the system will pause automatically and sound to remind users to turn meat over, after that touch STAR/STOP to resume cooking.
COOK BY WEIGHT
1) Touch COOK BY WEIGHT.
2) Enter the one digit code by touching the correct number pad (see below).
| CODE TYPE MAX WEIGHT | |
| 1 Beef 5 lb. 16 oz. | |
| 2 Chicken 5 lb. 16 oz. | |
| 3 Pork 5 lb. 4 oz. |
3) Enter weight and ounces.
4) Touch START / STOP [I/O] pad.
Note: Meat must be defrosted and at refrigerated temperature. Weight must be pounds and ounces. During cooking, the system will pause automatically and sound off to remind users to turn meat over. Touch Start/Stop to resume cooking.
DEFROST BY WEIGHT
1) Touch DEFROST BY WEIGHT pad.
2) Enter weight.
3) Touch START / STOP (I/O) pad.
Note: Weight must be in pounds and ounces.
4) Turn food over at signal.
5) Touch START / STOP [I/O] pad to resume defrosting.
6) Once Defrosting is completed, the microwave oven will beep and show "END" on the display. The beep will continue to sound every two minutes automatically until the door is opened or any pad is touched.
SETTING CHILD LOCK
The Safety Lock System prevents unsupervised operation by children.
1) To Set, touch and hold CLEAR for 3 seconds. LOCK is indicated on the display.
2) To Cancel, touch and hold CLEAR for 3 seconds. LOCK indication disappears.
Use quick setting to cook popcorn, potato, pizza, beverage, frozen dinner and reheat foods.
POPCORN MAIS A ECLATER POPCORN
1) Touch POPCORN.
2) CODE and cooking time appears in the display. POPCORN automatically sets the cooking time for a 3.5 oz bag of microwave popcorn.
3) Touch START / STOP [I/O].
Note: To change the preset POPCORN time.
1) Touch POPCORN twice.
2) TIME appears in display.
3) Touch number pads to enter minutes and seconds.
4) Touch START / STOP (I/O).
5] This new cooking time will remain whenever you use the POPCORN setting.
POTATO BAKED POTATO POMMEDE TERRE
4 to 6 oz. Potatoes
1) Touch POTATO.
2) Enter number of potatoes by touching the number pads from 1-4.
3) Touch START / STOP (I/O).
8 to 10 oz. Potatoes
1) Touch POTATO twice.
2) Enter number of potatoes by touching the number pads from 1-4.
3) Touch START / STOP (I/O).
PIZZA PIZZA
Reheating a Slice of Pizza
1) Touch PIZZA.
2) CODE and cooking time appears.
3) Touch START / STOP [I/O].
Heating a Whole Pizza
1) Touch PIZZA twice.
2) CODE and cooking time appears.
3) Touch START / STOP (I/O).

BEVERAGE
1) Touch BEVERAGE once (5-7 oz. cup) or touch Beverage twice (9-11 oz. cup).
2) Enter number of cups by touching the number pads from 1 -4.
3) Touch START / STOP [I/O].

FROZEN
1) Touch FROZEN DINNER once (7-9 oz.) or Touch twice FROZEN DINNER (10-12 oz.).
2) Enter 1 entree by touching the number pad "1" or "2" for 2 entrees.
3) Touch START / STOP (I/O).

REHEAT
Leftover Dinner
1) Touch REHEAT pad. Cooking time appears.
2) Touch START / STOP [I/O].
Care and Cleaning
CLEANING
Always unplug the cord before cleaning any part of the microwave oven. This product contains no user serviceable parts. Refer service to qualified service personnel.
Exterior
Clean the outside and door with mild soap and water. Wipe with a clean dampened cloth and dry soft cloth. Do not use any type of household or abrasive cleaner. To prevent damage to the operating parts inside the oven, water should not be allowed to leak into the Ventilation Openings.
Control Panel
Wipe with a damp cloth and dry thoroughly. Do not use cleaning sprays, large amounts of soap and water or abrasive objects—they can damage it. Some paper towels can also scratch the Control Panel.
Removable Glass Turntable / Turntable Support
The Glass Turntable and Turntable Support can be easily removed for cleaning. To prevent breakage, do not place the Glass Turntable into water just after cooking. Wash with mild, sudsy water or in the dishwasher. Do not operate the microwave oven without the Glass Turntable and Turntable Support in place.
Light
When it becomes necessary to replace the microwave Light, please consult qualified service personnel to have it replaced.
Odor Removal
Occasionally an odor may remain in the microwaveoven. Combine a cup of water, grated lemon peel and juice of one lemon in a large measuring cup. Boil for several minutes using Power Level 10 [High]. Allow to set in oven until cool. Wipe interior with a soft cloth.
NEED HELP?
For service, repair or any questions regarding your appliance, call the appropriate 800 number on cover of this book. Please DO NOT return the product to the place of purchase. Also, please DO NOT mail product back to manufacturer, nor bring it to a service center. You may also want to consult the website listed on the cover of this manual.
Two-Year Limited Warranty
(Appplies only in the United States and Canada)
What does it cover?
- Any defect in material or workmanship provided; however, Applica's liability will not exceed the purchase price of product.
For how long?
- Two years from the date of original purchase with proof of such purchase.
What will we do to help you? - Provide you with a reasonably similar replacement product that is either new or factory refurbished.
How do you get service?
- Save your receipt as proof of date of sale.
- Visit the online service website at www.prodprotect.com/applica, or call toll-free 1-800-231-9786, for general warranty service.
If you need parts or accessories, please call 1-800-738-0245.
What does your warranty not cover?
- Damage from commercial use
- Damage from misuse, abuse or neglect
- Products that have been modified in any way
- Products used or serviced outside the country of purchase
Glass parts and other accessory items that are packed with the unit - Shipping and handling costs associated with the replacement of the unit
- Consequential or incidental damages (Please note, however, that some states do not allow the exclusion or limitation of consequential or incidental damages, so this limitation may not apply to you.)
How does state law relate to this warranty?
- This warranty gives you specific legal rights. You may also have other rights that vary from state to state or province to province.
BLACK & DECKER is a trademark of The Black & Decker Corporation, Towson, Maryland, USA
Made and Printed in People's Republic of China
POMME DE TERRE AU FOUR
Applica Consumer Products, Inc.