10029124 - Barbecue Klarstein - Free user manual and instructions
Find the device manual for free 10029124 Klarstein in PDF.

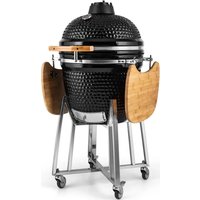
| Product type | Charcoal barbecue |
| Brand | Klarstein |
| Model | 10029124 |
| Fuel | Charcoal or wood |
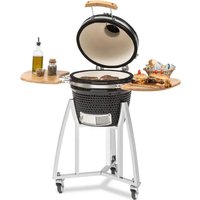
| Body material | Ceramic |
| Stand material | Steel |
| Number of grills | 1 cooking grill |
| Grill diameter | Approx. 50 cm |
| Total height | Approx. 90 cm |
| Weight | Approx. 30 kg |
| Usage | Outdoor only |
| Main functions | Intense grilling, light grilling, slow cooking, smoking |
| Temperature range | 110°C to 370°C |
| Temperature control | Via upper and lower air vents |
| Thermometer | Not included (recommended) |
| Assembly required | Yes, screws included |
| Safety | Do not use indoors, safety distance 2 m, use gloves |
| Cleaning | Let it cool completely, brush the grills, do not use water to extinguish |
| Maintenance | Tighten screws, lubricate the stand twice a year |
| Spare parts | Grill, charcoal tray, bowl, lid, handles |
| Repairability | Parts available via manufacturer |
| Warranty | 2 years |
Frequently Asked Questions - 10029124 Klarstein
User questions about 10029124 Klarstein
0 question about this device. Answer the ones you know or ask your own.
Ask a new question about this device
Download the instructions for your Barbecue in PDF format for free! Find your manual 10029124 - Klarstein and take your electronic device back in hand. On this page are published all the documents necessary for the use of your device. 10029124 by Klarstein.
USER MANUAL 10029124 Klarstein
Congratulations on purchasing this equipment. Please read this manual carefully and take care of the following hints to avoid damages. Any failure caused by ignoring the mentioned items and cautions mentioned in the instruction manual are not covered by our warranty and any liability.
Safety Instructions
- Read all the safety and operating instructions carefully and retain them for future reference.
- This product is intended for outdoor use only. Do not use indoors.
- Always keep children and pets at a safe distance from the oven when in use.
- Never leave a burning fire unattended.
- Danger of carbon monoxide poisoning. Never light this product, let it smoulder or cool down in confined spaces.
- Do not use this product in a tent, caravan, car, cellar, loft or boat.
- Do not use under any awnings, parasols or gazebos.
- Fire hazard - hot embers may emit while in use.
- Caution - do not use petrol, white spirit, lighter fluid, alcohol or other similar chemicals for lighting or religh- ting.
It is highly recommended that you use lump charcoal in your oven. It burns for longer and produces less ash which can restrict the airflow. - Important: when opening the lid at high temperatures it is essential to lift the lid only slightly, allowing air to enter slowly and safely, preventing any backdraft or flare-ups that may cause injury.
- Do not use the oven on decking or any other flammable surfaces such as dry grass, wood chips, leaves or decorative bark.
- Ensure that the oven is positioned at least 2 metres away from flammable items.
- Do not use this oven as a furnace.
- Attention: this product will become very hot, do not move it during operation.
- Always use heat resistant gloves when handling hot ceramics or cooking surfaces.
- Allow the unit to cool down completely before moving or storing.
- Always inspect the unit prior to use for fatigue and damage and replace as and when necessary.
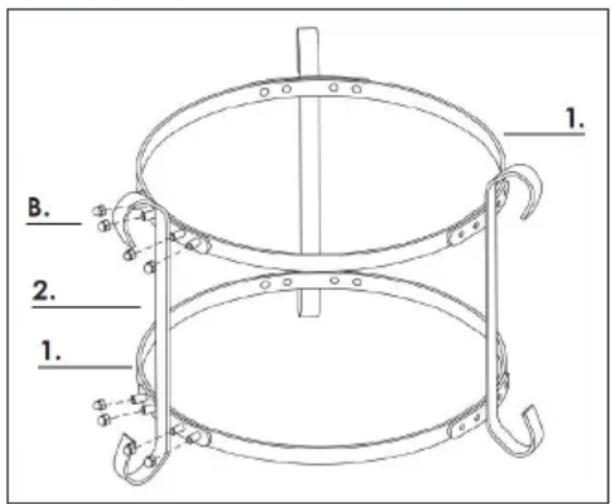
Assembling
Step 1
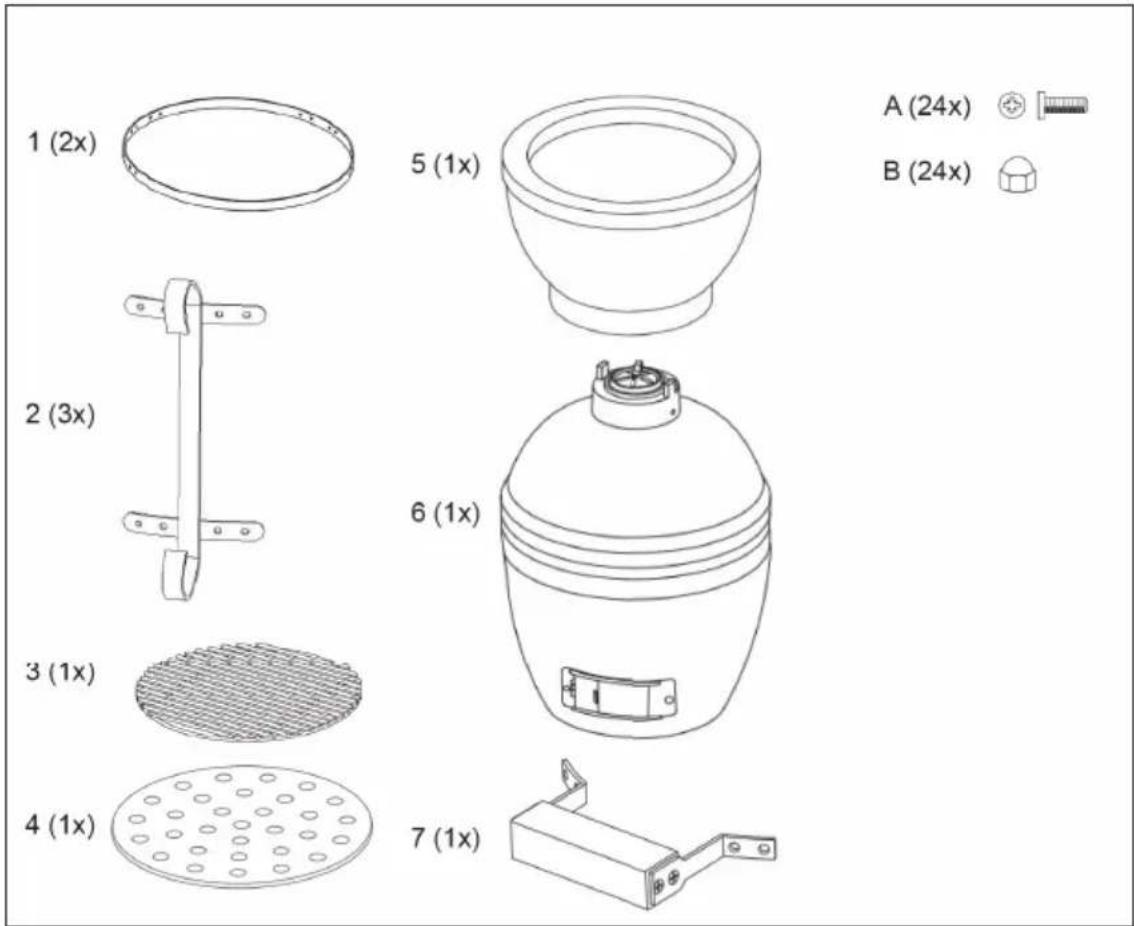
Attach one bracket piece (2) to the two brace rings (1). Secure the bracket to each brace ring using the 8x screws (A) with the 8x dome-headed nuts (B).
Step 2
Continue to attach the other brackets to the brace rings by aligning screw holes, and using the screws (A) and dome headed nuts (B). Please reference the above diagram.
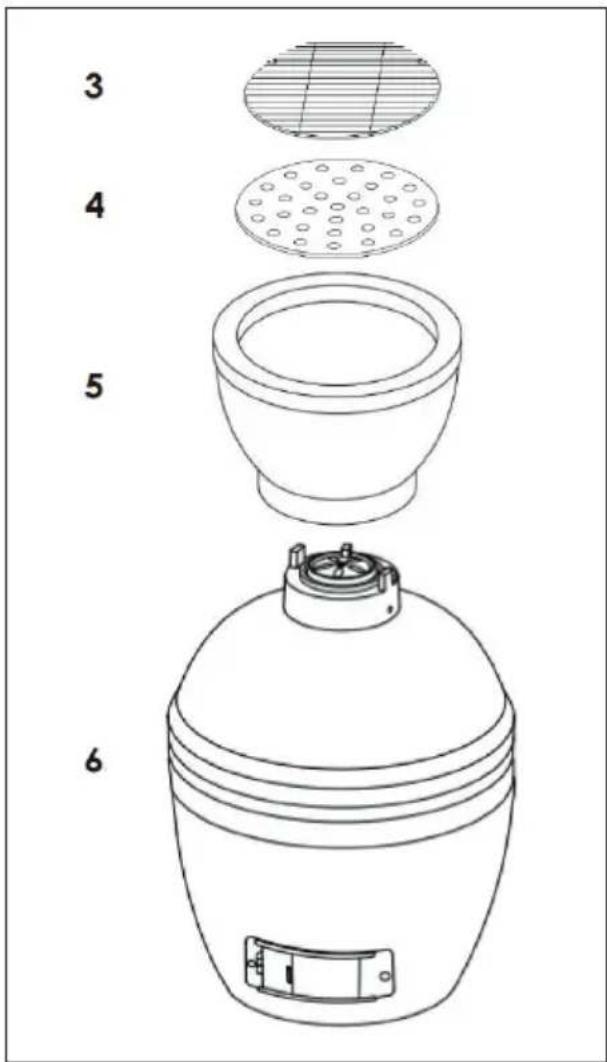
Step 3
On the side, add the firebox (5), charcoal plate (4) and cooking grill (3) inside of the oven. Please reference the diagram below.
Step 4
To attach the handle (7) to the lid align the bolt holes of the handle to pre-installed bolts on the lid. Secure the handle (7) with the 4 × pre-attached dome headed nuts.

Step 5
Place the grill on the stand with the bottom vent facing to the front of the stand, allowing the vent to open and close without any interruption
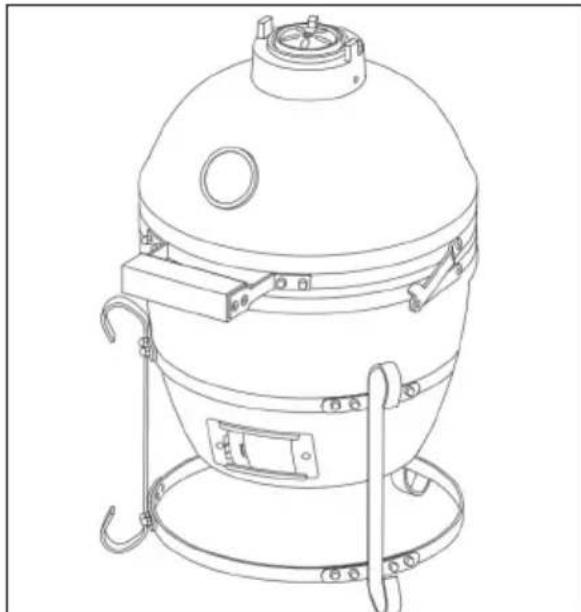
When the grill is securely placed on the stand, it is recommended to place a level on the cooking grill to ensure there is a flat cooking surface. The Grill is now ready to use. Please ensure that grill curing instructions are read thoroughly prior to use.
Use and Operation
Extinguishing
To extinguish unit - stop adding fuel and close all the vents and the lid to allow the fire to die naturally. Do not use water to extinguish the charcoal as this could damage the ceramic oven.
Maintenance
Tighten the bands and oil the hinge 2 times a year or more if needed.
Lighting, Usage and Care Information
- Ensure the oven is positioned on a permanent, flat, level, heat resistant non-flammable surface away from flammable items.
- Ensure the oven has a minimum of 2m overhead clearance and has a minimum 2m clearance from other surrounding items.
- To start a fire place rolled up newspaper with some lighter cubes or solid firelighters on the charcoal plate in the base of the oven. Then place 1 or 2 handfuls of lump charcoal over the top of the newspaper.
- Do not use petrol, white spirit, lighter fluid, alcohol or other similar chemicals for lighting or relighting.
- Open the bottom vent and light the newspaper using a long nosed lighter or safety matches. Once it has caught, leave the bottom vent and lid open for about 10 minutes to build a small bed of hot embers.
- It is recommended you don't stoke or turn the coals once they are alight. This allows the charcoals to burn more uniformly and efficiently.
- Once alight only use heat resistant gloves when handling hot ceramics or cooking surfaces.
- See below for cooking instructions depending on temperature and duration.
Refuelling
With the vents closed, the oven stays at a high temperature for several hours. If you require a longer cooking time (e.g when roasting a whole joint or slow smoking), it may be necessary to add more charcoal. Just add some additional charcoal and continue.
Gartabelle
| Slow cook / Smoke (110-135 °C) Top vent Bottom vent | |||
| Beef Brisket 2 h per 500 g | |||
| Pulled Pork 2 h per 500 g | |||
| Whole Chicken 3-4 h per 500 g | |||
| Ribs 3-5 h per 500 g | |||
| Roasts 9+ h per 500 g | |||
Note: Black = closed / White = opened
| Grill / Roast (160-180 °C) Top vent Bottom | |||
| Fish 15-20 Min. | |||
| Pork Tenderloin 15-30 Min. | |||
| Chicken Pieces 30-45 Min. | |||
| Whole Chicken 1-1,5 Std. | |||
| Leg of a lamb 3-4 Std. | |||
| Turkey 2-4 Std. | |||
| Ham 2-5 Std. | |||
| Sear (260-370 °C) Top vent Bottom | vent | ||
| Steak 5-8 Min. | |||
| Pork Chops 6-10 Min. | |||
| Burgers 6-10 Min. | |||
| Sausages 6-10 Min. | |||
Part List
Producer: Chal-Tec GmbH, Wallstraße 16, 10179 Berlin, Germany.
Estimado cliente:
Chere cliente, cher client,