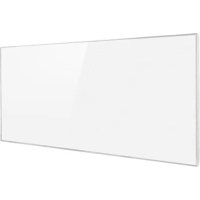
10032809 - Pan Klarstein - Free user manual and instructions
Find the device manual for free 10032809 Klarstein in PDF.


| Brand | Klarstein |
| Model | 10032809 |
| Product type | Infrared radiator (heater) |
| Nominal heat output | 360 W (0.36 kW) |
| Minimum heat output | 360 W (0.36 kW) |
| Maximum continuous power | 360 W (0.36 kW) |
| Supply voltage | 220-240 V, 50/60 Hz |
| Dimensions (approx.) | 60 x 100 cm |
| Mounting type | Wall-mounted (wall bracket included) |
| Temperature control | Electronic adjustment with thermostat |
| Weekly programming | Yes, up to 4 groups per day |
| Open window detection | Yes (automatic shutdown if temperature drops by 5°C in 5 min) |
| Standby consumption | 0.26 W |
| Safety distance | 1 m from combustible materials |
| Minimum height from floor | 20 cm |
| Overheat protection | Yes (do not cover) |
| Recommended cleaning | Soft damp cloth, no abrasive products |
| Intended use | Domestic supplementary heating (not as main source) |
| Certifications | CE (EMC, LVD, RoHS, ErP) |
| Manual pages | 56 pages |
| Article number | 10032809 |
Frequently Asked Questions - 10032809 Klarstein
User questions about 10032809 Klarstein
0 question about this device. Answer the ones you know or ask your own.
Ask a new question about this device
Download the instructions for your Pan in PDF format for free! Find your manual 10032809 - Klarstein and take your electronic device back in hand. On this page are published all the documents necessary for the use of your device. 10032809 by Klarstein.
USER MANUAL 10032809 Klarstein
Note: The device is not suitable for use as a primary heat source.
Congratulations on purchasing this equipment. Please read this manual carefully and take care of the following hints to avoid damages. Any failure caused by ignoring the mentioned items and cautions mentioned in the instruction manual are not covered by our warranty and any liability. Scan the QR code to get access to the latest user manual and other information about the product.

CONTENT
Product Data Sheet 14
Safety Instructions 15
Wall Mounting Instructions 16
Overview and Control Panel 18
Display Screen 18
Operation 19
Troubleshooting 21
Cleaning and Care 21
Hints on Disposal 22
TECHNICAL DATA
| Item number Power supply Power Dimensions | |||
| 10032809 | 0 x 100 cm50 x 90 cm50/60 Hz60 x 60 cm | 720 W 60 x | 120 cm |
| 10032810 600 W | |||
| 10032811 360 W | |||
| 10032812 360 W | |||
| 10032813 | 300 W 30 x | 100 cm | |
| 10032814 | Accessory part | x | x |
| 10032815 | 220-240 V50/60 Hz | 960 W | 80 x 120 cm |
| 10032816 | 1200 W | 100x120 cm | |
PRODUCT DATA SHEET
| Model identifier(s): 10032809 | ||||||
| Item Symbol Value Unit Item Unit | ||||||
| Heat output Type of heat input, for electric storage local space | heaters only | |||||
| Nominal heat output P | nom | 0.36 kW | manual heat | charge control, with integrated thermostat | no | |
| Minimum heat output (indicative) | Pmin | 0.36 kW | manual heat | charge control with room and/or outdoor temperature feedback | no | |
| Maximum continuous heat output | Pmax,c | 0.36 kW | electronic heat | charge control with room and/or outdoor temperature feedback | no | |
| Auxiliary electricity consumption | fan assisted heat output no | |||||
| At nominal heat output (fan motor) | elmax | N/A kW | Type of heat output/room temperature control | |||
| At minimum heat output (fan motor) | elmin | N/A kW | single stage | heat output and no room temperature control | no | |
| In standby mode el | SB | 0.26 W | Two | or more manual stages, no room temperature control | no | |
| with mechanic thermostat room temperature control | no | |||||
| with electronic room temperature control | no | |||||
| electronic room temperature control plus day timer | no | |||||
| electronic room temperature control plus week timer | yes | |||||
| Other control options (multiple selections possible) | ||||||
| room temperature control, with presence detection | no | |||||
| room temperature control, with open window detection | ja | |||||
| with distance control option | no | |||||
| with adaptive start control no | ||||||
| with working time limitation | ja | |||||
| with black bulb sensor | no | |||||
| Contact details | Chal-Tec GmbH, Wallstraße 16, 10179, Berlin, Germany | |||||
SAFETY INSTRUCTIONS
- Do not use the appliance until it is securely fixed as described in this manual.
- Check that the voltage indicates on the data plate corresponds with that of the local network before connecting the appliance to the mains power supply.
- If the supply cord is damaged, it must be replaced by a qualified engineer in order to avoid a hazard.
- The fireplace heater must not be positioned directly under the power socket.
- Keep furniture, curtains and other flammable material at least 1 meter away from the appliance.
- Do not leave the appliance unattended during use.
- Do not leave the appliance unattended whilst connected to the mains supply.
- Keep out of reach of children and do not allow them to operate this appliance.
- This appliance is intended for household use only and should not be used for industrial purposes.
- Do not operate this appliance after a malfunction or after being damaged in any way.
- Repairs to electrical appliances should only be performed by a qualified electrician.
- Improper repairs may place user at serious risk.
- Do not run the mains cable under carpets, rugs, etc.
- Do not allow the mains cable to hang over sharp edges or come in contact with hot surfaces.
- In order to avoid overheating, do not cover the heater.
- Do not use this heater with a programmer, timer, separate remote control system or any other device that switches the heater on automatically, since a fire risk exists if the heater is covered or positioned incorrectly.
- Never immerse the product in water or any other liquid for any reasons.
- Do not use this heater in the immediate surroundings of a bath, a shower or a swimming pool.
- Do not use the appliance outdoors.
- Do not use if you have wet hands.
- Never use the appliance on or near hot surfaces.
- Do not operate with a damaged cord.
- Before cleaning the appliance, make sure it is unplugged from the power and that it is completely cooled.
- Do not clean the appliance with abrasive chemicals.
- Never use accessories that are not recommended or supplied by the manufacturer. It could cause danger to the user or damage to the appliance.
- This appliance is not intended for use by persons (including children) with reduced Physical, sensory or mental capabilities, or lack of experience and knowledge unless they have been given supervision or instruction concerning use of the appliance by a person responsible for their safety.
Children should be supervised to ensure that they do not play with the appliance.
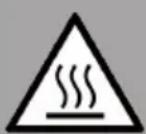
CAUTION
Risk of burns! Some parts of this product can become very hot and cause burns. Particular attention has to be given where children and vulnerable people are present.
WALL MOUNTING INSTRUCTIONS
| 1 | 2 |
| Mark the positions of the four holes to be drilled on the wall, and Drill the holes with the drill bit. Make sure the distance between each holes is same as the round holes on the brackets at back of the heater. | Insert the plastic rails fitting into the holes. |
| 3 | 4 |
| Insert the metal screws into the plastic rails. | Lift the heater and aim the four round holes on the brackets at back of the heater to the 4 screws on the wall. |
| 5 | 6 |
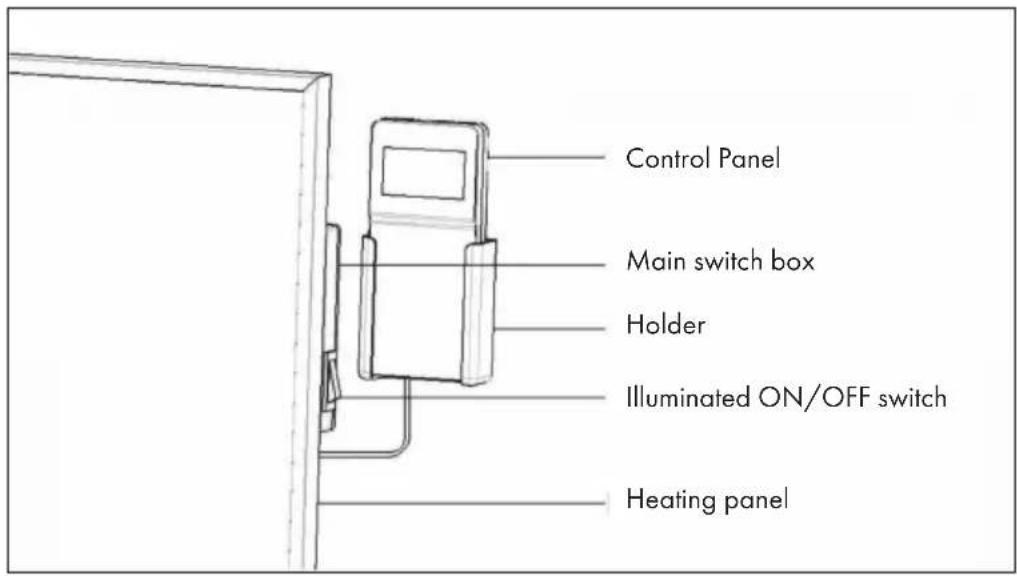
| Slide the screw from Position A to Position B by moving the heater slightly. Make sure the distance between the bottom of the heater and the floor is no less than 20 cm when the heater is installed. | Install the control panel holder onto the wall beside the heater. |
| 7 | |
| Insert the control panel into the holder. |
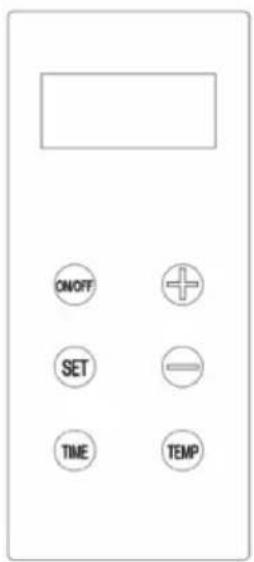
OVERVIEW AND CONTROL PANEL
DISPLAY SCREEN
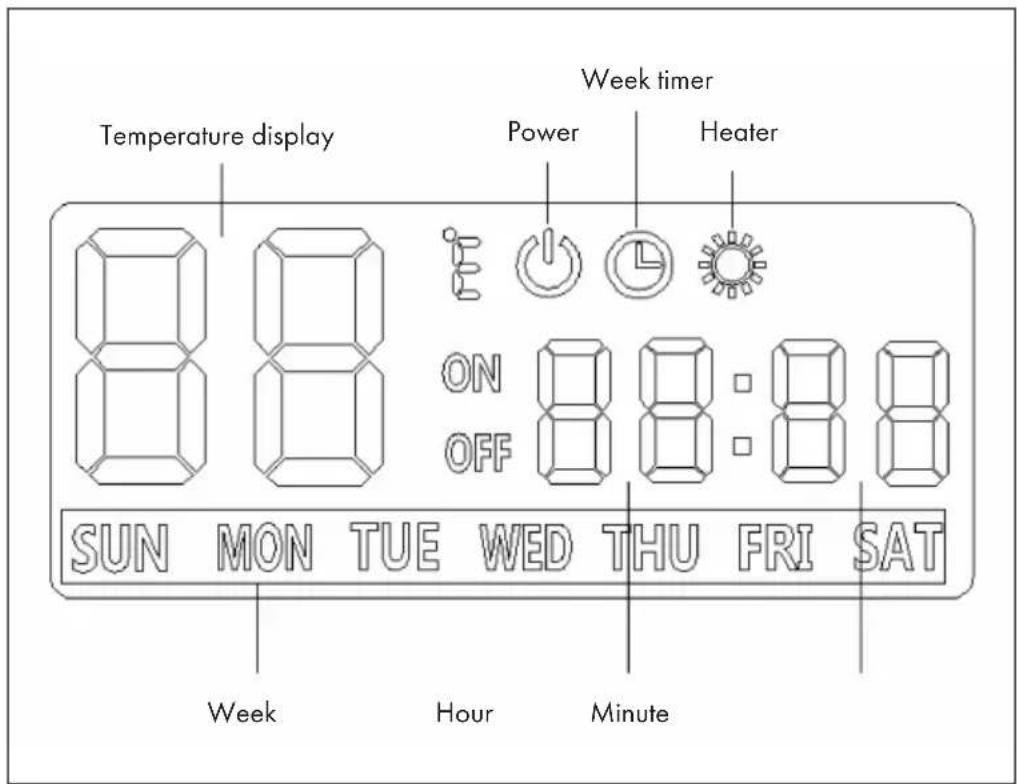
OPERATION
- Check the heater to be sure it is not damaged.
- Then, plug in it and then switch on the main illuminated ON/OFF switch on the side of the heater.
There are two ways to use the heater:
(1) Power ON/OFF
Press the on/off button on the control panel, and then the heater will start to work until your room temperature reached the set temperature. If need to power off the heater, press the on/off button again.
(2) Week timer Mode
Start the heater with week timer option: Press the Set button, and then press the ON/OFF straight way.
How to set the Week timer
- Press Timer button when the heater is power off (make sure the main illuminated switch is on).
-
After step 1, the WEEK symbol in the LCD display will start to flash, you can choose the day you want to set the timer by pressing the [+ or [-] button. Press SET again.
-
The grouping symbol in the display will start to flash, press [+] or [-] to choose the group you want to set. You can totally set 4 groups per day from P1 to P4. Press SET again to start to set the time of power on for the selected group.
-
The symbol of ON will be lighten in the display after that, and the [-] symbol for hour start to flash. Press [+] or [-] to choose the hour that you want to let the heater power on. Press SET again and the [-] symbol for minute will start to flash.
- Press [+] or [-] to choose the minute. Press SET button again to set the time you want to let the heater power off. The symbol of OFF will be lighten in the display after that, and the [-] symbol for hour start to flash
- Press [+] or [-] to choose the hour that you want to let the heater power off. Press SET again and the [-] symbol for minute will start to flash.
- Press [+] or [-] to choose the minute. After this, the first timer group is set successfully.
-
Press SET again, the WEEK symbol will start to flash, and you can set another group of timer for the same day you set as above or choose another day to set the timer. The way of operation is same as explained above.
-
After the operation of step 3, you can press the TIME button or leave it without any operation for more than 10 seconds to finish the week timer setting.
How to set the system time
Press TIME button when the heater is power on, and the [-] symbol for hour will start to flash. Press [+] or [-] to set the right hour. Press SET button and the [-] symbol for minute start to flash. Use [+] or [-] to set the right minute. Press SET button and the WEEK symbol will start to flash. Press [+] or [-] to set the right week. Press SET again to quite the system time setting.
How to set the temperature
Press TEMP button to start the setting, and press ([+] or ([-]) to choose the temperature you need. Press SET to finish the setting.
Open window Detective
This heater has open window detective function, which is when the heater is power on (no matter normal mode or week timer mode), it will automatically power off if the detected temperature drops 5^ (or more) in 5 minutes.
TROUBLESHOOTING
If your heater fails to operate, please follow these instructions:
- Ensure that your circuit breaker or fuse is working properly.
- Be sure the heater is plugged in and that the electrical outlet is working properly.
- If the ON/OFF switch is not illuminated at ON position, send it to service center for reparation directly.
Note: If you experience a problem with your heater, please see the warranty information for instructions. Please do not attempt to open or repair the heater yourself. Doing so may void the warranty and could cause damage or personal injury. If the problem still persists, please contact the distributor.
CLEANING AND CARE
Before cleaning your heater, switch off the heater and allow it to cool. Disconnect the electricity supply to the appliance. The outside can be cleaned by wiping it over with a soft damp cloth and then dried. Do not use abrasive cleaning powders or furniture polish, as this can damage the surface finish. To release the heater from the wall, for cleaning or redecoration, just open the screw bolt cap and unscrew the bolts to take off from the wall.
For short term storage, just plug off the heater and leave it away; for long term storage, you can dismantle from the wall or cover it with some material.
HINTS ON DISPOSAL
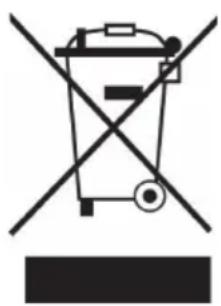
According to the European waste regulation 2012/19/EU this symbol on the product or on its packaging indicates that this product may not be treated as household waste. Instead it should be taken to the appropriate collection point for the recycling of electrical and electronic equipment. By ensuring this product is disposed of correctly, you will help prevent potential negative consequences for the environment and human health, which could otherwise be caused by inappropriate waste handling of this product. For more detailed information about recycling of this product, please contact your local council or your household waste disposal service.
DECLARATION OF CONFORMITY
C E
Producer:
Chal-Tec GmbH, Wallstraße 16, 10179 Berlin, Germany.
This product is conform to the following European Directives:
2014/30/EU (EMC)
2014/35/EU (LVD)
2011/65/EU (RoHS)
2009/125/EC (ErP)
Estimado cliente:
Installation murale 36
FICHE DE DONNÉES PRODUIT


- CONTENT
- TECHNICAL DATA
- SAFETY INSTRUCTIONS
- CAUTION
- WALL MOUNTING INSTRUCTIONS
- OVERVIEW AND CONTROL PANEL
- DISPLAY SCREEN
- OPERATION
- Power ON/OFF
- Week timer Mode
- How to set the Week timer
- How to set the system time
- How to set the temperature
- Open window Detective
- TROUBLESHOOTING
- CLEANING AND CARE
- HINTS ON DISPOSAL
- DECLARATION OF CONFORMITY
- Producer:
- Estimado cliente:
Brand : Klarstein
Model : 10032809
Category : Pan