
Bankett - Pan Klarstein - Free user manual and instructions
Find the device manual for free Bankett Klarstein in PDF.


| Product type | Pan |
| Brand | Klarstein |
| Model | Bankett |
| Diameter | 28 cm |
| Height | 5 cm |
| Weight | 1,2 kg |
| Body material | Aluminium |
| Interior coating | Non-stick PTFE |
| Handle | Insulating bakelite |
| Hob compatibility | Gas, electric, ceramic, induction |
| Oven use | Yes, up to 180°C |
| Color | Black |
| Capacity | 2,5 L |
| Cleaning | Hand wash recommended |
| Safety | Handle stays cool to the touch |
| Warranty | 2 years |
Frequently Asked Questions - Bankett Klarstein
User questions about Bankett Klarstein
0 question about this device. Answer the ones you know or ask your own.
Ask a new question about this device
Download the instructions for your Pan in PDF format for free! Find your manual Bankett - Klarstein and take your electronic device back in hand. On this page are published all the documents necessary for the use of your device. Bankett by Klarstein.
USER MANUAL Bankett Klarstein
INHALTSVERZEICHNIS
natural_image
Symbol of a trash bin crossed with a diagonal line, no text or numbers presentUnit 6 Riverside Business Centre
Brighton Road
Shoreham-by-Sea
BN43 6RE
United Kingdom
Dear Customer,
Congratulations on purchasing this equipment. Please read this manual carefully and take care of the following hints to avoid damages. Any failure caused by ignoring the items and cautions mentioned in the instruction manual is not covered by our warranty and any liability. Scan the QR code to get access to the latest user manual and other information about the product.

CONTENT
Safety Instructions 12
Product Overview 13
Before first Use 13
Operation 14
Suitable Food 14
Cooking and Preparation Tips 15
Cleaning and Care 16
Disposal Considerations 17
Manufacturer & Importer (UK) 17
TECHNICAL DATA
| Item number 10028121 | |
| Power supply 220-240 V ~ 50-60 Hz | |
| Power 320 W |
SAFETY INSTRUCTIONS
- Do not touch hot surfaces.
- Only use the device in the presence of children and under supervision.
- Disconnect the plug when not using or cleaning the appliance. Allow the appliance to cool down completely before disassembling.
- Do not use the appliance if the power cord is damaged, has been damaged in any way or is malfunctioning. Have the unit inspected or repaired by a specialist company.
- Only use accessories expressly approved by the manufacturer.
- Only connect the device to earthed sockets that correspond to the device voltage.
- To protect against electric shock, do not immerse the power cord, plug, or base in water or other liquids.
- Children, physically and mentally handicapped persons should only use the device if they have been thoroughly familiarized with its functions and safety precautions by a supervisor.
- Do not attempt to repair the unit yourself. Repairs may only be carried out by trained personnel.
- Do not use the unit outdoors.
- Do not let the power cord run over sharp edges or hot surfaces.
- Do not place the appliance on or near gas or electric stoves or ovens.
- Only move the appliance very carefully if it contains hot oil or other hot liquids.
- Always plug the power cord into the appliance first and then plug it into the wall outlet. Always switch off the appliance before removing the plug from the socket.
- Do not cook in the base of the appliance to prevent electric shock or damage.
- Do not use the appliance with remote or timer-controlled sockets.
- The appliance is not intended for commercial use, but only for domestic and similar environments.
- If possible, use the unit with the short power cord. If you are using an extension cord, be careful not to get caught or step on it. The electrical power of the cable must be at least as high as that of the appliance. Route the extension cord so that it does not hang over the work surface so that children cannot pull on it.
PRODUCT OVERVIEW
| 1 | Glass lids | 3 | Device base |
| 2 | Ceramic bowl | 4 | Control panel |
BEFORE FIRST USE
- Before using the unit for the first time, remove all stickers and packing materials.
Wash the ceramic tray and lid with hot soapy water, rinse with clear water, and dry thoroughly. Important: Do not immerse the base in water! - When first used, you may notice a slight odour due to manufacturing residues. This smell will disappear completely very soon.
OPERATION
- Insert the plug into the socket. The display on the control panel shows „OFF“ and flashes. Press the ON/OFF button on the control panel and press the HIGH/LOW/WARM button to select a temperature or keep warm function. The gentle cooker automatically starts the 12-hour cooking phase. At the end of the cooking time, the appliance automatically switches to the warm-keeping phase for 6 hours. After 6 hours the display shows „OFF“ and flashes.
- To set the timer, press the arrow buttons before pressing the HIGH/LOW/WARM button. Each time you press the arrow button, the time increases or decreases by 30 minutes.
- The maximum cooking time that can be set is 12 hours, the minimum cooking time is 30 minutes.
- Once you have set a timer, you can select the desired function with the HIGH/LOW/WARM button, the timer will not change.
- Press the ON/OFF button to turn off the unit. The display will show „OFF“ and flash until you turn off the unit. Remove the ceramic tray with oven gloves.
SUITABLE FOOD
- Cut root vegetables into small, even pieces because they cook slower than meat. Fry the vegetables at high temperature for 2-3 minutes before putting them in the Schongarer. Make sure that the vegetables are always placed at the bottom of the bowl and that all ingredients are covered with water.
- Remove the fat from the meat before cooking, as the fat cannot evaporate in the Schongarer. If you are using a normal recipe, you may need to reduce the amount of liquid indicated as liquid will not evaporate as much as in conventional cooking.
- Do not leave uncooked food at room temperature in the Schongarer for long periods of time. Do not use the Schongarer to reheat food.
- Uncooked red beans must first be soaked and cooked for 10 minutes to remove possible toxins.
- Use a meat thermometer to ensure that roasts, hams or chicken are cooked at the desired temperature.
- Authentic stoneware is fired at hot temperatures, so it is possible that the surface of the ceramic bowl is slightly uneven and the lid does not fit perfectly. Since no steam is produced during gentle cooking, there is little heat loss. Normal wear and tear can cause the surface to appear somewhat cracked over time.
- Do not place the ceramic bowl and glass lid in an oven, refrigerator, microwave, gas or electric hob. Do not expose the ceramic bowl to sudden changes in temperature. If you add cold water to the hot dish, it may break.
- Do not leave the bowl in the water for long periods of time. Just leave some water in the bowl to soak.
- There is an unglazed area on the underside of the ceramic bowl for production reasons. Since this area absorbs water, make sure that it does not get wet.
- Do not use the appliance when the ceramic bowl is empty or not in the appliance.
COOKING AND PREPARATION TIPS
- For optimum cooking results, the dish should be at least half full.
- The moisture is retained during gentle cooking. If you want to reduce the moisture, remove the lid after cooking, set the temperature to HIGH and simmer for 30-45 minutes.
- The lid does not have a seal. Do not lift it unnecessarily so that the heat is not lost. Increase the cooking time by 10 minutes for each time you lift the lid. If you are preparing soups, leave 5 cm of space between the top of the bowl and the lid to allow the soup to simmer.
- Most meat and vegetable dishes require a cooking time of 8-10 hours at low temperature (LOW) and 4-6 hours at high temperature (HIGH). Some ingredients are not suitable for gentle cooking. Noodles, seafood, milk and cream should be added towards the end of cooking. Several things have an effect on the cooking time, e.g. water and fat content, temperature of the food used and also the size.
- Cut food will cook faster. Experiment with different ingredients and cooking times until you get the desired result.
- Vegetables usually take longer to cook than meat, so put them in the bottom half of the bowl.
• After the meal is ready, turn off the appliance and leave the lid on the bowl. - The ingredients to be cooked should always be covered with water, broth or sauce.
- Fry onions and meat beforehand to trap the juice and reduce the fat content. If you don't have much time, you don't have to, but it increases the taste.
- If you cook pieces of meat, ham and chicken, size is important. The pieces should be in the lower 2/3 of the shell and completely covered with water. If necessary, cut larger pieces into pieces. The total weight should not exceed the maximum limit.
CLEANING AND CARE
- Turn off the appliance and unplug the appliance before cleaning or storing it. Allow the appliance to cool completely before cleaning.
- The ceramic dish is dishwasher safe, but you can also wash it with warm soapy water. To remove food residue, soak the inside of the dish overnight in soapy water and rinse the next day.
- Clean the outside of the base with a damp cloth. Do not use abrasive cleaners or sponges to avoid damaging the surface.
• Repairs may only be carried out by trained specialist personnel.
Important cleaning instructions:
- Never immerse the base of the unit in water or other liquids.
- Do not clean the glass lid and ceramic dish in the dishwasher as they may break.
- Do not place the glass lid in the refrigerator, otherwise it may break.
- If you remove the ceramic dish from the refrigerator, leave it at room temperature for 40 minutes, otherwise the temperature difference could break it.
- Do not use the ceramic dish on the gas stove, otherwise it may break.
• Defrost all foods before cooking.
DISPOSAL CONSIDERATIONS
natural_image
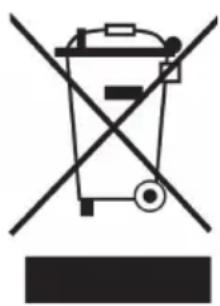
Symbol of a trash bin crossed with a diagonal line, no text or numbers presentIf there is a legal regulation for the disposal of electrical and electronic devices in your country, this symbol on the product or on the packaging indicates that this product must not be disposed of with household waste. Instead, it must be taken to a collection point for the recycling of electrical and electronic equipment. By disposing of it in accordance with the rules, you are protecting the environment and the health of your fellow human beings from negative consequences. For information about the recycling and disposal of this product, please contact your local authority or your household waste disposal service.
MANUFACTURER & IMPORTER (UK)
Manufacturer:
Chal-Tec GmbH, Wallstrasse 16, 10179 Berlin, Germany.
Importer for Great Britain:
Chal-Tec UK limited
Unit 6 Riverside Business Centre
Brighton Road
Shoreham-by-Sea
BN43 6RE
United Kingdom
Estimado cliente:
ÍNDICE DE CONTENIDOS
natural_image
Symbol of a trash bin crossed with a diagonal line, no text or numbers presentUnit 6 Riverside Business Centre
Brighton Road
Shoreham-by-Sea
BN43 6RE
United Kingdom
Chère cliente, cher client,
SOMMAIRE
natural_image
Symbol of a trash bin crossed with a diagonal line, no text or numbers presentUnit 6 Riverside Business Centre
Brighton Road
Shoreham-by-Sea
BN43 6RE
United Kingdom
Gentile cliente,
INDICE
natural_image
Symbol of a trash bin crossed with a diagonal line, no text or numbers presentPRODUTTORE E IMPORTATORE (UK)
Produttore:
Chal-Tec GmbH, Wallstraße 16, 10179 Berlin, Germania.
Unit 6 Riverside Business Centre
Brighton Road
Shoreham-by-Sea
BN43 6RE
United Kingdom

area
| Category | Value | |---|---| | 1 | 100 | | 2 | 100 | | 3 | 100 | | 4 | 100 | | 5 | 100 | | 6 | 100 | | 7 | 100 | | 8 | 100 | | 9 | 100 | | 10 | 100 | | 11 | 100 | | 12 | 100 | | 13 | 100 | | 14 | 100 | | 15 | 100 | | 16 | 100 | | 17 | 100 | | 18 | 100 | | 19 | 100 | | 20 | 100 | | 21 | 100 | | 22 | 100 | | 23 | 100 | | 24 | 100 | | 25 | 100 | | 26 | 100 | | 27 | 100 | | 28 | 100 | | 29 | 100 | | 30 | 100 | | 31 | 100 | | 32 | 100 | | 33 | 100 | | 34 | 100 | | 35 | 100 | | 36 | 100 | | 37 | 100 | | 38 | 100 | | 39 | 100 | | 40 | 100 | | 41 | 100 | | 42 | 100 | | 43 | 100 | | 44 | 100 | | 45 | 100 | | 46 | 100 | | 47 | 100 | | 48 | 100 | | 49 | 100 | | 50 | 100 | | 51 | 100 | | 52 | 100 | | 53 | 100 | | 54 | 100 | | 55 | 100 | | 56 | 100 | | 57 | 100 | | 58 | 100 | | 59 | 100 | | 60 | 100 | | 61 | 100 | | 62 | 100 | | 63 | 100 | | 64 | 100 | | 65 | 100 | | 66 | 100 | | 67 | 100 | | 68 | 100 | | 69 | 100 | | 70 | 100 | | 71 | 100 | | 72 | 100 | | 73 | 100 | | 74 | 100 | | 75 | 100 | | 76 | 100 | | 77 | 100 | | 78 | 100 | | 79 | 100 | | 80 | 100 | | 81 | 100 | | 82 | 100 | | 83 | 100 | | 84 | 100 | | 85 | 100 | | 86 | 100 | | 87 | 100 | | 88 | 100 | | 89 | 100 | | 90 | 100 | | 91 | 100 | | 92 | 100 | | 93 | 100 | | 94 | 100 | | 95 | 100 | | 96 | 100 | | 97 | 100 | | 98 | 100 | | 99 | 100 | | Note: The actual values in the 'Value' column are not provided in the code. I have used the label 'The Region' to represent the 'Region'. The values are estimated based on the provided code.
KLARSTEIN

- INHALTSVERZEICHNIS
- Dear Customer,
- CONTENT
- SAFETY INSTRUCTIONS
- PRODUCT OVERVIEW
- BEFORE FIRST USE
- OPERATION
- SUITABLE FOOD
- COOKING AND PREPARATION TIPS
- CLEANING AND CARE
- Important cleaning instructions:
- DISPOSAL CONSIDERATIONS
- MANUFACTURER & IMPORTER (UK)
- Manufacturer:
- Importer for Great Britain:
- Estimado cliente:
- ÍNDICE DE CONTENIDOS
- Chère cliente, cher client,
- SOMMAIRE
- Gentile cliente,
- INDICE
- PRODUTTORE E IMPORTATORE (UK)
- Produttore:
- KLARSTEIN
Brand : Klarstein
Model : Bankett
Category : Pan