STRDE305 - AV receiver SONY - Free user manual and instructions
Find the device manual for free STRDE305 SONY in PDF.
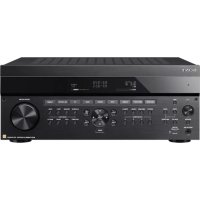
| Product type | Audio-video receiver |
| Brand | Sony |
| Model | STRDE305 |
| Dimensions (W x H x D) | 430 x 145 x 295 mm |
| Weight | 7.0 kg |
| Power supply | AC 120 V, 60 Hz |
| Power consumption | 270 VA |
| Output power (stereo) | 100 W + 100 W (8 ohms, 20 Hz - 20 kHz, 0.1% THD) |
| Dynamic power | 140 W + 140 W (8 ohms), 180 W + 180 W (4 ohms) |
| Audio inputs | PHONO (MM), CD, TAPE/MD, TV, VIDEO |
| Audio outputs | TAPE/MD REC OUT, VIDEO AUDIO OUT, PHONES (headphones) |
| Tuner section | FM/AM with PLL digital synthesizer |
| Number of presets | 30 (FM/AM) |
| Main functions | Source selection, volume control, bass (BASS BOOST), tone (BASS/TREBLE), balance, muting, speaker selection A/B |
| Cleaning | Soft cloth slightly dampened with mild detergent. Do not use abrasives or solvents. |
| Safety | Avoid exposure to rain or moisture. Unplug before cleaning. Do not open the cabinet. Refer repairs to qualified personnel. |
| Repairability | Repairs must be done by qualified personnel. No user-serviceable parts specified in the manual. |
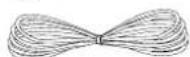
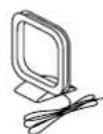
| Included accessories | FM wire antenna, AM loop antenna, remote control, AA (R6) batteries × 2 |
Frequently Asked Questions - STRDE305 SONY
User questions about STRDE305 SONY
0 question about this device. Answer the ones you know or ask your own.
Ask a new question about this device
Download the instructions for your AV receiver in PDF format for free! Find your manual STRDE305 - SONY and take your electronic device back in hand. On this page are published all the documents necessary for the use of your device. STRDE305 by SONY.
USER MANUAL STRDE305 SONY
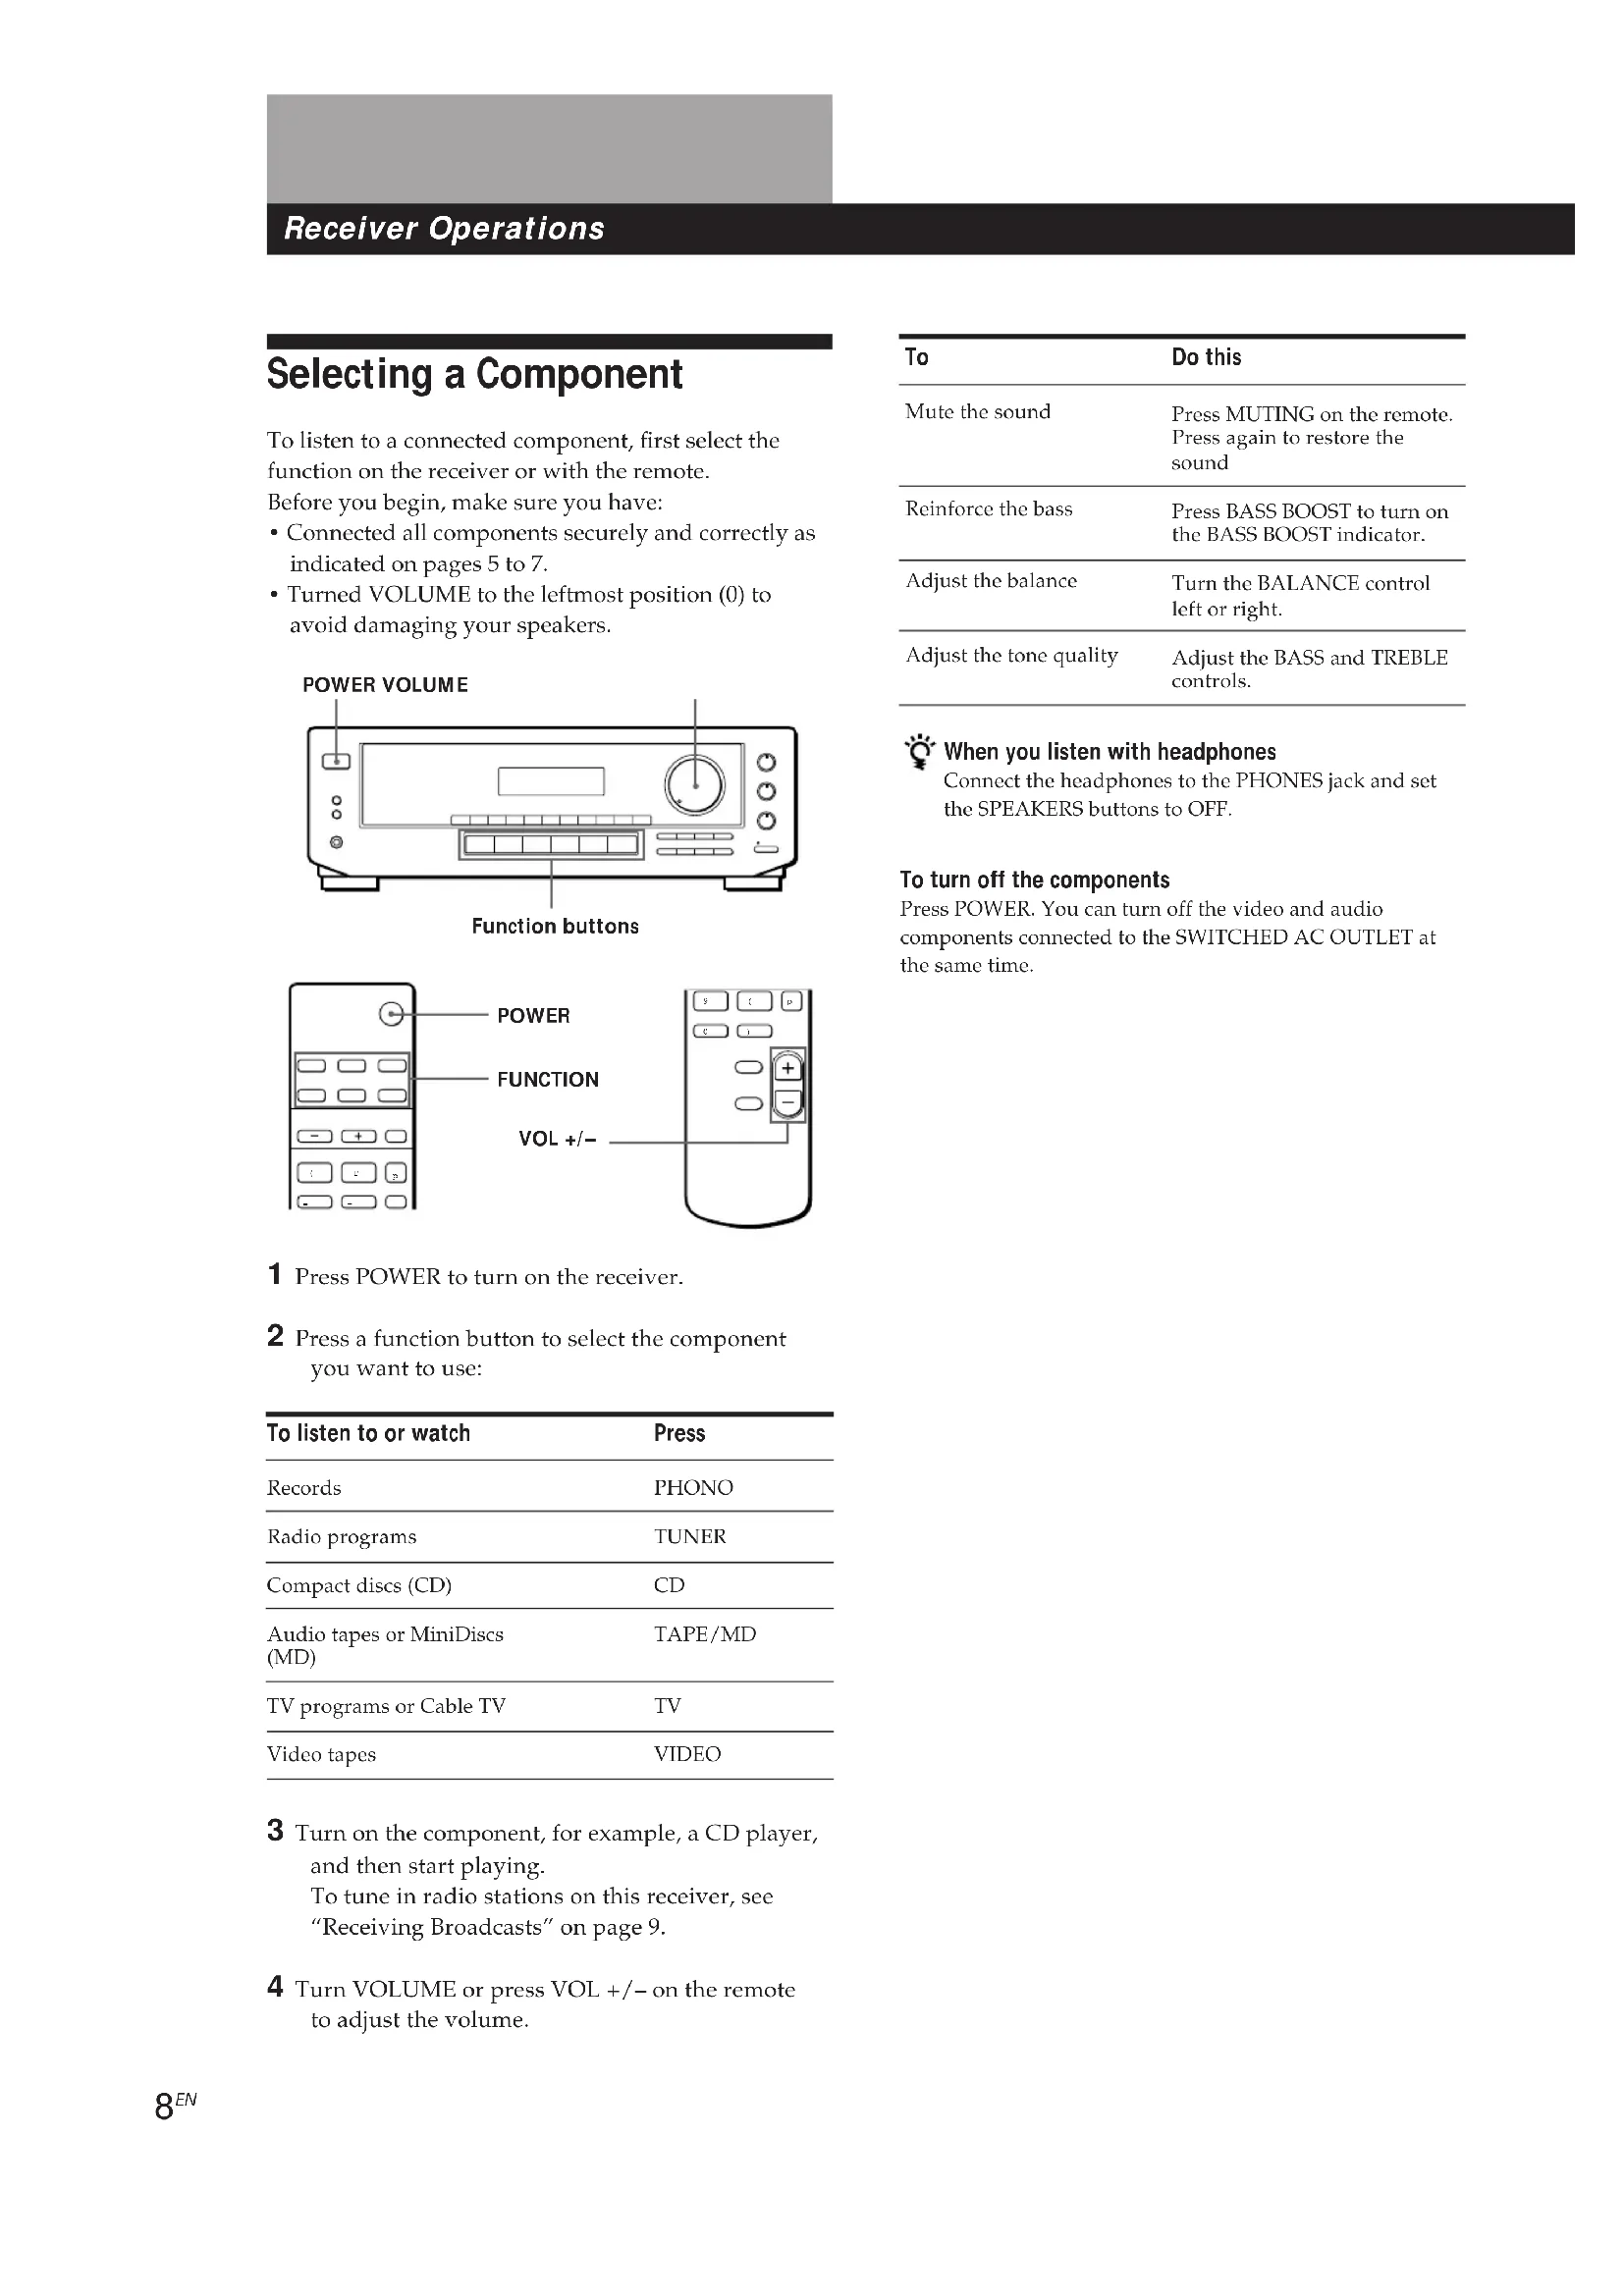
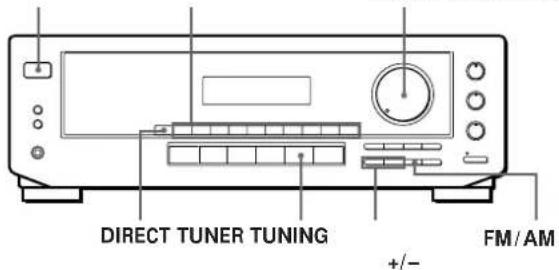
Selecting a Component
To listen to a connected component, first select the function on the receiver or with the remote. Before you begin, make sure you have:
- Connected all components securely and correctly as indicated on pages 5 to 7.
- Turned VOLUME to the leftmost position (0) to avoid damaging your speakers.
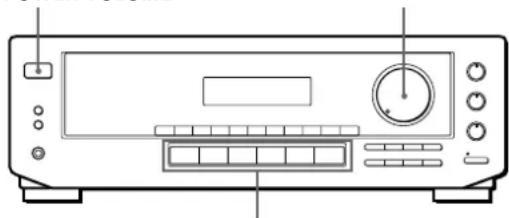
POWER VOLUME
Function buttons
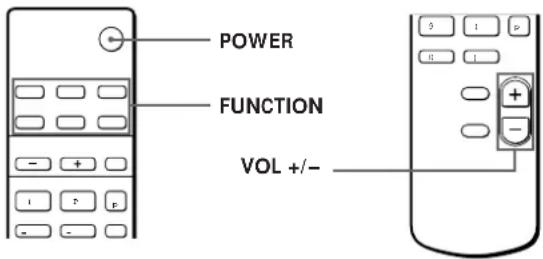
1 Press POWER to turn on the receiver.
2 Press a function button to select the component you want to use:
| To listen to or watch | Press |
| Records | PHONO |
| Radio programs | TUNER |
| Compact discs (CD) | CD |
| Audio tapes or MiniDiscs (MD) | TAPE/MD |
| TV programs or Cable TV | TV |
| Video tapes | VIDEO |
3 Turn on the component, for example, a CD player, and then start playing.
To tune in radio stations on this receiver, see "Receiving Broadcasts" on page 9.
4 Turn VOLUME or press VOL + / - on the remote to adjust the volume.
| To | Do this |
| Mute the sound | Press MUTING on the remote. Press again to restore the sound |
| Reinforce the bass | Press BASS BOOST to turn on the BASS BOOST indicator. |
| Adjust the balance | Turn the BALANCE control left or right. |
| Adjust the tone quality | Adjust the BASS and TREBLE controls. |

When you listen with headphones
Connect the headphones to the PHONES jack and set the SPEAKERS buttons to OFF.
To turn off the components
Press POWER. You can turn off the video and audio components connected to the SWITCHED AC OUTLET at the same time.
Receiving Broadcasts
This receiver lets you enter a station's frequency directly by using the numeric buttons (direct tuning). If you don't know the frequency of the station you want, see "Receiving broadcasts by scanning stations (automatic tuning)" on this page.
Before you begin, make sure you have:
- Connected an FM/AM antenna to the receiver as indicated on page 5.
- Selected the appropriate speaker system. (See "Selecting the speaker system" on page 7.)
If an FM stereo program is distorted
The STEREO indicator flashes. Press FM MODE to change to monaural (MONO). You will not have the stereo effect but the distortion will be reduced. To return to stereo mode, press this button again.
If you cannot tune in a station and the entered numbers are flashing
Make sure you've entered the right frequency. If not, press DIRECT and re-enter the frequency you want. If the entered numbers still flash, the frequency is not used in your area.
To watch FM simulcast TV programs
Make sure that you tune in the simulcast program both on the TV (or the VCR) and on the receiver.
1 Press POWER to turn on the receiver.
2 Press TUNER.
The last received station is tuned in.
3 Press FM/AM to select FM or AM stations.
4 Press DIRECT.
5 Press the numeric buttons to enter the frequency.
Example 1: FM 102.50 MHz
Example 2: AM 1350 kHz
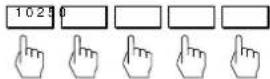
(You don't have to enter the last "0.")
6 When you tune in AM stations, adjust the direction of the AM loop antenna for optimum reception.
To receive other stations
Repeat Steps 3 to 5.
If you enter a frequency not covered by the tuning interval
The entered value is automatically rounded up or down to the closest covered value.
Tuning intervals for direct tuning are:
FM: 50 kHz intervals
AM: 10kHz intervals (to change to 9kHz intervals, see page 13)
Receiving broadcasts by scanning stations (automatic tuning)
If you don't know the frequency of the radio station you want, you can have the receiver scan all the receivable stations to locate the one you want.
1 Press TUNER.
The last received station is tuned in.
2 Press FM/AM to select FM or AM.
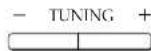
3 Press TUNING + or -.
Press the + button for a higher station number; press the - button for a lower one. When you tune past either end of the band, the receiver automatically jumps to the opposite end. Every time a station is received, the receiver stops scanning. To continue scanning, press the button again.

If the STEREO indicator remains off
Press FM MODE when an FM stereo broadcast is received.
Presetting Radio Stations
You'll most likely want to preset the receiver with the radio stations you listen to often so that you don't have to tune in the station every time. The receiver can store a total of 30 FM or AM stations. You can store the stations on preset numbers combining 3 characters (A, B, C) and numbers (0 - 9). For example, you can store a station as preset number A1, B6 or C9, etc.

1 Press TUNER.
The last received station is tuned in.
2 Tune in the station you want.
If you are not familiar with how to tune in a station, see "Receiving Broadcasts" on the previous page.
3 Press MEMORY.
"MEMORY" appears for a few seconds.
Do steps 4 and 5 before "MEMORY" goes out.
4 Press SHIFT to select a character (A, B or C).
Each time you press SHIFT, the letter "A," "B" or "C" appears in the display.
If "MEMORY" disappears, start again from step 3.
5 While MEMORY is displayed, press the number you want to use (0 to 9).
6 Repeat Steps 2 to 5 to preset other stations.
To change a preset station
Preset a new station on the number you want to change.
Note
If the AC power cord is disconnected for about one week, the preset stations will be cleared from the receiver's memory, and you will have to preset the stations again.
Tuning preset stations (preset tuning)
You can tune directly to a preset station by entering its preset number. If you don't know which stations are preset on which numbers, you can tune by scanning the preset stations.
1 Press TUNER.
The last received station is tuned in.
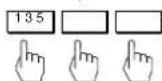
2 Press SHIFT to select a character (A, B or C), then press the number.
For example, select A and then press 7 to tune in the station preset as A7.

You can tune by scanning the preset stations
First press TUNER and then press PRESET TUNING + or - to select the station you want. Each time you press the buttons, the preset numbers change as follows:

Recording
This receiver makes it easy to record to and from the components connected to the receiver. You don't have to connect playback and recording components directly: once you select a program source on the receiver, you can record and edit as you normally would using the controls on each component. Before you begin, make sure you've connected all components properly.
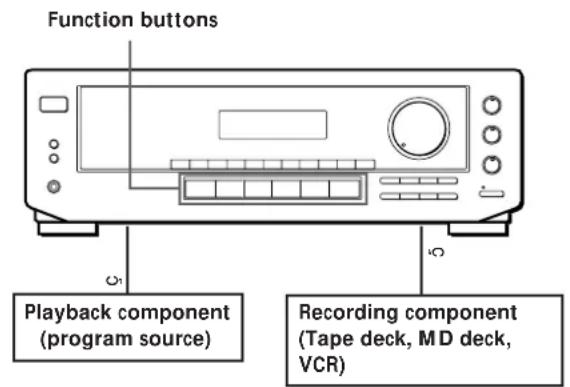
C: Audio signal flow
Recording on an audio tape, MiniDisc or video tape
You can record audio on a cassette tape, MiniDisc or video tape using the receiver. See the instruction manual of your tape deck, MD deck or VCR if you need help.
1 Press one of the function buttons to select the program source.
2 Set the component to be ready for playing. For example, insert a CD into the CD player.
3 Insert a blank tape or disc into the recording deck and adjust the recording level, if necessary.
4 Start recording on the recording deck and then start playing the component.
Troubleshooting
If you experience any of the following difficulties while using the receiver, use this troubleshooting guide to help you remedy the problem. Should any problem persist, consult your nearest Sony dealer.
There's no sound or only a very low-level sound is heard.
/ Check that the speakers and components are connected securely.
/Make sure you select the correct component on the receiver.
/Make sure you set the SPEAKERS selector correctly.
/ Press MUTING on the remote if the MUTING indicator turns on.
/ The protective device on the receiver has been activated because of a short circuit. ("PROTECT" flashes.) Turn off the receiver, eliminate the short-circuit problem and turn on the power again.
The left and right sounds are unbalanced or reversed.
/ Check that the speakers and components are connected correctly and securely.
Adjust the BALANCE control.
Severe hum or noise is heard.
/ Check that the speakers and components are connected securely.
/ Check that the connecting cords are away from a transformer or motor, and at least 10 feet (3 meters) away from a TV set or fluorescent light.
/ Place your TV away from the audio components.
/Make sure you connect a ground wire to the antenna ground terminal.
/ The plugs and jacks are dirty. Wipe them with a cloth slightly moistened with alcohol.
Radio stations cannot be tuned in.
/ Check that the antennas are connected securely. Adjust the antennas and connect an outdoor antenna if necessary.
/ The signal strength of the stations is too weak (when you tune in with automatic tuning). Use direct tuning.
/Make sure you set the tuning interval correctly (when you tune in AM stations with automatic tuning) (see pages 9 and 13).
/ No stations have been preset or the preset stations have been cleared (when you tune in with scanning preset stations). Preset the stations (see page 10).
No picture or an unclear picture is seen on the TV screen.
/ Place your TV away from the audio components.
Recording cannot be made.
/ Check that the components are connected correctly.
The remote does not function.
/ Point the remote at the remote sensor g on the receiver.
/ Remove the obstacles in the path of the remote and the receiver.
/ Replace both batteries in the remote with new ones if they are weak.
/Make sure you select the correct function on the remote.
Specifications
Amplifier section
| Power output | Sterco mode (8 ohms at 20 Hz - 20 kHz less than 0.1% total harmonic distortion) 100 W + 100 W |
| Dynamic power | 8 ohms: 140 W + 140 W |
| output | 4 ohms: 180 W + 180 W |
| Frequency response | PHONO: RIAA |
| equalization curve ±0.5 dB | |
| CD, TAPE/MD,VIDEO: 10 Hz - 50 kHz ±1 dB |
Inputs
| Sensitivity | Impedance | S/N(weighting network, input level) | |
| PHONO (MM) | 2.5 mV | 50 kilohms | 74 dB72 dB*(A, 2.5 mV) |
| CD | 200 mV | ||
| TAPE/MD,TV,VIDEO | 150 mV | 50kilohms | 82 dB82 dB*(A, 150 mV) |
*78 IHF
| Outputs | TAPE/MD REC OUT:Voltage 150 mV,Impedance 10 kilohmsVIDEO AUDIO OUT:Voltage 150 mV,Impedance 10 kilohmshPHONES: Accepts lowand high impedanceheadphones |
Muting Full mute
| BASS BOOST | +10 dB at 70 Hz |
| TONE | ±8 dB at 100 Hz |
| 10 kHz |
FM tuner section
| Tuning range | 87.5 - 108.0 MHz |
| Antenna terminals | 75 ohms, unbalanced 300 ohms, unbalanced |
| Sensitivity | Mono: 18.3 dBf, 4.5 μV |
| Stereo: 38.3 dBf, 45 μV |
| Usable sensitivity | 11.2 dBf, 2 μV (IHIF) |
| S/N | Mono: 76 dB |
| Stereo: 70 dB |
| Harmonic distortion at 1 kHz | Mono: 0.3% Stereo: 0.5% |
| Separation | 45 dB at 1 kHz |
| Frequency response | 30 Hz - 15 kHz |
| Selectivity | 60 dB at 400 kHz |
AM tuner section
| Tuning range | With 10 kHz interval**: |
| 530 - 1710 kHz | |
| With 9 kHz interval: | |
| 531 - 1710 kHz |
Antenna Loop antenna
| Usable sensitivity | 50 dB/m (at 1,000 kHz or 999 kHz) |
| S/N | 54 dB (at 50 mV/m) |
| Harmonic distortion | 0.5% (50 mV/m, 400 Hz) |
| Selectivity | At 9 kHz: 35 dB |
| At 10 kHz: 40 dB |
| ** You can change the AM tuning interval to 9 kHz. After tuning in any AM station, turn off the receiver. Hold down the TUNING + button and press the POWER button. All preset stations will be erased when you change the interval. To reset the interval to 10 kHz, repeat the procedure. |
General
| System | Tuner section: PLL. quartz-locked digital synthesizer system |
| Preamplifier section:Low-noise NF type equalizerPower amplifier section:Pure-complimentary SEPP |
| Power requirements | 120 V AC, 60 Hz |
| Power consumption | 270 VA |
| AC outlets | 1 switched, total 120 W/1A Max |
| Dimensions | 17 x 53/4 x 115/s inches(430 x 145 x 295 mm) |
| Mass (Approx.) | 7.0 kg (15 lb 6 oz) |
Design and specifications are subject to change without notice.
| Supplied accessories | FM wire antenna (1) AM loop antenna (1) Remote controller _remote (1) Size AA (R6) batteries (2) |
Index
A,B
Adjusting tone 8 volume 8 Antenna hookups 5 Audio/video component hookups 5,6 Automatic tuning 9
C
Connecting. See Hookups
D
Direct tuning 9 Dubbing. See Recording
E, F, G
Editing. See Recording
H, I, J, K, L, M, N, O
Hookups AC power cord 7 antennas 5 audio/video components 5, 6 overview 4 speakers 6,7
P
Presetting radio stations 10 Preset tuning 10 Program source selecting 8
Q
Quick reference guide Back cover
R
Rear panel 5,6,7,14
Receiving broadcasts directly9 using preset stations 10
Recording on a tape, MiniDisc or video tape 11
Remote buttons 8,15
S
Scanning preset stations 10 radio stations 9
Selecting a program source 8
Speakers connection 6,7 impedance 13 selecting speaker system 7
Storing radio stations. See Presetting
T
Troubleshooting 12
Tuning. See Receiving broadcasts
U, V, W, X, Y, Z Unpacking 4
Rear Panel Descriptions
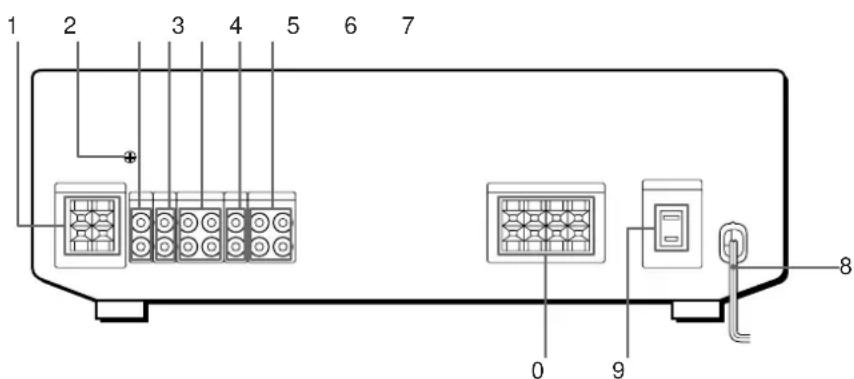
1 ANTENNA (AM/FM)
2 y ground terminal
3 PHONO
4 CD
5 TAPE/MD
6 TV
7 VIDEO
8 AC power cord
9 SWITCHED AC OUTLET
0 SPEAKERS (A/B)
For buttons not described on previous pages and buttons with names different from the buttons on the main unit.
| Remote Button | Operates | Function |
| PRESET +/- | Receiver | Scans and selects preset stations. |
| D. SKIP | CD player | Skipping discs (CD player with multi-disc changer only.) |
| 0 / ) | Tape deck | Fastforwards or rewinds. |
| = / + | CD player/ MD deck | Skipping tracks. |
| P | CD player/ MD deck | Pauses play or record. (Also starts recording with components in record standby.) |
| ( | CD player/ Tape deck/ MD deck | Starts play. |
| p | CD player/ Tape deck/ MD deck | Stops play. |
| 9 | Tape deck | Starts play on the reverse side. |
Receiving Broadcasts (direct tuning)
Example: Receiving FM 102.50 MHz

V
FM/AM

V

V

Display
FM 10250
Presetting Radio Stations
Example: Presetting a station as A7

V
Tune in the station you want.
V

V
SHIFT
Select A.
V

Selecting a Component
Example: Playing a CD
CD
Turn on the CD player.
V
Start playing.
Scanning Radio Stations (automatic tuning)
Receiving Preset Stations
Scanning Preset Stations
Example: Scanning FM stations

V
FM/AM
Select FM.
V
V
To continue
TUNING
scanning.
Example: Receiving the station number A7

V
SHIFT
Select A.
V

TUNER
V
- PRESET TUNING+

AVERTISSEMENT
Antenne cadre AM (fournic)1
Raccordements


Pourmettrelescomposantshors tension
Pour receivevoir d'autres stations
Demarrez la lecture.