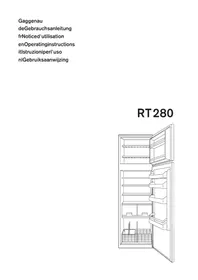
RT280200 - Refrigerator GAGGENAU - Free user manual and instructions
Find the device manual for free RT280200 GAGGENAU in PDF.



| Product Type | Refrigerator with freezer compartment |
| Brand | Gaggenau |
| Model | RT280200 |
| Installation Type | Built-in |
| Refrigerant | R600a (isobutane) - eco-friendly |
| Power supply | 230 V ~ 50 Hz |
| Interior lighting | Bulb T25 230V 15W E14 |
| Refrigerator defrost | Automatic |
| Freezer defrost | Manual |
| Ambient temperature range | 10°C to 38°C |
| Niche dimensions (H x D) | 1778 x 550 mm |
| Temperature adjustment | Rotary knob (positions 0 to 6) |
| Low temperature function | Red switch to maintain -18°C below 16°C |
| Shelf material | Glass |
| Door bins | Height adjustable |
| Bottle drawer | Sliding |
| Safety | Mandatory electrical disconnection after installation, do not use sharp objects to defrost |
| Maintenance | Clean with soapy or vinegar water, avoid abrasives |
| Normal noises | Compressor, fan, fluid circulation, thermostat click |
Frequently Asked Questions - RT280200 GAGGENAU
User questions about RT280200 GAGGENAU
0 question about this device. Answer the ones you know or ask your own.
Ask a new question about this device
Download the instructions for your Refrigerator in PDF format for free! Find your manual RT280200 - GAGGENAU and take your electronic device back in hand. On this page are published all the documents necessary for the use of your device. RT280200 by GAGGENAU.
USER MANUAL RT280200 GAGGENAU
natural_image
Line drawing of an open refrigerator with shelves and a basket (no text or symbols)Inhaltsverzeichnis
natural_image
Close-up of a white electronic device with a black indicator light and two labeled parts (5 and 4) on a surface, no readable text or symbols beyond the numbers.1
natural_image
Close-up of a white plastic shelf with a rectangular handle, no visible text or symbols2
natural_image
Person in lab coat handling a metal shelf with horizontal bars (no visible text or symbols)3
natural_image
Hand holding a white plastic tray inside a rectangular storage cabinet (no text or symbols visible)4
Variable Innentüre
natural_image
White metal rack with a handle inside a cabinet (no text or symbols visible)5
natural_image
Interior view of a large industrial or warehouse space with metal grids and structural supports (no visible text or symbols)6
Abtauen
natural_image
Close-up of a white electronic device with a black indicator light and two labeled parts (5 and 4) on its side, no readable text or symbols beyond the numbers.1
Marche Position 5 – 7 env.
natural_image
Close-up of a white rectangular shelf shelf with a handle, no visible text or symbols2
natural_image
Person in lab coat handling a container with liquid, no visible text or symbols3
natural_image
Hand reaching toward a rectangular metal shelf (no text or symbols visible)4
Contre-porte variable
natural_image
White metal rack with handle and basket, no visible text or symbols5
natural_image
Interior view of a large industrial storage or processing facility with metal grids and structural supports (no visible text or symbols)6
Operating Instructions
25 Introduction
25 Safety hints and warnings
26 Switching on and temperature selection
27 Freezing
30 Replacing light bulb
30 Malfunctions
30 Guarantee
32 Operating noises
33 Installation / Dimensions
Installation
See Assembly Instructions in Installation Pack
Dear Customer
You are now the owner of an up-to-date, power-saving refrigerator. We congratulate you on your excellent choice.
This refrigerator complies with the approved state of the art as well as EU directive 73/23/EEC (low voltage directive), is SEV-tested according to EMV directive 899/336/EWG and complies with the directive 96/57/EEC on energy efficiency.
Disposing of the old refrigerator
At the end of their useful life, refrigerators must immediately be rendered unusable (e.g. cut off the connecting cable). Please make sure that the cooling system tubes are not damaged before the refrigerator is removed to a proper environmentally friendly place of disposal. Please refer to the appropriate office in your local community for instructions on correct disposal. (Loosen the hinges and remove the door so that children cannot shut themselves in while playing, thus putting their lives at risk.)
Disposing of the packaging
All packaging materials used can be recycled.
Safety hints and warnings
Please read through the information contained in these Operating Instructions carefully before putting the refrigerator into operation and keep them in a safe place for later users.
■ Electrical safety (shock-hazard protection) must be effected as part of the installation procedure.
■ Use this appliance only for domestic purposes and according to the description in the Operating Instructions.
■ If you have received a damaged refrigerator, please contact your supplier immediately.
■ Repairs and other interventions must always be carried out by a qualified service fitter. Do not use extension leads.
■ Cut off power when cleaning: disconnect the plug or fuse. Never pull the plug out of the socket by the lead or with wet hands. Always take hold of the plug and pull it straight out.
■ Bottles containing high-percentage alcohol must be kept tightly closed and upright, and do not keep any explosive substances in the refrigerator. Danger of explosion!
■ This appliance is free of CFC and HCFC and contains small quantities of the environmentally friendly coolant isobutane (R600a).
■ When handling the appliance make sure that the coolant circuit is not damaged. Should the coolant circuit suffer damage in spite of all precautions, avoid any
naked light or ignition source of any kind. Ventilate the room in which the appliance is standing for several minutes.
■ An appliance with a damaged coolant circuit must not be put into operation.
■ When installed, make sure that the ventilation openings are not covered or blocked,
■ No mechanical or artificial means other than those recommended must be used to accelerate defrosting.
■ No liability is accepted for any damage if the appliance is used for any purpose other than that intended, if it is improperly operated or repaired by an unqualified person. In this case, the guarantee lapses and any other liability claims are null and void.
If the connecting lead of this appliance is damaged, it must be replaced by the manufacturer or the manufacturer's after-sales service or a similarly qualified person, in order to avoid any risk.
■ Warning: do not operate any electrical appliance inside the food storage area.
Switching on and temperature selection
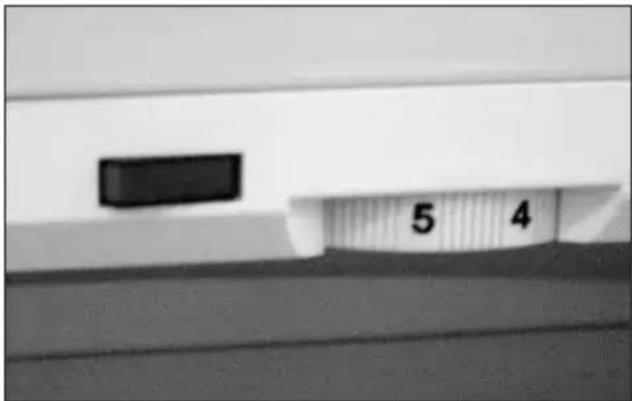
(Fig. ①)
The temperature regulator is used to set the cooling level and to switch the refrigerator on and off.
Important:
The appliance is designed to be operated at an ambient temperature of between 10 – 38°C. If the ambient temperature is outside this range, there is no guarantee
natural_image
Close-up of a mechanical component with a black rectangular slot and a scale marked 5 and 4 (no text or symbols on the main subject)1
that the inside temperature in the cooling zone and deep-freeze compartment will be maintained.
Normal: Position between 5 –7
The minimum temperature in the deep-freeze compartment remains at 18^ C when the temperature in the main cooling zone is +5^ C or less.
Low ambient temperature
With ambient temperatures below +15°C the temperature in the deep-freeze can be kept at -18°C by pressing the red flip switch (switch light "ON"). This is necessary to prolong short operating cycles of the compressor. With ambient temperatures of 16°C or more, leave the switch in normal position (switch light "OFF").
Off: Position 0
Refrigeration and light are switched off. If left off for a long period, leave both doors open to prevent odours forming.
Freezing
■ Only fresh foodstuff is suitable for freezing.
In order to freeze the maximum amount allowed ( see ratings plate) change the switch setting to approx. 1/2 position warmer than "normal" immediately before putting in the food to be frozen (e.g. from position 6 to 5.5).
■ Place the portions of food to be frozen side by side on the bottom of the deep-freeze compartment in order to obtain maximum cold transfer.
■ After 24 h turn the switch back to the normal setting.
■ Small quantities can be frozen in any part of the deep-freeze. It is sufficient to leave the switch on normal setting in this case.
■ To prevent the temperature of the deep frozen food from rising too high, freeze only the maximum quantity allowed at any one time (→ see ratings plate). It is advisable to make only small portions. The food to be frozen should not touch the frozen food already in the freezer.
■ Once food is thawed, do not freeze it again, as it may spoil.
natural_image
Close-up of a white plastic shelf bar with a rectangular extension (no text or symbols visible)2
natural_image
Person in lab coat handling a tray with liquid, viewed from above (no visible text or symbols)3
natural_image
Hand holding a white rectangular object inside a transparent container (no text or symbols visible)4
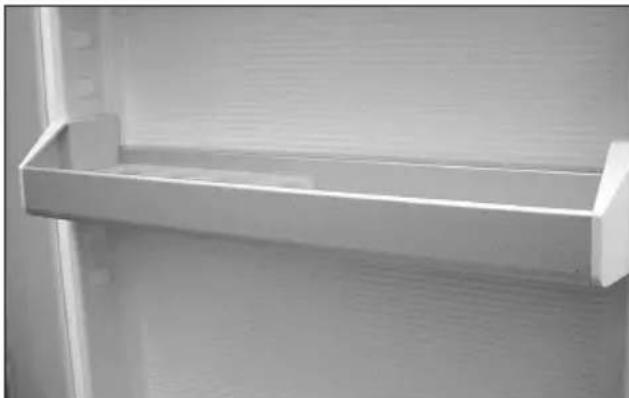
The compartments in the door can easily be adjusted and allow you to organise the divisions to suit your individual needs.
To adjust the door compartments (fig 2) and bottle drawer: first push up and pull out, adjust to the required height and proceed in inverse order to replace. Please note that the lid of the topmost compartment is not adjustable.
Cooling compartment
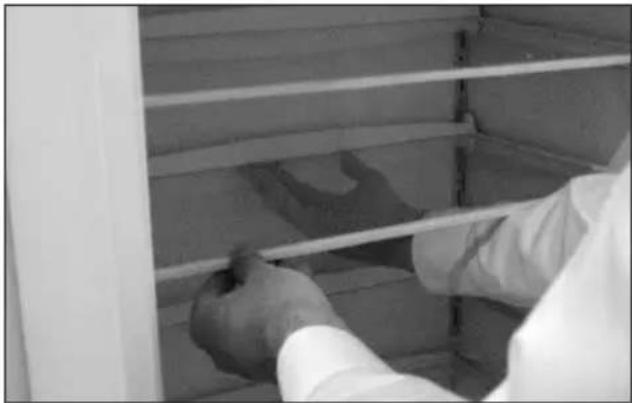
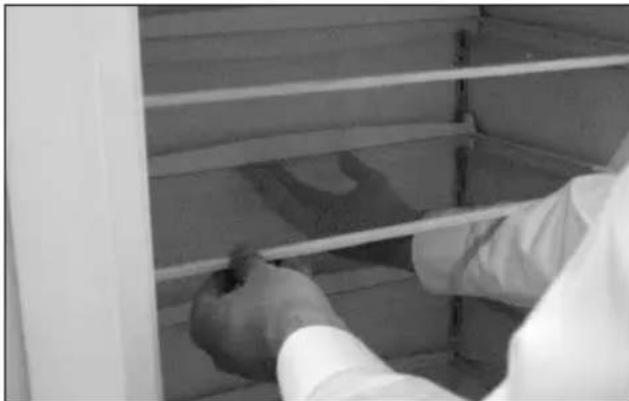
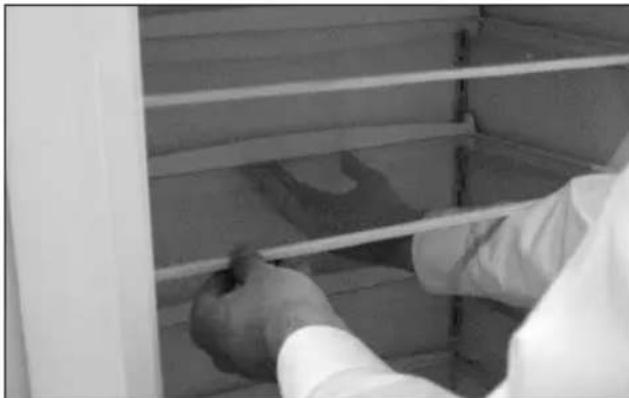
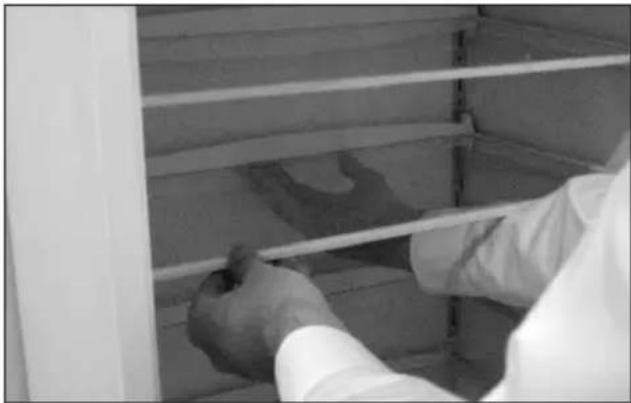
The glass shelves inserted at the back can be lifted and pulled out, and their position adjusted by proceeding in reverse order. (fig. ③). Make sure that the plastic packing pieces are removed from the track on the rear wall before adjusting the shelves.
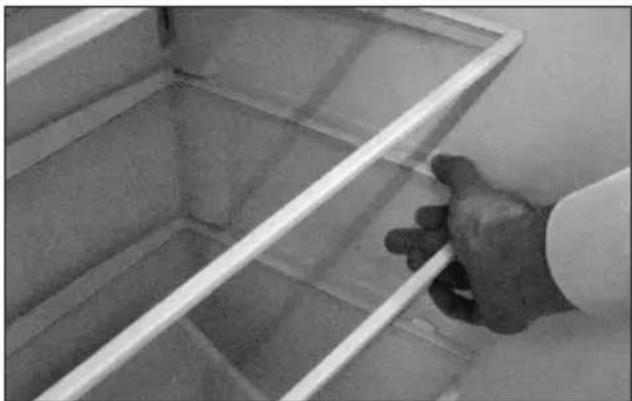
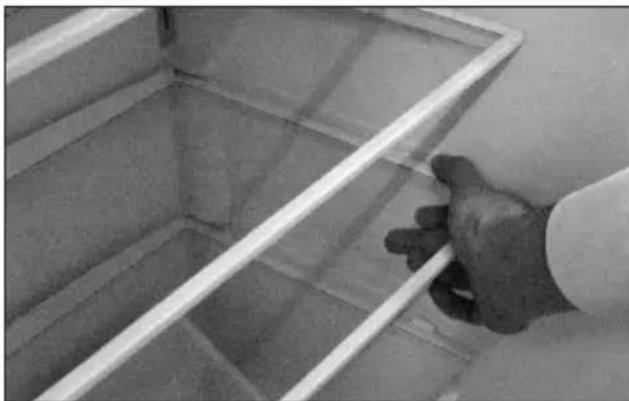
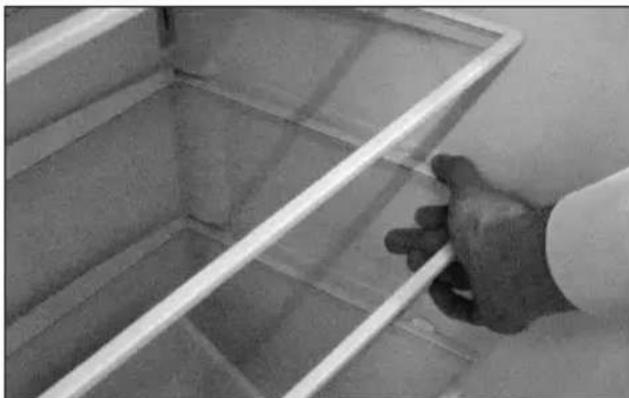
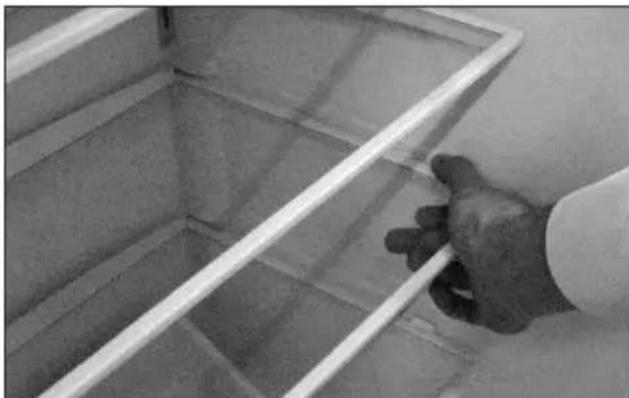
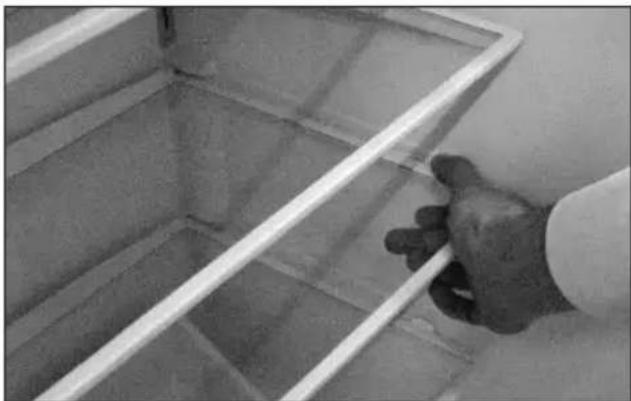
The glass shelves above and below the vegetable compartments can be removed by pressing the brackets on both sides at the same time, and lifting the shelves up and out (fig. 4). To re-insert, push the glass shelf into the groove at the back and press down at the front simultaneously into the two brackets on either side.
Bottle drawer
In this zone where the temperature is about 4 – 5°C higher than the rest of the fridge, drinks remain at the correct healthy drinking temperature of approx. 10°C.
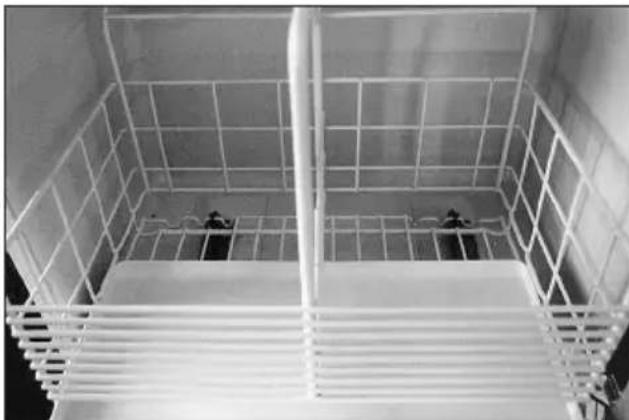
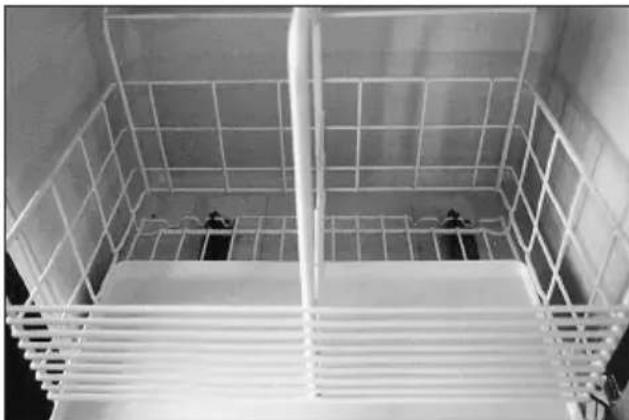
Pull out the basket: (fig. 5)
– Pull out the extension as far as it will go.
- Give a sharp pull on the operating handle and lift the basket up.
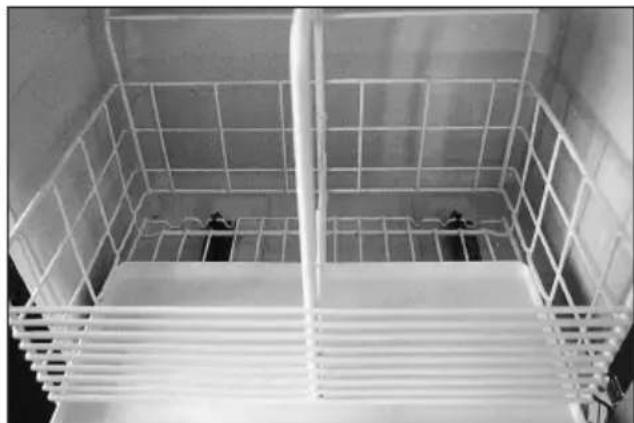
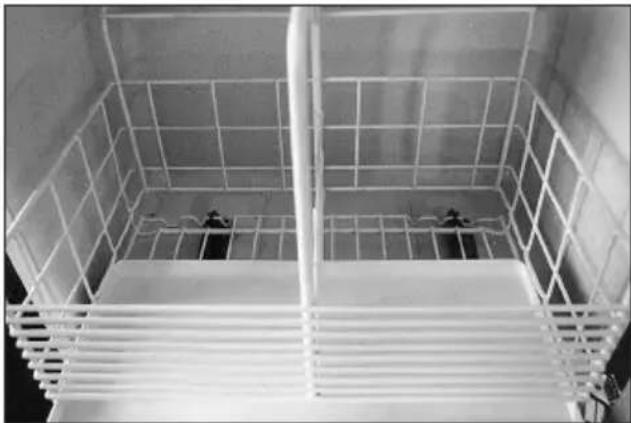
Replacing the basket: (fig. 6)
- Hold the basket against the inside wall opposite the hinges, lifting the front of the basket slightly.
- Put the rear edge of the basket onto the tracks and push together as far as the stop.
Snap the front of the basket into place by pushing down on the operating handle.
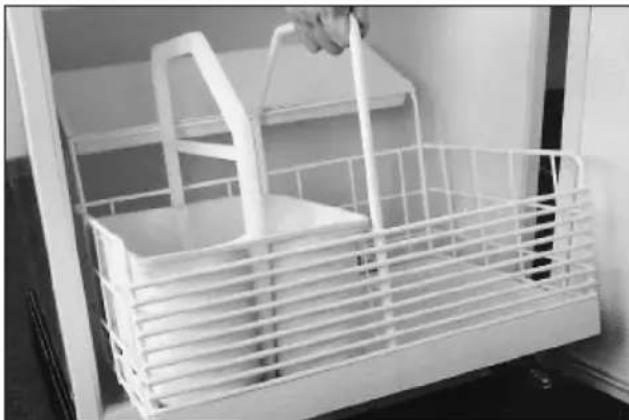
natural_image
White metal rack with a handle inside a cabinet (no text or symbols visible)5
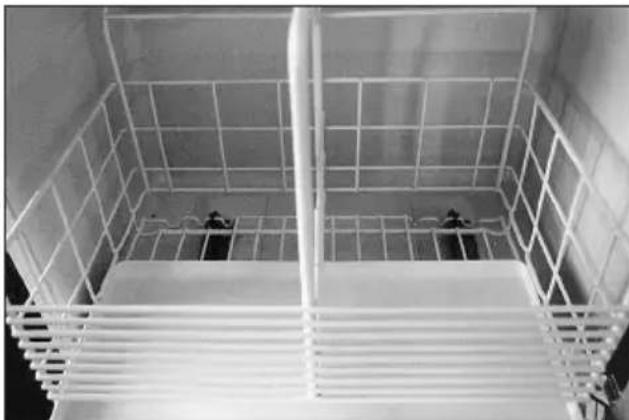
natural_image
Interior view of a large industrial or warehouse space with metal grids and structural supports (no visible text or symbols)6
Defrosting
The cooling compartment thaws entirely automatically. The ice that forms on the rear wall melts. The resulting water runs off through the weephole and evaporates in the drain pan outside the refrigerator.
Keep the collector duct and the weephole clean so that the water can drain off without obstruction. Clean the weephole with the green cleaner provided by moving it vertically and turning it.
Defrost the deep-freeze if large quantities of ice form. A thick layer of ice prevents the cold from reaching the frozen food. While defrosting, keep the deep-frozen food as cold as possible and well insulated, e.g. wrapped in newspaper.
– Turn the switch to position «0»
- Leave the door open.
The defrosting process can be considerably accelerated by placing a container of warm water (not boiling) in the deep-freeze compartment. Caution: Do not use any sharp or pointed objects to dislodge ice or frozen particles. Do not use any electrical heating appliance or naked flame to assist defrosting.
- The bottom tray of the deep-freeze collects the water as the ice thaws. Once defrosting is finished, the resulting water can be removed from the tray with a sponge or cloth.
- After defrosting, clean the inside and dry well.
- Turn the temperature regulator back to normal position and put the frozen food back.
Cleaning
To ensure perfectly hygienic storage of food, the refrigerator must be kept clean. Wash the cooling compartment out from time to time with a mild soapy solution and dry carefully. Wiping the inside of the fridge down with water containing a little vinegar also helps to combat smells and is recommended. Keeping the door seals clean prevents them from sticking and hence being damaged. Do not use any abrasive cleaning agents or scratchy cloths. Clean the door seals with a soft brush or paintbrush. If the fridge is out of use for any length of time, set the regulating knob to the position «0», empty the fridge, defrost, clean and leave the doors of the cooling compartment and of the deep-freeze open.
- Make sure that no cleaning water gets into the regulator housing (risk of short circuit)
- Make sure that no cleaning water can get through the weephole into the evaporation tray.
- Before putting into operation, make sure that the appliance and the seals of the cooling and deep-freeze compartments are completely dry.
Tips
When using your new refrigerator, pay attention to the following points:
■ If possible do not install the fridge near radiators, heating pipes or chimneys, and protect it from direct sunlight.
■ A new fridge needs to run for approx.15 hours (with food) before it reaches normal operating temperatures.
■ Do not keep the fridge door open any longer than necessary. Make sure when closing it that the door is properly closed and sealed. The self-closing hinges help in this.
- Drinks and other foodstuffs may take up to 6 hours to cool down from room temperature to fridge temperature. The warmer the food is when put in the fridge, the longer it will take to cool.
■ Adjusting the temperature regulator has no effect on the cooling time, only on the temperature level.
■ Let warm or hot food cool down outside the fridge first.
■ Storing goods that give off moisture may lead to condensation forming on the glass shelves.
■ Make sure that no food comes into contact with the rear wall of the fridge where it could freeze on and the water drain off into the cooling compartment when it thaws.
■ When organising storage pay attention to the following:
- Do not let oil or grease touch the plastic parts or the door seals
- Whatever the operating position of the temperature regulator, in the cooling compartment the coldest zones are at the back and above the bottom shelf. Therefore, put easily spoilt food on the bottom shelf.
■ Example of fridge organisation:
- In the deep-freeze compartment you can freeze and store food, and make ice.
- On the shelves, from top to bottom, come bread and cakes, ready-made dishes, dairy products, meat and sausages.
- In the door compartments from top to bottom: butter and cheese, tubes, small tins and eggs, large bottles.
– In the vegetable compartments vegetables, fruit and salad ingredients
– In the drawer: drinks, bottles
Replacing the light bulb
A faulty light bulb must be replaced immediately.
■ Shut off the power:
Disconnect the plug or fuse.
■ Remove the protective cover on the light by pulling it off towards the rear, unscrew the light bulb and replace by a new one. Push the protective cover back onto the light from behind until it snaps into place.
■ Light bulbs are available from your nearest After-sales service point or in specialist shops. Use pilot lamps T25/230 V/15 W/E14. Oven lamps (300°C) are not suitable.
Malfunctions
Your refrigerator has been tested to ensure that it functions perfectly before delivery. In the event of faulty operation, please contact your nearest After-sales service point and quote the type of refrigerator as well as the fault.
Malfunctions can also be caused by electric fuses going. The damage is easily remedied by replacing the appropriate fuse.
Guarantee
We grant you the guarantee from the date of delivery to the end user.
Any faults that may occur during the period of guarantee, despite the fridge being used according to the regulations, and which are dues to a material or manufacturing defect, will be remedied under guarantee by the After-sales service.
The guarantee does not cover:
– faulty light bulbs
- breakage of glass shelves and plastic parts
– defects due to non-observance of the operating instructions or improper use of the appliance
– claims for damages over and above the services covered by the guarantee
– appliances that have been repaired by a third party.
Operating noises
Noises which are totally normal
The refrigerator is cooled by a compressor (cooling aggregate). The compressor pumps coolant through the cooling system, and this produces noise. Even when the compressor cuts out, noises caused by temperature and pressure variations are unavoidable.
This cooler is fitted with a quiet compressor and low-noise cooling circuit in accordance with the latest state of technology. However, certain noises are unavoidable and their intensity depends on the size of the cooler.
Operating noises are most audible immediately after the compressor cuts in. They become quieter as the operating period continues.
Noises which are not normal
Most unusual noises are caused by improper installation. The cooler must be installed or built-in so that it is level and stable. Under no circumstances should pipes be in contact with a wall, other furniture or one another.
Where coolers are built in to open-plan kitchens or partition walls, normal operating noises will be more audible. However, this is due to the surrounding architecture and not to any fault with the cooler.
| Description Cause Comment | ||
| Droning Cooling aggregate Normal operating noise of the cooling aggregate.The level is dependent on the size of cooler | ||
| Humming Fan Normal operating noise of the fan | ||
| Gurgling Cooling circuit Normal operating noise as coolant flows throughBabbling the circuitMurmuring | ||
| Hissing Cooling circuit Normal operating noise as coolant is injected intothe condenser | ||
| Clicking Thermostat Normal switching sound of the electromechanicaltemperature controller | ||
| Rattling Shelves, baskets, Position the interior parts so that they don’t touch onefitted holders, refri- another, or so that they are fitted securely.gerator contents etc. | ||
| Cracking | Cooler housing | Normal as materials expand and contract dueto temperature variations (e.g. plastics, insulation) |
Built-in Refrigerator Niche SINK 14/6 (1778 mm)
Where the appliance space measures 550 mm the output data of the appliance are also guaranteed.
Electrical safety (shock-hazard protection) must be effected as part of the installation procedure. If the power point is no longer accessible once the appliance is in place, a current breaker must be provided on installation. Current breakers are switches with a contact opening of at least 3 mm, including LS switches and fuses as well as contactors.
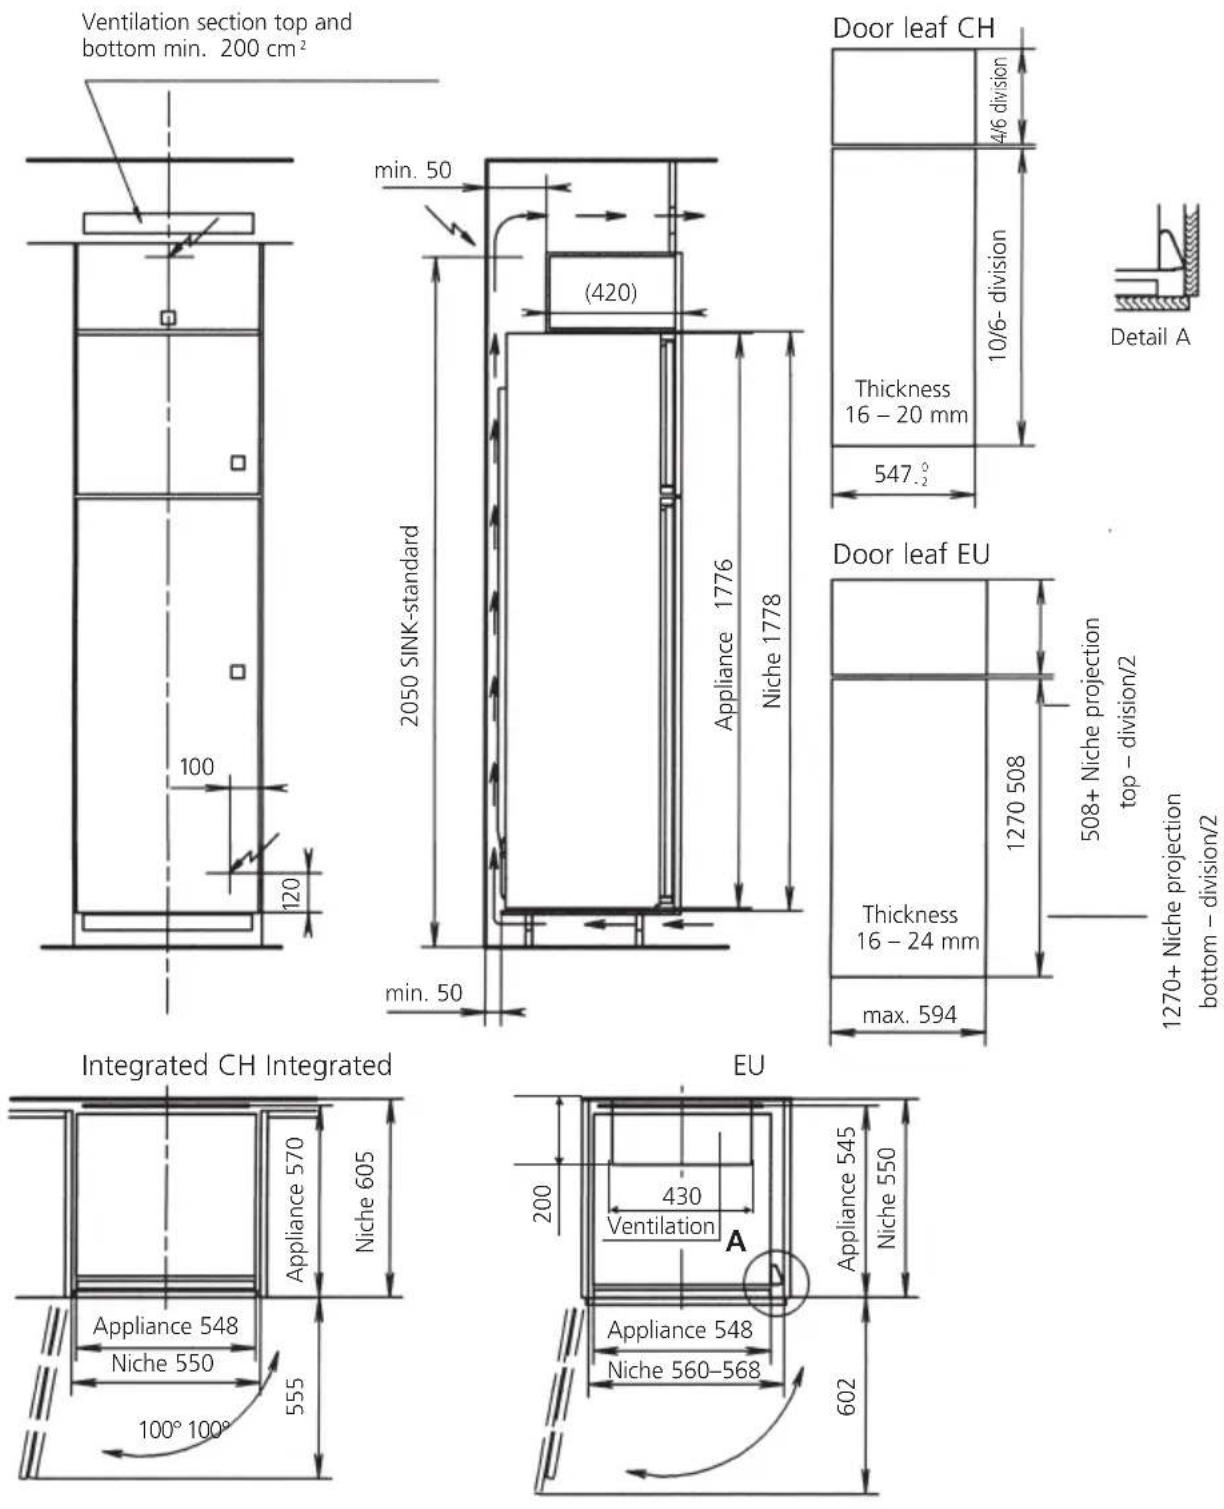
1270+ Niche projection
bottom - division/2
Sommario
natural_image
Close-up of a white electronic device with a black indicator light and two labeled parts (5 and 4) on its side, no readable text or symbols beyond the numbers.1
natural_image
Close-up of a white plastic shelf shelf with a rectangular extension (no text or symbols visible)2
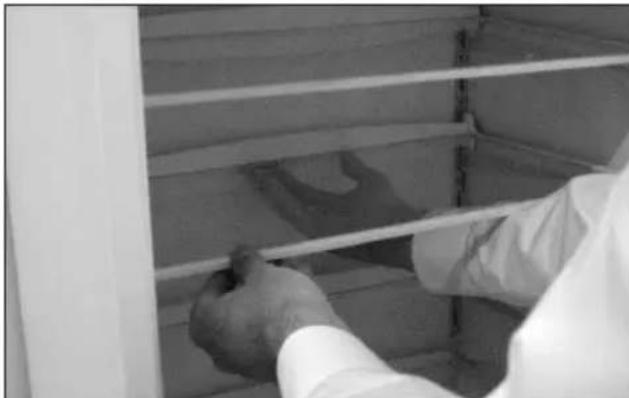
natural_image
Person in lab coat handling a large container with visible liquid, no text or symbols present3
natural_image
Hand holding a white rectangular object inside a transparent container (no text or symbols visible)4
Refrigeratore
natural_image
White metal rack with a handle inside a cabinet (no text or symbols visible)5
natural_image
Interior view of a large industrial or warehouse space with metal grating and structural beams (no visible text or symbols)6
Scongelamento
natural_image
Close-up of a white electronic device with a black rectangular button and a scale showing 5 and 4 units (no readable text or symbols beyond basic markings)1
natural_image
Close-up of a white shelf shelf with a rectangular metal bar extending from the side (no text or symbols visible)2
natural_image
Person in lab coat handling a shelf with horizontal white bars (no visible text or symbols)3
natural_image
Hand holding a white rod inside a metal-framed storage cabinet (no text or symbols visible)4
natural_image
White plastic basket with metal handles and handle, placed inside a cabinet (no text or symbols visible)5
natural_image
Interior view of a white metal rack with grid lines and a central vertical structure (no text or symbols visible)6
Subjecttoalterations.
Salvomodifiche.
- Inhaltsverzeichnis
- Variable Innentüre
- Abtauen
- Contre-porte variable
- Dear Customer
- Disposing of the old refrigerator
- Disposing of the packaging
- Safety hints and warnings
- Switching on and temperature selection
- (Fig. ①)
- Important:
- Low ambient temperature
- Freezing
- Cooling compartment
- Bottle drawer
- Defrosting
- Cleaning
- Tips
- Replacing the light bulb
- Malfunctions
- Guarantee
- Operating noises
- Built-in Refrigerator Niche SINK 14/6 (1778 mm)
- Sommario
- Refrigeratore
- Scongelamento
Brand : GAGGENAU
Model : RT280200
Category : Refrigerator