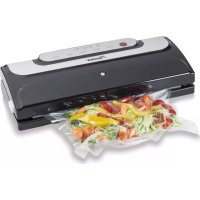
AVS501 - Vacuum packaging machines BESTRON - Free user manual and instructions
Find the device manual for free AVS501 BESTRON in PDF.


| Product type | Vacuum sealer |
| Brand | Bestron |
| Model | AVS501 |
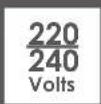
| Power supply | 220-240 V ~ 50 Hz |
| Power | 120 W |
| Dimensions (L x D x H) | 40 x 20 x 10 cm |
| Weight | 2 kg |
| Functions | Buttons: STOP, PUMP, MODE, PRESSURE, SEAL, VACUUM SEAL |
| Mode settings | Dry for dry foods; Moist for moist foods |
| Pressure settings | Normal for solid foods; Gentle for fragile foods |
| Included accessories | Vacuum hose for boxes and stoppers |
| Sealing capacity | Bag up to 30 cm width |
| Bag type | Original quality Bestron vacuum bags or rolls |
| Maintenance | Clean exterior with a damp cloth; removable lid; do not immerse |
| Safety | Overheating protection; automatic shut-off |
| Warranty | 60 months (5 years) from date of purchase |
| Usage | Domestic use only |
| Reparability | Repair by qualified technician; do not open yourself |
| Ambient temperature | Use on a flat and stable surface |
| Storage | Place the supporting cardboard in the vacuum chamber after use |
Frequently Asked Questions - AVS501 BESTRON
User questions about AVS501 BESTRON
0 question about this device. Answer the ones you know or ask your own.
Ask a new question about this device
Download the instructions for your Vacuum packaging machines in PDF format for free! Find your manual AVS501 - BESTRON and take your electronic device back in hand. On this page are published all the documents necessary for the use of your device. AVS501 by BESTRON.
USER MANUAL AVS501 BESTRON
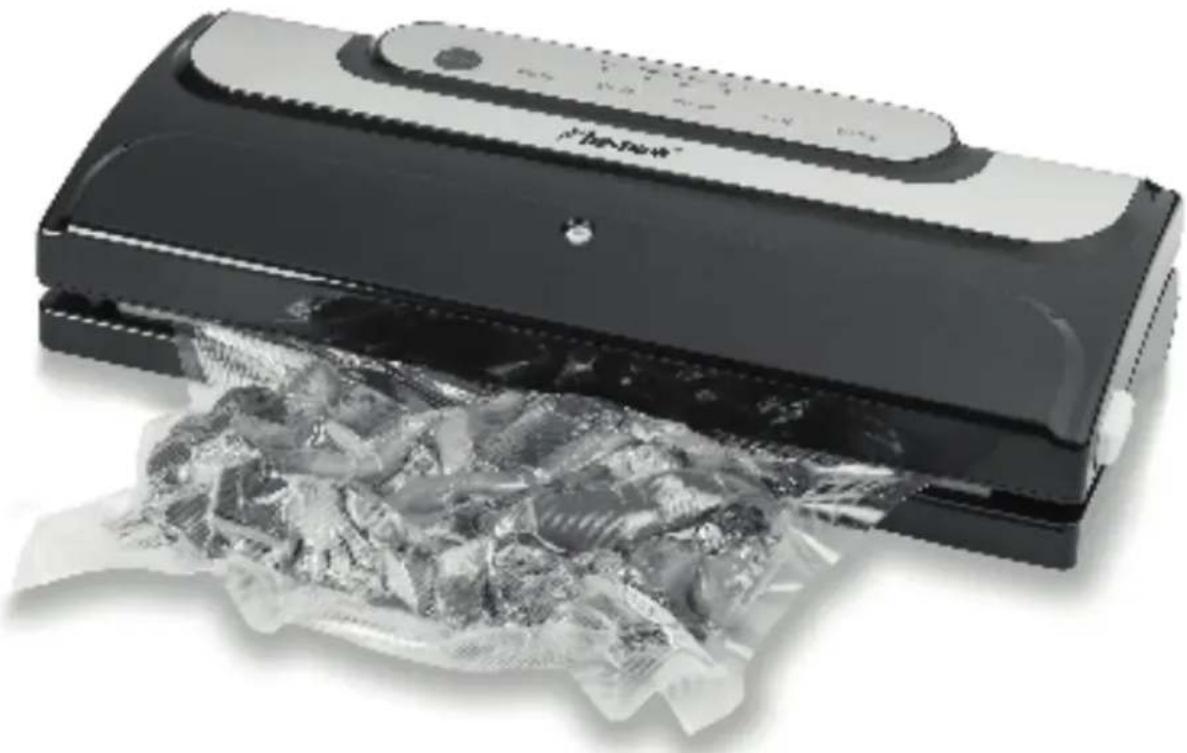
natural_image
Exterior view of a black industrial vacuum cleaner with plastic wrap (no text or symbols visible)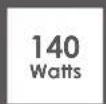

AVS501 INSTRUCTION MANUAL
DE
Bedienungsanleitung

Mode d'emploi
NL
Handleiding
EN
Instruction manual
IT
R. Neyman Quality control
DÉCLARATION DE CONFORMITÉ CE
WAT U MOET WETEN OVER DIT APPARAAT
R. Neyman Quality control
WERKING - Algemeen
Congratulations with the purchase of this Bestron product. These instructions tell you how the product works and how to use it. Read the instructions carefully before you start using the appliance. Only use the appliance in the manner described in the instructions. Keep these instructions in a safe place for future reference.
Defects:
If the appliance is defective, do not try to repair it yourself. Always have a qualified mechanic carry out any repairs.
Children:
- This appliance may be used by children over the age of 8 years old and persons with reduced physical, sensory or mental capabilities or lack of experience and know-how, but only if supervised or if they have been instructed on how to use the appliance safely and are aware of its potential dangers.
• Children are not allowed to clean and maintain the appliance, except if they are over the age of 8 years old and supervised. - Keep the appliance and the cable out of reach of children under the age of 8 years old.
- Keep an eye on children to ensure that they do not play with the appliance.
WHAT YOU SHOULD KNOW ABOUT ELECTRICAL APPLIANCES
- Check that the mains voltage corresponds with that shown on the rating plate of an electrical appliance before you use it.
- Check that the socket to which you connect the electrical appliance is earthed.
• Always install electrical appliances on a stable and level surface where it cannot fall over.
• Certain parts of an electrical appliance may become warm or sometimes hot. Do not touch them as you may burn yourself.
• Make sure your hands are dry when you touch an electrical appliance, a cord or a plug. -
Electrical appliances must be able to lose their heat to avoid fire hazards. Therefore, make sure that the appliance has sufficient clearance around it and that it does not come into contact with flammable materials. Electrical appliances must never be covered.
• Make sure that electrical appliances, cords or plugs do not come into contact with water. -
Never immerse electrical appliances, cords or plugs in water or any other liquid.
- Do not touch electrical appliances if they have fallen in the water. Immediately pull the plug out of the socket. Stop using the appliance.
• Make sure that electrical appliances, cords and plugs do not come into contact with heat sources, such as a hot hob or open fire. - Never let cords hang over the edge of the sink, a worktop or a table.
• Always remove plug from the socket when you are not using the electrical appliance. - Remove the plug from the socket by pulling the plug itself and not the cord.
- Regularly check if the cord of the electrical appliance is not damaged. Do not use the electrical appliance if the cord shows signs of damage. If the cord is damaged, it should be replaced by the manufacturer, a technical service provider or a person with an equivalent qualification, to avoid any danger.
- The appliance may not be switched on with the aid of an external time switch, or by a separate system with remote control.
WHAT YOU SHOULD KNOW ABOUT THIS APPLIANCE
- Be careful when using the appliance outdoors.
- Never use the appliance in damp or wet locations.
- Thoroughly clean the appliance after use (see Cleaning and Maintenance).
- Only use the original quality vacuum bags or rolls of this device.
ENVIRONMENT

- Dispose of packaging material such as plastic and cardboard boxes in the designated containers.
Do not dispose of this product as normal domestic waste at the end of its life, but hand it in at a collection point for the reuse of electric and electronic equipment. Look for the symbol on the product, the user instructions or the packaging showing the type of waste.
- The materials can be used as indicated. By helping us reuse and process the materials or otherwise recycle the old equipment, you will be making an important contribution towards the protection of the environment.
- Your municipality can tell you where to find the designated waste collection point in your neighbourhood.
CE DECLARATION OF CONFORMITY
This product conforms to the requirements of the following European Directives on safety:
• EMC Directive 2014/30/EU
- Low Voltage Directive 2014/35/EU
• RoHS Directive 2011/65/EU
R. Neyman
Quality control
OPERATION - General
The appliance is intended for domestic use only, not for professional use.
1
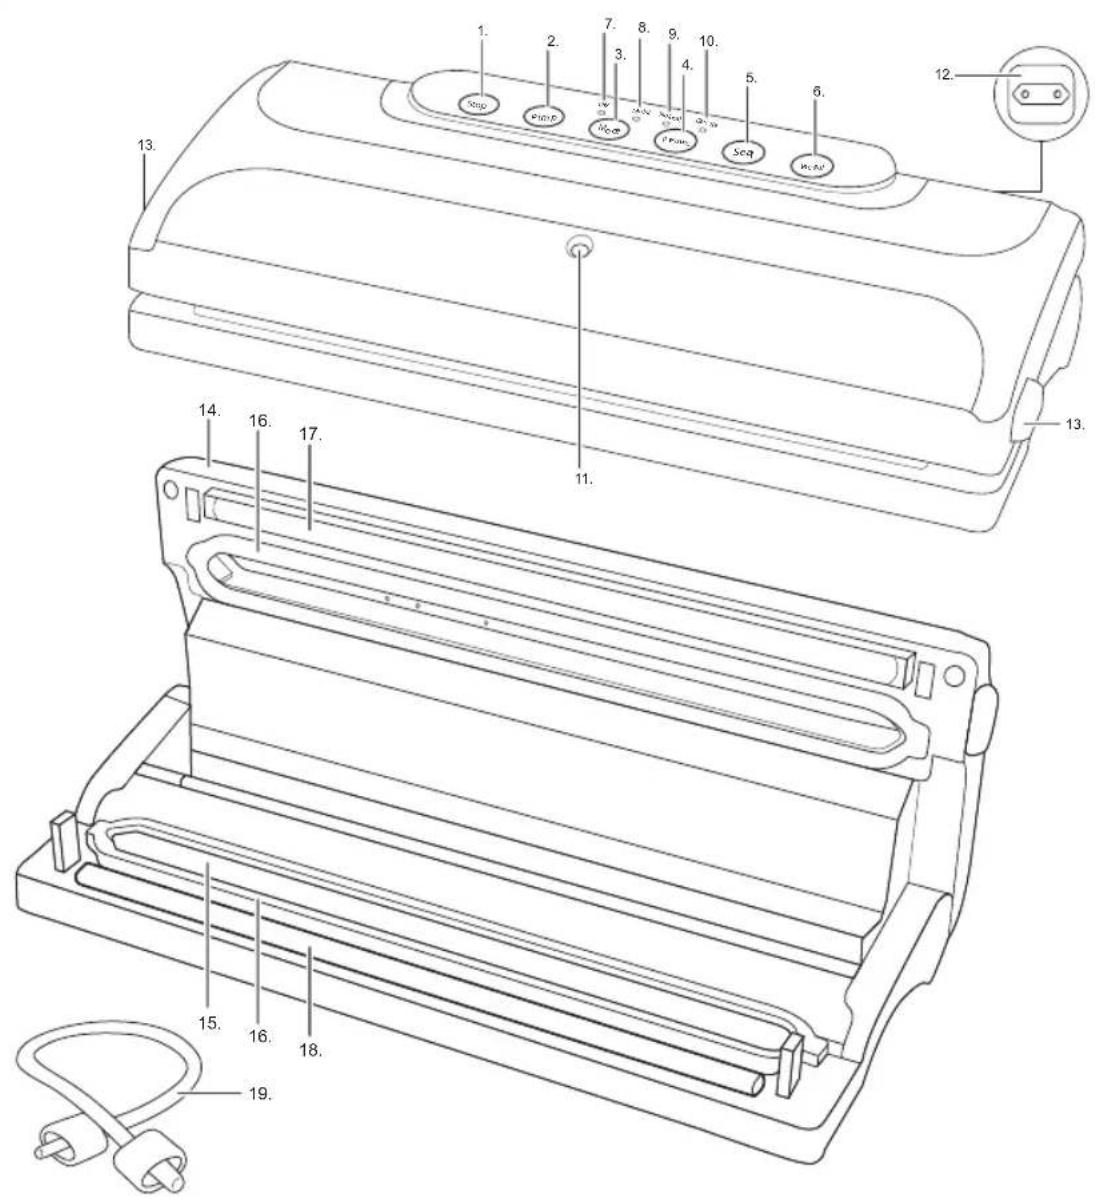
- STOP button with indicator light
- PUMP button with indicator light
- MODE button
- PRESSURE button
- SEAL button with indicator light
- VACUUM SEAL button with indicator light
- Dry" setting indicator light
- Moist setting indicator light
- Normal" setting indicator light
-
Gentle" setting indicator light
-
Hose connection point
- Storage space for the cord with plug
- Locking knobs
- Lid
- Vacuum chamber
- Upper and lower sealing ring
- 1Séalstrip
- Pressure rubber
- Vacuum hose
OPERATION - Before first use
- Remove the device from its packaging and remove all packaging parts.
- Clean the device and the loose parts to remove any residue from the manufacturing process (see 'Cleaning and maintenance').
- Remove the cardboard support card.
ATTENTION:
- Do not throw away the cardboard support card, it should be replaced after use (see 'Cleaning and maintenance').
OPERATION - Function buttons
STOP (1): Pressing this button during operation stops the vacuum or sealing process immediately.
PUMP (2): Button to vacuum a vacuum storage box or vacuum bottle stopper using the supplied hose.
MODE (3): Button to set the optimal sealing time.
- 'Dry' (7) setting is used for dry products and moisture-free food. These products require a shorter sealing time. The 'Dry' indicator (7) lights up.
- The 'Moist' setting (8) is used for products that are moist inside or contain moist food. These products require a longer sealing time. The 'Moist' indicator (8) lights up.
PRESSURE (4): Button to set the optimum vacuum pressure.
- 'Normal' (9) setting is used for solid and solid foods that can withstand normal vacuum pressure. The 'Normal' indicator (9) lights up.
- The 'Gentle' setting (10) is used for soft and pressure-sensitive foodstuffs, where a lower pressure is desirable. The 'Gentle' indicator (10) lights up.
SEAL (5): Button for sealing film bags or film rolls, without vacuuming.
VACUUM SEAL (6): Button that starts vacuuming and then seals automatically.
OPERATION - Sealing a bag of vacuum film
- Place the unit on a flat and stable surface and leave sufficient working space around the unit.
- Plug in the power cord and check that the indicator lights are illuminated.
- Calculate the length of the bag you will need to pack the food/object. Take the length of the food/object, add 8 cm and possibly 2 cm extra if you want to use the bag again afterwards. If you want to reuse the bag more than once, you must add 2 cm for each time you want to reuse the bag. Cut off the correct length of the film roll with scissors.
- Open the cover (14) of the device.
- Place one of the two open sides of the bag on the pressure rubber (18) of the opened device. The bag should not be placed in the vacuum chamber itself.
- Close the lid (14) and push it down on both sides simultaneously until you hear a click on both sides. The lid is then securely closed by locking knobs (13).
- Press the SEAL button (5) to seal the bag. The indicator light flashes when the sealing process is complete.
- Press the locking buttons (13) to open the lid. The bag is now sealed on one side and you can now fill it.
OPERATION - Vacuuming and sealing a bag
- Place the unit on a flat and stable surface and leave sufficient working space around the unit.
- Plug in the power cord and check that the indicator lights are lit.
- Place the food/object you want to store in the bag, make sure the bag is 8 cm larger than the food/object you want to store.
- Open the cover (14) of the device.
- Place the open part of the bag in the vacuum chamber (15), with the smooth side of the bag facing up. Make sure that the side of the bag that rests on the pressure rubber (18) is completely clean and free of food residue. The bag must be kept taut without folds.
- Close the cover (14) and push it down simultaneously on both sides until you hear a click on both sides. The lid is then securely closed by locking knobs (13).
- If necessary, select the desired setting by pressing the MODE (3) and/or PRESSURE (4) button.
- Press the VACUUM SEAL (6) button to vacuum and seal the bag. The indicator light flashes when the vacuuming process is complete.
- Press the locking buttons (13) to open the lid and check that the bag is tight.
WARNING:
- The sealing strip (17) becomes very hot during operation and must therefore not be touched during operation or immediately after use!
-
For optimum performance, allow the machine to cool for 1 minute after each vacuuming process before placing the next bag in between. Any moisture released in the vacuum chamber must always be wiped clean after use.
-
If you do not use the minute cooling down time, the overheating protection may be activated. In this case, you should switch off the appliance for approx. 30 minutes before using it again.
- You can also vacuum pack more than just item of food. Camping products such as matches, first aid bandages and clothes remain vacuum packed clean and dry. Cutlery that is vacuum packed is not dull and a vacuum-packed emergency candle is always ready for use.
- You can open a vacuum bag that is sealed with scissors.
OPERATION - Vacuuming of vacuum storage boxes
This device is supplied with a vacuum hose (19) and has a hose connection point (11) which allows you to vacuum storage boxes (not included).
PROBLEMS AND SOLUTIONS
The unit is not working?
• Make sure the power cord is plugged in.
- Check that the indicator lights are on.
- The overheating protection is activated: let the appliance cool down.
The device does not completely vacuum the bag?
• There may be a hole in the bag, use a new bag.
- Check whether the bag is sufficiently in the vacuum chamber (15).
- The sealing rings (16) may be overheated. Wait a few minutes until they have cooled down and then try again.
The bag does not remain vacuum after it has been sealed?
- Check if the bag is broken. Protect sharp edges of food or objects with a piece of kitchen paper.
- Check that no impurities such as crumbs, liquid, grease, etc. stick to the bag's closure. Reopen the bag and try to close it again.
The bag melts?
- If the sealing strip (17) or the pressure rubber (18) overheat, the bag may melt. In this case, switch off the machine, open the lid and let the parts cool down for a few minutes.
CLEANING AND MAINTENANCE
Thoroughly clean the device and its loose parts after each use:
-
Unplug the machine and the power outlet.
-
Allow the appliance to cool down completely before cleaning or storing.
-
Clean the outside of the machine with a damp cloth and wipe it with a dry cloth. Make sure no moisture enters the unit. The cover of the unit is removable for easy cleaning.
-
The lid must remain open and the locking pieces must not be stuck. Also, nothing may be placed on the unit so that no pressure can be exerted on the sealing rings (16). For this reason, always put the supplied cardboard support card back into the vacuum chamber (15) after use and then store the device in a safe place.
WARNING:
- Never immerse the appliance, plug or cord in water. Never put the appliance in a dishwasher.
- Do not use aggressive or abrasive cleaners or sharp objects (such as knives or hard brushes) when cleaning.
WARRANTY CONDITIONS
Bestron offers a 60-month warranty on this equipment against defects resulting from manufacturing and/or material errors, subject to the following conditions.
- No labour or material costs will be charged during this warranty period.
- Any repairs carried out under the warranty will not extend the warranty period.
- Faulty parts, or in the event of exchange, the faulty equipment itself, will automatically become the property of Bestron.
- The warranty is valid for the first buyer only and is non-transferable.
- The warranty is not valid for damage caused by:
- Accidents
- Improper use
- Wear and tear
- Neglect
- Faulty installation
- Connection to a different mains voltage than indicated on the type plate
• Unauthorised changes
• Repairs carried out by unqualified third parties - Use in violation with the applicable statutory, technical or safety standards
-
Careless transport without suitable packaging or other protection
-
Warranty cannot be claimed:
• For damage during transport
- If the serial number of the appliance is removed or changed
-
Items excluded from warranty are:
-
Cords
- Lamps
- Glass parts
- The warranty does not entitle the purchaser to compensation for any damage other than replacement or repair of the faulty parts. Bestron cannot in any event be held liable for any indirect or consequential losses caused by or in relation to the equipment it has provided.
- Claims under a warranty may only be submitted to your (online) retailer or directly to the Bestron Service Department. Never send items without being asked to. We may refuse the parcel and you will be liable for the costs. Contact us first and we tell you how the appliance should be packaged and sent. Each claim under a warranty must be accompanied by the relevant receipt.
SERVICE
If an unexpected problem occurs, please contact the BESTRON service department: www.bestron.com/service
COMPLIMENTI!
NEED HELP? CHAT WITH US! WHATSAPP CUSTOMER SERVICE

BESTRON.COM/WHATSAPP
- AVS501 INSTRUCTION MANUAL
- DÉCLARATION DE CONFORMITÉ CE
- WAT U MOET WETEN OVER DIT APPARAAT
- WERKING - Algemeen
- Defects:
- Children:
- WHAT YOU SHOULD KNOW ABOUT ELECTRICAL APPLIANCES
- WHAT YOU SHOULD KNOW ABOUT THIS APPLIANCE
- ENVIRONMENT
- CE DECLARATION OF CONFORMITY
- OPERATION - General
- OPERATION - Before first use
- ATTENTION:
- OPERATION - Function buttons
- OPERATION - Sealing a bag of vacuum film
- OPERATION - Vacuuming and sealing a bag
- WARNING:
- OPERATION - Vacuuming of vacuum storage boxes
- PROBLEMS AND SOLUTIONS
- CLEANING AND MAINTENANCE
- WARRANTY CONDITIONS
- SERVICE
- COMPLIMENTI!
Brand : BESTRON
Model : AVS501
Category : Vacuum packaging machines