
ESRW33 - Razor PANASONIC - Free user manual and instructions
Find the device manual for free ESRW33 PANASONIC in PDF.
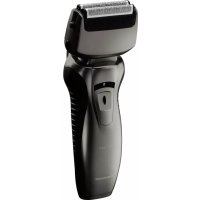



| Product type | Electric shaver |
| Brand | Panasonic |
| Model | ESRW33 |
| Usage | Dry or wet shaving with gel, usable in the shower |
| Power supply | AC adapter (RE7-67), rechargeable nickel-metal hydride battery |
| Charging time (230 V~) | Approximately 11 hours |
| Charging time (220 V~) | Approximately 12 hours |
| Battery life (full charge) | Approximately 30 minutes |
| Dimensions (main body) | 5.8 cm × 15.3 cm × 5.1 cm |
| Weight (shaver only) | 160 g |
| Main functions | Shaving, built-in trimmer |
| Noise level (shaving) | 59 dB (A) |
| Noise level (trimmer) | 63 dB (A) |
| Water resistance | Usable in the shower, washable with water |
| Charging temperature | 0 °C to 35 °C |
| Maintenance | Cleaning with soapy water, cleaning brush included |
| Spare parts | Outer foil (replace annually), inner blades (replace every 2 years) |
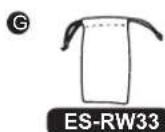
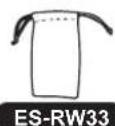
| Included accessories | Cleaning brush, travel pouch |
| Safety | Thin foil, automatic stop in case of blockage (not specified), do not use if foil is damaged |
| Usage | Household use only |
Frequently Asked Questions - ESRW33 PANASONIC
User questions about ESRW33 PANASONIC
0 question about this device. Answer the ones you know or ask your own.
Ask a new question about this device
Download the instructions for your Razor in PDF format for free! Find your manual ESRW33 - PANASONIC and take your electronic device back in hand. On this page are published all the documents necessary for the use of your device. ESRW33 by PANASONIC.
USER MANUAL ESRW33 PANASONIC
Operating Instructions
(Household) Rechargeable Shaver
ES-RW33
ES-RW31
| English | 2 | Português | 44 | Česky 86 | |
| Deutsch | 9 | Svenska | 51 | Slovensky 93 | |
| Français | 16 | Dansk | 58 | Magyar 100 | |
| Italiano | 23 | Norsk | 65 | Română 107 | |
| Español | 30 | Suomi | 72 | Türkçe 114 | |
| Nederlands | 37 | Polski | 79 |
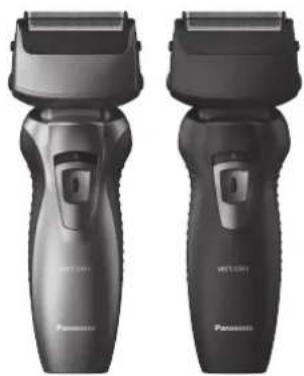
Thank you for purchasing this Panasonic product.
Before operating this unit, please read these instructions completely and save them for future use.
Warning
- This appliance can be used by children aged from 8 years and above and persons with reduced physical, sensory or mental capabilities or lack of experience and knowledge if they have been given supervision or instruction concerning use of the appliance in a safe way and understand the hazards involved. Children shall not play with the appliance. Cleaning and user maintenance shall not be made by children without supervision.
- The supply cord cannot be replaced. If the cord is damaged, the AC adaptor should be scrapped.
- Do not immerse the AC adaptor in water or wash with water.
- Do not use any AC adaptor other than one specifically designed for this model (RE7-67).
- This WET/DRY shaver can be used for wet shaving using shaving lather or for dry shaving. You can use this watertight shaver in the shower and clean with water. The following symbol means suitable for use in a bath or shower.

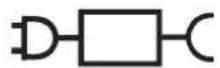
- The following symbol indicates that a specific detachable power supply unit is required for connecting the electrical appliance to the supply mains. The type reference of power supply unit is marked near the symbol.
Important
▶ Before use
Treat yourself to wet lather shaves for at least three weeks and notice the difference. Your Panasonic WET/DRY shaver requires a little time to get used to because your skin and beard need about a month to adjust to any new shaving method.
▶ Using the shaver
Caution - The outer foil is very thin and can be damaged if not used correctly. Check that the foil is not damaged before using the shaver. Do not use the shaver if the foil etc. is damaged as you will cut your skin.
The appliance may not operate in an ambient temperature lower than approximately 0 °C.
▶ Charging the shaver
Charge the appliance correctly according to these Operating Instructions. (See page 5 "Charging".)
This appliance contains battery that is only replaceable by skilled persons. Please contact an authorized service centre for the details of repair.
Plug in the adaptor into a household outlet where there is no moisture and handle it with dry hands. The shaver may become warm during use and charging. However, this is not a malfunction. Do not charge the shaver where it will be exposed to direct sunlight or other heat sources.
Adequate ambient temperature for charging is 0-35 °C.
▶ Cleaning the shaver
Warning - Remove the shaver from the AC adaptor before cleaning it to prevent electric shock.
If you clean the shaver with water, do not use salt water or hot water. Do not soak the shaver in water for a long period of time. Wipe it with a cloth dampened with soapy water. Do not use thinner, benzine or alcohol.
▶ Storing the shaver
Remove the shaver from the AC adaptor when storing it. Keep these operating instructions in a safe place.
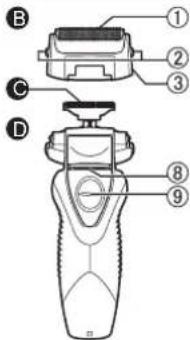
Parts identification
A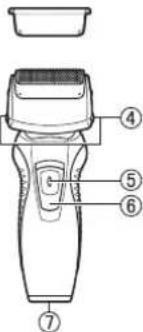
B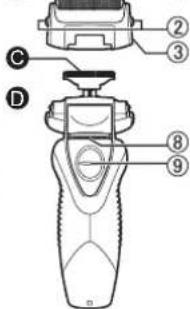
E F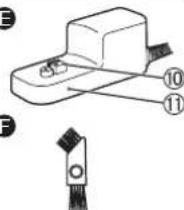
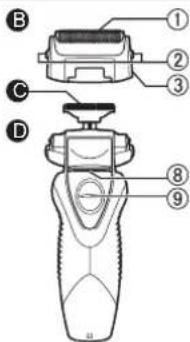
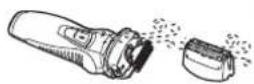
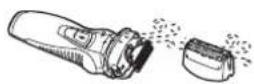
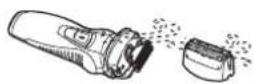
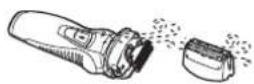
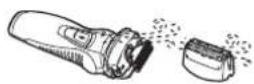
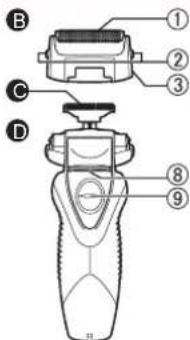
A Protective cap
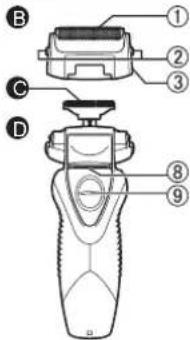
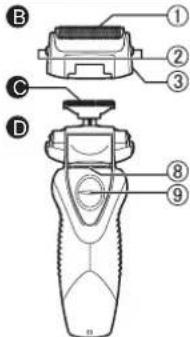
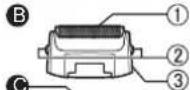
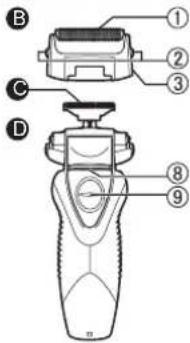
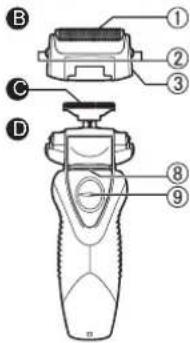
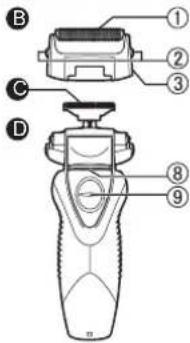
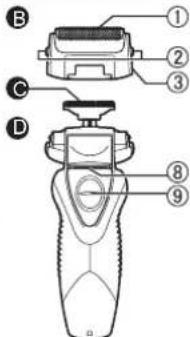
B Outer foil section
① System outer foil ② System outer foil release buttons ③ Foil frame
© Inner blades
D Main body
④ Foil frame release buttons ⑤ Switch lock button ⑥ Power switch (0/1)
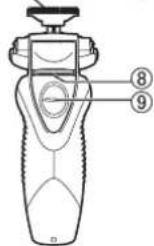
⑦ Appliance socket ⑧ Trimmer ⑨ Trimmer handle
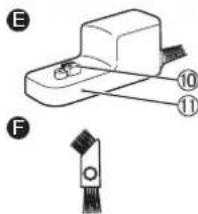
E AC adaptor (RE7-67)
⑩ Charging plug ⑪ Charge indicator lamp
Accessories
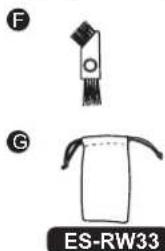
F Cleaning brush
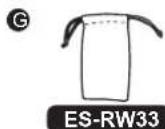
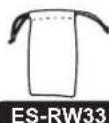
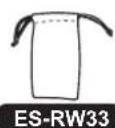
© Travel pouch ES-RW33
Charging
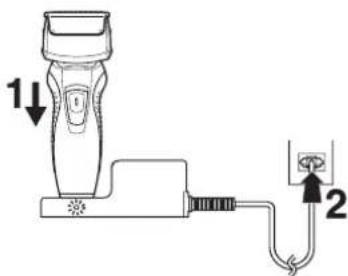
Perform the following steps to charge the shaver if it seems to lose speed.
The charging time differs depending on the rated voltage. (See page 8.)
- A full charge supplies enough power for approximately 30 minutes of use. (ES-RW33)
A full charge supplies enough power for approximately 21 minutes of use. (ES-RW31)
(Based on dry use at 20 °C-30 °C.)
The operating time may differ depending on the frequency of use and the operating method.
1 Turn off the shaver and insert it into the AC adaptor as illustrated.
2 Plug the adaptor into a household outlet.
- The charge indicator lamp glows and stays on until the shaver is removed from the AC adaptor.
Using the shaver
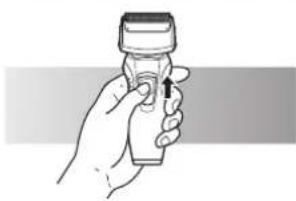
1 Depress the switch lock button and slide the power switch (0/1) upwards.
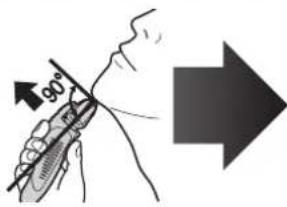
2 Hold the shaver as illustrated above and shave.
Start out shaving by applying gentle pressure to your face. Stretch your skin with your free hand and move the shaver back and forth in the direction of your beard. You may gently increase the amount of pressure as your skin becomes accustomed to this shaver. Applying excessive pressure does not provide a closer shave.
▶ Using the trimmer
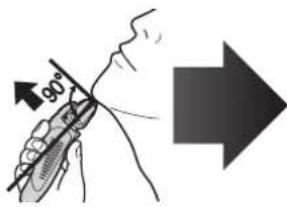
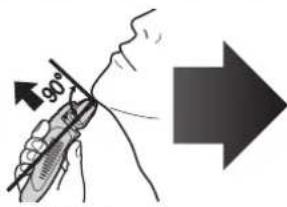
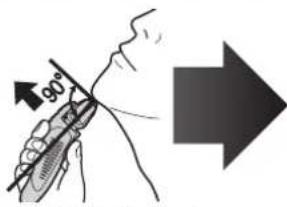
Slide the trimmer handle up. Place at a right angle to your skin and move downwards to trim your sideburns.
Cleaning
3 5,6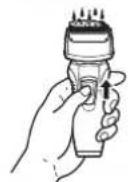
8
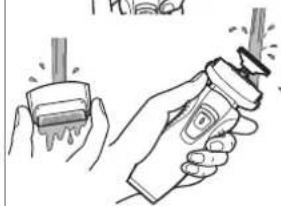
- Remove the shaver from the AC adaptor.
- Apply some hand soap and some water to the outer foil.
- Turn the shaver on.
- Turn the shaver off after 10-20 seconds.
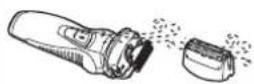
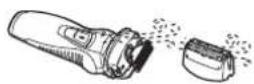
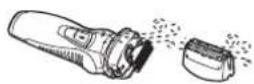
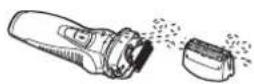
- Remove the outer foil section and turn the shaver on.
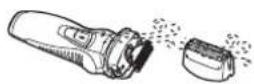
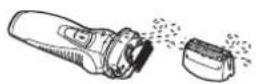
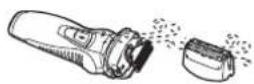
- Clean the shaver and the outer foil section with running water.
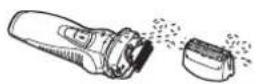
- Wipe off any drops of water with a dry cloth.
- Dry the outer foil section and the shaver completely.
- Attach the outer foil section to the shaver.
Replacing the outer foil and the inner blades
System outer foil: Once every year
Inner blade: Once every two years
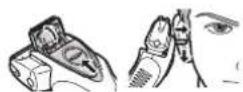
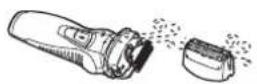
- Press the system outer foil release buttons and lift the system outer foil upwards as illustrated.
- Insert the system outer foil by pushing it downwards until it clicks.
Replacing the inner blades
1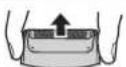
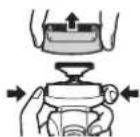
- Press the foil frame release buttons and lift the outer foil section upwards as illustrated.
- Remove the inner blades one at a time as illustrated.
Do not touch the edges (metal parts) of the inner blades to prevent injury to your hand.
- Insert the inner blades one at a time until they click as illustrated.
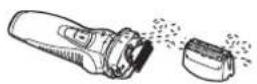
Cleaning with the brush
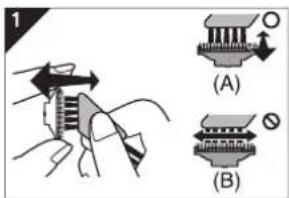
- Clean the inner blades using the short brush by moving it in direction (A).
Clean the outer foil, the shaver body and the trimmer using the long brush.
- Do not move the short brush in direction (B) as it will damage the inner blades and affect their sharpness.
- Do not use the short brush to clean the outer foil.
Removing the built-in rechargeable battery
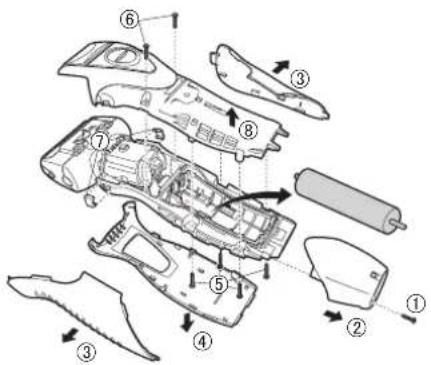
Remove the built-in rechargeable battery before disposing of the shaver. The battery is to be disposed of safely. Please make sure that the battery is disposed of at an officially designated location if there is one. Do not dismantle or replace the battery so that you can use the shaver again. This could cause fire or an electric shock. Replace it at an authorized service centre.
- Remove the shaver from the AC adaptor when removing the battery.
- Press the power switch to turn on the power and then keep the power on until the battery is completely discharged.
- Perform steps ① to ⑧ and lift the battery, and then remove it. • Take care not to short-circuit the positive and negative terminals of the removed battery, and insulate the terminals by applying tape to them.
For environmental protection and recycling of materials This shaver contains a Nickel-Metal Hydride battery. Please make sure that the battery is disposed of at an officially assigned location, if there is one in your country.
Specifications
| Power source See the name plate on the product. | |||
| Motor voltage 1.2 V --- | |||
| Charging time | ES-RW33 | 230 V~ Approx. 11 hours | |
| 220 V~ Approx. 12 hours | |||
| ES-RW31 | 230 V~ Approx. 7 hours | ||
| 220 V~ Approx. 8 hours | |||
| Airborne Acoustical Noise | In shaving mode: 59 (dB (A) re 1 pW) In trimmer mode: 63 (dB (A) re 1 pW) | ||
This product is intended for household use only.
Disposal of Old Equipment and Batteries Only for European Union and countries with recycling systems
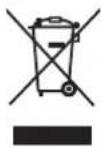
These symbols on the products, packaging, and/or accompanying documents mean that used electrical and electronic products and batteries must not be mixed with general household waste.
For proper treatment, recovery and recycling of old products and used batteries, please take them to applicable collection points in accordance with your national legislation.
By disposing of them correctly, you will help to save valuable resources and prevent any potential negative effects on human health and the environment.
For more information about collection and recycling, please contact your local authority.
Penalties may be applicable for incorrect disposal of this waste, in accordance with national legislation.
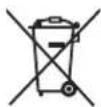
Note for the battery symbol (bottom symbol)
This symbol might be used in combination with a chemical symbol. In this case it complies with the requirement set by the Directive for the chemical involved.
Warning
German
A Protective cap
B Cutting head
8
B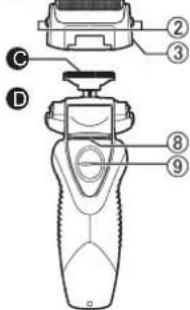
E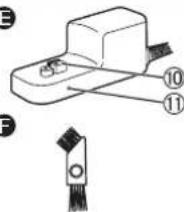
F

G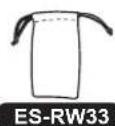
8
B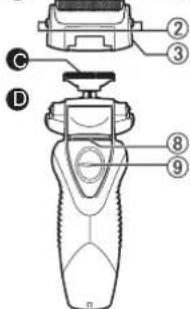
E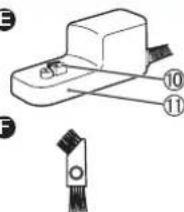
F G

ES-RW33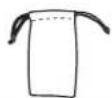
8
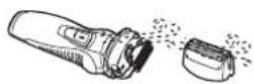
B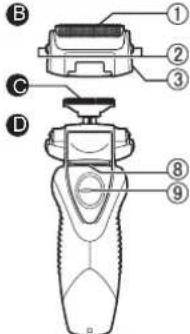
E F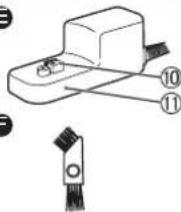
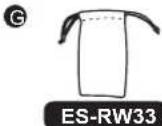
A Protective cap
8
E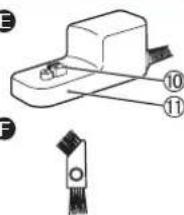
A Protective cap
B Shaving head
8
B D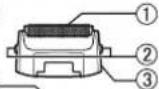
E F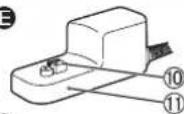

G ES-RW33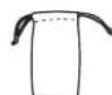
A Protective cap
B External part
8
E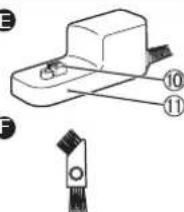
G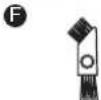
A Protective cover
B Outer blade part
① Outer blade unit ② Lock buttons for outer blade unit ③ Blade frame
© Inner blade
D Main unit
8
B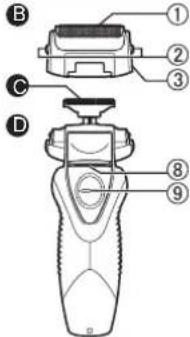
E F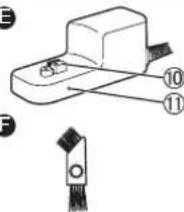
G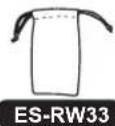
8
E F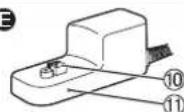

G ES-RW33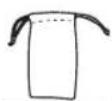
A Protective cover
B Outer foil
① System's outer foil ② Release buttons for the system's outer foil ③ Foil frame
© Inner blades
D Main body
④ Release buttons for the foil frame ⑤ Lock switch button ⑥ Power switch (0/1)
⑦ Plug socket ⑧ Trimmer ⑨ Trimmer handle
E AC adapter (RE7-67)
⑩ Charging contact ⑪ Charger indicator lamp
Accessories
F Cleaning brush
© Travel case
ES-RW33
Charging
8
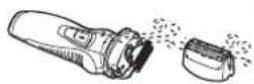
- Unplug the shaver from the AC adapter.
- Apply a little hand soap and water to the outer foil.
- Turn on the shaver.
- Turn off the shaver after 10-20 seconds.
- Remove the outer foil and turn on the shaver.
- Clean the shaver and outer foil with running water.
- Wipe off any water drops with a dry cloth.
- Dry the outer foil and shaver well.
- Put the outer foil back on the shaver.
D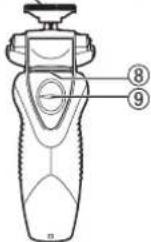
E F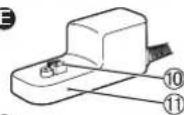

G ES-RW33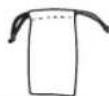
A Protective cap
B Outer foil part
8
B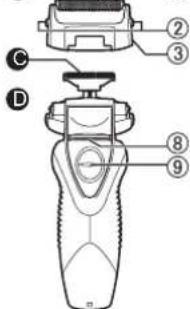
E F G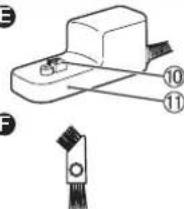
ES-RW33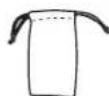
A Protective cover
8
Polish
E F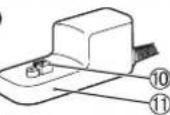

G ES-RW33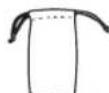
A Protective cover
8
E
G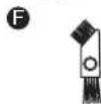
A Protective cover
B Part with outer foil
1 Press the lock switch button and slide the switch 0/1 upward.
8
- Remove the shaver from the power adapter.
- Apply soap and a little water to the outer foil.
- Turn on the shaver.
- After 10 to 20 seconds, turn off the shaver.
- Remove the part with the outer foil and turn on the shaver.
- Clean the shaver and the part with the outer foil under running water.
- Wipe off any remaining water drops with a dry cloth.
- Let the part with the outer foil and the shaver dry thoroughly.
- Attach the part with the outer foil to the shaver.
E F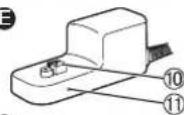

G ES-RW33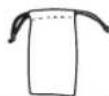
A Protective cap
B Outer foil part
8
E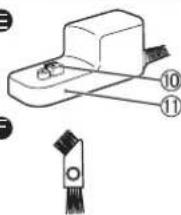
G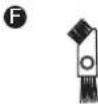
ES-RW33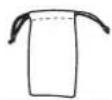
8
E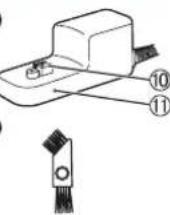
G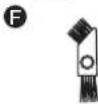
A Protective cover
B Outer sieve
① Outer sieve
8
33, Wanbao North Street, Wanbao Industry Zone, Zhongcun, Panyu District, Guangzhou City, Guangdong Province, China
AUTHORIZED REPRESENTATIVE
Importer:
Tesan İletişim A.Ş.
© EN, GE, FR, IT, SP, DU, PT, SW, DA, NW, FI, PL, CZ, SK, HU, RO, TK
ES9700RW332503 Y0619-10920


- WARNING
- IMPORTANT
- BEFORE USE
- USING THE SHAVER
- CHARGING THE SHAVER
- CLEANING THE SHAVER
- STORING THE SHAVER
- PARTS IDENTIFICATION
- A PROTECTIVE CAP
- B OUTER FOIL SECTION
- © INNER BLADES
- D MAIN BODY
- E AC ADAPTOR (RE7-67)
- ACCESSORIES
- F CLEANING BRUSH
- © TRAVEL POUCH ES-RW
- CHARGING
- USING THE TRIMMER
- CLEANING
- REPLACING THE OUTER FOIL AND THE INNER BLADES
- REPLACING THE INNER BLADES
- CLEANING WITH THE BRUSH
- REMOVING THE BUILT-IN RECHARGEABLE BATTERY
- DISPOSAL OF OLD EQUIPMENT AND BATTERIES ONLY FOR EUROPEAN UNION AND COUNTRIES WITH RECYCLING SYSTEMS
- NOTE FOR THE BATTERY SYMBOL (BOTTOM SYMBOL)
- B CUTTING HEAD
- B SHAVING HEAD
- B EXTERNAL PART
- A PROTECTIVE COVER
- B OUTER BLADE PART
- © INNER BLADE
- D MAIN UNIT
- B OUTER FOIL
- E AC ADAPTER (RE7-67)
- © TRAVEL CASE
- B OUTER FOIL PART
- B PART WITH OUTER FOIL
- B OUTER SIEVE
- AUTHORIZED REPRESENTATIVE
Brand : PANASONIC
Model : ESRW33
Category : Razor