MIG 2042 - Microwave Oven Orbegozo - Free user manual and instructions
Find the device manual for free MIG 2042 Orbegozo in PDF.

User questions about MIG 2042 Orbegozo
0 question about this device. Answer the ones you know or ask your own.
Ask a new question about this device
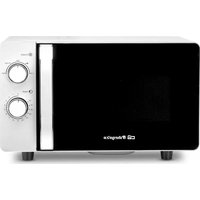
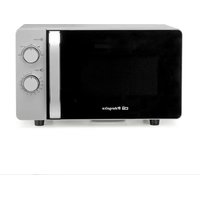
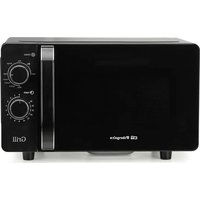
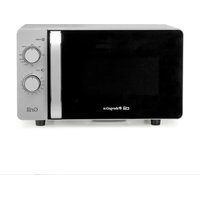
Download the instructions for your Microwave Oven in PDF format for free! Find your manual MIG 2042 - Orbegozo and take your electronic device back in hand. On this page are published all the documents necessary for the use of your device. MIG 2042 by Orbegozo.
USER MANUAL MIG 2042 Orbegozo
Read this manual carefully before running this appliance and save it for reference
IMPORTANT SAFETY INSTRUCTIONS
When using electrical appliance basic safety precautions should be followed, including the following:
WARNING: To reduce the risk of burns, electric shock, fire, injury to persons or exposure to excessive microwave energy:
- This appliance can be used by children aged from 8 years and above and persons with reduced physical, sensory or mental capabilities or lack of experience and knowledge if they have been given supervision or instruction concerning use of the appliance in a safe way and understand the hazards involved. Children must never play with the appliance. Cleaning and user maintenance must never be carried out by children without supervision.
- Children should be supervised to ensure that they do not play with the appliance.
- Keep the appliance and the cable cord out of the reach of children less than 8 years old.
- WARNING: In order to ensure your children's safety, please keep all packaging (plastic bags, boxes, polystyrene
etc.) out of their reach.
- If the supply cord is damaged it must be repaired by the Authorized Service Agent in order to avoid hazards.
- Never pull on the cord when unplugging.
- Do not use the unit with a damaged cord or plug, or if it is not working properly.
- Do not handle the appliance with wet hands.
- Never immerse the appliance in water or any other liquid.
- Make sure the appliance has been unplugged before cleaning.
- This appliance must be installed following the national regulations for electrical installations.
- This appliance is for household use only.
- In case that you need a copy of the instruction manual, you can ask for it writing an email to sonifer@sonifer.es.
- The rear of the appliance should be against the wall.
- WARNING: It is hazardous for anyone other than a trained person to carry out any service or repair operation which involves the removal of any cover which gives protection against exposure to microwave energy.
- WARNING: Liquid or other food must not be heated in
sealed containers since they are liable to explode.
- If smoke is observed, switch off or unplug the appliance and keep the door closed in order to stifle any flames.
- Microwave heating of beverage can result in delayed eruptive boiling, therefore care has to be taken when handling the container.
- The contents of feeding bottles and baby jars should be stirred or shaken and the temperature should be checked before serving in order to avoid burns.
- Eggs in their shell and whole hard-boiled eggs should not be heated in microwave ovens since they may explode even after microwave heating has ended.
- WARNING: If the door or seals are damaged, the oven must not be used until properly repaired by qualified service personnel.
- Use only utensils that are intended for use in microwave ovens.
- When heating food in plastic or paper containers, carefully attend the oven due to the possibility of ignition.
- The intended use of the microwave oven is that of heating beverages and food. The drying of food or clothes
and the warming of pillows, slippers, sponges, damp clothes and similar items may result in injury, ignition or fire.
- The oven must be cleaned regularly and any food residue removed.
- The failure to keep the oven clean could lead to damage in its surface and negatively affect the appliance's performance, leading to a potentially hazardous situation.
- WARNING: Check the oven for any damage, for example, a misaligned or bent door, damaged door seals and sealing surfaces, broken or loose latches or hinges, and dents inside the oven or on the door. If there is any damage, do not operate the oven and contact the qualified service personnel.
- Read these instructions completely before using the microwave.
- Use this appliance only for its intended use as described in this manual. Do not use corrosive chemicals or vapors in this appliance. This type of oven is specifically designed to heat, cook or dry food. It is not designed for industrial or laboratory use.
-
Do not operate the oven when empty.
-
To reduce the risk of fire in the oven cavity:
- Remove wire twist-ties from paper or plastic bags before placing bag in oven.
- Do not use the cavity for storage purposes. Do not leave paper products, cooking utensils or food in the cavity when not in use.
- Do not fry food in the oven. Hot oil can damage oven parts and utensils and even result in skin burns.
- Pierce foods with heavy skins such as potatoes, whole squashes, apples and chestnuts before cooking.
- Cooking utensils may become hot because of heat transferred from the heated food. Potholders may be needed to handle the utensil.
- Utensils should be checked to ensure that they are suitable for use in microwave oven.
- This product is a Group 2 Class B ISM equipment. The definition of Group 2 which contains all ISM (Industrial, Scientific and Medical) equipment in which radio-frequency energy is intentionally generated and/or used in the form of electromagnetic radiation for the treatment of material, and spark erosion equipment. For Class B equipment is equipment suitable for use in domestic
establishments and in establishments directly connected to a low voltage power supply network which supplies buildings used for domestic purpose.
- CAUTION: The surface can remain hot during or after use.
- Do not operate the device connected to an external timer or a separate remote control system.
- WARNING: In case of misuse, there is a risk of possible injury.
SPECIFICATIONS*
| Power Consumption: | |
| 230V/50Hz, 1200W (Microondas) | |
| 900W (Grill) | |
| Rated Microwave Power Output: | 700W |
| Operation Frequency: | 2450MHz |
| Outside Dimensions: | 262mm×452mm×363mm |
| Oven Cavity Dimensions: | 198mm×315mm×297mm |
| Oven Capacity: | 20Litros |
| Cooking Uniformity: | Turntable system |
| Net Weight: | Approx.11.3kg |
INSTALLATION
- Make sure that all the packing materials are removed from the inside of the door.
- WARNING: Check the oven for any damage, such as misaligned or bent door, damaged door seals and sealing surface, broken or loose door hinges and latches and dents inside the cavity or on the door. If there is any damage, do not operate the oven and contact qualified service personnel.
- This microwave oven must be placed on a flat, stable surface to hold its weight and the heaviest food likely to be cooked in the oven.
-
Do not place the oven where heat, moisture, or high humidity are generated, or near combustible materials.
-
For correct operation, the oven must have sufficient airflow. Allow 20cm of space above the oven, 10cm at back and 5cm at both sides. Do not cover or block any openings on the appliance. Do not remove feet.
- The appliance shall be only used on a countertop over 3 feet above the floor.
- Do not operate the oven without glass tray, roller support, and shaft in their proper positions.
- Make sure that the power supply cord is undamaged and does not run under the oven or over any hot or sharp surface.
- The socket must be readily accessible so that it can be easily unplugged in an emergency.
- Do not use the oven outdoors.
RADIO INTERFERENCE
Operation of the microwave oven can cause interference to your radio, TV, or similar equipment. When there is interference, it may be reduced or eliminated by taking the following measures:
- Clean door and sealing surface of the oven.
- Reorient the receiving antenna of radio or television.
- Relocate the microwave oven with respect to the receiver.
- Move the microwave oven away from the receiver.
- Plug the microwave oven into a different outlet so that microwave oven and receiver are on different branch circuits
GROUNDING INSTRUCTIONS
This appliance must be grounded. This oven is equipped with a cord having a grounding wire with a grounding plug. It must be plugged into a wall receptacle that is properly installed and grounded. In the event of an electrical short circuit, grounding reduces risk of electric shock by providing an escape wire for the electric current. It is recommended that a separate circuit serving only the oven be provided. Using a high voltage is dangerous and may result in a fire or other accident causing oven damage.
WARNING Improper use of the grounding plug can result in a risk of electric shock.
Note:
- If you have any questions about the grounding or electrical instructions, consult a qualified electrician or service person.
- Neither the manufacturer nor the dealer can accept any liability for damage to the oven or personal injury resulting from failure to observe the electrical connection procedures.
The wires in this cable main are colored in accordance with the following code:
Green and Yellow = EARTH
Blue = NEUTRAL
Brown = LIVE
MICROWAVE COOKING PRINCIPLES
- Arrange food carefully. Place thickest areas towards outside of dish.
- Watch cooking time. Cook for the shortest amount of time indicated and add more as needed. Food severely overcooked can smoke or ignite.
-
Cover foods while cooking. Covers prevent spattering and help foods to cook evenly.
-
Turn foods over once during microwaving to speed cooking of such foods as chicken and hamburgers. Large items like roasts must be turned over at least once.
- Rearrange foods such as meatballs halfway through cooking both from top to bottom and from the center of the dish to the outside.
BEFORE YOU CALL FOR SERVICE
If the oven fails to operate:
- Check to ensure that the oven is plugged in securely. If it is not, remove the plug from the outlet, wait 10 seconds, and plug it in again securely.
- Check for a blown circuit fuse or a tripped main circuit breaker. If these seem to be operating properly, test the outlet with another appliance.
- Check to ensure that the control panel is programmed correctly and the timer is set.
- Check to ensure that the door is securely closed engaging the door safety lock system. Otherwise, the microwave energy will not flow into the oven.
IF NONE OF THE ABOVE RECTIFIES THE SITUATION, THEN CONTACT A QUALIFIED TECHNICIAN. DO NOT TRY TO ADJUST OR REPAIR THE OVEN YOURSELF
UTENSILS GUIDE
- The ideal material for a microwave utensil is transparent to microwave, it allows energy to pass through the container and heat the food.
- Microwave can not penetrate metal, so metal utensils or dishes with metallic trim should not be used.
- Do not use recycled paper products when microwave cooking, as they may contain small metal fragments which may cause sparks or fires.
- Round or oval dishes rather than square or oblong ones are recommend, as food in corners tends to overcook.
- Narrow strips of aluminum foil may be used to prevent overcooking of exposed areas. But be careful don't use too much and keep a distance of 1 inch (2.54cm) between foil and cavity.
| The list below is a general guide to help you select the correct utensils.Cookware | Microwave | Grill | Combination* |
| Heat-Resistant Glass | Yes | Yes | Yes |
| Non Heat-Resistant Glass | No | No | No |
| Heat-Resistant Ceramics | Yes | Yes | Yes |
| Microwave-Safe Plastic Dish | Yes | No | No |
| Kitchen Paper | Yes | No | No |
| Metal Tray | No | Yes | No |
| Metal Rack | No | Yes | No |
| Aluminum Foil & Foil Container | No | Yes | No |
- Combination: applicable for both "microwave+grill", and "microwave+convection" cooking.
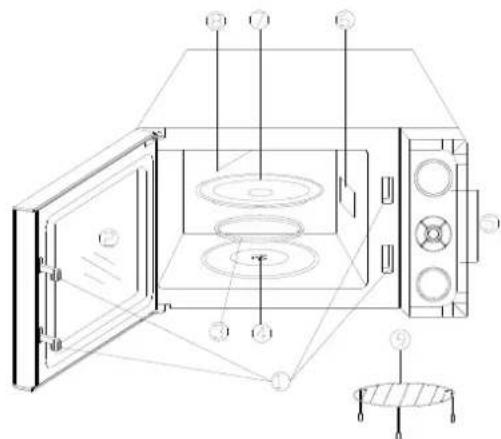
PART NAMES
- Door Safety Lock System
- Oven Window
- Roller Ring
- Shaft
- Control Panel
- Wave Guide (Please do not remove the mica plate covering the wave guide)
- Glass Tray
- Grill Heater
- Metal Rack
CONTROL PANEL
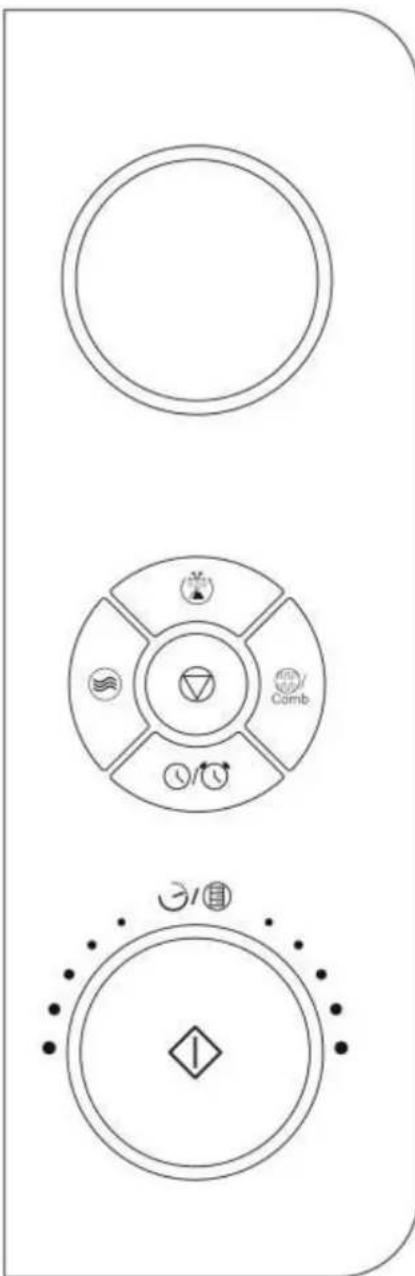
DISPLAY
Cooking time, power, indicators and present time are displayed.
POWER
Use to set power level. To check power level during time cooking, touch POWER pad.
DEFROST (
Touch to set weight defrost program. The defrosting time and power level are automatically set once the weight are programmed.
GRILL/COMB.()

Press this button to access grill cooking mode or one of two combination cooking settings.
CLOCK/TIMER
Use to set the time of day
Use to set the oven timer.
TIME/MENU (3)

Rotate the dial to input popular food menu, clock time, cook time, cook weight.
PAUSE/CANCEL

Touch to clear the selected power level, cook or defrost times that previously programmed.
START/QUICK START (
Touch to start the cooking or defrosting programs.
Touch to set quick start program.
(Pleases also see the following pages for more detail)
HOW TO SET THE OVEN CONTROLS
When the oven first plugged in, beep will sound and the display will show and "1:00".
During cooking, if press PAUSE/CANCEL pad once or open the door, the program will be paused, then press START/QUICK START pad to resume, but if press PAUSE/CANCEL pad twice, the program will be canceled.
After ending cooking, the screen will display End with sound every two minutes until user press any pad or open the door.
The controlling system of the microwave oven has the feature of cooling. As for microwave cooking, grill cooking or combination cooking mode which cooking time above 2 minutes, whether cooking pause mode or finishing cooking, the oven fan will work about 3 minutes automatically to cool the oven for prolonging the life of the oven.
SETTING CLOCK TIME
It is 12/24 hour cycle clock system. In standby mode, press "CLOCK/TIMER" button for 3 seconds, the display shows "Hr 12", it is 12 hour cycle. Press the "CLOCK/TIMER" button again and shows "Hr 24", it is 24 hour cycle.
FOR EXAMPLE: Suppose you want to set the oven clock time to 8:30.
- Press and hold CLOCK/TIMER button to select hours cycle.
- Turn TIME/MENU to indicate the hour digit 8.
- Press CLOCK/TIMER button.
- Turn TIME/MENU dial to indicate the minute digits.
- Press CLOCK/TIMER button to confirm the setting.
QUICK START
Use this feature to program the oven to start at 100% power conveniently. The max time can be set is 10 minutes.
- Place food in the oven. Close the oven door.
- Press START/QUICK START button in quick succession to set the cooking time. The ovens will auto-start immediately. Press START/QUICK START button during cooking to add cook time.
MICROWAVE COOKING
For microwave cooking, just press POWER pad a numbers of time enter cooking power level and then turn the TIME/MENU knob enter cooking time. The longest cooking time is 95 minutes. The oven will start to cook after START/QUICK START pad is pressed.
By pressing POWER repeatedly, you are selecting different microwave power levels as the following table shows:
| Press POWER button | Displa y | Power Level |
| Once | 100 | 100% of total |
| Twice | 90 | 90% |
| 3 times | 80 | 80% |
| 4 times | 70 | 70% |
| 5 times | 60 | 60% |
| 6 times | 50 | 50% |
| 7 times | 40 | 40% |
| 8 times | 30 | 30% |
| 9 times | 20 | 20% |
| 10 times | 10 | 10% |
| 11 times | 00 | 0% |
For example, suppose you want to cook for 10 minute at 60% of microwave power.
- Touches POWER button a number of times to set 60% .
- Turn TIME/MENU knob to 10:00.
- Press START/QUICK START.
NOTE: You can check the microwave power when the program is in progress by pressing POWER.
GRILL
The longest cooking time is 95 minutes. Grill cooking is particularly useful for thin slices of meat, steaks, chops, kebabs, sausages or pieces of chicken. It is also suitable for hot sandwiches and au grain dishes. Suppose you want to grill for 40 minutes.
- In standby mode, touch GRILL/COMB. pad once.
- Rotate TIME/MENU clockwise to enter cooking time.
- Touch START/QUICK START.
COMBINATION
The longest cooking time is 95 minutes.
Combination 1: 30% of the time for cooking with microwaves and 55% for cooking with a grill. Use this function for fish, potatoes or gratin.
Suppose you want to cook with Combination 1 for 25 minutes.
- Touch GRILL/COMB. pad twice, "Co-1" will be displayed.
- Rotate TIME/MENU clockwise to enter cooking time.
- Touch START/QUICK START.
Combination 2: 55% of the time for cooking with microwaves and 45% for cooking with a grill. Use this function to cook desserts, tortillas, roast potatoes or poultry.
Suppose you want to cook with Combination 2 for 12 minutes.
- Touch GRILL/COMB. pad 3 times, "Co-2" will be displayed.
- Rotate TIME/MENU clockwise to enter cooking time.
- Touch START/QUICK START.
DEFROST
Automatically sets proper defrosting cycle once you have selected the weight of the food to be thawed. The weight varies between 100g and 1800g.
Suppose you want to defrost 600g of food.
- In standby mode, press DEFROST pad once.
- Rotate TIME/MENU to choose food weight.
- Touch START/QUICK START.
NOTE: During defrosting, the system will sound to remind you to turn over the food and pause until you press START/QUICK START to resume defrosting.
SETTING THE TIMER
- Press CLOCK/TIMER pad once.
- Turn TIME/MENU to enter timer time. The longest time you can set is 95 minutes.
- Press START/QUICK START button.
NOTE: You can check the countdown time by press CLOCK/TIMER pad and cancel the function by touching PAUSE/CANCEL pad within 5 seconds.
MULTI-STAGE COOKING
Your oven can be programmed for up to 3 automatic cooking sequences .Suppose you want to set the following cooking program:
o,1 Microwave cooking;
,2 Microwave cooking;
。 3 Grill cooking;
- Input the first cooking program, "1S" will be lit. Do not touch START/QUICK START
- Input the second stage cooking program, "2S" will be lit. Do not touch START/QUICK START
- Input the third stage cooking program, "3S" will be lit.
- Press START/QUICK START pad.
NOTE: Quick start, Defrost and Auto menu can't be set in multi-stage cooking.
CHILD LOCK
Use to prevent unsupervised operation of the oven by little children. The child lock indicator will show up on display screen, and the oven cannot be operated while the child lock is set.
To set the child lock: In standby mode, there is not any operation within 1 minute the oven will enter child lock mode and lock indicator lights.
To cancel the child lock: In child lock mode open or close the oven door once can cancel the function and the lock indicator on display goes off.
AUTO COOK
For food or the following cooking mode, it is not necessary to program the duration and the cooking power. It is sufficient to indicate the type of food that you wish to cook as well as the weight of it.
- Rotate TIME/MENU clockwise to select food code (see the table below).
- Press START/QUICK START to confirm.
- Turn the TIME/MENU dial to select food weight or number of servings.
- Press START/QUICK START.
Auto Cook Code/Menu
| Code | Menu | Notes |
| A-1 | Coffee (200ml/cup) | 1. The result of auto cooking depends on factors such as the shape and size of food, voltage fluctuation your personal preference as to the doneness of certain foods and even how well you happen to place food in the oven. If you find the result at any rate not quite satisfactory, please adjust the cooking time a little bit accordingly. |
| A-2 | Potatoes(230g/pot) | |
| A-3 | Spaghetti(g) | |
| A-4 | Fish (g) | |
| A-5 | Chicken (g) | |
| A-6 | Reheat (g) | |
| A-7 | Sponge Cake (g) | 2. For Coffee and potatoes, numbers of choices indicate amount but not weight directly. |
| A-8 | Pizza (g) | 3. For Spaghetti add boiling water before cooking. |
CLEANING AND CARE
- Turn off the oven and remove the power plug from the wall socket before cleaning.
- Keep the inside of the oven clean. When food splatters or spilled liquids adhere to oven walls, wipe with a damp cloth. Mild detergent may be used if the oven gets very dirty. Avoid the use of spray and other harsh cleaners as they may stain, streak or dull the door surface.
- The outside surfaces should be cleaned with a damp cloth. To prevent damage to the operating parts inside the oven, water should not be allowed to seep into the ventilation openings.
- Wipe the both sides of the door and window, the door seals and adjacent parts frequently with a damp cloth to remove any spills or spatters. Do not use abrasive cleaner.
- Do not allow the control panel to become wet. Clean with a soft, damp cloth. When cleaning the control panel, leave oven door open to prevent oven from accidentally turning on.
- If steam accumulates inside or around the outside of the oven door, wipe with a soft cloth. This may
occur when the microwave oven is operated under high humidity condition. And it is normal.
- It is occasionally necessary to remove the glass tray for cleaning. Wash the tray in warm sudsy water or in a dishwasher.
- The roller ring and oven floor should be cleaned regularly to avoid excessive noise. Simply wipe the bottom surface of the oven with mild detergent. The roller ring may be washed in mild sudsy water or dishwasher. When removing the roller ring from cavity floor for cleaning, be sure to replace in the proper position.
- Remove odors from your oven by combining a cup of water with the juice and skin of one lemon in a deep microwaveable bowl, microwave for 5 minutes. Wipe thoroughly and dry with a soft cloth.
- When it becomes necessary to replace the oven light, please consult a dealer to have it replaced.
- The oven should be cleaned regularly and any food deposits removed. Failure to maintain the oven in a clean condition could lead to deterioration of the surface that could adversely affect the life of the appliance and possibly result in a hazardous situation.
- Please do not dispose this appliance into the domestic rubbish bin; it should be disposed to the particular disposal center provided by the municipalities.
- When the microwave oven with grill function is first used, it may produce slight smoke and smell. This is a normal phenomenon because the oven is made of a steel plate coated with lubricating oil, and the new oven will produce fumes and odor generated by burning the lubricating oil. This phenomenon will disappear after a period of using.
DISPOSAL OF OLD ELECTRICAL APPLIANCES
The European directive 2002/96/EC on Waste Electrical and Electronic Equipment (WEEE), requires that old household electrical appliances must not be disposed of in the normal unsorted municipal waste stream. Old appliances must be collected separately in order to optimize the
recovery and recycling of the materials they contain, and reduce the impact on human health and the environment. The crossed out "wheeled bin" symbol on the product reminds you of your obligation, that when you dispose of the appliance, it must be separately collected. Consumers should contact their local authority or retailer for information concerning the correct disposal of their old appliance.
DECLARATION OF CONFORMITY:
This device complies with the requirements of the Low Voltage Directive 2014/35/EU and the requirements of the EMC directive 2014/30/EU.
DECLARATION OF CONFORMITY:
This device complies with the requirements of the Low Voltage Directive 2014/35/EU and the requirements of the EMC directive 2014/30/EU.
It is 12/24 hour cycle clock system. In standby mode, press "CLOCK/TIMER" button for 3 seconds, the display shows "Hr 12", it is 12 hour cycle. Press the "CLOCK/TIMER" button again and shows "Hr 24", it is 24 hour cycle.
FOR EXAMPLE: Suppose you want to set the oven clock time to 8:30.
- Press and hold CLOCK/TIMER button to select hours cycle.
- Turn TIME/MENU to indicate the hour digit 8.
- Press CLOCK/TIMER button.
- Turn TIME/MENU dial to indicate the minute digits.
- Press CLOCK/TIMER button to confirm the setting.