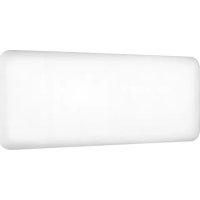
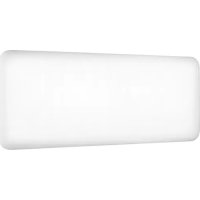
ABH1500WIFI - Pan MILL - Free user manual and instructions
Find the device manual for free ABH1500WIFI MILL in PDF.
User questions about ABH1500WIFI MILL
0 question about this device. Answer the ones you know or ask your own.
Ask a new question about this device
Download the instructions for your Pan in PDF format for free! Find your manual ABH1500WIFI - MILL and take your electronic device back in hand. On this page are published all the documents necessary for the use of your device. ABH1500WIFI by MILL.
USER MANUAL ABH1500WIFI MILL
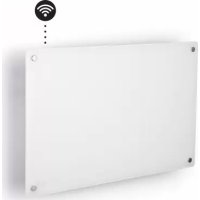
This product is only suitable for well insulated spaces or occasional use.
SLO
Ta izdelek jeprimerenismo za dobro izolirane prostore ali obcasno uporabo.
NL
Please read the instructions carefully before use. Take good care of this manual for later use.
Thanks for buying Mill
Our company was founded in Norway in 1992 by Cato Bryn, specializing in distribution of oil filled radiators and other types of heaters. From 1992 to 2009, we had gained significant knowledge and expertise of different type of heaters, thus enabling us to sell to many of the largest retailers in the Nordic countries.
In 2010, Cato's son, Phillip joined the company. Philip looked at the heating industry with fresh new eyes and wondered why there had been so little change with the appearance of portable heaters in the last 20 years, especially since interior design in general had changed dramatically over the years. Philip thought consumers should have more styles to choose from other than the typical old-fashioned, traditional heaters.
Since heaters are part of so many homes, Philip and Cato decided to use their extensive knowledge to re-invent the design of heaters. They wanted to create beautiful, modern and minimalistic heaters, using the most advanced technology, that would complement people's homes. They launched the brand "Mill" in 2012.
Mill offers revolutionary, innovative Norwegian designs. We are continuously innovating to complement our line of products to meet consumers' demand.
Prospering on our success in the Nordics we decided to promote Mill at some of the world's largest electronic fairs and home shows in 2015 and 2016 - the feedback from retailers and distributors all over the world were amazing. We are proud to say that consumers in over 25 countries can now keep warm with style!
Win a Mill product!
Write a review of the Millheat APP in Google Play or App Store for the chance to win exciting Mill products. The lucky winners will be contacted directly in Google Play or App Store.
Follow us on social media:

fb.com/millheat

@millheat

millheat.com

post@millheat.com
Content
2-3 Important safety information
4 | Specifications
4 Before first use
4 | First use
4 Description of heater
4 Parts
5 Assembly
5 | Temperature calibration
5 | Power indicator
5 | Resetting the heater
5 "Open Window" function
6 Instructions
6 Usage without WiFi connection
7 Timer function without WiFi connection
7 Memory function without WiFi connection
7 | Usage with WiFi connection
8 | Color codes (WiFi control light)
9 Activating WiFi
9 | Deactivating WiFi
9 | Reconnecting WiFi
9 | Delete WiFi settings
9 Memory function with WiFi connection
10 Maintenance
10 Warranty
10 Waste disposal
Please read the instructions carefully before use. Take good care of this manual for later use.
STORE THIS INSTRUCTION MANUAL FOR FUTURE USE!
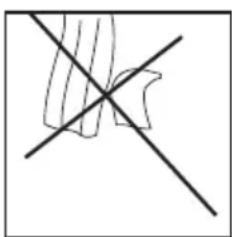
NEVER TOUCH YOUR HEATER OR ITS CASING WITH WET HANDS!
Important safety information
You must obey common safety guidelines when using electrical products, especially in the presence of children.

WARNING! To avoid electric shock or damage due to the heat, always make sure the plug is pulled out before the heater is moved or cleaned.
READ THE INSTRUCTIONS CAREFULLY
- The product is intended for home use only.
- Make sure the heater is connected to the house's regular mains as indicated on the heater.
- New heaters will produce a specific odor when used the first time. This will stop after a short time and is completely harmless.
- Check for any pieces of packing foam or cardboard that may have fallen into the heating elements of the heater. These pieces must be removed to avoid unpleasant odors.
- Prevent the heater from overheating – do not cover.
- Always turn off the heater and unplug it when not used for a long period of time.
- Pay special attention if the heater is used in rooms where children, the handicapped or elderly reside.
- The heater should not be set up directly beneath an electrical socket outlet.
- The cord must not be laid under any kind of carpet. Make sure the cord is laid in such a way that nobody can trip on it.
- The heater must not be used if either the cord or plug is damaged. The heater must not be used if it has been dropped on the floor or is damaged in any other way causing it to malfunction.
- The cord must be repaired by the manufacturer or by an expert if it has been damaged, to avoid dangerous situations.
- Avoid using extension cords, which may overheat and could possibly start a fire.
- Never cover the air vents on the heater. Avoid potential fire hazards by making sure the air intakes are not blocked or covered. The heater should be used in the rooms with normal flat floors.
millheat.com
- The heater should not be installed in close proximity to flammable materials of any kind because there can always be a risk of fire.
- The heater must never be used in rooms where gasoline, paint or other flammable liquids are stored, such as in a garage.
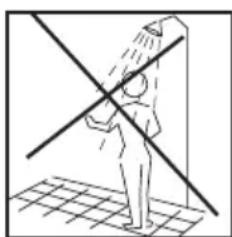
- Never touch an electric heater with wet hands. The heater should be installed so a person showering or taking a bath cannot come into direct contact with it.
- Some parts of this product can become very hot and cause burns. Particular attention has to be given where children and vulnerable people are present.
- The heater must be switched off, the plug removed and the heater must cool down before it is moved.
- Avoid overloading the mains (the circuit) where the heater is connected. The heater may overload the electrical circuit if other electrical devices are plugged into the same socket outlet.
- Do not use this heater in small rooms when they are occupied by persons not capable to leaving the room on their own, unless constant supervision is provided.
- The product cannot be used by children under 8 years of age and persons with reduced physical or mental abilities or lack of experience and knowledge unless they have been given supervision or instruction in the safe use of the product and understand the hazards involved.
- Children should not play with the product. Cleaning and maintenance should not be done by unsupervised children.
Children under the age of 3 should be kept away from the product, unless they are under constant supervision. - Children aged 3 to 8 years are only permitted to turn the product ON/OFF, assuming the heater is mounted according to the assembly instructions and the children have received instruction or supervision in the safe use of the product and understand the hazards involved.
- Do not use this heater in the immediate surroundings of a bath, a shower or a swimming pool.
Specifications
Model Thermostat Color Amperage
Power
(W) Fan WiFi
AB-H1500WIFI
WiFi
White
220 - 240V / 50 - 60Hz
1500
Yes
802.11 b/g/n
Before first use
After unpacking the heater, check to make sure the product was not damaged during transport. Contact the retailer or importer if you discover any visible damages to the product.
Keep the outer packaging to transport the heater in the future. If you want to dispose the packaging, make sure it is done properly. Keep plastic bags away from children.
First use
After turning on the heater for the first time or after an extended period without use, the heater can produce a burnt odor for a short time. This is normal.
Please read all the instructions carefully before use. Save the instruction manual for future use.
It is also normal for the heater to make "sounds" when it warms up or cools down.
Description of heater
See figure 1 on separate illustration sheet
- Heat emission
- LED display
- Control panel
- Thermostat
- ON/OFF
- Legs (aluminium)
Parts
See figure 2 on separate illustration sheet
- 2 rails for the feet
- 2 foot brackets
- 8 screws (pre-mounted)
Assembly
See figure 3 on separate illustration sheet
- The heater should be unplugged during assembly or disassembly.
- Attach the legs to the brackets by tightening 2 screws into each bracket.
- Remove the pre-mounted screws from the bottom of the heater and place the heater gently on its head to mount the feet.
- Two screws must be fastened on each foot bracket.
5. NEVER USE THE HEATER BEFORE THE LEGS HAVE BEEN TIGHTLY SCREWED.
Temperature calibration
See figure 4 on separate illustration sheet
It may occur deviation between the temperature registered by the heater and the actual temperature in the room. This can be caused by several reasons, however, the most common is that the heater is placed in a fair distance from where you usually reside. When you set the temperature to for example 22 degrees Celsius, it is only natural that you expect the same temperature where your sofa is placed for instance. However, the temperature sensor is placed on the product itself, and therefore a deviation in temperature may occur. To adjust this, all Mill heaters are equipped with a calibration function, which enables you to adjust the temperature registered by the heater. N.B! The room must have achieved a stable temperature before any calibration.
Press 2 times and use + or - to set the actual tempeature observed in the room. Confirm with or wait 15 seconds for automatic confirmation.
Power indicator
See figure 5 on separate illustration sheet
When the heater is using power (i.e. when it is heating), the power indicator is lit .
Resetting the heater
See figure 6 on separate illustration sheet
Turn off the heater's main switch. Press and hold while you turn on the heater's main switch.
"Open window" function
The heater has an 'open window' function that is activated instantly when it registers a sudden drop in temperature with more than 2 degrees Celsius in 2 minutes. The heater will automatically stop heating and FO will be visible in the display of the heater.
The heater will automatically start heating again after 10 minutes (the display switch from FO to desired room temperature).
Instructions
Control panel
See figure 7 on separate illustration sheet
- Standby
- Control light WiFi
- Power indicator - shows whether the heater is using power or not
- Desired room temperature
5,6,7 Indicates the output level - Timer function indicator
- Output selector - push the button to change the desired power level. 3 power levels
- WiFi button
- Function button
- Timer activation button
- Thermostat - turn the selector to the left to decrease the temperature, and turn the selector to the right to increase the temperature
WARNING! BE SURE THE FOOT IS FITTED CORRECTLY AND ACCORDING TO THE INSTRUCTIONS BEFORE USING THE HEATER!

If the temperature sensor is not functioning properly, you will see this symbol on the display. Please contact the dealer or importer.
Usage without WiFi connection
See figure 8 on separate illustration sheet
- Plug the heater into a grounded outlet.
- Press OFF/ON button.
- Choose the desired power I, II or III, by pressing the output selector. Turn the thermostat to the desired temperature while looking at the display. As soon as the room temperature drops below this level, the heater will automatically start again. When the room has reached the desired temperature again, the heater will turn itself off.
- The thermostat goes from 5 to 35^
- If you want to change the temperature in the room, repeat step 3.
- The heater has an overheat protection that turns the device off if any parts become extremely hot.
- To turn off the heater, press the OFF/ON button. Should the heater be left unused for a longer period of time, pull out the plug.
Timer function without WiFi connection
See figure 9 on separate illustration sheet
The timer function will turn off the heater after a desired number of hours have passed.
Memory function without WiFi connection
The heater remembers all the temperature settings and will automatically return to the desired temperature after a power cut.
Usage with WiFi connection
A free app is available for downloading for iOS and Android.
By connecting your heaters with the iOS/Android device you can do the following:
- Control all your heaters situated in multiple locations. Everything is controlled with the Millheat-app (with same user).
- Set up weekly programs (or use the standard program already available in the app) by using the 4 modes: Comfort, Sleep, Away and OFF.
- Set individual temperature for different models in each room.
- Override the set programs for the whole house, a specific room or a specific heater. There is no need to edit your program if you get home earlier than normal one day.
- Enable vacation mode for saving energy while you are away. The app will automatically increase the temperature in your house before you get back home.
- Share your house with other family members, making control easy.
- If internet is down one can easily turn off the WiFi on the heaters and control them manually, so that the heaters keep an even temperature throughout the whole day and nigh.
- Many other things.
To download the app search for "millheat" in Appstore or Google Play and install the app on your device.
Before Use
Be aware that the Millheat-app must be installed before you can connect your heaters to your WiFi network. You can then simply follow the instructions given in the app when connecting your heaters. The heaters will connect directly to your router via WiFi with 2,4 Ghz mode b/g/n. Minimum OS requirement: iOS 8.0 and Android 4.0.
Go to our help desk at www.millheat.com for more information or if you have any questions regarding the Millheat-app, connecting to WiFi or other relating questions.
ATTENTION! The heaters will be connected directly to your WiFi router and it is therefore important to make sure the router has sufficient capacity for the number of active devices connected at the same time.
Color codes (WiFi control light)

The heater has not been connected to WiFi. The heater keeps an event temperature throughout the whole day and night.

The heater is online in the Millheat cloud.

(flash)
- The heater's WiFi is deactivated by the user.
- When installing/connecting the Millheat-app and cloud, the light will flash in various speed. This is normal.

(flash)
The heater has a problem connecting to or finding the WiFi signal. Please do the following:
- Please turn the heater OFF and ON again.
- Please restart the WiFi router.
- Please check the WiFi router to make sure the capacity is sufficient for the number of active devices connected at the same time.
- Please make sure 2,4 Ghz is activated. If the problem persists we recommend you to deactivate 5 Ghz during the installation. After the installation 5 Ghz can be activated again.

The heaters are offline and have no contact with the Millheat cloud.
millheat.com
Activating WiFi
See figure 10 on separate illustration sheet
Press «add heater» on the home screen in the Millheat-app. Follow the instructions in the app.
Dectivating WiFi
See figure 11 on separate illustration sheet
Press 1 time on the WiFi button. The heater can now be used as described on page 6 (usage without WiFi connection). Relevant only if WiFi is already installed.
Reconnecting to WiFi
See figure 12 on separate illustration sheet
Press the WiFi button 1 time. Relevant only if WiFi is already installed.
Delete WiFi setting
See figure 13 on separate illustration sheet
Delete WiFi-settings: Press and hold WiFi button for 3 seconds.
The heater can also be reset to the factory settings by doing the following: Turn off the heater's main switch. Press and hold while you switch on the heater's main switch.
Memory function with WiFi connection
When the heater is connected to WiFi, it will automatically reconnect with WiFi (where all temperatures are saved) after a power cut.
Maintenance
- For cleaning, always unplug the heater and leave it to cool.
- Wipe the heater regularly with a damp cloth and dry the surface before turning on the heater again.
- The heater must be cleaned at least once a month during the heating season.
CAUTION! The heater should never be immersed in water.
Avoid using detergents to clean the heater.
Never let any water get inside the heater; this can be hazardous.
- Dust etc. should be removed with a soft cloth.
- The heater can be stored in a dry and clean place.
- If the heater stops working, do not attempt to repair it yourself because it can cause a fire hazard and/or electric shock.
Warranty
The warranty is valid for 2 years. The heater will be replaced during this time should any malfunction occur. The warranty applies if the heater is used according to these instructions, the customer can present a purchase receipt and as long as this product is only used for private household purposes. If the heater malfunctions in any way, please contact the store where it was purchased or the importer.
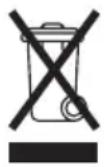
Waste disposal
The symbol indicates that this product is not to be disposed of together with household waste. This product must be delivered to a recycling service or container for electrical appliances and electronic equipment. This is done to avoid health risks and prevent harm to the environment. Local businesses (or the environmental station in your neighborhood) are required by law to accept and recycle such products, as a means of environmentally sound disposal.
mill
Mill International B.V.
De Giesel 5
6081 PG Haelen
The Netherlands
www.millheat.com
post@millheat.com
Vsebina
ATTENTION! The heaters will be connected directly to your WiFi router and it is therefore important to make sure the router has sufficient capacity for the number of active devices connected at the same time.
Kleur codes (WiFi controIe lampje)

De heater is online in de Millheat cloud.

LUGEGE JUHENDIT HOOLIKALT
Värvikoodid (WiFi margututed)