Nespresso Expert M500 - Coffee machine MAGIMIX - Free user manual and instructions
Find the device manual for free Nespresso Expert M500 MAGIMIX in PDF.
User questions about Nespresso Expert M500 MAGIMIX
0 question about this device. Answer the ones you know or ask your own.
Ask a new question about this device
Download the instructions for your Coffee machine in PDF format for free! Find your manual Nespresso Expert M500 - MAGIMIX and take your electronic device back in hand. On this page are published all the documents necessary for the use of your device. Nespresso Expert M500 by MAGIMIX.
USER MANUAL Nespresso Expert M500 MAGIMIX
Get the App / Obtain l'Application

Download the Nespresso App
If you have it already, please update the App.
Telechargez IApplication Nespresso.
To check your device's compatibility, go on www.nespresso.com
Click on the Machine Icon.
Please remember that the Bluetooth® mode must be activated beforehand on your smartphone or tablet.
complete, the Nespresso Light will blink 3 times.
Nespresso is an exclusive system creating the ultimate Espresso, time after time. All Nespresso machines are equipped with a unique extraction system that guarantees up to 19 bar pressure. Each parameter has been calculated with great precision to ensure that all the aromas from each capsule can be extracted, to give the coffee body and create an exceptionally thick and smooth crema.
GUIDE D'UTILISATION
CAUTION: when you see this sign, please refer to the safety precautions to avoid possible harm and damage.
M500 Specifications/M500 Specifications techniques
220-240V-,50-60Hz,1150-1260W
Frequency/ 2.402-2.480 GHz
Frquence: MaxTransmit Power 4dBm / MaxTransmit Power 4dBm

19 bar / 1.9 MPa / Pression maxima: 19 bars / 1.9 MPa

Standard version: -4.4 kg / Version standard: -4.4 kg

-1.111

38.05cm

28.7 cm

Content/Table des matieres
Get the App /Obtenir I'Application 3
Paining / Appairage 3
Specifications / Specifications techniques 5
First use (or after a long period of non-use)/
Settings mode: Reset to Factory Settings /
Settings mode: Emptying the System /
Cleaning/Nettoyage 22
Water Hardness / Durete de I'eau 23
Disposal and Environmental Protection /
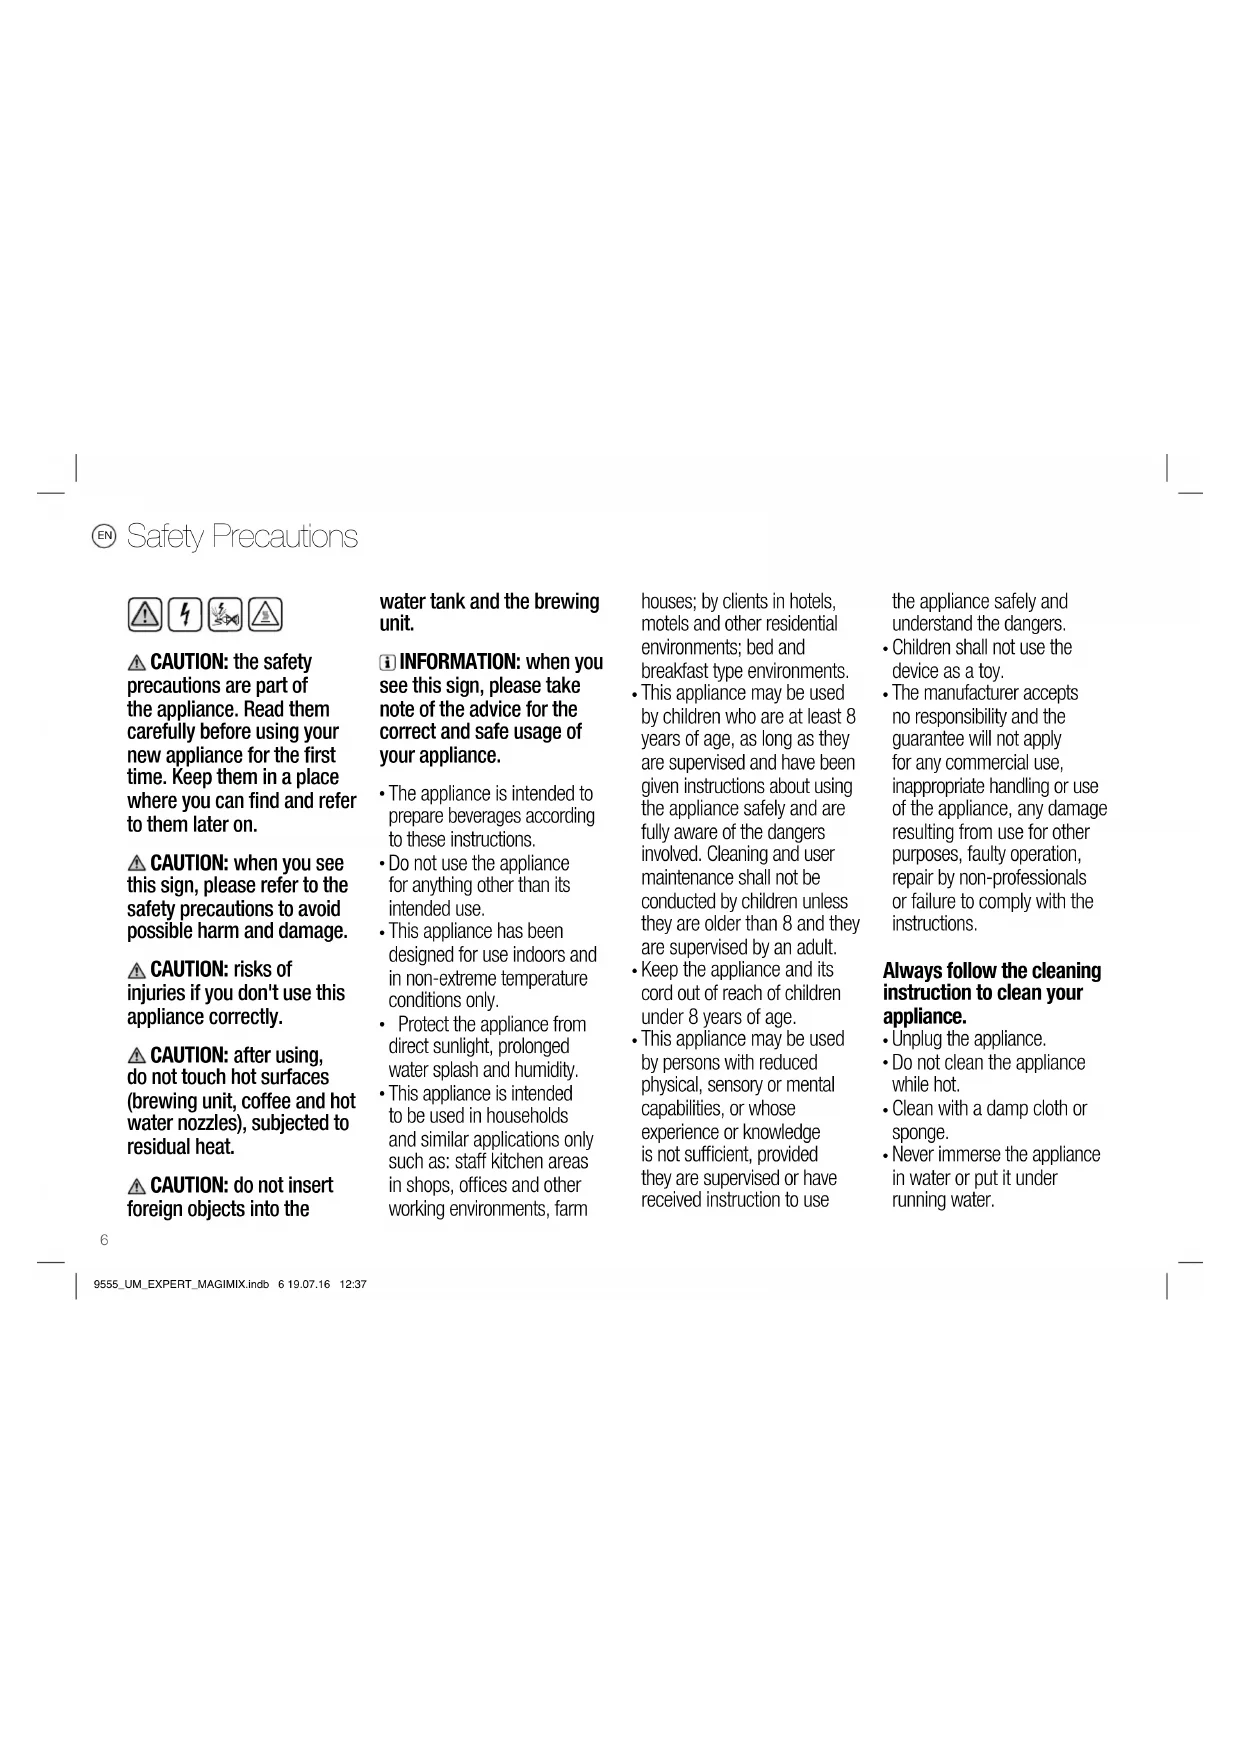
CAUTION: the safety precautions are part of the appliance. Read them carefully before using your new appliance for the first time. Keep them in a place where you can find and refer to them later on.
CAUTION: when you see this sign, please refer to the safety precautions to avoid possible harm and damage.
CAUTION: risks of injuries if you don't use this appliance correctly.
CAUTION: after using, do not touch hot surfaces (brewing unit, coffee and hot water nozzles), subjected to residual heat.
CAUTION: do not insert foreign objects into the
water tank and the brewing unit.
iINFORMATION: when you see this sign, please take note of the advice for the correct and safe usage of your appliance.
- The appliance is intended to prepare beverages according to these instructions.
- Do not use the appliance for anything other than its intended use.
- This appliance has been designed for use indoors and in non-extreme temperature conditions only.
- Protect the appliance from direct sunlight, prolonged water splash and humidity.
- This appliance is intended to be used in households and similar applications only such as: staff kitchen areas in shops, offices and other working environments, farm
houses; by clients in hotels, motels and other residential environments; bed and breakfast type environments.
- This appliance may be used by children who are at least 8 years of age, as long as they are supervised and have been given instructions about using the appliance safely and are fully aware of the dangers involved. Cleaning and user maintenance shall not be conducted by children unless they are older than 8 and they are supervised by an adult.
- Keep the appliance and its cord out of reach of children under 8 years of age.
- This appliance may be used by persons with reduced physical, sensory or mental capabilities, or whose experience or knowledge is not sufficient, provided they are supervised or have received instruction to use
the appliance safely and understand the dangers.
Children shall not use the device as a toy.
- The manufacturer accepts no responsibility and the guarantee will not apply for any commercial use, inappropriate handling or use of the appliance, any damage resulting from use for other purposes, faulty operation, repair by non-professionals or failure to comply with the instructions.
Always follow the cleaning instruction to clean your appliance.
- Unplug the appliance.
- Do not clean the appliance while hot.
- Clean with a damp cloth or sponge.
- Never immerse the appliance in water or put it under running water.
Avoid risk of fatal electric shock and fire.
- In case of an emergency: immediately remove the plug from the power socket.
- Only plug the appliance into suitable, easily accessible, earthed mains connections. Make sure that the voltage of the power source is the same as that specified on the rating plate. The use of an incorrect connection voids the guarantee.
The appliance must only be connected after installation.
- Do not pull the cord over sharp edges, clamp it or allow it to hang down.
- Keep the cord away from heat and damp.
-
If the supply cord is damaged, it must be replaced by the manufacturer, its service agent or similarly qualified persons, in order to avoid all risks.
-
If the cord is damaged, do not operate the appliance. Return the appliance to the Nespresso Club or to a Nespresso authorised representative.
- If an extension cord is required, use only an earthed cord with a conductor cross-section of at least 1.5mm^2 or matching input power.
- To avoid hazardous damage, never place the appliance on or beside hot surfaces such as radiators, stoves, ovens, gas burners, open flame, or similar.
Always place it on a horizontal, stable and even surface. The surface must be resistant to heat and fluids, like water, coffee, descale fluid or similar liquids. - Disconnect the appliance from the mains when not in use for a long period. Disconnect by pulling out the plug and not
by pulling the cord itself or the cord may become damaged.
- Before cleaning and servicing, remove the plug from the mains socket and let the appliance cool down.
- Never touch the cord with wet hands.
- Never immerse the appliance or part of it in water or other liquid.
- Never put the appliance or part of it in a dishwasher.
Electricity and water together is dangerous and can lead to fatal electrical shocks. - Do not open the appliance. Hazardous voltage inside!
- Do not put anything into any openings. Doing so may cause fire or electrical shock!
Avoid possible harm when operating the appliance.
- Never leave the appliance unattended in case of manually operated brewing
mode. In case of preprogrammed or remote brewing mode, additional safety precautions must be undertaken to avoid any possible harm, such as: respect the intended use, make sure the cup of adequate size is placed on the cup support, slider is completed closed, ensure there is water in the water tank and keep the appliance and its cord out of reach of unassisted children or pets.
- Do not use the appliance if it is damaged or not operating perfectly. Immediately remove the plug from the power socket. Contact the Nespresso Club or Nespresso authorised representative for examination, repair or adjustment.
- A damaged appliance can cause electrical shocks, burns and fire.
Always completely close the
EN Safety Precautions
slider and never open it during operation. Scalding may occur.
- Do not put fingers under coffee outlet, risk of scalding.
- Do not put fingers into capsule compartment or the capsule shaft. Danger of injury!
Water could flow around a capsule when not perforated by the blades and damage the appliance. - Never use a damaged or deformed capsule. If a capsule is blocked in the capsule compartment, turn the machine off and unplug it before any operation. Call the Nespresso Club or Nespresso authorised representative.
- Fill the water tank only with fresh potable water.
- Empty water tank if the appliance will not be used for an extended time (holidays, etc.).
- Replace water in water tank when the appliance is not
operated for a weekend or a similar period of time.
- Do not use the appliance without the drip tray and drip grid to avoid spilling any liquid on surrounding surfaces.
- Do not touch hot surfaces. Use handles, protected surfaces or knobs.
- To avoid scalding, keep always the milk frother lid closed during preparation.
- Do not use any strong cleaning agent or solvent cleaner. Use a damp cloth and mild cleaning agent to clean the surface of the appliance.
- To clean machine, use only clean cleaning tools.
- When unpacking the machine, remove the plastic film and dispose.
- This appliance is designed for Nespresso coffee capsules available exclusively through the Nespresso Club or your Nespresso authorised
representative.
- All Nespresso appliances pass stringent controls. Reliability tests under practical conditions are performed randomly on selected units. This can show traces of any previous use.
- Nespresso reserves the right to change instructions without prior notice.
- This machine contains magnets.
Dscaling
- Nespresso descaling agent, when used correctly, helps ensure the proper functioning of your machine over its lifetime and ensures that your coffee experience is as perfect as the first day.
- Nespresso descaling agent has been specifically developed for Nespresso machines; the use of any other descaling agent may
lead to machine component damage or an insufficient.
descaling process.
- Your Nespresso machine calculates when a descale is necessary based on the amount of water used and your water hardness level. This is set at the first use with the help of the water hardness test stick. Make sure to test the water hardness again if you use your machine in another state/region.
Make sure you descale your machine as soon as the machine requests it; a late.
descaling procedure may not be completely efficient.
SAVE THESE INSTRUCTIONS Pass them on to any subsequent user.
This instruction manual is also available as a PDF at nespresso.com
Remove the water tank and capsule container to clean them (see cleaning section).
Adjust the cable length and store the excess under the machine. Ensure machine is in the upright position.
Turn the machine ON by pressing the brewing button, moving the dialas or by opening the slider. Lights will blink. Heating up takes approximately 25-30 seconds. Steady lights: machine is ready.
To connect your machine, please follow the instructions in sections "Get the App" and "Pairing" on page 3. Multiple devices can be connected to your Nespresso Expert machine only if using a unique Club Members number. To pair these additional devices, please follow the instructions in the sections "Get the App" and "Pairing".
Turn the machine OFF by turning the temperature dial anti clockwise until it reaches 0 temperature. The light will blink for 5 seconds before shutting off.
Before making any coffee, make sure to rinse your machine by:
- Placing a container under coffee outlet.
- Close the slider, select the Lungo icon and press the brewing button.
- Repeat three times.
- Select hot water icon and press the brewing button.
- Repeat two times.
- Empty the drip tray.
Fill the water tank with fresh potable water. Place a cup under the coffee outlet.
Open the slider, insert a capsule and close the slider.

Ristretto (25 ml)

Espresso (40 ml)

Americano (25 ml coffee; 125 ml hot water)
Hot water (200 ml)
To select you recipe, tum the beverage dial until the desired beverage. Then select the desired temperature by turning the temperature dial. Push the brewing button on the top of the machine. The coffee will then flow.

To ensure hygienic conditions, it is highly recommended to not reuse a used capsule.

The highest temperature setting is very hot, we recommend to use a cup with a handle.
Preparation will stop automatically. The capsule will eject automatically after 10 seconds.
To manually top up your beverage, press the brewing button within 10 seconds from the end of preparation. For water top-up you may add manually by selecting the water icon on the beverage button. Please note the temperature cannot be changed during the brew.

10 sec
To stop the coffee flow, press the brewing button or slightly move the slider towards the right of the machine. Please note, a manual top-up is not possible in this case.
To change the selected cup size during brewing select the new desired coffee button. The machine will immediately stop if the coffee volume extracted is larger than new desired coffee size.
To accommodate a tall recipe glass, slide the cup support across the metallic base of the machine.
To enter a settings mode:
- Ensure machine is OFF and slider is closed.
- Press the brewing button for 6 seconds.
-Select the relevant dial.
- Press the brewing button.
To exit settings mode:
- The machine goes back to stand-by mode automatically after 30 seconds.
- Open the slider.
Settings mode options:
| Ristretto: Descalng |
| Espresso: Emptying the system |
| Lungo: Reset to factory settings |
| Americano: Water hardness |
| Hot water: Energy savings mode |
| All Lights lit up: Bluetooth* |
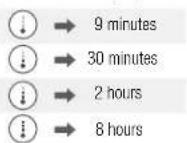
To change automatic OFF mode:
- Enter settings mode and select the hot water icon [ ]
- Press the brewing button for confirmation.
- Use temperature dial to choose desired time.
- Confirm by pressing the brewing button.
You can now program another auto OFF mode:
The selected icon will blink twice to confirm change has been made and then the machine will turn OFF.
Any coffee button can be programmed:
Ristretto: from 15 to 30 ml
Espresso: from 30 to 70 ml
Lungo: from 70 to 130 ml
Americano: coffee from 15 to 110ml hot water from 25 to 300ml
Hot water from 50 to 300 ml
To program Ristretto, Espresso and Lungo volumes:
- Ensure the machine is ON. 2. Open the slider and insert the capsule.
- Close the slider. 4. Select desired coffee and press and hold brewing button.
- Release the button when desired volume is reached. 6. Brewing button will
flash 3 times for confirmation.
To program Americano volume:
- Select Americano recipe and press and hold brewing button until desired
coffee volume is reached. 2. Press and hold again and keep pressed until
desired water volume is reached . 3 . Brewing button will flash once for
confirmation. 4.Water and coffee volume are now stored.
To program water volume
- Select hot water icon and press and hold brewing button until desired water
volume is reached. 2. Water volume is now stored.
Factory settings are:
- Ristretto (25 ml). Espresso (40 ml). Lungo (110 ml). Americano (25 ml). coffee; 125 ml hot water.
Or select the drop icon for hot water (200 ml).
- Automatic OFF mode after 9 minutes.
- The water hardness set by default is hard.
- No device paired.
To do it via your machine:
- Ensure machine is OFF and slider is closed.
- Press brewing button for 6 seconds - both dials will flash to confirm you are in settings mode.
- Select Lungo cup and press brewing button.
The Lunng cup will blink to confirm you have entered this mode.
- To exit this mode without doing a factory reset, push the brewing button. No / Exit;
Yes/Confirm:
- To factory reset, turn temperature dial up to maximum position and press brewing button.
- All lights will blink to confirm.
Non/Quitter: Oui/Confirmer:
Remove the water tank. Place a container under the coffee outlet. Remove, empty and place back the drip tray.
Enter settings mode:
- Press brewing button for 6 seconds - both dials will flash to confirm you are in settings mode.
- Select Espresso and press brewing button - Espresso icon flashes for confirmation.
- To exit this mode without doing a factory reset, push the brewing button. No/ Exit: Yes/ Confirm
- To factory reset, turn temperature dial up to maximum position and press brewing button.
- The emptying process will begin.
- When the procedure is finished, clean the drip tray and the cup support.
- Machine tums to OFF mode automatically when empty.
EN Cleaning/Nettoyage FR
To ensure hygienic conditions, it is highly recommended to empty and clean the used capsule container every day. Par mesure d'hygène, il est fortement recommendé de vider et de nettoyer quotidiennement le bac à capsules usages.
Remove lid and water tank and clean them all with odorless detergent and rinse with warm/ hot water.
- Dry all water tank container parts with a fresh and clean towel, cloth or paper and reassemble all parts.
Clean the surface of the machine, including under the metallic grid, with a damp cloth and odorless detergent.
Never immerse the appliance or part of it in water or any other liquid.
The water hardness level can be tested with the water hardness stick available on the first page of the user manual. To enter the water hardness mode:
- Ensure machine is OFF and slider is closed.
- Press brew button 6 seconds, both dials will flash for confirmation.
- Select Americano icon, press brew buton, Americano icon will flash for confirmation.
- Use the temperature dial to select the appropriate level.
- Once done, press brew button for confirmation
- The machine will exit setting mode and turn off.
French degree Degre francais German Grade
dH Degre alemand CaCO3 Calciun Carbonate Carbonate de calcium
A strong use of Americano or hot water function may lead to an earlier descaling.
Read the safety precautions on the descending package and refer to the table for the frequency of use. The descending solution can be harmful. Avoid contact with eyes, skin and surfaces. Never use any product other than the Nespresso descaling kit available at the Nespresso Club to avoid damage to your machine. Please refer to the table on the "water hardness" section that indicates the descending frequency required for the optimum performance of your machine, based on water hardness. For any additional questions you may have regarding descending, please contact the Nespresso Club.
To exit the descending mode before final validation with the temperature dial, open slider or machine goes back to stand-by mode automatically after 30 seconds.
Duration approximately 20 minutes.
Durée approximative: 20 minutes.

empty the drip tray and the used capsule container.
Fill the water tank with 2 units of Nespresso descending liquid and add potable water up to the max level.
Place a container (minimum volume: 1.2 L) under the coffee outlet.
To enter the descending mode: Ensure machine is OFF and slider is closed. Press brewing button for 6 seconds - both dials will flash for confirmation. On the recipe dial, select Ristretto icon, press brewing button to validate selection. Then, on the temperature dial, select high level "1" to confirm or lower level "0" to cancel, press brewing button to validate choice. Ristretto icon blinks to confirm you are in descending mode.
Ristretto icon will blink during the entire descending process. Maintenance light will be steady ON while machine is automatically proceeding. Maintenance light will blink when a manual user action is required.
Rinse the water tank, drip tray and cup support thoroughly to avoid any residue.
7 Refill the water tank with 1.2 L fresh potable water.
Press brewing button to start the descending cycle; descending agent will flow through the coffee and hot water outlets. When machine stops and maintenance light blinks, remove and empty the drip tray and place back. Push brewing button again. Machine will stop when water tank is empty.
Throughout the descending process you can pause at any time by pressing the brewing button (e.g. to empty and place back your container). Continue by pressing the brew button again.
Press brewing button to start rinsing the machine, pump will run. Machine will stop automatically when the water tank is empty. Remove and empty the drip tray and place back. The machine will automatically switch OFF when the descending process is done. The machine is now ready for use.
If maintenance light continues to blink after rinsing it means less than 1.2 L water was added. Repeat step 7.
i Videos are available on the App and on www.nespresso.com - Go to section "services".
| Pairing has not succeeded. - Check that theBluetooth® on the smartphone or tablet is activated. - Check the compatibility of your smartphone or tablet with the machine (see page 3). | - Ensure the smartphone or tablet is placed next to the machine (max distance 20 cm) during the pairing. - Make sure to not turn ON any microwave close to the machine during pairing. |
| If you want to unpair your machine, via the App. | - Note: In case of an unpairing, all the setups and specifications will be lost and the machine will be reset to factory settings. |
| No lights on the coffee machine. | - Check the mains: plug, voltage, fuse. |
| No coffee, no water, unusual coffee flow. | - Descale it if necessary. |
| Coffee is not hot enough. - Preheat cup. - Descale the machine if necessary. | |
| The slider does not close completely or the machine doesn't start brewing. | - Empty the capsule container. - Check that no capsule is blocked inside the machine. (Note: do not put the finger inside the machine) |
| Leakage (water under the machine). - Unplug the machine. | - If problem persists, call the Nespresso Club. |
| Maintenance light is ON. | - Brew button light ON and maintenance LED slow blinking means descaling is required. - Brew button is OFF and maintenance LED is ON means water tank is empty and/or capsule tray full. - If problem persists, call the Nespresso Club. |
| Nespresso light is ON. | - It means your capsule stock is empty. You can order capsules via the App or Nespresso website. |
| Machine overheating or in an environment below 0°. | - Temperature button will blink fast. Please wait for all buttons to switch off, this will take a few minutes. During this time the machine cannot be used. |
| Water or coffee flow does not stop even when pushing the brewing button. | - Gently move the slider towards the back of the machine to stop the flow. Hot water flow always stops a short time after pressing the brewing button to stop, this is a normal behavior not a troubleshooting. |
| No coffee flow, water goes directly into the drip tray (despite inserted capsule). | - Pull the slider to ensure it is closed. - If problem persists, call the Nespresso Club. |
| Machine turns to OFF mode. | - To save energy the machine will turn to OFF mode after 9 minutes of non-use. - See paragraph on "Energy Saving Concept". |
| Capsule container and drip tray are stuck. | - Use the hole underneath the machine to manually push out the container. - Clean the capsule container, the drip tray and the insert. |
Dépannage

As we may not have foreseen all uses of your appliance, should you need any additional information, in case of problems or simply to seek advice, call the Nespresso Club or your Nespresso authorised representative. Contact details for your Nespresso Club or your Nespresso authorised representative can be found in the "Welcome to Nespresso" folder in your machine box or at nespresso.com
This appliance complies with the EU Directive 2012/19/EC. Packaging materials and appliance contain recyclable materials. Your appliance contains valuable materials that can be recovered or can be recycled. Separation of the remaining waste materials into different types facilitates the recycling of valuable raw materials. Leave the appliance at a collection point. You can obtain information on disposal from your local authorities. To know more about Nespresso sustainability strategy, go to www.nespresso.com/positive
UK & ROI. Should your machine have a genuine manufacturing fault, you must return it to the retailer within 28 days of purchase. Outside of 28 days, please contact Nespresso on 0800 442 442. Your machine is guaranteed for 3 years for parts and labour from the date of purchase. To take advantage of this guarantee, you must present your proof of purchase. This guarantee excludes damage resulting from: a fall or impact, incorrect handling not in compliance with the instructions for use, insufficient Non aftercare or cleaning, external events (fire, flood, etc.), commercial use (including small offices). Under no circumstances shall the application of this guarantee give rise to the complete replacement of the machine or entitle the consumer to damages. The guarantee period commences from the date of purchase and will not be extended due to any claims made during this period. This warranty is valid only in the country of purchase or in such other countries where Magimix sells or services the same model with identical technical specifications.
www.nespresso.com/positive