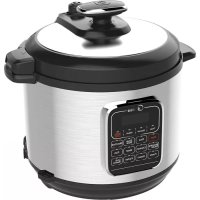
MSC176TGDIP - Saucepan MIDEA - Free user manual and instructions
Find the device manual for free MSC176TGDIP MIDEA in PDF.

| Product Type | Programmable Slow Cooker |
| Brand | Midea |
| Model | MSC176TGDIP |
| Pot Material | Ceramic |
| Lid Material | Glass |
| Cooking Modes | Low, Medium, High, Keep Warm |
| Programmable Timer | From 30 minutes to 10 hours |
| Keep Warm Function | Yes, default 6 hours |
| Lid Lock | Yes, via levers and pins |
| Side Handles | Yes |
| Power Supply | 120 V, 60 Hz (North American model) |
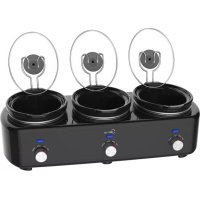
| Included Accessories | Ceramic pot, glass lid, 0.6 L mini slow cooker with glass lid |
| Pot and Lid Cleaning | Dishwasher safe or hand wash |
| Base Cleaning | Wipe with a damp cloth, do not immerse |
| Intended Use | Household use only |
| Safety | Do not expose to sudden temperature changes; use oven mitts |
| Mini Slow Cooker | 0.6 L capacity (thermal basket) for sauces and chocolate |
| Number of manual pages | 45 pages |
Frequently Asked Questions - MSC176TGDIP MIDEA
User questions about MSC176TGDIP MIDEA
0 question about this device. Answer the ones you know or ask your own.
Ask a new question about this device
Download the instructions for your Saucepan in PDF format for free! Find your manual MSC176TGDIP - MIDEA and take your electronic device back in hand. On this page are published all the documents necessary for the use of your device. MSC176TGDIP by MIDEA.
USER MANUAL MSC176TGDIP MIDEA
natural_image
Line drawing of a Midea rice cooker with digital display and control buttons (no text or symbols on main body)MSC176TGDIP
MD-YHB06
Please read the manual carefully before operating your product.
Retain it for future reference.
IMPORTANT SAFEGUARDES
When using your electrical appliances, basic safety precautions should always be followed to reduce the risk of fire, electric hazard and injury to persons, including the following.
- Read All Instructions.
- Do not touch hot surface. Use handles or buttons of control panel. The unit body will become very hot during long-time using, handle it carefully.
- CAUTION: To reduce the risk or electric shock, cook only in removable container.
- Close supervision is necessary when any appliance is used by or near children.
- To protect against electrical shock, do not immerse cord, plug, or cooker body in water or other liquid.
- Do not add too much water beyond the edge of the porcelain inner pot, or the water will flow out during cooking.
- Unplug from outlet when do not in use and before cleaning. Allow to cool before putting on or taking off parts, and before cleaning the appliance.
- Do not operate any appliance with a damaged cord or plug or after the appliance malfunctions or has been damaged in any manner. Return appliance to the nearest authorized service facility for examination, repair, or adjustment.
- The use of accessory attachment not recommended by the appliance manufacturer may cause injuries.
- Intended for countertop use only.
- Do not use the appliance for other than intended use.
- Do not use outdoors.
- Extreme caution must be used when moving an appliance containing hot oil or other hot liquids.
- Do not let cord hang over edge of table and counter, or touch hot surface.
- A short power-supply cord is used to reduce the risk resulting from it being grabbed by children, becoming entangled in, or tripping over a longer cord.
- WARNING: Spilled food can cause serious burns. Keep appliance and cord away from children. Never drape cord over edge of counter, never use outlet below counter, and never use with an extension cord.
- Prior to first use, please make sure that the electric rating of the appliance is in conformity with the current electric rating.
- To disconnect, turn any control to "off", then remove plug from wall outlet.
- DO NOT place unit on or near a hot gas or electric burner, or in a heated oven.
-
Do NOT add frozen food to ceramic cooking vessels when cooking vessels are HOT. DO NOT rinse with COLD water when ceramic cooking vessel is HOT.
-
DO NOT uncover the lid when in cooking, otherwise the heat will run out and more cook time will be needed.
- To reduce the risk or electric shock, cook only in removable container.
DO NOT cooking food directly in the Aluminum pot. - DO NOT place the ceramic inner pot on gas stove.
- To avoid any cracks or spoilage that may bring to the slow cooker, proper maintenance is necessary.
- The appliance has a polarized plug (one blade is wider than the other). To reduce the risk of electric shock, this plug is intended to fit into a polarized outlet only one way. If the plug does not fit fully into the outlet, reverse the plug. If it still does not fit, contact a qualified electrician. Do not attempt to modify the plug in any way.
- Important: only carry the slow cooker from the side handles on the cooking base.
Do NOT carry from the handle on the lid, even when locked. - HOUSEHOLD USE ONLY.
SAVE THESE INSTRUCTIONS
INTRODUCTION
The Programmable Slow Cooker is an attractive, convenient and easy to use appliance that will help you prepare meals for the whole family with minimum effort. The Oval Ceramic Casserole and Glass Lid double as a handy Casserole so the meal can be brought right to the table. They are dishwasher safe for easy clean ups.
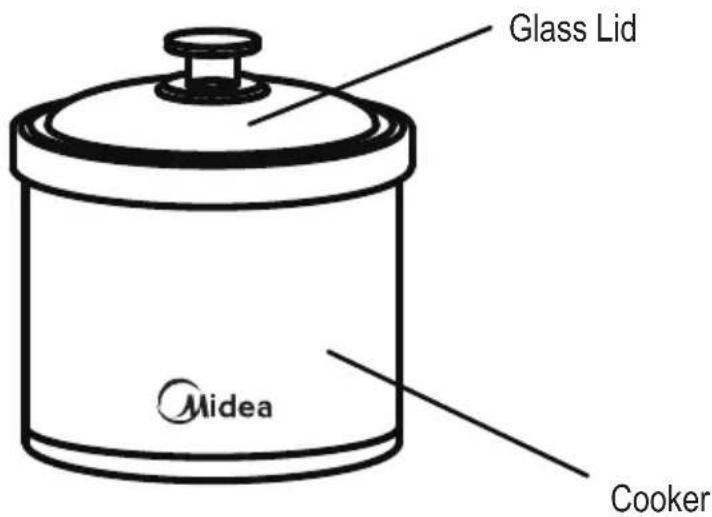
DESCRIPTION OF PARTS
- Lid Handle
- Glass Lid
- Locking Lever
- Locking Wire
- Ceramic Casserole
- Hook
- Side Handle
- Cooking base
- Electronic Control
a) Digital Display
b) Cook Mode
c) Cook Time Button
d) STOP Button
e)Indicator lights
(LOW,MEDIUM,HIGH&WARM)

BEFORE FIRST USE
- Unpack and remove all parts and packaging materials from the carton.
• DO NOT plug the power cord into any outlet before reading these instructions. - Wash the Casserole and Lid in warm, soapy water. Rinse and dry thoroughly.
-
Wipe the interior and exterior of the Base with a clean, damp cloth. Dry thoroughly with a soft polishing cloth.
-
Place the Slow Cooker on a level, dry surface. Place Casserole in Base and add 2 cups (500 ml) of water. Cover with Lid and plug cord into wall outlet. Follow the instructions in the "How to Use the Slow Cooker" section and allow the unit to cook on high for 30 minutes.
- Once the time has elapsed, push the Stop Button, unplug the Slow Cooker and allow it to cool. Remove the Casserole and discard water.
- Rinse Casserole and Lid. Dry thoroughly and place back in the Base.
NOTE:
DO NOT use harsh detergents or abrasive cleansers on any parts of the appliance.
DO NOT immerse the Base or power cord and plug in water or any other liquid.
HOW TO USE CERAMIC CASSEROLE
IMPORTANT PRECAUTIONS: Like any ceramic, the Casserole may crack or break if not handled properly resulting in injury or property damage.
To prevent damage to the Casserole:
• Always handle with care as all ceramic is breakable.
• Always use potholders when handling hot containers.
• DO NOT place hot Ceramic Casserole on counter. Use heat resistant trivet.
• DO NOT place Ceramic Casserole or Lid on range top burner, under a broiling or microwave browning element or in a toaster oven.
• DO NOT place hot Ceramic Casserole or Lid in a sink or on cold wet surfaces.
- DO NOT use the Ceramic Casserole to pop corn, caramelize sugar or make candy.
- DO NOT use abrasive cleansers or scouring pads or any object that could scratch the Ceramic Casserole or Lid.
• DO NOT repair or use if any part is chipped, cracked or broken.
* DO NOT use the ceramic casserole to freezer, oven, and gas stove.
* DO NOT submerge cooker base in water or wash in dishwasher. WIPE CLEAN ONLY.
* DO NOT use the ceramic casserole to freezer, oven, and gas stove. * DO NOT submerge cooker base in water or wash in dishwasher. WIPE CLEAN ONLY.
USE: Both the Glass Lid and Ceramic Casserole can be cleaned in a dishwasher.
CARE: Use only wooden or plastic utensils. Metal utensils can scratch or mark the ceramic. The Casserole can be washed by hand or in a dishwasher.
DO NOT allow the Ceramic Casserole to soak or stand in water for an extended period of time. Heating the Casserole after soaking may cause the surface to crack. If scouring is required use only plastic or nylon pads with non-abrasive cleansers.
- NEVER subject the Casserole to sudden temperature changes such as moving it from the refrigerator directly into the oven or immersing it in water when it is hot.
• NEVER add cold water to a hot Ceramic Casserole. - NEVER place it in contact with direct intense heat such as on a range burner or under a broiler element.
• NEVER heat the Casserole when it is empty. NEVER preheat the Base.
• NEVER add cold food from the refrigerator directly to the Casserole.
• ALWAYS unplug the Base and allow the Casserole to cool before cleaning.
HOW TO USE THE GLASS LID
IMPORTANT PRECAUTIONS: The Glass Lid may shatter if exposed to direct heat or sudden temperature changes. Chips, cracks or deep scratches may also weaken the Lid. If the Lid becomes chipped, cracked or scratched, do not use it. Discard it and order a replacement.
ALWAYS allow Lid to cool on a dry heat resistant surface before handling.
NEVER place it on a cold or wet surface as this may cause it to crack or shatter.
NEVER uses the Glass Lid in a conventional, convection or microwave oven.
HOW TO USE SLOW COOKER
A Slow Cooker is easy to use but it is different from conventional cooking. This booklet is intended to be used as a general guideline and contains several suggestions and helpful hints for successful slow cooking. One of the benefits of slow cooking is that meals can be prepared in advance and the cooking time can be set so that the food is ready to serve at the appropriate time. There is an abundance of recipes specifically designed for slow cooking that can be easily found on the internet or in recipe books in your local bookstores and libraries.
- Place the Ceramic Casserole in Slow cooker base. Then place the lid on top.
- Fully extend locking levers outward. Then swing the locking wires down and into hooks.
- Lock the locking levers by pushing them toward the center of the lid and down.
Caution: Keep fingers away from locking wire to avoid pinching injury.
-
To unlock, pull the locking levers on the lid outward into the open position and unhook wires.
-
Plug unit into the wall outlet. The digital display will flash "----".
-
Press the Cook Mode Button to select Low, Medium, High or Warm. (Press once for Low, twice for Medium, 3 times for High and 4 times for Warm) The default setting of 6 hours (6:00) will be shown in the Digital Display if you have selected Low, Medium, High or Warm. After 3 seconds the Indicator Light will illuminate beside Low, Medium, High or Warm, depending on your selected setting.
-
Set the required amount of time by pressing the "Cook Time" Button. Each time you press the Cook Time Button the time will increase by 30 minutes, to a maximum of 10 hours. If you don't press the Cook Time Button for 3 seconds the cooking time will be the time showing in the Display Window.
NOTE: If you would prefer less cooking time than the default setting of 6 hours, continue to press the Cook Time Button past 10 hours and the Cook Time will display 30 minutes. Press to increase the time by 30 minute increments.
-
Once the Cooking Time is finished, the unit will switch to "Warm." The default time of the Warm cycle is 6 hours. NOTE: If you would prefer less warming time that the default 6 hours, continue to press the Cook Time Button past 10 hours and Cook Time will display 30 minutes. Press to increase the time by 30 minute increments.
-
Once the warming time has elapsed, the slow cooker automatically switches Off. The indicator lights will go out and the Digital Display shows "----". Unplug the Slow Cooker from the wall outlet.
NOTE: To stop heating during the cooking process, press the Stop Button. The Digital Display blinks "----". Unplug the Slow Cooker.
• Always slow cook with the lid on. It is OK to have the lid locked during cooking, but not necessary.
- Do not open lid during first 2 hours of cooking; this allows heat to rise efficiently.
- Open the lid as little as possible to assure even cooking. Every time the lid is removed, the cooking time increases by 15–20 minutes.
• Stirring is not required while slow cooking. However, when cooking on High, stirring occasionally will help distribute flavours.
• For best results the Casserole should be at least half full.
- For soups and stews, leave a 2" (5 cm) space between the food and the top to allow ingredients to simmer. When cooking on High setting, keep checking from time to time as some soups and stews may come to a boil.
- When slow cooking it is more appropriate to use less tender, cheaper cuts of meat than the more expensive varieties. Remove excess fat before cooking and if called for, brown the meat on a range top using a metal frypan before adding meat to the Casserole.
- The greater the fat content in the meat the less liquid is required. When cooking meat with high fat content, place thick slices of onion under the meat so that it will not sit and cook in the fat. Roasts, when cooked on Low, may be prepared without adding any liquid.
- Use a meat thermometer to determine if the meat has been cooked to your taste.
- Fresh or thawed fish or seafood should be added to the Casserole only 1 hour before serving as they can fall apart during prolonged cooking.
- Since raw vegetables take longer to cook than meat, cut them into small pieces 1/2" (12mm) diameter before adding to Casserole.
- Milk, sour cream or other dairy products should be added just before serving as these tend to break down during prolonged cooking. You may substitute condensed milk or evaporated milk. Processed cheese may also be used instead of naturally aged cheese.
- Rice and pasta may be cooked separately or added uncooked to the ingredients no more than two hours before serving. If the pasta is uncooked there should be at least 2 cups (500 ml) of liquid in the Casserole. Stir occasionally to prevent pieces from sticking together.
- To thicken juices or make gravy at the end of the cooking cycle, make a smooth mixture of 2 to 4 tbsps. (30 – 60 ml) of cornstarch, 1/4 cup (60 ml) of water, and 2 tbsp. (30 ml) of butter. Remove cooked food from Casserole. Add the mixture to the juices remaining in the Casserole, set to High and stir until liquid thickens.
- Do not worry if the food remains in the Slow Cooker longer than planned. The Slow Cooker cooks very slowly and will be very forgiving if you are running a little late.
GENERAL RECIPE INSTRUCTIONS
- Prepare recipe according to directions.
- Place food in Ceramic Casserole and cover with Lid.
- Use the following chart to help adapt your favorite recipes to the Slow Cooker. These times are approximate and should be used only as general guidelines.
TIME CONVERSION CHART
| Regular cooking | Slow Cooker Time | ||
| Time | Low | Medium | High |
| 30 minutes | 7–8 hours | 5-6 hours | 3–4 hours |
| 35 – 60 minutes | 8–9 hours | 6-7 hours | 4–5 hours |
| 1 – 3 hours | 9–10 hours | 7-8 hours | 5–6 hours |
- Follow the instructions in the "How to Use the Slow Cooker" section.
- Using a potholder or oven mitt, carefully remove Lid. CAUTION: When removing Lid, grasp the knob and slowly lift the side that is away from you to allow the steam to escape before setting the Lid aside. To avoid burns, always hold the Lid so that escaping steam flows away from your hands, arms and face.
- Using potholders or oven mitts grasp the Ceramic Casserole by the handles on either end and remove from the Base.
- Always place a trivet under the Casserole before placing on table or countertop. Serve contents.
HELPFUL HINTS FOR ADAPTING RECIPES
- The Low setting is recommended for all day cooking. Most meat and vegetable combinations require at least 7 hours on Low.
- For best flavour use whole leaf herbs and spice during the initial preparation. If ground herbs and spices are used, stir in during the last hour of cooking.
- The time required to cook is affected by many factors. The water and fat content of the food, its starting temperature, and the size of the pieces will all affect the cooking time. For example, meat cut into pieces will cook faster than a whole roast. Adjust the time accordingly.
- Recipes for vegetable casseroles must contain liquid to prevent scorching of the sides of the Casserole.
- You may choose to substitute ingredients in a recipe. For example, a 12 oz. can of chicken broth could be replaced by a 10 oz. can of tomato soup and 2 oz. of another liquid such as water or wine.
- Canned beans may be added directly to any recipe. However, dried beans (especially red kidney beans) should be soaked in water and boiled first. After boiling in 3 times their volume of unsalted water, discard water and add beans to recipe. NOTE: Beans must be softened completely before they are combined with sugary and/or acidic foods, as these have a hardening effect on beans. In this case, beans should be allowed to simmer until tender after boiling (about 1-1/2 hours).
CARE AND CLEANING
- This appliance should be cleaned after every use. Before cleaning unplug the Base and allow the appliance to cool. DO NOT use harsh detergents or abrasive cleansers on any part of the appliance.
- Wash the Casserole and Lid in warm soapy water. Rinse well and dry. If food sticks to the surface of the Casserole, fill it with warm soapy water and let stand for an hour before cleaning. Casserole and Lid may be washed in a dishwasher. To prevent damage place them carefully in a rack so that they do not touch each other or any other object during the cleaning cycles.
- Wipe exterior and interior of Base with soft damp cloth. Dry with a soft cloth. DO NOT immerse the Base or power cord and plug in water or any other liquid.
- To remove any stains from the Ceramic Casserole clean with non-abrasive cleanser or apply a thin paste of baking soda to the affected areas. To remove water spots or mineral deposits wipe with distilled white vinegar. Clean in warm soapy water, rinse and wipe dry with a soft cloth.
- Store all parts of the Slow Cooker only once they are clean and dry. Never store when the Casserole is wet. To store, place Casserole inside Base and wrap Lid in a soft cloth or towel before storing upside down on the Casserole. Never wrap the power cord around the Base.
0.6Qt Warmer Crock
(Mini Slow Cooker)
Using Your 0.6Qt Warmer Crock
0.6Qt Warmer Crock is designed for heating and keeping your favourite dips, sauces and gravies at the perfect serving temperature.
It is important to note that this unit is not for use with uncooked meats. If your recipe includes meat, you must ensure the food is fully cooked through before placing in the mini slow cooker.
- Fill the mini crock with the prepared dip, sauce, gravy or chocolate. Do not fill over 1-1/4 cups(300ml). Cover the unit with the glass lid.
- Plug your mini slow cooker into a 120V 60Hz AC-only outlet.
- Heat the food for 15-60 minutes or until the dip, sauce, gravy or chocolate is completely melted. It is important to stir the contents of the mini slow cooker occasionally while heating or melting to ensure even heat distribution.
- Remove the cover for serving. The dip will maintain the perfect serving temperature. Stir occasionally.
NOTE: We do not recommend using your mini slow cooker for serving for longer than 3 hours.
Cleaning Your 0.6Qt Warmer Crock
Always ensure the slow cooker is unplugged and cool before cleaning.IMPORTANT: The interior crock will not withstand the shock of sudden temperature changes.To wash your mini slow cooker right after cooling.use hot water.NEVER use cold water if the crock is still hot.
NOTE: your mini slow cooker does not have a removable crock. It is important to take special cage to ensure the base, cord and housing does not get immersed in water while cleaning.
After emptying the contents of the mini slow cooker, fill the crock with hot or warm soapy water to loosen food remains. For best results, allow the unit to soak for 15-30 minutes. Remove the warm soapy water and wash the inside of the crock carefully. Use a cloth, nylon covered mesh sponge or rubber spatula to gently scrape out the food residue. Rinse the crock and dry thoroughly.
Do not use abrasive cleaners or metal scoring pads on any part of the mini slow cooker.
You may wash the glass lid in warm soapy water. Rinse and dry thoroughly.
Wipe the outside of the mini slow cooker with a clean damp cloth and dry with a soft dry cloth.
RECIPES
BEEF POT ROAST
| 3 lb. (1.4 kg.) | pot roast |
| 1 tsp. (5 ml) | vegetable oil |
| 1-1/2 tsp. (8 ml) | salt |
| 1/4 tsp. (1.2 ml) | pepper |
| 4 | apples, cored and cut in large chunks |
| 1 | onion, sliced |
| 1/2 cup (125 ml) | apple juice |
| 3 tbsp. (45 ml) | flour |
| 3 tbsp. (45 ml) | water |
Trim excess fat from roast and coat meat with oil. Sprinkle with salt and pepper. Place apples and onions in the bottom of the ceramic casserole, then place roast on top of mixture. Pour in apple juice. Cover and cook on low setting for 8 – 10 hours. Remove the roast.
Make a paste with the flour and water and stir into the dripping in the ceramic casserole to make the gravy and cook until thickened. Slice the roast and serve with gravy.
CHILI
| 2 lbs. (900 g) | ground beef |
| 2 cans | kidney beans, washed and drained |
| 1 large can | tomatoes, drained |
| 2 | onions, large dice |
| 1 | green pepper, large dice |
| 2 | garlic cloves, peeled and minced |
| 2 tbsp. (30 ml) | chili powder |
| 1 tsp. (5 ml) | cumin |
| 1 tsp. (5 ml) | pepper |
| 1/2 tsp. (3 ml) | salt |
In a large skillet, brown the ground beef and drain off the fat.
Add all ingredients into the ceramic casserole and stir. Cover and cook on low for 9 - 10 hours.
CHICKEN AND VEGETABLE CASSEROLE
6 half chicken breasts, bone in (3 - 4 lbs, 1.4 - 1.8g)
1/4 tsp. (1.5 ml) paprika
1 tsp. (5 ml) salt
1/4 (1.5 ml) white pepper
2 tsp. (10 ml) chicken stock powder
2 cups (500 ml) mushrooms, sliced
1 small onion, small dice
1 cup (250 ml) small baby carrots
3/4 cup (180 ml) white wine
1/2 cup (125 ml) evaporated milk
2 tbsp. (30 ml) cornstarch
Remove skin from chicken. Mix the paprika, salt and pepper together. Sprinkle on chicken. Place chicken in ceramic casserole. Add chicken stock powder, mushrooms and onion. Pour wine over top. Do not stir.
Cover and cook on high for 2-1/2 to 3 hours. Remove chicken and vegetables and keep warm. In a small pot combine evaporated milk and cornstarch until 12 smooth. Gradually stir in 2 cups of the cooking liquid. Stir over medium heat until mixture comes to a boil and thickens. Serve with chicken and vegetables.
CHICKEN NOODLE SOUP
3 lbs. (1.4 kg) chicken, cut up
2 qts. (2 L) water
1 tbsp. (15 ml) salt
1/2 tsp. (3 ml) pepper
1 onion, diced
2 stalks celery, diced
2 carrots, diced
1 bay leaf
1/3 cup (85 ml) parsley
6 oz. (140 g) small pasta noodles
Place all ingredients except the noodles in the ceramic casserole. Cover and cook on low for 7 hours. Remove the chicken. Pull meat from the bones. Discard bones and cut chicken into bit size pieces. Return chicken to broth and add the noodles. Cook for 30 minutes on high. Remove bay leaf and serve.
BAKED BEANS
| 2 | cans white beans |
| 1/3 cup (85 ml) | molasses |
| 1/4 cup (60 ml) | light brown sugar |
| 1 | onion, diced |
| 1/4 lb (60 g) | bacon, diced |
| 1 tbsp. (15 ml) | mustard |
| 1/2 tsp. (3 ml) | salt |
Rinse beans. Combine all ingredients in the ceramic casserole and cook on medium for 7 hours or until beans are tender.
natural_image
Line drawing of a Midea rice cooker with digital display and control panel (no text or symbols on main body)MSC176TGDIP
MD-YHB06
PROTECTIONS IMPORTANTES
natural_image
Line drawing of a Midea rice cooker with digital display and control buttons (no text or symbols on main body)MSC176TGDIP
MD-YHB06