2514 - Tricycle Puky - Free user manual and instructions
Find the device manual for free 2514 Puky in PDF.

| Product Type | Tricycle |
| Brand | Puky |
| Model | 2514 |
| Recommended Age | From 1.5 years |
| Maximum Load Capacity | 25 kg |
| Use | Playground or protected area (not on public roads) |
| Safety Standard | CE, directive 2009/48/EC (toy safety) |
| Brake | No (no brake) |
| Required Footwear | Closed shoes mandatory |
| Delivery Contents | Frame, fork with front wheel and pedal crank, seat, rear axle, seat screws, handlebar |
| Assembly Tools Required | 10 mm open-end wrench, 5 mm Allen key |
| Maintenance and Cleaning | Clean with soapy solution, dry with a soft cloth. Do not use high-pressure cleaner. Avoid corrosive substances (salt, seawater, fertilizers). |
| Wear Parts | Wheels, pedal crank |
| Repairability | Use original PUKY spare parts. Do not straighten bent parts, replace them. |
| Storage | Do not store in damp rooms |
| Warranty | Legal warranty for hidden defects applicable |
Frequently Asked Questions - 2514 Puky
User questions about 2514 Puky
0 question about this device. Answer the ones you know or ask your own.
Ask a new question about this device
Download the instructions for your Tricycle in PDF format for free! Find your manual 2514 - Puky and take your electronic device back in hand. On this page are published all the documents necessary for the use of your device. 2514 by Puky.
USER MANUAL 2514 Puky
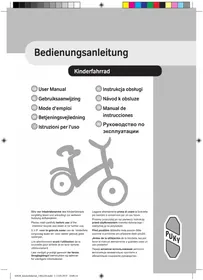
Please read carefully before using the tricycle for the first time and keep in a safe place for future reference!
Congratulations on the purchase of this PUKY tricycle! You have purchased a high quality product which is certain to provide much pleasure.
These instructions contain information for safe usage and care. Please read the manual carefully prior to use and keep it in a secure place for future reference. Failure to observe the information contained in this manual may impair the safety of your child. Should any problems or questions arise, please contact your specialist dealer, or contact us via Internet: www.puky.net.
Responsibility of the parents
When using this item for its intended purpose, risks while playing are excluded to a large extent. However, please bear in mind that the natural need for movement and the temperament of children and teenagers can lead to unforeseeable situations and dangers which are excluded from the scope of the manufacturer's responsibility.
Teach children and teenagers how to use the vehicle correctly, in order to avoid falls and collisions. The vehicle does not have any brakes.
Supervise them and make them aware of any possible hazards.
Suitability
Only use the tricycle in a suitably safe area for playing or a protected environment (e.g. play park). This vehicle does not comply with the German Road Traffic Licensing Act (StVZO) and must not be used in road traffic. The permitted total load is a maximum of 25kg . This toy vehicle may have sharp edges.
Information for use
It is necessary to wear closed shoes. The tricycle must not be driven close to steps, sloped terrain, swimming pools and other waters. Steps in the vicinity must be suitably secured to ensure that under no circumstances are children able to ascend or descend with the tricycle.
This tricycle is suitable for children aged 1.5 years and up. The legal liability for material defects applies. Damages caused by inappropriate use, the effects of force, insufficient maintenance or due to normal wear and tear are excluded from the liability of material defects.
CE marking
The tricycle fulfils the requirements of the European Directive 2009/48/EC concerning the safety of toys, and therefore carries the CE marking.
Type label
The type label is attached on the underside of the rear frame. Note the information listed on the type label into the vehicle passport at the rear of these operating instructions, so you have this to hand in case of questions or spare parts being required.
Maintenance and care
Check the following before use and also the correctness of the screw connections. Self-tightening nuts are hard to loosen and must be replaced after complete disassembly!
In order to maintain the high, design-specified safety levels, all worn or defective parts are to be immediately replaced by original PUKY spare parts. For safety reasons, the vehicle should not be used until it has been repaired. Bent or deformed parts should not be repaired but instead should be replaced.
Parts subject to wear: Wheels, crank bearing.
The tricycle must not be cleaned using a high-pressure cleaner. Clean the tricycle using a mild soapy solution and carefully wipe dry using a soft cloth. Avoid the tricycle coming into contact with corrosion-promoting materials (road salt, sea water, fertiliser). The tricycle must not be stored in a damp room.
Unpacking and scope of delivery
Do not use sharp objects to open the packaging or for removing any protective materials. You could inadvertently scratch the paintwork or damage parts of the tricycle.
Remove all parts from the packaging.
- Remove the protective materials. Keep all packaging material out of reach of children - there is a risk of suffocation.
Check the delivery for completeness and integrity. Should parts be missing, please contact your specialist dealer before beginning any further work.
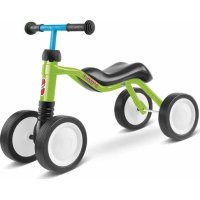
The delivery comprises of (Figure A):
- Frame
- Fork incl. front wheel and pedal crank
- Seat
- Rear axle
- Screw to fasten the seat
- Handlebar
Assembly
The assembly instructions are contained on the last pages of these instructions.
The following tools are required for assembly (Figure B):
- Spanner 10 mm
- Allen key 5 mm
Small parts which are required during assembly (e.g. screws and washers) must be kept out of the reach of small children. There is a danger of suffocation as a result of swallowing the parts. Also keep all packaging materials away from children.
In order to prevent accidents or injuries occurring later, the assembly must be carried out very carefully by an adult. Take sufficient time to do this. Several assembly steps require manual skill and practise in handling tools (e.g. spanner). If you are unsure, then please contact your specialist dealer or a workshop.
At several points it is necessary to tighten screws with a certain force. This force is given in Newton meters (e.g. 2 Nm). If a screw is not tightened with sufficient force, then the connection will possibly still be too loose and unsafe. If the force is too great, then screws and other parts may be damaged and destroyed.
Figure 1: Insert rear axle into the frame. Align the square nut to the rear.
Figure 2: Insert screws and tighten.
Figure 3: Remove the washer (!) from the transportation lock by loosening the screw connection.
Figure 4: Slide the steering tube with bearing shells all the way onto the fork shaft. Place the washer back on and align the lug of the fork shaft to the rear.
Figure 5: Slide the handlebar all the way onto the fork shaft. Tighten the screw. Align the slot in the handlebar to the rear. Firmly press down the cap until it snaps into position.
Figure 6: Slide the seat onto the frame from the rear and screw tight.
Operation
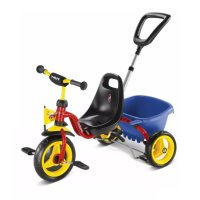
Figure 7: Adjusting the seat position
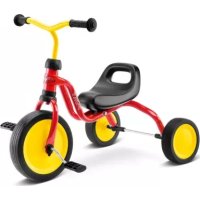
Figure 8: State ready for use.
Inleiding
Please complete the identification plate on the cycle passport page. The PUKY identification plate is fitted to the vehicles as shown in the drawings below and must be noted down for ordering replacement parts from your dealer.