Inspire 2439156 - Coffee machine RUSSELL HOBBS - Free user manual and instructions
Find the device manual for free Inspire 2439156 RUSSELL HOBBS in PDF.
User questions about Inspire 2439156 RUSSELL HOBBS
0 question about this device. Answer the ones you know or ask your own.
Ask a new question about this device
Download the instructions for your Coffee machine in PDF format for free! Find your manual Inspire 2439156 - RUSSELL HOBBS and take your electronic device back in hand. On this page are published all the documents necessary for the use of your device. Inspire 2439156 by RUSSELL HOBBS.
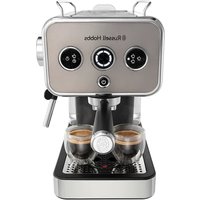
USER MANUAL Inspire 2439156 RUSSELL HOBBS
Read the instructions, keep them safe, pass them on if you pass the appliance on. Remove all packaging before use.
IMPORTANT SAFEGUARDS
Follow basic safety precautions, including:
This appliance can be used by children aged from 8 years and above and persons with reduced physical, sensory or mental capabilities or lack of experience and knowledge if they have been supervised/instructed and understand the hazards involved.
Children shall not play with the appliance.
Cleaning and user maintenance shall not be done by children unless they are older than 8 and supervised.
Keep the appliance and cable out of reach of children under 8 years.
Misuse of the appliance may cause injury.
The surfaces of the appliance will get hot. Residual heat will keep the surfaces hot after use.
Do not use this appliance near bathtubs, showers, basins or other vessels containing water.
If the cable is damaged, it must be replaced by the manufacturer, its service agent, or someone similarly qualified, to avoid hazard.
The surface of the heating element is subject to residual heat after use.
Use the appliance according to these instructions. Any misuse may cause potential injury, electric shock or other hazards.
This appliance can be used by persons with reduced physical, sensory or mental capabilities or lack of experience and knowledge if they have been given supervision or instruction concerning use of the appliance in a safe way and understand the hazards involved.
This appliance is intended to be used in household and similar applications such as:
- staff kitchen areas in shops, offices and other working environments;
- by clients in hotels, motels and other residential type environments;
- bed and breakfast type environments;
- farm houses.
- Sit the appliance on a stable, level, heat-resistant surface.
- Keep the appliance and cable away from the edges of worktops.
- Don't use accessories or attachments other than those we supply.
- Don't use the appliance for any purpose other than those described in these instructions.
- Don't use the appliance if it's damaged or malfunctions.
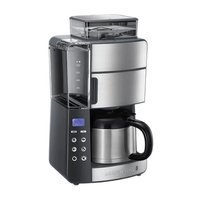
PARTS
- Lid
- Water reservoir
- Paper filter #4 (not supplied)
- Filter holder
-
Water gauge
-
Hot plate
- Carafe
- Scoop
Dishwasher - top rack
BEFORE USING FOR THE FIRST TIME
Fill the reservoir to the max mark, and run the appliance without coffee.
FILLING
- Remove the carafe from the hotplate.
- Open the lid.
- Fill the reservoir with the exact amount of water required. Note that the brewing process will use all of the water that you put in the reservoir.
- Make sure that the filter holder is pressed down all the way into position. It will click when correctly installed.
- Put a #4 paper filter into the filter holder.
- The reservoir is calibrated to give 10 large cups (at 125ml per cup) and 15 small cups (at 83ml per cup). For each large cup, add 6g of ground filter coffee and for each small cup add 4g.
- Close the lid.
- Replace the carafe on the hotplate.
SET THE CLOCK
It isn't necessary to set the clock to use your coffee maker but you will need to set it if you want to use the timer functions.
- Put the plug into the power socket.
- Use the hr and min buttons to set the correct time in 24 hour format.
- The clock will retain its settings until the coffee maker is unplugged.
- To change the time, press the ① button. The time will flash. Use the hr and min buttons to set the new time. If you don't press either the hr or min buttons within 3 seconds, the coffee maker will revert to normal, and the current time will show.
MAKING COFFEE
- Press the button - the icon will appear on the display.
- Shortly afterwards, coffee will start to drip into the carafe.
- If you want to stop the coffee maker while it's brewing, press the button.
- Once brewed, the hotplate will keep the carafe warm for up to 40 minutes.
USING THE TIMER
Note: Make sure the clock is set to the correct time. Use the h and min buttons.
- Set the timer to the time you want to start brewing.
a) Press and hold the button until the icon flashes on the display.
b) Use the h and min buttons to set the time you want brewing to start.
If you don't press either the hr or min buttons within 3 seconds, the coffee maker will revert to normal, and the current time will show. Press the ① button to start again.
- When the time is programmed, press the button. The ① icon will appear on the display. Your coffee maker is now set to make coffee at the selected time.
If you want to check the program time press the button. The programmed time will show for 3 seconds and then return to the time of day.
If you want to cancel the timer before brewing has started, press the button.
If you want to stop the coffee maker while it's brewing, press the button.
KEEP WARM/AUTO SHUT-OFF
- Your coffee maker will keep the coffee warm for about 40 minutes.
- 40 minutes after brewing your coffee maker will shut down and the time of day will be displayed.
- To wake the appliance, press the min button.
A QUICK CUP
If you want a quick cup of coffee before the brewing cycle has finished:
- You can remove the carafe at any time. The non-drip valve will prevent coffee dripping on to the hotplate.
- To prevent the filter holder overflowing, replace the carafe on the hotplate within about 20 seconds.
- When you replace the carafe on the hotplate the non-drip valve opens to let any remaining coffee through.
CARE AND MAINTENANCE
- Unplug the appliance and let it cool.
- Tip the contents of the filter holder into the bin.
- Wipe all surfaces with a clean damp cloth.
- Press the lever at the rear of the carafe lid, above the handle, to open the carafe lid.
- Hand wash the carafe and filter holder.
- Replace the filter holder. Make sure that the filter holder is pressed down all the way into position. It will click when correctly installed.
- Close the lid, and press down to lock it.

You may wash these parts in the top rack of a dishwasher.
RECYCLING
To avoid environmental and health problems due to hazardous substances, appliances and rechargeable and non-rechargeable batteries marked with one of these symbols must not be disposed of with unsorted municipal waste. Always dispose of electrical and electronic products and, where applicable, rechargeable and non-rechargeable batteries, at an appropriate official recycling/collection point.
SO STEllen SIE DIE UHR
BEHANDLING OG VEDLIKEHOLD
BAKHbIE MEPbl IPEIOCTOPOXHOCTN
CneyuTe OCHOBHbIM INHCTpyKcIyM NO 6e3ONaCHOCTN, BKIOUay CneyuOuIe:
IcnoIb3OBAHne daHHoro yCTpoiCTBa DeTbMn CTapwe 8 let, IuIaMn COrpaHueHHbIMN n3UueCKIMN, ceHCOPHBIMN uIN yMCTBeHHbIMN cNoC6HOCTaMn, HeIOCTaTKOM ObIta uIN 3HaHni DOnyckaETcR npu ycIOBmKoHTpOJIu INHCTpyKTaJa N OCo3HaHnra CBa3aHHbIX PnCKOB.
TeTAM 3aIpeSeHo nIrpTaB cyCTpoiCTBOM.
OuNTky n o6cnyKuBaHne yCtpoiCTBa MOrTy BblOnHrTb DeTu CTapWe 8 let npu ycNoBn Ha6IIODeHn B3pocblIMN.
XpaHnTe yctpoiCTBO n Ka6eIb B HeIOCTynHom dIa IeTeJdo 8 let MeCTe.
HenpaBnIbHoe nCnoIb3ObaHne np6opa moKeT npuBeCTN K TpaBMe.
IobepxnoT np6opa harpeBaOTc. 3a cuet octatoHoro TeNla nobepxHOCTn 6ydyT OCTaBaTbCra TOpAumn IocJe NcNoB3OBAHn.
Ecn Ka6enb NOBpeXdeH, OH DoJKeH 6bITb 3aMeHeH IpOn3BOOnTeJIeM, cepBnCHbIM aReHTOM nIIN dpYrIM KBaIIuΦNcIpOBaHHbIM IInC0m DnI ppeIoTbpaUeHnOpaCHOCTn.
Поверхноctь HarpeBaTeIbHOrO элем enta ocTaetcra ropae ese B TeueHne HeKOTopoRo BpeMeHn noCle nCpOJIb3OBAHn np6opa.
IcnoIb3yIte np6op B COOTBeTCTBmC nPnBEeHHbIMn INHCTpyKzmaMn. HenpaBnIbHoe IcnoIb30BaHne np6opa MoXeT npVBecTn K TpaBMe, nopaxeHIO 3JIeKTPnuyeCKm TOKOM I BO3HnKHOBeHIO dpyrIX ONaChbIX CITyaU.
IcnoIb30BaHne daHHoro yCTpoiCTBa IuIaMn COrpaHnueHHbIMN fI3NueCKIMN, ceHCOPHbIMN IIN YMCtBeHHbIMN cNoC6HOCTaMn, HeIOCTaTKOM ObIta IIN 3HaHm DOnyCKaeTc npu ycNOBn KOHTpOJIa IIN INCTpyKTAJa PO 6e3ONaCHO JkCnIyaTaUu N yCTpoiCTBa N OCo3HaHn COnyTCTByIOx pNCKOB.
PIN ANO THN INPOTHXPHSH
TepoTo doxio vpou muXpi Tnv evdelta n oTaOunc max kai theote oE λeitoupyia tn ouokun xwpic va npooeotk ape.
NAPHQ2H
- Anouakpuve tnv kavata ano tnv eoia.
- AvoiETo KaNakl.
- to doxio 1e tnv akpiñ noootnta vepou nou aataei tai. ExTe unoyn oac otkata th diaikaoia npaokeunc kaΦe θa xpnoiopoinθεi oλo to vepo nou θa baIeTc moe oTo doxio vepou.
- Bεβaiωθείτοτι θήκη φιλτρου εἶναι πεμένη ευτελώς προς τα κάτω ως τη θέση της. 'Oτavirus Ελθει στη Μωτή της θέση θα ακουσείτοχαρακτηριοτικό κλικ.
- AvoiEe eva xapitvo pfipop ap. 4 kaltoonthetaote to eoa stnv hkn pfipov.
- To o x i o v e p o u i a l a o v o u n v o y i a t n v n a p a o k e u n 10 y a w v i a v i v (125 ml ava i a v i) k a l 15 i k p v i a v i v k a p e (83 m l a v a i a v i). I a k a y a o i a v i, p r o o o t e 6 g a e o e v o u k a p e i t p o u, e v w y i a k a i k p o i a v i 4 g.
- Kλειστο το καπάκι.
- Tonoetntote nai tnv kavata otnv eoia.
PYOMIISHPOAONIOY
(\Delta \varepsilon v x p e i a c z e t a i v a p u \theta \mu i o s e t o p o l o i y a v x p n o i m o n o i n o s e t t n v k a p e t i e p a, a l a a \theta a \pi p e n e i v a to p u \theta \mu i o s e t a v \theta \acute {e} \lambda e t e v a x p n o i m o n o i n o s e t t i c \lambda e i t o u p y i e c x p o v o b i a k o n t n.
1.Σuvδεοτε to φις στην πρία.
2. Xpnooioiote ta koumuia hr (wpc) kai min (aenra yia va puuioeTe tn ootn wpa e p0p 24 oww.
To poIoi 0a diatnpnoei tic puOioeic mexip n kaepiepa va anooovdEe i ano tv npica.
Tia va aaláεte tny ωpa, πañote to kouμπi ①. H evδεiŋ tnc ωpaç avαβoβhνeI. XpnoiμoioηoTe ta kouμniá hr kal min yia va puθuioεte tny vα ωpa. Eav δev πañóεte oute to kouμni hr ouTE to kouμπi min εvtoc 3 δεutepoλεπtwv, η kaφεtiépa θa επιστρεψει σntv "kavovikn" katασtaon kal θa εμφavioTe i n ωpa.
IAPAZKEYH KAΦE
- Παποτε μia φορά το κουμπi Ενδειξη θα εμφαιστει στην oθόνη.
- Aéowc μeτa apxizεi va pεei o kapec σηv kavata.
- Eav eToue va diaKoTe Tn aeitoupyia Tnc Kaepiepa cKa ta Tnv npaokeun Kae, nato To koupi
- MoIc npaokeuaotei o kapec, n eotia 8a diatnpnoei Tnv kavata cetn ecai 40 eaTtA.

XPHSEHTOYXPONODIAKONTH
IounCTBaHTo I noDpBxKkTa He Tp8Ba Da ce n3BbPWBaT OT Deua, OCBeh aKO Te He ca HaI 8-roiHa Bb3paT N HraKo rN HargJka.
Ia3eTe ypeHa n Ka6ena ot Deca noD 8-ToOnnHa Bb3paCT.
HenpaBnHaTa ynoTpe6a Ha ypea MoKe da doBeDe Do HapaHbAHe.
ПовьхhoeТаHaурдаиce сеharоpeи.Остынотонпinaип подьрka ПовьхhoeTteHaropeшенисeДуnotpe6a.
Ako Ka6eIbTe nOBpeHEn, ToT Tp86Ba Da ce NODMeHn OT npOn3BOOnTeJIa, HerOB npEiCTaBHTe 3a cepBn3Ho 06cIyXBAHe IIN Dpyro KBaIIuΦNupaHO 3a Ta3N cen IInCe, 3a Da Ce n36eHrHe BcKaKbB pNCK.
IobbpxhocTtHa HaraepBaTeHnna enemeH e noJIOXeHa Ha ocTaBcHa TOnnHa cIeYnoTpe6a.
I3non3BaIte ypeDa B cBOTBeTCTBHe C Te3n INHCTpyKcun. HenpaBnHaTa ynoTppe6a MoKe da doBeDe do HapaHbAHe, TOKOB ydap nn DpyrO onaCHOCTn.
To3n ypeJ moKe Ja ce n3noJI3Ba OT nIuca C OgrpaHnueHn fN3nueckn, cETNBn nn yMCTBeHn cnOco6HOCTn, nII nnCa Ha ONIT N NO3HaHnA, aKO ca HArJIeXJaHn nn INHCTpyKTIpaHn Bbb Bpb3Ka c 6e3oNaChata yNoTpe6a Ha ypeJa n pa3bnpat OnaCHOCTnte.
To3n ypeE npedHa3NaueH 3a ynoTe6a B domaunu ycNoBn n noo6n npinOKeHn, KaTO:
KyxHeHcknte 30HN KbM MaRa3HH, oHNCn I npyra pa6oTHn cpei;
OT KIneHTB XOTEJI, MToJI N IpyrN BnIOBe JINIuHn CpeJN;
- cpei n OT Tnna Kbun 3a roctn C IeIIO N 3aKycka;
- epMepckn Kbui.
He BnKopncToByte ue npncptiin no6nn3y BaH, dywiB, 6aceHIB Ta iHnx pe3epByapib i3 BOIOU.
- NocTabeTe ypeHa Na TBbpda, paBHa, TOnlOyCToNbBa NOBbpxHOCT.
- PanaTe ypea n Ka6eNa danue ot pbo6oBeTe Ha nIIOta.
- He n3noJ3BaIe akcecoapn nn npucTbKn, pa3nUHn OT Te3n, npedocTabeHn OT Hac.
- He n3noJ3BaIe ypeJa 3a dpyrI cJIeN, OCBen Te3n, ONIcaHb HacToaIuTe IHCTpyKcIe.
- He n3noJ3BaIte ypeJa, aKo e noBpeH eH pa60Tu 3pAДHo.

NIOCTPAUN
- Kanak
- Pe3epBoap 3a BOda
- Xaptnen Hnntbnp N4 (He e npedocTaBeH)
-
NocTaBka 3a fNITbP
5.ИндкаTop3a HNBOHa BOdata -
KOTJIOH
- KaHa
8.Мерптелнальхица

MnaHa MaunHa - ropHa npucTaBka
PPEIINbPBOHAUJIHO N3IOJ3BAHE
HanbIhHepe3epBoapa do 6o3haueHneTo max n npchTe ypea 6e3 Kafe.
ПьлHEH
- OTeTaHeTe KaHaTa OT KOTNoHa.
- OTbopeTe kanaKa.
- HanbIhHepepeBoapa cToHOTo Heo6xOIMo KOINueCTBO Bda. B npoueca Ha BapeHe ue 6bde H3PON3BaHa BCNUKaTa BOa, KOrTO CLOXnTE B peepBoapa.
- ПoctabkaTaHa Фиntbp Tpr6Ba Da e Hata KpaHaoNy. KoratoЯ noctabute npabunho, ue ippakHe.
- Pa3rheXapTneH fNtbp N 4 n ro noCTaBe T B noCTaBkata 3a fNtbp.
- PezepeboapbTe kannibpnpaH 3a npnroTbAne Ha 10 rolemu yaun (125 m) n 15 mank uan (83 m). KbM Bcya raama yawa ce doabaret 6 r cmnaHO fnnTbpHo kae, a KbM Bcya MaIka -4r.
- 3atbopete kanaKa.
- OTHOBO NOCTABETe KaHata Ha KOTNoHa.
HACTPOIKA HA YACOBHINK
He e Heo6xOJIMo Da HacTpoBbTe YacOBHnKa, 3a Da N3PON3BaTe KaΦe MaunHaTa, a cMo aKO JeJaTe Da
N3PON3BaTe YHKUnTe Ha TaMepa.
- BkIIOUe Te IeNcena B 3aXpaHbAun KoHTaKT.
- ⅢnoJI3BaIte 6yToHInTe hr (uac) n min (MnHyTa), 3a da HactponTe BpeMeTo B 24-ycob fOpMaT.
- YacobHnKbT 3ana3n HactpoiKnte cn, DOKaTO KaΦemaunHaTa He 6bne n3KJIouyeHa.
3a da CmeHnte BpeMeTo, HATNCHeTe 6yToHa 巧 .BpeMeTo 3e 3anOHe da mra. N3non3BaIte 6yToHnte hr n min, 3a da HacTpOnTe HOBO BpeMe. Ako He HATNCHeTe 6yToH hr nn 6yToH min B paMKInTe Ha 3 cekyni, KaΦeMaunHaTa ige Ce BbpHe KbM "HopMaJeH" peKIM n ige ce nokajke YacbT.
ПИГOTВЯНЕHAKAФЕ
- HaxmTe n otnyctnte KhoNky Ha dncnnee oTo6pa3ntcya
- He cneI dIbIro KafoTo ige 3aTeue B KaHaTa.
- AkoKeenaete da cnpete KaefemaunHaTa,doKaTo e B npocc Ha BapeHe,HaTnCHTe 6yTOH
- CnE cBapraBaHeTo KOTIOHbT ige IbpKu KaHaTa TOnIa 3a MaKcMym 40 MmHyTu.
N3NOJ3BAHE HA TAIMEPA
IpoBepTe daHn YacOBnKbTe hAcTpoe H 3a npabunHna yac. N3non3BaIte 6yToHnTe hr (vac) n min (MnHyTa).
- HactpoTe TaMepa Ha JeJaHTo BpeMe, 3a Da 3aNoHte BapeHe.
a) HataheTe n3aPbXte 6yToHa ,doKaTo NKoHaTa 3aNoUHe da Mnra Ha ekpaHa.
b) C nOMOJI KHOJOK hr n min 3aJaTe BpeM Haayala npnroTOBneHry Kofoe.
Ako He HaTncheTe 6yToH hr nnn 6yToH min B paMKnTe Ha 3 cekyHn, KaΦemaunHaTa Ie Ce BbPHe KbM "HopMaJIeH" pexIM n Ie Ce nokaxe yacbT. ChOba HaxmTe n ydepXnBaIte KhoNkY (1)
- Cnep nporpamnpaHe Ha BpeMeTo HATncHete 6yToHa .Ha nCnpeR ce noBBA uKoHaTa 1. KaΦemaunHata e HacTpoEHa da nprirotBa KaΦe 3a nocOueHOTO BpeMe.
Дя npOBePKn 3aJaHHoro BpeMeHn HaxMITE N OTNcyTNTe KhoNky ①. 3aJaHHoe BpeMЯ 6ydeT OTO6paKaTbCnB TeueHne 3 cekyHd, nocIe yero ChOba OTO6pa3ntcT KeKyuIee BpeMЯ cyTok.
-Дясбраза таймара поед началом пи��товлиая нажмITE КНКУ.
AkoKeIaTe da cnpTe KaΦeMaunHaTa,doKaTo e B npOec Ha BapeHe,HaTnCHe6byTOH
ABTOMATNUHO N3KJIIOUBAHE/PEXUM „CbH"
- Maunhata 3a kafe ue nbpxk KafoTo TOnNo 3a Okono 40 mHyTu.
- 40 MInHyTN CneI CBapraBaHTo MaunHaTa 3a Kafoe Ice Ce N3KIOUH N Ice Ce NOKaKe YacOBnKbT.
- 3a da BkIIOHTe ypeDa OTHOB, HaTnCHTe 6yToHa min.
ББР3AЧАWA
Ako nckate 6bp3a yaa kafo, npedn da e 3abpwn cukbnt Ha BapeHe:
- Moxe Ta OCTpaHnte KaHaTa NO BcAko BpeMe. HenoTeKaIoUm KlaIaH He Donyckaet nonaDaHn Kaenb KoOe Ha NoCTabKy.
- TTo6bI DepeKaTeJIbPra He nepenONHnICr, BepHnte rpaΦnH Na nOCTaBky B TeueHne 20 cekyHd.
- Pn yctahOBKe rpaHHa Ha MeCTo HEnoTKeAIOUcN KLnAnH OTKpoETc, YTO6bl CInb OCTaTK KoFe.
ΓPUNNIOADPbXKA
1.ИЗКЛЮЧЕурдаOTKOHTaKtAиroOCTaBeTeДИЗТСИнHe.
2.ИЗТРБСКАТЕсБДБРЖАНЕTOОТNOCTABKATA3aФИЛТьрВКоФаТа3a6OKЛУК.
3. NouncTeTe BCNUKINOBbpxHOCTN C UNTa BnaXHa KbPna.
4. HatncheTe pBukata B 3aHaTa YAcT Ha KaNaKa Ha KaHaTa, HAd npbXkKaTa, 3a da y OTBOpnte.
5.ИЗМИТЕHa pьka KaHаТи NOCTaBKaTa 3aФИNTbP.
6. YctahOBtTe IepKataIbΦnIbTpHa MeCTO. NocTabKaTa Ha ΦnITbp Tp8Ba Da e HATNCaTAp DOKpaHADONY. KoratoЯ nocTabtE npabINHo, ue upaKHe.
7. 3aTbOpTe KaNaKa I Do HaTnCHeTe, 3a Da ce 3aKnIouN.
MOxKe Ia n3MnTe Te3n Yactn B rOpHaTa npunctaBka Ha MmJIHaTa MaunHa.
PEUKNIPAHE
3a da ce n36erHaT ekoloruHn n 3dpabHn npo6lemn nopadn haIyue Ha onaCHn cy6ctaHcun, ypeDnte, akymlyaTOPHnTe n HeakymlyaTOPHnTe 6aTePnN, o6O3NaueHn c eINH OT Te3n CmBOLn, He Tp8Ba Da ce n3XBbPnT 3aeJHO C HecOpTnpaHn O6UHNCKn OTpaDbu. BnHaRn n3XbPnIte eNeKTPnueckn n eNeKTPoHHn PPOdyKTn N, KbJeTo e npInloKIMo, akymlyaTOPHn n HeakymlyaTOPHn 6aTePnN, Ha IOnxOJaO oΦNiuaHNO MRCTO 3a pezIKnIPAhe/Cb6nPaHe.
Jie aie 1y j y Jn Jn Jn Jn Jn Jn Jn Jn Jn Jn Jn Jn Jn Jn Jn Jn Jn
Jiawei 21
J
ailll aaii jilj lal jll
8 1 j 1 1 1 1 1 1 1 1
g
aiee aee eae ee eae
jlll jil 1
8 15 2
PQ = 12
.8 j 1g j
J 1
aaii i 1
( 1 + u) = 1 + u + ( 1 + u) u >
1 1
.
aaiiia aiee iieae eae ee eae eae eae eae eae eae eae eae
Jaiia 1i jg i 1i i 1i i 1i i
.
a a a a a a a a a a a a a a a a a a a a a a a a a a a
e caiiie 100bc! g paele c 1y pi i j aegg o jz g pde g aiiaai
aaii aai iiaai
jloogjoljollduua jglal
Jaeill
.
.
.
e 15
S1 = S2 = S_3 = 0
.
6.
1
7
2.
8.
3.
- 5
g 1
.683 12 jzll jzss max oXe 1j zai
Jall
1
2.
(slc) "normal" 5 n j (aclw) h j
.
S OBC = S COD + S_ BOC
.1
2
4
aagai pia
.(a)min(aclll)hrn jrrjdl.
.1
. ① jj j j j j j j j j j j j j j j j j j j j j j j j j j j j j j j j j j j j j j j
J K 1 1 1 1 1 1 1 1 1 1 1 1 1 1 1 1 1 1 1 1 1 1 1 1 1 1 1 1 1 1 1 1 1
"normal" 3 3 3 3 3 3 3 3 3 3 3 3 3 3 3 3 3 3 3 3 3 3
① y j 15 ≤ j 64 ≤ j
alil 1 jy 1j y 1j 1j 1j 1j 1j 1j 1j 1j 1j 1j 1j 1j 1j 1j 1j 1j 1j 1j 1j 1j 1j 1j 1j 1j 1j 1j
a1 = 2,an + 1 = 2an - 2an + 1 < 1an - 1an + 1
3 100000000000000000000000000000000000000000
.
jll bial 100 woll Jao lol a cii o gall a sla
g
Aa 2.
.()minj jjglbc bcljglblal
y
: 1
1